- Manuals
- Brands
- Roland Manuals
- Printer
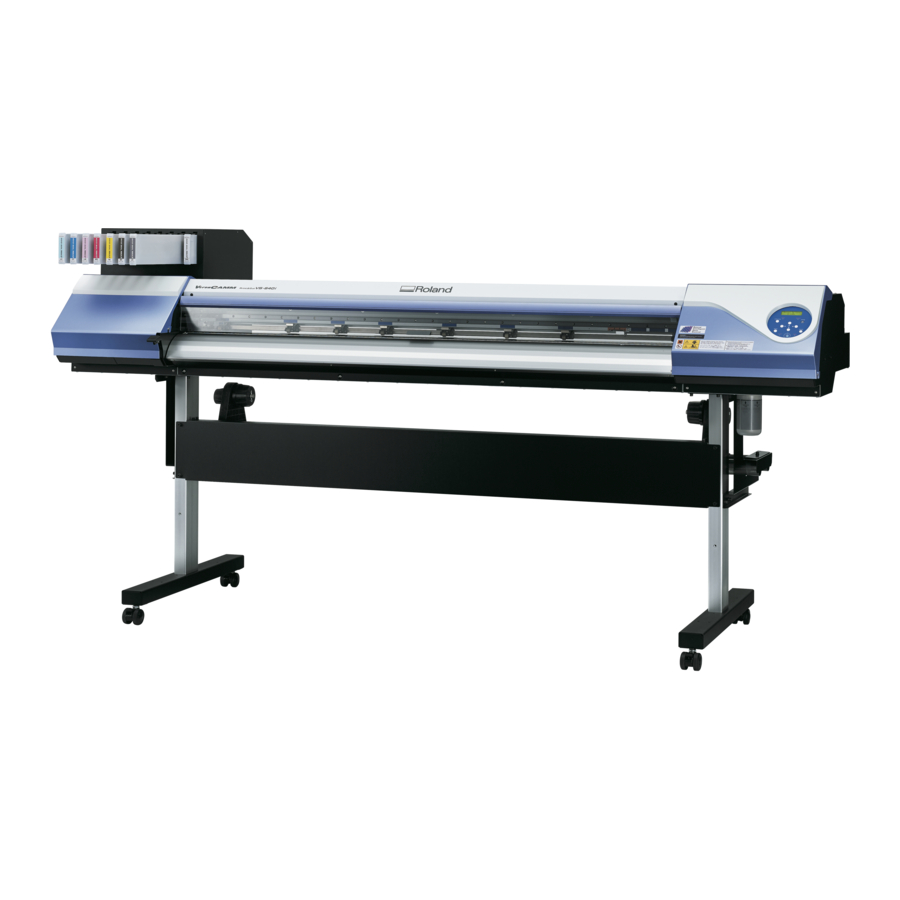
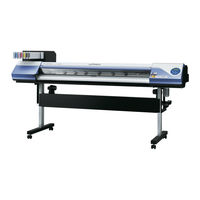
- VS-640i
- Setup manual
-
Contents
-
Table of Contents
-
Bookmarks
Quick Links
Setup Guide
Read this first.
This describes the setup tasks and important conditions about the installation
location that must be met in order to enable use of this machine.
Related Manuals for Roland VersaCamm VS-640i
Summary of Contents for Roland VersaCamm VS-640i
-
Page 1: Setup Guide
Setup Guide Read this first. This describes the setup tasks and important conditions about the installation location that must be met in order to enable use of this machine.
-
Page 2
Roland DG Corp. assumes no responsibility for any direct or indirect loss or damage which may occur with respect to any article made using this product. -
Page 3: Table Of Contents
VS-540i — 54-inch model VS-300i — 30-inch model Also, most of the figures in this document depict the VS-640i. Company names and product names are trademarks or registered trademarks of their respective holders. Copyright © 2013 Roland DG Corporation http://www.rolanddg.com/…
-
Page 4: To Ensure Safe Use
To Ensure Safe Use Improper handling or operation of this machine may result in injury or damage to property. Points which must be observed to prevent such injury or damage are described as follows. About WARNING and CAUTION Notices Used for instructions intended to alert the user to the risk of death or WARNING severe injury should the unit be used improperly.
-
Page 5
To Ensure Safe Use Incorrect operation may cause injury. WARNING WARNING Be sure to follow the operation proce- Never attempt to disassemble, repair, or dures described in this documentation. modify the machine. Never allow anyone unfamiliar with the Doing so may result in fire, electrical shock, usage or handling of the machine to or injury. -
Page 6
If anything gets inside, immedi- ately disconnect the power cord and contact Do not use the supplied power supply your authorized Roland DG Corp. dealer. cord for other products. Never place any flammable object nearby. Never use a combustible aerosol spray nearby. -
Page 7
To Ensure Safe Use Important notes about the power cord, plug, and electrical outlet Never place any object on top or subject to Never allow to get wet. damage. Never bend or twist with undue force. Never make hot. Never pull with undue force. Dust may cause fire. -
Page 8
To Ensure Safe Use Ink, cleaning fluid, and discharged fluid are flammable and toxic. WARNING CAUTION Keep open flame away from the work Ensure adequate ventilation for the work area. area. Ink and discharged fluid are flammable. Failing to perform ventilation may result in a health hazard or danger of combustion due to ink fumes. -
Page 9
To Ensure Safe Use This machine weighs 225 kg (497 lbs). Media weighs 40 kg (88 lbs). WARNING WARNING Install the machine in a location that is Be sure to lock the stand’s casters. level, stable, and able to bear the weight If the machine should begin to topple, a ma- of the machine. -
Page 10: Warning Labels
To Ensure Safe Use Warning Labels Warning labels are affixed to make areas of danger immediately clear. The meanings of these labels are as follows. Be sure to heed their warnings. Also, never remove the labels or allow them to become obscured.
-
Page 11: Pour Utiliser En Toute Sécurité
Pour utiliser en toute sécurité La manipulation ou l’utilisation inadéquates de cet appareil peuvent causer des blessures ou des dommages matériels. Les précautions à prendre pour prévenir les blessures ou les dommages sont décrites ci-dessous. Avis sur les avertissements Utilisé pour avertir l’utilisateur d’un risque de décès ou de blessure grave ATTENTION en cas de mauvaise utilisation de l’appareil.
-
Page 12
Pour utiliser en toute sécurité L’utilisation incorrecte peut causer des blessures ATTENTION ATTENTION Débrancher le câble d’alimentation avant S’assurer de suivre les procédures de procéder au nettoyage ou à l’entretien d’utilisation décrites dans la documen- de l’appareil, et avant d’y fixer ou d’en tation. -
Page 13
Côté corps électrique. Si un objet ou du liquide s’infiltre dans l’appareil, débrancher immédiatement le câble d’alimentation et communiquer avec le représentant Roland DG Corp. autorisé. -
Page 14
Continuer à utiliser l’appareil peut causer un raient se produire. incendie, un choc électrique ou des bles- sures. Communiquer avec le représentant Roland DG Corp. Autorisé. Manipuler le câble d’alimentation, la fiche et la prise électrique correctement et avec soin. -
Page 15
Pour utiliser en toute sécurité Remarques importantes à propos du câble d’alimentation, de la fiche et de la prise électrique Ne jamais déposer aucun objet sur le câble, sur Ne jamais laisser l’eau toucher le câble, la fiche la fiche ou sur la prise car cela risque de les ou la prise. -
Page 16
Pour utiliser en toute sécurité L’encre, les liquides nettoyants et les liquides usées sont inflammables et toxiques ATTENTION ATTENTION Ne jamais boire l’encre, le liquide de Ne pas approcher une flamme nue de nettoyage ni les liquides usés, ne pas l’espace de travail. -
Page 17
Pour utiliser en toute sécurité Le poids de cet appareil est de 225 kg (497 lbs) Le poids du support est de 40 kg (88 lbs) ATTENTION ATTENTION S’assurer de verrouiller les roulettes de Installer l’appareil à un endroit stable et la base. -
Page 18
Pour utiliser en toute sécurité Vignettes d’avertissement Des vignettes d’avertissement sont apposées pour qu’il soit facile de repérer les zones dangereuses. La signification des vignettes est donnée ci-dessous. Respecter les avertissements. Ne jamais retirer les vignettes et ne pas les laisser s’encrasser. Attention : Risque de pincement Faire attention de ne pas coincer les doigts pendant le chargement… -
Page 19: Setup Guide
Setup Guide…
-
Page 20: Installation Environment
1. Installation Environment Deciding on an Installation Site Install in a quiet, stable location offering good operating conditions. An unsuitable location can cause accident, fire, faulty operation, or breakdown. WARNING Install the machine in a location that is level, stable, and able to bear the weight of the machine.
-
Page 21: Temperature And Humidity
1. Installation Environment Temperature and Humidity Maintain the specified temperature and humidity even when the machine is not in use. If temperatures are too high or too low, it may cause malfunction. During operation: Temperature 20 to 32˚C (68 to 90˚F), relative humidity 35 to 80% (no condensation) During non-operation: Temperature 5 to 40˚C (41 to 104˚F), relative humidity 20 to 80% (no conden- sation) Installation Space…
-
Page 22: Included Items
2. Included Items The following items are packed together with the unit. Make sure they are all present and accounted for. Arms (one for right and Stand legs (one for Power cord (1) Casters (2) left each) right and left each) Stand stay (1) Shafts (2) Shaft clamps (2)
-
Page 23
2. Included Items Setup guide User’s Manual (1) Cleaning liquid (1) Cleaning sticks (this document) (1) SPECIAL COLOR INK INKJET PRINTER MAIN- Software RIP (1) GUIDE (1) TENANCE GUIDE (1) -
Page 24: Assembling And Installing
3. Assembling and Installing Step 1: Assemble the Stand – Mount the Machine WARNING Perform this task with all power switches left switched off. Otherwise sudden movement of the machine may cause injury. CAUTION Unpacking and installation must be carried out by six or more personnel (by four or more personnel for the 30-inch model).
-
Page 25
3. Assembling and Installing Attach the casters onto the stand legs. Attach the casters to the end farther away from the stand stay. The casters have no particular front and rear orientation. Tighten the bolts securely (8 locations in total). Loose bolts may cause the stand to wobble. Hexagonal wrench Bolts Pipe… -
Page 26
3. Assembling and Installing Place the machine on the stand. Align the holes on the base surface of the machine to the protrusions of the arms. (8 locations in total) Tighten the bolts securely. Loose bolts may cause the stand to wobble. Align with the arms. -
Page 27: Step 2: Installing The Media Holder
3. Assembling and Installing Step 2: Installing the Media Holder WARNING Perform this task with all power switches left switched off. Otherwise sudden movement of the machine may cause injury. Procedure Place the shafts on the stand. Shafts Pass the left media holder onto the shaft.
-
Page 28
3. Assembling and Installing In the same way as the left media, pass the right media holder onto the shafts and at- tach the retaining screw. Only light tightening is necessary for the retaining screw. Retaining screws Tighten loosely. Attach the shaft clamps to secure the shafts in place. Do not place the media holders too close to the edge so that they will not get caught in the shaft clamps. -
Page 29: Step 3: Install The Drain Bottle
3. Assembling and Installing Step 3: Install the Drain Bottle WARNING Perform this task with all power switches left switched off. Otherwise sudden movement of the machine may cause injury. Procedure Remove the bottom plug. Please be careful as the fluid used in the inspection may still remain. Bottom plug …
-
Page 30: Step 4: Remove The Packing Materials
3. Assembling and Installing Step 4: Remove the Packing Materials Tape and other packing materials are attached to the machine to protect it from vibration during transporta- tion. When the installation is complete, remove these materials. WARNING Perform this task with all power switches left switched off. Otherwise sudden movement of the machine may cause injury.
-
Page 31: Connecting The Cables
4. Connecting the Cables Connecting the Power Cable and the Network Cable WARNING Connect to electrical outlet that complies with this machine’s ratings (for voltage, frequency, and current). Incorrect voltage or insufficient current may cause fire or electrical shock. WARNING Connect to ground.
-
Page 32: Installing The Ink Cartridges
5. Installing the Ink Cartridges Filling with Ink for the First Time Special procedures are required when installing ink cartridges for the first time. These are required only once, when installing ink cartridges for the first time after shipment from the factory. Firstly, clean the print heads with the cleaning cartridges, and then fill with the inks of each color.
-
Page 33
E-SOL MAX2 WMT * When «E-SOL MAX2 7C» is selected, one dedicated cleaning cartridge (ESL4-CL) for ECO-SOL MAX2 is needed. Contact your authorized Roland DG Corp. dealer or us. After selecting the Ink Type, press Confirm the Ink Type is correct, and then use… -
Page 34
5. Installing the Ink Cartridges Perform cleaning with a cleaning stick. When the screen shown on the left appears, open the cover R. OPEN COVER R Touch the location shown in the figure to discharge any static electricity. Screws Cover R Discharge static electricity Hook … -
Page 35
Insert each color ink cartridge into the slot labeled with the machining color. If you insert wrong cartridges, the color inks may be mixed. Be careful not to insert the wrong cartridges. Contact your authorized Roland DG Corp. dealer or us, if you wrong cartridges inserted and the color inks were mixed. -
Page 36
5. Installing the Ink Cartridges Follow the on-screen instructions to remove and insert the REMOVE SOL CL SOL INK cleaning cartridges. FILLING INK… SET SOLCL-LIQUID FILLING INK… Pull out the dummy cartridges from slot 3 and 4. REMOVE DUMMY CRT. Press By following the on-screen instructions, clean the print heads in the order of slots 3 and 4, slots 5 and 6, and slots 7 and 8. -
Page 37
5. Installing the Ink Cartridges Insert the ink cartridge for each color. Before you insert the ink cartridge for each color, gently shake the cartridge. Insert Ink cartridges into slots 7 and 8. SET SOL CRT. When «E-SOL MAX2 7C» is selected, insert a dedicated cleaning cartridge (ESL4-CL) for ECO-SOL MAX2 into slot 8. -
Page 38
5. Installing the Ink Cartridges Insert the ink cartridge for each color. SET SOL CRT. FILLING INK… Insert into the slot of the matching color. Discard the discharged ink in the drain bottle. E M P T Y D R A I N B O T T L E Be sure to discard. -
Page 39
5. Installing the Ink Cartridges When this screen appears, filling with ink is finished. SETUP SHEET… -
Page 40: Installing The Blade
6. Installing the Blade CAUTION Be sure to perform operations as specified by these instructions, and never touch any area not specified in the instructions. Sudden movement of the machine may cause injury. CAUTION Never touch the tip of the blade with your fingers. Doing so may result in injury, and the cutting performance of the blade will be impaired.
-
Page 41
6. Installing the Blade Install the blade holder. Loosen the screw as shown in the figure. Screw Support the screw from below and insert the blade holder. If you install the blade holder without supporting the screw from below, the cutting quality may be deteriorated. -
Page 42: Network Settings
7. Network Settings Introduction This machine has a built-in print server as a network interface. When you use the print server, you can send output data to the machine from anywhere on the network. TCP/IP is used as the protocol. Make sure the machine is connected to the network by an Ethernet cable.
-
Page 43
7. Network Settings Click [Properties]. Click [Allow] when the [User Account Control] dialog box appears. The [Local Area Connection Properties] dialog box will appear. Select [Internet Protocol Version 4 (TCP/IPv4)] (Win- dows Vista/7) or [Internet Protocol (TCP/IP) (Windows XP), and then click [Properties]. If the check box for [Internet Protocol] is unselected, then click and check the box. -
Page 44: Step 2: Make The Network Settings On The Printer
7. Network Settings Step 2: Make the Network Settings on the Printer Important The addresses used in this section are merely example settings. For detailed information about the settings, consult your network administrator. Set the IP address. Press Press several times until the screen shown on the MENU…
-
Page 45
7. Network Settings to select the address number. SUBNET MASK 000 . 000 . 000 . 000 [SUBNET MASK]: 255.255.255.000 For the subnet mask, make the setting the same value as the one used by the computer. Here, «255.255.255.000» is entered by way of example. Press SUBNET MASK 255 . -
Page 46: Step 3: Make The Port Settings For The Software Rip
7. Network Settings Step 3: Make the Port Settings for the Software RIP The settings for the software RIP will be made here. For the output destination, use the IP address set for the machine. For the setup procedures, refer to the documentation of the instructions for the software RIP. You can check whether the connection to the network has been complete by using the printing-test feature of the software.
-
Page 47: When Not In Use For A Prolonged Period
8. When Not in Use for a Prolonged Period Keep Performing Maintenance Switch on the power once every month. Switch on the sub power once every month. When you turn on the power, the machine automatically per- forms some operations such as those to keep the print heads from drying out. Allowing the machine to stand completely unused for a prolonged period may damage the print heads, so be sure to switch on the power to perform these automatic operations.
-
Page 48: When Moving The Unit
9. When Moving the Unit Procedures from Preparing to Move Through Reinstalling To transfer this machine, you need to secure the print heads in place with the retainers to protect them from damage. If your ink type is the W mode or WMT mode, you also need to circulate the ink manually then. If you transfer the machine without performing such steps, it may cause ink leakage, which can damage the internal devices of the machine, or cause damage to the head.
-
Page 49
9. When Moving the Unit Press MAINTENANCE DRAIN BOTTLE When the screen shown on the left appears, detach the bottle, EMPTY discard the discharged fluid to empty it. DRAIN BOTTLE CAUTION Before you detach the drain bottle, be sure to wait for the screen to display «EMPTY DRAIN BOTTLE.»… -
Page 50
9. When Moving the Unit Detach the blade holder. Detach the blade holder. Raise the loading lever. Secure the print heads in place. Secure the print heads in place using the retainer. For information on the method of securing the print heads, refer to P. 28, «Step 4: Remove the Pack- ing Materials»… -
Page 52
R2-130919…
инструкцияRoland VS-640

USER’S MANUAL
Thank you very much for purchasing this product.
To ensure correct and safe usage with a full understanding of this product’s performance, please be sure to read through
this manual completely and store it in a safe location.
Unauthorized copying or transferral, in whole or in part, of this manual is prohibited.
The contents of this document and the specications of this product are subject to change without notice.
The documentation and the product have been prepared and tested as much as possible. If you nd any misprint or
error, please inform us.
Roland DG Corp. assumes no responsibility for any direct or indirect loss or damage which may occur through use of this
product, regardless of any failure to perform on the part of this product.
Roland DG Corp. assumes no responsibility for any direct or indirect loss or damage which may occur with respect to
any article made using this product.
Роланд, ООО Корпорация является одним из ведущих мировых разработчиков и производителей электрических музыкальных инструментов, специализирующихся на клавишных и синтезаторах, звуковых модулях, процессорах эффектов, электронных барабанах, записывающем оборудовании и ampлифтеры. Их официальный webсайт Роланд.com
Каталог руководств пользователя и инструкций для продуктов Roland можно найти ниже. Продукция Roland запатентована и зарегистрирована под торговыми марками Роланд, ООО
Контактная информация:
АДРЕС: Roland Corporation US 5100 S. Eastern Ave. Лос-Анджелес,
CA: 90040-2938
323-890-3700
Как проехать

Найти
Roland P-20HD Video Instant Replayer What you can do with the P-20HD Slow-motion replay During video recording, you can select a scene and replay it in slow motion. This is ideal for live events and sports broadcasting. Composite the video from multiple cameras, and capture and replay it Two HDMI inputs are provided. You can …
Подробнее “Roland P-20HD Video Instant Replayer Owner’s Manual”
Roland DG Connect Руководство по установке Roland DG Connect Настройка Roland DG Connect состоит из трех шагов. Загрузите и установите Roland DG Connect Hub. Настройте Roland DG Connect Hub после создания Roland DG Connect ID, если у вас его нет. Настройте Roland DG Connect Hub, если у вас уже есть…
Подробнее «Руководство пользователя Roland DG Connect»
Руководство пользователя цифрового пианино Roland FP-E50 ] Описание панелей Верхняя панель Описание панелей Подготовка к игре Установка FP-E50 на подставку Будьте осторожны, чтобы не прищемить пальцы при установке подставки. Для поддержки FP-E50 используйте одну из следующих подставок Roland: KSFE50, KS-10Z, KS-12 или KS-20X. Обратитесь к…
Подробнее «Руководство пользователя цифрового пианино Roland FP-E50»
AE-20 Aerophone Информация о продукте: Руководство пользователя Руководство пользователя содержит важную информацию для безопасного и эффективного использования продукта. Он включает в себя введение в продукт, описания панелей, инструкции по подготовке к игре, игре на инструменте, уходу за мундштуком и другим настройкам. Важные примечания: внимательно прочитайте и следуйте всем инструкциям перед использованием…
Подробнее «Руководство пользователя аэрофона Roland AE-20»
Руководство пользователя цифрового рояля GP-9 Вот что можно делать Развлекайтесь Игра на фортепиано Воспроизведение различных тембров Помимо тембров рояля для использования на концертах, этот инструмент имеет широкий диапазон встроенных инструментальных тембров. Используйте эти тона по своему усмотрению в соответствии с песней, которую вы играете, и настроением. Ты …
Подробнее «Руководство пользователя цифрового рояля Roland GP-9»
XPS-30 Expandable Synthesizer Руководство пользователя Описания панелей содержания . . . . . . . . . . . . . . . . . . . . . . . . . . . . . . . . . . . . 2 Верхняя панель. . . . . . . . …
Подробнее «Руководство пользователя расширяемого синтезатора Roland XPS-30»
Цифровое пианино GP-6 Mini Grand, полированное черное дерево. Руководство пользователя. Чем можно заняться Развлекаясь Играя на фортепиано Воспроизведение различных тембров стр. 9 Помимо тембров рояля для использования на концертах, этот инструмент имеет широкий диапазон встроенных инструментальных тембров. Используйте эти тона по своему усмотрению в соответствии с песней, которую вы…
Подробнее “Руководство пользователя цифрового пианино Roland GP-6 Mini Grand из полированного черного дерева”
Roland HDMI Video Switcher Введение продукта Коммутатор поддерживает 4 входа видеосигнала HDMI, 1 * выход HDMI PVW + 1 * выход HDMI PGM; 5поддерживает встроенный звук HDMl + внешний звук, он может быть встроен в выходной сигнал HDMI или выводиться из аудиопорта после обработки микширования; также оснащен портом захвата видео Type-C, поддерживает OBS, vMix, VLc, …
Подробнее «Руководство пользователя видеомикшера Roland HDMI»
Проверка деталей подставки для клавиатуры Roland KSC-70 Прежде чем приступить к сборке подставки, убедитесь, что все детали входят в комплект поставки. Боковая доска (левая) 1 шт. B Боковая панель (правая) 1 шт. C Центральная панель 1 шт. 1 Винт «a» (M5 x 12 мм) 6 шт. 2 Стабилизаторы (левый/правый) 3 Винт «b» (4×14 мм) 6 шт. …
Подробнее «Руководство пользователя стойки для клавиатуры Roland KSC-70»
Versa STUDIO Versa STUDIO GS2-24 Информация по технике безопасности Авторское право © Корпорация Roland DG, 2022 г. http://www.rolanddg.com/ R1-220222TWКорпорация Roland DG Меры предосторожности для обеспечения безопасного использования Неправильное обращение или эксплуатация данного аппарата может привести к травмам или повреждению имущества. . Пункты, которые необходимо соблюдать для предотвращения таких травм или повреждений, описаны ниже. Значение ПРЕДУПРЕЖДЕНИЕ…
Подробнее «Руководство по эксплуатации плоттера для резки винила Roland GS2-24 Desktop Sign Maker»
- Manuals
- Brands
- Roland Manuals
- Plotter
ManualsLib has more than 69 Roland Plotter manuals
Click on an alphabet below to see the full list of models starting with that letter:
C
D
G
H
I
L
M
P
R
S
T
V

235 pages
VersaCAMM VP-540 Service Notes
243 pages
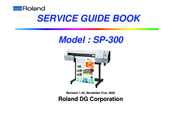
SP-300 Service Manual Book
263 pages
VersaCamm VS-640i Service Notes

295 pages
VersaCamm VS-640 Service Notes

121 pages
versaCamm sp-540v User Manual
58 pages
Camm-1 CX-24/12 User Manual

33 pages
CAMM-1 User Manual
70 pages
GX-24 User Manual
63 pages
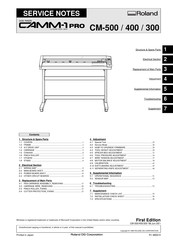
CAMM-1 PRO CM-500 Service Notes

102 pages
Camm-1Pro Series User Manual

150 pages
soljet pro4 xf 640 User Manual

64 pages
CX-500 User Manual

45 pages
DXY_1350 User Manual

39 pages
VersaEXPRESS RF-640 Setup Manual

64 pages
VersaUV LEF-300 First Step Manual

25 pages
VersaSTUDIO BN-20 Switching Manual

22 pages
VersaEXPRESS RF-640 Manual

24 pages
SOLJET PRO4 XR-640 Manual

56 pages
versaArt RE-640 Setup Manual

144 pages
IU-1000F Operating Instructions Manual
C
CAMM-1 CX-12

User Manual
CAMM-1 CX-24
Camm-1 CX-24/12
User Manual • User Manual • User Manual • User Manual • Manual • Manual
Camm-1 GR2-540
User Manual • Installation Manual • Setup Manual
Camm-1 GR2-640
User Manual • Installation Manual • Setup Manual
Installation Manual • Setup & Maintenance Manual
CAMM-1 PRO CM-300
Service Notes
CAMM-1 PRO CM-400
Service Notes
CAMM-1 PRO CM-500
Service Notes
User Manual
Camm-1Pro GX-300
User Manual
Camm-1Pro GX-400
User Manual
Camm-1Pro GX-500
Camm-1Pro GX-640
User Manual
Camm-1Pro Series
User Manual
CM-12
User Manual
CM-24
Color Camm Pro PC-60
Service Notes • User Manual
CX-300
Startup Manual • User Manual • Setup Instructions
CX-400
Startup Manual • User Manual • Setup Instructions
CX-500
Startup Manual • User Manual • Setup Instructions
D
DPX-2700A
User Manual
DPX-3700A
User Manual
DXY-101
Operation Manual
DXY-1100
Command Reference Manual
DXY-1150A
User Manual
DXY-1200
Command Reference Manual
DXY-1300
Command Reference Manual
DXY-800
Operation Manual
DXY_1350
User Manual
G
GS-24
Installation Manual • Quick Reference Manual
GX-24
User Manual • Manual • Manual
H
Hi-Fi Express FP-740
User Manual • Setup Manual
I
IU-1000F
Operating Instructions Manual • Manual • Manual
L
LEC-300
Supplement Manual • Setup Manual • User Manual • Setup Manual • Supplemental Manual • User Manual
LEC-300A
Supplement Manual • Setup Manual • User Manual • User Manual • Supplemental Manual • User Manual
LEC-330
Supplement Manual • User Manual • User Manual • Supplemental Manual • User Manual
LEF-300
Master Manual • First Step Manual
M
MODELA MDX-15
User Manual
MODELA MDX-20
User Manual
P
PNS-401
Assembly Instructions
PNS-501
Assembly Instructions
R
RS Series
Manual
S
SF-200
Setup Manual
SolJet Pro II
Conversion Procedure
soljet pro4 xf 640
User Manual
SOLJET PRO4 XF-640
User Manual • Setup Manual • Manual
SP-300
User Manual • Service Manual Book
T
TrueVIS Series
Maintenance Instructions Manual
TrueVIS VG-540
Setup Manual • Supplemental Manual
TrueVIS VG-640
Setup Manual • User Manual • Supplemental Manual
V
VersaArt RE-640
Setup Manual • User Manual
VersaCamm SP-540V
Service Notes • Setup Manual • User Manual
VersaCamm VP-300
User Manual • Service Notes
VersaCamm VP-540
User Manual • Service Notes
VersaEXPRESS RF-640
User Manual • Setup Manual • Manual • Product Manual
VersaEXPRESS RF-640A
User Manual • Manual
VersaStudio BN-20
Master Manual • Manual • First Step Manual • Switching Manual
VersaUv LEF — 12i
Master Manual • Troubleshooting Manual • Manual
VersaUV LEF-200
First Step Manual • Tutorial
VP Series
Manual
VS-300
User Manual • User Manual • Setup Manual • Manual • Service Notes
VS-300i
Manual • Setup Manual • Setup & Maintenance Manual • Service Notes • Self Maintenance Manual
VS-420
User Manual • User Manual • Setup Manual • Manual • Service Notes
VS-540
User Manual • User Manual • Setup Manual • Manual • Service Notes
VS-540i
Manual • Setup Manual • Setup & Maintenance Manual • Service Notes • Self Maintenance Manual
VS-640
User Manual • User Manual • Setup Manual • Manual • Service Notes
VS-640i
Manual • Setup Manual • Setup & Maintenance Manual • Service Notes • Self Maintenance Manual
VT-200
User Manual
Сейчас в базе инструкций для ROLAND насчитывается 154 бесплатных инструкций.
Аккомпанирующий модуль
Цифровые клавишные
Органный звуковой модуль
Педальная клавиатура
Сценическое цифровое фортепьяно
комбо-монитор
USB аудио интерфейс
гитарный комбо
MIDI клавиатура
гитарный синтезатор
компактный фразовый сэмплер
цифровой рояль со стендом
триггер для малого барабана
триггер для томов
триггер для бас барабана
цифровой аккордеон
гитарный усилитель
комбик для акустической гитары
звуковой модуль со звуковой картой
8 встроенных пэдов
MIDI-интерфейс
наплечный синтезатор
гитарный комбик
педаль-контроллер
универсальный аудиоинтерфейс для Mac, PC и iPad
триггерная педаль
сценическое фортепиано
диатонический аккордеон
рама для TD-20KX
комбо-орган
перкуссионный сэмплер
перкуссионный модуль
дополнительная стойка и тарелка к TD-1
микшерный пульт

Руководство пользователя на русском языке для продукта Roland HP307, формат A4, переплёт пластиковая пружина, обложки пластиковые, 86 страниц.
- Артикул: ROLANDHP307OMR

Руководство пользователя на русском языке для продукта Roland SonicCell, формат A4, переплёт пластиковая пружина, обложки пластиковые, 20 страниц.
- Артикул: ROLANDSonicCellOMR

Руководство пользователя на русском языке для продукта Roland JUNO-STAGE, формат A4, переплёт пластиковая пружина, обложки пластиковые, 248 страниц.
- Артикул: ROLANDJUNOSTAGEOMR

Руководство пользователя на русском языке для продукта Roland LX-10F, формат A4, переплёт пластиковая пружина, обложки пластиковые, 85 страниц.
- Артикул: ROLANDLX10FOMR

Руководство пользователя на русском языке для продукта Roland TD-4K, формат A4, переплёт пластиковая пружина, обложки пластиковые, 2 страницы.
- Артикул: ROLANDTD4KOMR

Руководство пользователя на русском языке для продукта Roland SP-555, формат A4, переплёт пластиковая пружина, обложки пластиковые, 75 страниц.
- Артикул: ROLANDSP555OMR

Руководство пользователя на русском языке для продукта Roland RD-700NX, формат A4, переплёт пластиковая пружина, обложки пластиковые, 100 страниц.
- Артикул: ROLANDRD700NXOMR

Руководство пользователя на русском языке для продукта Roland VB-99, формат A4, переплёт пластиковая пружина, обложки пластиковые, 170 страниц.
- Артикул: ROLANDVB99OMR

Руководство пользователя на русском языке для продукта Roland KC-880, формат A4, переплёт пластиковая пружина, обложки пластиковые, 20 страниц.
- Артикул: ROLANDKC880OMR

Руководство пользователя на русском языке для продукта Roland PD-125SX, формат A4, переплёт пластиковая пружина, обложки пластиковые, 13 страниц.
- Артикул: ROLANDPD125SXOMR

Руководство пользователя на русском языке для продукта Roland BK-5, формат A4, переплёт пластиковая пружина, обложки пластиковые, 145 страниц.
- Артикул: ROLANDBK5OMR

Руководство пользователя на русском языке для продукта Roland FR-1XB, формат A4, переплёт пластиковая пружина, обложки пластиковые, 76 страниц.
- Артикул: ROLANDFR1XBOMR

Руководство пользователя на русском языке для продукта Roland V-800HD, формат A4, переплёт пластиковая пружина, обложки пластиковые, 58 страниц.
- Артикул: ROLANDV800HDOMR

Руководство пользователя на русском языке для продукта Roland A-49, формат A4, переплёт пластиковая пружина, обложки пластиковые, 51 страницa.
- Артикул: ROLANDA49OMR

Руководство пользователя на русском языке для продукта Roland FA-08, формат A4, переплёт пластиковая пружина, обложки пластиковые, 122 страницы.
- Артикул: ROLANDFA08OMR
ГРАФИК РАБОТЫ
- Понедельник-Пятница:
10.00 до 18.00 - Суббота:
———— По договорённости - Воскресенье:
—————- Выходной
ЧТО ИЩУТ