
- Manuals
- Brands
- COBHAM Manuals
- Antenna
- SAILOR 6120
- User manual
-
Contents
-
Table of Contents
-
Troubleshooting
-
Bookmarks
Quick Links
SAILOR 6120/30/40/50
User manual
Related Manuals for COBHAM SAILOR 6120
Summary of Contents for COBHAM SAILOR 6120
-
Page 1
SAILOR 6120/30/40/50 User manual… -
Page 3
SAILOR 6120/30/40/50 User manual Document number: 98-154542-A Release date: September 21, 2017… -
Page 4
In the event of any discrepancies, the English version shall be the governing text. Thrane & Thrane A/S is trading as Cobham SATCOM. Copyright © 2017 Thrane & Thrane A/S. All rights reserved. -
Page 5
Warranties Any attempt to install or execute software not supplied by Cobham SATCOM on the devices in this system will result in the warranty being void. Any attempt to modify the software on these devices in a way not specified by Cobham SATCOM will result in the warranty being void. -
Page 6
Safety summary The following general safety precautions must be observed during all phases of operation, service and repair of this equipment. Failure to comply with these precautions or with specific warnings elsewhere in this manual violates safety standards of design, manufacture and intended use of the equipment. -
Page 7
SAILOR 3027 Non-SOLAS Terminal Intended readers This manual is a user manual for the SAILOR 6120/30/40/50 systems. The manual is intended for anyone who is using or intends to use any of these four systems. No specific skills are required to operate the mini-C system. However,… -
Page 8
• Service contains information on software update and a short troubleshooting guide and explains how to check the status of the system. Related documents Ref Title and description Document no. SAILOR 6120/30/40/50, Installation manual 98-154541 (with SAILOR 6018 Message Terminal) SAILOR 6110 mini-C GMDSS, User manual 98-154172… -
Page 9
Typography In this manual, typography is used as indicated below: Bold is used for the following purposes: • To emphasize words. Example: “Do not touch the antenna”. • To indicate what the user should select in the user interface. Example: “Select SETTINGS > LAN”. Italic is used to emphasize the paragraph title in cross-references. -
Page 10
viii… -
Page 11: Table Of Contents
Contents Chapter 1 Introduction Welcome ………………..1 System overview ………………. 2 System units ……………….. 4 User interfaces ………………5 The Inmarsat C services …………..9 Chapter 2 Get started Registration ………………13 User interfaces ………………14 Start up the system …………….18 Chapter 3 To use easyMail Overview of easyMail …………..
-
Page 12
Set up easyMail ……………… 63 Chapter 4 To use Distress and SSA buttons To send a Distress Alert (SAILOR 6150 only) ……. 65 To send a Ship Security Alert (SAILOR 6120 only) … 69 Chapter 5 Service Get support ………………. 71 Troubleshooting guide ………….. -
Page 13: Chapter 1 Introduction
With the mini-C system you can send and receive data via satellite through the Inmarsat C network. Four variants of the mini-C system are described in this manual: • SAILOR 6120 SSA System • SAILOR 6130 LRIT System • SAILOR 6140 Maritime System •…
-
Page 14: System Overview
Chapter 1: Introduction System overview The SAILOR 6120/30/40/50 mini-C system The Inmarsat C satellite network is the link between the mini-C system and the destination office. It uses four geostationary satellites to cover the world. For each satellite there is an NCS, Network Coordination Station, handling registration of the mobile unit (in this case the SAILOR 3027) in the Inmarsat C system.
-
Page 15
Chapter 1: Introduction The SAILOR 3027 can be connected to a SAILOR 6018 Message Terminal, where you can read and write messages and send Distress alerts (SAILOR 6150 only). This communication is transmitted via the SAILOR 3027 to/from the Inmarsat C satellite network. Scripting The SAILOR 6194 Terminal Control Unit supports simple scripting, using Lua language. -
Page 16: System Units
SAILOR 6150 systems only, but is available for the other systems as well. For a more detailed description of the units, refer to the installation manual for the SAILOR 6120/30/40/50 mini-C system and the manuals for the respective units. See Related documents on page vi. System units…
-
Page 17: User Interfaces
CAN interface. The SAILOR 6018 has a built-in user interface. For overall system status, diagnostics and live logging you may use the ThraneLINK Management System (TMA). For details on the TMA, see the SAILOR 6120/30/40/50, Installation manual [1]. User interfaces…
-
Page 18
Chapter 1: Introduction easyMail easyMail is a user interface for the mini-C system. With easyMail you can send and receive messages, view status and configure the system. To use easyMail you must have a SAILOR 6194 Terminal Control Unit and a computer with the easyMail application installed. -
Page 19
Chapter 1: Introduction SAILOR 6018 user interface (for SAILOR 6150) For the SAILOR 6150 Non-SOLAS system you can use the SAILOR 6018 Message Terminal. With the SAILOR 6018 Message Terminal you can send and receive messages, send Distress alerts, view system status and configure the system. -
Page 20
Chapter 1: Introduction Menu overview, SAILOR 6018 The below drawing shows the menu system in the SAILOR 6018. Note: Menu items in grey colour are only available if Cyrillic characters are enabled under System > Settings > Regional settings > Cyrillic. The items in the menu overview are described in SAILOR 6110 mini-C GMDSS, User manual [2]. -
Page 21: The Inmarsat C Services
Distress alerts and Distress priority messages If a ship or a crew is in grave and imminent danger, the crew can use the SAILOR 6120/30/40/50 to send a Distress alert by pushing a dedicated Distress button. The alert contains information on the terminal’s ID (ID of the SAILOR 3027), addressed LES, date/time of alert, ship’s position, course, speed, time…
-
Page 22
Chapter 1: Introduction Enhanced Group Call (EGC) Two EGC services are available: • EGC SafetyNET — the international safety service, which allows authorised maritime safety information (MSI) providers, such as meteorological offices, hydrographic officers and MRCCs to broadcast messages to all ships in certain geographical areas. MSI includes navigational and meteorological warnings, meteorological forecasts and other urgent safety-related information, which is addressed to all ships in NAVAREA / METAREA, user-defined circular or… -
Page 23
Chapter 1: Introduction Message transmission Ship to shore: Text and data from the SAILOR 3027 can be sent to: • An e-mail address • Any telex or fax (text, one way only) number • Any computer connected to the public telephone and data networks (PSTN and PSDN), using a telephone modem number •… -
Page 24
Chapter 1: Introduction 3027 sends its reports to this mailbox and other tracking systems can then access and empty the mailbox. The SAILOR 3027 supports up to 64 DNIDs. Up to 255 mobile terminals can use the same DNID, and the specific terminal is identified by a member number between 1 and 255. -
Page 25: Chapter 2 Get Started
Chapter 2 Get started This chapter explains how to register, start up and log on your mini-C system. It has the following sections: • Registration • User interfaces • Start up the system Registration Before using the SAILOR 3027 mini-C terminal on the Inmarsat-C system you must register the terminal.
-
Page 26: User Interfaces
Install easyMail To install the easyMail application on your computer, do as follows: 1. Go to www.cobham.com/satcom 2. Select Cobham SYNC Partner Portal. 3. Select Downloads > Product software > Maritime. 4. Search for the easyMail software. 5. Click Download.
-
Page 27
Chapter 2: Get started Access your SAILOR 3027 with easyMail 1. Acquire a SAILOR 6194 Terminal Control Unit, if it is not already part of your system. 2. Connect your SAILOR 3027 to the CAN interface on the SAILOR 6194 Terminal Control Unit. -
Page 28
Chapter 2: Get started SAILOR 6018 Message Terminal The SAILOR 6018 has its own built-in user interface. If you are using a SAILOR 6018 with your SAILOR 6150 Non-SOLAS system, you must config- ure the SAILOR 6018 before using it for the first time. The initial configuration may already have been done during Note installation of the system. -
Page 29
Chapter 2: Get started For details on how to use the SAILOR 6018, see SAILOR 6110 mini-C GMDSS, User manual [2]. If, at a later stage, you want to switch between the Radiotelex and Inmarsat C applications, do as follows: 1. -
Page 30: Start Up The System
Chapter 2: Get started Start up the system easyMail When the power source is on, the SAILOR 3027 automatically starts up and logs on to the satellite network. You can see the logon status on screen on a connected computer with easyMail installed.
-
Page 31
Chapter 2: Get started Log into the satellite network The SAILOR 3027 logs into the Inmarsat C network automatically at startup. The upper right corner of the display shows if the system is logged If, however, the selected satellite is no longer available, you must manually select another satellite to log into. -
Page 32
Chapter 2: Get started 2. On the Network Status page select Login. 3. Select the Ocean Region to which you want to log in. If the selected satellite is available, the system will now log in. When the display shows the Ocean Region and the position, and there is a green check mark at the satellite symbol, the system is ready for use. -
Page 33: Chapter 3 To Use Easymail
Chapter 3 To use easyMail This chapter describes how to operate the mini-C system using the easyMail application. It has the following sections: • Overview of easyMail • Distress functions (only SAILOR 6150) • Work with messages • Position reporting •…
-
Page 34: Overview Of Easymail
Chapter 3: To use easyMail Overview of easyMail For information on how to install and start up easyMail, see easyMail application on page 14. Overview of the screen Below is an overview of the main screen in easyMail. Menu bar Mobile status Connection status Message…
-
Page 35
Chapter 3: To use easyMail • Connection status shows the status of your PC connection, your mini-C antenna connection and your GPS connection. • Message header contains the fields where you can enter recipients and subject for a message. • Shortcut buttons may be used for quick access to some of the menu items. -
Page 36
Chapter 3: To use easyMail Menu overview, easyMail Overview of easyMail… -
Page 37: Distress Functions (Only Sailor 6150)
Chapter 3: To use easyMail Distress functions (only SAILOR 6150) Write a Distress priority message Distress priority messages are sent to the MRCC only. Note Distress priority messages must be written in English. To write a Distress priority message, do as follows: 1.
-
Page 38
Chapter 3: To use easyMail The Distress Alert Nature and the Distress Alert Position, Course Note and Speed settings are only valid for the current Distress Alert or maximum one hour. Then these settings are returned to the default settings. The entered Distress LESes remain in the system. To change the Distress alert settings, do as follows: 1. -
Page 39
Chapter 3: To use easyMail 4. If necessary, change the position, course and speed. Do not change the default setting unless you have good Note reasons to do so. The default setting is “Always use latest position from GPS”. It is normally best to show your current GPS position when sending a Distress Alert. -
Page 40
Chapter 3: To use easyMail Test Distress buttons Never test the installation by sending an alert on-air! Important If an alert is sent by mistake, inform the relevant authorities immediately. You can test the Distress button(s) in your system without sending a real Distress alert. -
Page 41
Chapter 3: To use easyMail Test easyMail alarm sound To test the alarm sound in easyMail, do as follows: 1. Select Distress > Test easyMail sound. 2. Click Start to hear the sound on your computer. Your computer will now play the same sound that you will hear when a Distress alert is sent or an urgent/distress priority EGC or message is received. -
Page 42: Work With Messages
Chapter 3: To use easyMail Work with messages Prepare the system Before you can send a message: • The recipient of the message must be listed in the Address book. For details, see Manage the list of Contacts on page 38. •…
-
Page 43
Chapter 3: To use easyMail Write a routine priority message To write a routine priority message, do as follows: 1. If the editor is not already open, select File > New or click the Editor button to the left (if present). 2. -
Page 44
Chapter 3: To use easyMail If you want to save your message without sending it, you can Note save it as a file by selecting File > Save. 6. When the message is ready to be sent, click Send. 7. Select what you want to send. •… -
Page 45
Chapter 3: To use easyMail Options for writing and sending messages In the File menu, you have the following options: • New. Opens a new message. • Open. Allows you to select a text file to be opened in the editor. •… -
Page 46
Chapter 3: To use easyMail To insert information automatically To insert information such as position and vessel data in your message, do as follows: 1. Select Edit > Insert. 2. Select the information you want to insert. Signature and vessel data must first be defined. See the next Note section. -
Page 47
Chapter 3: To use easyMail To enter signature and vessel data You can enter a signature and your vessel data for later automatic insertion in your messages (see previous section). To define your signature, do as follows: 1. Select Edit > Define signature. 2. -
Page 48
Chapter 3: To use easyMail To use default messages You can write a default message that you can recall and send by pressing one of the F-keys F1 to F8. Create a default message To create a default message, do as follows: 1. -
Page 49
Chapter 3: To use easyMail View messages in the Inbox To view the messages in the Inbox, do as follows: 1. Select View > Inbox. 2. Double-click the message you want to read. From within the message you have the following options: •… -
Page 50
Chapter 3: To use easyMail View sent messages (Outbox) After writing a message and selecting Send, you can see the message and the status of the message in the Outbox. To view messages in the Outbox, select View > Outbox. Manage the list of Contacts or select Messaging >… -
Page 51
Chapter 3: To use easyMail To add a new contact Do as follows: 1. In the Address book, select New at the bottom of the page. 2. Type in the name of your contact. 3. Select the address type below the name. 4. -
Page 52
Type Format of number Example Presentation E-mail Standard e-mail address info@cobham.com 5, 7 or 8 bit Telex Country code + subscriber no. 0045 99999999 5 or 7 bit Country code + subscriber no. 0045 99999999 5, 7 or 8 bit… -
Page 53
Chapter 3: To use easyMail To edit a contact Do as follows: 1. In the Address book, select the contact. 2. Select Properties. 3. Edit the details. See the previous section for information on the contact details. 4. Select OK. To delete a contact Do as follows: 1. -
Page 54: Position Reporting
Chapter 3: To use easyMail Position reporting For general information on the position reporting service, see Position reports on page 11. To be able to use the position reporting feature, a DNID must be Note downloaded and enabled in the SAILOR 3027. See Set up ENIDs on page 53.
-
Page 55
Chapter 3: To use easyMail To start a local position reporting program Note Only local position reporting programs can be managed locally. You can see the remotely configured programs as well but you cannot change them. To start a program that is already defined, do as follows: 1. -
Page 56: Receive Egcs
Chapter 3: To use easyMail 2. Select the DNID information (provider, LES, DNID and member number) for each ocean region. 3. Select the time to start the position reporting or select Immediately. 4. Select the interval between the position reports. 5.
-
Page 57
Chapter 3: To use easyMail View incoming EGCs To view EGCs, do as follows: 1. Select View > EGC from the main menu. 2. Double-click an EGC to see the contents. From within the EGC you have the following options: •… -
Page 58: Network Status And Settings
Chapter 3: To use easyMail Network status and settings The Mobile status field at the top of the page shows the status of the network connection. When the SAILOR 3027 is logged in to the network, this field shows the ocean region to which the SAILOR 3027 is logged in. Log into and out of the network To log into the Inmarsat C network, select Actions >…
-
Page 59
Chapter 3: To use easyMail Link test Note To test basic system connectivity, we recommend that you send a short message to yourself instead of using the link test. For details on how to send a message, see Write a routine priority message on page 31. -
Page 60: View System Details
Chapter 3: To use easyMail View system details To see information on easyMail and the SAILOR 3027, click or select Help > System info. View system details…
-
Page 61: View Or Change Position Information
Chapter 3: To use easyMail View or change position information To view or change your current position information, course and speed, do as follows: 1. select View > Position info. 2. If there is no synchronization with the positioning system, you can enter a manual position, course and speed.
-
Page 62: View Status And Info Log
Chapter 3: To use easyMail View status and Info log To see status To see the status of the SAILOR 3027, select View > Transceiver status, or click the Antenna signal bar in the connections status field at the top of the page.
-
Page 63: Set Up The Default Isp And Default Leses
Chapter 3: To use easyMail Set up the default ISP and default LESes To set up the default ISP To set up a default ISP, do as follows: 1. Select Setup > Default ISP. 2. Select the default ISP from the list. 3.
-
Page 64: Set Up Reception Of Egcs
Chapter 3: To use easyMail Set up reception of EGCs For general information on EGCs, see Enhanced Group Call (EGC) on page 10. To set up reception of EGCs, do as follows: 1. Select Setup > EGCs. 2. To set up the additional areas from which you want to receive meteorological or navigational EGCs, select Additional NAVAREA(s) /METAREA(s).
-
Page 65: Set Up Enids
Chapter 3: To use easyMail 3. Select whether you want to receive System Messages or SafetyNET messages or both. 4. To change the Coastal Warning Areas, type in the new areas under Coastal Warning Areas [A..Z]. 5. Select the types of EGC service you want to receive. 6.
-
Page 66: Set Up The Land Earth Stations (Les)
Chapter 3: To use easyMail Set up the Land Earth Stations (LES) To view or edit the list of Land Earth Stations for each ocean region, do as follows: 1. Select Setup > Land Earth Stations (LES). 2. Select a LES and click Edit. 3.
-
Page 67
Chapter 3: To use easyMail List of currently supported LESes The table below shows the LESes supported by the service providers at the time of writing. Note that the list is dynamic, so it may not be completely up to date. LES no. -
Page 68: Set Up Inmarsat Service Providers (Isp)
Chapter 3: To use easyMail Set up Inmarsat Service Providers (ISP) Do not change these settings unless you know the exact formats Note to enter. The Inmarsat Service Providers are already set up when you receive your system. However, if an Inmarsat Service Provider e.g. changes the format for email, you can change these settings to match the new format.
-
Page 69
Chapter 3: To use easyMail To add a new provider To add a new provider to the list, do as follows: 1. In the Inmarsat service providers window, click New provider. 2. Type the name of the provider in the top left corner and click Add. The new provider is now added to the list, but without any information. -
Page 70: Enter The Mobile Number
Chapter 3: To use easyMail Enter the mobile number Before you can use the SAILOR 3027 on the Inmarsat C network you must configure the mobile number from your service provider in the SAILOR 3027. To enter the mobile number, do as follows: 1.
-
Page 71: Set The Local Time
Chapter 3: To use easyMail Set the local time The SAILOR 3027 gets the UTC time from the GPS receiver. You can convert this time to local time and set the time on your computer accordingly. Do as follows: 1. Select Setup > Local time zone/PC time. 2.
-
Page 72: Set Up Password Protection
Chapter 3: To use easyMail Set up password protection You can add password protection to three different actions: Transmission, configuration and remote configuration. To add password protection, do as follows: 1. Select Setup > Passwords. 2. Select the password you want to add or change. 3.
-
Page 73: Set Up Pc Communication With The Sailor 3027
Chapter 3: To use easyMail Set up PC communication with the SAILOR 3027 To connect a computer to the system you must use a SAILOR 6194 Terminal Control Unit. You can connect the computer to the LAN interface or the RS-232 interface on the SAILOR 6194. Note The Communication setup is not accessible when the computer has established a connection with the SAILOR 3027.
-
Page 74
Chapter 3: To use easyMail To set up RS-232 communication To set up easyMail for RS-232 communication with the SAILOR 6194 and thereby the SAILOR 3027, do as follows: 1. Select Setup > Communication setup. 2. Select Serial communication. 3. Select the COM port you are using on your computer and the Baud rate of the SAILOR 6194 (default is 115200). -
Page 75: Set Up Easymail
Chapter 3: To use easyMail Set up easyMail To change message setup You can set up some general settings for messages in the Messages tab. Do as follows: 1. Select Setup > Settings. 2. Select the Messages tab. 3. If you want to get an info box when a new message has arrived, select Show info box when new message is received.
-
Page 76
Chapter 3: To use easyMail To use electronic forms Some users have a need for a specific layout, e.g. for fishery catch reporting. The files for this layout must be downloaded to the system before selecting the formats on this page. Miscellaneous settings In Harbour Button Select Setup >… -
Page 77: Chapter 4 To Use Distress And Ssa Buttons
Ship Security Alert with the SSA buttons. It has the following sections: • To send a Distress Alert (SAILOR 6150 only) • To send a Ship Security Alert (SAILOR 6120 only) To send a Distress Alert (SAILOR 6150 only) Distress alert with SAILOR 3042E…
-
Page 78
Chapter 4: To use Distress and SSA buttons The MRCC normally sends a message to the alerting unit to Important gather more information about the situation. If possible, respond to such messages with a Distress message sent to the same LES that was used for the Distress Alert. -
Page 79
Chapter 4: To use Distress and SSA buttons Distress alert with SAILOR 6018 If you have a SAILOR 6018 Message Terminal connected to your SAILOR 6150 system, you can use the Distress button on the SAILOR 6018 to send Distress alerts, and you may also have additional SAILOR 6101 or SAILOR 6103 alarm panels connected. -
Page 80
Chapter 4: To use Distress and SSA buttons The below table shows the behavior of the Distress button on the SAILOR 6018. Behavior Meaning Button light flashes, The Distress button is pushed. Hold until light buzzer sounds and sound changes (more than 3 seconds). Button light constant, The Distress Alert is being sent buzzer is silent… -
Page 81: To Send A Ship Security Alert (Sailor 6120 Only)
Install the SSA buttons and configure the SAILOR 3027 as described in SAILOR 6194 Terminal Control Unit, Installation and user manual [4] and SAILOR 6120/30/40/50, Installation manual [1]. To send a Ship Security Alert (SAILOR 6120 only)
-
Page 82
30 – 33 seconds during test, an SSA Test Message is sent to all recipients configured to receive test messages. 1. “Operational” means the following criteria are met: GPS fix obtained, logged in, recipient(s) of covert alert configured, all SSA buttons connected correctly. To send a Ship Security Alert (SAILOR 6120 only) -
Page 83: Chapter 5 Service
Airtime subscription documents for a contact number to call. System support Lists of certified partners and distributors are available on www.cobham.com/satcom. Select Technical Service Partner List from the menu to the right and select one of the dealers or partners lists shown.
-
Page 84: Troubleshooting Guide
Chapter 5: Service Troubleshooting guide The below table provides information on some of the problems that might occur, including possible causes and remedies to solve the problems. Problem Possible cause Remedy The system The SAILOR 6018 has a If the SAILOR 6018 is using a cannot be remote on/off switch, so the remote on/off switch, use…
-
Page 85
Chapter 5: Service Problem Possible cause Remedy No connection The PC connection to the For information on how to between SAILOR 3027 is not set up set up the PC connection, see easyMail and properly. Set up PC communication SAILOR 3027 with the SAILOR 3027 on page 61. -
Page 86: Status Signalling In Easymail
Chapter 5: Service Status signalling in easyMail Status information The top of the display shows the most important status information. You can click each status area to get details, or use the View menu to enter the status pages. Information of events Popup windows When an event requires your attention, a popup window appears.
-
Page 87: Status Signalling In Sailor 6018
Chapter 5: Service Status signalling in SAILOR 6018 The SAILOR 6018 can show basic status and error messages. When an error occurs in the system, check the SAILOR 6018 for information first. Status information in SAILOR 6018 The upper right corner of the display shows the most important status information.
-
Page 88
Chapter 5: Service List of active warnings and errors The top right corner of the display shows a short text about the current status. The icon in the corner can change depending on the situation. From the list of active warnings and errors you can access the event log. Event log From the list of active errors or warnings, you can select Event log to see a complete list of events. -
Page 89: Service And Repair
Your dealer, installer or Cobham SATCOM partner will assist you whether the need is user training, technical support, arranging on-site repair or sending the product for repair. Your dealer, installer or Cobham SATCOM partner will also take care of any warranty issue.
-
Page 90
Chapter 5: Service Service and repair… -
Page 91
Appendix A Conformity CE (RED) The mini-C systems SAILOR 6120, SAILOR 6130, SAILOR 6140 and SAILOR 6150 are CE certified as stated in the “EU Declaration of Conformity” enclosed in electronic copy on the next pages. -
Page 92
The full text of the EU declaration of conformity is available at the following internet address: http://sync.cobham.com/satcom/support/downloads Document no.: 99-157523-A Thrane & Thrane A/S trading as Cobham SATCOM. Registered no.: DK — 65 72 46 18. Registered address: Lundtoftegaardsvej 93 D, 2800 Kgs. Lyngby, Denmark. www.cobham.com… -
Page 93
The full text of the EU declaration of conformity is available at the following internet address: http://sync.cobham.com/satcom/support/downloads Document no.: 99-157524-A Thrane & Thrane A/S trading as Cobham SATCOM. Registered no.: DK — 65 72 46 18. Registered address: Lundtoftegaardsvej 93 D, 2800 Kgs. Lyngby, Denmark. www.cobham.com… -
Page 94
The full text of the EU declaration of conformity is available at the following internet address: http://sync.cobham.com/satcom/support/downloads Document no.: 99-157525-A Thrane & Thrane A/S trading as Cobham SATCOM. Registered no.: DK — 65 72 46 18. Registered address: Lundtoftegaardsvej 93 D, 2800 Kgs. Lyngby, Denmark. www.cobham.com… -
Page 95
The full text of the EU declaration of conformity is available at the following internet address: http://sync.cobham.com/satcom/support/downloads Document no.: 99-157526-A Thrane & Thrane A/S trading as Cobham SATCOM. Registered no.: DK — 65 72 46 18. Registered address: Lundtoftegaardsvej 93 D, 2800 Kgs. Lyngby, Denmark. www.cobham.com… -
Page 96
Appendix A: Conformity… -
Page 97
Appendix B GNU License texts GNU General Public License Version 2, June 1991 Copyright (C) 1989, 1991 Free Software Foundation, Inc., 51 Franklin Street, Fifth Floor, Boston, MA 02110-1301 USA. Everyone is permitted to copy and distribute verbatim copies of this license document, but changing it is not allowed. -
Page 98
Appendix B: GNU License texts Whether that is true depends on what the Program does. 1. You may copy and distribute verbatim copies of the Program’s source code as you receive it, in any medium, provided that you conspicuously and appropriately publish on each copy an appropriate copyright notice and disclaimer of warranty;… -
Page 99
Appendix B: GNU License texts terminate your rights under this License. However, parties who have received copies, or rights, from you under this License will not have their licenses terminated so long as such parties remain in full compliance. 5. You are not required to accept this License, since you have not signed it. However, nothing else grants you permission to modify or distribute the Program or its derivative works. -
Page 100
Appendix B: GNU License texts DAMAGES ARISING OUT OF THE USE OR INABILITY TO USE THE PROGRAM (INCLUDING BUT NOT LIMITED TO LOSS OF DATA OR DATA BEING RENDERED INACCURATE OR LOSSES SUSTAINED BY YOU OR THIRD PARTIES OR A FAILURE OF THE PROGRAM TO OPERATE WITH ANY OTHER PROGRAMS), EVEN IF SUCH HOLDER OR OTHER PARTY HAS BEEN ADVISED OF THE POSSIBILITY OF SUCH DAMAGES. -
Page 101
Appendix B: GNU License texts GNU Lesser General Public License Version 2.1, February 1999 Copyright (C) 1991, 1999 Free Software Foundation, Inc., 51 Franklin Street, Fifth Floor, Boston, MA 02110-1301 USA. Everyone is permitted to copy and distribute verbatim copies of this license document, but changing it is not allowed. -
Page 102
Appendix B: GNU License texts case, there is little to gain by limiting the free library to free software only, so we use the Lesser General Public License. In other cases, permission to use a particular library in non-free programs enables a greater number of people to use a large body of free software. -
Page 103
Appendix B: GNU License texts License, and its terms, do not apply to those sections when you distribute them as separate works. But when you distribute the same sections as part of a whole which is a work based on the Library, the distribution of the whole must be on the terms of this License, whose permissions for other licensees extend to the entire whole, and thus to each and every part regardless of who wrote it. -
Page 104
Appendix B: GNU License texts contents of definitions files in the Library will not necessarily be able to recompile the application to use the modified definitions.) b) Use a suitable shared library mechanism for linking with the Library. A suitable mechanism is one that (1) uses at run time a copy of the library already present on the user’s computer system, rather than copying library functions into the executable, and (2) will operate properly with a modified version of the library, if the user installs one, as long as the modified version is interface-compatible with the version that the work was made… -
Page 105
Appendix B: GNU License texts contributions to the wide range of software distributed through that system in reliance on consistent application of that system; it is up to the author/donor to decide if he or she is willing to distribute software through any other system and a licensee cannot impose that choice. -
Page 106
Appendix B: GNU License texts You should also get your employer (if you work as a programmer) or your school, if any, to sign a «copyright disclaimer» for the library, if necessary. Here is a sample; alter the names: Yoyodyne, Inc., hereby disclaims all copyright interest in the library `Frob’ (a library for tweaking knobs) written by James Random Hacker. -
Page 107: Glossary
Glossary Glossary Controller-Area Network. A message based protocol designed to allow microcontrollers and devices to communicate with each other within a vehicle without a host computer. DNIC Data Network Identification Code DNID Data reporting Network IDentification code. An address code to an electronic mailbox at the Land Earth Station.
-
Page 108
Glossary GNU’s Not Unix. A Unix-like computer operating system developed by the GNU project, ultimately aiming to be a «complete Unix-compatible software system» composed wholly of free software General Public License Global Positioning System. A system of satellites, computers, and receivers that is able to determine the latitude and longitude of a receiver on Earth by calculating the time difference for signals from different satellites to reach the receiver. -
Page 109
Glossary LRIT Long Range Identification and Tracking. A system established by the IMO applying to all passenger ships, cargo ships > 300 gross tonnage and mobile offshore drilling units. These ships/units must automatically report their position to their Flag Administration at least 4 times a day. Other contracting governments may request information about vessels in which they have a legitimate interest under the regulation. -
Page 110
Glossary PSTN Public Switched Telephone Network. The network of the world’s public circuit-switched telephone networks. It consists of telephone lines, fibre-optic cables, microwave transmission links, cellular networks, communications satellites, and undersea telephone cables all inter-connected by switching centres which allows any telephone in the world to communicate with any other. -
Page 111: Index
Index Index deleting EGC, 45 activation of service, 13 message, 37 alert Distress Ship Security Alert, 69 alert with SAILOR 3042E, 65 approvals, 79 alert with SAILOR 6018, 67 auto-print button test (easyMail), 28 EGCs and messages, 63 clear indications (easyMail), 66 clear indications (SAILOR 6018), 69 description of service, 9 message, 25…
-
Page 112
Index mobile number entering, 58 Inbox, 37 info log, 74 network login, 46 scan, 46 setup with easyMail, 61 view status, 46 LES number Distress (SAILOR 6018), 67 list of supported, 55 link test, 47 Outbox, 38 login, 46 script language, 3 position for Distress, 27 viewing, 49… -
Page 113
Index system units, 4 safety summary, iv SAILOR 3042E sending Distress alert, 65 transmission stop, 47 SAILOR 6018 troubleshooting, 71 menu overview, 8 typography used in this manual, vii sending Distress alert, 67 scan, 46 script introduction, 3 units in the system, 4 Lua, 3 user interface, 5 sent items, 38… -
Page 114
98-154542-A www.cobham.com/satcom…
USER MANUAL
SAILOR 6120/30/40/50 System
Посмотреть товар в Интернет-магазине seacomm.ru
SAILOR 6120/30/40/50 System
User manual
Document number: 98-131590-A
Release date: May 25, 2011
Disclaimer
Any responsibility or liability for loss or damage in connection with the use of this product and the accompanying documentation is disclaimed by Thrane & Thrane. The information in this manual is provided for information purposes only, is subject to change without notice and may contain errors or inaccuracies.
Manuals issued by Thrane & Thrane are periodically revised and updated. Anyone relying on this information should acquire the most current version e.g. from http://www.thrane.com
or from the distributor .
Thrane & Thrane is not responsible for the content or accuracy of any translations or reproductions, in whole or in part, of this manual from any other source.
Copyright
© 2011 Thrane & Thrane A/S. All rights reserved.
GPL notification
The software included in this product contains copyrighted software that is licensed under the GPL/LGPL. A copy of those licenses is included in this document in the last appendix. You may obtain the complete corresponding source code from us for a period of three years after our last shipment of this product, which will be no earlier than
December 2015, by sending a money order or check for DKK 50 to:
SW Technology/GPL Compliance,
Thrane & Thrane A/S,
Lundtoftegaardsvej 93D
2800 Lyngby
DENMARK
Please write “source for product <product name>” in the memo line of your payment
(replace <product name> with e.g. SAILOR 3027 SSA Terminal).
You may also find a copy of the source at http://www.thrane.com/foss .
This offer is valid to anyone in receipt of this information.
Warranties
Any attempt to install or execute software not supplied by Thrane & Thrane on the devices in this system will result in the warranty being void. Any attempt to modify the software on these devices in a way not specified by Thrane & Thrane will result in the warranty being void.
Trademark Acknowledgements
•
Thrane & Thrane is a registered trademark of Thrane & Thrane A/S in the European
Union and the United States.
•
Inmarsat is a registered trademark of the International Maritime Satellite
Organisation (IMSO) and is licensed by IMSO to Inmarsat Limited and Inmarsat
Ventures plc.
•
SAILOR is a registered trademark of Thrane & Thrane A/S in the European Union, the
United States and other countries.
• Other product and company names mentioned in this manual may be trademarks or trade names of their respective owners.
iv
Safety summary
The following general safety precautions must be observed during all phases of operation, service and repair of this equipment. Failure to comply with these precautions or with specific warnings elsewhere in this manual violates safety standards of design, manufacture and intended use of the equipment. Thrane & Thrane assumes no liability for the customer’s failure to comply with these requirements.
Observe marked areas
Under extreme heat conditions do not touch areas of the units that are marked with this symbol, as it may result in injury.
Microwave radiation hazards
During transmission the antenna in this system radiates Microwave
Power.This radiation may be hazardous to humans close to the antenna.
When the system is powered, make sure that nobody gets closer than the recommended minimum safety distance of 0.3 m (1 ft.).
Keep away from live circuits
Operating personnel must not remove equipment covers. Only qualified maintenance personal must make component replacement and internal adjustment. Under certain conditions, dangerous voltages may exist even with the cable removed. To avoid injuries, always disconnect power and discharge circuits before touching them.
Compass safe distance
Minimum safety distance: 5 m from the Mini-C Terminal.
1
About the manual
Naming conventions
This manual covers four different types of system. For information that applies to all four types, the following naming conventions are used:
Common name Used for
2
Mini-C System
Mini-C Terminal
SAILOR 6120 SSA System
SAILOR 6130 LRIT System
SAILOR 6140 Maritime System
SAILOR 6150 Non-SOLAS System
SAILOR 3027 SSA Terminal
SAILOR 3027 LRIT Terminal
SAILOR 3027 Maritime Terminal
SAILOR 3027 Non-SOLAS Terminal
Intended readers
This manual is a user manual for the SAILOR 6120/30/40/50 Mini-C
Systems. The manual is intended for anyone who is using or intends to use any of these four systems. No specific skills are required to operate the SAILOR 6120/30/40/50. However, it is important that you observe all safety requirements listed in the beginning of this manual, and operate the system according to the guidelines in this manual.
v
Manual overview
Note that this manual does not cover installation of the system. For information on installation and initial configuration, refer to
SAILOR 6120/30/40/50 System, Installation manual [1]. Part
numbers for related manuals are listed in the next section.
This manual has the following chapters:
•
Introduction contains an overview of the SAILOR 6120/30/40/50
and a brief description of each unit in the system.
•
Getting started explains how start up the system. It also
contains a short guide to the most important functions.
•
Using easyMail explains how to set up and use the system with
the easyMail application from a connected computer or
SAILOR 6007 Message Terminal.
•
Using Distress and SSA buttons explains how to use connected
Distress buttons and SSA buttons.
•
Troubleshooting contains a short troubleshooting guide and
explains how to check the status of the system.
vi
Related documents
The below list shows the documents related to this manual and to the SAILOR 6120/30/40/50.
Ref Title and description
Document number
[1] SAILOR 6120/30/40/50 System,
Installation manual
[2] SAILOR 6006 and SAILOR 6007
Message Terminal,
Installation manual
98-131589
98-130088
[3] THRANE 6194 Terminal Control Unit,
Installation and user manual
98-131593
Typography
In this manual, typography is used as indicated below:
Bold is used for the following purposes:
• To emphasize words.
Example: “Do not touch the antenna”.
• To indicate what the user should select in the user interface.
Example: “Select SETTINGS > LAN”.
Italic is used to emphasize the paragraph title in cross-references.
Example: “For further information, see Connecting Cables on page…”.
vii
viii
Chapter 1
Chapter 2
Chapter 3
Contents
Introduction
Welcome …………………………………………………………………. 1
System overview ………………………………………………………..2
System units ……………………………………………………………..3
User interface ……………………………………………………………4
The Inmarsat C services ………………………………………………5
Getting started
Registration ……………………………………………………………..9
Starting up the system ……………………………………………… 10
User interfaces ……………………………………………………….. 10
Using easyMail
Overview of easyMail …………………………………………………14
Distress functions (only SAILOR 6150) …………………………..17
Working with messages …………………………………………… 22
Position reporting …………………………………………………… 34
Receiving EGCs ……………………………………………………….36
Network status and settings ………………………………………38
Viewing system details ……………………………………………..40
Viewing or changing position information …………………….41
Viewing status ………………………………………………………… 42
Viewing the Info log ………………………………………………… 42
Setting up the default ISP …………………………………………. 43
ix
x
Contents
Chapter 4
Chapter 5
App. A
App. B
Setting up the default LESes ………………………………………43
Setting up reception of EGCs ……………………………………..44
Setting up ENIDs ……………………………………………………..45
Setting up the Land Earth Stations (LES) ………………………46
Setting up the Inmarsat Service Providers (ISP) …………….48
Entering the mobile number …………………………………….. 50
Setting the local time ……………………………………………….. 51
Setting up password protection ………………………………….52
Setting the language ………………………………………………..52
Setting up PC communication with the Mini-C Terminal …53
Setting up easyMail ………………………………………………….56
Using Distress and SSA buttons
Sending a Distress Alert (SAILOR 6150 only) ……………….. 60
Using SSA buttons (SAILOR 6120 only) …………………………62
Troubleshooting
Getting support ……………………………………………………….63
Updating software ……………………………………………………64
Troubleshooting guide ……………………………………………..66
Status signalling in easyMail ……………………………………..67
Service and repair ………………………………………………….. 68
Conformity
GNU License texts
GNU General Public License ………………………………………75
Glossary
Index
Contents
GNU Lesser General Public License ……………………………. 79
……………………………………………………………………………..85
……………………………………………………………………………..89
xi
Contents xii
Chapter 1
Introduction
Welcome
Congratulations on the purchase of your Mini-C System!
With the Mini-C System you can send and receive data via satellite through the Inmarsat C network. Four variants of the Mini-C System are described in this manual:
• SAILOR 6120 SSA System
• SAILOR 6130 LRIT System
• SAILOR 6140 Maritime System
• SAILOR 6150 Non-SOLAS System
Each of these systems uses its own variant of the
SAILOR 3027 Mini-C Terminal.
This chapter has the following sections:
•
System overview
•
System units
•
User interface
•
The Inmarsat C services
1
1
Chapter 1: Introduction
System overview
The SAILOR 6120/30/40/50 Mini-C System
The Inmarsat C satellite network is the link between the SAILOR 6120/30/40/50 and the destination office. It uses four geostationary satellites to cover the world. For each satellite there is an NCS, Network Coordination Station, handling registration of the mobile unit (in this case the SAILOR 3027) in the
Inmarsat C system.
Each NCS is associated with a number of LESs, Land Earth Stations, which handle the transmission between the mobile units and the destination office.
Satellite
NCS
Network Coordination
Station
LES
Land Earth Station
LES
Land Earth Station
SAILOR 3027
THRANE 6194
2
Internet
Telex
Network
PSDN
Network
PSTN
Network
SAILOR 6007 or computer
Destination office
The SAILOR 3027 can work as a standalone system automatically transmitting data on the Inmarsat C network, or you can connect alarm buttons and/or a
Message Terminal or a computer through the THRANE 6194 Terminal Control
Unit.
System overview
Chapter 1: Introduction
System units
The basic Mini-C System consists of a power supply and the following units:
• SAILOR 3027 Mini-C Terminal.
Contains both transceiver, GPS receiver and omnidirectional antenna for the Inmarsat C system.
Connects to other equipment, primarily the
THRANE 6194, through a CAN interface carrying both power and bi-directional communication.
• THRANE 6194 Terminal Control Unit (only included with SAILOR 6120 and SAILOR 6150).
Enables you to connect the SAILOR 3027 with other equipment, such as Distress buttons, SSA (Ship
Security Alert) buttons or a computer or Message
Terminal. The THRANE 6194 comes with the
SAILOR 6120 and SAILOR 6150 systems only, but is available for the other systems as well.
• SAILOR 6007 Message Terminal (not included. Can be purchased separately).
When the easyMail program is installed, you can send and receive messages, monitor system status and test the system. The SAILOR 6007 has a touchscreen interface but can also be operated from a connected keyboard.
For a more detailed description of the units, refer to the installation manual for the SAILOR 6120/30/40/50 Mini-C System.
System units 3
Chapter 1: Introduction
User interface
The basic Mini-C System does not have a dedicated user interface. To have a user interface you must connect a THRANE 6194 Terminal Control Unit and a computer or SAILOR 6007 Message Terminal with the easyMail application
installed. For details, refer to SAILOR 6120/30/40/50 System, Installation
manual [1].
easyMail
easyMail is a user interface for the Mini-C System. With easyMail you can send and receive messages, view system status and configure the system. To use easyMail you must have a THRANE 6194 Terminal Control Unit and a computer or SAILOR 6007 Message Terminal with the easyMail application installed. For
information on how to get started with easyMail, see easyMail application on page 10.
4
For details on how to use easyMail, see Using easyMail on page 13.
User interface
Chapter 1: Introduction
The Inmarsat C services
The SAILOR 6120/30/40/50 supports the following services through the
Inmarsat C system. For a description of these services, see the next sections.
Distress Alerting
Enhanced Group Call (EGC)
Message transmission
Position reporting
Polling
Distress Alerting and Distress priority messaging
If a ship or a crew is in grave and imminent danger, maritime Inmarsat C and some mini-C models are used to send a Distress Alert by pressing a dedicated
Distress button.
The alert contains information on the ship’s identity (Inmarsat C mobile number), ship’s position (latitude and longitude), ship’s course and speed, nature of Distress, date / time when the alert was sent and time when the ship’s position was last updated.
All Distress Alerts are automatically routed through the addressed LES to an associated Maritime Rescue Coordination Centre (MRCC), which will establish communication with the ship and launch the search and rescue (SAR) operation the ship may need.
After sending the initial Distress Alert, if time permits, it is possible to send a more detailed Distress priority message to give more details about the Distress event and ask for the required assistance.
The Distress priority message should be sent via the same LES as the Distress
Alert, to ensure that it is delivered automatically to the same MRCC.
The Inmarsat C services 5
Chapter 1: Introduction
Enhanced Group Calling (EGC)
The Inmarsat C system has a special capability known as Enhanced Group Call
(EGC), which enables authorised information providers to broadcast messages to selected groups of ships. Reception by ships that are fitted with Inmarsat C or mini-C terminals is automatic. A special header is added by the system to the EGC message to indicate the group of mobile terminals or the geographical area to which the message is to be sent.
Two EGC services are available:
• EGC SafetyNET — the international safety service, which allows authorised maritime safety information (MSI) providers, such as meteorological offices, hydrographic officers and MRCCs to broadcast messages to all ships in certain geographical areas.
MSI includes navigational and meteorological warnings, meteorological forecasts and other urgent safety-related information, which is addressed to all ships in NAVAREA / METAREA, user-defined circular or rectangular area or coastal area.
Reception of SafetyNET messages is a mandatory function of the GMDSS equipment that is required to be carried in certain ships under the provision of the International Maritime Organisation’s Safety Of Life At Sea
(SOLAS) convention.
• EGC FleetNET — the international commercial service, which allows authorised information providers, such as commercial subscription services, shipping companies or governments to broadcast messages to selected groups of vessels, each of which has registered with the information provider and been added to a FleetNET closed group / network. The mobile terminals on these groups of vessels are identified by an ENID (EGC Network IDentification) common to the group.
For further information on EGC via Inmarsat C read the Inmarsat Maritime
Communications Handbook, Chapter 6, or visit the Inmarsat Maritime
Safety Services section of the Inmarsat website www.inmarsat.com
.
6 The Inmarsat C services
Chapter 1: Introduction
Message transmission
Ship to shore: Text and data from Inmarsat C and mini-C terminals can be sent
to:
• An e-mail address
• Any telex or fax (text, one way only) number
• Any computer connected to the public telephone and data networks (PSTN and PSDN), using a telephone modem number
• Another Inmarsat C / mini-C terminal
• A Short (or Special) Access Code (SAC).
The maximum message size is up to 10 kb for the Mini-C Terminal.
Shore to ship: Text and data can be sent via telex, e-mail and the data and
telephone (PSDN / PSTN) networks. To be able to send messages to ships, a shore-based message originator needs to be registered (to have a commercial service agreement) with an Inmarsat C service provider of their choice.
Ship to ship: Messages can also be sent in a ship-to-ship direction from one
Inmarsat C / mini-C terminal to another.
Position reporting
Most of Inmarsat C and mini-C models are integrated with Global Navigational
Satellite System (GNSS) receivers, such as GPS, to provide highly reliable, round-the-clock position information of a ship, which can be used for position reporting.
The position reporting service is based on using the data reporting and polling protocol and allows a shore-based subscriber (base station or shipping company) to request position information from a vessel, as a single report or automatic reception at fixed intervals, e.g. every six hours.
A ship’s terminal can also be programmed to send regular position reports to any desired destination.
The position report includes ship’s identity, latitude, longitude, course, speed, date / time of the position report and time of the last position update.
The Inmarsat C services 7
Chapter 1: Introduction
In the Mini-C System, the report is sent to a DNID (Data reporting Network
IDentification) that is effectively a mailbox created on some LESes. The
Mini-C Terminal sends its reports to this mailbox and other tracking systems can then access and empty the mailbox.
Up to 255 mobile terminals can use the same DNID, and the specific terminal is identified by a member number between 1 and 255.
Before the position reporting feature can be used the DNID must be created on the LES. Once the DNID account is created, the LES can download the DNID information to the desired terminals, thereby enabling them to send reports to the DNID.
Data reporting and polling
Inmarsat C users may need to acquire information (short data reports) from vessels, or to collect data automatically at fixed or variable intervals.
The data reporting service allows for the transmission of information, in packets of up to 32 bytes on request or at prearranged intervals from Inmarsat
C or mini-C terminals, to shore-based customers.
Polling allows shore-based customers to interrogate an Inmarsat C or mini-C terminal or group of terminals by sending a special polling command. The polling command instructs a terminal or group of terminals to send a data report immediately, start sending regular reports, change transmission schedule of reports or perform another task of the polled terminal(s).
8 The Inmarsat C services
Chapter 2
Getting started
This chapter explains how to start up and log on your SAILOR 6120/30/40/50. It has the following sections:
•
Registration
•
Starting up the system
•
User interfaces
Registration
Before using the SAILOR 3027 Mini-C Terminal on the Inmarsat-C system you must register the terminal to the system. In most cases the distributor has already filled in the SARF (Service Activation Registration Form) for your
SAILOR 3027 when you receive your SAILOR 6120/30/40/50 Mini-C System.
For details on registration, see the Installation manual for the SAILOR
6120/30/40/50 Mini-C System.
After registration you must use a Message Terminal or a computer with the easyMail application to set up the mobile number in the SAILOR 3027. See
Using easyMail on page 13.
2
9
Chapter 2: Getting started
Starting up the system
When the power source is on, the SAILOR 3027 automatically starts up and logs on to the satellite network.
With the Message terminal or a computer with easyMail installed you can see the logon status on screen.
User interfaces
If you are going to use your Mini-C System for anything other than automatically transmitting reports, you should have a user interface for accessing the Mini-C System. In Non-SOLAS Distress systems a user interface is mandatory, because of the need for safety communication.
You can control the Mini-C System using the easyMail application installed on a computer or on a SAILOR 6007 Message Terminal. The computer or the
SAILOR 6007 Message Terminal must be connected via the LAN interface in the THRANE 6194 Terminal Control Unit to the Mini-C System.
For SAILOR 6150 systems only, you may also use a SAILOR 6006 Message
Terminal. The SAILOR 6006 Message Terminal connects directly to the CAN interface.
easyMail application
Installing easyMail
To install the easyMail application on your computer, do as follows:
1. Insert the installation CD supplied with the THRANE 6194 into the CD drive of the computer.
The setup program should start up automatically. If not, run the file setup.exe from the CD drive.
2. Click Install easyMail and go through the InstallShield Wizard.
10 Starting up the system
Chapter 2: Getting started
3. When the Wizard is complete, you can start the application from the easyMail shortcut on the desktop, or from Start > Programs > easyMail
<version>.
Accessing your Mini-C Terminal with easyMail
1. Acquire a THRANE 6194 Terminal Control Unit, if it is not already part of your system.
2. Connect your Mini-C Terminal to the CAN interface on the THRANE 6194
Terminal Control Unit.
3. Connect a computer to the RS-232 port or the LAN port of the THRANE 6194
Terminal Control Unit.
Refer to THRANE 6194 Terminal Control Unit, Installation and user manual
[3] for information on how to connect and set up the interfaces.
4. Start the application from the easyMail shortcut on the desktop, or from
Start > Programs > Thrane & Thrane > easyMail <version>.
5. If the PC connection is not already set up
(the PC connection bar is red), see Setting
up PC communication with the
Mini-C Terminal on page 53.
When all three bars are green, you can use the easyMail application to set up
and control the Mini-C System, send and receive messages etc. See Using
easyMail on page 13.
User interfaces 11
Chapter 2: Getting started
SAILOR 6006 Message Terminal (SAILOR 6150 only)
To get started with the SAILOR 6006 Message Terminal, do as follows:
1. Acquire a SAILOR 6006 Message Terminal from Thrane & Thrane.
2. Connect the THRANE 6194 to the Mini-C System
as described in SAILOR
6120/30/40/50 System, Installation manual [1].
3. Connect the Message Terminal to the CAN interface (T-connector) in the
Mini-C System. See SAILOR 6120/30/40/50 System, Installation manual [1].
You can now use the Message Terminal to set up and control the Mini-C
System, send and receive messages etc.
12 User interfaces
Chapter 3
Using easyMail
This chapter describes how to operate the SAILOR 6120/30/40/50 using the easyMail application. It has the following sections:
•
Overview of easyMail
•
Distress functions (only SAILOR 6150)
•
Working with messages
•
Position reporting
•
Receiving EGCs
•
Network status and settings
•
Viewing system details
•
Viewing or changing position information
•
Viewing status
•
Viewing the Info log
•
Setting up the default ISP
•
Setting up the default LESes
•
Setting up reception of EGCs
•
Setting up ENIDs
•
Setting up the Land Earth Stations (LES)
•
Setting up the Inmarsat Service Providers (ISP)
•
Entering the mobile number
•
Setting the local time
•
Setting up password protection
•
Setting the language
•
Setting up PC communication with the Mini-C Terminal
•
Setting up easyMail
3
13
Chapter 3: Using easyMail
Overview of easyMail
For information on how to install and start up easyMail, see easyMail
application on page 10.
Overview of the screen
Below is an overview of the main screen in easyMail.
Mobile status Connection status Menu bar
Message header
Contents
14
Shortcut buttons
•
The menu bar holds the menus. For an overview of all menus, see Menu
overview on page 16
Overview of easyMail
Chapter 3: Using easyMail
•
Mobile status shows the status of your Mini-C Terminal. When connected
and logged in, this field shows the mobile number (MMI) and the ocean region to which your Mini-C Terminal is logged in.
•
Connection status shows the status of your PC connection, your mini-C
antenna connection and your GPS connection.
•
Message header contains the fields where you can enter recipients and
subject for a message.
•
Shortcut buttons may be used for quick access to some of the menu items.
You can show/hide the shortcut buttons under View > Compact mode.
•
Contents. Depending on the selected view, this area can show your
message text or e.g. received messages or EGCs.
Overview of easyMail 15
Chapter 3: Using easyMail
Menu overview
File
Edit
View
Messaging
Distress
*
Setup
Actions
Help
New
Open
Save
Merge
Print Editor
Exit
Cut
Copy
Paste
Text Size
Insert
Define signature
Enter Vessel data
Editor
Distress message editor *
Inbox
Outbox
EGC
Info Log
Transceiver status
GPS status
Position info
Terminal mode **
Compact mode
New message
Contacts/Address book
Default messages
Position reporting
Send message
Distress alert setup
Reset alarm/latest Distress info
Distress test mode
Test easyMail sound
Default ISP
Default LES
EGCs
DNIDs
ENIDs
Land Earth Stations (LES)
Inmarsat Service Providers (ISP)
Mobile number (IMN)
Local time zone/PC time
Passwords
Language
Communication setup
Settings
* Only for SAILOR 6150
** Only described in
SAILOR 6120/30/40/50 installation manual
Position
Speed and course
Signature
Mobile number
UTC date and time
Local date and time
Vessel name
Vessel data
Set up function keys
F1 [Empty]
F2 [Empty]
F3 [Empty]
F4 [Empty]
F5 [Empty]
F6 [Empty]
F7 [Empty]
F8 [Empty]
Transmit password
Config password
Remote config password
Messages
Electronic forms
Misc
Login
Logout
Preferred ocean
Link test
Abort transmission
System info
About easyMail
[581] East Atlantic (AOR-E)
[582] Pacific (POR )
[583] Indian (IOR)
[584] West Atlantic (AOR-W)
Scan preferred ocean
Set preferred ocean
[581] East Atlantic (AOR-E)
[582] Pacific (POR)
[583] Indian (IOR)
[584] West Atlantic (AOR-W)
None
16 Overview of easyMail
Chapter 3: Using easyMail
Distress functions (only SAILOR 6150)
Writing a Distress priority message (only SAILOR 6150)
Note
Distress priority messages are sent to the MRCC only.
Distress priority messages must be written in English.
To write a Distress priority message, do as follows:
1. From the menu bar, select View > Distress message editor.
A warning appears.
2. Click Yes and then OK to continue to the Distress message editor.
The position and mobile number of your Mini-C Terminal is automatically inserted at the beginning of the Distress message, together with the data you have entered under Vessel data (if any).
3. Type a subject for the message.
Important
The Subject field is important — some messages may not be received correctly if the subject is missing.
4. Type your message, describing the nature of the Distress.
5. Click Send.
Setting up Distress alert
You can temporarily change the settings for your Distress function.
For information on how to use the Distress button to send a Distress alert, see
Sending a Distress Alert (SAILOR 6150 only) on page 60.
Default settings:
• Distress Alert Nature: Unspecified.
• Distress Alert Land Earth Stations: LES automatically selected by mobile.
(the SAILOR 3027 selects the LES with the best signal).
Distress functions (only SAILOR 6150) 17
Chapter 3: Using easyMail
• Distress Alert Position, Course and Speed: Always use latest position from
GPS.
Note
The Distress Alert Nature and the Distress Alert Position, Course and
Speed settings are only valid for the current Distress Alert or maximum one hour. Then these settings are returned to the default settings. The entered Distress LESs remain in the system.
To change the Distress alert settings, do as follows:
1. From the menu bar, select Distress > Distress alert setup.
2. Click OK after reading the warning popup window.
18 Distress functions (only SAILOR 6150)
Chapter 3: Using easyMail
3. From the drop-down list at each ocean region, select the LES to be used for
Distress alerts or leave the setting at LES automatically selected by mobile
(default setting).
4. If necessary, change the position, course and speed.
Note
Do not change the default setting unless you have good reasons to do so. The default setting is “Always use latest position from
GPS”. It is normally best to show your current GPS position when sending a Distress Alert.
You may need to change the position, e.g. if the person(s) that need help are no longer on board the ship (man overboard).
5. Select the nature of the Distress.
6. Click OK.
Reset alarm/latest Distress info
After sending a Distress alert or receiving an urgent/distress priority EGC or message, you can reset the alarm light and sound in the alarm buttons. At the same time you can see status on Distress alerts and Distress test. Do as follows:
1. Select Distress > Reset alarm/latest Distress info.
A popup window shows information on the latest Distress Alert and the latest Distress test.
2. Click OK.
The light and sound in the alarm button(s) are switched off.
Distress functions (only SAILOR 6150) 19
Chapter 3: Using easyMail
Testing Distress buttons
Important
Never test the installation by sending an alert on-air!
If an alert is sent by mistake, inform the relevant authorities immediately.
You can test the Distress button(s) in your system without sending a real
Distress alert. Do as follows:
1. Select Distress > Distress test mode.
2. When you see the Distress test mode window shown above, press the connected Distress button(s) as you would in a real Distress situation.
The light and buzzer in the Distress buttons should work the same way as
in a real Distress situation. For details on the Distress buttons, see Sending
a Distress Alert (SAILOR 6150 only) on page 60.
3. To clear alarm indications, select Distress > Reset alarms/latest Distress
info.
The button light should go off.
4. Click Cancel to exit Distress test mode.
Note
The system automatically exits the test mode after 15 minutes, if you do not Cancel it.
20 Distress functions (only SAILOR 6150)
Chapter 3: Using easyMail
Testing easyMail alarm sound
To test the alarm sound in easyMail, do as follows:
1. Select Distress > Test easyMail sound.
2. Click Start to hear the sound on your computer.
Your computer will now play the same sound that you will hear when a
Distress alert is sent or an urgent/distress priority EGC or message is received.
3. Click Stop to stop the sound.
4. When you have finished testing, click Cancel or close the window.
Distress functions (only SAILOR 6150) 21
Chapter 3: Using easyMail
Working with messages
Preparing the system
Before you can send a message:
• The recipient of the message must be listed in the Address book. For
details, see Managing the list of Contacts on page 30.
• The Mini-C Terminal must be logged in to an Ocean Region.
Normally the Mini-C Terminal logs in automatically. If it is logged out, see
Logging into and out of the network on page 38.
• The default ISP must be set.
See Setting up the default ISP on page 43.
• Default LESes must be set for all Ocean Regions.
See Setting up the default LESes on page 43.
• The mobile number must be configured in the Mini-C Terminal.
This is normally set up during installation. If not, see Entering the mobile
number on page 50.
22 Working with messages
Chapter 3: Using easyMail
Writing a routine priority message
To write a routine priority message, do as follows:
1. If the editor is not already open, select File > New or click the Editor button to the left (if present).
2. Select To… in the top left corner and select the recipient(s) of the message from the Address book.
Alternatively you may type in the recipient manually.
3. In the Subject field, type in a subject title for your message.
Important
The Subject field is important — some messages may not be received correctly if the subject is missing.
4. If you want to send a data file instead of typing text in the text editor, skip
the next step and go directly to step 6.
5. Type your message text in the editor.
Working with messages 23
Chapter 3: Using easyMail
For information on how to edit text, see Editing your message on page 25.
Note
If you want to save your message without sending it, you can save it as a file by selecting File > Save.
6. When the message is ready to be sent, click Send.
24
7. Select what you want to send.
• If you want to send a data file, select File from disk, browse to the file you want to send and click Open.
• If you want to send the text in the editor, select Text in editor.
8. Select if you want:
• Confirmation request
• Print message upon sending
9. Select OK.
The message is sent as soon as the network allows it. You can see the status of your message under View > Outbox.
Working with messages
Chapter 3: Using easyMail
Options for writing and sending messages
In the File menu, you have the following options:
•
New. Opens a new message.
•
Open. Allows you to select a text file to be opened in the editor.
•
Save. Allows you to save the message for later use.
•
Merge. Allows you to insert the contents from a text file into your message
at the cursor position.
•
Print editor. Prints the message on a connected printer.
•
Exit. Closes easyMail.
Editing your message
When writing a message you have some editing options, described in the next subsections.
To cut, copy and paste
In the Edit menu you can select Cut, Copy and Paste as in a normal editor.
To change text size
To change the text size, press Ctrl+F1 (smaller) and Ctrl+F2 (larger), or select
Edit > Text size > + Ctrl+F2 or — Ctrl+F1.
Working with messages 25
Chapter 3: Using easyMail
To insert information automatically
To insert information such as position and vessel data in your message, do as follows:
1. Select Edit > Insert.
2. Select the information you want to insert.
Note
Signature and vessel data must first be defined. See the next section.
The information is now inserted in your message as part of the message text.
26 Working with messages
Chapter 3: Using easyMail
To enter signature and vessel data
You can enter a signature and your vessel data for later automatic insertion in your messages (see previous section). To define your signature, do as follows:
1. Select Edit > Define signature.
2. Type in your signature and click OK.
The signature is now saved for later use with Edit > Insert.
To enter your vessel data, do as follows:
1. Select Edit > Enter vessel data.
2. Fill in the vessel data for your ship and click OK.
Working with messages 27
Chapter 3: Using easyMail
Using default messages
You can write a default message that you can recall and send by pressing one of the F-keys F1 to F8.
Creating a default message
To create a default message, do as follows:
1. Open the message editor.
2. Type in your message.
3. Select Messaging > Default messages.
4. Select the F-key you want to use for the message.
5. Type a name for the message.
6. Click Save and close.
Sending a default message
To recall and send the message, fill in the message recipient and a subject in the editor To… field and press the F-key you selected above.
Important
The Subject field is important — some messages may not be received correctly if the subject is missing.
28 Working with messages
Viewing messages in the Inbox
To view the messages in the Inbox, do as follows:
1. Select View > Inbox.
Chapter 3: Using easyMail
2. Double-click the message you want to read.
From within the message you have the following options:
•
Print. The message is printed on the connected printer.
•
Save. You can browse to a location and save the message (.txt file)
•
Forward. The message text is inserted into the editor so you can
forward it to a new recipient.
•
Wrap text. When selected, the text is wrapped to fit the window size.
3. Click OK or Cancel to close the message.
4. To delete one or more messages, right-click the message(s) and select
Delete message)
Working with messages 29
Chapter 3: Using easyMail
Viewing sent messages (Outbox)
After writing a message and selecting Send, you can see the message and the status of the message in the Outbox
To view messages in the Outbox, select View > Outbox.
Managing the list of Contacts
To manage your list of contacts, click
Contacts/Address book.
or select Messaging >
30
To see details for a contact, select it and click Properties.
Working with messages
Chapter 3: Using easyMail
To add a new contact
Do as follows:
1. In the Address book, select New at the bottom of the page.
2. Type in the name of your contact.
3. Select the address type below the name.
4. Type in the details for your contact. The format of the address/number depends on the selected address type. See the table on the next page.
5. Select OK.
The new contact is now listed in the Address book.
Working with messages 31
Chapter 3: Using easyMail
Message formats and presentation:
Type Format of number Example Presentation
Telex
Standard e-mail address [email protected]
5, 7 or 8 bit
Country code + subscriber no.
0045 99999999 5 or 7 bit
Fax
Inmarsat-C mobile
Country code + subscriber no.
0045 99999999
Mobile number 492388999
Country code + subscriber no.
0045 99999999
5, 7 or 8 bit
5, 7 or 8 bit
5, 7 or 8 bit PSTN modem
Special access code
5, 7 or 8 bit
X.25
Pre-defined codes:
• 32 — Medical Advice
• 33 — Technical Assistance
• 38 — Medical Assistance
• 39 — Maritime Assistance
• 41 — Meteorological
Reports
• 42 — Navigational Hazards and Warnings
• 43 — Ship Position and Sail
Plan Reports
32
DNIC (country code) + subscriber no.
2380 99999999 5, 7 or 8 bit
32 Working with messages
Chapter 3: Using easyMail
To edit a contact
Do as follows:
1. In the Address book, select the contact.
2. Select Properties.
3. Edit the details.
See the previous section for information on the contact details.
4. Select OK.
To delete a contact
Do as follows:
1. In the Address book, select the contact.
2. Select Delete.
3. Select Yes to confirm.
4. Select OK to leave the Address book.
Working with messages 33
Chapter 3: Using easyMail
Position reporting
For general information on the position reporting service, see Position
reporting on page 7.
Note
To be able to use the position reporting feature, a DNID must be
downloaded and enabled in the Mini-C Terminal. See Setting up
ENIDs on page 45.
To access the PU reporting setup page, Select:
Messaging > Position reporting.
The PU (Position Unreserved) reporting setup window shows the position reporting programs for the Mini-C Terminal. For each program you can see the status and whether it is a local or remote program.
34 Position reporting
Chapter 3: Using easyMail
To start a local position reporting program
Note
Only local position reporting programs can be managed locally. You can see the remotely configured programs as well but you cannot change them.
To start a program that is already defined, do as follows:
1. From the PU Reporting Setup page, click the Start button at the program you want to start. The Start button becomes a Stop button .
The Mini-C Terminal will now start sending position reports from the defined start time with the defined intervals until you stop it with the Stop button.
2. Click OK.
To define a new position reporting program
To define a new local program, do as follows:
1. From the PU Reporting Setup page, select New.
Position reporting 35
Chapter 3: Using easyMail
2. Select the DNID information (provider, LES, DNID and member number) for each ocean region.
3. Select the time to start the position reporting or select Immediately.
4. Select the interval between the position reports.
5. Click OK.
The program is now set up and you can start and stop it with the buttons as described in the previous section.
6. Click OK again to exit the PU Reporting Setup page.
Receiving EGCs
Viewing incoming EGCs
You can receive various types of EGCs in easyMail. For details about how to set up which EGCs to receive, see
Setting up reception of EGCs on page 44.
Note
To be able to receive FleetNET EGCs, an ENID must be downloaded
and enabled in the Mini-C Terminal. See Setting up ENIDs on page 45.
Note
When the EGC Inbox is full, the oldest EGCs are automatically deleted.
36 Receiving EGCs
To view EGCs, do as follows:
1. Select View > EGC from the main menu.
Chapter 3: Using easyMail
2. Double-click an EGC to see the contents.
From within the EGC you have the following options:
•
Print. The EGC is printed on the connected printer.
•
Save. You can browse to a location and save the EGC (.txt file)
•
Forward. The EGC text is inserted into the message editor so you can
forward it to a new recipient.
•
Wrap text. When selected, the text is wrapped to fit the window size.
3. Click OK or Cancel to close the EGC.
4. To delete one or more EGCs, right-click the EGC(s) and select Delete EGC.
Receiving EGCs 37
Chapter 3: Using easyMail
Network status and settings
The Mobile status field at the top of the page shows the status of the network connection. When the Mini-C Terminal is logged in to the network, this field shows the ocean region to which the Mini-C Terminal is logged in.
Logging into and out of the network
To log into the Inmarsat C network, select Actions > Login and select the Ocean
region you are logging into.
If you want to use the preferred ocean configured in the Mini-C Terminal, or simply the region with the best signal, use Scan preferred ocean instead (see the next section).
To log out of the network, select Actions > Logout.
Scanning the network
If you want the system to find the best signal, select Actions > Preferred ocean
> Scan preferred ocean. The system will then scan for the best signal and log in.
If an ocean region is selected under Set preferred ocean, the system will scan the selected ocean first.
Setting the preferred ocean region
If you want the system to generally use a specific ocean region, select Actions
> Preferred ocean > Set preferred ocean and select the ocean region you want to use. If you select None, the scanning process will use the ocean region with the best signal.
38 Network status and settings
Chapter 3: Using easyMail
The selected ocean region is used when you select Actions > Preferred ocean
> Scan.
Link test
Note
To test basic system connectivity, we recommend that you send a short message to yourself instead of using the link test. For details
on how to send a message, see Writing a routine priority message on page 23.
If you still want to make a link test, do as follows:
1. In the easyMail application, click Actions > Link test.
After the Link test is requested, the NCS assigns a LES for performing the
Link test. This can take a while.
2. When the Linktest window appears, click Execute to start the test.
Note
Because the link test has low priority in the network it can take a long time for the system to complete the link test, and during this time the system has limited functionality.
A popup window informs you that the test has started. When the test has ended another popup window informs you that the test was completed successfully or that it failed.
Stop Transmission
If you want the system to immediately stop transmitting, select Actions > Abort
transmission.
The current protocol is then cleared, and any ongoing transmission is stopped.
Network status and settings 39
Chapter 3: Using easyMail
Viewing system details
To see information on easyMail and the Mini-C Terminal, click
Help > System info.
or select
40 Viewing system details
Chapter 3: Using easyMail
Viewing or changing position information
To view or change your current position information, course and speed, do as follows:
1. select View > Position info.
2. If there is no synchronization with the positioning system, you can enter a manual position, course and speed.
3. Select OK.
The manually entered position data will be used by the system until the automatic position data is available again.
Viewing or changing position information 41
Chapter 3: Using easyMail
Viewing status
To see the status of the Mini-C Terminal, select View > Transceiver status, or click the Antenna signal bar in the connections status field at the top of the page.
To see the GPS status, select View > GPS status, or click the GPS bar in the connections status field at the top of the page.
Connection status field
Viewing the Info log
To see the information log, select View > Info log.
The information log shows the most recent events registered in your Mini-C
System.
42 Viewing status
Chapter 3: Using easyMail
Setting up the default ISP
To set up a default ISP, do as follows:
1. Select Setup > Default ISP.
2. Select the default ISP from the list.
3. Select Set Default LESs to ISP settings if you want to use the default ISP with the Default LESes.
4. Click OK.
Setting up the default LESes
To set up the default LESes, do as follows:
1. Select Setup > Default LES.
2. Select the default LES for each ocean region.
3. Click OK.
Setting up the default ISP 43
Chapter 3: Using easyMail
Setting up reception of EGCs
For general information on EGCs, see Enhanced Group Calling (EGC) on page 6.
To set up reception of EGCs, do as follows:
1. Select Setup > EGCs.
44
2. To set up the additional areas from which you want to receive meteorological or navigational EGCs, select Additional NAVAREA(s)
/METAREA(s).
Then select the numbers of the areas from which you want to receive EGCs, and select OK.
Note
You always receive EGCs from the area in which you are located.
The areas selected here are additional areas.
Setting up reception of EGCs
Chapter 3: Using easyMail
3. Select whether you want to receive System Messages or SafetyNET messages or both.
4. To change the Coastal Warning Areas, type in the new areas under Coastal
Warning Areas [A..Z].
5. Select the types of EGC service you want to receive.
6. If you want to receive EGCs at specific positions on your route, select Fixed
positions and fill in the position information for each point on the route.
7. Click OK.
Setting up ENIDs
ENIDs (EGC Network IDentification) are used for identifying the
Mini-C Terminal on the network in order for the terminal to receive FleetNET
EGCs.
ENIDs must be set up with your LES operator and downloaded to your
Mini-C Terminal before you can use them.
To set up the ENIDs, do as follows:
1. Select Setup > ENIDs.
The ENIDs are listed with provider, ENID and status.
2. Select the ENIDs you want to enable.
3. Click OK.
Setting up ENIDs 45
Chapter 3: Using easyMail
Setting up the Land Earth Stations (LES)
To view or edit the list of Land Earth Stations for each ocean region, do as follows:
1. Select Setup > Land Earth Stations (LES).
2. Select a LES and click Edit.
46
3. If necessary, type in the new name of the LES.
4. Click OK.
5. To use default LES numbers and names for an ocean region, click the
Default button and click Yes.
6. Click OK to exit.
Setting up the Land Earth Stations (LES)
Chapter 3: Using easyMail
List of currently supported LESs
The table below shows the LESs supported by the service providers at the time of writing. Note that the list is dynamic, so it may not be completely up to date.
Service Provider
CTTC China
KDDI SatMail-C Japan
Morsviazsputnik Russia
OTE Greece
SingTel Mail65 (SAC65)
SingTel Mail65 (SAC6500)
SingTel Mail65 (SAC6599)
Stratos Global C-email 02
Stratos Global C-email 12
Telemar X.25
Vizada SkyFile C 01
Vizada SkyFile C 04
Vizada SkyFile C 21
002
012
004
001
—
002
002
002
—
003
—
LES no.
AOR-W
LES no.
AOR-E
LES no.
POR
211
004
021
—
103
117
120
102
102
102
102
112
104
101
104
121
203
—
—
210
210
210
202
212
204
201
204
221
303
317
305
328
LES no.
IOR
311
304
301
304
321
328
328
302
312
Setting up the Land Earth Stations (LES) 47
Chapter 3: Using easyMail
Setting up the Inmarsat Service Providers (ISP)
Note
Do not change these settings unless you know the exact formats to enter.
The Inmarsat Service Providers are already set up when you receive your system. However, if an Inmarsat Service Provider e.g. changes the format for email, you can change these settings to match the new format.
To set up the Inmarsat Service Providers in the Mini-C Terminal, do as follows:
1. Select Setup > Inmarsat Service Providers (ISP).
48
2. To edit the information for a provider, select the provider from the list and fill in the new information as specified from the provider.
3. Click OK.
Setting up the Inmarsat Service Providers (ISP)
Chapter 3: Using easyMail
To add a new provider
To add a new provider to the list, do as follows:
1. In the Inmarsat service providers window, click New provider.
2. Type the name of the provider in the top left corner and click Add.
The new provider is now added to the list, but without any information.
3. Fill in the information for the provider.
4. Click OK.
Setting up the Inmarsat Service Providers (ISP) 49
Chapter 3: Using easyMail
Entering the mobile number
Before you can use the Mini-C Terminal on the Inmarsat C network you must configure the mobile number from your service provider in the
Mini-C Terminal.
To enter the mobile number, do as follows:
1. Select Setup > Mobile number (IMN).
2. Type in the mobile number from your service provider.
3. Click OK.
The number is now stored in the Mini-C Terminal and can be used to access the Mini-C Terminal on the Inmarsat C network.
50 Entering the mobile number
Chapter 3: Using easyMail
Setting the local time
The Mini-C Terminal gets the UTC time from the GPS receiver. You can convert this time to local time and set the time on your computer accordingly.
Do as follows:
1. Select Setup > Local time zone/PC time.
2. Use the up/down arrows to set the time difference between your local time and UTC time.
3. At the bottom of the window, select one of the following:
•
Yes. The PC time is automatically updated at startup
•
No. The PC time will not be updated.
•
Ask. You will be asked at startup whether you want to update the PC
time or not.
4. Click OK.
Setting the local time 51
Chapter 3: Using easyMail
Setting up password protection
You can add password protection to three different actions: Transmission, configuration and remote configuration.
To add password protection, do as follows:
1. Select Setup > Passwords.
2. Select the password you want to add or change.
3. Type in the old password (leave empty if there was no password protection).
4. Type in the new password under New password and again under Confirm
password.
5. Click OK and close easyMail.
With the password protection, easyMail will ask for a password when a person tries to access the password protected areas (transmit a message, configure the system or configure the system remotely).
To remove the password, repeat the above procedure and leave the fields with the new password empty.
Setting the language
To change the language in easyMail, do as follows:
1. Select Setup > Language.
2. Select the language you want in easyMail.
3. Select at the bottom whether you want to show the language selection at startup.
4. Click OK.
52 Setting up password protection
Chapter 3: Using easyMail
Setting up PC communication with the
Mini-C Terminal
To connect a computer to the system you must use a THRANE 6194 Terminal
Control Unit. You can connect the computer to the LAN interface or the RS-232 interface on the THRANE 6194.
Note
The Communication setup is not accessible when the computer has established a connection with the Mini-C Terminal.
To set up LAN communication
To set up easyMail for LAN communication with the THRANE 6194 and thereby the Mini-C Terminal, do as follows:
1. Select Setup > Communication setup.
2. Select LAN communication.
Same subnet
3. Type in the IP address of the THRANE 6194 Terminal Control Unit (TCU).
You can find the IP address in two ways:
Setting up PC communication with the Mini-C Terminal 53
Chapter 3: Using easyMail
• Using the SNMP upload program, described in Updating software on page 63.
• By pressing the Temporary fixed IP address button on the
THRANE 6194. The IP address of the THRANE 6194 is temporarily set to
169.254.100.100.
Your IP: Shows the IP address of your PC. Make sure your PC is on the
same subnet as the TCU! This means the two first sections of the IP address
(10.6. in the example picture above) must be the same on the TCU as on your PC.
4. If you want to set the THRANE 6194 to a fixed IP address for your next easyMail session, select Force fixed IP and type in the IP address you want to use.
Important
Before clicking OK, make sure the IP address of your PC is on the same subnet as the new TCU IP address.
5. Click OK.
easyMail now tries to establish a connection to the THRANE 6194 and thereby the Mini-C Terminal. When the LAN connection is established the
PC connection bar at the top of the easyMail window turns green.
54 Setting up PC communication with the Mini-C Terminal
Chapter 3: Using easyMail
To set up RS-232 communication
To set up easyMail for RS-232 communication with the THRANE 6194 and thereby the Mini-C Terminal, do as follows:
1. Select Setup > Communication setup.
2. Select Serial communication.
3. Select the COM port you are using on your computer and the Baud rate of the THRANE 6194 (default is 115200).
4. Click OK.
easyMail now tries to establish a connection to the THRANE 6194 and thereby the Mini-C Terminal. When the RS-232 connection is established the PC connection bar at the top of the easyMail window turns green.
Setting up PC communication with the Mini-C Terminal 55
Chapter 3: Using easyMail
Setting up easyMail
To change message setup
You can set up some general settings for messages in the Messages tab. Do as follows:
1. Select Setup > Settings.
2. Select the Messages tab.
56
3. If you want to get an info box when a new message has arrived, select
Show info box when new message is received.
4. If you want to allow configuration of easyMail from a remote location, select Allow easyMail Remote Configuration.
Selecting this option enables an authorised remote user to configure certain parts of easyMail using a special kind of message sent to your
Mini-C System.
5. If you have a printer connected, select the message types you want to print automatically (if any).
Setting up easyMail
Chapter 3: Using easyMail
To use electronic forms
Some users have a need for a specific layout, e.g. for fishery catch reporting.
The files for this layout must be downloaded to the system before selecting the formats on this page.
Miscellaneous settings
In Harbour Button
Select Setup > Settings > Misc > In Harbour Button to select whether or not you want to show an In Harbour Button in easyMail. The In Harbour button is used for setting a longer reporting interval when the ship is in harbour.
Reset HotList
The HotList is a list of the last used commands on the Mini-C Terminal. To see the list, press F12.
To reset the HotList, select Setup > Settings > Misc > Reset HotList.
Setting up easyMail 57
Chapter 3: Using easyMail
58 Setting up easyMail
Chapter 4
Using Distress and SSA buttons
4
This chapter describes how to use the 6108 Non-SOLAS Alarm Panel and the
SSA buttons. It has the following sections:
•
Sending a Distress Alert (SAILOR 6150 only)
•
Using SSA buttons (SAILOR 6120 only)
59
Chapter 4: Using Distress and SSA buttons
Sending a Distress Alert (SAILOR 6150 only)
Important
Only send a Distress Alert if you are in immediate danger!
The Distress Alert can be compared to a MAYDAY call.
With the SAILOR 6150 system you may have a SAILOR 6108 Non-SOLAS Alarm
Panel installed.
To send a Distress Alert, do as follows:
1. Open the cover for the Distress button.
2. Press and hold the button until the light is steady and the buzzer stops (more than 5 seconds).
During this time the button light flashes and the buzzer sounds. After 5 seconds the red light goes steady on and the buzzer is silent.
When the Distress alert is acknowledged, the button light goes off shortly every 15 seconds.
You must have either a Message Terminal or a computer with easyMail in a
SAILOR 6150 system. Use the Message Terminal or easyMail to see the status
of the Distress and to follow up. See Distress functions (only SAILOR 6150) on page 17.
Important
The MRCC normally sends a message to the alerting unit to gather more information about the situation.
If possible, respond to such messages with a Distress message sent to the same LES that was used for the Distress Alert.
For information on how to send a Distress message, see Writing a Distress
priority message (only SAILOR 6150) on page 17.
The MRCC may also send Distress EGCs to other ships in the area to request assistance (typically as Distress Relay or SAR Coordination request).
See also Setting up Distress alert on page 17.
60 Sending a Distress Alert (SAILOR 6150 only)
Chapter 4: Using Distress and SSA buttons
Clearing distress indications
Note
This function will only turn off the visual and audible indications on board. It will not cancel the transmission of the Distress Alert.
If you want to turn off all distress indications while a Distress Alert is still active, you can use one of the following:
•
Message Terminal: Select Distress > Status > Clear distress indications.
•
easyMail: Select Distress > Reset alarm/Latest Distress info.
Sending a Distress Alert (SAILOR 6150 only) 61
Chapter 4: Using Distress and SSA buttons
Using SSA buttons (SAILOR 6120 only)
The recipient(s) of the Ship Security Alert must be configured in the
Mini-C Terminal according to the Flag Administration under which the vessel is sailing. The recipients can be e-mail addresses, phone numbers (SMS), fax numbers or telex numbers.
Install the SSA buttons and configure the Mini-C Terminal as described in
THRANE 6194 Terminal Control Unit, Installation and user manual [3].
Sending a covert Ship Security Alert (SSA)
To send a covert SSA, do as follows:
1. Open the cover for the red covert alert button.
2. Press the button.
•
Instant activation button: When pressed, an alert is sent immediately to
the configured SSA recipient(s).
•
Standard activation buttons: When pressed, an alert is sent after 30 –
33 seconds. If released (pressed again) within the 30 seconds, the alert is not sent. If the alert button is not released SSA Messages will be retransmitted every 30 minutes, until the button is released.
Using the green or yellow test button
The green or yellow button is a test button with a lamp. The button has momentary action (closed only as long as the button is pressed and held).
When the system is operational
1
, the test button is permanently lit. When the test button is pressed the light switches off and the covert alert buttons can be pressed without sending any alerts. If a covert alert button is pressed for 30 –
33 seconds during test, an SSA Test Message is sent to all recipients configured to receive test messages.
1.
“Operational” means the following criteria are met: GPS fix obtained, logged in, recipient(s) of covert alert configured, all SSA buttons connected correctly.
62 Using SSA buttons (SAILOR 6120 only)
Chapter 5
Troubleshooting
This chapter gives guidelines for troubleshooting and provides an overview of the different means of status signalling. It has the following sections:
•
Getting support
•
Updating software
•
Troubleshooting guide
Getting support
If this manual does not provide the remedies to solve your problem, you may want to contact your Airtime Provider or your local distributor.
To help with the troubleshooting, please generate a diagnostic report as described in the next page, and enclose the diagnostic report file when asking for support.
Airtime support
If you need assistance from your Airtime Provider, check your Airtime subscription documents for a contact number to call.
System support
If you need assistance with problems caused by one of your system units, please call a distributor in your area.
A list of certified partners and distributors is available on Thrane & Thrane’s web site: www.thrane.com
. Select Maritime and select Where to buy from the top menu bar.
5
63
Chapter 5: Troubleshooting
Updating software
Required tools and files
Before you can update the software you must get a download tool and the new software for the Mini-C Terminal.
Do as follows:
1. Open your browser and log into the Thrane &Thrane Extranet.
2. Find and download the zip file containing the Thrane &Thrane SNMP
upload application.
3. Extract the files to C:Thrane (create the folder if it is not already there).
Remember to select Use folder names.
4. On the Extranet, find the new software image for the Mini-C Terminal (.tiif file).
5. Download the .tiif file to the folder C:ThraneTFTP-Root (this folder should be created automatically when you extract the files from the zip file).
Updating the Mini-C Terminal software
Get the download tool and the new software as described in the previous section. Then do as follows:
1. Connect the Mini-C Terminal to the THRANE 6194 Terminal Control Unit and connect your computer to the LAN port on the THRANE 6194.
2. Start the SNMP upload tool (.exe file) placed in C:Thrane.
3. The application searches for units connected to the local network. When a unit is found, it is listed with IP address, description, serial number and software version.
Note
It may take some time for the Mini-C Terminal to appear in the list.
64 Updating software
Chapter 5: Troubleshooting
4. When the Mini-C Terminal appears in the list you can check the current software version in the sw-version column. If there are more than one
Mini-C Terminal you can recognize your unit by the serial number.
5. Click on your Mini-C Terminal to select it.
6. When the IP address of your Mini-C Terminal appears in the small field in the bottom left corner, click the button Upload software (.TIIF file).
7. Browse to the .tiif file in C:ThraneTFTP-Root.
8. Select the file and click Open.
The software is now updated and the Mini-C Terminal automatically restarts with the new software. You can use the SNMP upload application again to check the software version as in step 4 above.
Updating software 65
Chapter 5: Troubleshooting
Troubleshooting guide
The below table provides information on some of the problems that might occur, including possible causes and remedies to solve the problems.
Problem Possible cause Remedy
SAILOR 6150 only: The
Message
Terminal cannot switch off.
Software error
There is no signal or weak signal from the satellite.
The view to the satellite is blocked, or there is a hardware problem.
Push and hold the Power button for 10 seconds, or reboot via the power cable.
Make sure the SAILOR 3027 has a clear view in all directions. See the installation manual for details.
If the view is not blocked, check the error log. If the problem persists, contact your local distributor.
SAILOR 6150 only: No connection between
SAILOR 6006 and SAILOR 3027
The LAN cable between the
THRANE 6164 and the
SAILOR 6006 or the CAN cable between the
SAILOR 3027 and the
THRANE 6194 is damaged or is not properly connected.
Make sure the cables are properly connected and that the cables and connectors are not damaged.
No connection between easyMail and
SAILOR 3027
The PC connection to the
SAILOR 3027 is not set up properly.
For information on how to set up the PC connection, see
Setting up PC communication
with the Mini-C Terminal on page 53.
66 Troubleshooting guide
Chapter 5: Troubleshooting
Status signalling in easyMail
Status information
The top of the display shows the most important status information.
You can click each status area to get details, or use the View menu to enter the status pages.
Information of events
Popup windows
When an event requires your attention, a popup window appears.
When you have read the text, select OK to close the window. The latest event is shown in the info bar at the bottom of the page and is added to the information log.
Information log
To see the information log, select View > Info log.
The log shows the events that are registered in your Mini-C System.
Status signalling in easyMail 67
Chapter 5: Troubleshooting
Service and repair
Should your Thrane & Thrane product fail, please contact your dealer or installer, or the nearest Thrane & Thrane partner. You will find the partner details on www.thrane.com
where you also find the Thrane & Thrane Self
Service Center web-portal, which may help you solving the problem.
Your dealer, installer or Thrane & Thrane partner will assist you whether the need is user training, technical support, arranging on-site repair or sending the product for repair.
Your dealer, installer or Thrane & Thrane partner will also take care of any warranty issue.
Repacking for shipment
Should you need to send the product for repair, please read the below information before packing the product.
The shipping cartons for the SAILOR 6120/30/40/50 system have been carefully designed to protect the equipment during shipment. The cartons and their associated packing material should be used when repacking for shipment.
Attach a tag indicating the type of service required, return address, model number and full serial number. Mark the carton “FRAGILE” to ensure careful handling.
Note
Correct shipment is the customer’s own responsibility.
68 Service and repair
Appendix A
A
Conformity
The Mini-C Systems SAILOR 6120, SAILOR 6130, SAILOR 6140 and SAILOR 6150 are CE certified (R&TTE directive) as stated in “Declaration of Conformity with
R&TTE Directive”, enclosed in electronic copy on the next pages (one declaration for each system).
69
Appendix A: Conformity
74
Appendix B
B
GNU License texts
GNU General Public License
Version 2, June 1991
Copyright (C) 1989, 1991 Free Software Foundation, Inc., 51 Franklin Street, Fifth Floor, Boston, MA 02110-1301 USA.
Everyone is permitted to copy and distribute verbatim copies of this license document, but changing it is not allowed.
Preamble
The licenses for most software are designed to take away your freedom to share and change it. By contrast, the
GNU General Public License is intended to guarantee your freedom to share and change free software—to make sure the software is free for all its users. This General Public License applies to most of the Free Software
Foundation’s software and to any other program whose authors commit to using it. (Some other Free Software
Foundation software is covered by the GNU Lesser General Public License instead.) You can apply it to your programs, too.
When we speak of free software, we are referring to freedom, not price. Our General Public Licenses are designed to make sure that you have the freedom to distribute copies of free software (and charge for this service if you wish), that you receive source code or can get it if you want it, that you can change the software or use pieces of it in new free programs; and that you know you can do these things.
To protect your rights, we need to make restrictions that forbid anyone to deny you these rights or to ask you to surrender the rights. These restrictions translate to certain responsibilities for you if you distribute copies of the software, or if you modify it.
For example, if you distribute copies of such a program, whether gratis or for a fee, you must give the recipients all the rights that you have. You must make sure that they, too, receive or can get the source code. And you must show them these terms so they know their rights.
We protect your rights with two steps: (1) copyright the software, and (2) offer you this license which gives you legal permission to copy, distribute and/or modify the software.
Also, for each author’s protection and ours, we want to make certain that everyone understands that there is no warranty for this free software. If the software is modified by someone else and passed on, we want its recipients to know that what they have is not the original, so that any problems introduced by others will not reflect on the original authors’ reputations.
Finally, any free program is threatened constantly by software patents. We wish to avoid the danger that redistributors of a free program will individually obtain patent licenses, in effect making the program proprietary.
To prevent this, we have made it clear that any patent must be licensed for everyone’s free use or not licensed at all.
The precise terms and conditions for copying, distribution and modification follow.
GNU GENERAL PUBLIC LICENSE
TERMS AND CONDITIONS FOR COPYING, DISTRIBUTION AND MODIFICATION
0. This License applies to any program or other work which contains a notice placed by the copyright holder saying it may be distributed under the terms of this General Public License. The «Program», below, refers to any such program or work, and a «work based on the Program» means either the Program or any derivative work under copyright law: that is to say, a work containing the Program or a portion of it, either verbatim or with modifications and/or translated into another language. (Hereinafter, translation is included without limitation in the term
«modification».) Each licensee is addressed as «you».
75
Appendix B: GNU License texts
Activities other than copying, distribution and modification are not covered by this License; they are outside its scope. The act of running the Program is not restricted, and the output from the Program is covered only if its contents constitute a work based on the Program (independent of having been made by running the Program).
Whether that is true depends on what the Program does.
1. You may copy and distribute verbatim copies of the Program’s source code as you receive it, in any medium, provided that you conspicuously and appropriately publish on each copy an appropriate copyright notice and disclaimer of warranty; keep intact all the notices that refer to this License and to the absence of any warranty; and give any other recipients of the Program a copy of this License along with the Program.
You may charge a fee for the physical act of transferring a copy, and you may at your option offer warranty protection in exchange for a fee.
2. You may modify your copy or copies of the Program or any portion of it, thus forming a work based on the
Program, and copy and distribute such modifications or work under the terms of Section 1 above, provided that you also meet all of these conditions: a) You must cause the modified files to carry prominent notices stating that you changed the files and the date of any change.
b) You must cause any work that you distribute or publish, that in whole or in part contains or is derived from the Program or any part thereof, to be licensed as a whole at no charge to all third parties under the terms of this License.
c) If the modified program normally reads commands interactively when run, you must cause it, when started running for such interactive use in the most ordinary way, to print or display an announcement including an appropriate copyright notice and a notice that there is no warranty (or else, saying that you provide a warranty) and that users may redistribute the program under these conditions, and telling the user how to view a copy of this License. (Exception: if the Program itself is interactive but does not normally print such an announcement, your work based on the Program is not required to print an announcement.)
These requirements apply to the modified work as a whole. If identifiable sections of that work are not derived from the Program, and can be reasonably considered independent and separate works in themselves, then this
License, and its terms, do not apply to those sections when you distribute them as separate works. But when you distribute the same sections as part of a whole which is a work based on the Program, the distribution of the whole must be on the terms of this License, whose permissions for other licensees extend to the entire whole, and thus to each and every part regardless of who wrote it.
Thus, it is not the intent of this section to claim rights or contest your rights to work written entirely by you; rather, the intent is to exercise the right to control the distribution of derivative or collective works based on the Program.
In addition, mere aggregation of another work not based on the Program with the Program (or with a work based on the Program) on a volume of a storage or distribution medium does not bring the other work under the scope of this License.
3. You may copy and distribute the Program (or a work based on it, under Section 2) in object code or executable form under the terms of Sections 1 and 2 above provided that you also do one of the following: a) Accompany it with the complete corresponding machine-readable source code, which must be distributed under the terms of Sections 1 and 2 above on a medium customarily used for software interchange; or, b) Accompany it with a written offer, valid for at least three years, to give any third party, for a charge no more than your cost of physically performing source distribution, a complete machine-readable copy of the corresponding source code, to be distributed under the terms of Sections 1 and 2 above on a medium customarily used for software interchange; or, c) Accompany it with the information you received as to the offer to distribute corresponding source code. (This alternative is allowed only for noncommercial distribution and only if you received the program in object code or executable form with such an offer, in accord with Subsection b above.)
The source code for a work means the preferred form of the work for making modifications to it. For an executable work, complete source code means all the source code for all modules it contains, plus any associated interface definition files, plus the scripts used to control compilation and installation of the executable. However, as a special exception, the source code distributed need not include anything that is normally distributed (in either source or binary form) with the major components (compiler, kernel, and so on) of the operating system on which the executable runs, unless that component itself accompanies the executable.
If distribution of executable or object code is made by offering access to copy from a designated place, then offering equivalent access to copy the source code from the same place counts as distribution of the source code, even though third parties are not compelled to copy the source along with the object code.
76 GNU General Public License
Appendix B: GNU License texts
4. You may not copy, modify, sublicense, or distribute the Program except as expressly provided under this License.
Any attempt otherwise to copy, modify, sublicense or distribute the Program is void, and will automatically terminate your rights under this License. However, parties who have received copies, or rights, from you under this
License will not have their licenses terminated so long as such parties remain in full compliance.
5. You are not required to accept this License, since you have not signed it. However, nothing else grants you permission to modify or distribute the Program or its derivative works. These actions are prohibited by law if you do not accept this License. Therefore, by modifying or distributing the Program (or any work based on the
Program), you indicate your acceptance of this License to do so, and all its terms and conditions for copying, distributing or modifying the Program or works based on it.
6. Each time you redistribute the Program (or any work based on the Program), the recipient automatically receives a license from the original licensor to copy, distribute or modify the Program subject to these terms and conditions.
You may not impose any further restrictions on the recipients’ exercise of the rights granted herein. You are not responsible for enforcing compliance by third parties to this License.
7. If, as a consequence of a court judgment or allegation of patent infringement or for any other reason (not limited to patent issues), conditions are imposed on you (whether by court order, agreement or otherwise) that contradict the conditions of this License, they do not excuse you from the conditions of this License. If you cannot distribute so as to satisfy simultaneously your obligations under this License and any other pertinent obligations, then as a consequence you may not distribute the Program at all. For example, if a patent license would not permit royaltyfree redistribution of the Program by all those who receive copies directly or indirectly through you, then the only way you could satisfy both it and this License would be to refrain entirely from distribution of the Program.
If any portion of this section is held invalid or unenforceable under any particular circumstance, the balance of the section is intended to apply and the section as a whole is intended to apply in other circumstances.
It is not the purpose of this section to induce you to infringe any patents or other property right claims or to contest validity of any such claims; this section has the sole purpose of protecting the integrity of the free software distribution system, which is implemented by public license practices. Many people have made generous contributions to the wide range of software distributed through that system in reliance on consistent application of that system; it is up to the author/donor to decide if he or she is willing to distribute software through any other system and a licensee cannot impose that choice.
This section is intended to make thoroughly clear what is believed to be a consequence of the rest of this License.
8. If the distribution and/or use of the Program is restricted in certain countries either by patents or by copyrighted interfaces, the original copyright holder who places the Program under this License may add an explicit geographical distribution limitation excluding those countries, so that distribution is permitted only in or among countries not thus excluded. In such case, this License incorporates the limitation as if written in the body of this
License.
9. The Free Software Foundation may publish revised and/or new versions of the General Public License from time to time. Such new versions will be similar in spirit to the present version, but may differ in detail to address new problems or concerns.
Each version is given a distinguishing version number. If the Program specifies a version number of this License which applies to it and «any later version», you have the option of following the terms and conditions either of that version or of any later version published by the Free Software Foundation. If the Program does not specify a version number of this License, you may choose any version ever published by the Free Software Foundation.
10. If you wish to incorporate parts of the Program into other free programs whose distribution conditions are different, write to the author to ask for permission. For software which is copyrighted by the Free Software
Foundation, write to the Free Software Foundation; we sometimes make exceptions for this. Our decision will be guided by the two goals of preserving the free status of all derivatives of our free software and of promoting the sharing and reuse of software generally.
NO WARRANTY
11. BECAUSE THE PROGRAM IS LICENSED FREE OF CHARGE, THERE IS NO WARRANTY FOR THE PROGRAM, TO THE
EXTENT PERMITTED BY APPLICABLE LAW. EXCEPT WHEN OTHERWISE STATED IN WRITING THE COPYRIGHT
HOLDERS AND/OR OTHER PARTIES PROVIDE THE PROGRAM «AS IS» WITHOUT WARRANTY OF ANY KIND, EITHER
EXPRESSED OR IMPLIED, INCLUDING, BUT NOT LIMITED TO, THE IMPLIED WARRANTIES OF MERCHANTABILITY
AND FITNESS FOR A PARTICULAR PURPOSE. THE ENTIRE RISK AS TO THE QUALITY AND PERFORMANCE OF THE
PROGRAM IS WITH YOU. SHOULD THE PROGRAM PROVE DEFECTIVE, YOU ASSUME THE COST OF ALL NECESSARY
SERVICING, REPAIR OR CORRECTION.
GNU General Public License 77
Appendix B: GNU License texts
12. IN NO EVENT UNLESS REQUIRED BY APPLICABLE LAW OR AGREED TO IN WRITING WILL ANY COPYRIGHT
HOLDER, OR ANY OTHER PARTY WHO MAY MODIFY AND/OR REDISTRIBUTE THE PROGRAM AS PERMITTED ABOVE,
BE LIABLE TO YOU FOR DAMAGES, INCLUDING ANY GENERAL, SPECIAL, INCIDENTAL OR CONSEQUENTIAL
DAMAGES ARISING OUT OF THE USE OR INABILITY TO USE THE PROGRAM (INCLUDING BUT NOT LIMITED TO LOSS
OF DATA OR DATA BEING RENDERED INACCURATE OR LOSSES SUSTAINED BY YOU OR THIRD PARTIES OR A
FAILURE OF THE PROGRAM TO OPERATE WITH ANY OTHER PROGRAMS), EVEN IF SUCH HOLDER OR OTHER PARTY
HAS BEEN ADVISED OF THE POSSIBILITY OF SUCH DAMAGES.
END OF TERMS AND CONDITIONS
How to apply these terms to your new programs
If you develop a new program, and you want it to be of the greatest possible use to the public, the best way to achieve this is to make it free software which everyone can redistribute and change under these terms.
To do so, attach the following notices to the program. It is safest to attach them to the start of each source file to most effectively convey the exclusion of warranty; and each file should have at least the «copyright» line and a pointer to where the full notice is found.
Copyright (C)
This program is free software; you can redistribute it and/or modify it under the terms of the GNU General
Public License as published by the Free Software Foundation; either version 2 of the License, or (at your option) any later version.
This program is distributed in the hope that it will be useful, but WITHOUT ANY WARRANTY; without even the implied warranty of MERCHANTABILITY or FITNESS FOR A PARTICULAR PURPOSE. See the GNU General Public
License for more details.
You should have received a copy of the GNU General Public License along with this program; if not, write to the
Free Software Foundation, Inc., 51 Franklin Street, Fifth Floor, Boston, MA 02110-1301 USA.
Also add information on how to contact you by electronic and paper mail. If the program is interactive, make it output a short notice like this when it starts in an interactive mode:
Gnomovision version 69, Copyright (C) year name of author
Gnomovision comes with ABSOLUTELY NO WARRANTY; for details type `show w’.
This is free software, and you are welcome to redistribute it under certain conditions; type `show c’ for details.
The hypothetical commands `show w’ and `show c’ should show the appropriate parts of the General Public
License. Of course, the commands you use may be called something other than `show w’ and `show c’; they could even be mouse-clicks or menu items—whatever suits your program.
You should also get your employer (if you work as a programmer) or your school, if any, to sign a «copyright disclaimer» for the program, if necessary. Here is a sample; alter the names:
Yoyodyne, Inc., hereby disclaims all copyright interest in the program `Gnomovision’ (which makes passes at compilers) written by James Hacker.
signature of Ty Coon, 1 April 1989
Ty Coon, President of Vice
This General Public License does not permit incorporating your program into proprietary programs. If your program is a subroutine library, you may consider it more useful to permit linking proprietary applications with the library. If this is what you want to do, use the GNU Lesser General Public License instead of this License.
78 GNU General Public License
Appendix B: GNU License texts
GNU Lesser General Public License
Version 2.1, February 1999
Copyright (C) 1991, 1999 Free Software Foundation, Inc., 51 Franklin Street, Fifth Floor, Boston, MA 02110-1301 USA.
Everyone is permitted to copy and distribute verbatim copies of this license document, but changing it is not allowed.
[This is the first released version of the Lesser GPL. It also counts as the successor of the GNU Library Public
License, version 2, hence the version number 2.1.]
Preamble
The licenses for most software are designed to take away your freedom to share and change it. By contrast, the
GNU General Public Licenses are intended to guarantee your freedom to share and change free software—to make sure the software is free for all its users.
This license, the Lesser General Public License, applies to some specially designated software packages—typically libraries—of the Free Software Foundation and other authors who decide to use it. You can use it too, but we suggest you first think carefully about whether this license or the ordinary General Public License is the better strategy to use in any particular case, based on the explanations below.
When we speak of free software, we are referring to freedom of use, not price. Our General Public Licenses are designed to make sure that you have the freedom to distribute copies of free software (and charge for this service if you wish); that you receive source code or can get it if you want it; that you can change the software and use pieces of it in new free programs; and that you are informed that you can do these things.
To protect your rights, we need to make restrictions that forbid distributors to deny you these rights or to ask you to surrender these rights. These restrictions translate to certain responsibilities for you if you distribute copies of the library or if you modify it.
For example, if you distribute copies of the library, whether gratis or for a fee, you must give the recipients all the rights that we gave you. You must make sure that they, too, receive or can get the source code. If you link other code with the library, you must provide complete object files to the recipients, so that they can relink them with the library after making changes to the library and recompiling it. And you must show them these terms so they know their rights.
We protect your rights with a two-step method: (1) we copyright the library, and (2) we offer you this license, which gives you legal permission to copy, distribute and/or modify the library.
To protect each distributor, we want to make it very clear that there is no warranty for the free library. Also, if the library is modified by someone else and passed on, the recipients should know that what they have is not the original version, so that the original author’s reputation will not be affected by problems that might be introduced by others.
Finally, software patents pose a constant threat to the existence of any free program. We wish to make sure that a company cannot effectively restrict the users of a free program by obtaining a restrictive license from a patent holder. Therefore, we insist that any patent license obtained for a version of the library must be consistent with the full freedom of use specified in this license.
Most GNU software, including some libraries, is covered by the ordinary GNU General Public License. This license, the GNU Lesser General Public License, applies to certain designated libraries, and is quite different from the ordinary General Public License. We use this license for certain libraries in order to permit linking those libraries into non-free programs.
When a program is linked with a library, whether statically or using a shared library, the combination of the two is legally speaking a combined work, a derivative of the original library. The ordinary General Public License therefore permits such linking only if the entire combination fits its criteria of freedom. The Lesser General Public
License permits more lax criteria for linking other code with the library.
We call this license the «Lesser» General Public License because it does Less to protect the user’s freedom than the ordinary General Public License. It also provides other free software developers Less of an advantage over competing non-free programs. These disadvantages are the reason we use the ordinary General Public License for many libraries. However, the Lesser license provides advantages in certain special circumstances.
For example, on rare occasions, there may be a special need to encourage the widest possible use of a certain library, so that it becomes a de-facto standard. To achieve this, non-free programs must be allowed to use the library. A more frequent case is that a free library does the same job as widely used non-free libraries. In this
GNU Lesser General Public License 79
Appendix B: GNU License texts case, there is little to gain by limiting the free library to free software only, so we use the Lesser General Public
License.
In other cases, permission to use a particular library in non-free programs enables a greater number of people to use a large body of free software. For example, permission to use the GNU C Library in non-free programs enables many more people to use the whole GNU operating system, as well as its variant, the GNU/Linux operating system.
Although the Lesser General Public License is Less protective of the users’ freedom, it does ensure that the user of a program that is linked with the Library has the freedom and the wherewithal to run that program using a modified version of the Library.
The precise terms and conditions for copying, distribution and modification follow. Pay close attention to the difference between a «work based on the library» and a «work that uses the library». The former contains code derived from the library, whereas the latter must be combined with the library in order to run.
GNU LESSER GENERAL PUBLIC LICENSE
TERMS AND CONDITIONS FOR COPYING, DISTRIBUTION AND MODIFICATION
0. This License Agreement applies to any software library or other program which contains a notice placed by the copyright holder or other authorized party saying it may be distributed under the terms of this Lesser General
Public License (also called «this License»). Each licensee is addressed as «you».
A «library» means a collection of software functions and/or data prepared so as to be conveniently linked with application programs (which use some of those functions and data) to form executables.
The «Library», below, refers to any such software library or work which has been distributed under these terms. A
«work based on the Library» means either the Library or any derivative work under copyright law: that is to say, a work containing the Library or a portion of it, either verbatim or with modifications and/or translated straightforwardly into another language. (Hereinafter, translation is included without limitation in the term
«modification».)
«Source code» for a work means the preferred form of the work for making modifications to it. For a library, complete source code means all the source code for all modules it contains, plus any associated interface definition files, plus the scripts used to control compilation and installation of the library.
Activities other than copying, distribution and modification are not covered by this License; they are outside its scope. The act of running a program using the Library is not restricted, and output from such a program is covered only if its contents constitute a work based on the Library (independent of the use of the Library in a tool for writing it). Whether that is true depends on what the Library does and what the program that uses the Library does.
1. You may copy and distribute verbatim copies of the Library’s complete source code as you receive it, in any medium, provided that you conspicuously and appropriately publish on each copy an appropriate copyright notice and disclaimer of warranty; keep intact all the notices that refer to this License and to the absence of any warranty; and distribute a copy of this License along with the Library.
You may charge a fee for the physical act of transferring a copy, and you may at your option offer warranty protection in exchange for a fee.
2. You may modify your copy or copies of the Library or any portion of it, thus forming a work based on the Library, and copy and distribute such modifications or work under the terms of Section 1 above, provided that you also meet all of these conditions: a) The modified work must itself be a software library.
b) You must cause the files modified to carry prominent notices stating that you changed the files and the date of any change.
c) You must cause the whole of the work to be licensed at no charge to all third parties under the terms of this
License.
d) If a facility in the modified Library refers to a function or a table of data to be supplied by an application program that uses the facility, other than as an argument passed when the facility is invoked, then you must make a good faith effort to ensure that, in the event an application does not supply such function or table, the facility still operates, and performs whatever part of its purpose remains meaningful.
(For example, a function in a library to compute square roots has a purpose that is entirely well-defined independent of the application. Therefore, Subsection 2d requires that any application-supplied function or table used by this function must be optional: if the application does not supply it, the square root function must still compute square roots.)
These requirements apply to the modified work as a whole. If identifiable sections of that work are not derived from the Library, and can be reasonably considered independent and separate works in themselves, then this
License, and its terms, do not apply to those sections when you distribute them as separate works. But when you
80 GNU Lesser General Public License
Appendix B: GNU License texts distribute the same sections as part of a whole which is a work based on the Library, the distribution of the whole must be on the terms of this License, whose permissions for other licensees extend to the entire whole, and thus to each and every part regardless of who wrote it.
Thus, it is not the intent of this section to claim rights or contest your rights to work written entirely by you; rather, the intent is to exercise the right to control the distribution of derivative or collective works based on the Library.
In addition, mere aggregation of another work not based on the Library with the Library (or with a work based on the Library) on a volume of a storage or distribution medium does not bring the other work under the scope of this
License.
3. You may opt to apply the terms of the ordinary GNU General Public License instead of this License to a given copy of the Library. To do this, you must alter all the notices that refer to this License, so that they refer to the ordinary GNU General Public License, version 2, instead of to this License. (If a newer version than version 2 of the ordinary GNU General Public License has appeared, then you can specify that version instead if you wish.) Do not make any other change in these notices.
Once this change is made in a given copy, it is irreversible for that copy, so the ordinary GNU General Public
License applies to all subsequent copies and derivative works made from that copy.
This option is useful when you wish to copy part of the code of the Library into a program that is not a library.
4. You may copy and distribute the Library (or a portion or derivative of it, under Section 2) in object code or executable form under the terms of Sections 1 and 2 above provided that you accompany it with the complete corresponding machine-readable source code, which must be distributed under the terms of Sections 1 and 2 above on a medium customarily used for software interchange.
If distribution of object code is made by offering access to copy from a designated place, then offering equivalent access to copy the source code from the same place satisfies the requirement to distribute the source code, even though third parties are not compelled to copy the source along with the object code.
5. A program that contains no derivative of any portion of the Library, but is designed to work with the Library by being compiled or linked with it, is called a «work that uses the Library». Such a work, in isolation, is not a derivative work of the Library, and therefore falls outside the scope of this License.
However, linking a «work that uses the Library» with the Library creates an executable that is a derivative of the
Library (because it contains portions of the Library), rather than a «work that uses the library». The executable is therefore covered by this License. Section 6 states terms for distribution of such executables.
When a «work that uses the Library» uses material from a header file that is part of the Library, the object code for the work may be a derivative work of the Library even though the source code is not. Whether this is true is especially significant if the work can be linked without the Library, or if the work is itself a library. The threshold for this to be true is not precisely defined by law.
If such an object file uses only numerical parameters, data structure layouts and accessors, and small macros and small inline functions (ten lines or less in length), then the use of the object file is unrestricted, regardless of whether it is legally a derivative work. (Executables containing this object code plus portions of the Library will still fall under Section 6.)
Otherwise, if the work is a derivative of the Library, you may distribute the object code for the work under the terms of Section 6. Any executables containing that work also fall under Section 6, whether or not they are linked directly with the Library itself.
6. As an exception to the Sections above, you may also combine or link a «work that uses the Library» with the
Library to produce a work containing portions of the Library, and distribute that work under terms of your choice, provided that the terms permit modification of the work for the customer’s own use and reverse engineering for debugging such modifications.
You must give prominent notice with each copy of the work that the Library is used in it and that the Library and its use are covered by this License. You must supply a copy of this License. If the work during execution displays copyright notices, you must include the copyright notice for the Library among them, as well as a reference directing the user to the copy of this License. Also, you must do one of these things: a) Accompany the work with the complete corresponding machine-readable source code for the Library including whatever changes were used in the work (which must be distributed under Sections 1 and 2 above); and, if the work is an executable linked with the Library, with the complete machine-readable «work that uses the Library», as object code and/or source code, so that the user can modify the Library and then relink to produce a modified executable containing the modified Library. (It is understood that the user who changes the contents of definitions files in the Library will not necessarily be able to recompile the application to use the modified definitions.)
GNU Lesser General Public License 81
Appendix B: GNU License texts b) Use a suitable shared library mechanism for linking with the Library. A suitable mechanism is one that (1) uses at run time a copy of the library already present on the user’s computer system, rather than copying library functions into the executable, and (2) will operate properly with a modified version of the library, if the user installs one, as long as the modified version is interface-compatible with the version that the work was made with.
c) Accompany the work with a written offer, valid for at least three years, to give the same user the materials specified in Subsection 6a, above, for a charge no more than the cost of performing this distribution.
d) If distribution of the work is made by offering access to copy from a designated place, offer equivalent access to copy the above specified materials from the same place.
e) Verify that the user has already received a copy of these materials or that you have already sent this user a copy.
For an executable, the required form of the «work that uses the Library» must include any data and utility programs needed for reproducing the executable from it. However, as a special exception, the materials to be distributed need not include anything that is normally distributed (in either source or binary form) with the major components
(compiler, kernel, and so on) of the operating system on which the executable runs, unless that component itself accompanies the executable.
It may happen that this requirement contradicts the license restrictions of other proprietary libraries that do not normally accompany the operating system. Such a contradiction means you cannot use both them and the Library together in an executable that you distribute.
7. You may place library facilities that are a work based on the Library side-by-side in a single library together with other library facilities not covered by this License, and distribute such a combined library, provided that the separate distribution of the work based on the Library and of the other library facilities is otherwise permitted, and provided that you do these two things: a) Accompany the combined library with a copy of the same work based on the Library, uncombined with any other library facilities. This must be distributed under the terms of the Sections above.
b) Give prominent notice with the combined library of the fact that part of it is a work based on the Library, and explaining where to find the accompanying uncombined form of the same work.
8. You may not copy, modify, sublicense, link with, or distribute the Library except as expressly provided under this
License. Any attempt otherwise to copy, modify, sublicense, link with, or distribute the Library is void, and will automatically terminate your rights under this License. However, parties who have received copies, or rights, from you under this License will not have their licenses terminated so long as such parties remain in full compliance.
9. You are not required to accept this License, since you have not signed it. However, nothing else grants you permission to modify or distribute the Library or its derivative works. These actions are prohibited by law if you do not accept this License. Therefore, by modifying or distributing the Library (or any work based on the Library), you indicate your acceptance of this License to do so, and all its terms and conditions for copying, distributing or modifying the Library or works based on it.
10. Each time you redistribute the Library (or any work based on the Library), the recipient automatically receives a license from the original licensor to copy, distribute, link with or modify the Library subject to these terms and conditions. You may not impose any further restrictions on the recipients’ exercise of the rights granted herein.
You are not responsible for enforcing compliance by third parties with this License.
11. If, as a consequence of a court judgment or allegation of patent infringement or for any other reason (not limited to patent issues), conditions are imposed on you (whether by court order, agreement or otherwise) that contradict the conditions of this License, they do not excuse you from the conditions of this License. If you cannot distribute so as to satisfy simultaneously your obligations under this License and any other pertinent obligations, then as a consequence you may not distribute the Library at all. For example, if a patent license would not permit royalty-free redistribution of the Library by all those who receive copies directly or indirectly through you, then the only way you could satisfy both it and this License would be to refrain entirely from distribution of the Library.
If any portion of this section is held invalid or unenforceable under any particular circumstance, the balance of the section is intended to apply, and the section as a whole is intended to apply in other circumstances.
It is not the purpose of this section to induce you to infringe any patents or other property right claims or to contest validity of any such claims; this section has the sole purpose of protecting the integrity of the free software distribution system which is implemented by public license practices. Many people have made generous contributions to the wide range of software distributed through that system in reliance on consistent application of that system; it is up to the author/donor to decide if he or she is willing to distribute software through any other system and a licensee cannot impose that choice.
82 GNU Lesser General Public License
Appendix B: GNU License texts
This section is intended to make thoroughly clear what is believed to be a consequence of the rest of this License.
12. If the distribution and/or use of the Library is restricted in certain countries either by patents or by copyrighted interfaces, the original copyright holder who places the Library under this License may add an explicit geographical distribution limitation excluding those countries, so that distribution is permitted only in or among countries not thus excluded. In such case, this License incorporates the limitation as if written in the body of this
License.
13. The Free Software Foundation may publish revised and/or new versions of the Lesser General Public License from time to time. Such new versions will be similar in spirit to the present version, but may differ in detail to address new problems or concerns.
Each version is given a distinguishing version number. If the Library specifies a version number of this License which applies to it and «any later version», you have the option of following the terms and conditions either of that version or of any later version published by the Free Software Foundation. If the Library does not specify a license version number, you may choose any version ever published by the Free Software Foundation.
14. If you wish to incorporate parts of the Library into other free programs whose distribution conditions are incompatible with these, write to the author to ask for permission. For software which is copyrighted by the Free
Software Foundation, write to the Free Software Foundation; we sometimes make exceptions for this. Our decision will be guided by the two goals of preserving the free status of all derivatives of our free software and of promoting the sharing and reuse of software generally.
NO WARRANTY
15. BECAUSE THE LIBRARY IS LICENSED FREE OF CHARGE, THERE IS NO WARRANTY FOR THE LIBRARY, TO THE
EXTENT PERMITTED BY APPLICABLE LAW. EXCEPT WHEN OTHERWISE STATED IN WRITING THE COPYRIGHT
HOLDERS AND/OR OTHER PARTIES PROVIDE THE LIBRARY «AS IS» WITHOUT WARRANTY OF ANY KIND, EITHER
EXPRESSED OR IMPLIED, INCLUDING, BUT NOT LIMITED TO, THE IMPLIED WARRANTIES OF MERCHANTABILITY
AND FITNESS FOR A PARTICULAR PURPOSE. THE ENTIRE RISK AS TO THE QUALITY AND PERFORMANCE OF THE
LIBRARY IS WITH YOU. SHOULD THE LIBRARY PROVE DEFECTIVE, YOU ASSUME THE COST OF ALL NECESSARY
SERVICING, REPAIR OR CORRECTION.
16. IN NO EVENT UNLESS REQUIRED BY APPLICABLE LAW OR AGREED TO IN WRITING WILL ANY COPYRIGHT
HOLDER, OR ANY OTHER PARTY WHO MAY MODIFY AND/OR REDISTRIBUTE THE LIBRARY AS PERMITTED ABOVE,
BE LIABLE TO YOU FOR DAMAGES, INCLUDING ANY GENERAL, SPECIAL, INCIDENTAL OR CONSEQUENTIAL
DAMAGES ARISING OUT OF THE USE OR INABILITY TO USE THE LIBRARY (INCLUDING BUT NOT LIMITED TO LOSS OF
DATA OR DATA BEING RENDERED INACCURATE OR LOSSES SUSTAINED BY YOU OR THIRD PARTIES OR A FAILURE
OF THE LIBRARY TO OPERATE WITH ANY OTHER SOFTWARE), EVEN IF SUCH HOLDER OR OTHER PARTY HAS BEEN
ADVISED OF THE POSSIBILITY OF SUCH DAMAGES.
END OF TERMS AND CONDITIONS
How to apply these terms to your new libraries
If you develop a new library, and you want it to be of the greatest possible use to the public, we recommend making it free software that everyone can redistribute and change. You can do so by permitting redistribution under these terms (or, alternatively, under the terms of the ordinary General Public License).
To apply these terms, attach the following notices to the library. It is safest to attach them to the start of each source file to most effectively convey the exclusion of warranty; and each file should have at least the «copyright» line and a pointer to where the full notice is found.
Copyright (C)
This library is free software; you can redistribute it and/or modify it under the terms of the GNU Lesser General
Public License as published by the Free Software Foundation; either version 2.1 of the License, or (at your option) any later version.
This library is distributed in the hope that it will be useful, but WITHOUT ANY WARRANTY; without even the implied warranty of MERCHANTABILITY or FITNESS FOR A PARTICULAR PURPOSE. See the GNU Lesser General
Public License for more details.
You should have received a copy of the GNU Lesser General Public License along with this library; if not, write to the Free Software Foundation, Inc., 51 Franklin Street, Fifth Floor, Boston, MA 02110-1301 USA
Also add information on how to contact you by electronic and paper mail.
You should also get your employer (if you work as a programmer) or your school, if any, to sign a «copyright disclaimer» for the library, if necessary. Here is a sample; alter the names:
GNU Lesser General Public License 83
Appendix B: GNU License texts
Yoyodyne, Inc., hereby disclaims all copyright interest in the library `Frob’ (a library for tweaking knobs) written by James Random Hacker.
signature of Ty Coon, 1 April 1990
Ty Coon, President of Vice
84 GNU Lesser General Public License
Glossary
CD
D
DNIC
E
EGC
ENID
Glossary
C
CAN Controller-Area Network. A message based protocol designed to allow microcontrollers and devices to communicate with each other within a vehicle without a host computer.
Compact Disk. An optical disc used to store digital data.
Data Network Identification Code
Enhanced Group Call. A type of broadcast data for ships.
EGC Network IDentification. An identification code used for reception of EGCs.
C
G
GMDSS
GNSS
GNU
GPL
Global Maritime Distress Safety System. The GMDSS system is intended to perform the following functions: alerting (including position determination of the unit in distress), search and rescue coordination, locating (homing), maritime safety information broadcasts, general communications, and bridge-to-bridge
communications.
Global Navigational Satellite System
GNU’s Not Unix. A Unix-like computer operating system developed by the GNU project, ultimately aiming to be a
«complete Unix-compatible software system» composed wholly of
free software
General Public License
85
ISP
L
LAN
Glossary
GPS Global Positioning System. A system of satellites, computers, and receivers that is able to determine the latitude and longitude of a receiver on Earth by calculating the time difference for signals from different satellites to reach the receiver.
I
IMN
IMSO
Inmarsat Mobile Number
International Maritime Satellite Organisation. An intergovernmental body established to ensure that Inmarsat
continues to meet its public service obligations.
Inmarsat Service Provider. The company providing the Inmarsat
services.
LES
LGPL
LRIT
Local Area Network. A computer network covering a small physical area, like a home, office, school or airport. The defining characteristics of LANs, in contrast to wide-area networks
(WANs), include their usually higher data-transfer rates, smaller geographic area, and lack of a need for leased telecommunication lines.
Land Earth Station
Lesser General Public License
Long Range Identification and Tracking. A system established by the IMO applying to all passenger ships, cargo ships > 300 gross tonnage and mobile offshore drilling units. These ships/units must automatically report their position to their Flag
Administration at least 4 times a day. Other contracting governments may request information about vessels in which they have a legitimate interest under the regulation.
86
Glossary
N
NAVAREA
NCS
P
PSDN
PSTN
M
METAREA mobile
MRCC
MSI
The geographic areas in which various governments are
responsible for meteorological warnings.
Mobile terminal. In this context the Mini-C Terminal
Maritime Rescue Co-ordination Centre
Maritime Safety Information. Maritime Safety Information. An internationally coordinated network of broadcasts of Maritime
Safety Information from official information providers, such as
National Hydrographic Offices, National Meteorological Offices,
Rescue Co-ordination Centres (RCCs), and The International Ice
Patrol, for Oceanic ice hazards.
The geographic areas in which various governments are responsible for navigation and weather warnings.
Network Coordination Station
PU
Public Switched Data Network
Public Switched Telephone Network. The network of the world’s public circuit-switched telephone networks. It consists of telephone lines, fibre-optic cables, microwave transmission links, cellular networks, communications satellites, and undersea telephone cables all inter-connected by switching centres which allows any telephone in the world to communicate with any other.
Position Unreserved
87
Glossary
S
SAC
SAR
SARF
SNMP
SOLAS
SSA
Short Access Code
Search And Rescue
Service Activation Registration Form. A form used to register your mobile equipment for activation of the services you are going to
use.
Simple Network Management Protocol. An Internet-standard protocol for managing devices on IP networks. It is used mostly in network management systems to monitor network-attached devices for conditions that warrant administrative attention.
(International Convention for the) Safety Of Life At Sea. Generally regarded as the most important of all international treaties
concerning the safety of merchant ships.
Ship Security Alert. The ship security alert system is provided to a vessel for the purpose of transmitting a security alert to the shore
(not to other vessel!) to indicate to a competent authority that the security of the ship is under threat or has been compromised.
T
TCU Terminal Control Unit
88
Index
Index
A
activation of service, 9
auto-print
EGCs and messages, 56
B
buttons
Distress, using, 60
SSA, using, 62
C
clear protocol, 39
conformity, 69
contacts, 30
D
data file, send, 24
data reporting and polling
description of service, 8
deleting
EGC, 37
message, 29
Distress
button test, 20
clear indications, 61
description of service, 5
message, write, 17
sending alert with SAILOR 6108, 60
settings, 17
Distress position, 19
document number
this manual, i
E
easyMail
menu overview, 16
using LAN, 53
using RS-232, 55
EGC
auto-print, 56
deleting, 37
description of service, 6
receiving, 36
setup, 44
event log, 67
G
GNU General Public License, 75
GNU Lesser General Public License, 79
I
Inbox, 29
info log, 67
L
LAN
setup with easyMail, 53
LES number
list of supported, 47
link test, 39
login, 38
D
89
Index
M
manual
document number, i
menu overview, 16
message
auto-print, 56
deleting, 29
Distress, 17
Inbox, 29
options, 25
Outbox, 30 sent items, 30
writing, 23
messaging
description of service, 7
mobile number
entering, 50
N
network
login, 38 scan, 38 view status, 38
O
Outbox, 30
P
position
for Distress, 19
viewing, 41
position information, 8
position reporting
description of service, 7
90
powering the system, 10
protocol, clear, 39
R
receiving EGCs, 36
registration, 9
reporting position, 8
RS-232
communication with easyMail, 55
S
safety summary, iv
SAILOR 6108 or SAILOR 3042E
sending Distress alert, 60
scan, 38
sent items, 30
serial communication with easyMail, 55
service activation, 9
services
data reporting and polling, 8
Distress, 5
EGC, 6
Inmarsat C details, 5
messaging, 7 position reporting, 7
sound
testing, 21
special access codes, 32
SSA buttons
using, 62
starting up, 10
status
network, 38
signalling, 67
support, 63
system overview
total, 2
system units, 3
T
transmission stop, 39
troubleshooting, 63
typography used in this manual, vii
U
units in the system, 3
user interface, 4
W
warranty, 68
writing messages, 23
Index
91
98-131590-A [email protected]
• thrane.com
Содержание
- 1 SAILOR 6120 SSA System
- 1.1 Производитель
- 1.2 Состав
- 1.3 Программирование
- 1.4 IP адреса (смотреть в TMA)
- 1.5 Процедура программирования
- 1.6 Подключение кнопок
- 1.7 Практика программирования
- 1.7.1 Подключаемся к Mini-C
- 1.7.2 Создаем в блокноте файл с таким содержимым (максимум 200 знаков):
- 1.7.3 Выделяем его содержимое и копируем в буфер (Ctr+C), затем вставляем в консоль:
- 1.7.4 Записываем в память командой
- 1.7.5 Вводим e-mail адреса и номера телефонов для доставки SMS
- 1.8 Удаление строки
- 1.9 Подключение ГЛОНАСС
SAILOR 6120 SSA System
Производитель
Thrane&Thrane
Состав
- SAILOR 3027 SSA Terminal — INMARSAT антенна/трансивер
- THRANE 6194 Terminal Contol Unit — Блок подключения и управления
- SSA alert button — Стандартно 2 кнопки тревоги 3-x проводные и одна кнопка тестирования 4-х проводная.
- Power supply — Блок питания
Программирование
Консоль RS232 COM Baud rate:115200
Подключить компьютер последовательным кабелем к блоку подключения и управления Thrane  6194
На компьютере запустить терминальную программу Putty или любую др.
Выбрать соответствующий COM порт и скорость обмена данными 115200
После включения, появится tt6194:/$
Команда подключения к терминалу MINI-C : minic
ответ: Сan0:/$
Далее ввести команду получения статуса администратора : su sysadm
Терминал запросит пароль pass:
При первом включении пароль : ****
который необходимо будет поменять на другой.
Возможно подключение телнетом на адрес TCU (2 LAN кабеля + свич), но данный способ работает не очень корректно, лучше использовать подключение через консольный порт.
IP адреса (смотреть в TMA)
- IP трансивера 169.254.29.21 (?)
- IP TCU 169.254.173.109
Процедура программирования
Перед программированием обязательно получить у заказчика текст для программирования!
Для разных флагов строка для передачи может быть разной, обязательные параметры: Ship Name, MMSI, IMO, CALL.
Формат команды:
set (space) –am (space) – (entry),(type),{(address),(param)}
(Entry)- строка
Номер строки от 0 до 2 (0,1,2) т.о. максимально только 3 строки
(type)Типы сообщений :
0: TELEX — Телекс
1: FAX — Факсимильное сообщение
6: SMS — SMS сообщение и код береговой станции
254: EMAIL — Электронная почта
ПРИМЕР ДЛЯ ТЕЛЕКСНЫХ СООБЩЕНИЙ:
(set -am) “пробел” строка (0, 1, 2) “запятая” тип сообщения (0) “запятая” телексный номер 5519298 оканчивается знаком (+/) автоответ“TATJH” далее нажать (enter)
- set –am 0,0,5519298+/TATJH (enter)
ПРИМЕР ДЛЯ ФАКСИМИЛЬНЫХ СООБЩЕНИЙ:
Команда (se -am) “пробел”, номер строки (0, 1, 2) “запятая” далее тип сообщения (1) “запятая” телефонный номер факса 4539558888 заканчивается (t30) нажать “enter”.
: set –am 0,1,4539558888,t30 (enter)
ПРИМЕР ДЛЯ SMS СООБЩЕНИЙ:
Команда (set -am) “пробел”, номер строки (0, 1, 2) “запятая” типе сообщения (6) “запятая” номер мобильного телефона 4525414111 заканчивается кодом (LES SMS CODE) нажать “enter”
примерный формат для TELENOR LES.
: set –am 0,6,4525414111,66 (enter)
Кроме France Telecom который использует специальный формат сообщения для доставки:
: set –am 0,6,SMS+4525414111,29 (enter)
SEE LES SMS CODES BELOW:
TELENOR LES USE CODE (66)
XANTIC LES USE CODE (696)
FRANCE TELECOM USE CODE (29)
STRATOS LES USE CODE (696)
Помните о нобходимости регистрации терминала на используемый океанский регион для береговой станции LES
для доставки SMS сообщений (команда set –m)
: set -m 4,104,204,304
: SEt -m ALL_OCEANS

Alert LES for ocean 0     : 4
Alert LES for ocean 1     : 104
Alert LES for ocean 2     : 204
Alert LES for ocean 3     : 304
ПРИМЕР ДЛЯ АДРЕСОВ ЭЛЕКТРОННОЙ ПОЧТЫ:
команда (set -am) “пробел”, номер строки (0, 1, 2) “запятая” тип сообщения (254) “запятая” адрес эл.почты ssasalert@**.** нажать “enter”
: set –am 0,254,ssasalert@**.** (enter)
Многоадресное программирование
можно запрограммировать несколько адресов доставки электронной почты и факс номеров но не более 79 знаков в одной строке.
Кроме SMS сообщений.
Команда проверки запрограммированых адресов и типа сообщений:
 set -am

Entry  Type  Param  Address
    0   254         qwer@thrane.com;tyui@thrane;asdf@thrane.com
    1     1    t30  4539551234;4539555678;4539550987
    2     6     66  4525414111

To set/clear addresses: set -am <Entry>,<Type>[,<Addresses>[,<Param>]]
Возможно задать вариант отправки сообщения: Alert, Test, Alert+Test
set -ame <Entry>,<Type>
Где <Entry> — номер сообщения, <Type> — вариант отправки сообщения: 1 = Alert, 2 = Test, 3 = Alert+Test
Подключение кнопок
- Подключение тревожных кнопок трехпроводное, тестовая кнопка подключается по 4 проводам.
- Возможно подключить до 6 кнопок тревоги
- В минимальной комплектации одна кнопка «тест» (X14) и две «тревога». Для нормальной работы системы необходимо поставить перемычки между клеммами 1-2 «пустых» колодок, к которым кнопки не подключены. То есть перемычки 1-2 ставить с X7 по X12, исключая колодки с подключенными кнопками.
Практика программирования
Исходные данные:
Ship name:ATLANTIC
CallSign:999
IMO:111
MMSI:222
CSO VIKTOR 0079211234567,DSCO ANDREY 0079217654321

Covert message setup :
Destination type     : E-mail
Address              : vic@spb.ru;alert.isps@transport.gov.mt
Parameter            :
Usage                : Msg+Test
Destination type     : E-mail
Address              : a@spb.ru;everyone@spb.ru
Parameter            :
Usage                : Msg+Test
Destination type     : SAC
Address              : sms+79211234567;sms+79217654321
Parameter            : 29
Usage                : Msg+Test
Подключаемся к Mini-C
tt6194:/$ minic
Connecting... Connected, type ^D or exit to disconnect
can0:/$ su sysadm
Enter password: ***
Создаем в блокноте файл с таким содержимым (максимум 200 знаков):
В терминале EasyMail многострочный ввод не работает! Ставим PuTTY https://www.chiark.greenend.org.uk/~sgtatham/putty/latest.html
tr long.txt
Ship name:ATLANTIC
CallSign:999
IMO:111
MMSI:222
CSO VIKTOR 0079211234567,DSCO ANDREY 0079217654321
Выделяем его содержимое и копируем в буфер (Ctr+C), затем вставляем в консоль:
can0:/$ tr long.txt
Ship name:ATLANTIC
CallSign:999
IMO:111
MMSI:222
CSO VIKTOR 0079211234567,DSCO ANDREY 0079217654321
Таким способом мы создаем файл long.txt с необходимым содержимым
can0:/$ dir
         main.cfg Prio=172  ILLEGAL 13-01-11  09:07 18055 bytes
'''         long.txt Prio=  0     POLL 13-01-11  08:31 89 bytes'''
          _EGCLOG Prio=  0     POLL 70-01-01  00:00 0 bytes
last_power_on.cfg Prio=180  ILLEGAL 13-01-11  08:32 18055 bytes
           _RXLOG Prio=  0     POLL 70-01-01  00:00 0 bytes
           _TXLOG Prio=  0     POLL 13-01-11  09:28 1898 bytes
      factory.cfg Prio=180  ILLEGAL 70-01-01  00:00 3661 bytes
  part_number.txt Prio=180  ILLEGAL 70-01-01  00:00 50 bytes
      last_ok.cfg Prio=180  ILLEGAL 13-01-11  09:03 18055 bytes
Просмотр содержимого файла
can0:/$ type long.txt
Удалить файл можно командой
can0:/$ delete long.txt
Записываем в память командой
can0:/$ se -atf long.txt
Просмотреть содержимое памяти можно командой
can0:/$ se -at
Current text:
Ship name:ATLANTIC
CallSign:999
IMO:111
MMSI:222
CSO VIKTOR 0079211234567,DSCO ANDREY 0079217654321
To change text: set -atf <filename>
Очистить содержимое памяти
can0:/$ se -at "пробел"
Вводим e-mail адреса и номера телефонов для доставки SMS
can0:/$ set -am 0,254,vic@spb.ru;alert.isps@transport.gov.mt
can0:/$ set -am 1,254,a@spb.ru;everyone@spb.ru
can0:/$ set -am 2,6,sms+79211234567;sms+79217654321,29
В последней строке параметр 29 для доставки SMS через France Telecom. Для TELENOR параметр должен быть 66.
Просматриваем:
can0:/$ set -am
Update time: 2013-01-11  09:54:31
Entry  Type  Param  Address
    0   254         vic@spb.ru;alert.isps@transport.gov.mt
    1   254         a@spb.ru;everyone@spb.ru
    2     6     29  sms+79211234567;sms+79217654321

To set/clear addresses: set -am <Entry>,<Type>[,<Addresses>[,<Param>]]
Таким образом сообщение будет отправлено на 4 почтовых адреса и 2 телефона.
Удаление строки
can0:/$ set -am <Entry>,255
Подключение ГЛОНАСС
To allow external navigational input

External navigational input     Command
Allow                           can0:/$ cfg -pa 1
Not allow                       can0:/$ cfg -pa 0

To display the current external navigational input, type:
can0:/$ cfg -pa
External nav input: 1 (Allowed)


To set preferred navigational input

Preferred navigational input     Command
GPS                              can0:/$ cfg -pi 1
Glonass                          can0:/$ cfg -pi 2

To display the currently preferred navigational input, type:
can0:/$ cfg -pi
Preferred nav input: 2 (External Glonass)
- Каталог/
- Объекты наблюдения Российского Морского Регистра Судоходства/
- Навигационное оборудование/
- Оборудование системы опознавания судов и слежения за ними на дальнем расстоянии (ОСДР)/
- Sailor 6120 SSA/LRIT
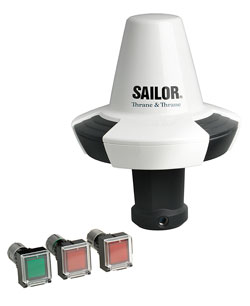
Sailor 6120 SSA/LRIT System представляет собой судовую систему опознавания судов и слежения за ними на дальнем расстоянии, основанная на Sailor 6120 mini-C. Имеет сертификат одобрения Российского Морского Регистра Судоходства. Система предназначена для установки на суда любого типа. Имеет встроенный GPS модуль и всенаправленную антенну, что обеспечивает стабильную работу даже в самых сложных условиях. SAILOR 6120 мини-C SSAS полностью соответствует требованиям, перечисленным в IMO MSC. 136 (76) и MSC. 144 (77), Конвенции СОЛАС XI-2/6. Основная функция системы — SSAS — это передача предупреждения системе безопасности об угрозе терроризма или пиратства.
Технические характеристики:
- Рабочие частоты:
- Rx Диапазон частот: Rx: 1525 — 1545 МГц
- Tx Диапазон частот: Tx: 1626,5 — 1646,5 МГц
- GPS модуль 50 канала
- Терминал интерфейса DeviceNet NMEA2K
- Характеристики антенного блока:
- G / T -23,7 БРК при 5 °
- ЭИИМ Мин. 7 дБВт при 5 °
- Абсолютный диапазон питания 9 — 32 В постоянного тока
- Номинальная мощность входного сигнала: 15 В постоянного тока
- Потребляемая мощность (типовая):
- Rx: 1,85 W @ 15 VDC
- Tx: 22 Вт при 15 В постоянного тока
Check item
Is the shield of the CAN cable connected
correctly to the ship ground (hull)?
Is the polarity of power connections
correct? Red wire = DC+, Black wire = DC-
If you have a SAILOR 6130 LRIT System, you may not have anything
connected to your SAILOR 3027, except for a power supply.
However, we recommend testing the signal path. This can be done by
requesting a LESO (LES Operator) in the Inmarsat-C system to perform a
PVT (Performance Verification Test) on your SAILOR 3027 LRIT Terminal.
The LESO returns the result of the test, which is either that the mobile
passed or failed the test. A written result may look like this:
Test
Id
Group
pvt
ss
subsys
test
m
tem
Any further requirements for testing are defined by the Flag administration.
Table 12: Installation check list (Continued)
Start time
20110128
15:07:45
Test the SAILOR 6130 LRIT System
Chapter 5: Installation check and test
Reference
SAILOR 3027
mini-C terminal on
page 29
Connect power on
page 33
End time
20110128
15:17:07
OK
Overall
result
finished
pvt
75