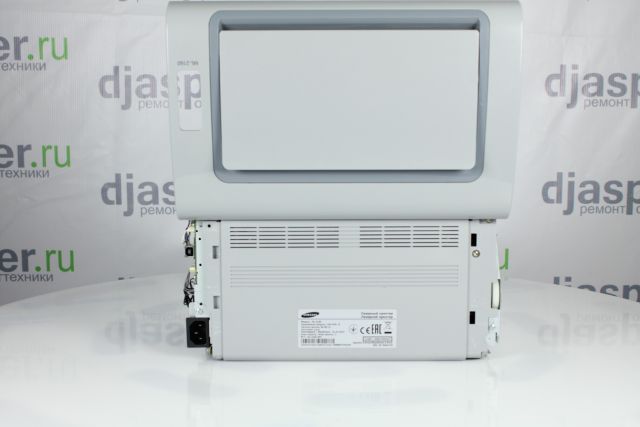
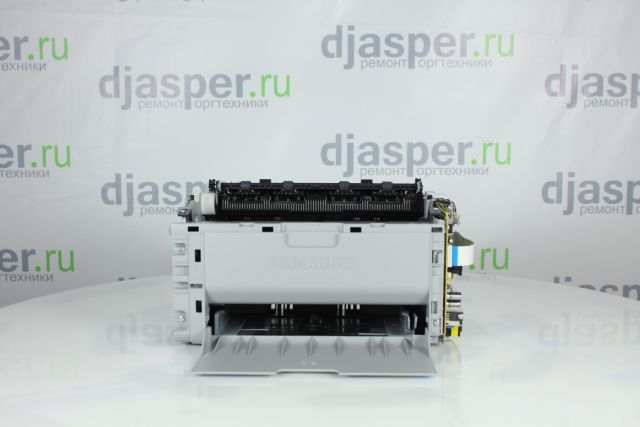
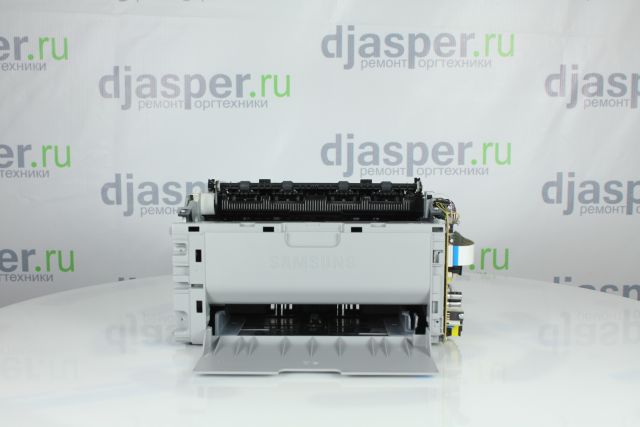
Подготовьте принтер к разборке

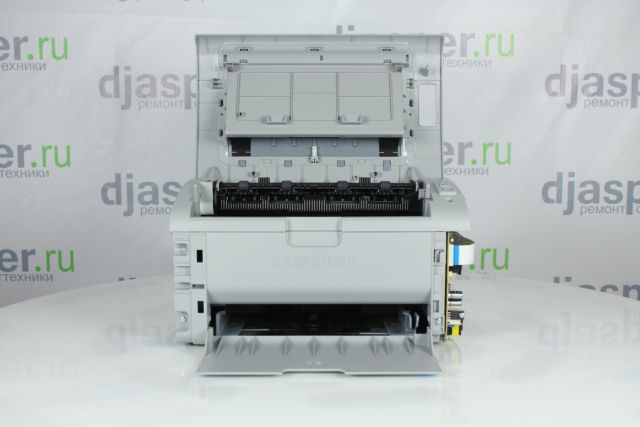
Откройте верхнюю крышку
Верхняя крышка
Извлеките картридж
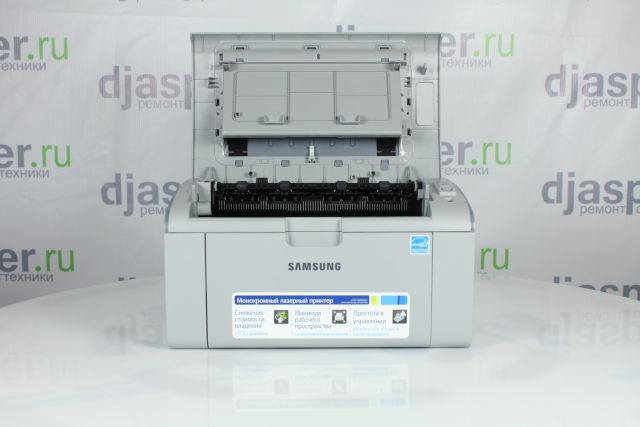
Картридж
Выкрутите винт
Винт
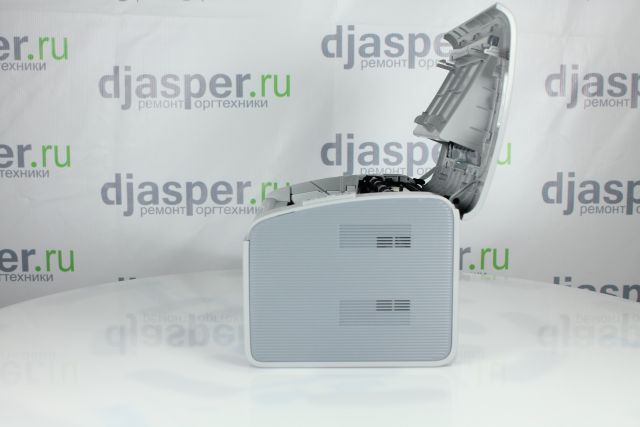
Снимите правую крышку
Защелка
Защелка
Защелка
Защелка
Защелка
Защелка
Защелка
Защелка
Защелка
Правая крышка
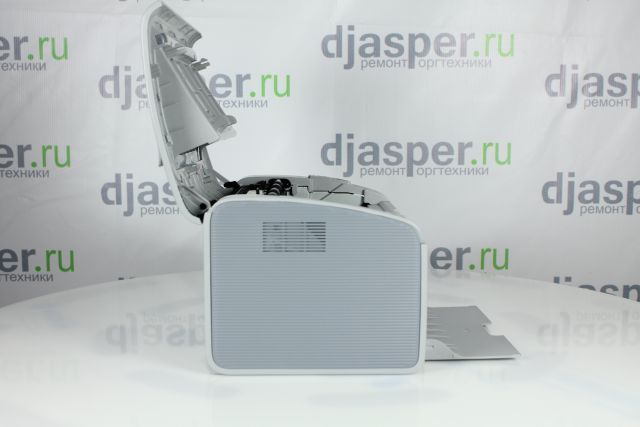
Снимите левую крышку
Защелка
Защелка
Защелка
Защелка
Защелка
Защелка
Защелка
Защелка
Защелка
Левая крышка
Выкрутите 2 винта
Винт
Винт
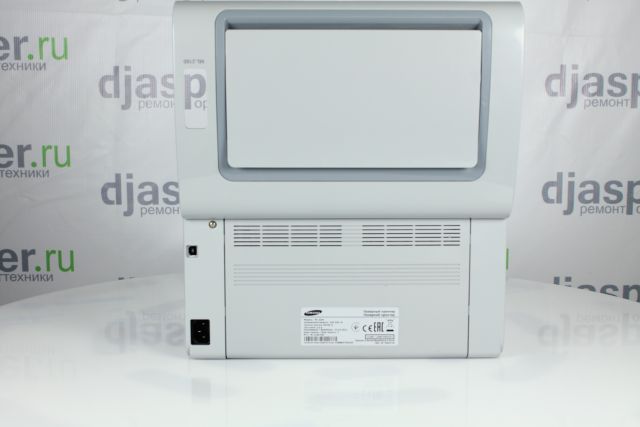
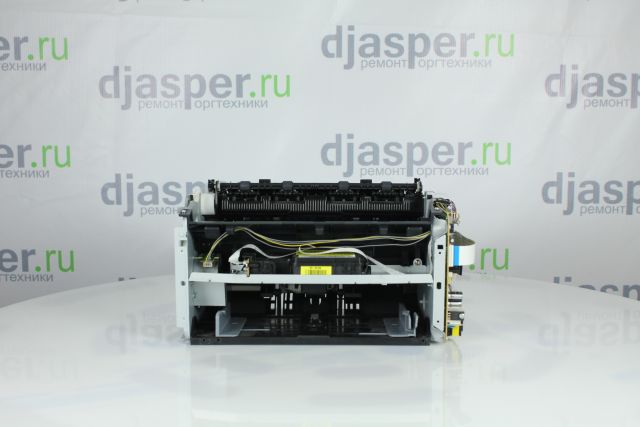
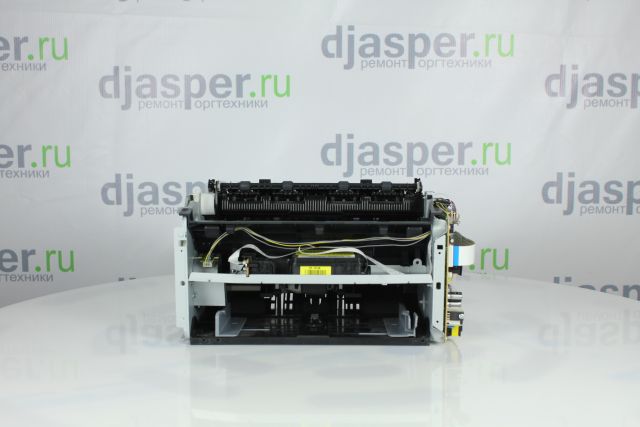
Снимите заднюю крышку
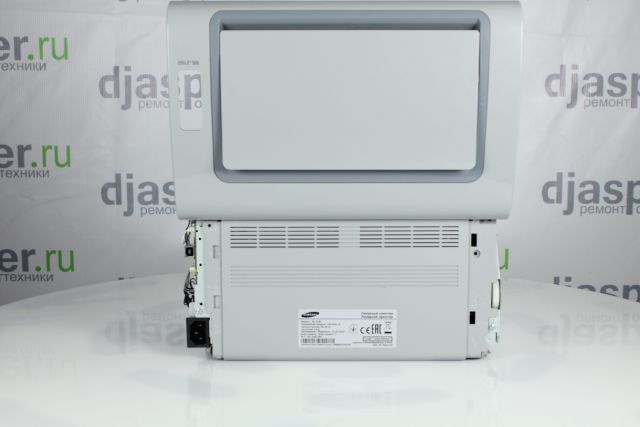
Задняя крышка
Отсоедините разъём панели управления
Разъём панели управления
Ослабьте 2 фиксатора и снимите верхнюю крышку
Фиксатор
Фиксатор
Верхняя крышка
Выкрутите 2 винта
Винт
Винт
Ослабьте 2 защелки и снимите переднюю крышку
Защелка
Защелка
Передняя крышка
Выкрутите 4 винта
Винт
Винт
Винт
Винт
Снимите пластиковую крышку
Пластиковая крышка
Отсоедините 2 шлейфа
Шлейф
Шлейф
Выкрутите 3 винта
Винт
Винт
Винт
Снимите лазер
Лазер
Отсоедините 7 разъемов от платы форматера
Шлейф
Шлейф
Разъем
Разъем
Разъем
Разъем
Разъем
Выкрутите 3 винта и снимите плату форматера
Винт
Винт
Винт
Отсоедините питание печки
Разъем питания печки
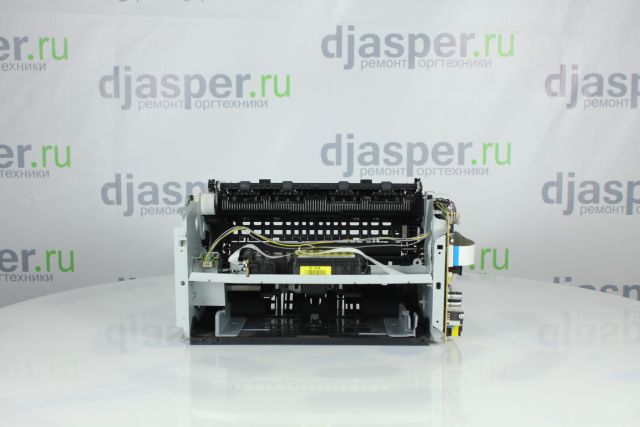
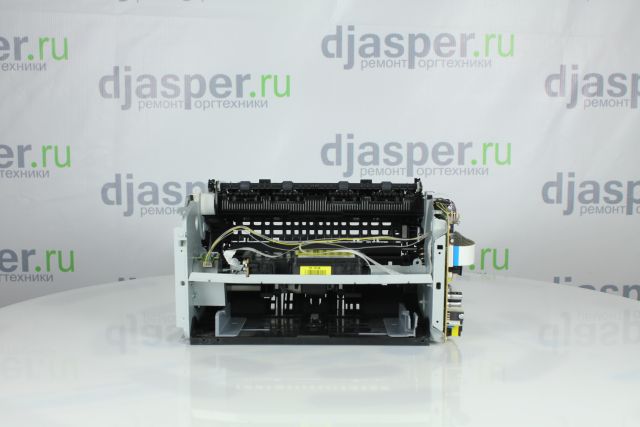
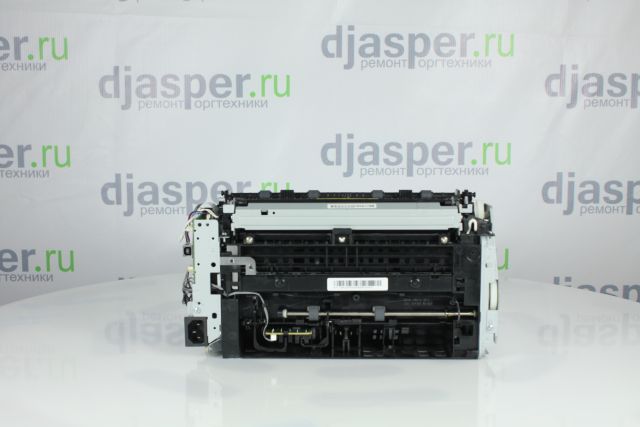
Снимите защитный экран

Защитный экран
Выкрутите один винт сзади
Винт
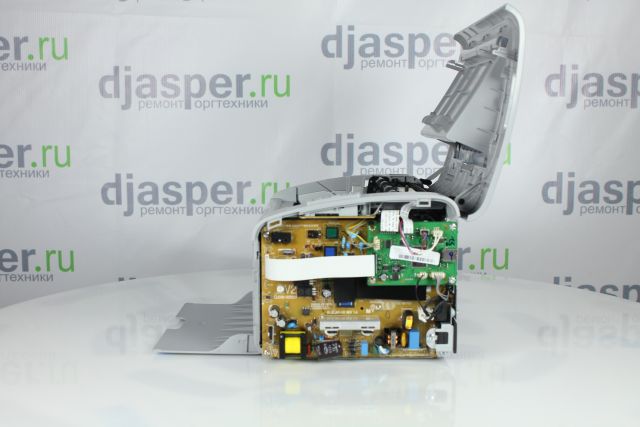
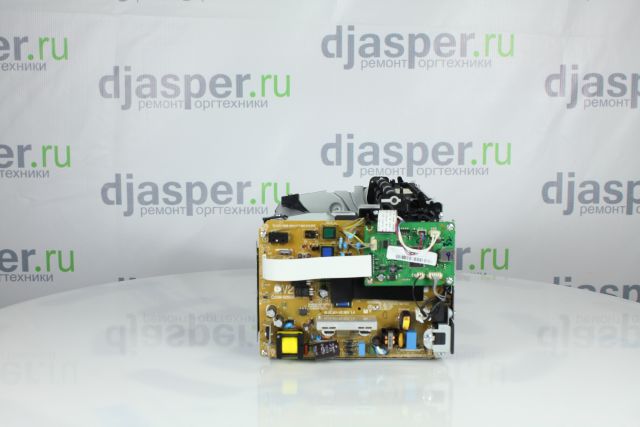
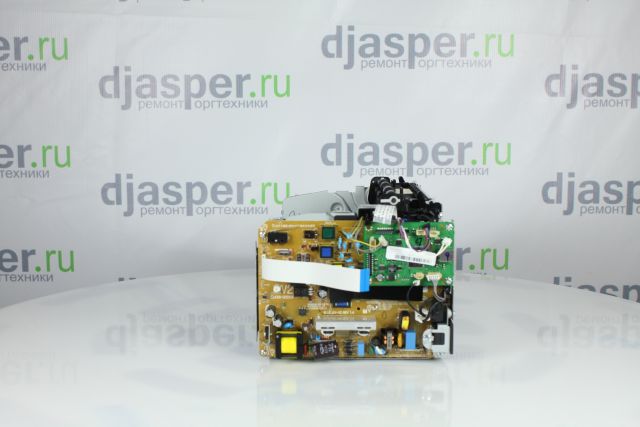
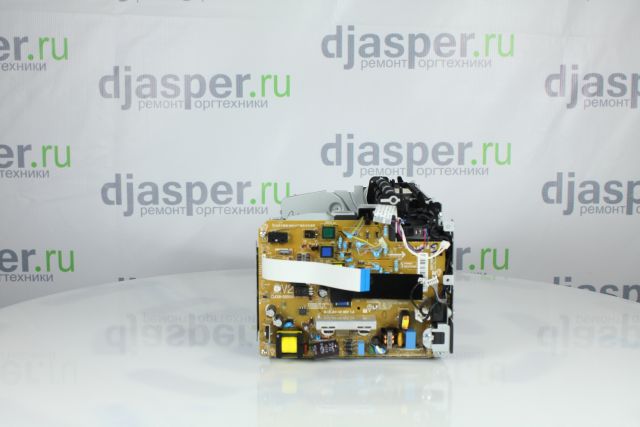
Выкрутите 7 винтов из платы питания
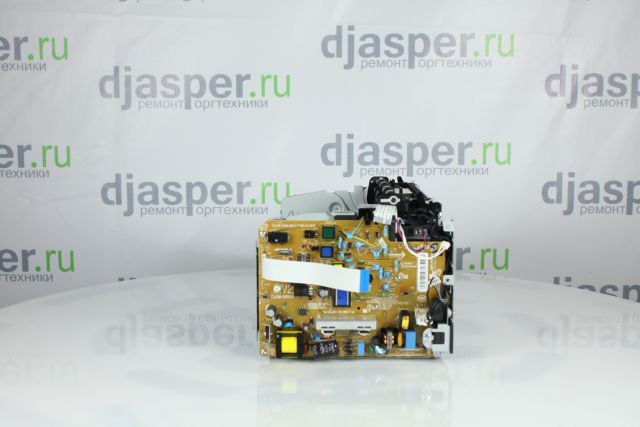
Винт
Винт
Винт
Винт
Винт
Винт
Винт
Снимите плату питания
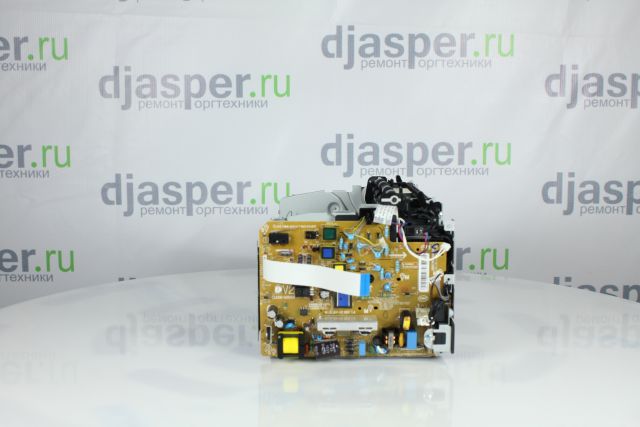
Плата питания
Выкрутите один винт сзади
Винт
Выкрутите 3 винта
Винт
Винт
Винт
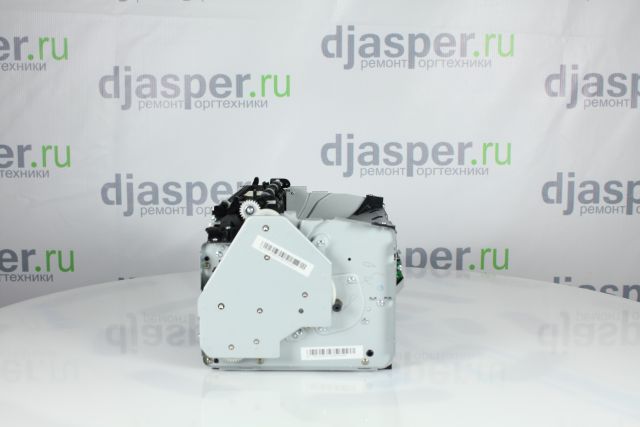
Снимите редуктор
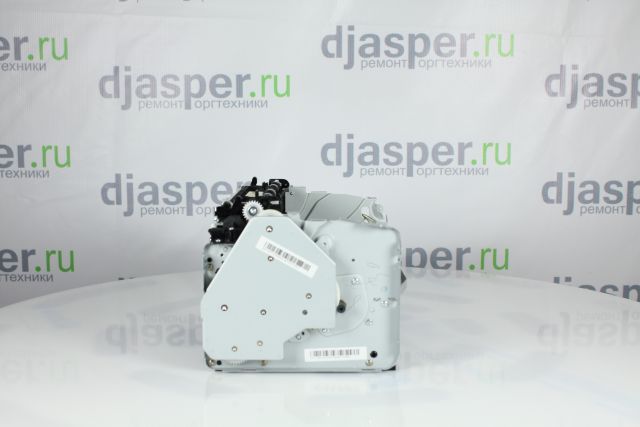
Редуктор
Выкрутите 3 винта
Винт
Винт
Винт
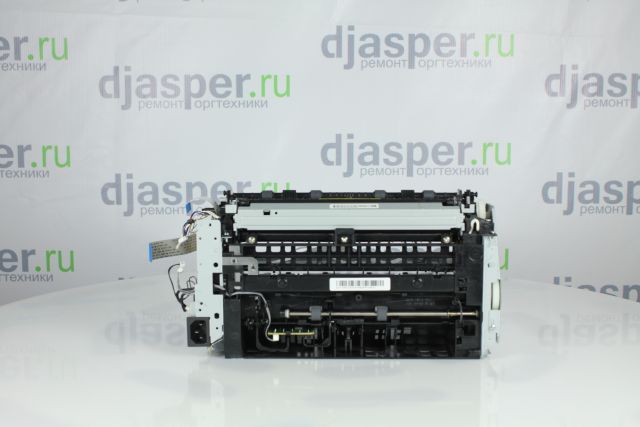
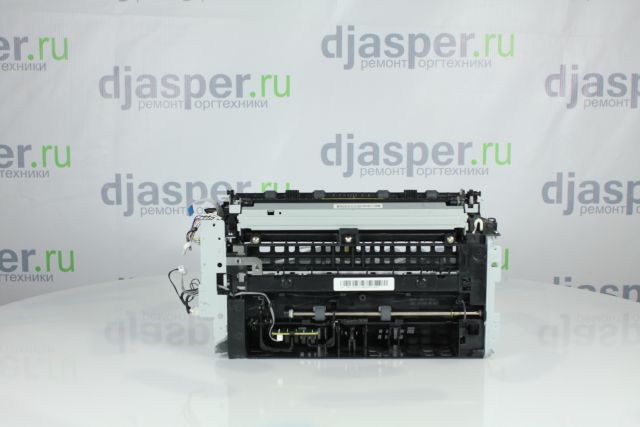
Снимите печку
Узел термозакрепления (печка)

Mono Laser Printer
ML-216x series
ML-216x / ML-216xW
SERVICE
MANUAL
Mono Laser Printer
Contents
1. Precautions
2. Product Specifications and Description
3. Disassembly and Reassembly
4. Alignment and Troubleshooting
5. System Diagram
6. Reference Information
Refer to the service manual in the GSPN (see the rear cover) for more information.
Contents
Contents
1.
Precautions ...................................................................................................................................... 1 − 1
1.1.
Safety warning ........................................................................................................................ 1 − 1
1.2.
Caution for safety .................................................................................................................... 1 − 2
1.3.
2.
1.2.1.
Toxic material............................................................................................................. 1 − 2
1.2.2.
Electric shock and fire safety precautions ......................................................................... 1 − 2
1.2.3.
Handling precautions ................................................................................................... 1 − 3
1.2.4.
Assembly and Disassembly precautions ........................................................................... 1 − 3
1.2.5.
Disregarding this warning may cause bodily injury ............................................................ 1 − 4
ESD precautions ...................................................................................................................... 1 − 5
Product Specifications and Description .................................................................................................. 2 − 1
2.1.
Product Specifications .............................................................................................................. 2 − 1
2.1.1.
Product Overview........................................................................................................ 2 − 1
2.1.2.
Specifications ............................................................................................................. 2 − 1
2.1.3.
2.2.
General Print Engine...................................................................................... 2 − 1
2.1.2.2.
Controller and Software.................................................................................. 2 − 2
2.1.2.3.
Paper Handling ............................................................................................. 2 − 3
2.1.2.4.
Consumables ................................................................................................ 2 − 3
2.1.2.5.
Maintenance Part .......................................................................................... 2 − 4
2.1.2.6.
Reliability and Service ................................................................................... 2 − 4
2.1.2.7.
Environment ................................................................................................ 2 − 4
2.1.2.8.
Accessories .................................................................................................. 2 − 5
Model Comparison Table .............................................................................................. 2 − 6
System Overview..................................................................................................................... 2 − 7
2.2.1.
Front View ................................................................................................................. 2 − 7
2.2.2.
Rear View .................................................................................................................. 2 − 8
2.2.3.
Paper Path.................................................................................................................. 2 − 9
2.2.4.
System Layout ............................................................................................................ 2 − 10
2.2.5.
i
2.1.2.1.
2.2.4.1.
Feeding Part ................................................................................................. 2 − 11
2.2.4.2.
Transfer Roller ............................................................................................. 2 − 12
2.2.4.3.
Drive Unit ................................................................................................... 2 − 12
2.2.4.4.
Fuser Unit.................................................................................................... 2 − 13
2.2.4.5.
LSU (Laser Scanner Unit)............................................................................... 2 − 15
2.2.4.6.
Toner Cartridge............................................................................................. 2 − 16
Hardware configuration ................................................................................................ 2 − 17
2.2.5.1.
Main board .................................................................................................. 2 − 18
2.2.5.2.
OPE board ................................................................................................... 2 − 20
2.2.5.3.
Wireless LAN board (ML-216xW only) ............................................................ 2 − 21
2.2.5.4.
SMPS/HVPS board ....................................................................................... 2 − 22
Copyright© 1995-2011 SAMSUNG. All rights reserved.
Contents
2.2.5.5.
2.2.6.
2.2.7.
3.
Electrical Parts Location ................................................................................. 2 − 24
Engine F/W Contol Algorithm ....................................................................................... 2 − 25
2.2.6.1.
Feeding ....................................................................................................... 2 − 25
2.2.6.2.
Transfer....................................................................................................... 2 − 25
2.2.6.3.
Fusing......................................................................................................... 2 − 26
2.2.6.4.
LSU............................................................................................................ 2 − 26
Software Descriptions .................................................................................................. 2 − 27
2.2.7.1.
Software system overview .............................................................................. 2 − 27
2.2.7.2.
Architecture ................................................................................................. 2 − 27
2.2.7.3.
Data and Control Flow ................................................................................... 2 − 28
Disassembly and Reassembly .............................................................................................................. 3 − 1
3.1.
Precautions when replacing parts ................................................................................................ 3 − 1
3.1.1.
Precautions when assembling and disassembling ............................................................... 3 − 1
3.1.2.
Preautions when handling PBA ...................................................................................... 3 − 1
3.1.3.
Releasing Plastic Latches .............................................................................................. 3 − 2
3.2.
Screws used in the printer.......................................................................................................... 3 − 3
3.3.
Replacing the Main SVC parts ................................................................................................... 3 − 4
3.3.1.
Cover ........................................................................................................................ 3 − 4
3.3.2.
Main board................................................................................................................. 3 − 6
3.3.3.
Fuser Unit .................................................................................................................. 3 − 6
3.3.4.
SMPS/HVPS board...................................................................................................... 3 − 7
3.3.5.
Drive Unit.................................................................................................................. 3 − 7
3.3.6.
LSU.......................................................................................................................... 3 − 8
3.3.7.
Feed Sensor PBA ........................................................................................................ 3 − 9
3.3.8.
Pick up roller .............................................................................................................. 3 − 9
3.3.9.
Motor........................................................................................................................ 3 − 10
3.3.10. Transfer roller............................................................................................................. 3 − 11
4.
Alignment and Troubleshooting ........................................................................................................... 4 − 1
4.1.
Alignment and Adjustments....................................................................................................... 4 − 1
4.1.1.
Control Panel.............................................................................................................. 4 − 1
4.1.2.
Understanding the status LED........................................................................................ 4 − 3
4.1.3.
Jam Removal.............................................................................................................. 4 − 4
4.1.4.
Periodic Defective Image .............................................................................................. 4 − 6
4.1.5.
Useful management tools .............................................................................................. 4 − 7
4.1.6.
4.1.5.1.
Using Samsung Easy Printer Manager (Windows and Macintosh only) .................... 4 − 7
4.1.5.2.
Using Samsung Printer Status (Windows only) ................................................... 4 − 9
4.1.5.3.
Using Smart Panel (Linux only) ....................................................................... 4 − 10
4.1.5.4.
Using SyncThru Web Service (SWS) ................................................................ 4 − 11
Updating Firmware ...................................................................................................... 4 − 13
4.1.6.1.
Update the firmware by using the USB port........................................................ 4 − 13
Copyright© 1995-2011 SAMSUNG. All rights reserved.
ii
Contents
4.1.6.2.
4.2.
Troubleshooting ...................................................................................................................... 4 − 16
4.2.1.
Procedure of checking the symptoms............................................................................... 4 − 16
4.2.1.1.
5.
6.
iii
Update the firmware by using the network (ML-216xW only)................................ 4 − 14
Basic Check List ........................................................................................... 4 − 17
4.2.2.
Error Code and Troubleshooting..................................................................................... 4 − 18
4.2.3.
Image quality problem.................................................................................................. 4 − 25
4.2.4.
Other errors ................................................................................................................ 4 − 31
System Diagram................................................................................................................................ 5 − 1
5.1.
Block Diagram ........................................................................................................................ 5 − 1
5.2.
Connection Diagram................................................................................................................. 5 − 2
Reference Information........................................................................................................................ 6 − 1
6.1.
Tool for Troubleshooting ........................................................................................................... 6 − 1
6.2.
Glossary................................................................................................................................. 6 − 2
6.3.
The Sample Pattern for the Test .................................................................................................. 6 − 8
6.4.
Selecting a location .................................................................................................................. 6 − 9
Copyright© 1995-2011 SAMSUNG. All rights reserved.
1. Precautions
1. Precautions
1.1. Safety warning
1) Only to be serviced by a factory trained service technician.
High voltages and lasers inside this product are dangerous. This product should only be serviced by a factory trained
service technician.
2) Use only Samsung replacement parts.
There are no user serviceable parts inside the product. Do not make any unauthorized changes or additions to the
product as these could cause the product to malfunctions and create an electric shocks or fire hazards.
3) Laser Safety Statement
The printer is certified in the U.S. to conform to the requirements of DHHS 21 CFR, chapter 1 Subchapter J for
Class I(1) laser products, and elsewhere is certified as a Class I laser product conforming to the requirements of IEC
60825-1. Class I laser products are not considered to be hazardous. The laser system and printer are designed so
there is never any human access to laser radiation above a Class I level during normal operation, user maintenance
or prescribed service condition.
•
Wavelength: Max. 800 nm (785 -10/+15)
•
Beam divergence
•
-
Paraller: Max. 13 degrees (10 -4/+3)
-
Perpendicular: Max. 35 degrees (31 -6/+4)
Maximum power of energy output: 12 mW
WARNING
Never operate or service the product with the protective cover removed from Laser/Scanner assembly. The reflected
beam, although invisible, can damage your eyes.
When using this product, these basic safety precautions should always be followed to reduce risk of fire, electric shock,
and personal injury.
Copyright© 1995-2011 SAMSUNG. All rights reserved.
1-1
1. Precautions
1.2. Caution for safety
1.2.1. Toxic material
This product contains toxic materials that could cause illness if ingested.
1) Please keep imaging unit and toner cartridge away from children. The toner powder contained in the imaging unit and
toner cartridge may be harmful, and if swallowed, you should contact a doctor.
1.2.2. Electric shock and fire safety precautions
Failure to follow the following instructions could cause electric shock or potentially cause a fire.
1) Use only the correct voltage, failure to do so could damage the product and potentially cause a fire or electric shock.
2) Use only the power cable supplied with the product. Use of an incorrectly specified cable could cause the cable to
overheat and potentially cause a fire.
3) Do not overload the power socket, this could lead to overheating of the cables inside the wall and could lead to a fire.
4) Do not allow water or other liquids to spill into the product, this can cause electric shock. Do not allow paper clips, pins
or other foreign objects to fall into the product, these could cause a short circuit leading to an electric shock or fire hazard.
5) Never touch the plugs on either end of the power cable with wet hands, this can cause electric shock. When servicing
the product, remove the power plug from the wall socket.
6) Use caution when inserting or removing the power cord. When removing the power cord, grip it firmly and pull. The
power cord must be inserted completely, otherwise a poor contact could cause overheating leading to a fire.
7) Take care of the power cable. Do not allow it to become twisted, bent sharply around corners or power cable may be
damaged. Do not place objects on top of the power cable. If the power cable is damaged it could overheat and cause a
fire. Exposed cables could cause an electric shock. Replace the damaged power cable immediately, do not reuse or
repair the damaged cable. Some chemicals can attack the coating on the power cable, weakening the cover or exposing
cables causing fire and shock risks.
8) Ensure that the power sockets and plugs are not cracked or broken in any way. Any such defects should be repaired
immediately. Take care not to cut or damage the power cable or plugs when moving the machine.
9) Use caution during thunder or lightning storms. Samsung recommends that this machine be disconnected from the
power source when such weather conditions are expected. Do not touch the machine or the power cord if it is still
connected to the wall socket in these weather conditions.
10) Avoid damp or dusty areas, install the product in a clean well ventilated location. Do not position the machine near a
humidifier or in front of an air conditioner. Moisture and dust built up inside the machine can lead to overheating and
cause a fire or cause parts to rust.
11) Do not position the product in direct sunlight. This will cause the temperature inside the product to rise possibly leading
to the product failing to work properly and in extreme conditions could lead to a fire.
12) Do not insert any metal objects into the machine through the ventilator fan or other part of the casing, it could make
contact with a high voltage conductor inside the machine and cause an electric shock.
13)
1-2
When replacing the SMPS board, please wait 5 minutes after unplugging the power cord, then replace it. You
can get a shock by the electric discharge.
Copyright© 1995-2011 SAMSUNG. All rights reserved.
1. Precautions
1.2.3. Handling precautions
The following instructions are for your own personal safety to avoid injury and so as not to damage the product.
1) Ensure the product is installed on a level surface, capable of supporting its weight. Failure to do so could cause
the product to tip or fall.
2) The product contains many rollers, gears and fans. Take great care to ensure that you do not catch your fingers, hair or
clothing in any of these rotating devices.
3) Do not place any small metal objects, containers of water, chemicals or other liquids close to the product which if spilled
could get into the machine and cause damage or a shock or fire hazard.
4) Do not install the machine in areas with high dust or moisture levels, beside on open window or close to a humidifier or
heater. Damage could be caused to the product in such areas.
5) Do not place candles, burning cigarettes, etc on the product, These could cause a fire.
1.2.4. Assembly and Disassembly precautions
1) Replace parts carefully and always use Samsung parts. Take care to note the exact location of parts and also cable
routing before dismantling any part of the machine. Ensure all parts and cables are replaced correctly. Please carry out
the following procedures before dismantling the product or replacing any parts.
2) Ensure that power is disconnected before servicing or replacing any electrical parts.
3) Disconnect interface cables and power cables.
4) Only use approved spare parts. Ensure that part number, product name, any voltage, current or temperature rating
are correct.
5) When removing or re-fitting any parts do not use excessive force, especially when fitting screws into plastic.
6) Take care not to drop any small parts into the machine.
7) Handling of the OPC Drum
•
The OPC Drum can be irreparably damaged if it exposed to light. Take care not to expose the OPC Drum either
to direct sunlight or to fluorescent or incandescent room lighting. Exposure for as little as 5 minutes can damage
the surface of the photoconductive properties and will result in print quality degradation. Take extra care when
servicing the product. Remove the OPC Drum and store it in a black bag or other lightproof container. Take
care when working with the Covers (especially the top cover) open as light is admitted to the OPC area and can
damage the OPC Drum.
•
Take care not to scratch the green surface of OPC Drum Unit. If the green surface of the Drum Cartridge is
scratched or touched the print quality will be compromised.
Copyright© 1995-2011 SAMSUNG. All rights reserved.
1-3
1. Precautions
1.2.5. Disregarding this warning may cause bodily injury
1) Be careful with the high temperature part.
The fuser unit works at a high temperature. Use caution when working on the printer. Wait for the fuser unit to
cool down before disassembly.
2) Do not put fingers or hair into the rotating parts.
When operating a printer, do not put hand or hair into the rotating parts (Paper feeding entrance, motor, fan, etc.).
If do, you can get harm.
3) When you move the printer, use safe lifting and handling techniques.
This printer is heavy. Use the lifting handles located on each side of the machine. Back injury could be caused if
you do not lift carefully.
4) Ensure the printer is installed safely.
Ensure the printer is installed on a level surface, capable of supporting its weight. Failure to do so could cause the
printer to tip or fall possibly causing personal injury or damaging the printer.
5) Do not install the printer on a sloping or unstable surface. After installation, double check that the printer is stable.
1-4
Copyright© 1995-2011 SAMSUNG. All rights reserved.
1. Precautions
1.3. ESD precautions
Certain semiconductor devices can be easily damaged by static electricity. Such components are commonly called
“Electrostatically Sensitive (ES) Devices” or ESDs. Examples of typical ESDs are: integrated circuits, some field effect
transistors, and semiconductor “chip” components. The techniques outlined below should be followed to help reduce the
incidence of component damage caused by static electricity.
CAUTION
Be sure no power is applied to the chassis or circuit, and observe all other safety precautions.
1) Immediately before handling a semiconductor component or semiconductor-equipped assembly, drain off any
electrostatic charge on your body by touching a known earth ground. Alternatively, employ a commercially available
wrist strap device, which should be removed for your personal safety reasons prior to applying power to the unit
under test.
2) After removing an electrical assembly equipped with ESDs, place the assembly on a conductive surface, such as
aluminum or copper foil, or conductive foam, to prevent electrostatic charge buildup in the vicinity of the assembly.
3) Use only a grounded tip soldering iron to solder or desolder ESDs.
4) Use only an “anti-static” solder removal device. Some solder removal devices not classified as “anti-static” can
generate electrical charges sufficient to damage ESDs.
5) Do not use Freon-propelled chemicals. When sprayed, these can generate electrical charges sufficient to damage ESDs.
6) Do not remove a replacement ESD from its protective packaging until immediately before installing it. Most
replacement ESDs are packaged with all leads shorted together by conductive foam, aluminum foil, or a comparable
conductive material.
7) Immediately before removing the protective shorting material from the leads of a replacement ESD, touch the protective
material to the chassis or circuit assembly into which the device will be installed.
8) Maintain continuous electrical contact between the ESD and the assembly into which it will be installed, until
completely plugged or soldered into the circuit.
9) Minimize bodily motions when handling unpackaged replacement ESDs. Normal motions, such as the brushing together
of clothing fabric and lifting one’s foot from a carpeted floor, can generate static electricity sufficient to damage an ESD.
Copyright© 1995-2011 SAMSUNG. All rights reserved.
1-5
2. Product Specifications and Description
2. Product Specifications and Description
2.1. Product Specifications
2.1.1. Product Overview
1) Speed
•
Up to 20 ppm in A4 (21 ppm in Letter)
2) Processor
•
300 MHz
3) Printer Languages
•
SPL (Samsung Printer Language)
4) Memory
•
ML-216x : 8 MB
•
ML-216xW : 32 MB
5) Interface
•
Hi-Speed USB 2.0
•
Network Interface 802.11b/g/n wireless LAN (Only
ML-216xW)
6) Toner Cartridges
•
Initial : 0.7 K
•
Sales : 1.5 K
2.1.2. Specifications
Product Specifications are subject to change without notice. See below for product specifications.
2.1.2.1. General Print Engine
Item
Engine Speed
Specification
Simplex
Up to 20 ppm in A4 (21 ppm in Letter)
Duplex
Manual Duplex
Warm-up time
From Sleep
Less than 30 seconds
FPOT
From Ready
Less than 8.5 seconds
From Sleep
Less than 15.5 seconds
Resolution
2-1
Up to 1,200 x 1,200 dpi effective output
Copyright© 1995-2011 SAMSUNG. All rights reserved.
2. Product Specifications and Description
2.1.2.2. Controller and Software
Item
Specification
Processor
300 MHz
Memory
Std.
Optional
•
ML-216x : 8 MB
•
ML-216xW : 32 MB
N/A
Printer Languages
SPL (Samsung Printer Language)
Fonts
Windows Fonts
Default Driver
SPL (Samsung Printer Language)
Install
SPL (Samsung Printer Language)
Windows 2000/ XP(32/64bits)/ Vista(32/64bits)/ 2003 Server(32/64bits)/
2008 Server(32/64bits)/ 7(32/64bits)/ 2008 Server R2(64bits)
•
Driver
Supporting OS
Various Linux OS
•
RedHat Enterprise Linux WS 4, 5 (32/64 bit)
•
Fedora 5, 6, 7, 8, 9, 10, 11, 12, 13 (32/64 bit)
•
SuSE Linux 10.1 (32 bit)
•
OpenSuSE 10.2, 10.3, 11.0, 11.1, 11.2 (32/64 bit)
•
Mandriva 2007, 2008, 2009, 2009.1, 2010 (32/64 bit)
•
Ubuntu 6.06, 6.10, 7.04, 7.10, 8.04, 8.10, 9.04, 9.10, 10.04
(32/64 bit)
•
SuSE Linux Enterprise Desktop 10, 11 (32/64 bit)
•
Debian 4.0, 5.0 (32/64 bit)
Mac OS X 10.4~10.7
Interface
Application
WHQL
Windows Vista(32/64bits)/ Win7(32/64bits)/ 2003 Server(32/64bits)
Compatibility
Windows 2000/ XP(32/64bits)/ Vista(32/64bits)/ 2003 Server(32/64bits)/
2008 Server(32/64bits)/ 7(32/64bits)/ 2008 Server R2(64bits)
Parallel
N/A
USB
Hi-Speed USB 2.0
Wired Network
N/A
Wireless Network
Network Interface 802.11b/g/n wireless LAN
Samsung AnyWeb
Windows and Macintosh OS only
Samsung Easy Printer
Manager
Windows and Macintosh OS only
Samsung Printer Status
Windows OS only
Smart Panel
Linux OS only
Copyright© 1995-2011 SAMSUNG. All rights reserved.
2-2
2. Product Specifications and Description
2.1.2.3. Paper Handling
Item
Specification
Standard Capacity
150-sheet Multi Purpose Tray @ 80 g/m²
Max. Capacity
150-sheet @ 80 g/m²
Printing
Max. Size
216 x 356 mm (8.5" x 14.02")
Min. Size
76 x 183 mm (3.0" x 7.2")
Standard Cassette Tray
N/A
Capacity
Multi-purpose Tray
(Bin type)
Duplex
Printable Area
Plain Paper : 150 sheets @ 80 g/m²
•
Envelop : 1 sheet @ 80 g/m²
Media sizes
A4, A5, Letter, Legal, Executive, Folio, Oficio, ISO B5, JIS B5,
Envelope(Monarch, No.10, DL, C5), Custom
Media type
Plain ,Thin, Cotton, Recycled, Archive, Colored, Pre-Printed, Label, Bond,
Thick, Envelopes, Cardstock
Media weight
16~43 lb (60 to 163 g/m²)
Sensing
N/A
Optional Cassette Tray
Output Stacking
•
N/A
Capacity
•
Face-Down : 100 sheets @ 80 g/m²
Output Full sensing
N/A
Supporting
Yes (manual)
Media sizes
A4, A5, Letter, Legal, Executive, Folio, Oficio, ISO B5, JIS B5, Custom
Media types
Plain, Thin, Recycled, Archive,
Media weight
16~24 lb (60 to 90 g/m²)
Non-Printable Area
•
3 mm (0.12") from edge (Top, Bottom, Left, Right)
2.1.2.4. Consumables
Item
Specification
Toner Cartridge
Part name
Average yield
MLT-D101S
•
Average Cartridge Yield 1,500 standard pages
(Ships with 700 pages Starter Toner Cartridge)
NOTE
Declared yield value in accordance with ISO/IEC 19752.
NOTE
Depending on the options, percentage of image area, and job mode used, the toner cartridge’s lifespan may differ.
2-3
Copyright© 1995-2011 SAMSUNG. All rights reserved.
2. Product Specifications and Description
2.1.2.5. Maintenance Part
Item
Part Code
Fuser Unit
Life
•
JC91–01075A (220V)
•
JC91–01074A (110V)
30,000 Pages
Transfer Roller
JC66–02709A
30,000 Pages
Pick-Up Roller (Assy)
JC93–00525A
30,000 Pages
Feed Roller
JC66–02598B
30,000 Pages
2.1.2.6. Reliability and Service
Items
Specification
Printing Volume (SET AMPV)
75 sheets/month
MPBF
20,000 sheets
MTTR
30 min.
SET Life Cycle
30,000 sheets or 5 years (whichever comes first)
2.1.2.7. Environment
Item
Specification
Dimension (W x D x H)
Machine
332 x 215 x 178 mm (13.07 x 8.46 x 7.01 inches)
Weight
Machine with toner cartridge
3.88 kg (8.55 lbs)
Ready mode
Less than 30 dB (A)
Print mode
Less than 50 dB (A)
Temperature
Operation
10 ~ 32 °C (50 ~ 90 °F)
Humidity
Operation
20 ~ 80% RH
110 volt models
AC 110 - 127 V
220 volt models
AC 220 - 240 V
Average operating mode
Less than 230 W
Ready mode
Less than 35 W
Power save mode
Less than 1.0 W
Power off mode
Less than 0.45 W (0.1 W***)
Noise Level*
Power rating**
Power Consumption
* Sound Pressure Level, ISO 7779. Configuration tested: basic machine installation, A4 paper, simplex printing.
** See the rating label on the machine for the correct voltage (V), frequency (hertz) and type of current (A) for your machine.
*** For the machine that has a power switch.
Copyright© 1995-2011 SAMSUNG. All rights reserved.
2-4
2. Product Specifications and Description
2.1.2.8. Accessories
Image
Item
Remark
Power cord
Quick installation guide
Software CD
The software CD contains the printer drivers and software
applications.
Misc. accessories
Miscellaneous accessories included with your machine may
vary by country of purchase and specific model.
Stacker
2-5
Copyright© 1995-2011 SAMSUNG. All rights reserved.
2. Product Specifications and Description
2.1.3. Model Comparison Table
Samsung ML-216x
Samsung ML-167x
HP P1505n
Speed
20 ppm (A4)
16 ppm (A4)
18 ppm (A4)
Processor
300 MHz
300 MHz
266 MHz
Memory
8 MB
8 MB
2 MB
Print Language
SPL
SPL
PCL5e
Input
150 sheets Bin
150 sheets Bin
150 sheets Bin
Duplex
Manual
Manual
Manual
Interface
High Speed USB 2.0
High Speed USB 2.0
High Speed USB 2.0
Size (mm)
332 x 215 x 178 mm
341 x 224 x 184 mm
349 x 238 x 196 mm
Toner
Standard 1.5K
Standard 1.5K
Standard 1.6K
Image
Copyright© 1995-2011 SAMSUNG. All rights reserved.
2-6
2. Product Specifications and Description
2.2. System Overview
This chapter describes the functions and operating principal of the main component.
2.2.1. Front View
NOTE
•
This illustration may differ from your machine depending on its model.
•
Some features and optional goods may not be available depending on model or country.
7
6
1
2
3
4
5
1
Control panel
6
Output tray
2
Top cover
7
Output support
3
Toner cartridge
4
Paper width guides
5
Tray
2-7
Copyright© 1995-2011 SAMSUNG. All rights reserved.
2. Product Specifications and Description
2.2.2. Rear View
NOTE
•
This illustration may differ from your machine depending on its model.
•
Some features and optional goods may not be available depending on model or country.
1
2
1
USB Port
2
Power receptacle
Copyright© 1995-2011 SAMSUNG. All rights reserved.
2-8
2. Product Specifications and Description
2.2.3. Paper Path
The following diagram displays the path the paper follows during the printing process.
2-9
Copyright© 1995-2011 SAMSUNG. All rights reserved.
2. Product Specifications and Description
2.2.4. System Layout
This model consists of the engine parts, hardware parts, firmware. The engine parts consists of the mechanical parts
comprising Frame, Toner Cartridge, Drive Unit, Transfer roller, Pick up unit, Fuser, Bin-tray. The hardware parts consists of
the main board, SMPS/HVPS board, OPE board, PC interface.
1
LSU
6
Plate-Bottom
2
Toner Cartridge
7
Fuser Unit
3
Transfer roller
8
Exit roller1
4
Feed roller
5
Pick-Up roller
Copyright© 1995-2011 SAMSUNG. All rights reserved.
2-10
2. Product Specifications and Description
2.2.4.1. Feeding Part
It is consists of a bin-type tray, pick-up roller, friction pad and parts related to paper feed initialization.
1) Input Tray
This model has a bin-type tray.
It takes a center loading method and applies ‘friction pad separating method.’
The side guide can be adjusted for various types of papers from A6 to legal size paper. It has a paper detecting function,
paper arranging function.
2) Pick-up roller
It has functions such as a paper pickup function, driving control function, paper feeding function, and removing electronic
static function. Pick up roller is driven by clutch.
2-11
Copyright© 1995-2011 SAMSUNG. All rights reserved.
2. Product Specifications and Description
2.2.4.2. Transfer Roller
The transfer roller delivers the toner of the OPC drum to the paper.
• Life Span : Print over 30,000 sheets (in 15~30°C)
2.2.4.3. Drive Unit
In ML-216x series, the driving device consists of OPC, Pick- up, Feed, Fuser, Gear- Train connected with Mounting
member. A step motor for driving is assembled to the left frame.
• Driving Frequency: Step Motor 810 PPS (1013 rpm)
• It is a power delivery unit by gearing: Step Motor → Pick-up/ Feeder/ OPC/ Fuser/ Exit
Copyright© 1995-2011 SAMSUNG. All rights reserved.
2-12
2. Product Specifications and Description
2.2.4.4. Fuser Unit
This unit consists of Heat Roller, a Thermostat, and Thermistor, etc. It fuses the toner that was transferred by the transfer
roller onto the paper, by applying heat and pressure to complete fusing process.
1) Thermostat
When a heat lamp is overheated, a Thermostat cuts off the main power to prevent over- heating.
•
Thermostat Type : Non- Contact type Thermostat
•
Control Temperature : 195°C ± 5°C
2) Thermistor
It is a temperature detecting sensor.
•
Temperature Resistance : 7 kΩ(180°C)
3) Heat roller
The heat roller transfers the heat from the lamp to apply a heat on the paper.
The surface of a heat roller is coated with Teflon, so toner does not stick to the surface.
4) Pressure roller
A pressure roller mounted under a heat roller is made of a silicon resin, and the surface also is coated with Teflon. When a
paper passes between a heat roller and a pressure roller, toner adheres to the surface of a paper and is permanently fused.
5) Halogen Lamp
2-13
•
Voltage : 120 V (115 ± 5 %) / 220 V : 230 ± 5 %
•
Capacity : 850 Watt ± 25 W
Copyright© 1995-2011 SAMSUNG. All rights reserved.
2. Product Specifications and Description
6) Items for safety
•
•
Protecting device for overheating
-
1st protection device: Hardware cuts off when overheated
-
2nd protection device: Software cuts off when overheated
-
3rd protection device: Thermostat cuts off main power.
Safety device
-
A fuser power is cut off when a front cover is opened.
-
Maintain a temperature of fuser cover’s surface under 80°C for user, and attach a caution label at where
customer can see easily when customer open a rear cover.
Copyright© 1995-2011 SAMSUNG. All rights reserved.
2-14
2. Product Specifications and Description
2.2.4.5. LSU (Laser Scanner Unit)
It is the core part of the LBP which switches from the video data received to the controller to the electrostatic latent image
on the OPC drum by controlling laser beam, exposing OPC drum, and turning principle of polygon mirror. The OPC drum is
turned with the paper feeding speed. The HSYNC signal is created when the laser beam from LSU reaches the end of the
polygon mirror, and the signal is sent to the controller. The controller detects the HSYNC signal to adjust the vertical line of
the image on paper. In other words, after the HSYNC signal is detected, the image data is sent to the LSU to adjust the left
margin on paper. The one side of the polygon mirror is one line for scanning.
2-15
Copyright© 1995-2011 SAMSUNG. All rights reserved.
2. Product Specifications and Description
2.2.4.6. Toner Cartridge
By using the electronic photo process, it creates a visual image. In the toner cartridge, the OPC unit and the developing
unit are in a body. The OPC unit has OPC drum and charging roller, and the developing unit has toner, supply roller,
developing roller, and blade.
• Developing Method : Non magnetic single component non-contacting method
• Toner : Non magnetic single component pulverized type toner
• The life span of toner (ISO 19752 pattern / A4 standard)
- Initial toner : 0.7 K
- Sales toner : 1.5K
• OPC Cleaning : Collect the toner by using cleaning blade
• Handling of wasted toner : Collect the wasted toner in the cleaning frame by using cleaning blade
• Classifying device for toner cartridge: ID is classified by CRUM
Copyright© 1995-2011 SAMSUNG. All rights reserved.
2-16
2. Product Specifications and Description
2.2.5. Hardware configuration
The ML-216x series Electrical Circuit System consists of the following:
• Main board (System board)
• OPE board
• HVPS/SMPS board
• Wireless board (Only ML-216xW)
Diagram of the ML-216x series Electrical Circuit
LSU
OP E
8P
16P
TOP Cover
Micro Switch
MAIN
Controller
3.3V
LSU
CONTROL
+24V
24VS
3.3V
Clock
Generator
SDRAM(e mbbe d)
(8MByte )
SMP S & HVP S
CLK
24V
12 MHz
Te mujin
Core : 300 MHz
ARM926 EJ S
FUSER ON
RESET IC
DEV
SPI Fla sh
(e mbbe d)
(0.5Mbyte)
MHV
Supply
FUSER
CONTROL
THV
OPC
AC INLET
S te ppe r Motor
Controlle r IC
USB Device
00
00
S
4P
M
D
DRUM
T
2P
C R UM
THERMISTOR
DEVELOPER Unit
3P
4P
2P
5P
Thermis tor
Thermos tat
SOL
FUSER Unit
MT
STEP
PickUp
Clutch
FEED
Sens or
EMPTY
Sens or
Ma in
Motor
ML-216x series has a system board of integrated engine controller and video controller.
The engine controller controls all modules required to print, that is, LSU, HVPS/SMPS, Fuser, Motor etc. It communicates
with the video control block inside CPU for printing. And it has the interface for all video sync signal to print out
the video data.
The video controller receives print data from the host through network or USB Port. It takes this information and generates
printable video bitmap data.
The main board is adopted 300 MHz TEMUJIN CPU that is integrated with engine controller, video controller, SDRAM,
Flash ROM. It uses SDRAM and Flash ROM inside the ASIC chip.
2-17
Copyright© 1995-2011 SAMSUNG. All rights reserved.
2. Product Specifications and Description
2.2.5.1. Main board
TEMUJIN chip (TEMUJIN-C : wireless model) is applied to the main processor. Its process speed is 300 MHz.
It is integrated engine controller, video controller, SDRAM, Flash ROM.
For ML-216x, the internal Flash ROM is applied to Boot. For ML-216xW, the external Flash ROM is applied to Boot.
USB is the embedded type.
[Main board diagram]
Copyright© 1995-2011 SAMSUNG. All rights reserved.
2-18
2. Product Specifications and Description
[Main board image]
• ML-216x
• ML-216xW (Wireless Model)
• Connection
1
OPE connector
7
USB device connector
2
LSU connector
8
Fuser thermistor interface connector
3
Wireless module interface connector
9
CRUM connector
4
SMPS/HVPS interface connector
10
Engint motor connector
5
Pick up connector
6
Sensor connector
• Information
- Part Code : JC92–02393A (ML-216x) / JC92–02397A (ML-216xW)
- Part Name : PBA-MAIN
2-19
Copyright© 1995-2011 SAMSUNG. All rights reserved.
2. Product Specifications and Description
2.2.5.2. OPE board
The OPE board is not a controller. It receives the KEY input from ASIC. LED on/off also is controlled by ASIC.
[OPE board image]
[OPE board image]
• Information
- Part Code : JC92–02392A / JC92–02392B (Wireless model)
- PBA name : OPE
• Connection
1
Direct sholder flat cable
Copyright© 1995-2011 SAMSUNG. All rights reserved.
2-20
2. Product Specifications and Description
2.2.5.3. Wireless LAN board (ML-216xW only)
The Wireless LAN Module supports 802.11b/g/n. It communicates with main board via SPI.
[WLAN board image]
• Information
- Part Code : JC92–02402A
- PBA name : PBA-WNPC
• Connection
1
INTERFACE CONNECTOR TO SYSTEM BOARD
(JC39-01562A , FFC CABLE-WLAN)
2-21
Copyright© 1995-2011 SAMSUNG. All rights reserved.
2. Product Specifications and Description
2.2.5.4. SMPS/HVPS board
ML-216x series has a power board of integrated SMPS and HVPS.
The SMPS (Switching Mode Power Supply) Board supplies electric power to the Main Board and other boards through a
Main Controller. The voltage provided includes +24V from a 110V/220V power input.
The HVPS board generates high-voltage channels which includes MHV, DEV DC, DEV AC, SUPPLY, THV.
[SMPS/HVPS board image]
• Specification
- General Input / Output Voltage
- AC 110V (110V ~ 127V)
- AC 220V (220V ~ 240V)
- Input Current : 8.0A (110V) / 6.3A (220V)
- Output Power: 43.2W
▪ DC 24V : 43.2W
• Information
110V
220V
Part Code
JC44–00208A
JC44–00209A
PBA name
SMPS/HVPS V1
SMPS/HVPS V2
• Connection
1
Main Board interface connector
2
AC_Inlet
3
COVER OPEN/CLOSE Switch
4
FUSER_AC Output
Copyright© 1995-2011 SAMSUNG. All rights reserved.
2-22
2. Product Specifications and Description
• Input / Output connector
AC Output Connector( CN1 )
Pin Assign
Pin No.
1
AC_L
2
AC_N
Description
AC Output for Heater Controller
DC Output Connector (CN2)
2-23
PIN NO
PIN ASSIGN
Description
1
THV_READ
HVPS
2
PWM_MHV
HVPS
3
nTHV_EN
HVPS
4
PWM_DEV_DC
HVPS
5
+3.3V OPEN
COVER ON, OFF DETECT
6
PWM_DEV_AC
HVPS
7
+3.3V
COVER ON, OFF DETECT
8
nDEV_EN
HVPS
9
PWM_THV
HVPS
10
VPP_DEV_AC
HVPS
11
GND
Common Ground
12
+24VS1
Relay, Fuser
13
GND
Common Ground
14
GND
Common Ground
15
+24V
SMPS
16
RELAY_ON
AC RELAY ON (ACTIVE HIGH)
17
+24V
SMPS
18
GND
Common Ground
19
+24V
SMPS
20
FUSER_ON
FUSER_ON (ACTIVE HIGH)
Copyright© 1995-2011 SAMSUNG. All rights reserved.
2. Product Specifications and Description
2.2.5.5. Electrical Parts Location
1) Sensors
No.
Description
Controller
Function
S1
Photo interrupter (Feed Sensor)
PBA sensor
Paper detection
S2
Photo interrupter (width Sensor)
PBA sensor
Paper detection
S3
Switch Front Cover
SMPS
Cover Open detection
Motor, Clutch
No.
Description
M1
Main motor
C1
Pick-Up clutch
Copyright© 1995-2011 SAMSUNG. All rights reserved.
2-24
2. Product Specifications and Description
2.2.6. Engine F/W Contol Algorithm
2.2.6.1. Feeding
If feeding from a tray, the drive of the pickup roller is controlled by controlling the clutch. The on/off of the clutch is
controlled by controlling the general output port or the external output port. While paper moves, occurrence of Jam
is judged as below.
Item
Description
JAM 0
•
After picking up, paper does not reach the Feed Sensor within a predetermined time.
or
•
After picking up, if the feed sensor is not on, re-pick up will be initiated. After re-picking up, if the
feed sensor is not on after certain time, it is JAM 0
•
Even though the paper reaches to the feed sensor, the feed sensor does not detect the lead edge of
the paper.
•
After the leading edge of the paper passes the feed sensor, the trailing edge of the paper does not clear
the sensor the feed sensor after predetermined period of time.
Paper Empty
JAM 1
2.2.6.2. Transfer
The charging voltage, developing voltage and the transfer voltage are controlled by PWM (Pulse Width Modulation). The
each output voltage is changeable due to the PWM duty. The transfer voltage admitted when the paper passes the transfer
roller is decided by environment conditions. The resistance value of the transfer roller is changed due to the surrounding
environment or the environment of the set, and the voltage value, which changes due to the environment, is changed through
the AD converter. The voltage value for impressing to the transfer roller is decided by the changed value.
2-25
Copyright© 1995-2011 SAMSUNG. All rights reserved.
2. Product Specifications and Description
2.2.6.3. Fusing
The temperature change of the heat roller’s surface is changed to the resistance value through the use of a thermistor. The
Main Board uses the resistance value of the Thermistor and converts it to a voltage value through the use of an AD
converter, the temperature is decided based on the voltage value read. The AC power is controlled by comparing the target
temperature to the value from the thermistor. If the value from the thermistor is out of controlling range while controlling
the fusing, the error stated in the below table occurs.
• Open Heat Error
When the engine operates the warm-up process, if the temperature of the fixing unit is not higher than a specified
temperature within a predetermined time, the engine defines Open Heat Error. When this error is detected, the engine
stops all functions and keeps the error state. Also, the engine informs the error status of the main system, so it can take
appropriate action; and then the error message is displayed at LCD window or LED informing the error status of the user.
• Low Heat Error
When the engine is at stand-by, printing or warm-up mode, if the temperature of the fixing unit is lower than the
specified temperature at each state and the lower temperature state is maintained during the specified time, the engine
defines Low Heat Error. When this error is detected, the engine stops all functions and keeps it at the error state. Also,
the engine informs the error status of the main system, so it can take appropriate action; and then the error message
is displayed at LCD window or LED informing the error status of the user.
• Over Heat Error
For overall engine state, if the temperature of the fixing unit is higher than the specified temperature and the temperature
state is detected for a specific duration, then the engine defines Over Heat Error. When this error is detected, the engine
stops all functions and keeps it at the error state. Also, the engine informs the error status of the main system, so it
can take appropriate action; and then the error message is displayed at LCD window or LED informing the error
status of the user.
2.2.6.4. LSU
LSU receives the image data from PVC or HPVC and make the latent image on OPC surface. It uses the single beam,
LD. The errors related to LSU are as follows:
• By Lready
When the printing is started, the engine drives the polygon motor of LSU. After the specified time is elapsed, if the
motor is not in a ready status, the engine detects the error that the polygon motor is not in a ready status. If this error
happens, the engine stops all functions and keeps it at the error state. Also, the engine informs the error status of the
main system and the error message is displayed at LCD window or LED informing the error status of the user.
• By Hsync
When the polygon motor is ready, the LSU sends out the signal called Hsync and used to synchronize with each image
line. So, if the engine does not detect consecutively the signal for a fixed time, it defines the Hsync Error. If this error
happens, the engine stops all functions and keeps it at the error state. Also, the engine informs the error status of the
main system and then the error message is displayed at LCD window or LED informing the error status of the user. LSU
Error Recovery: If the LReady or Hsync error happens, the paper is exited before the error code is initiated. The engine
mode is changed to recovery mode and the engine informs the main system of the engine mode. The engine rechecks
the LSU error, if the error does not reoccur printing is resumed.
Copyright© 1995-2011 SAMSUNG. All rights reserved.
2-26
2. Product Specifications and Description
2.2.7. Software Descriptions
2.2.7.1. Software system overview
The software system of this model is constructed with
• Host Software part that the application software operated in Window and Web Environment
• Firmware parts that is a Embedded software controls printing job.
2.2.7.2. Architecture
P rin ter /MFP
HOS T
S o ftware
Driver
Web -b as ed
Ap p licatio n
Firm ware
S tan d -alo n e
Ap p licatio n
Ap p licatio n
(Em u latio n )
Kern el
Host Software is made up of
1) Graphic User Interface offers the various editing functions to user in Host.
2) Driver translates the received document to a Printing Command language which printer can understand and transfers
data to spooler.
3) Stand-alone Application offers the various printing application such as Easy Printer Manager, Printer Status in Window
system.
4) Web-based-Application offers the same functions as Stand-alone Application in Web environment.
Firmware is made up of
1) Application (Emulation) that is a interpreter translates data received from Host to a printing language (PCL, PS, GDI,
etc.) to be able to make the user to take same output as originally one what composed in Host.
2) Kernel controls and manage the whole procedure including Control flow and Printing Job before transferring to Engine
system.
2-27
Copyright© 1995-2011 SAMSUNG. All rights reserved.
2. Product Specifications and Description
2.2.7.3. Data and Control Flow
Ho s t
Firmwa re
US B
Driver
- P CL3, P S 3
Web-b as ed
- Do cument Manag ement
Q
p
s
u
KERNEL
S ys tem
- Netwo rk Ad minis tratio n
- S tatus Mo nito r
- Remo te Co ntro l P anel
S tan d-alo n e
- P rinter S etting Utility
En g in e
N
p
o
j
u
p
s
- Netwo rk Ad minis tratio n
Netwo rk
In terface
Ap p licatio n
Ap p licatio n
(Em u latio n )
- P CL
- PS3
- S tatus Mo nito r
The above Block Diagram is explained that:
Host Side is made up of
1) Driver that is Windows application software translate printed data to one of printer language and create spooler file.
2) Web-based Application that offer a various printer additional functions, management of printing job, printer
administration, Status monitor to monitoring the printer status by real time in Web, independent environment on OS.
3) Stand-alone Application that is a similar Window software as same as above 2.
4) Port Monitor that manages the network communication between spooler and Network Interface Card, or various
additional application and Network Interface Card,(this is, at first, make communication logical port, manage the data,
transfer them from spooler to network port, and offer the result of printing).
Firmware Side is made up of
1) Network Interface Card is that relay the communication between Host and kernel using various network protocol.
2) Kernel is that manages the flow control of emulation procedure, receiving data from Host or Network card and printing
with engine & rendering job.
Copyright© 1995-2011 SAMSUNG. All rights reserved.
2-28
2. Product Specifications and Description
3) Emulation is that interprets the various output data from selected emulation.
4) Engine is that prints rendered bit-map data to paper with required size and type by Kernel.
And then, for Job Spooling function for Multi-User, Multi-Printing that is occurred in Network printing and various
additional printing functions, this Kernel use max. 10 Queuing systems in a memory.
In Printing, the two procedures are
1) Case of using USB Port
•
After user start to print the wanted document to PCL string or compressed GDI bit-map data, the Driver translates
the all graphic data of the client PC and send data to host spooler. And then the spooler sends the data stream to
the printer via USB port.
•
Kernel receives this data from Host, and then select emulation fit to data and start selected one. After emulation job
end, Kernel sends the output bit-map data to Engine using Printer Video Controller (by clock type for LSU).
•
Engine print the received data to required paper with the sequential developing process.
2) Case of using Network Interface Card
2-29
•
After user start to print the wanted document to PCL string or compressed GDI bit-map data, Driver translate the
all graphic data of it and send data to host spooler.
•
If so, Port monitor managing network port receives data from spooler and sends a data stream to the Network
Interface Card.
•
Network interface card receives it and send to Kernel part.
•
Kernel receives this data from Host, and then select emulation fit to data and start selected one. After emulation job
end, Kernel sends the output bit-map data to Engine using Printer Video Controller (by clock type for LSU).
•
Engine print the received data to required paper with the sequential developing process.
Copyright© 1995-2011 SAMSUNG. All rights reserved.
3. Disassembly and Reassembly
3. Disassembly and Reassembly
3.1. Precautions when replacing parts
3.1.1. Precautions when assembling and disassembling
• Use only approved Samsung spare parts. Ensure that part number, product name, any voltage, current or temperature
rating are correct. Failure to do so could result in damage to the machine, circuit overload, fire or electric shock.
• Do not make any unauthorized changes or additions to the printer, these could cause the printer to malfunction and
create electric shock or fire hazards.
• Take care when dismantling the unit to note where each screw goes. There are 19 different screws. Use of the wrong
screw could lead to system failure, short circuit or electric shock.
• Do not disassemble the LSU unit. Once it is disassembled dust is admitted to the mirror chamber and will seriously
degrade print quality. There are no serviceable parts inside.
• Regularly check the condition of the power cord, plug and socket. Bad contacts could lead to overheating and firfe.
Damaged cables could lead to electric shock or unit malfunction.
3.1.2. Preautions when handling PBA
Static electricity can damage a PBA, always used approved anti-static precautions when handling or storing a PBA.
• Precautions when moving and storing PBA
1) Please keep PBA in a conductive case, anti-static bag, or wrapped in aluminum foil.
2) Do not store a PBA where it is exposed to direct sunlight.
• Precautions when replacing PBA
1) Disconnect power connectors first, before disconnecting other cables.
2) Do not touch any soldered connections, connector terminals or other electronic parts when handling insulated parts.
• Precautions when checking PBA
1) Before touching a PBA, please touch other grounded areas of the chassis to discharge any static electrical charge
on the body.
2) Take care not to touch the PBA with your bare hands or metal objects as you could create a short circuit or get an
electric shock. Take extra care when handling PBAs with moving parts fitted such as sensors, motors or lamps as
they may get hot.
3) Take care when fitting, or removing, screws. Look out for hidden screws. Always ensure that the correct screw is
used and always ensure that when toothed washers are removed they are refitted in their original positions.
Copyright© 1995-2011 SAMSUNG. All rights reserved.
3-1
3. Disassembly and Reassembly
3.1.3. Releasing Plastic Latches
Many of the parts are held in place with plastic latches. The latches break easily; release them carefully.
To remove such parts, press the hook end of the latch away from the part to which it is latched.
3-2
Copyright© 1995-2011 SAMSUNG. All rights reserved.
3. Disassembly and Reassembly
3.2. Screws used in the printer
The screws listed in the table below are used in this printer. Please ensure that, when you disassemble the printer, you keep
a note of which screw is used for which part and that, when reassembling the printer, the correct screws are used in the
appropriate places.
Part Code
Location
Description
Qty
6003-000196
FRAME
SCREW-TAPTYPE;PWH,+,B,M3,L10,NI PLT,SWRCH18A
18
6003-000269
FRAME
SCREW-TAPTYPE;BH,+,-,S,M3,L6,ZPC(WHT),SWRCH18A,-
13
6006-001078
FUSER
SCREW-TAPTYPE;PH,+,WSP,B,M3,L10,ZPC(WHT),SWRCH18A
1
6003-000269
FUSER-LOWER
SCREW-TAPTYPE;BH,+,-,S,M3,L6,ZPC(WHT),SWRCH18A,-
2
6003-000196
FUSER-UPPER
SCREW-TAPTYPE;PWH,+,B,M3,L10,NI PLT,SWRCH18A
1
6003-000282
FUSER-UPPER
SCREW-TAPTYPE;BH,+,-,B,M3,L8,ZPC(BLK),SWRCH18A,-
7
6003-000196
FRAME-PATH
SCREW-TAPTYPE;PWH,+,B,M3,L10,NI PLT,SWRCH18A
3
6003-000269
FRAME
MAIN-LEFT
SCREW-TAPTYPE;BH,+,-,S,M3,L6,ZPC(WHT),SWRCH18A,-
6
6003-000282
FRAME
MAIN-LEFT
SCREW-TAPTYPE;BH,+,-,B,M3,L8,ZPC(BLK),SWRCH18A,-
2
6002-000308
FRAME
MAIN-RIGHT
SCREW-TAPTYPE;PH,+,-,B,M2.6,L6,ZPC(WHT),SWRCH18A,-
4
6003-000269
FRAME
MAIN-RIGHT
SCREW-TAPTYPE;BH,+,-,S,M3,L6,ZPC(WHT),SWRCH18A,-
2
6003-000269
FRAME
MAIN-MIDDLE
SCREW-TAPTYPE;BH,+,-,S,M3,L6,ZPC(WHT),SWRCH18A,-
5
6003-000282
LSU
SCREW-TAPTYPE;BH,+,-,B,M3,L8,ZPC(BLK),SWRCH18A,-
5
6003-000269
FRAME-FEED IDLE
SCREW-TAPTYPE;BH,+,-,S,M3,L6,ZPC(WHT),SWRCH18A,-
2
6003-000282
COVER-TOP
SCREW-TAPTYPE;BH,+,-,B,M3,L8,ZPC(BLK),SWRCH18A,-
2
6003-000196
MAINLINE
SCREW-TAPTYPE;PWH,+,B,M3,L10,NI PLT,SWRCH18A
4
6003-000269
MAINLINE
SCREW-TAPTYPE;BH,+,-,S,M3,L6,ZPC(WHT),SWRCH18A,-
5
Copyright© 1995-2011 SAMSUNG. All rights reserved.
3-3
3. Disassembly and Reassembly
3.3. Replacing the Main SVC parts
3.3.1. Cover
1. Open the top cover. Remove the right cover from the
rear and bottom hooks.
4. Open the COVER-OPEN. Release both jam lever from
it.
2. Remove the left cover from the rear and bottom hooks.
5. Remove the COVER-OPEN after releasing it from the
COVER-TOP.
3. Remove the rear cover after removing 3 screws.
3-4
Copyright© 1995-2011 SAMSUNG. All rights reserved.
3. Disassembly and Reassembly
6. Unplug the OPE connector from the main board.
8. Remove the front cover after remove 2 screws.
7. Remove the COVER-TOP.
Copyright© 1995-2011 SAMSUNG. All rights reserved.
3-5
3. Disassembly and Reassembly
3.3.2. Main board
1. Remove 1 screw. (In case of wireless model, remove
the WLAN board.)
2. Unplug all connectors. Remove 2 screws. And then
remove the main board.
3.3.3. Fuser Unit
1. Remove the main board. (Refer to 3.3.2)
3. Release the fuser unit after removing 3 screws.
2. Unplug the fuser connector.
3-6
Copyright© 1995-2011 SAMSUNG. All rights reserved.
3. Disassembly and Reassembly
3.3.4. SMPS/HVPS board
1. Remove the main board. (Refer to 3.3.2)
2. Unplug the fuser connector. Remove 8 screws. And
release the SMPS/HVPS board.
3.3.5. Drive Unit
1. Release the Drive Unit after removing 4 screws.
Copyright© 1995-2011 SAMSUNG. All rights reserved.
3-7
3. Disassembly and Reassembly
3.3.6. LSU
1. Remove all covers. (Refer to 3.3.1)
2. Remove 2 screws securing the LSU cover.
4. Unplug 2 flat cables. Remove 3 screws. And release
the LSU.
3. Remove 2 screws securing the LSU cover. Unplug the
motor connector. And release the LSU cover.
3-8
Copyright© 1995-2011 SAMSUNG. All rights reserved.
3. Disassembly and Reassembly
3.3.7. Feed Sensor PBA
1. Remove the rear cover. (Refer to 3.3.1)
2. Unplug the connector after releasing the Feed Sensor
PBA.
3.3.8. Pick up roller
1. Remove 2 screws from the bottom.
Copyright© 1995-2011 SAMSUNG. All rights reserved.
2. Release the pick up roller.
3-9
3. Disassembly and Reassembly
3.3.9. Motor
1. Release the left frame after removing 6 screws.
3-10
2. Release the motor after removing 2 screws.
Copyright© 1995-2011 SAMSUNG. All rights reserved.
3. Disassembly and Reassembly
3.3.10. Transfer roller
1. Open the top cover. Remove the toner cartridge.
4. Remove the rear cover after removing 3 screws.
2. Remove the right cover from the rear and bottom hooks.
5. Push the Bush-TR from the rear and remove the
Transfer roller from the front.
3. Remove the left cover from the rear and bottom hooks.
6. When reassembling it, push the bush-TR in two
direction like below picture.
Copyright© 1995-2011 SAMSUNG. All rights reserved.
3-11
4. Alignment and Troubleshooting
4. Alignment and Troubleshooting
4.1. Alignment and Adjustments
This chapter describes the main functions for service, such as the product maintenance method, the test output related to
maintenance and repair, Jam removing method, and so on. It includes the contents of manual.
4.1.1. Control Panel
NOTE
This control panel may differ from your machine depending on its model. There are various types of control panels.
4-1
1
Toner LED
Shows the status of the toner.
2
Status LED
Shows the status of your machine.
3
WPS
Configures the wireless network connection easily without a computer.
Copyright© 1995-2011 SAMSUNG. All rights reserved.
4. Alignment and Troubleshooting
4
Print Screen
•
Prints the screen
•
Press this button and the green LED will start blinking. If you
want to print only the active screen, release the button when the
green LED stops blinking. If you want to print the whole screen,
release the button while it’s blinking.
NOTE
•
Power
You can only use this function with USB-connected machine.
▪
When printing the active window/whole monitor screen using
the print screen button, the machine may use more toner
depending on what is being printed.
▪
You can only use this function if the machine’s Easy Printer
Manager program is installed.
Press and hold this button for about 10 seconds until the green
LED blinks slowly, and release.
Press and hold this button for about 10 seconds until the green
LED is on (not blinking), and release.
Manual print
•
5
▪
Prints event log report & supplies info report & usage counter
•
•
Print Screen can only be used in the Windows and Macintosh
operating systems.
Prints configuration sheet and Network configuration sheet
•
•
▪
Press this button each time you load a sheet of paper in the tray
if you have selected Manual Feeder for Source in your printer
driver.
You can turn the power off or wake the machine up from the sleep mode
with this button.
Copyright© 1995-2011 SAMSUNG. All rights reserved.
4-2
4. Alignment and Troubleshooting
4.1.2. Understanding the status LED
Status LED
Status
Description
Off
Green
Red
The machine is off-line.
Blinking
When the backlight slowly blinks, the machine is receiving data from the
computer.
•
When the backlight blinks rapidly, the machine is printing data.
On
The machine is on-line and can be used.
Blinking
A minor error has occurred and the machine is waiting for the error to be cleared.
When the problem is cleared, the machine resumes.
On
Orange
•
•
The cover is opened. Close the cover.
•
There is no paper in the tray. Load paper in the tray.
•
The machine has stopped due to a major error.
Blinking
Upgrading firmware.
On
A paper jam has occurred.
Toner LED / WPS LED
Status
Description
Orange
(Toner
LED)
Blue
(WPS
LED)**
Blue
Blinking
Small amount of toner is left in the cartridge. The estimated cartridge life of toner is
close. Prepare a new cartridge for replacement. You may temporarily increase the
printing quality by redistributing the toner.
On
A toner cartridge has almost reached its estimated cartridge life*. It is recommended
to replace the toner cartridge.
Off
All toner cartridges are at normal capacity.
Blinking
The machine is connecting to a wireless network.
On
The machine is connected to a wireless network.
Off
The machine is disconnected from a wireless network.
On
The machine is in power save mode.
Off
The machine is in ready mode or the machine’s power is off.
(Power
LED)
* Estimated cartridge life means the expected or estimated toner cartridge life, which indicates the average capacity of
print-outs and is designed pursuant to ISO/ IEC 19752. The number of pages may be affected by operating environment,
printing interval, graphics, media type and media size. Some amount of toner may remain in the cartridge even when
red LED is on and the printer stops printing.
** Wireless model only
4-3
Copyright© 1995-2011 SAMSUNG. All rights reserved.
4. Alignment and Troubleshooting
4.1.3. Jam Removal
NOTE
To avoid tearing the paper, pull the jammed paper out slowly
and gently.
In tray
1) Remove the original jammed paper by gently pulling it
straight out.
Inside the machine
3) Open the fuser unit cover.
NOTE
The fuser unit area is hot. Take care when removing paper
from the machine.
1) Before opening the top cover, close the output support
first.
2) Open the top cover. And then remove the toner
cartridge.
1
2
Copyright© 1995-2011 SAMSUNG. All rights reserved.
4-4
4. Alignment and Troubleshooting
4) Remove the original jammed paper by gently pulling it
straight out.
5) Re-install the toner cartridge. Close the fuser unit cover.
6) Close the top cover and open the output tray.
4-5
Copyright© 1995-2011 SAMSUNG. All rights reserved.
4. Alignment and Troubleshooting
4.1.4. Periodic Defective Image
If an image defects appears at regular intervals on the printed-paper, it is due to a faulty or damaged roller. Refer to the table
below and check the condition of the appropriate roller.
Roller
Period (mm)
Phenomenon
Defective part
1
Pressure Roller
62.8 mm
Background
Fuser Unit
2
Heat Roller
63.7 mm
Black spot and image ghost
3
Charging Roller
26.7 mm
Black Spot and line and periodic band
4
OPC Drum
62.9 mm
White and Black Spots
5
Developing Roller
33.7 mm
White spot, Horizontal black band
6
Supply Roller
78.2 mm
Periodic Band by little difference of density
7
Transfer Roller
39.3 mm
Ghost, Damaged image by abnormal
transfer
Copyright© 1995-2011 SAMSUNG. All rights reserved.
Toner Cartridge
Transfer roller
4-6
4. Alignment and Troubleshooting
4.1.5. Useful management tools
4.1.5.1. Using Samsung Easy Printer Manager (Windows and Macintosh only)
NOTE
•
This feature may not be available depending on model or optional goods.
•
Available for Windows or Macintosh OS users only.
•
For Windows, Internet Explorer 6.0 or higher is the minimum requirement for Samsung Easy Printer Manager.
Samsung Easy Printer Manager is an application that combines Samsung machine settings into one location. Samsung
Easy Printer Manager combines device settings as well as printing environments, settings/actions and launching. All of
these features provide a gateway to conveniently use your Samsung machine. Samsung Easy Printer Manager provides two
different user interfaces for the user to choose from: the basic user interface and the advanced user interface. Switching
between the two interfaces is easy: just click a button.
Understanding Samsung Easy Printer Manager
To open the program:
• For Windows, Select Start > Programs or All Programs > Samsung Printers > Samsung Easy Printer Manager >
Samsung Easy Printer Manager.
• For Macintosh, Open the Applications folder > Samsung folder > Samsung Easy Printer Manager.
The Samsung Easy Printer Manager interface is comprised of various basic sections as described in the table that follows:
NOTE
The screenshot may differ depending on operating system you are using.
4-7
Copyright© 1995-2011 SAMSUNG. All rights reserved.
4. Alignment and Troubleshooting
No
Area
Description
1
Printer List
The printer list displays the installed printer icons on your computer.
2
Printer Information
This area gives you general information about your machine. You can check
information, such as the machine’s model name, IP address (or Port name),
and machine status.
NOTE
Troubleshooting button: This button opens Troubleshooting Guide when an
error occurs. You can directly open the necessary section in the user’s guide.
3
Application Information
Includes links for changing to the advanced settings, preference, help, and
about.
4
Quick links
Displays Quick links to machine specific functions. This section also includes
links to applications in the advanced settings.
5
Contents Area
Displays information about the selected machine, remaining toner level,
and paper. The information will vary based on the machine selected. Some
machines do not have this feature.
6
Order Supplies
Click on the Order button from the supply ordering window. You can order
replacement toner cartridge(s) from online.
Advanced settings user interface overview
The advanced user interface is intended to be used by the person responsible for managing the network and machines.
• Device Settings
You can configure various machine settings such as machine setup, paper, layout, emulation, network, and print
information.
• Alert Settings
This is menu includes settings related to error alerting.
- Printer Alert : Provides settings related to when alerts will be received.
- Email Alert : Provides options relating to receiving alerts via email.
- History Alert : Provides a history of device and toner related alerts.
• Job Accounting
Provides querying of quota information of the specified job accounting user. This quota information can be created and
applied to devices by job accounting software such as SyncThru™ or CounThru™ admin software.
Copyright© 1995-2011 SAMSUNG. All rights reserved.
4-8
4. Alignment and Troubleshooting
4.1.5.2. Using Samsung Printer Status (Windows only)
The Samsung Printer Status is a program that monitors and informs you of the machine status.
NOTE
•
The Samsung Printer Status window and its contents shown in this user’s guide may differ depending on the machine
or operating system in use.
•
Check the operating system(s) that are compatible with your machine.
Samsung Printer Status overview
If an error occurs while operating, you can check the error from the Samsung Printer Status. Samsung Printer Status is
installed automatically when you install the machine software.
You can also launch Samsung Printer Status manually. Go to the Printing Preferences , click the Basic tab > Printer
Status button.
These icons appear on the Windows task bar:
Icon
4-9
Mean
Description
Normal
The machine is in ready mode and experiencing no errors or warnings.
Warning
The machine is in a state where a soft error has occurred. For example, a toner low status,
which may lead to toner empty status.
Error
The machine has at least one hard error, such as out of paper, fuser error, etc. Machine
does not have ability to come to ready without customer intervention.
1
Toner Level
You can view the level of toner remaining in each toner cartridge. The machine
and the number of toner cartridge(s) shown in the above window may differ
depending on the machine in use. Some machines do not have this feature.
2
Alert Settings
Select the settings you want from the options window.
3
Order Supplies
You can order replacement toner cartridge(s) from online.
4
Troubleshooting
You can directly open the troubleshooting section in the user’s guide.
5
Close
Close the window.
Copyright© 1995-2011 SAMSUNG. All rights reserved.
4. Alignment and Troubleshooting
4.1.5.3. Using Smart Panel (Linux only)
Smart Panel is a program that monitors and informs you of the machine’s status, and allows you to customize the machine’s
settings. You can download Smart Panel from the Samsung website.
NOTE
•
The Smart Panel window and its contents shown in this user’s guide may differ depending on the machine or operating
system in use.
•
Check the operating system(s) that are compatible with this model.
Smart Panel overview
If an error occurs while operating, you can check the error from the Smart Panel. You can also launch Smart Panel manually.
Double-click the Smart Panel icon
in the Notification Area.
1
Toner Level
You can view the level of toner remaining in each toner cartridge. The machine and the
number of toner cartridge(s) shown in the above window may differ depending on the
machine in use. Some machines do not have this feature.
2
Buy Now
You can order replacement toner cartridge(s) from online.
3
User’s Guide
You can view the online User’s Guide.
NOTE
This button opens the Troubleshooting Guide when an error occurs. You can directly
open the troubleshooting section in the user’s guide.
4
Printer Setting
You can configure various machine settings in the Printer Settings Utility window. Some
machines do not have this feature
NOTE
If you connect your machine to a network, the SyncThru™ Web Service window
appears instead of the Printer Settings Utility.
Changing Smart Panel‘s settings
Right-click in Linux on the Smart Panel icon and select Configure smart panel. Select the settings you want from the
Configure smart panel window.
Copyright© 1995-2011 SAMSUNG. All rights reserved.
4-10
4. Alignment and Troubleshooting
4.1.5.4. Using SyncThru Web Service (SWS)
SWS is an embedded web server in the machine. This web server informs you of machine configuration, version, status and
allows you to customize the machine’s settings. You can contact this server via wired and wireless network using your
web browser in the remote place.
Connecting preparations
• Wired or Wireless Network connection is established.
• Browser (Ex> Internet Explorer) Program on your PC network connected
SWS overview
SyncThru Web Service (SWS)
• accepts HTTP request via port 80 as normal web servers.
• provides interface to users information of networked printers and allow to configure the setting of printers.
• is able to provide more complicated options than Local UI for printer configuration.
Connection Procedure
1) Open the Web-browser and input IP address of machine. Click “Login”.
2) Log-in Admin Mode. (ID: admin, PW: sec00000)
3) Select pages to check the configuration and customize the settings.
CAUTION
Please, change SWS Default ID and Password for system security in case of your first connection.
4-11
Copyright© 1995-2011 SAMSUNG. All rights reserved.
4. Alignment and Troubleshooting
NOTE
If the machine supports ‘Direct Print’, you can enable this function using the SWS menu. The default configuration is
‘Disabled’ for your security.
Firstly, you have to login to SWS.
1) Click ‘Direct Print Configuration’ in the pop up windows when clicking ‘Direct Print’.
2) In the ‘Services’ Menu, check ‘Direct Print’.
Or,
1) Click ‘System Security’ in the ‘Security’ menu.
2) Select ‘Feature Management’ in the left frame.
3) In the ‘Services’ Menu, check ‘Direct Print’.
Copyright© 1995-2011 SAMSUNG. All rights reserved.
4-12
4. Alignment and Troubleshooting
4.1.6. Updating Firmware
This chapter includes instructions for updating the printer firmware. You can update the printer firmware by using one
of the following methods :
• Update the firmware by using the USB port.
• Update the firmware by using the Network.
4.1.6.1. Update the firmware by using the USB port
Upgrading preparations
• usblist2.exe : Tool which sends firmware data to printer.
• Firmware file to update.
Upgrade Procedure
1) Turn the machine off.
2) Connect USB cable to printer.
3) Turn the machine on. Check if the printer is the ready status.
4) Drag the firmware file and Drop down on the usblist2.exe.
And then firmware update will be started automatically.
5) When upgrading is completed, machine is automatically re-booting.
4-13
Copyright© 1995-2011 SAMSUNG. All rights reserved.
4. Alignment and Troubleshooting
4.1.6.2. Update the firmware by using the network (ML-216xW only)
Upgrading preparations
• Wired or Wireless Network connection is established.
• Firmware file to update
Upgrade Procedure
1) Open the Web-browser and input IP address of machine. Click “Login”.
2) Log-in Admin Mode. (ID: admin, PW: sec00000)
3) Select Maintenance menu and click “upgrade wizard”
Copyright© 1995-2011 SAMSUNG. All rights reserved.
4-14
4. Alignment and Troubleshooting
4) Select firmware file using “browser” button and press next button.
5) SyncThru will check verify firmware file and compare version and press next button.
6) Machine starts upgrading. SyncThru will return home page after upgrading is completed.
4-15
Copyright© 1995-2011 SAMSUNG. All rights reserved.
4. Alignment and Troubleshooting
4.2. Troubleshooting
4.2.1. Procedure of checking the symptoms
Before attempting to repair the printer first obtain a detailed description of the problem from the customer.
Power On
OPE LED
ON?
OPE LED
Green OK?
- No Power
- Power Module error
- Main PBA
Red LED on /
Error message
is displayed.
See the troubleshooting
for error code
Print (test page)
Printing
quality is
nomal?
Refer to "Solution
of Image Problem"
END
Copyright© 1995-2011 SAMSUNG. All rights reserved.
4-16
4. Alignment and Troubleshooting
4.2.1.1. Basic Check List
1) Check the Power.
•
Check that the power switch is turned on.
•
Check that the power cable is plugged into the outlet and the printer.
•
Check the voltage of the power outlet.
2) Check the LED of Panel.
•
Is there OPE LED ON?
›
•
If not check power cable, switch SMPS or Main board.
Is the abnormal Lamp?
›
Check the Main board and cable harness.
3) Check the Paper Path
•
Is there a Paper Jam?
›
•
Remove any paper fragments caught in the paper path.
Paper Jam occurs repeatedly at a specific point in the Paper Path
›
Open the fuser cover, Jam clear.
›
Dismantle the machine and carefully inspect the region where the jam occurs.
(Especially, check if paper fragments are caught in the Fuser
4) Print the Information Page (Configuration).
•
Try printing a test page from a computer.
›
If there is an error check cables and driver installation.
5) Check the Print Quality.
•
Is there are a Print Quality Problem?
›
Refer to image quality problem section.
6) Check consumables (toner etc.).
•
Using the keys print the Test Pattern.
›
4-17
Expected life of various consumable parts, compare this with the figures printed and replace as required
Copyright© 1995-2011 SAMSUNG. All rights reserved.
4. Alignment and Troubleshooting
4.2.2. Error Code and Troubleshooting
Error in machine can be checked through “Event Log Information” report.
Error Code
Error Message
Troubleshooting
C2-1110
Prepare new toner cartridge.
Page 4–19
C2-1120
Replace with new toner cartridge.
Page 4–19
C2-1140
End of life, Replace with new toner cartridge.
Page 4–19
C2-1410
Toner cartridge is not installed. Install the cartridge.
Page 4–19
C2-1510
Toner cartridge is not compatible. Check user's guide.
Page 4–20
C2–1710
Toner Cartridge Failure: #C2-1710. Call for service
Page 4–19
C2–1711
Toner Cartridge Failure: #C2-1711. Call for service
Page 4–19
C2–1712
Toner Cartridge Failure: #C2-1712. Call for service
Page 4–19
M2-1110
Paper jam inside of machine.
Page 4–20
M2–1116
Paper jam or empty in tray
Page 4–20
M2–1317
Paper jam inside of machine
Page 4–21
S1-5221
Wireless network card is not installed. Install the card.
Page 4–21
S2-4110
Door is open. Close it.
Page 4–22
S6-3123
This IP address conflicts with that of other system. Check it.
Page 4–22
U1-2320
Fuser Unit Failure #U1-2320. Turn off then on.
Page 4–23
U1-2330
Fuser Unit Failure #U1-2330. Turn off then on.
Page 4–23
U1-2340
Fuser Unit Failure #U1-2340. Turn off then on.
Page 4–23
U2-1112
LSU Unit Failure: #U2-1112. Turn off then on.
Page 4–24
U2-1113
LSU Unit Failure: #U2-1113. Turn off then on.
Page 4–24
Copyright© 1995-2011 SAMSUNG. All rights reserved.
4-18
4. Alignment and Troubleshooting
► Error Code
C2–1110
C2–1120
C2–1140
► Error message
Prepare new toner cartridge.
Replace with new toner cartridge.
End of life, Replace with new toner cartridge.
► Symptom
The remaining toner cartridge is less than 10% / The toner cartridge is at the end of its life.
► Troubleshooting method
Print the supply information report.
Check the life remaining of the toner cartridge.
If its life is at the end, turn the machine off and replace the toner cartridge with new one.
► Error Code
C2–1410
C2–1710
C2–1711
C2–1712
► Error message
Toner cartridge is not installed. Install the cartridge.
Toner Cartridge Failure: #C2-1710. Call for service
Toner Cartridge Failure: #C2-1711 Call for service
Toner Cartridge Failure: #C2-1712. Call for service
► Symptom
The toner cartridge is not installed. / The machine can’t detect the toner cartridge.
► Troubleshooting method
1) Check if the toner cartridge is installed. If it is OK, turn the machine off then on.
2) If the error message is not disappear, remove the toner cartridge. Thoroughly roll the cartridge five or six times to
distribute the toner evenly inside the cartridge. And reinstall the toner cartridge.
3) If the problem persists, check that the CRUM contact area is contaminated. Clean it.
4) If the problem persists, replace the toner cartridge with new one.
4-19
Copyright© 1995-2011 SAMSUNG. All rights reserved.
4. Alignment and Troubleshooting
► Error Code
C2–1510
► Error message
Toner cartridge is not compatible. Check users guide.
► Symptom
Toner cartridge is not compatible.
► Troubleshooting method
1) Print the supply information report. Check information of the toner cartridge.
2) If the toner cartridge is not a Samsung genuine toner cartridge, replace it with new one.
► Error Code
M2–1110
M2–1116
► Error message
Paper jam inside of machine.
Paper jam or empty in tray
► Symptom
A paper jam was detected at the feed sensor.
► Troubleshooting method
1) Check if paper is on tray.
2) Remove the jammed paper. (Refer to 4.1.3 Jam removal)
3) If the jammed paper occurs continually, check the followings.
a) Check if the pick up rubber or friction pad is worn out or contaminated. Clean the contaminated part or replace it.
b) Check if the connector is connected to the feed sensor PBA correctly.
c) Check if the actuator is assembled correctly.
d) If the connection and actuator are OK, replace the feed sensor PBA.
Copyright© 1995-2011 SAMSUNG. All rights reserved.
4-20
4. Alignment and Troubleshooting
► Error Code
M2–1317
► Error message
Paper jam inside of machine.
► Symptom
A paper jam was detected in the fuser unit area.
► Troubleshooting method
1) Open the top cover. Remove the jammed paper.
2) Turn the machine off.
3) Turn the machine on while pushing the print screen button. (wireless model : WPS button) Wait for rebooting
the machine.
► Error Code
S1–5221
► Error message
Wireless network card is not installed. Install the card.
► Symptom
The communication error between the main board and the wireless board has occurred.
► Troubleshooting method
1) Check if the connection between the main board and the wireless board is normal.
2) If the connection is OK, replace the flat cable.
3) If the flat cable is OK, replace the WLAN board.
4) If the problem persists after replacing the WLAN board, replace the main board.
4-21
Copyright© 1995-2011 SAMSUNG. All rights reserved.
4. Alignment and Troubleshooting
► Error Code
S2–4110
► Error message
Door is open. Close it.
► Symptom
Top cover is open or the cover open switch is defective.
► Troubleshooting method
1) Check if the top cover is closed perfectly. Open and close it.
2) Remove the right cover. Check if the connection between the main board and SMPS/HVPS board is correct.
3) Check if the cover open switch on SMPS/HVPS board is operated properly. If it is defective, replace the
SMPS/HVPS board.
► Error Code
S6–3123
► Error message
This IP address conflicts with that of other system. Check it.
► Symptom
Network has some problem. (IP address conflicts with that of other system. / Communication error / There is no
response when checking the ping test.)
► Troubleshooting method
Change the machine’s IP address.
•
Execute the Samsung Easy Printer Manager program. (Device setting — Network — IP address). Change the
IP address.
•
In case of DHCP or Bootp, reboot the machine to receive a new IP address.
Copyright© 1995-2011 SAMSUNG. All rights reserved.
4-22
4. Alignment and Troubleshooting
► Error Code
U1–2320
U1–2330
U1–2340
► Error message
Fuser Unit Failure #U1-2320 : Turn off then on.
Fuser Unit Failure #U1-2330 : Turn off then on.
Fuser Unit Failure #U1-2340 : Turn off then on.
► Symptom
The temperature control of fuser unit is abnormal. (U1–2320 : Open Heat Error / U1–2330 : Low Heat Error / U1–2340
: Over Heat Error)
► Troubleshooting method
1) Turn the machine off. Re-install the fuser unit. Then turn the machine on. Is the error message is disappeared?
2) If the problem persists, turn the machine off and remove the fuser unit.
a) Check if the fuser connector is connected properly.
b) Check if the input voltage is normal.
c) Check if the thermistor is twisted or contaminated.
3) After confirming continuity in the fuser connector and the problem still exists; order an SMPS/HVPS and Fuser
Unit and install as is necessary.
4-23
Copyright© 1995-2011 SAMSUNG. All rights reserved.
4. Alignment and Troubleshooting
► Error Code
U2–1112
U2–1113
► Error message
LSU Unit Failure #U2-1112. Turn off then on.
LSU Unit Failure #U2-1113. Turn off then on.
► Symptom
LSU Motor does not work normally.
► Troubleshooting method
1) Check if the LSU harness on the main board is connected properly. (picture- 1)
2) If it is OK, check that the LSU harness on LSU board is connected properly. (picture- 2,3)
3) Check if the LSU harness is defective. (picture- 4,5)
4) If the problem persists, replace the LSU.
5) If the problem persists after replacing LSU, replace the main board.
Copyright© 1995-2011 SAMSUNG. All rights reserved.
4-24
4. Alignment and Troubleshooting
4.2.3. Image quality problem
1) Vertical Black Line and Band
Description : Straight thin black vertical line occurs in the printed image.
Check and cause
•
Damaged develop roller in the toner cartridge.
Deformed Doctor-blade or cleaning-blade.
•
Scratched surface of the charge roller in the toner
cartridge.
Partly depression or deformation on the surface of the
transfer roller.
Solution
Replace the toner cartridge.
Replace the transfer roller.
2) Vertical White Line
Description : White vertical voids occurs in the printed image.
4-25
Check and cause
Solution
Foreign matter stucks onto the window of internal lenses of
LSU mirror.
Clean the LSU window with recommended cleaner (IPA).
Clean the window with a clean cotton swab.
The life of the toner cartridge has been expired
Replace the toner cartridge.
Some foreign substances are on the window of the toner
cartridge frame.
Remove the foreign matter of the exposure window.
If the fuser is defective, voids occur periodically at the top
of a black image.
Replace the fuser unit.
Copyright© 1995-2011 SAMSUNG. All rights reserved.
4. Alignment and Troubleshooting
3) Horizontal Black Band
Description : Dark of blurry horizontal stripes occur in the printing periodically.
Check and cause
Solution
Bad contacts of the voltage terminals to toner cartridge.
Clean each voltage terminal of the Charge, Developing
roller and Transfer roller. (remove the toner particles and
paper particles)
The rollers of developer may be stained.
Replace the toner cartridge.
— OPC Drum = 62.9 mm
— Developing roller = 33.7 mm
— Charge roller = 26.7 mm
4) Black and White spot
Description : Dark or blurry black spots occur periodically in the printing.
Check and cause
Solution
If dark or blurry black spots occur periodically, the rollers in
the toner cartridge may be contaminated with foreign matte
or paper particles. (Charge roller : 26.7 mm interval / OPC
drum : 62.9 mm interval)
Clean each voltage terminal of the Charge, Magnetic, toner
cartridge and Transfer roller. (remove the toner particles
and paper particles)
If faded areas or voids occur in a black image at intervals of
62.9 mm, the OPC drum surface is damaged.
Replace the toner cartridge.
If a black image is partially broken, the transfer voltage is
abnormal or the transfer roller’s life has expired.
•
If the transfer roller’s life is expired, replace it.
•
Clean the inside of the set against the paper particles
and foreign matter in order not to cause the trouble.
Copyright© 1995-2011 SAMSUNG. All rights reserved.
4-26
4. Alignment and Troubleshooting
5) Light image
Description : The printed image is light, with no ghost.
Check and cause
Solution
Toner cartridge life is expired.
Replace the toner cartridge.
HVPS terminal is contaminated.
Clean the contaminated terminal.
The output from the HVPS is abnormal.
Replace the HVPS board.
6) Dark or Black page
Description : The printed image is dark or black.
4-27
Check and cause
Solution
Check if the high voltage terminal is contaminated.
Clean the high voltage terminal.
The charging roller is defective.
Replace the toner cartridge.
The output from the HVPS is abnormal.
Replace the HVPS board.
Copyright© 1995-2011 SAMSUNG. All rights reserved.
4. Alignment and Troubleshooting
7) Uneven Density
Description : Print density is uneven between left and right.
Check and cause
Solution
•
The pressure force on the left and right springs of the
transfer roller is not even.
1) Remove the transfer roller Assy.
•
The springs are damaged.
3) Replace the transfer roller Assy.
•
The transfer roller is improperly installed.
The toner level is not even on the toner cartridge roller due
to the bad doctor blade.
2) Check if the transfer roller Assy has any wrong part.
Replace the toner cartridge.
8) Background
Description : Light dark background appears in whole area of the printing.
Check and cause
Solution
Does recycle paper be used?
Use the proper papers.
The life of the toner cartridge has been expired
Replace the toner cartridge.
The output from the HVPS is abnormal.
Replace the HVPS board.
Copyright© 1995-2011 SAMSUNG. All rights reserved.
4-28
4. Alignment and Troubleshooting
9) Ghost
Description : Ghost occurs at 62.9 mm intervals of the OPC drum.
Check and cause
Solution
The high voltage terminal is contaminated.
Clean the high voltage terminals.
The life of the toner cartridge has been expired
Replace the toner cartridge.
The life of the transfer roller has been expired.
Replace the transfer roller.
10) Stains on back of page
Description : The back of the page is stained.
4-29
Check and cause
Solution
Transfer roller is contaminated.
Replace the transfer roller.
Copyright© 1995-2011 SAMSUNG. All rights reserved.
4. Alignment and Troubleshooting
11) Blank page
Description : The back of the page is stained.
Check and cause
Solution
The ground contact of the toner cartridge is bad.
Clean the ground terminal of the toner cartridge. If the
problem persists, replace the toner cartridge.
LSU is defective.
Replace the LSU.
The connection between the main board and HVPS board
is bad.
Reconnect the harness. If the main board or HVPS board
is defective, replace it.
12) Partial image void
Description : The partial void occurs in the printed page.
Check and cause
Solution
The printer is not installed on flat ground.
Install the printer on flat ground. Print 10 sample pages for
test.
The developer circulation in the toner cartridge is bad.
1) Shake the toner cartridge 2~3 times from right to left.
Reinstall the toner cartridge. Print 10 sample pages
for test.
2) If the problem persists, replace the toner cartridge.
The contact between toner cartridge and transfer roller is
bad.
Copyright© 1995-2011 SAMSUNG. All rights reserved.
Check if the toner cartridge and transfer roller are installed
properly.
4-30
4. Alignment and Troubleshooting
4.2.4. Other errors
1) Multi-feeding
• Description : Multiple sheet of paper are fed at once.
Check and cause
Solution
Pick clutch does not work properly.
Replace the defective clutch if necessary.
Pick up roller is worn out or contaminated.
Clean or replace the pick up roller.
2) No-Power
• Description : When system power is turned on, LED and LCD on the operator panel do not come on.
Check and cause
Solution
The connection between main board and OPE board is bad.
Reconnect or replace the harness.
HVPS/SMPS output is abnormal.
Replace the HVPS/SMPS board.
4-31
Copyright© 1995-2011 SAMSUNG. All rights reserved.
5. System Diagram
5. System Diagram
5.1. Block Diagram
LSU
OP E
8P
16P
TOP Cover
Micro Switch
MAIN
Controller
3.3V
LSU
CONTROL
+24V
24VS
3.3V
Clock
Generator
SDRAM(e mbbe d)
(8MByte )
SMP S & HVP S
CLK
24V
12 MHz
Te mujin
Core : 300 MHz
ARM926 EJ S
FUSER ON
RESET IC
DEV
SPI Fla sh
(e mbbe d)
(0.5Mbyte)
MHV
Supply
FUSER
CONTROL
THV
OPC
AC INLET
S te ppe r Motor
Controlle r IC
USB Device
00
00
S
4P
M
D
DRUM
T
2P
C R UM
THERMISTOR
DEVELOPER Unit
3P
4P
2P
5P
Thermis tor
Thermos tat
SOL
FUSER Unit
MT
STEP
PickUp
Clutch
FEED
Sens or
EMPTY
Sens or
Ma in
Motor
Copyright© 1995-2011 SAMSUNG. All rights reserved.
5-1
5. System Diagram
5.2. Connection Diagram
LSU
OP E
TONER
R e a dy & Error
P R INT P OWER
Dua l LED
S C R EEN S /W
P -MOTOR
LD P BA
8
7
6
5
4
3
2
1
1
24 VS
2
G ND
3 n LS U_MOTO R _ENn
4
n LS U_R EADY
5
LS U_C LO CK
N.C
6
N .C
7
8
LD_P OWE R1
9
n S H_LS U0
nLD_ENAB LE
10
11
GND
VDO_0_P
12
13
VDO_0 _N
GND
14
n HS YNC 0
15
16
3 .3V_LS U
CN2
CN2
OPC
THV
M
S D
4P
DR UM
THV_R EAD
P W M_MHV
n THV_EN
P W M_DEV_DC
+ 3.3V_OP EN
P W M_DEV_AC
+ 3.3 V
n DEV_EN
P W M_THV
VP P_DEV_AC
GND
+ 24VS
GND
GND
+ 24 V
R ELAY_AC_ON
+ 24 V
GND
+ 24 V
F US ER_ON
1
2
3
4
GND
S CL0_TEMUJ IN
S DA0_TEMUJ IN
3.3V_CRUM
CN6
LS U I/F
CN4
MHV
OP E I/ F
20
19
18
17
16
15
14
13
12
11
10
9
8
7
6
5
4
3
2
1
SM PS & HVPS I/F
DEV
Supply
1
2
3
4
5
6
7
8
9
10
11
12
13
14
15
16
17
18
19
20
5
4
3
2
1
9
8
7
6
5
4
3
2
1
N. C
n KE Y_PRIN T
n PO WER_S W
G ND
n L ED_P O WE R
n L ED_E RRO R
n LE D_RE ADY
G ND
n LE D_T ONE R
MAIN
C ontrolle r
SMP S & HVP S
1
2
3
4
5
6
7
8
9
TOP Cover
Micro Switch
LSU
CONTROL
CLK
16P
SDRAM(e mbbe d)
(8MByte)
Te mujin
Clock
Generator
12 MHz
RESET IC
Core : 300 MHz
ARM926 EJ S
T
US B
VBUS
DM
DP
DGND
1
2
3
4
USB De vice
000
000
CN2
FUS ER_THERM1
N.C
THERMIS TOR 1
THE RMIS TOR
1
2
3
SPI Fla sh
(e mbbe d)
(4Mbit)
CN3
LIVE
NE UTR AL
Ste ppe r
Motor
Controlle r IC
1
2
C R UM
CN7
AC
INLET
DEVELOP ER
Unit
S TE P MOT OR
CN1
CN5
1
2
3
4
5
1
2
3
4
1
2
The rmosta t
CN7
S TE P MOTOR
OUT1A
OUT1B
OUT2A
OUT2B
24VS
P ICKUP _
CLUTCH
P ICKUP
The rmistor
3.3V_S ENS OR
3.3V_S ENS OR
n P_WIDTH
n P_F EED
GND
S E NS OR
CN8
FUSER Unit
1
2
3
4
5
1
2
3
4
5-2
SOL
MT
STEP
PickUp
Clutch
Ma in
Motor
WIDTH
SENSOR
FEED
Sens or
Copyright© 1995-2011 SAMSUNG. All rights reserved.
6. Reference Information
6. Reference Information
This chapter contains the tools list, list of abbreviations used in this manual, and a guide to the location space required when
installing the printer. A definition of test pages and Wireless Network information definition is also included.
6.1. Tool for Troubleshooting
The following tools are recommended safe and easy troubleshooting as described in this service manual.
DVM (Digital Volt Meter)
Cleaning Equipments
Standard : Indicates more than 3 digits.
Standard : An IPA (Isopropyl Alcohol) dry wipe tissue or a
gentle neutral detergent and lint-free cloth.
Driver
Vacuum Cleaner
Standard : “-” type, “+” type (M3 long, M3 short, M2 long,
M2 short).
Tweezers
Spring Hook
Standard : For general home use, small type.
Standard : For general use
Cotton Swab
Software (Driver) installation CD ROM
Standard : For general home use, for medical service.
Copyright© 1995-2011 SAMSUNG. All rights reserved.
6-1
6. Reference Information
6.2. Glossary
The following glossary helps you get familiar with the product by understanding the terminologies commonly used with
printing as well as mentioned in this user’s guide and service manual.
802.11
802.11 is a set of standards for wireless local area network (WLAN) communication, developed by
the IEEE LAN/MAN Standards Committee (IEEE 802).
802.11b/g/n
802.11b/g/n can share same hardware and use the 2.4 GHz band. 802.11b supports bandwidth up to 11
Mbps, 802.11n supports bandwidth up to 150 Mbps. 802.11b/g/n devices may occasionally suffer
interference from microwave ovens, cordless telephones, and Bluetooth devices.
Access point
Access Point or Wireless Access Point (AP or WAP) is a device that connects wireless communication
devices together on wireless local area networks (WLAN), and acts as a central transmitter and
receiver of WLAN radio signals.
ADF
An Automatic Document Feeder (ADF) is a scanning unit that will automatically feed an original
sheet of paper so that the machine can scan some amount of the paper at once.
AppleTalk
AppleTalk is a proprietary suite of protocols developed by Apple, Inc for computer networking. It
was included in the original Macintosh (1984) and is now deprecated by Apple in favor of TCP/IP
networking.
BIT Depth
A computer graphics term describing the number of bits used to represent the color of a single pixel in
a bitmapped image. Higher color depth gives a broader range of distinct colors. As the number of bits
increases, the number of possible colors becomes impractically large for a color map. 1-bit color is
commonly called as monochrome or black and white.
BMP
A bitmapped graphics format used internally by the Microsoft Windows graphics subsystem (GDI),
and used commonly as a simple graphics file format on that platform.
BOOTP
Bootstrap Protocol. A network protocol used by a network client to obtain its IP address automatically.
This is usually done in the bootstrap process of computers or operating systems running on them. The
BOOTP servers assign the IP address from a pool of addresses to each client. BOOTP enables 'diskless
workstation' computers to obtain an IP address prior to loading any advanced operating system.
CCD
Charge Coupled Device (CCD) is a hardware which enables the scan job. CCD Locking mechanism is
also used to hold the CCD module to prevent any damage when you move the machine.
Collation
Collation is a process of printing a multiple-copy job in sets. When collation is selected, the device
prints an entire set before printing additional copies.
Control Panel
A control panel is a flat, typically vertical, area where control or monitoring instruments are displayed.
They are typically found in front of the machine.
Coverage
It is the printing term used for a toner usage measurement on printing. For example, 5% coverage
means that an A4 sided paper has about 5% image or text on it. So, if the paper or original has
complicated images or lots of text on it, the coverage will be higher and at the same time, a toner
usage will be as much as the coverage.
CSV
Comma Separated Values (CSV). A type of file format, CSV is used to exchange data between
disparate applications. The file format, as it is used in Microsoft Excel, has become a de facto standard
throughout the industry, even among non-Microsoft platforms.
DADF
A Duplex Automatic Document Feeder (DADF) is a scanning unit that will automatically feed and
turn over an original sheet of paper so that the machine can scan on both sides of the paper.
Default
The value or setting that is in effect when taking a printer out of its box state, reset, or initialized.
DHCP
A Dynamic Host Configuration Protocol (DHCP) is a client-server networking protocol. A DHCP
server provides configuration parameters specific to the DHCP client host requesting, generally,
information required by the client host to participate on an IP network. DHCP also provides a
mechanism for allocation of IP addresses to client hosts.
DIMM
Dual Inline Memory Module (DIMM), a small circuit board that holds memory. DIMM stores all
the data within the machine like printing data, received fax data.
6-2
Copyright© 1995-2011 SAMSUNG. All rights reserved.
6. Reference Information
DLNA
The Digital Living Network Alliance (DLNA) is a standard that allows devices on a home network to
share information with each other across the network.
DNS
The Domain Name Server (DNS) is a system that stores information associated with domain names in
a distributed database on networks, such as the Internet.
Dot Matrix Printer
A dot matrix printer refers to a type of computer printer with a print head that runs back and forth
on the page and prints by impact, striking an ink-soaked cloth ribbon against the paper, much like a
typewriter.
DPI
Dots Per Inch (DPI) is a measurement of resolution that is used for scanning and printing. Generally,
higher DPI results in a higher resolution, more visible detail in the image, and a larger file size.
DRPD
Distinctive Ring Pattern Detection. Distinctive Ring is a telephone company service which enables a
user to use a single telephone line to answer several different telephone numbers.
Duplex
A mechanism that will automatically turn over a sheet of paper so that the machine can print (or
scan) on both sides of the paper. A printer equipped with a Duplex Unit can print on both sides of
paper during one print cycle.
Duty Cycle
Duty cycle is the page quantity which does not affect printer performance for a month. Generally the
printer has the lifespan limitation such as pages per year. The lifespan means the average capacity
of print-outs, usually within the warranty period. For example, if the duty cycle is 48,000 pages per
month assuming 20 working days, a printer limits 2,400 pages a day.
ECM
Error Correction Mode (ECM) is an optional transmission mode built into Class 1 fax machines
or fax modems. It automatically detects and corrects errors in the fax transmission process that
are sometimes caused by telephone line noise.
Emulation
Emulation is a technique of one machine obtaining the same results as another. An emulator
duplicates the functions of one system with a different system, so that the second system behaves like
the first system. Emulation focuses on exact reproduction of external behavior, which is in contrast
to simulation, which concerns an abstract model of the system being simulated, often considering
its internal state.
Ethernet
Ethernet is a frame-based computer networking technology for local area networks (LANs). It defines
wiring and signaling for the physical layer, and frame formats and protocols for the media access
control (MAC)/data link layer of the OSI model. Ethernet is mostly standardized as IEEE 802.3. It
has become the most widespread LAN technology in use during the 1990s to the present.
EtherTalk
A suite of protocols developed by Apple Computer for computer networking. It was included in the
original Macintosh (1984) and is now deprecated by Apple in favor of TCP/IP networking.
FDI
Foreign Device Interface (FDI) is a card installed inside the machine to allow a third party device
such as a coin operated device or a card reader. Those devices allow the pay-for-print service
on your machine.
FTP
A File Transfer Protocol (FTP) is a commonly used protocol for exchanging files over any network
that supports the TCP/IP protocol (such as the Internet or an intranet).
Fuser Unit
The part of a laser printer that fuses the toner onto the print media. It consists of a heat roller and
a pressure roller. After toner is transferred onto the paper, the fuser unit applies heat and pressure
to ensure that the toner stays on the paper permanently, which is why paper is warm when it comes
out of a laser printer.
Gateway
A connection between computer networks, or between a computer network and a telephone line. It is
very popular, as it is a computer or a network that allows access to another computer or network.
Grayscale
A shades of gray that represent light and dark portions of an image when color images are converted
to grayscale; colors are represented by various shades of gray.
Halftone
An image type that simulates grayscale by varying the number of dots. Highly colored areas consist of
a large number of dots, while lighter areas consist of a smaller number of dots.
HDD
Hard Disk Drive (HDD), commonly referred to as a hard drive or hard disk, is a non-volatile storage
device which stores digitally-encoded data on rapidly rotating platters with magnetic surfaces.
Copyright© 1995-2011 SAMSUNG. All rights reserved.
6-3
6. Reference Information
IEEE
The Institute of Electrical and Electronics Engineers (IEEE) is an international non-profit, professional
organization for the advancement of technology related to electricity.
IEEE 1284
The 1284 parallel port standard was developed by the Institute of Electrical and Electronics Engineers
(IEEE). The term "1284-B" refers to a specific connector type on the end of the parallel cable that
attaches to the peripheral (for example, a printer).
Intranet
A private network that uses Internet Protocols, network connectivity, and possibly the public
telecommunication system to securely share part of an organization's information or operations with
its employees. Sometimes the term refers only to the most visible service, the internal website.
IP address
An Internet Protocol (IP) address is a unique number that devices use in order to identify and
communicate with each other on a network utilizing the Internet Protocol standard.
IPM
The Images Per Minute (IPM) is a way of measuring the speed of a printer. An IPM rate indicates the
number of single-sided sheets a printer can complete within one minute.
IPP
The Internet Printing Protocol (IPP) defines a standard protocol for printing as well as managing print
jobs, media size, resolution, and so forth. IPP can be used locally or over the Internet to hundreds
of printers, and also supports access control, authentication, and encryption, making it a much more
capable and secure printing solution than older ones.
IPX/SPX
IPX/SPX stands for Internet Packet Exchange/Sequenced Packet Exchange. It is a networking
protocol used by the Novell NetWare operating systems. IPX and SPX both provide connection
services similar to TCP/IP, with the IPX protocol having similarities to IP, and SPX having similarities
to TCP. IPX/SPX was primarily designed for local area networks (LANs), and is a very efficient
protocol for this purpose (typically its performance exceeds that of TCP/IP on a LAN).
ISO
The International Organization for Standardization (ISO) is an international standard-setting body
composed of representatives from national standards bodies. It produces world-wide industrial and
commercial standards.
ITU-T
The International Telecommunication Union is an international organization established to standardize
and regulate international radio and telecommunications. Its main tasks include standardization,
allocation of the radio spectrum, and organizing interconnection arrangements between different
countries to allow international phone calls. A -T out of ITU-T indicates telecommunication.
ITU-T No. 1 chart
Standardized test chart published by ITU-T for document facsimile transmissions.
JBIG
Joint Bi-level Image Experts Group (JBIG) is an image compression standard with no loss of accuracy
or quality, which was designed for compression of binary images, particularly for faxes, but can
also be used on other images.
JPEG
Joint Photographic Experts Group (JPEG) is a most commonly used standard method of lossy
compression for photographic images. It is the format used for storing and transmitting photographs
on the World Wide Web.
LDAP
The Lightweight Directory Access Protocol (LDAP) is a networking protocol for querying and
modifying directory services running over TCP/IP.
LED
A Light-Emitting Diode (LED) is a semiconductor device that indicates the status of a machine.
MAC address
Media Access Control (MAC) address is a unique identifier associated with a network adapter. MAC
address is a unique 48-bit identifier usually written as 12 hexadecimal characters grouped in pairs (e.
g., 00-00-0c-34-11-4e). This address is usually hard-coded into a Network Interface Card (NIC) by its
manufacturer, and used as an aid for routers trying to locate machines on large networks.
MFP
Multi Function Peripheral (MFP) is an office machine that includes the following functionality in one
physical body, so as to have a printer, a copier, a fax, a scanner and etc.
MH
Modified Huffman (MH) is a compression method for decreasing the amount of data that needs to be
transmitted between the fax machines to transfer the image recommended by ITU-T T.4. MH is a
codebook-based run-length encoding scheme optimized to efficiently compress white space. As most
faxes consist mostly of white space, this minimizes the transmission time of most faxes.
MMR
Modified Modified READ (MMR) is a compression method recommended by ITU-T T.6.
6-4
Copyright© 1995-2011 SAMSUNG. All rights reserved.
6. Reference Information
Modem
A device that modulates a carrier signal to encode digital information, and also demodulates such a
carrier signal to decode transmitted information.
MR
Modified Read (MR) is a compression method recommended by ITUT T.4. MR encodes the first
scanned line using MH. The next line is compared to the first, the differences determined, and then the
differences are encoded and transmitted.
NetWare
A network operating system developed by Novell, Inc. It initially used cooperative multitasking to
run various services on a PC, and the network protocols were based on the archetypal Xerox XNS
stack. Today NetWare supports TCP/IP as well as IPX/SPX.
OPC
Organic Photo Conductor (OPC) is a mechanism that makes a virtual image for print using a laser
beam emitted from a laser printer, and it is usually green or rust colored and has a cylinder shape.
An imaging unit containing a drum slowly wears the drum surface by its usage in the printer, and
it should be replaced appropriately since it gets worn from contact with the cartridge development
brush, cleaning mechanism, and paper.
Originals
The first example of something, such as a document, photograph or text, etc, which is copied,
reproduced or translated to produce others, but which is not itself copied or derived from something
else.
OSI
Open Systems Interconnection (OSI) is a model developed by the International Organization for
Standardization (ISO) for communications. OSI offers a standard, modular approach to network
design that divides the required set of complex functions into manageable, self-contained, functional
layers. The layers are, from top to bottom, Application, Presentation, Session, Transport, Network,
Data Link and Physical.
PABX
A private automatic branch exchange (PABX) is an automatic telephone switching system within a
private enterprise.
PCL
Printer Command Language (PCL) is a Page Description Language (PDL) developed by HP as a
printer protocol and has become an industry standard. Originally developed for early inkjet printers,
PCL has been released in varying levels for thermal, dot matrix printer, and laser printers.
PDF
Portable Document Format (PDF) is a proprietary file format developed by Adobe Systems for
representing two dimensional documents in a device independent and resolution independent format.
PostScript(PS)
PostScript (PS) is a page description language and programming language used primarily in the
electronic and desktop publishing areas. - that is run in an interpreter to generate an image.
Printer Driver
A program used to send commands and transfer data from the computer to the printer.
Print Media
The media like paper, envelopes, labels, and transparencies which can be used in a printer, a scanner, a
fax or, a copier.
PPM
Pages Per Minute (PPM) is a method of measurement for determining how fast a printer works,
meaning the number of pages a printer can produce in one minute.
PRN file
An interface for a device driver, this allows software to interact with the device driver using standard
input/output system calls, which simplifies many tasks.
Protocol
A convention or standard that controls or enables the connection, communication, and data transfer
between two computing endpoints.
PSTN
The Public-Switched Telephone Network (PSTN) is the network of the world's public circuit-switched
telephone networks which, on industrial premises, is usually routed through the switchboard.
RADIUS
Remote Authentication Dial In User Service (RADIUS) is a protocol for remote user authentication
and accounting. RADIUS enables centralized management of authentication data such as usernames
and passwords using an AAA (authentication, authorization, and accounting) concept to manage
network access.
Resolution
The sharpness of an image, measured in Dots Per Inch (DPI). The higher the dpi, the greater the
resolution.
SMB
Server Message Block (SMB) is a network protocol mainly applied to share files, printers, serial ports,
and miscellaneous communications between nodes on a network. It also provides an authenticated
Interprocess communication mechanism.
Copyright© 1995-2011 SAMSUNG. All rights reserved.
6-5
6. Reference Information
SMTP
Simple Mail Transfer Protocol (SMTP) is the standard for e-mail transmissions across the Internet.
SMTP is a relatively simple, text based protocol, where one or more recipients of a message are
specified, and then the message text is transferred. It is a client server protocol, where the client
transmits an email message to the server.
SSID
Service Set Identifier (SSID) is a name of a wireless local area network (WLAN). All wireless devices
in a WLAN use the same SSID in order to communicate with each other. The SSIDs are case-sensitive
and have a maximum length of 32 characters.
Subnet Mask
The subnet mask is used in conjunction with the network address to determine which part of the
address is the network address and which part is the host address.
TCP/IP
The Transmission Control Protocol (TCP) and the Internet Protocol (IP); the set of communications
protocols that implement the protocol stack on which the Internet and most commercial networks run.
TCR
Transmission Confirmation Report (TCR) provides details of each transmission such as job status,
transmission result and number of pages sent. This report can be set to print after each job or only
after failed transmissions.
TIFF
Tagged Image File Format (TIFF) is a variable-resolution bitmapped image format. TIFF describes
image data that typically come from scanners. TIFF images make use of tags, keywords defining the
characteristics of the image that is included in the file. This flexible and platform-independent format
can be used for pictures that have been made by various image processing applications.
Toner Cartridge
A kind of bottle or container used in a machine like a printer which contains toner. Toner is a powder
used in laser printers and photocopiers, which forms the text and images on the printed paper. Toner
can be fused by a combination of heat/pressure from the fuser, causing it to bind to the fibers in
the paper.
TWAIN
An industry standard for scanners and software. By using a TWAINcompliant scanner with a
TWAIN-compliant program, a scan can be initiated from within the program. It is an image capture
API for Microsoft Windows and Apple Macintosh operating systems.
UNC Path
Uniform Naming Convention (UNC) is a standard way to access network shares in Window NT and
other Microsoft products. The format of a UNC path is: \<servername><sharename><Additional
directory>
URL
Uniform Resource Locator (URL) is the global address of documents and resources on the Internet.
The first part of the address indicates what protocol to use, the second part specifies the IP address or
the domain name where the resource is located.
USB
Universal Serial Bus (USB) is a standard that was developed by the USB Implementers Forum, Inc., to
connect computers and peripherals. Unlike the parallel port, USB is designed to concurrently connect
a single computer USB port to multiple peripherals.
Watermark
A watermark is a recognizable image or pattern in paper that appears lighter when viewed by
transmitted light. Watermarks were first introduced in Bologna, Italy in 1282; they have been used by
papermakers to identify their product, and also on postage stamps, currency, and other government
documents to discourage counterfeiting.
WEP
Wired Equivalent Privacy (WEP) is a security protocol specified in IEEE 802.11 to provide the same
level of security as that of a wired LAN. WEP provides security by encrypting data over radio so that
it is protected as it is transmitted from one end point to another.
WIA
Windows Imaging Architecture (WIA) is an imaging architecture that is originally introduced in
Windows Me and Windows XP. A scan can be initiated from within these operating systems by
using a WIAcompliant scanner.
WPA
Wi-Fi Protected Access (WPA) is a class of systems to secure wireless (Wi-Fi) computer networks,
which was created to improve upon the security features of WEP.
WPA-PSK
WPA-PSK (WPA Pre-Shared Key) is special mode of WPA for small business or home users. A
shared key, or password, is configured in the wireless access point (WAP) and any wireless laptop or
desktop devices. WPA-PSK generates a unique key for each session between a wireless client and the
associated WAP for more advanced security.
6-6
Copyright© 1995-2011 SAMSUNG. All rights reserved.
6. Reference Information
WPS
The Wi-Fi Protected Setup (WPS) is a standard for establishing a wireless home network. If your
wireless access point supports WPS, you can configure the wireless network connection easily
without a computer.
XPS
XML Paper Specification (XPS) is a specification for a Page Description Language (PDL) and a new
document format, which has benefits for portable document and electronic document, developed
by Microsoft. It is an XML-based specification, based on a new print path and a vector-based
device-independent document format.
Copyright© 1995-2011 SAMSUNG. All rights reserved.
6-7
6. Reference Information
6.3. The Sample Pattern for the Test
The life of the toner cartridge and the printing speed are measured using the pattern shown below.
6-8
Copyright© 1995-2011 SAMSUNG. All rights reserved.
6. Reference Information
6.4. Selecting a location
Select a level, stable place with adequate space for air circulation. Allow extra space for opening covers and trays.
The area should be well-ventilated and away from direct sunlight or sources of heat, cold, and humidity. Do not set the
machine close to the edge of your desk or table.
Clearance space
• Front: 326 mm (enough space so that the paper tray can be removed)
• Back: 100 mm (enough space for ventilation)
• Right: 100 mm (enough space for ventilation)
• Left: 100 mm (enough space for ventilation)
Copyright© 1995-2011 SAMSUNG. All rights reserved.
6-9
GSPN (GLOBAL SERVICE PARTNER NETWORK)
Area
Web Site
Europe, MENA,
CIS, Africa
https://gspn1.samsungcsportal.com
E.Asia, W.Asia,
China, Japan
https://gspn2.samsungcsportal.com
N.America, S.America
https://gspn3.samsungcsportal.com
This Service Manual is a property of Samsung Electronics
Co.,Ltd.
Any unauthorized use of Manual can be punished under
applicable International and/or domestic law.
© 2011 Samsung Electronics Co.,Ltd.
All rights reserved.
Printed in Korea

КРАТКОЕ
Руководство пользователя
ML-216x Series
ML-216xW Series
КРАТКОЕ
Руководство пользователя
В данном руководстве представлена информация по установке,
основным функциям и устранению неисправностей в системе
Windows.
РАСШИРЕННОЕ
Данное руководство содержит информацию об установке, расширенной
конфигурации, эксплуатации, а также поиске и устранении неисправностей в
различных операционных системах.
Некоторые функции могут различаться в зависимости от модели и региона.

2
РАТ
Е
1. Введение
Ключевые преимущества 5
Функции различных моделей 7
Полезная информация 9
О руководстве пользователя 10
Информация о безопасности 11
Обзор устройства 18
Обзор панели управления 21
Включение устройства 23
Установка драйвера локально 24
Замена драйвера 26
2. Обзор основных функций
Печать тестовой страницы 28
Материалы и лотки 29
Основные операции печати 39
3. Обслуживание
Заказ расходных материалов и
дополнительных компонентов 43
Доступные материалы 44
Доступные сменные компоненты 45
Хранение картриджей 46
Перераспределение тонера 48
Замена картриджа 49
Чистка устройства 51
Советы по перемещению и хранению
устройства 54
4. Устранение неисправностей
Рекомендации по предотвращению замятия
бумаги 56
Удаление замятой бумаги 57
Описание индикаторов состояния 60

3
РАТ
Е
5. Приложение
Технические характеристики 64
Нормативная информация 73
Авторские права 84

1. Введение
В данной главе содержится информация, которую необходимо усвоить прежде, чем приступать к работе
с устройством.
• Ключевые преимущества 5
• Функции различных моделей 7
• Полезная информация 9
• О руководстве пользователя 10
• Информация о безопасности 11
• Обзор устройства 18
• Обзор панели управления 21
• Включение устройства 23
• Установка драйвера локально 24
• Замена драйвера 26
Ключевые преимущества
Экологическая безопасность
• Для экономии тонера и бумаги устройство снабжено функцией
экопечати (см. «Easy Eco Driver» на стр. 176).
• В целях экономии бумаги можно распечатывать несколько страниц
на одном листе (см. «Использование дополнительных параметров
печати» на стр. 155).
• Для экономии бумаги можно печатать на обеих сторонах листа
(функция двусторонней ручной печати) (см. «Использование
дополнительных параметров печати» на ст
р. 15
5).
• Данное устройство позволяет сэкономить электроэнергию,
автоматически снижая ее потребление в режиме ожидания.
Быстрая и высококачественная печать
• Печать можно выполнять с разрешением до 1200 x 1200 тчк/дюйм
(фактическое разрешение).
• Быстрая печать по требованию.
-20 стр/мин для формата A4 или 21 стр/мин для формата Letter
при односторонней печати.
Удобство
• Программа Easy Capture Manager позволяет печатать снимки
экрана, полученные нажатием кнопки Print Screen на клавиатуре
(см. «Знакомство с программой Easy Capture Manager» на стр.
177).
• Приложения Samsung Easy Printer Manager и Состояние принтера
Samsung (или Smart Panel) предназначены для мониторинга и
отображения информации о состоянии устройства. Они позволяют
выбрать подходящие параметры работы (см. «Работа с Samsung
Easy Printer Manager» на стр. 182).
Ключевые преимущества
• Приложение AnyWeb Print помогает делать снимки экрана, а также
обеспечивает удобный предпросмотр, редактирование и печать
изображений (см. «Samsung AnyWeb Print» на стр. 175).
• Программа Служба обновлений позволяет регулярно проверять
наличие новых версий программного обеспечения и
устанавливать их во время установки драйвера. Эта функция
доступна только для пользователей ОС Windows.
• Если у вас есть доступ в Интернет, вы мо
жете полу
чить справку,
поддержку, драйверы устройства, руководства и информацию о
заказе материалов на веб—сайте www.samsung.com > ваш продукт
> Поддержка и загрузка.
Широкий набор функций и поддержка
множества приложений
• Поддержка разного формата бумаги (см. «Характеристики
материала для печати» на стр. 66).
• Печать водяных знаков: В документ можно добавлять различные
надписи, например «Секретно» (см. «Использование
дополнительных параметров печати» на стр. 155).
• Печать плакатов: Текст и изображения на каждой странице
документа можно увеличить, распечатать на нескольких листах
бумаги и склеить (см. раздел «Использование допол
нительн
ых
параметров печати» на стр. 155).
• Печать можно выполнять из разных операционных систем (см.
«Системные требования» на стр. 69).
• Устройство оборудовано интерфейсом USB.
Поддержка разных методов настройки
беспроводной сети
• Использование кнопки WPS (Wi-Fi Protected Setup™)
— Вы можете легко подключить устройство к беспроводной сети
при помощи кнопки WPS на устройстве и точке доступа
(беспроводном маршрутизаторе).
• Использование USB-кабеля или сетевого кабеля
— Вы можете подключить и использовать различные
беспроводные сети посредством USB-кабеля или сетевого
кабеля.
• С помощью Wi-Fi Direct
— Вы можете легко и удобно посылать файлы на пе
чать с ваших
мобильн
ых устройств посредством функций Wi-Fi или Wi-Fi
Direct.
См. «Введение в методы настройки беспроводной сети.» на
стр. 115.

Функции различных моделей
Функции и комплектация устройств могут различаться в зависимости от модели и региона.
Операционная система
Программное обеспечение
Операционная система ML-216x Series ML-216xW Series
Windows ● ●
Macintosh ● ●
Linux ● ●
Unix
Программное обеспечение ML-216x Series ML-216xW Series
Драйвер принтера PCL
Драйвер принтера SPL ● ●
Драйвер печати PS
Драйвер принтера XPS
a
a. Драйвер XPS поддерживается только в системе Windows. Его можно загрузить с веб—сайта Samsung
(www.samsung.com)
● ●
Samsung Easy Printer Manager ● ●
SyncThru™ Web Service ●

Функции различных моделей
Различные функции
(●: поддерживаемая функция, пустое поле: неподдерживаемая функция)
Функции ML-216x Series ML-216xW Series
Высокоскоростной интерфейс USB 2.0 ● ●
Интерфейс проводной локальной сети Ethernet
10/100 Base TX
Беспроводной сетевой интерфейс 802.11b/g/n ●
Протокол IPv6 ●
Easy Eco Driver (Экономичная печать
a
a. Настроить параметры ECO можно в окне драйвера.
● ●
Защищенная настройка Wi-Fi (WPS) ●
Дуплексная (двусторонняя) печать в ручном
режиме
● ●

Откуда можно загрузить драйвер для
устройства?
• Посетите страницу www.samsung.com/printer. Отсюда
можно скачать последний драйвер к устройству,
который следует установить.
Где можно приобрести дополнительные
компоненты и расходные материалы?
• Задайте вопрос поставщику или продавцу техники
Samsung.
• Посетите страницу www.samsung.com/supplies.
Выберите ваш регион и страну, чтобы просмотреть
соответствующую информацию по обслуживанию.
Индикатор состояния мигает или светится
непрерывно.
• Выключите и снова включите устройство.
• Проверьте значение такого поведения индикатора в
данном руководстве, а затем выполните
соответствующую процедуру устранения проблемы
(см. «Описание индикаторов состояния» на стр. 60).
Произошло замятие бумаги.
• Откройте и закройте верхнюю крышку (см. «Вид
спереди» на стр. 19).
• См. указания по устранению замятия бумаги в данном
руководстве, а затем выполните соответствующую
процедуру устранения проблемы (см. «Удаление
замятой бумаги» на стр. 57).
Нечеткая печать.
• Низкий уровень тонера или неравномерное его
распределение в картридже. Встряхните картридж с
тонером.
• Выберите другое разрешение печати.
• Замените картридж с тонером.
Устройство не печатает.
• Откройте очередь печати и удалите документ из списка
на печать (см. «Отмена задания печати» на стр. 40).
• Удалите драйвер и установите его повторно (см.
«Установка драйвера локально» на стр. 24).
• Выберите данное устройство устройством по
умолчанию в ОС Windows.
10
1. Введение
О руководстве пользователя
В настоящем руководстве пользователя приведены основные
сведения об устройстве, а также детальное описание порядка его
использования.
• Перед началом эксплуатации устройства следует ознакомиться с
информацией о безопасности.
• Решение проблем, связанных с эксплуатацией устройства,
приведено в разделе, посвященном устранению неисправностей.
• Описание терминов, используемых в данном руководстве, см. в
глоссарии.
• В зависимости от модели и компле
ктации конкретного устройства
его вид может отличаться от иллюстраций в данном руководстве
пользователя.
• В зависимости от версии драйвера/микропрограммы конкретного
устройства, вид меню может отличаться от иллюстраций в данном
руководстве пользователя.
• Операции, приведенные в данном руководстве, в основном
предназначены для выполнения в среде Windows 7.
1
Условные обозначения
Некоторые термины настоящего руководства имеют одинаковое
значение, например:
•«документ» и «оригинал».
•«бумага», «материал» и «материал для печати».
•«устройство», «принтер» и «МФУ».
2
Общие значки
Значок Текст Описание
Внимание!
Содержит инструкции по защите устройства
от возможных механических повреждений и
неисправностей.
Примечан
ие
Содержит дополнительные сведения или
подробные описания функций и возможностей
устройства.
11
1. Введение
Информация о безопасности
Приведенные здесь предупреждения призваны защитить вас и
окружающих от получения травм, а также от причинения возможного
вреда устройству. Внимательно прочтите эти инструкции перед
эксплуатацией устройства. После ознакомления с данным документом
сохраните его для последующего использования.
3
Важные обозначения, относящиеся к
безопасности
Разъяснение значков и обозначений,
используемых в данной главе
4
Условия эксплуатации
Осторожно
Осторожно!
Обозначает ситуации, которые могут повлечь
за собой смерть или нанесение вреда
здоровью.
Внимание!
Обозначает ситуации, которые могут повлечь
за собой нанесение легкого вреда здоровью
или имуществу.
Не пытайтесь использовать устройство.
Эксплуатация устройства с поврежденным шнуром
питания или незаземленной розеткой запрещается.
Это может привести к поражению электрическим током или
пожару.
Не допускайте попадания на устройство каких—либо
веществ, (например, воды) и размещения на его
поверхности каких—либо предметов (например, мелких
металлических или тяжелых предметов, свечей,
зажженных сигарет и пр.).
Это может привести к по
ражению электричес
ким током или
пожару.
• При перегреве из устройства может пойти дым, оно
может издавать необычные звуки или распространять
запахи. В этом случае следует немедленно выключить
питание и отключить устройство от электрической сети.
• Доступ к электрической розетке должен быть постоянно
открыт на случай необходимости экстренного
отключения питания.
Это может привес
ти к по
ражению электрическим током или
пожару.
Информация о безопасности
12
1. Введение
Внимание
Запрещается сгибать шнур питания или ставить на него
тяжелые предметы.
Хождение по шнуру или повреждение его тяжелыми
предметами может привести к поражению электрическим
током или пожару.
Запрещается тянуть за шнур при отключении устройства из
розетки; запрещается трогать вилку влажными руками.
Это может привести к поражению электрическим током или
пожару.
Во время грозы или дл
ител
ьного простоя устройства
следует вытащить шнур питания из розетки.
Это может привести к поражению электрическим током
или пожару.
Осторожно, область выхода бумаги может сильно
нагреваться.
Опасность ожогов.
При падении устройства или повреждении его корпуса
следует отключить все соединительные кабели и
обратиться к квалифицированному обслуживающему
персоналу.
В противном случае возникнет опасность поражения
электрическим током или пожара.
Если после исполнения всех инструкций устройство не
работает как следует, обратитесь к квалифицированному
обслуживающему персоналу.
В противном случае возникнет опасность поражения
электрическим током или по
жара.
Есл
и вилка с трудом входит в электрическую розетку, не
следует применять силу.
Следует вызвать электрика для замены розетки, иначе
это может привести к поражению электрическим током.
Следите, чтобы домашние животные не грызли шнуры
питания, телефонные или соединительные кабели.
Это может привести к поражению электрическим током,
пожару или травме животного.
Информация о безопасности
13
1. Введение
5
Правила эксплуатации
Внимание
Не вытягивайте выходящую из устройства бумагу во время
печати.
В противном случае это может привести к повреждению
устройства.
Не кладите руки между устройством и лотком для бумаги.
В этом случае можно получить травму.
Для подключения устройства к электрической сети
используется шнур питания.
Чтобы выключить блок питания устройства, следует
извлечь шнур питания из ро
зетки.
Со
блюдайте осторожность при замене бумаги и
устранении замятий.
Новая бумага имеет острые края и может вызвать
болезненные порезы.
При больших объемах печати нижняя часть области
выхода бумаги может нагреваться. Не позволяйте детям
прикасаться к ней.
Возможно возгорание.
При удалении замятий не пользуйтесь пинцетом или
острыми металлическими предметами.
Это может повредить устройство.
Не накапливайте большое количество бумаги в выходном
лотке.
Это может повредить устройство.
Не закрывайте вентиляционные отверстия и не
проталкивайте в них никакие предметы.
Это может привести к перегреву компонентов, что, в свою
очередь, может спровоцировать повреждение или
в
о
згорание.
Использование элементов управления и настроек или
выполнение операций, не описанных в настоящем
руководстве, может привести к опасному радиационному
облучению.
Информация о безопасности
14
1. Введение
6
Установка и перемещение
Осторожно
Внимание
Запрещается устанавливать устройство в запыленных,
влажных помещениях или помещениях, где возможна
утечка воды.
Это может привести к поражению электрическим током или
пожару.
Перед перемещением устройства отключите питание и
отсоедините все кабели. Информация ниже является
рекомендательной и принимает во внимание веса
устройства. Если состояние вашего здоровья не
позволяет вам поднимать тяжести, не следует поднимать
устройство. Обратитесь за помощью и привлеките к
подъему устройства нужно число людей.
После этого поднимите устройство.
• Если устройство весит менее 20
кг, его может
подн
имать один человек.
• Если устройство весит 20 – 40 кг, его следует
поднимать вдвоем.
• Если устройство весит более 40 кг, его следует
поднимать как минимум вчетвером.
При несоблюдении этого требования устройство может
упасть, сломаться или травмировать людей.
Не устанавливайте устройство на неустойчивой
поверхности.
При несоблюдении этого требования устройство может
упасть, сломаться или тр
авмиро
вать людей.
Информация о безопасности
15
1. Введение
7
Обслуживание и профилактический контроль
Внимание
При необходимости используйте только телефонный
кабель стандарта № 26 AWG
a
или больший.
В противном случае это может привести к повреждению
устройства.
Для безопасной эксплуатации используйте шнур питания
только из комплекта поставки. При использовании шнура
длиной более 2 м и напряжении 110 В размер кабеля
должен соответствовать стандарту 16 AWG или больше.
Невыполнение этого требования может привести к
повреждению устройства, поражению электрическим
током или пожару.
Подключайте шнур пит
ания только к заземленной
розетке.
В противном случае возникнет опасность поражения
электрическим током или пожара.
Электрическая нагрузка на розетки и шнуры питания не
должна превышать допустимую.
Несоблюдение этого требования может сказаться на
производительности устройства, привести к поражению
электрическим током или пожару.
Запрещается накрывать устройство или помещать его в
воздухонепроницаемое место, например, в шкаф.
Н
едостаток вентиляции может привести к возгоранию.
Уровень мощности в розетке должен соответствовать
значению, указанному на этикетке устройства.
Чтобы узнать уровень мощности в используемой розетке,
обратитесь в электроэнергетическую компанию.
a. AWG: система стандартов American Wire Gauge
Перед внутренней чисткой устройства отключите его от
розетки. Не используйте для чистки устройства бензин,
растворитель или спирт; не распыляйте воду прямо на
устройство.
Это может привести к поражению электрическим током
или пожару.
Не включайте устройство при замене частей или
внутренней чистке.
При несоблюдении этой меры можно получить травму.
Храните чистящие принадлежности в местах
недос
тупн
ых для детей.
Опасность травмирования детей.
Информация о безопасности
16
1. Введение
8
Использование расходных материалов
Внимание
Запрещается самостоятельно разбирать, ремонтировать
или реконструировать устройство.
Это может повредить устройство. Ремонтировать
устройство должны только сертифицированные
специалисты.
• Не снимайте щитки и кожухи, закрепленные винтами.
• Замену предохронителей должны производить только
сертифицированные специалисты по обслуживанию.
В противном случае возникнет опасность поражения
электрическим током или пожара.
• Ремонтом устройства должны заниматься только
специалисты по обслуживанию S
a
msung.
При чистке и эксплуатации устройства строго следуйте
поставляемому в комплекте руководству пользователя.
Иначе можно повредить устройство.
Не допускайте запыления или попадания воды на
штепсельную розетку.
В противном случае возникнет опасность поражения
электрическим током или пожара.
Не разбирайте картридж с тонером.
Пыль от тонера может представлять опасность в случае
вдыхания или попадания внутрь организма.
Запрещается сжигать какие—либо расходные материалы,
например, картриджи или термофиксаторы.
Это может привести к взрыву или неконтролируемому
возгоранию.
Хранить такие расходные материалы, как картриджи,
следует в недоступном для детей месте.
Пыль от тонера мо
жет пр
едставлять опасность в случае
вдыхания или попадания внутрь организма.
В процессе замены картриджа или удаления замятий
следует избегать попадания тонера на кожу или одежду.
Пыль от тонера может представлять опасность в случае
вдыхания или попадания внутрь организма.
Если тонер попал на одежду, не стирайте ее в горячей
воде.
Под воздействием горячей воды тон
ер въедается в
ткань. Используйте холодную воду.

Информация о безопасности
17
1. Введение
Повторное использование таких расходных материалов,
как тонер, может привести к повреждению устройства.
При повреждении устройства вследствие повторного
использования расходных материалов сервисное
обслуживание будет платным.
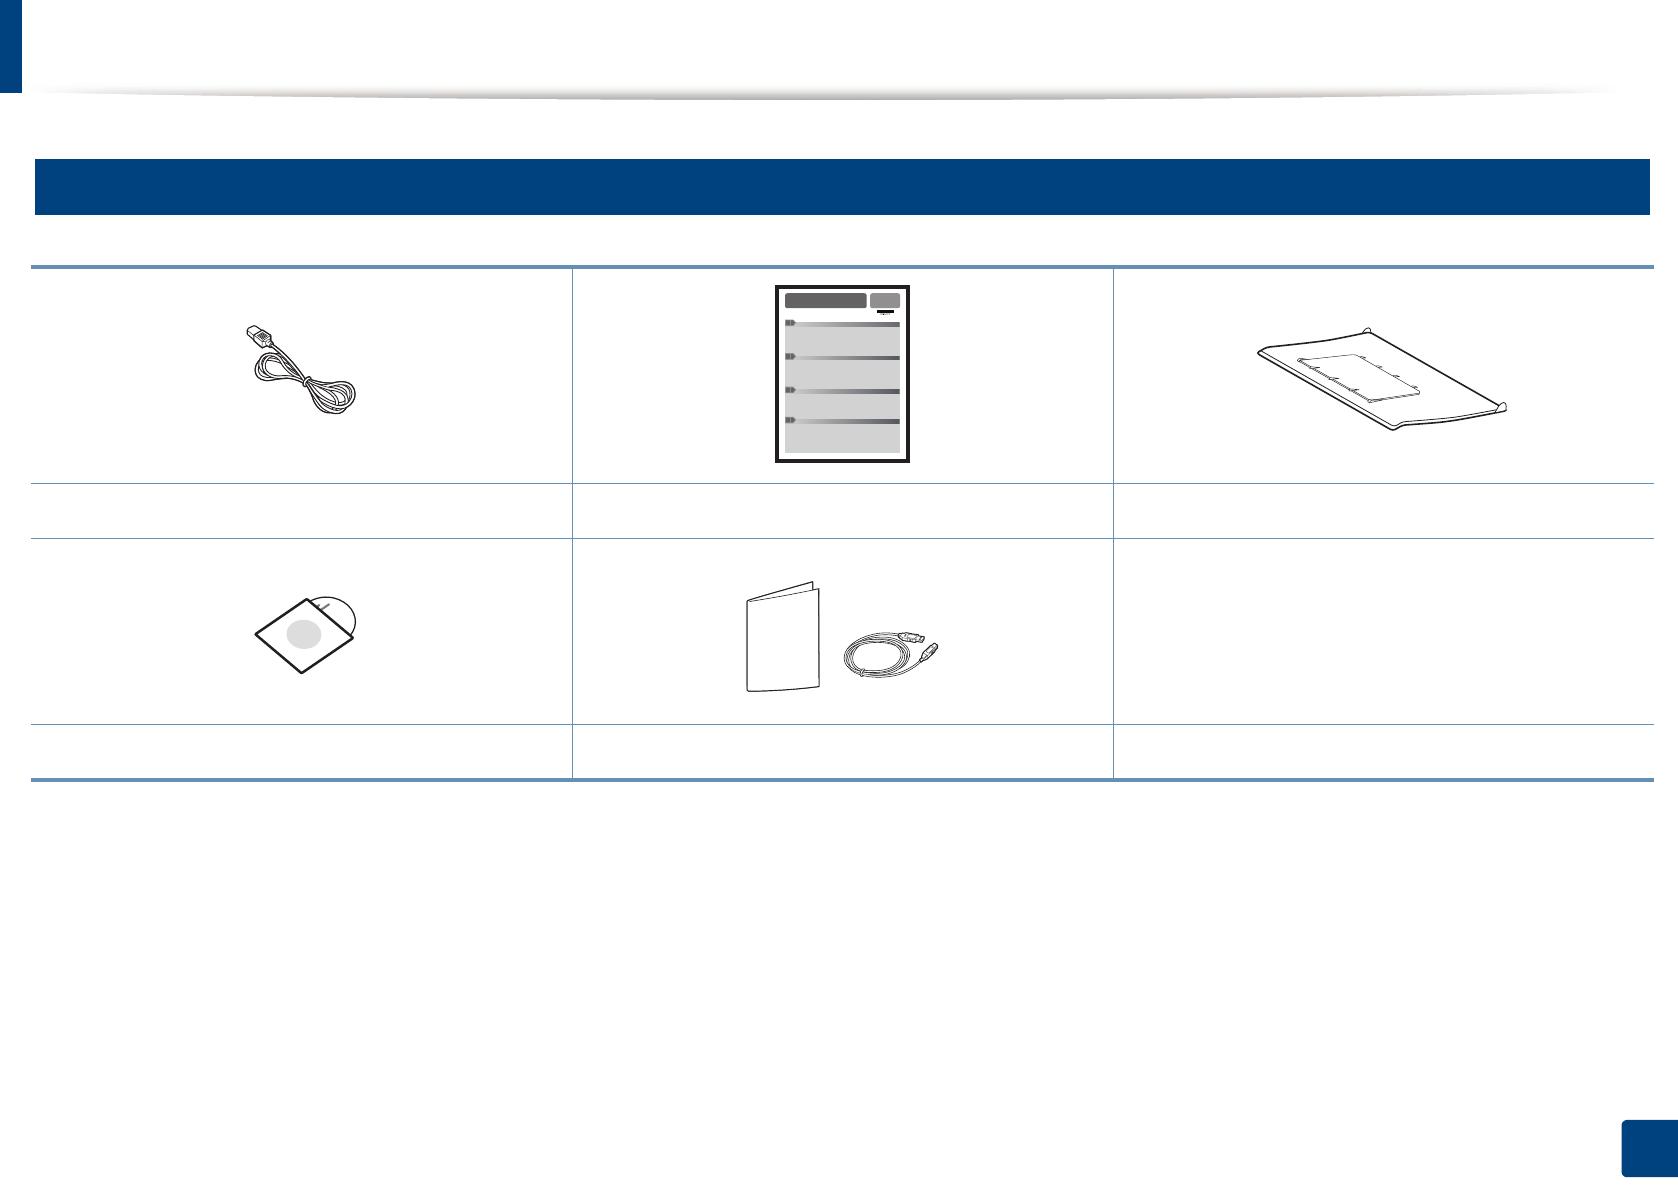
18
1. Введение
Обзор устройства
9
Стандартные
Шнур питания Краткое руководство по установке
Выходной укладчик
a
a. В Кратком руководстве по установке приводится инструкция по креплению выходного укладчика.
Компакт—диск с ПО
b
b. На компакт—диск с ПО записаны драйверы и программные приложения.
Принадлежности
c
c. Комплект принадлежностей зависит от страны приобретения устройства и его модели.
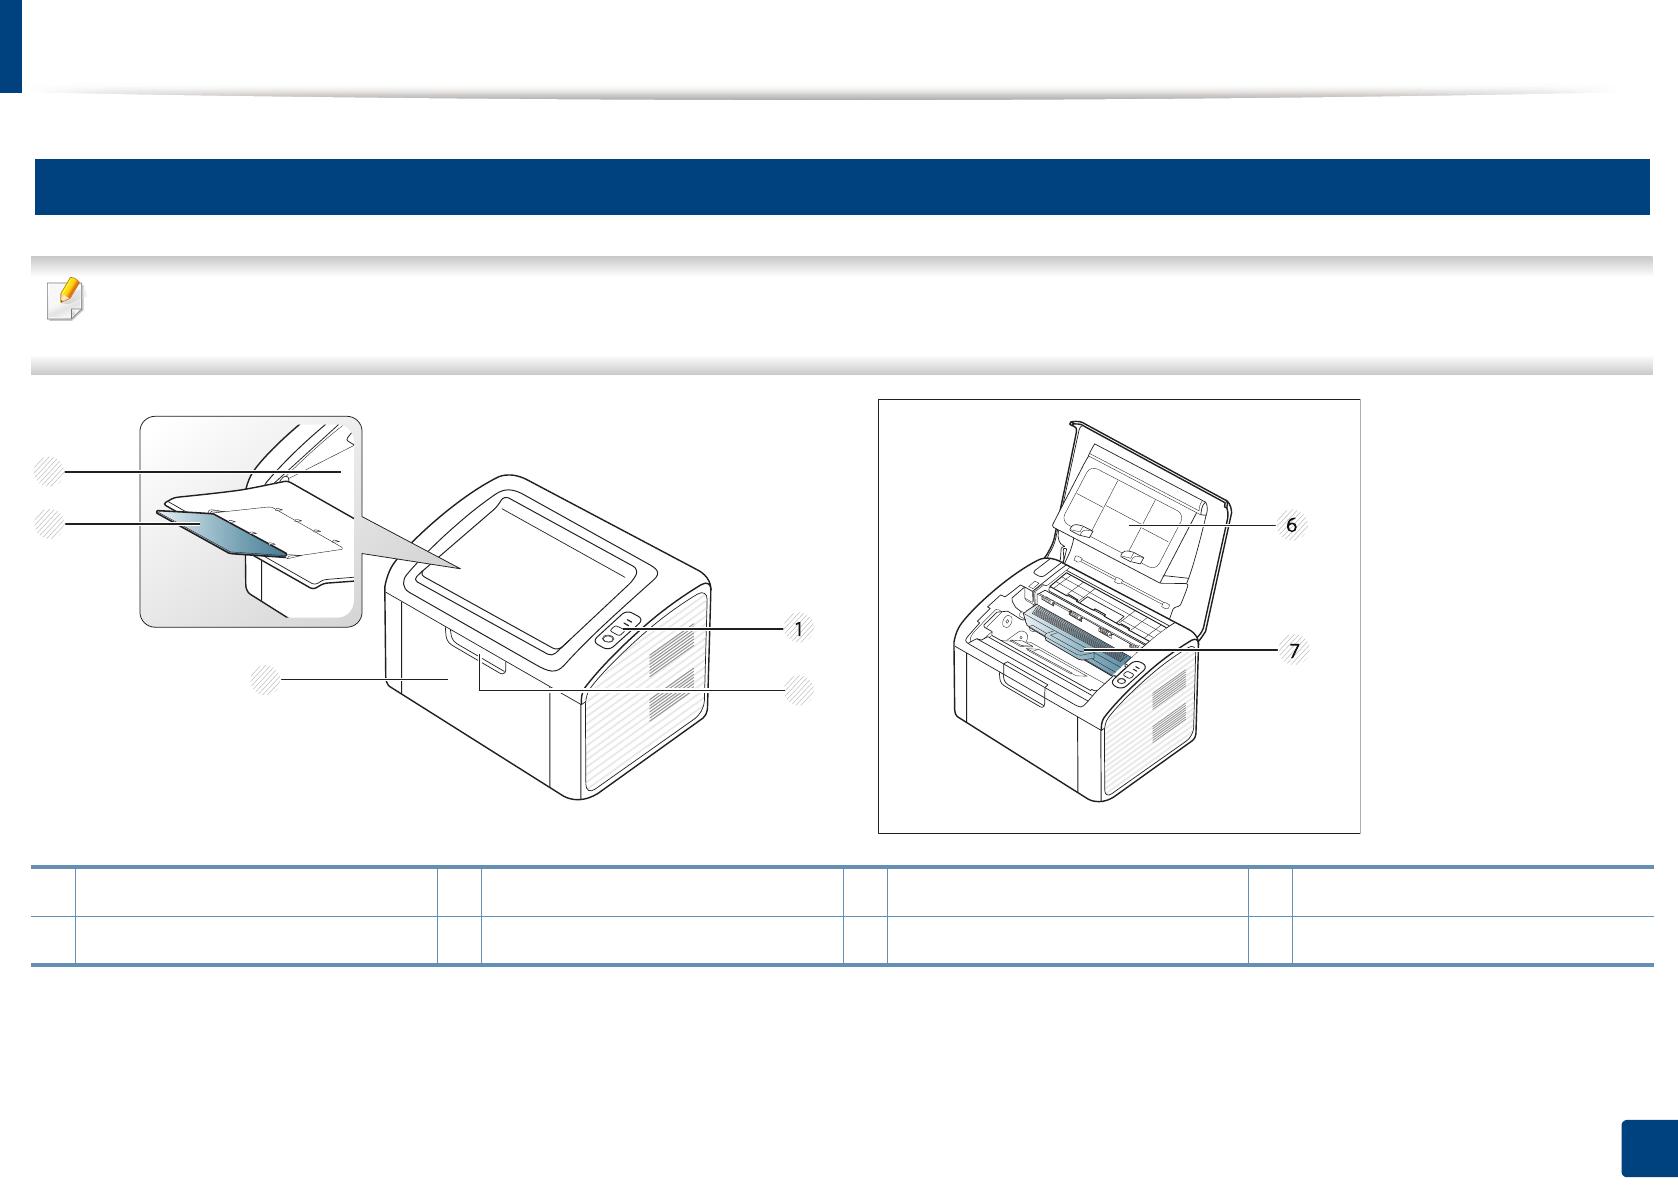
Обзор устройства
19
1. Введение
10
Вид спереди
• Вид принтера может отличаться от представленного на иллюстрации в зависимости от модели.
• Функции и комплектация устройств могут различаться в зависимости от модели и региона (см. «Функции различных моделей» на стр. 7).
1 Панель управления 3 Лоток 5 Подставка выходного лотка 7 Карт. с тонером
2 Ручка лотка 4 Выходной лоток 6 Верхняя крышка
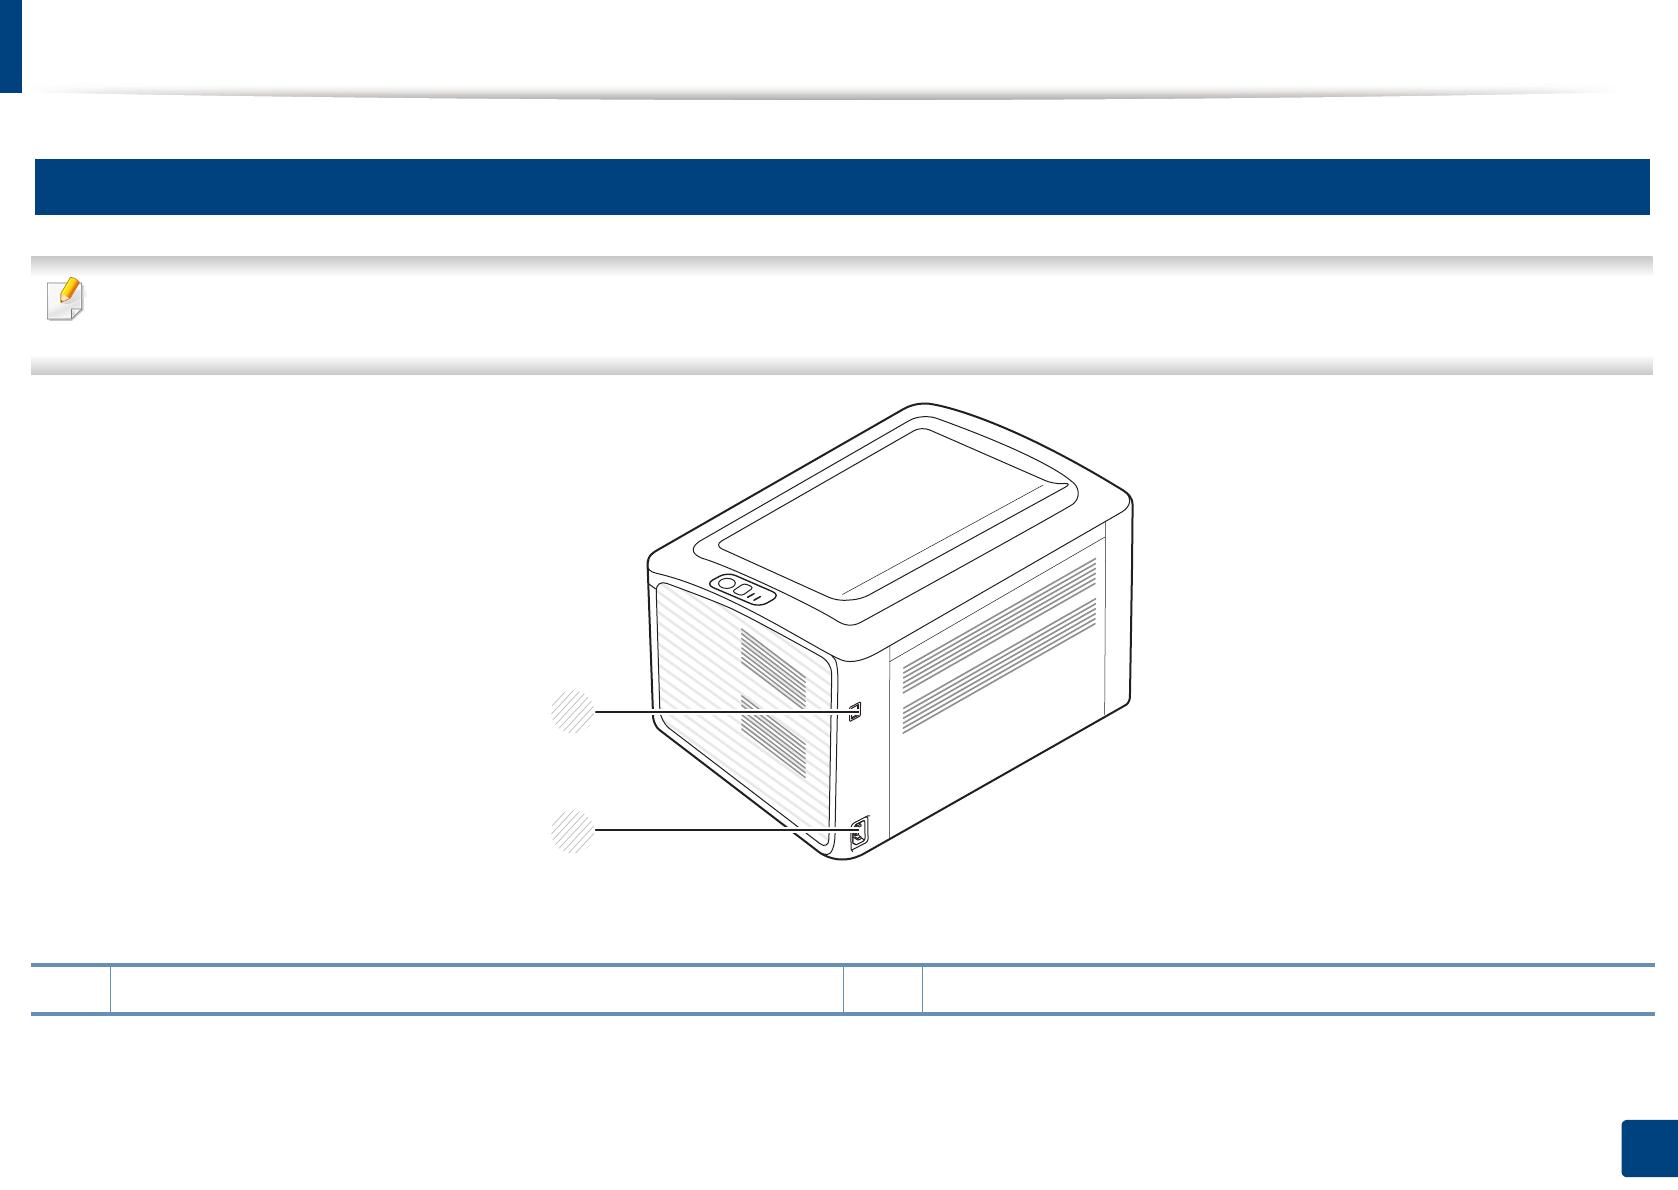
Обзор устройства
20
1. Введение
11
Вид сзади
• Вид принтера может отличаться от представленного на иллюстрации в зависимости от модели.
• Функции и комплектация устройств могут различаться в зависимости от модели и региона (см. «Функции различных моделей» на стр. 7).
1 Порт USB 2 Разъем для шнура питания
1
2
 12:40
12:40
Заправка картриджа MLT-D101s к принтерам Samsung SCX-3400/3405 и ML-2160/2165
 10:21
10:21
Прошивка Samsung ML-2160 с ужасной версией 1.01.02.00
 04:31
04:31
Обзор принтера Samsung ML 2160
 34:28
34:28
Разборка и профилактика принтера Samsung ML-2160
 08:58
08:58
Обзор лазерного принтера samsung ml 2160
 15:39
15:39
Заправка картриджа MLT D101S Samsung ML-2160 /SCX 3400
 08:51
08:51
#7 Принтер Samsung ML 2160 | Как снять и чем почистить ролик захвата бумаги, либо заменить.
 05:55
05:55
Понижение версии прошивки, прошивка принтера Samsung ML-2160, ML-2165 (v1.01.02.00) с помощью JTAG
КРАТКОЕ
Руководство пользователя
ML-216x Series
ML-216xW Series
КРАТКОЕ
Руководство пользователя
В
данном руководстве представлена информация по установке,
основным
функциям и устранению неисправностей в системе
Windows.
РАСШИРЕННОЕ
Данное
руководство содержит информацию об установке, расширенной
конфигурации
, эксплуатации, а также поиске и устранении неисправностей в
различных
операционных системах.
Некоторые
функции могут различаться в зависимости от модели и региона.


Ключевые преимущества, Экологическая безопасность, Быстрая и высококачественная печать
Удобство
- Изображение
- Текст
Ключевые преимущества
Экологическая безопасность
• Для экономии тонера и бумаги устройство снабжено функцией
экопечати
(см. «Easy Eco Driver» на стр. 176).
• В целях экономии бумаги можно распечатывать несколько страниц
на
одном листе (см. «Использование дополнительных параметров
печати
» на стр. 155).
• Для экономии бумаги можно печатать на обеих сторонах листа
(функция двусторонней ручной печати) (см. «Использование
дополнительных
параметров печати» на стр. 155).
• Данное устройство позволяет сэкономить электроэнергию,
автоматически
снижая ее потребление в режиме ожидания.
Быстрая и высококачественная печать
• Печать можно выполнять с разрешением до 1200 x 1200 тчк/дюйм
(фактическое разрешение).
• Быстрая печать по требованию.
— 20 стр/мин для формата A4 или 21 стр/мин для формата Letter
при
односторонней печати.
Удобство
• Программа Easy Capture Manager позволяет печатать снимки
экрана
, полученные нажатием кнопки Print Screen на клавиатуре
(см. «Знакомство с программой Easy Capture Manager» на стр.
177).
• Приложения Samsung Easy Printer Manager и Состояние принтера
Samsung (или Smart Panel) предназначены для мониторинга и
отображения
информации о состоянии устройства. Они позволяют
выбрать
подходящие параметры работы (см. «Работа с Samsung
Easy Printer Manager» на стр. 182).

Ключевые преимущества
• Приложение AnyWeb Print помогает делать снимки экрана, а также
обеспечивает
удобный предпросмотр, редактирование и печать
изображений
(см. «Samsung AnyWeb Print» на стр. 175).
• Программа Служба обновлений позволяет регулярно проверять
наличие
новых версий программного обеспечения и
устанавливать
их во время установки драйвера. Эта функция
доступна
только для пользователей ОС Windows.
• Если у вас есть доступ в Интернет, вы можете получить справку,
поддержку
, драйверы устройства, руководства и информацию о
заказе
материалов на веб-сайте www.samsung.com > ваш продукт
> Поддержка и загрузка.
Широкий набор функций и поддержка
множества приложений
• Поддержка разного формата бумаги (см. «Характеристики
материала
для печати» на стр. 66).
• Печать водяных знаков: В документ можно добавлять различные
надписи
, например «Секретно» (см. «Использование
дополнительных
параметров печати» на стр. 155).
• Печать плакатов: Текст и изображения на каждой странице
документа
можно увеличить, распечатать на нескольких листах
бумаги
и склеить (см. раздел «Использование дополнительных
параметров
печати» на стр. 155).
• Печать можно выполнять из разных операционных систем (см.
«Системные требования» на стр. 69).
• Устройство оборудовано интерфейсом USB.
Поддержка разных методов настройки
беспроводной сети
• Использование кнопки WPS (Wi-Fi Protected Setup™)
— Вы можете легко подключить устройство к беспроводной сети
при
помощи кнопки WPS на устройстве и точке доступа
(беспроводном маршрутизаторе).
• Использование USB-кабеля или сетевого кабеля
— Вы можете подключить и использовать различные
беспроводные
сети посредством USB-кабеля или сетевого
кабеля
.
• С помощью Wi-Fi Direct
— Вы можете легко и удобно посылать файлы на печать с ваших
мобильных
устройств посредством функций Wi-Fi или Wi-Fi
Direct.
См
. «Введение в методы настройки беспроводной сети.» на
стр
. 115.

Функции различных моделей, Операционная система, Программное обеспечение
Страница 7
- Изображение
- Текст
Функции различных моделей
Функции и комплектация устройств могут различаться в зависимости от модели и региона.
Операционная система
Программное обеспечение
Операционная система
ML-216x Series
ML-216xW Series
Windows
●
●
Macintosh
●
●
Linux
●
●
Unix
Программное обеспечение
ML-216x Series
ML-216xW Series
Драйвер принтера PCL
Драйвер принтера SPL
●
●
Драйвер печати PS
Драйвер принтера XPS
a
a. Драйвер XPS поддерживается только в системе Windows. Его можно загрузить с веб-сайта Samsung
(www.samsung.com)
●
●
Samsung Easy Printer Manager
●
●
SyncThru™ Web Service
●

Функции различных моделей
Различные функции
(●: поддерживаемая функция, пустое поле: неподдерживаемая функция)
Функции
ML-216x Series
ML-216xW Series
Высокоскоростной интерфейс USB 2.0
●
●
Интерфейс проводной локальной сети Ethernet
10/100 Base TX
Беспроводной сетевой интерфейс 802.11b/g/n
●
Протокол IPv6
●
Easy Eco Driver (
Экономичная печать
a
a. Настроить параметры ECO можно в окне драйвера.
●
●
Защищенная настройка Wi-Fi (WPS)
●
Дуплексная (двусторонняя) печать в ручном
режиме
●
●

Полезная информация
Откуда можно загрузить драйвер для
устройства?
• Посетите страницу www.samsung.com/printer. Отсюда
можно
скачать последний драйвер к устройству,
который
следует установить.
Где можно приобрести дополнительные
компоненты и расходные материалы?
• Задайте вопрос поставщику или продавцу техники
Samsung.
• Посетите страницу www.samsung.com/supplies.
Выберите
ваш регион и страну, чтобы просмотреть
соответствующую
информацию по обслуживанию.
Индикатор состояния мигает или светится
непрерывно.
• Выключите и снова включите устройство.
• Проверьте значение такого поведения индикатора в
данном
руководстве, а затем выполните
соответствующую
процедуру устранения проблемы
(см. «Описание индикаторов состояния» на стр. 60).
Произошло замятие бумаги.
• Откройте и закройте верхнюю крышку (см. «Вид
спереди
» на стр. 19).
• См. указания по устранению замятия бумаги в данном
руководстве
, а затем выполните соответствующую
процедуру
устранения проблемы (см. «Удаление
замятой
бумаги» на стр. 57).
Нечеткая печать.
• Низкий уровень тонера или неравномерное его
распределение
в картридже. Встряхните картридж с
тонером
.
• Выберите другое разрешение печати.
• Замените картридж с тонером.
Устройство не печатает.
• Откройте очередь печати и удалите документ из списка
на
печать (см. «Отмена задания печати» на стр. 40).
• Удалите драйвер и установите его повторно (см.
«Установка драйвера локально» на стр. 24).
• Выберите данное устройство устройством по
умолчанию
в ОС Windows.

О руководстве пользователя, Условные обозначения, Общие значки
Страница 10
- Изображение
- Текст
10
1.
Введение
О руководстве пользователя
В
настоящем руководстве пользователя приведены основные
сведения
об устройстве, а также детальное описание порядка его
использования
.
• Перед началом эксплуатации устройства следует ознакомиться с
информацией
о безопасности.
• Решение проблем, связанных с эксплуатацией устройства,
приведено
в разделе, посвященном устранению неисправностей.
• Описание терминов, используемых в данном руководстве, см. в
глоссарии
.
• В зависимости от модели и комплектации конкретного устройства
его
вид может отличаться от иллюстраций в данном руководстве
пользователя
.
• В зависимости от версии драйвера/микропрограммы конкретного
устройства
, вид меню может отличаться от иллюстраций в данном
руководстве
пользователя.
• Операции, приведенные в данном руководстве, в основном
предназначены
для выполнения в среде Windows 7.
1
Условные обозначения
Некоторые
термины настоящего руководства имеют одинаковое
значение
, например:
• «документ» и «оригинал».
• «бумага», «материал» и «материал для печати».
• «устройство», «принтер» и «МФУ».
2
Общие значки
Значок
Текст
Описание
Внимание!
Содержит
инструкции по защите устройства
от
возможных механических повреждений и
неисправностей
.
Примечан
ие
Содержит
дополнительные сведения или
подробные
описания функций и возможностей
устройства
.

Комментарии

КРАТКОЕ
Руководство
пользователя
ML-216x Series
ML-216xW Series
КРАТКОЕ
Руководство
пользователя
В
данном руководстве представлена информация по установке,
основным
функциям и устранению неисправностей в системе
Windows.
РАСШИРЕННОЕ
Данное
руководство содержит информацию об установке, расширенной
конфигурации
, эксплуатации, а также поиске и устранении неисправностей в
различных
операционных системах.
Некоторые
функции могут различаться в зависимости от модели и региона.
00:00:04
![]()
[музыка]
00:00:10
![]()
здравствуйте сегодня будем делать
00:00:11
![]()
профилактику принтера samsung ml 2160
00:00:16
![]()
начнем профилактику для начала тучин
00:00:19
![]()
питание принтера второе вытащим картридж
00:00:26
![]()
принтера
00:00:27
![]()
снимаем верхнюю крышку вытаскиваем
00:00:30
![]()
карточку интера
00:00:33
![]()
вытащи его убрали в сторону делаем по
00:00:39
![]()
русски часы запись уже идет для того
00:00:45
![]()
чтоб снять боковую крышку принтера надо
00:00:48
![]()
сначала крутить винтик он у нас уже трюк
00:00:51
![]()
откручен и берем отвертку и из снимаем
00:00:56
![]()
защелки 1 2
00:01:05
![]()
переворачиваем к нам низом вещи тоже
00:01:09
![]()
есть две защелки находятся от но здесь
00:01:12
![]()
на здесь снимаем раз-два и легким
00:01:23
![]()
движением вверх
00:01:26
![]()
легким движением вверх и влево мы можем
00:01:31
![]()
снять боковую крышку далее снимаем
00:01:34
![]()
другую крышку боковую для этого
00:01:38
![]()
проделаем те же самые действия снимаем
00:01:41
![]()
сначала 2 задних защелки для этого поддеваем
00:01:45
![]()
отверточкой 1 2 переворачиваем снизу две
00:01:53
![]()
защелки
00:02:01
![]()
раз-два
00:02:07
![]()
заднюю крышку тянем
00:02:09
![]()
у тебя и снимаем боковую крышку далее
00:02:22
![]()
снимаем заднюю крышку принтера для этого
00:02:25
![]()
откручиваем болтик здесь уже все
00:02:37
![]()
поднимаем задвижку
00:02:44
![]()
бранью сторону чтоб нам не мешала
00:02:46
![]()
для того чтоб снять верхнюю крышку
00:02:49
![]()
прежде всего надо снять переднюю панель
00:02:52
![]()
для этого открутим два винтика который
00:02:56
![]()
находится здесь и здесь
00:02:59
![]()
открутить винтики который находится
00:03:03
![]()
здесь все страны для того чтобы снять
00:03:07
![]()
переднюю панель надо поднять чуть-чуть
00:03:09
![]()
людях приподнимаем и избегаем ее
00:03:12
![]()
чуть-чуть от себя снять 5 убираем you
00:03:19
![]()
сторону поднимаем верхнюю крышку
00:03:24
![]()
принтера
00:03:26
![]()
вот черненькая движ ленин который держит
00:03:31
![]()
верхнюю крышку и снимаем его с одной
00:03:38
![]()
стороны
00:03:47
![]()
на высоту и ширину выбираю с другой
00:03:54
![]()
стороны
00:04:01
![]()
снимаю убираем крышку далее чтобы снять
00:04:14
![]()
панель управления и ворочу
00:04:17
![]()
принтер и откручиваем вот этот винтик
00:04:25
![]()
открутил винтик для того чтоб поднять
00:04:30
![]()
панель управления нам надо отцепить вот
00:04:34
![]()
этот шлейф к ним его на себя
00:04:37
![]()
аккуратненько чтобы не порвать и
00:04:40
![]()
поднимаем панель управления
00:04:43
![]()
я убираем наш редуктор расположен на 4
00:04:51
![]()
болтах
00:04:53
![]()
которой обозначены цифрами на редукторе
00:04:56
![]()
раскручиваем по порядку начале 4
00:04:59
![]()
потом 321 после того как скрутили все
00:05:05
![]()
четыре болта снимаем наш редуктор
00:05:13
![]()
состояние редукторы видим неплохое здесь
00:05:18
![]()
шестерен cmyk почистил далее будем
00:05:24
![]()
снимать печку делаем это для этого видим
00:05:27
![]()
свет идет на тефлонового лом то есть на
00:05:30
![]()
датчики и также на пальцев у нас таки 1
00:05:36
![]()
тонна чтобы сделать профилактики печки
00:05:39
![]()
будем снимать далее переходим к снять и
00:05:42
![]()
печки чтобы сделать ей профилактику
00:05:46
![]()
для этого нам надо открутить 4 болта то
00:05:51
![]()
есть 1 2
00:05:58
![]()
с этой стороны 3
00:06:06
![]()
4 затем после того как открутили четыре
00:06:11
![]()
наших балтика
00:06:13
![]()
снимаем провода печки
00:06:33
![]()
вытаскиваем
00:06:34
![]()
шлейф
00:06:40
![]()
следующий
00:06:51
![]()
аккуратненько когда вы таскаем беремся
00:06:53
![]()
за синюю полосочку
00:07:06
![]()
далее скручиваем нашли 2
00:07:11
![]()
балтика после того как вы tele2 водки
00:07:18
![]()
снимаем аккуратненько нашу схему которая
00:07:24
![]()
мешала нам вытащить от печки видим идет
00:07:38
![]()
про снимайте нажимаем на защелочку такая
00:07:41
![]()
защелочка это им на себя откручиваем
00:07:53
![]()
пучок наших проводов
00:08:00
![]()
и далее
00:08:02
![]()
вытаскиваем
00:08:06
![]()
[аплодисменты]
00:08:13
![]()
наш
00:08:23
![]()
далее чтобы вытащить печку поднимаем наш
00:08:27
![]()
левый угол и тянем поднимаем наш левый
00:08:33
![]()
угол и тянем его влево все
00:08:42
![]()
печка наши вытащили переходим к и
00:08:45
![]()
профилактики начнем разбор нашей спичке
00:08:51
![]()
для этого для начала откручиваем два
00:08:56
![]()
винтика после того как стройке два
00:08:59
![]()
винтика начинаемся мой крышку которая
00:09:02
![]()
закрывать наши провода для этого видим
00:09:04
![]()
здесь на 4 защелках она расположена
00:09:09
![]()
аккуратненько потихонечку поддеваем
00:09:14
![]()
отверточкой
00:09:17
![]()
наши за щелочки и снимаем я
00:09:27
![]()
чтобы не сломать наши защелки
00:09:54
![]()
здесь расположена 4 защелку их внизу на
00:09:56
![]()
2-х держав тоже такая защелочка
00:10:00
![]()
снимаем нашу крышечку
00:10:08
![]()
после чего отсоединяем провода от нашего
00:10:17
![]()
терморегулятора нажимает
00:10:23
![]()
здесь видна
00:10:37
![]()
нажимаю
00:10:38
![]()
видим здесь как бы такая защелочка чтобы
00:10:42
![]()
снять надо нажать две тысячи сторону то
00:10:47
![]()
есть нажимаем вот на эту защелочку и
00:10:51
![]()
вытаскиваем сторону со старым проводом
00:10:54
![]()
про делаем такую же операцию
00:11:06
![]()
убираем наш провод
00:11:10
![]()
запоминаем его расположение
00:11:19
![]()
чтобы потом
00:11:24
![]()
ставить его котла на
00:11:34
![]()
покажу внимательно вам видео чтоб потом
00:11:37
![]()
вы смогли поставить его
00:11:54
![]()
то есть выбираем
00:11:56
![]()
со мной держать со второго держа камеры
00:12:00
![]()
и получается с 3
00:12:10
![]()
также
00:12:15
![]()
4 все стороны шва buddy lee
00:12:22
![]()
переходим на следующей полосы
00:12:31
![]()
есть получается у нас с этим держать так
00:12:33
![]()
обама
00:12:36
![]()
далее снимаем наши боковые крепления
00:12:42
![]()
далее будем снимать нашим боковой крепеж
00:12:46
![]()
для этого провод мы убираем сторону
00:12:55
![]()
отверточкой видим здесь как бы наши
00:13:00
![]()
защелочкой
00:13:06
![]()
а терке поднимаем вверх
00:13:08
![]()
и тянем на себя
00:13:14
![]()
подняли
00:13:17
![]()
то есть она у нас поднялась
00:13:31
![]()
караджич cut это тоже
00:13:33
![]()
верх подняли чтобы легче уходила то
00:13:37
![]()
защелочку
00:13:38
![]()
вот таскаем
00:13:45
![]()
с другой стороны про делаем такую же
00:13:48
![]()
операцию тут она уже видим наши за
00:13:52
![]()
щелочки не дает выйти шоссе леночка
00:13:55
![]()
откручиваем на шестеренку
00:14:00
![]()
открутив шестеренку
00:14:06
![]()
защелочка наши поднимаешь
00:14:13
![]()
такси нынче поддеть
00:14:18
![]()
и она легко выходит
00:14:26
![]()
дальше будем
00:14:29
![]()
держать наше крепежи slamp
00:14:35
![]()
также нажимаем на нашу защелку и снимаем
00:14:38
![]()
на себя
00:14:43
![]()
с одной стороны затем
00:14:53
![]()
другой страны
00:14:56
![]()
на что
00:15:02
![]()
после чего мы откручиваем наши два
00:15:07
![]()
болтика чтобы вытащить нашу лампу после
00:15:14
![]()
того как сшить или
00:15:15
![]()
нашла по поддеваем ее
00:15:28
![]()
аккуратненько вот так
00:15:43
![]()
затем чем добраться наш пальцев и
00:15:46
![]()
датчика на снять этот крышку этого мы
00:15:51
![]()
снимаем пружинки
00:16:03
![]()
одной стороны
00:16:13
![]()
другой странное после чего наши пешка
00:16:20
![]()
расходится по попал после чего наши
00:16:24
![]()
печка расходятся попала
00:16:30
![]()
мы можем свободно вытащить наш
00:16:36
![]()
тефлоновый вал и посмотреть на него
00:16:40
![]()
внимательно
00:16:41
![]()
видим следы которые остаются отсеке
00:16:47
![]()
пешего донора если в свое время ее
00:16:51
![]()
если свое время этот tunar не убрать то
00:16:55
![]()
есть мы видим здесь и то у нас она из
00:17:02
![]()
лесу и время
00:17:03
![]()
тонн армию брать видим здесь след то у
00:17:06
![]()
нас стонах только я боюсь наш угол до
00:17:13
![]()
металла
00:17:16
![]()
значимо числа
00:17:18
![]()
видим на нашем датчики
00:17:23
![]()
донор значительное количество нот это
00:17:29
![]()
незначительный количество тонов
00:17:31
![]()
она и поцарапала наш теплом и овал также
00:17:35
![]()
покажу
00:17:40
![]()
видим здесь тоже как бы
00:17:48
![]()
значительное количество тонера которые
00:17:55
![]()
коряво из наш вал хоть принтер пускайте
00:17:59
![]()
новый
00:18:06
![]()
и мелочь
00:18:10
![]()
я бы назвал очищаемых
00:18:18
![]()
защищаем наши палец
00:18:22
![]()
so today
00:18:24
![]()
себя 5
00:18:30
![]()
чтоб они были идеально белые
00:18:34
![]()
чтобы ничего не царапала видимо какой
00:18:38
![]()
был состояние стало после того как мы
00:18:44
![]()
почистили наши пальчики и датчик
00:18:48
![]()
людям состояние стало чисто и вставляем
00:18:52
![]()
тефлоновый вал тефлоновый вал поставить
00:18:56
![]()
не забываем что наши пальчики должны
00:18:58
![]()
быть на нем
00:18:59
![]()
они под не мы для этого делаем нехитрый
00:19:03
![]()
такого приспособления то есть берем
00:19:05
![]()
проволоку надеваем
00:19:11
![]()
на пальчик
00:19:12
![]()
поднимаем его вверх
00:19:18
![]()
и закрепляем
00:19:28
![]()
когда вала денег все с ними
00:19:32
![]()
в общем все
00:19:35
![]()
пальчик очистили печку посмотрели все
00:19:41
![]()
чистая все смазали
00:19:44
![]()
надели sister проволочкой одеваете
00:19:46
![]()
формула
00:19:53
![]()
видимо
00:19:54
![]()
оделся
00:19:57
![]()
теперь просто убираем все проволочкой
00:20:16
![]()
дальше
00:20:19
![]()
одеваем нижнюю части
00:20:28
![]()
нижней части девается видим
00:20:34
![]()
в эти места
00:21:05
![]()
все нижняя часть одета дальше будем вот
00:21:09
![]()
такой пружинки далее натягиваем наш хуже
00:21:13
![]()
берем наш пружинку
00:21:32
![]()
фиксируем я одет
00:21:35
![]()
также второй прыжок
00:21:54
![]()
так же вторую пружинка берем фиксируем
00:21:57
![]()
ее смотрим одет
00:22:02
![]()
печка наши готова то есть больше
00:22:06
![]()
царапать тефлонового
00:22:08
![]()
закипевший тоннах не будет проверяем
00:22:12
![]()
прокручиваем далее засова нашла по то
00:22:24
![]()
есть получается и
00:22:28
![]()
широкий двойной
00:22:32
![]()
контакт за салоном
00:22:50
![]()
если потеряем а черточки ставим на свои
00:22:54
![]()
места с этой стороны и с этой
00:22:57
![]()
и закручиваю после того как закрытия
00:23:03
![]()
нашей винтики отделе наши контакты
00:23:07
![]()
начинаю собирать наши боковушки
00:23:11
![]()
поднимаем крышку
00:23:23
![]()
отделе одну подружку
00:23:42
![]()
а деле старую боковушку
00:23:48
![]()
после чего располагаем наш про
00:23:52
![]()
как он был
00:25:04
![]()
то есть видим
00:25:06
![]()
наш проф расположен на все пазы чтобы он
00:25:08
![]()
нигде не мешал не торчал другой стороны
00:25:12
![]()
проделаем то же самое и уходит пошел
00:25:22
![]()
заснули два паза затем
00:25:27
![]()
в цепи и
00:25:29
![]()
и ведем провод как он был
00:26:09
![]()
то есть видит шумом нигде не торчал
00:26:20
![]()
все
00:26:22
![]()
после чего не забываем закрутить нашу
00:26:25
![]()
шестеренку
00:26:33
![]()
затем закручиваем наши два винтика
00:26:46
![]()
после того как закрутили два болта
00:26:48
![]()
попробовали чтобы у вас все работало
00:26:52
![]()
отходила приходила продеваем нашу крышку
00:26:56
![]()
сверху крышка одевается
00:27:10
![]()
видим у нас внизу две защелки начали
00:27:15
![]()
засовом миг
00:27:22
![]()
потом постепенно
00:27:33
![]()
это опять вот и все
00:27:39
![]()
на этом
00:27:42
![]()
профилактики нашей птички закончена
00:27:44
![]()
переходим дальше далее смотрим внутри
00:27:52
![]()
внутри видим у нас закипевший тонах
00:27:55
![]()
который все все уберем убирайте который
00:27:58
![]()
мешает нашим принтер может попасть в
00:28:00
![]()
печку и потом будет тоже царапаться
00:28:03
![]()
телефону вал ролики захвата здесь у нас
00:28:07
![]()
порядке менять не будем если вы захотите
00:28:09
![]()
сменить и ролики захвата вам надо будет
00:28:13
![]()
открутить
00:28:19
![]()
1
00:28:22
![]()
винтик
00:28:24
![]()
два винтика с другой стороной вам надо
00:28:29
![]()
будет снять эту схему и также снять этот
00:28:32
![]()
винтик затем все развивается всю панель
00:28:40
![]()
вытаскиваете и так происходит замена
00:28:44
![]()
ролика захвата еще и в чем-то было дело
00:28:48
![]()
в этом принтере
00:28:49
![]()
когда принесли видать он долго стоял
00:28:51
![]()
датчики
00:28:52
![]()
начали завидовать маленько смогли их
00:28:57
![]()
смазкой чтобы работали хорошо все
00:29:02
![]()
производим очистку и собираем далее
00:29:07
![]()
ставим нашу печку засов вначале прогулов
00:29:11
![]()
достают его всего бред кратенько
00:29:19
![]()
запись
00:29:21
![]()
затем левый закручиваем сверху в наши
00:29:26
![]()
четыре винтика закрутили наши четыре
00:29:29
![]()
винтика 110 расположено два с этой
00:29:33
![]()
стороны и 2 1 2
00:29:37
![]()
с этой пропустили провод
00:29:48
![]()
и одеваем нашим схему зеленая
00:30:00
![]()
схема закручиваются у нас на два великих
00:30:03
![]()
а вначале
00:30:12
![]()
то есть она закручивается на два нижних
00:30:15
![]()
винтика когда будете закончил схем
00:30:19
![]()
обратите внимание что здесь справа сына
00:30:23
![]()
болтик с левой стороной винтик далее
00:30:28
![]()
после за того как закрутили наши болтик
00:30:32
![]()
винтик застегиваем все на что да и
00:30:36
![]()
проверяем далее после того как закрыть
00:30:40
![]()
или наш болты критик видим здесь пучок
00:30:44
![]()
проводов который был обмотанной тонким
00:30:47
![]()
проводом засовываем все на свое место
00:30:56
![]()
все все ставили
00:30:58
![]()
теперь сможем проверяем от печки два
00:31:01
![]()
нижних шлейф выше шлейфа дальше этот
00:31:10
![]()
шлейф вес дальше от печки белый и рядом
00:31:14
![]()
и остался у нас один пустой
00:31:16
![]()
для панели управления дальше делаем
00:31:20
![]()
редуктор далее делаем редуктор чтобы
00:31:23
![]()
было вам легче
00:31:24
![]()
редуктор берем здесь он видит наша
00:31:31
![]()
задняя стенка сначала делаем ее
00:31:42
![]()
потом все легко lazy все надели
00:31:48
![]()
и закручиваем по цифры коми 1234
00:31:52
![]()
все после того как закрутили наши 4
00:31:55
![]()
болтика посмотрели дальше одеваем одно из
00:31:58
![]()
управления панели программы вставим
00:32:05
![]()
защелкивается потрогали дальше берем
00:32:16
![]()
шлейф засовываю его на место
00:32:27
![]()
затем когда мы оделись вечно панель
00:32:30
![]()
управление закручиваем поставить их на
00:32:34
![]()
схеме дальше одеваем верхнюю крышку
00:32:41
![]()
далее взбиваем нашу верхнюю крышку для
00:32:45
![]()
того чтобы эти
00:32:48
![]()
наш мешок переключаемся дай а затем
00:32:56
![]()
вставляем нашу чёрную тем одеваем крышку
00:33:03
![]()
другой сам пределом тушь сама операция
00:33:18
![]()
вставляем наш
00:33:19
![]()
лишку затем черную штучку
00:33:31
![]()
забудьте собирать принтер вначале делаем
00:33:34
![]()
за не крышка закручиваем на один болт
00:33:35
![]()
затем одеваем с правом боку крышку затем
00:33:40
![]()
слева когда быть одевать прыжку обрати
00:33:43
![]()
внимание что этот зубик надо поднять
00:33:47
![]()
крышку верхняя чтобы прошел вниз все закончим
00:34:02
![]()
большое
00:34:03
![]()
последние наш витик закончим посреди наш
00:34:07
![]()
винтик и на этом наш принтер готов
51
3.
Обслуживание
Чистка устройства
При
возникновении проблем с качеством печати или при использовании устройства в запыленном помещении необходимо регулярно чистить
его
. Это позволит поддерживать наилучшие условия печати и продлить срок эксплуатации устройства.
• Чистка корпуса устройства с помощью средств, содержащих большое количество спирта, растворителя или другого сильнодействующего
вещества
, может привести к потере цвета или деформации корпуса.
• Если устройство или находящиеся рядом предметы загрязнены тонером, рекомендуется использовать для очистки влажную тканевую
салфетку
. При использовании пылесоса тонер попадает в воздух. Его вдыхание вредно для здоровья.
• Во время печати внутри устройства могут накапливаться обрывки бумаги, частицы тонера и пыли. Постепенно это может привести к снижению
качества
печати, например, появлению пятен тонера и его смазыванию. Очистка внутренних частей устройства поможет устранить эту
проблему
или снизить степень ее проявления.
4
Чистка устройства снаружи
Для
чистки корпуса устройства используйте мягкую ткань без ворса. Ткань можно немного смочить водой, избегая при этом попадания капель на
устройство
или внутрь него.
5
Внутренняя чистка
Во
время печати внутри устройства могут накапливаться обрывки бумаги, частицы тонера и пыли. Постепенно это может привести к снижению
качества
печати, например, появлению пятен тонера и его смазыванию. Очистка внутренних частей устройства поможет устранить эту проблему
или
снизить степень ее проявления.
• Для чистки устройства используйте мягкую ткань без ворса.
• Если у вашего устройства есть выключатель питания, обесточьте устройство посредством этого выключателя прежде, чем приступать к
чистке
.
• Прежде, чем открывать верхнюю крышку, закройте подставку выходного лотка.
Чистка устройства
53
3.
Обслуживание
6
Очистка ролика подачи
• Для чистки устройства используйте мягкую ткань без ворса.
• Если у вашего устройства есть выключатель питания, обесточьте устройство посредством этого выключателя прежде, чем приступать к
чистке
.
54
3.
Обслуживание
Советы по перемещению и хранению устройства
• При перемещении устройства не наклоняйте и не переворачивайте его. В противном случае на внутреннюю поверхность может высыпаться
тонер
, что приведет к повреждению устройства или ухудшению качества печати.
• Перемещать устройство должны не менее двух человек.
4.
Устранение
неисправностей
В
этой главе изложены рекомендации по устранению ошибок в работе устройства.
•
Рекомендации по предотвращению замятия
бумаги
56
•
Удаление замятой бумаги
57
•
Описание индикаторов состояния
60
В
этой главе изложены рекомендации по устранению ошибок в работе устройства.
Если
ваше устройство оснащено дисплеем, то прежде, чем приступать к
устранению
неисправности, посмотрите сообщение на дисплее. Если найти
решение
проблемы с помощью информации в данной главе не удалось, обратитесь
к
главе Устранение неисправностей в Расширенное Руководство пользователя
(см. «Устранение неисправностей» на стр. 192). Если способ устранения в
Руководство
пользователя не найден, или проблему устранить не удалось,
обратитесь
в службу технической поддержки.
56
4.
Устранение неисправностей
Рекомендации по предотвращению замятия бумаги
В
большинстве случаев замятия бумаги можно избежать, если использовать бумагу рекомендованного типа. Чтобы избежать замятия бумаги,
соблюдайте
следующие рекомендации:
• Правильно установите ограничители бумаги (см. «Обзор лотка» на стр. 29).
• Не перегружайте лоток. Стопка бумаги в лотке не должна быть выше отметки максимального уровня бумаги на внутренней стороне лотка.
• Не вынимайте бумагу из лотка во время печати.
• Перед загрузкой согните и выпрямите пачку бумаги или разверните ее края веером.
• Не используйте мятую, сырую или сильно скрученную бумагу.
• Не загружайте одновременно бумагу различных типов.
• Используйте только рекомендованные материалы для печати (см. «Характеристики материала для печати» на стр. 66).
57
4.
Устранение неисправностей
Удаление замятой бумаги
Во
избежание разрыва бумаги вытягивайте ее медленно и осторожно.
1
В лотке
Удаление замятой бумаги
58
4.
Устранение неисправностей
2
Замятие внутри устройства
• При работе область термофиксатора сильно нагревается. При извлечении бумаги из устройства соблюдайте осторожность.
• Прежде, чем открывать верхнюю крышку, закройте подставку выходного лотка.
Удаление замятой бумаги
59
4.
Устранение неисправностей
Если бумага в этой области не обнаружена, переходите к следующему шагу.
60
4.
Устранение неисправностей
Описание индикаторов состояния
Цвет
индикатора показывает текущее состояние устройства.
• Некоторые индикаторы могут различаться в зависимости от модели и региона.
• Для устранения неисправности прочтите сообщение об ошибке и указания соответствующего раздела главы «Устранение неисправностей»
• Также неисправность можно устранить, следуя указаниям программ
Состояние
принтера Samsung или Smart Panel
на компьютере.
• Если неисправность не устранена, обратитесь в службу технической поддержки.