Велокомпьютер SunDING SD-558A с синей подсветкой, имеет 30 функций
Профессиональный велокомпьютер с большим набором функций, подсветкой экрана и набором креплений для различных типов велосипедов.
Множество функций, среди которых «Персональный тренер», термометр, подсветка экрана, напоминание о наступлении времени ТО велосипеда.
Производитель заявляет, что корпус водонепроницаемый.
Отличительная особенность — большой экран, разделённый на 3 части. Вследствие чего можно смотреть сразу на несколько показаний без нужды их переключать.
Индикаторы:
— низкий заряд батареи
— температура окружающего воздуха
— автовключение/отключение
Функции велокомпьютера:
— текущая скорость;
— одометр (общий пробег) 0÷99 999 км;
— расстояние одной поездки;
— максимальная скорость;
— средняя скорость;
— общее время в пути;
— время отрезка пути;
— суммарное время эксплуатации;
— секундомер;
— часы;
— функция «Персональный тренер»: задание нужного расстояния и времени за которое необходимо преодолеть дистанцию – велокомпьютер будет информировать и сообщать об ускорении или замедлении.;
«Персональный тренер» следит за тем, чтобы заданная дистанция была преодолена за требуемое время. В случае ускорений или замедлений, «тренер» автоматически пересчитывает среднюю скорость, указывает на оставшееся время и расстояние.
— компаратор (сравнение показателей за различные периоды);
— термометр;
— установка шкалы скорости (км/ч, м/ч);
— напоминание о техническом обслуживании велосипеда по истечении заданного времени или общего пробега;
— сохранение нужных данных, рекордов, напоминаний сигналов в памяти велокомпьютера;
Комплектация:
— велокомпьютер
— крепеж на руль с датчиком на вилку
— датчик с кабелем длиной 85 см
— спец.крепление (выносное)
— магнит на спицу
— батарейка 3V CR2032 (внутри)
— пластиковые стяжки для крепежа
Инструкция по установке и настройке велокомпьютера (текст):
Основные сокращения
SPD – (SPeeD) – Текущая скорость (до 99,9 км/час)
ODO – (ODOmeter) – Общий пробег велосипеда (отсчитывается с момента установки компьютера на велосипед) – сумма всех расстояний, преодоленных на велосипеде (до 99999 км)
DST – (DiSTance) – Дистанция, расстояние, пройденное за текущую поездку (в любой момент это показание можно обнулить) (от 0 до 9999 км)
MXS (MaXSpeed) – Максимальная зафиксированная скорость за текущую поездку
AVS – (Average Speed) – Средняя скорость за текущую поездку
TM – (Trip tiMe) – Общая продолжительность текущей поездки (при остановках отсчет времени приостанавливается, т.е. учитывается только время, когда вы двигаетесь)
CLK – (CLocK) – Часы, текущее время (12 ч / 24 ч)
Scan – Режим, при котором последовательно отображаются следующие показатели: DST, MXS, AVS и TM (каждая высвечивается в течение 4 сек)
“+” “-” SPEED COMPARATOR – Значок, индикатор указывающий на то, ниже или выше ваша текущая скорость, чем средняя за поездку
Freeze Frame Memory – Заморозка текущих показаний компьютера
Установка размера колеса:
— Когда батарейка будет вставлена, удерживайте правую кнопку пока в центре не появится мигающий символ температуры. Левой кнопкой устанавливаем градусы, нажимаем правую кнопку.
— Режим 12 или 24 часа. Выбираем нужный левой кнопкой, правой устанавливаем.
— Устанавливаем текущее время. Левой перебираем, правой подтверждаем.
— Слева появится цифра «208.0», ноль будет мигать. Нужно выбрать правильную окружность колеса из таблицы, которая поставляется в комплекте с велокомпьютером, начиная с последней цифры. Нажмите левую кнопку чтобы выбрать значение, затем правую чтобы сохранить значение.
— Таким же образом выберите отображение в км/ч или миль в час.
— Установите начальные значения общего одометра (например, если меняли батарею, а общий пробег терять не хочется).
— Установите общее время использования компьютера (если нужно)
Настройка закончена.
Сброс значения ODO ( Общий пробег велосипеда)
Нажмите правую и левую кнопки одновременно и удерживайте их в течении 3 секунд для очистки ODO, Общего пробега и других значений.
Сбросятся значения размера колеса и пробега, показания часов останутся без изменений
SPD – Текущая скорость (Спидометр)
Текущая скорость постоянно отображается на экране. Максимально-возможное значение 99,9 км/час, точность + / – 0,1 км/час.
“+” “-” Сравнение значений скорости SPEED COMPARATOR
На протяжении поездки на экране появляется индикатор «+» или «-», что означает, что текущая скорость больше или меньше среднего значения скорости за поездку.
Одометр ODO – Общий пробег велосипеда
В режиме ODO полное расстояние отображается на экране (значение от 0.001 до 99999 км)
ПОКАЗАНИЯ ТЕКУЩЕЙ ПОЕЗДКИ
DST ( Дистанция, расстояние, пройденное за текущую поездку)
MXS (Максимальная зафиксированная скорость за текущую поездку)
AVS (Средняя скорость за текущую поездку)
TM – Общая продолжительность текущей поездки (при остановках отсчет времени приостанавливается, т.е. учитывается только время, когда вы двигаетесь). Значение от 0:00:00 до 9:59:59.
Для сброса показаний текущей поездки — удерживайте ЛЕВУЮ кнопку 5 секунд (сбросятся DST, MXS, AVS, TM )
TRIP UP и TRIP DOWN
Полезная функция когда нужно сравнить 2 расстояния.
Например, Вы часто ездите на работу на велосипеде. Проехать можно многими путями, но Вас интересуют самые короткие и быстрые. Вы едете в одну сторону, когда приезжаете — забиваете данные текущей поездки (которые берутся из DST и ТМ) в TRIP UP. Когда едете в обратную сторону — по приезду на место забиваете данные в TRIP DOWN.
Примем это за эталон. Дальше можно экспериментировать с различными путями до работы и обратно и сравнивать их со своими эталонными показателями и таким образом вычислить какой маршрут самый быстрый и самый короткий. Не всегда самый быстрый маршрут самый короткий и наоборот.
Важно проехать одним путём в обе стороны, т.к. дорожное движение может быть организовано по разному, по разным сторонам дороги можно ехать.
Также этот режим пригодится для тренировки. Поездка в одну сторону — забиваем данные. Едем обратно — забиваем обратно. В следующий раз пытаемся превзойти эти значения и ставим личные рекорды.
Freeze Frame Memory – Заморозка текущих показаний компьютера
Нажмите левую кнопку в любое время, все показания «заморозятся».
Если сигнал с датчика не поступает в течении 5 минут, устройство переходит в спящий режим, на экране остаются показания часов.
Размеры: 9 х 4.5 х 2 см.
Вес: вес в сборе с кредлом, датчиком и магнитом (без доборов) — 70,0 гр.
—
SD 558A
ENGLISH
FUNCTIONS ILLUSTRATIONS
-SPD
CURRENT SPEED
-ODO ODOMETER
(
0.00 9999km m
/
)
-DST
TRIP DISTANCE
-MXS
MAXIMUM SPEED
-AVS
AVERAGE SPEED
-TTM TOTAL TRIP TIME
-TM
TRIP TIME
-RAT
RIDING ALL TIME
-CLK
CLOCK
12H/24H .
-SW
STOPWATCH
(
— TEMPERATURE
-20
~7
0
)
-TM UP TRIP TIME UP
-TM DN TRIP TIME DOWN
-TRIP UP TRIP DISTANCE UP
-TRIP DN TRIP DISTANCE DOWN
—
COMPARATOR
—
Km Mile SELECTION
/
-MAINTENANCE ALERT
-CARE
REMINDER
—
—
OVER SPEED REMINDER
-SETTING TYRE CIRCUMFERENCE
-SETTING THE LAST VALUE OF ODOMETER / ODO
-SETTING THE LAST VALUE OF TOTAL TIME
-FREEZE FRAME MEMORY
-LCD BACKLIGHT
—
LOW BATTERY INDICATOR
-AUTO ON/OFF
HEAD UNIT ILLUSTRATION
MAINTENANCE ALERT
CARE REMINDER
COMPAPATOR
LOW BATTERY INDICATOR
UP BUTTON
SET BUTTON
MODE BUTTON
COMPONENT ILLUSTRATIONS
BATTERY INSTALLATION
Remove the battery cover
from the bottom of the computer
by using a flat blade screwdriver,
install a CR2032battery with the positive
(+) pole facing the battery cover and
replace the cover. Should the LCD
show irregular figures, take out
the battery and reinstall it.
INSTATION PROCEDURES
&
MOUNT BRACKET
HEAD UNIT
Attach the computer to the mounting shoe by sliding the unit
until it snaps firmly into its postion. To remove it, press the
button on it in the opposite direction.To check for proper
speed function and sensor alignment.
Cable tire
Cable tire
&
WIRELESS TRANSMITTER MAGNET
Attach the sensor transmitter to the left fork blade, the closer the better.
Using the shims to adjust the diameter, and using the cable ties(show
below) to tie it with the fork. Position the sensor transmitter and magnet
as shows, make sure that the arc of the magnet intersects the alignment
. 5
marked on the sensor transmitter with 1
mm clearance. Alignment, spin
the front wheel with computer in speed mode. Adjust the position of sensor
and magnet when there is no or weak reaction.
MAIN UNIT SETUP
MODE INSTRUCTION
,
When set up the battery
it into the
(
)
.
DISPLAY DST
mode Still press MODE
button
,
will go into UP or DOWN
MODE
,
The DST MODE is the
default one
.
ENTER THE DATA SETTING MODE
In the
and
DST
ODO MODE
,
press
button
SET
for 3
into DATA SETTING MODE
seconds
.
( / )
SET TEMPERATURE C F
,
When into the DATA SETTING MODE
C
F
.
press
UP
button to choose
and
Press SET button to confirm and
.
enter into the CLOCK SET MODE
/
SET 12 24 CLOCK
Press UP button to set 12 24hour
/
exchange Press the SET button to
.
confirm and enter to Hour setting,
when the figure indicating HOUR start to flash, press the UP button to
adjust it. Continue to press the SET button to enter Minute
Second
setting mode, press the UP button to
,
adjust it
Upon completion
press SET button to set the wheel size
,
SET WHEEL SIZE
Default wheel circumference setting is
2080mm Choose correct wheel circumference figure from Reference
.
.
Chart Press
UP
Button to advance as needed and SET button to
.(
: —
)
confirm and advance
Range 0 9999mm
TIRE SIZE
CIRC
TIRE SIZE
CIRC TIRE SIZE
«
700CX38mm
2180
650CX23mm
1990
26 x1 75
«
700CX35mm
2168
650CX20mm
1945
26 X1 5
«
— / «
«
700Cx32mm
2155
27 x1 1 4
2161
26 X1 25
«
— / «
«
700Cx30mm
2145
27 x1 1 8
2155
26 X1 0
«
. «
«
700Cx28mm
2136
26 x2 3
2135
24 x1 9
«
.
«
«
700Cx25mm
2124
26 x2 25
2115
20 x1 1 4
«
. «
. «
700Cx23mm
2105
26 x2 1
2095
1 6 X2 0
«
. «
. «
700Cx20mm
2074
26 x2 0
2074
1 6 X1 95
«
. «
. «
700CxTubular 2130
26 X1 9
2055
1 6 X1 5
If the wheel size is not on the chart or if you want a more precise
calibration wheel circumference maybe calculated as following Mark the
,
.
tire and a spot on the floor Roll the wheel forward acomplete revolution
until the tire mark touches the floor against and mark the spot Measure
the distance betwen the marks on floor in millimeters and enter the
. (
result into the computer
1 inch 2 54mm
(
/ )/
/ )
SET
KM H
(M H
,
After circumference setting it enters
to
(
km/h or m/h setting mode.
)
(
)
IN
Press the UP button to select the
km h or m h Press the SET button
/
/ .
SET ODOMETER
OUT
press UP button to adjust the flashing
ODO rercord P
.
ress SET button to
advance The default number is 0000 range 0 9999kms
.
miles
).
when the ODO setting
is
SET RAT
,
When in
RAT
mode
press UP button to
adjust
press SET button to advance
.
:
:
the default number is 00 00 00 range 0 9999Hrs
finished press SET button to DISPLAY mode
,
SET TM UP AND TRIP UP
When in
mode press MODE button
,
DISPLAY
enter to TM UP AND TRIP UP mode press
SET button for 3 seconds to enter into
UP AND TRIP UP SET
mode Press UP button
.
,
to adjust press SET button to advance
The TM UP default number is
:
:
(
:
00 00 00 range
0 99 99 99Hrs
—
.
.
000 0 999 9kms miles
. —
.
/
).
Press «SET back to TM UP AND TRIP UP mode
SET TM DOWN AND TRIP
When TM UP AND TRIP UP mode press
SET button to enter into TM DN
.
AND TRIP
DN
mode Press
SET
seconds to enter into TM DN AND TRIP DN SET
Press UP button
to adjust press SET button
,
.
to advance The TM DN default number is
:
:
(
: ~
:
:
00 00 00 range 0 99 99
99
Hrs
—
.
/
).
0 999 9kms miles
Press SET back to
RETURN TO FACTORY SETTING
,
in any mode press SET and UP button for 5 seconds
except CLOCK Put off
.
battery will clear all the datas and return
the
to factory setting
.
FUNCTION
SPD
Speed is shown all the time on the screen, its maximum reading is 99.9
km/h(m/h), and it’s accurate to +/- 0.1km(m/n).
SPD CONTAST
During riding ,
‘ ‘
and
‘ ‘
indicates the current speed is higher or lower
than average speed(AVS) .
ODO
In ODO mode , the total distance is indicated on the screen, its mileage range
.
is 0.00 9999km(m).
T
he display will be back to 0 when value exceeds its
maximum limit .
DST
In DST mode, the distance for one trip is indicated on the bottom line. DST
ranges from 0 9999km(m),when the value exceed the range limit, it restarts
from 0 automatically Both the time and the distance records will be cleared
when the time of one trip exceed the range limit.
MAX SPD
CIRC
In MXS mode, maximum speed is indicated on the bottom line.
.
«
2035
AVS
. «
1985
.
«
1953
In AVS mode, average speed is indicated on the bottom line.
. «
1913
TM
. «
1916
In TM mode, trip time is indicated on the top line. TM ranges
— / «
1618
0 :00 :00 99 :59 :59. It will be back to 0 when value exceed the limits.
. «
1253
TTM
.
«
1257
All riding time T
. TM ranges 0 :00 :00 9999hr.
. «
1206
,
RAT
:
Total elapsed time RAT
.
STOPWATCH
= .
)
In DST or ODO mode Press SET button
STOPWATCH appears.
Start stopwatch with UP button, press UP button again and
the watch stops, with another UP button it starts again
Press SET button again
confirm and enter ODO SET
mode
to
SLEEP MODE
If no signal has been inputted for 300 seconds,
.
computer will enter into Sleep Mode
remains. It will turn back to the former mode with all
(
: —
/
the data collected when any signal is inputted or
finished press SET button to
,
mode
.
RAT
any button is pressed.
BACK LIGHT
.
(
: ~
).
when the
RAT
setting
is
The backlight function is switched on when you
.
press
any
automaticly in seconds
TEMPERATURE
The range for the temperature is as follows
—
—
TM
20C
70
.
—
OVER SPEED REMINDER
.
. (
:
)
the
TRIP UP
default number is 000 0 range
When the SPD 20KM H the SPD will
«
<
speed 20KMH it will stop
D W
O
N
MAINTENANCE ALERT
,
When the
MODE at same time it
button
for 3
.
CARE REMINDER
When the
).
. (
:
the TRIP DN defaultis 000 0 range
MODE
at same time will clear
.
TM
DN
AND TRIP D
N
MODE
FREEZE FRAME MEMORY
,
Press the UP button in any MODE
clear all the data
mode will enter into freeze frame memory mode.
)
Flashing TM data will appear on the screen.the display will
show the records
UP button will exit this mode
MALFUNCTIONS AND PROBLEMS
KMH NO DISPLAY
a Improper magnet/sensor alignment
.
Inaccurate value is indicated
A. Improperly input, such as wheel circumference.
Slow display response
a Temperature exceeds operating limits(0
.
Black display
a Temperature too high, or display exposed to direct
.
sunlight for too long.
Display readout fades
a Poor battery contact or dead battery
.
Display shows irregular figures
.
a Take out battery and re-install it after 10 seconds.
Abnormal sound when shaking computer
a Rolling Ball switch voice/ shaking the computer in
.
sleep mode, computer auto wake-up.
.
ranges 0 :00 :00 9999hr.
,
,
.
,
the watch goes to zero.
,
automaticly but
CLK
s
:
:
~
:
,
buttons
during PM 17 00 AM 08 00
and switch off
.
.
It will not work at any other time
:
—
—
1 5 8
C or
4F
F
>
/ ,
;
be
shining when the
,
.
>
,
,
ODO 500
KM the
will
be
shining
press both UP and
,
will clear
>
,
,
ODO 300
KM the
will
be
shining
press both SET and
(
Except STOPWATCH
of
DST TTM or TM SPD Go on press the
,
,
.
.
55 ).

- Цена: $9.24
- Перейти в магазин
Доброго времени суток!
После приобретения «педального коня» отправился на поиски велокомпьютера, выбор пал на Sunding sd-558a.
Покупал за $7.39 — сейчас цена выросла.
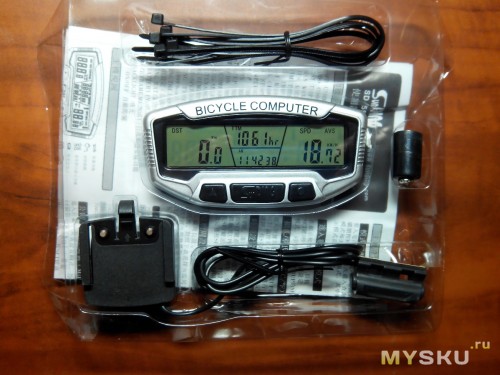
Комплектация:
-велокомп
-база с проводом и сенсором
-датчик на спицу
-6 стяжек
-инструкция
-батарейка «таблетка» CR2032
При установке на велосипед проблем не возникло, стяжки держат хорошо:
2 для сенсора на вилке
2 для базы на руле
2 для провода

Подсветка (синего цвета) включается при нажатии кнопок всего на 2 секунды, но этого достаточно для оценки ситуации)))
Если часы настроены правильно, то в дневное время подсветка включатся не будет.
Продавец пишет о водонепроницаемости, но об этом речи не может быть, зазор между передней и задней частью, примерно в 1мм, запросто пропустит воду. Обклеил велокомп скотчем по периметру, как показали полевые испытания — скотч сработал))) Фото малоинформативно, но всё же 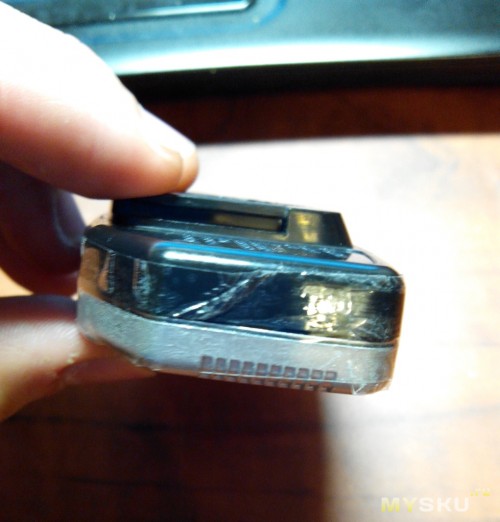
Переключение между режимами производится средней кнопкой. Имеется режим заморозки, включается левой кнопкой.
Если кому будет интересно, нашёл видео www.youtube.com/watch?v=q_Oa2-9uOI0
Плюсы:
— цена
— функциональность
— наличие подсветки
— возможность точно выставить диаметр колеса
— наличие секундомера/таймера
— не возникло проблем с установкой на велосипед
— показывает температуру, пусть и с небольшой погрешностью
Минусы:
— отсутствие водонепроницаемости (решается скотчем)
Напоследок фото на руле 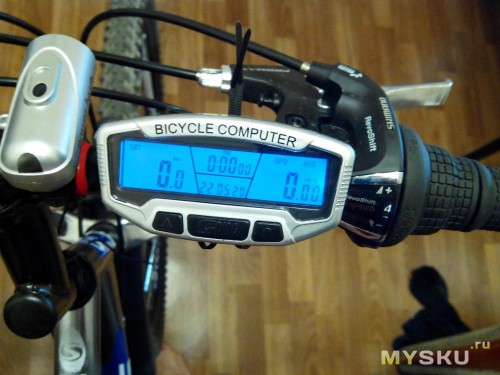
Планирую купить
+15
Добавить в избранное
Обзор понравился
+18
+29

COMPUTER & PARTS
1
2
3
4
5
6
SET
MODE
1
2
3
4
5
6
Computer
Cr2032 Battery
Magnet
Mounting Shoe
Sensor
Ties
Remove the battery
cover out of the
bottom of the
computer
by using a flat blade
screwdriver,
install one CR2032
battery with the
positive (+)po le
facing the batte ry
cover and close
the cover.
INSTALLATION
1
2
COMPONENT ILLUSTRATIONS
Fix it firmly by
screwdriver.
This m ag net
is onl y fo r
less t ha n
2mm sp ok e.
CAUTION:
COMPUTER SETTINGS
MALFUNCTIONS AND REASONS
Attach the sensor to the one side of the front wheel fork, place
the magnet on spoke as the same level to make the good signal
connection. using the shims to adjust the diameter, tie it to the
fork by cable ties. Position the sensor and magnet as image
shows; make sure that the arc of the magnet intersects the
alignment mark on the sensor with 1mm clearance.
Fix the wire :Place the wire like image shows,
avoid binding the wire on the controller, or
probably affect your control on riding.
MAIN UNIT
SPEED
TIME
MODE
SET
BATTERY COVER
COMPUTER & MOUNTING
SHOE TRIGGER
FRONT
BACK
Open
Close
Coin
1 . 5 m m
Important!
Attach the computer to the mounting shoe by sliding
the computer completely to the end of the shoe.
To remove it, press and hold the arrow part of the
shoe and slide the computer to the opposite direction.
To check for proper speed function and sensor
alignment, spin the front wheel with computer in
speed mode. Adjust the position of sensor and
magnet if there is no or weak reaction.
Attach the sensor on the bike by ties, peel
off the paper off the mountin g shoe to glue
to the computer and make it more reliable.
A.Temperature exceeds operating limits (0℃~55℃).
3,Slow display response
4,Weak display
A.Poor battery or dead battery.
5,Displays irregular figures
A.Take battery out and reinstall it after 10 seconds..
1,No speedometer
A.Improper magnet/sensor alignment
2,Inaccurate value is indicated
A.Improper input, such as wheel circumference.
WHEEL SIZE
SETTING & CHART
When in WHEEL SIZE SETTING
MODE, the default wheel
circumference setting is
2080mm,Choose correct
wheel circumference figure as
the chart below.Press UP button
to change each figure properly,
press SET button to confirm and
jump to next figure. (Range:0—9999mm).
When this setting is over, press SET button
to enter into (KM/H)/(M/H) SE TTING MODE.
Press UP button to switch 12/24 hour mode.press the SET button to
confirm and enter to HOUR setting, wh en figure indicates HOUR and
start flashing, press the UP button to adjust the figure to the proper one,
each press makes one number plus.Then press the SET button to set
MINUTE,SECOND SETTING MODE and adjust them by pressing UP
button as well. Wh en this setting is over, press SET button to enter into
WHEEL SIZE SETTING MODE.
TEMPERATURE SETTING(°C/°F)
When in DATA SETTING MODE, press UP button to choose C and F,
press SET button to confirm and enter into the CLOCK SETTING MODE.
12/24 CLOCK SETTING
RAT SETTING
When in RAT SETTING MODE, press UP button to adjust press SET
button to jump to next figure.The default number is.The defalut number
is 00 :00 :00 (range : 0—9999Hrs).When this setting is over, press SET
button to enter into DISPLAY MODE,then press MODE to enter into
TM UP & TRIP UP SETTING MODE.
When in TM UP & TRIP UP SETTING MODE, press and hold SET button
for three seconds to SET the figure of TM UP & TRIP UP. Press UP button
to adjust, press SET to jump to next figure. The TM UP default number is
00 :00 :00 (range :0—99.59.59Hrs). The TRIP UP default number is
000.0 (range :0—999.9kms/miles). Press SET button to finish this setting
and back to TM UP & TRIP UP SETTING MODE. Pr ess SET button to
enter into TM DOWM & TRIP DOWN SETTING MODE.
TM UP & TRIP UP SETTING
When in TM DOWM & TRIP DOWN SETTING MODE, press and hold SET
button for three seconds to SET the figure of TM DOWM & TRIP DOWN.
Press UP button to adjust, press SET to jump to next figure. The
TM DOWN default number is 00 :00 :00 (range :0-99.59.59Hrs). The
TRIP DOWN default number is 000.0 (range :0—999.9kms/miles). Pr ess
SET button to finish this setting and back to TM DOWM & TRIP DOWN
SETTING MODE.
TM DOWM & TRIP DOWN SETTING
DST
The distance of one single trip. Its range is: 0~9999km(m),
The display will automatically turn to zero if the value
is out of the range.
.
SPD
When the wheel is cicrling, the current speed data is
showing all the time on the screen, its ranges is :
0— 99.9km/h(m/h), and it is accurate to +/— 0.1km/h (m/h).
SPD COMPARATOR
During riding , or will dispaly on the screen ,
indicates the speed is higher than average speed.
Indicates the current speed is lower than average
speed.
ODO
The total distance record from the beginning zero to the
current. its mileage ranges : 0.001~99999km(m). The
display will automatically turn to zero if the value is out
of the range.
If the computer is free for over 300 seconds,the computer
will automatically enter into Sleep mode and hide all data
but CLK. It wi ll turn back to the previous mode with all the
data when start circling or press any botton.
MAX SPD
AVS
The maximum speed of one single trip.
The average speed of one single trip.
TM
The trip time is how long one single trip riding lasts .
SLEEP MODE
The wired remote control button is attached the mounting
shoe, it is able to replace the MODE button...
(KM/H)/(M/H)SETTING
When in (KM/H)/(M/H) SETTING MODE, press the UP button to switch
KM/H or M/ H mode, press SET button to confirm and enter into
ODOMETER SETTING MODE.
ODOMETER SETTING
When in ODOMETER SETTING MODE, Pr ess UP button to adjust the
flashing.ODO figure.Press SET button to jump to next number and set
them as the same way.The default number is 0000
(range : 0—9999kms/miles). Wh en this setting is over,
press SET button to enter into RAT SETTING MODE.
MODE INSTRUCTION
When battery is put in the computer, the display is in DST mode. It has three modes of this computer,
DST ,TRIP UP/DOWN and INQUIRY MODE.Each press of the MODE button switches into one of
three MODEs .The DST MODE is the default one.
STOPWATCH
In DST or ODO mode, press SET button to enter into
STOPWATCH MODE.Start stopwatch with UP button,
press UP button again to freeze,press one more UP
button to start the stopwatch again. Clean the stopwatch
data by pressing SET button.
TTM
The total trip time record from the beginning zero to the
current. Its range is: 0~99 :59 :59, The display will
automatically turn to zero if the value is out of the range.。
RAT
Riding time record in total from the beginning zero to
the current.its range is 0—9999 Hr.。
TH
FREEZE FRAME MEMORY
Press the UP button in any mode except STOPWATCH
mode to enter into FreezeFrame memory mode, DST,
TTM, SPD data will be freezed and the figures start flashing.
Press the UP button to leave this mode.
When the SPD is over 20KM/H, the SPD will be flashing
until the SPD is less than 20KM/H.
。
When the ODO is over 300KM, will be flashing, press
both UP and MODE button at the same time to clear the
reminder.
When the ODO
is over 300KM,
the will
be flashing,
press both UP
and MODE button at the
same time to clear the reminder.
WIRED REMOTE CONTROL
AUTO ON/OFF
The sensor in computer is able to wake up automatically
the computer from sleep mode.
TRIP UP/DOWN MODEFix the shoe firmly by ties .
Slid e th e
comp ut er
by the
trou gh o f
the mo un ting
shoe .
DST MODEINQUIRY MODE
ONE SINGLE TRIP DATA RESET
In any mode, press and hold UP button for 3 seconds, then all the data of this single trip riding will be reset to zero except
CLK ODO and RAT.
MAIN FUNCTIONS
Up
UP
OVER-SPEED REMINDER
MAINTENANCE ALERT
CARE REMINDER
The current outdoor temperature. its ranges
is :-20~70 (℃) —4℉~158℉.
TIRE SIZE CIRC TIRE SIZE CIRC TIRE SIZE CIRC
700CX38 mm 2 18 0 65 0C X2 3m m 19 90 2 6« x 1. 75» 2035
700CX35 mm 2 16 8 65 0C X2 0m m 19 45 2 6« X 1. 5» 1985
700Cx32 mm 2 15 5 27 « x1 — 1/ 4» 2 16 1 26 « X1 . 25« 1953
700Cx30 mm 2 14 5 27 « x1 — 1/ 8« 2 15 5 26 « X1 . 0» 1913
700Cx28 mm 2 13 6 26 « x2 . 3» 2135 24« x 1. 9 » 19 16
700Cx25 mm 2 12 4 26 « x2 . 25» 211 5 20 « x1— 1 / 4» 1 61 8
700Cx23 mm 2 10 5 26 « x2 . 1» 2095 1. 6« X 2. 0» 1253
700Cx20 mm 2 07 4 26 « x2 . 0« 2074 1. 6« X 1. 95» 1257
700CxTub ul ar 2 130 26« X1. 9 » 20 55 1 . 6« X1 . 5« 1 20 6
INSTRUCTION
Велокомпьютер SunDING SD-558A с синей подсветкой, имеет 30 функций
Профессиональный велокомпьютер с большим набором функций, подсветкой экрана и набором креплений для различных типов велосипедов.
Множество функций, среди которых «Персональный тренер», термометр, подсветка экрана, напоминание о наступлении времени ТО велосипеда.
Производитель заявляет, что корпус водонепроницаемый.
Отличительная особенность — большой экран, разделённый на 3 части. Вследствие чего можно смотреть сразу на несколько показаний без нужды их переключать.
Индикаторы:
— низкий заряд батареи
— температура окружающего воздуха
— автовключение/отключение
Функции велокомпьютера:
— текущая скорость;
— одометр (общий пробег) 0÷99 999 км;
— расстояние одной поездки;
— максимальная скорость;
— средняя скорость;
— общее время в пути;
— время отрезка пути;
— суммарное время эксплуатации;
— секундомер;
— часы;
— функция «Персональный тренер»: задание нужного расстояния и времени за которое необходимо преодолеть дистанцию – велокомпьютер будет информировать и сообщать об ускорении или замедлении.;
«Персональный тренер» следит за тем, чтобы заданная дистанция была преодолена за требуемое время. В случае ускорений или замедлений, «тренер» автоматически пересчитывает среднюю скорость, указывает на оставшееся время и расстояние.
— компаратор (сравнение показателей за различные периоды);
— термометр;
— установка шкалы скорости (км/ч, м/ч);
— напоминание о техническом обслуживании велосипеда по истечении заданного времени или общего пробега;
— сохранение нужных данных, рекордов, напоминаний сигналов в памяти велокомпьютера;
Комплектация:
— велокомпьютер
— крепеж на руль с датчиком на вилку
— датчик с кабелем длиной 85 см
— спец.крепление (выносное)
— магнит на спицу
— батарейка 3V CR2032 (внутри)
— пластиковые стяжки для крепежа
Инструкция по установке и настройке велокомпьютера (текст):
Основные сокращения
SPD – (SPeeD) – Текущая скорость (до 99,9 км/час)
ODO – (ODOmeter) – Общий пробег велосипеда (отсчитывается с момента установки компьютера на велосипед) – сумма всех расстояний, преодоленных на велосипеде (до 99999 км)
DST – (DiSTance) – Дистанция, расстояние, пройденное за текущую поездку (в любой момент это показание можно обнулить) (от 0 до 9999 км)
MXS (MaXSpeed) – Максимальная зафиксированная скорость за текущую поездку
AVS – (Average Speed) – Средняя скорость за текущую поездку
TM – (Trip tiMe) – Общая продолжительность текущей поездки (при остановках отсчет времени приостанавливается, т.е. учитывается только время, когда вы двигаетесь)
CLK – (CLocK) – Часы, текущее время (12 ч / 24 ч)
Scan – Режим, при котором последовательно отображаются следующие показатели: DST, MXS, AVS и TM (каждая высвечивается в течение 4 сек)
“+” “-” SPEED COMPARATOR – Значок, индикатор указывающий на то, ниже или выше ваша текущая скорость, чем средняя за поездку
Freeze Frame Memory – Заморозка текущих показаний компьютера
Установка размера колеса:
— Когда батарейка будет вставлена, удерживайте правую кнопку пока в центре не появится мигающий символ температуры. Левой кнопкой устанавливаем градусы, нажимаем правую кнопку.
— Режим 12 или 24 часа. Выбираем нужный левой кнопкой, правой устанавливаем.
— Устанавливаем текущее время. Левой перебираем, правой подтверждаем.
— Слева появится цифра «208.0», ноль будет мигать. Нужно выбрать правильную окружность колеса из таблицы, которая поставляется в комплекте с велокомпьютером, начиная с последней цифры. Нажмите левую кнопку чтобы выбрать значение, затем правую чтобы сохранить значение.
— Таким же образом выберите отображение в км/ч или миль в час.
— Установите начальные значения общего одометра (например, если меняли батарею, а общий пробег терять не хочется).
— Установите общее время использования компьютера (если нужно)
Настройка закончена.
Сброс значения ODO ( Общий пробег велосипеда)
Нажмите правую и левую кнопки одновременно и удерживайте их в течении 3 секунд для очистки ODO, Общего пробега и других значений.
Сбросятся значения размера колеса и пробега, показания часов останутся без изменений
SPD – Текущая скорость (Спидометр)
Текущая скорость постоянно отображается на экране. Максимально-возможное значение 99,9 км/час, точность + / – 0,1 км/час.
“+” “-” Сравнение значений скорости SPEED COMPARATOR
На протяжении поездки на экране появляется индикатор «+» или «-», что означает, что текущая скорость больше или меньше среднего значения скорости за поездку.
Одометр ODO – Общий пробег велосипеда
В режиме ODO полное расстояние отображается на экране (значение от 0.001 до 99999 км)
ПОКАЗАНИЯ ТЕКУЩЕЙ ПОЕЗДКИ
DST ( Дистанция, расстояние, пройденное за текущую поездку)
MXS (Максимальная зафиксированная скорость за текущую поездку)
AVS (Средняя скорость за текущую поездку)
TM – Общая продолжительность текущей поездки (при остановках отсчет времени приостанавливается, т.е. учитывается только время, когда вы двигаетесь). Значение от 0:00:00 до 9:59:59.
Для сброса показаний текущей поездки — удерживайте ЛЕВУЮ кнопку 5 секунд (сбросятся DST, MXS, AVS, TM )
TRIP UP и TRIP DOWN
Полезная функция когда нужно сравнить 2 расстояния.
Например, Вы часто ездите на работу на велосипеде. Проехать можно многими путями, но Вас интересуют самые короткие и быстрые. Вы едете в одну сторону, когда приезжаете — забиваете данные текущей поездки (которые берутся из DST и ТМ) в TRIP UP. Когда едете в обратную сторону — по приезду на место забиваете данные в TRIP DOWN.
Примем это за эталон. Дальше можно экспериментировать с различными путями до работы и обратно и сравнивать их со своими эталонными показателями и таким образом вычислить какой маршрут самый быстрый и самый короткий. Не всегда самый быстрый маршрут самый короткий и наоборот.
Важно проехать одним путём в обе стороны, т.к. дорожное движение может быть организовано по разному, по разным сторонам дороги можно ехать.
Также этот режим пригодится для тренировки. Поездка в одну сторону — забиваем данные. Едем обратно — забиваем обратно. В следующий раз пытаемся превзойти эти значения и ставим личные рекорды.
Freeze Frame Memory – Заморозка текущих показаний компьютера
Нажмите левую кнопку в любое время, все показания «заморозятся».
Если сигнал с датчика не поступает в течении 5 минут, устройство переходит в спящий режим, на экране остаются показания часов.
Размеры: 9 х 4.5 х 2 см.
Вес: вес в сборе с кредлом, датчиком и магнитом (без доборов) — 70,0 гр.
—
SD 558A
ENGLISH
FUNCTIONS ILLUSTRATIONS
-SPD
CURRENT SPEED
-ODO ODOMETER
(
0.00 9999km m
/
)
-DST
TRIP DISTANCE
-MXS
MAXIMUM SPEED
-AVS
AVERAGE SPEED
-TTM TOTAL TRIP TIME
-TM
TRIP TIME
-RAT
RIDING ALL TIME
-CLK
CLOCK
12H/24H .
-SW
STOPWATCH
(
— TEMPERATURE
-20
~7
0
)
-TM UP TRIP TIME UP
-TM DN TRIP TIME DOWN
-TRIP UP TRIP DISTANCE UP
-TRIP DN TRIP DISTANCE DOWN
—
COMPARATOR
—
Km Mile SELECTION
/
-MAINTENANCE ALERT
-CARE
REMINDER
—
—
OVER SPEED REMINDER
-SETTING TYRE CIRCUMFERENCE
-SETTING THE LAST VALUE OF ODOMETER / ODO
-SETTING THE LAST VALUE OF TOTAL TIME
-FREEZE FRAME MEMORY
-LCD BACKLIGHT
—
LOW BATTERY INDICATOR
-AUTO ON/OFF
HEAD UNIT ILLUSTRATION
MAINTENANCE ALERT
CARE REMINDER
COMPAPATOR
LOW BATTERY INDICATOR
UP BUTTON
SET BUTTON
MODE BUTTON
COMPONENT ILLUSTRATIONS
BATTERY INSTALLATION
Remove the battery cover
from the bottom of the computer
by using a flat blade screwdriver,
install a CR2032battery with the positive
(+) pole facing the battery cover and
replace the cover. Should the LCD
show irregular figures, take out
the battery and reinstall it.
INSTATION PROCEDURES
&
MOUNT BRACKET
HEAD UNIT
Attach the computer to the mounting shoe by sliding the unit
until it snaps firmly into its postion. To remove it, press the
button on it in the opposite direction.To check for proper
speed function and sensor alignment.
Cable tire
Cable tire
&
WIRELESS TRANSMITTER MAGNET
Attach the sensor transmitter to the left fork blade, the closer the better.
Using the shims to adjust the diameter, and using the cable ties(show
below) to tie it with the fork. Position the sensor transmitter and magnet
as shows, make sure that the arc of the magnet intersects the alignment
. 5
marked on the sensor transmitter with 1
mm clearance. Alignment, spin
the front wheel with computer in speed mode. Adjust the position of sensor
and magnet when there is no or weak reaction.
MAIN UNIT SETUP
MODE INSTRUCTION
,
When set up the battery
it into the
(
)
.
DISPLAY DST
mode Still press MODE
button
,
will go into UP or DOWN
MODE
,
The DST MODE is the
default one
.
ENTER THE DATA SETTING MODE
In the
and
DST
ODO MODE
,
press
button
SET
for 3
into DATA SETTING MODE
seconds
.
( / )
SET TEMPERATURE C F
,
When into the DATA SETTING MODE
C
F
.
press
UP
button to choose
and
Press SET button to confirm and
.
enter into the CLOCK SET MODE
/
SET 12 24 CLOCK
Press UP button to set 12 24hour
/
exchange Press the SET button to
.
confirm and enter to Hour setting,
when the figure indicating HOUR start to flash, press the UP button to
adjust it. Continue to press the SET button to enter Minute
Second
setting mode, press the UP button to
,
adjust it
Upon completion
press SET button to set the wheel size
,
SET WHEEL SIZE
Default wheel circumference setting is
2080mm Choose correct wheel circumference figure from Reference
.
.
Chart Press
UP
Button to advance as needed and SET button to
.(
: —
)
confirm and advance
Range 0 9999mm
TIRE SIZE
CIRC
TIRE SIZE
CIRC TIRE SIZE
«
700CX38mm
2180
650CX23mm
1990
26 x1 75
«
700CX35mm
2168
650CX20mm
1945
26 X1 5
«
— / «
«
700Cx32mm
2155
27 x1 1 4
2161
26 X1 25
«
— / «
«
700Cx30mm
2145
27 x1 1 8
2155
26 X1 0
«
. «
«
700Cx28mm
2136
26 x2 3
2135
24 x1 9
«
.
«
«
700Cx25mm
2124
26 x2 25
2115
20 x1 1 4
«
. «
. «
700Cx23mm
2105
26 x2 1
2095
1 6 X2 0
«
. «
. «
700Cx20mm
2074
26 x2 0
2074
1 6 X1 95
«
. «
. «
700CxTubular 2130
26 X1 9
2055
1 6 X1 5
If the wheel size is not on the chart or if you want a more precise
calibration wheel circumference maybe calculated as following Mark the
,
.
tire and a spot on the floor Roll the wheel forward acomplete revolution
until the tire mark touches the floor against and mark the spot Measure
the distance betwen the marks on floor in millimeters and enter the
. (
result into the computer
1 inch 2 54mm
(
/ )/
/ )
SET
KM H
(M H
,
After circumference setting it enters
to
(
km/h or m/h setting mode.
)
(
)
IN
Press the UP button to select the
km h or m h Press the SET button
/
/ .
SET ODOMETER
OUT
press UP button to adjust the flashing
ODO rercord P
.
ress SET button to
advance The default number is 0000 range 0 9999kms
.
miles
).
when the ODO setting
is
SET RAT
,
When in
RAT
mode
press UP button to
adjust
press SET button to advance
.
:
:
the default number is 00 00 00 range 0 9999Hrs
finished press SET button to DISPLAY mode
,
SET TM UP AND TRIP UP
When in
mode press MODE button
,
DISPLAY
enter to TM UP AND TRIP UP mode press
SET button for 3 seconds to enter into
UP AND TRIP UP SET
mode Press UP button
.
,
to adjust press SET button to advance
The TM UP default number is
:
:
(
:
00 00 00 range
0 99 99 99Hrs
—
.
.
000 0 999 9kms miles
. —
.
/
).
Press «SET back to TM UP AND TRIP UP mode
SET TM DOWN AND TRIP
When TM UP AND TRIP UP mode press
SET button to enter into TM DN
.
AND TRIP
DN
mode Press
SET
seconds to enter into TM DN AND TRIP DN SET
Press UP button
to adjust press SET button
,
.
to advance The TM DN default number is
:
:
(
: ~
:
:
00 00 00 range 0 99 99
99
Hrs
—
.
/
).
0 999 9kms miles
Press SET back to
RETURN TO FACTORY SETTING
,
in any mode press SET and UP button for 5 seconds
except CLOCK Put off
.
battery will clear all the datas and return
the
to factory setting
.
FUNCTION
SPD
Speed is shown all the time on the screen, its maximum reading is 99.9
km/h(m/h), and it’s accurate to +/- 0.1km(m/n).
SPD CONTAST
During riding ,
‘ ‘
and
‘ ‘
indicates the current speed is higher or lower
than average speed(AVS) .
ODO
In ODO mode , the total distance is indicated on the screen, its mileage range
.
is 0.00 9999km(m).
T
he display will be back to 0 when value exceeds its
maximum limit .
DST
In DST mode, the distance for one trip is indicated on the bottom line. DST
ranges from 0 9999km(m),when the value exceed the range limit, it restarts
from 0 automatically Both the time and the distance records will be cleared
when the time of one trip exceed the range limit.
MAX SPD
CIRC
In MXS mode, maximum speed is indicated on the bottom line.
.
«
2035
AVS
. «
1985
.
«
1953
In AVS mode, average speed is indicated on the bottom line.
. «
1913
TM
. «
1916
In TM mode, trip time is indicated on the top line. TM ranges
— / «
1618
0 :00 :00 99 :59 :59. It will be back to 0 when value exceed the limits.
. «
1253
TTM
.
«
1257
All riding time T
. TM ranges 0 :00 :00 9999hr.
. «
1206
,
RAT
:
Total elapsed time RAT
.
STOPWATCH
= .
)
In DST or ODO mode Press SET button
STOPWATCH appears.
Start stopwatch with UP button, press UP button again and
the watch stops, with another UP button it starts again
Press SET button again
confirm and enter ODO SET
mode
to
SLEEP MODE
If no signal has been inputted for 300 seconds,
.
computer will enter into Sleep Mode
remains. It will turn back to the former mode with all
(
: —
/
the data collected when any signal is inputted or
finished press SET button to
,
mode
.
RAT
any button is pressed.
BACK LIGHT
.
(
: ~
).
when the
RAT
setting
is
The backlight function is switched on when you
.
press
any
automaticly in seconds
TEMPERATURE
The range for the temperature is as follows
—
—
TM
20C
70
.
—
OVER SPEED REMINDER
.
. (
:
)
the
TRIP UP
default number is 000 0 range
When the SPD 20KM H the SPD will
«
<
speed 20KMH it will stop
D W
O
N
MAINTENANCE ALERT
,
When the
MODE at same time it
button
for 3
.
CARE REMINDER
When the
).
. (
:
the TRIP DN defaultis 000 0 range
MODE
at same time will clear
.
TM
DN
AND TRIP D
N
MODE
FREEZE FRAME MEMORY
,
Press the UP button in any MODE
clear all the data
mode will enter into freeze frame memory mode.
)
Flashing TM data will appear on the screen.the display will
show the records
UP button will exit this mode
MALFUNCTIONS AND PROBLEMS
KMH NO DISPLAY
a Improper magnet/sensor alignment
.
Inaccurate value is indicated
A. Improperly input, such as wheel circumference.
Slow display response
a Temperature exceeds operating limits(0
.
Black display
a Temperature too high, or display exposed to direct
.
sunlight for too long.
Display readout fades
a Poor battery contact or dead battery
.
Display shows irregular figures
.
a Take out battery and re-install it after 10 seconds.
Abnormal sound when shaking computer
a Rolling Ball switch voice/ shaking the computer in
.
sleep mode, computer auto wake-up.
.
ranges 0 :00 :00 9999hr.
,
,
.
,
the watch goes to zero.
,
automaticly but
CLK
s
:
:
~
:
,
buttons
during PM 17 00 AM 08 00
and switch off
.
.
It will not work at any other time
:
—
—
1 5 8
C or
4F
F
>
/ ,
;
be
shining when the
,
.
>
,
,
ODO 500
KM the
will
be
shining
press both UP and
,
will clear
>
,
,
ODO 300
KM the
will
be
shining
press both SET and
(
Except STOPWATCH
of
DST TTM or TM SPD Go on press the
,
,
.
.
55 ).
Заказать велокомпьютер Sunding SD-558A у надежного продавца по хорошей цене (лучше просмотрите все варианты, цены могут меняться):
https://bit.ly/2GGlCOt
https://bit.ly/2vnn95H
https://bit.ly/2UTVXdU
Альтернативные варианты:
https://bit.ly/2H0qkJ8
Не хватает денег на покупки, тогда Вам сюда:
https://bit.ly/2Ynhidz
https://bit.ly/2J03OiC
Крупнейший украинский интернет-магазин с адекватными ценами и гарантией:
https://bit.ly/31ZpiDz
Крупнейший европейский магазин с брендовой одеждой и обувью:
http://bit.ly/2xlUgrp
Поблагодарить за обзор и дать на хлеб:
Webmoney
Z175064698975
R392587048354
U231670575376
Велокомпьютер Sunding sd 558A купить в Украине по самой выгодной цене:
https://freeshopt.com.ua
Верните часть потраченных денег (3-10%), покупая в заграничных и отечественных интернет-магазинах, при помощи кэшбек сервиса https://bit.ly/2DAMIVJ (проверенный сервис) . К примеру, для Aliexpress размер кэшбека может достигать до 7,5 % от потраченной суммы. Всего в списке свыше 1600 разных магазинов как иностранных, так и отечественных.
Детальный обзор на проводной велокомпьютер sunding 558A инструкция, настройка. В данной видео расскажу о всех его функциях, покажу, что необходимо делать при его установке непосредственно на велосипед. Велокомпьютер sunding 558A по виду и своим функциям абсолютно такой же, как и велокомпьютре 558C, единственное их отличие — провод. У модели 558C его нет, у 558A — есть. К Sunging sd 558A инструкция на русском не предоставляется производителем, поэтому приходится учить английский) чтобы не тратить много времени на это, лучше просмотрите данное видео и если останутся вопросы, пишите их в комментариях.
#freeshopt
#freeshoptчасы
#тактическиечасы
#тактическоеснаряжение
Видео Проводной велокомпьютер Sunding SD-558A bicycle computer обзор, инструкция на русском, настройка канала Дионисий Кораблёв вещает
Показать