- Manuals
- Brands
- Italtecnica Manuals
- Inverter
- Sirio Entry 230
Manuals and User Guides for Italtecnica Sirio Entry 230. We have 3 Italtecnica Sirio Entry 230 manuals available for free PDF download: Service Manual, Owner’s Manual

Italtecnica Sirio Entry 230 Service Manual (158 pages)
Brand: Italtecnica
|
Category: DC Drives
|
Size: 7.14 MB
Table of Contents
-
Italiano
2
-
Table of Contents
2
-
1 Descrizione Parametri Avanzati
3
-
2 Procedura Per la Sostituzione Delle Schede Elettroniche
8
-
Scheda Display
9
-
Scheda Potenza
10
-
-
3 Procedura Per la Sostituzione Dei Sensori DI Flusso Epressione
13
-
4 Procedura Per la Pulizia/Sostituzione del Flussostato
15
-
5 Calibrazione Dei Sensori
17
-
Sensore DI Pressione
18
-
Sensore DI Flusso
18
-
Verifica Delle Calibrazioni
18
-
-
6 Storico Allarmi
18
-
-
English
21
-
1 Description of Advanced Parameters
22
-
2 Procedure for Replacing Electronic Boards
27
-
Display Board
28
-
Power Board
29
-
-
3 Procedure for Replacing Flow and Pressure Sensors
32
-
4 Procedure for Cleaning/Replacing the Flow Switch
34
-
5 Sensor Calibration
36
-
Pressure Sensor
36
-
Flow Sensor
37
-
Checking Calibrations
37
-
-
6 Alarm Log
37
-
-
Português
40
-
1 Descrição de Parâmetros Avançados
41
-
2 Procedimentos para Substituição das Placas Eletrônicas
47
-
Placa Do Visor
48
-
Placa de Potência
49
-
-
3 Procedimentos para Substituição de Sensores de Fluxo E de Pressão
52
-
Sensor de Pressão
52
-
Sensor de Fluxo
53
-
-
4 Procedimentos para Limpeza/Substituição Do Interruptor de Fluxo
54
-
5 Calibração Dos Sensores
56
-
Sensor de Pressão
56
-
Sensor de Fluxo
57
-
Verificação das Calibrações
57
-
-
6 Alarmes
57
-
7 Configurações de Fábrica
59
-
-
Русский
60
-
1 Описание Специализированных Парамеров
61
-
2 Процедура Замены Электронных Плат
68
-
Плата Дисплея
69
-
Плата Питания
70
-
-
3 Процедура Замены Датчиков Потока И Давления
73
-
4 Процедура Очистки/Замены Клапана
75
-
5 Калибровка Датчиков
77
-
Калибровка Датчика Давления
78
-
Клибровка Датчик Потока
78
-
Проверка Калибровки
78
-
-
6 Журнал Регистрации Аварийных Сообщений
79
-
7 Заводские Настройки
81
-
-
Deutsch
82
-
1 Beschreibung der Erweiterten Parameter
83
-
2 Austausch der Platinen
88
-
Grafikkarte
89
-
Leistungsplatine
90
-
-
3 Austauch der Strömungs- und Drucksensoren
93
-
4 Reinigung/Austausch des Strömungswächters
95
-
5 Eichung der Sensoren
97
-
Drucksensor
98
-
Strömungssensor
98
-
Überprüfung der Eichung
98
-
-
6 Alarmaufzeichnungen
98
-
7 Hochladen der Einstellungen des Werkes
100
-
-
Español
101
-
1 Descripción de Los Parámetros Avanzados
102
-
2 Procedimiento para la Sustitución de las Tarjetas Electrónicas
107
-
Tarjeta Pantalla
108
-
Tarjeta Potencia
109
-
-
3 Procedimiento para la Sustitución de Los Sensores de Flujo Ypresión
112
-
4 Procedimiento para la Limpieza/Sustitución del Interruptor de Flujo
114
-
5 Calibración de Los Sensores
116
-
Sensor de Presión
116
-
Sensor de Flujo
116
-
Verificación de las Calibraciones
117
-
-
6 Histórico de Alarmas
117
-
7 Cargar Los Ajustes de Fábrica
119
-
-
Français
120
-
1 Description Paramètres Avancés
121
-
2 Procédure Pour Le Remplacement des Cartes Électroniques
126
-
Carteafficheur
127
-
Carte Puissance
128
-
-
3 Procédure Pour Le Remplacement des Capteurs de Débit Et Pression
131
-
4 Procédure Pour Le Nettoyage/Remplacement du Fluxostat
133
-
5 Calibrage des Capteurs
135
-
Capteur de Pression
136
-
Capteur de Débit
136
-
Vérification des Calibrages
136
-
-
6 Historique Alarmes
136
-
7 Chargement des Paramètres D’usine
138
-
-
Română
139
-
Descriere Parametri AvansațI
140
-
Procedura Pentru Înlocuirea Plăcilor Electronice
145
-
Placă de Putere
147
-
-
Procedura Pentru Înlocuirea Senzorilor de Debit ȘI de Presiune
149
-
Senzor de Debit
150
-
Verificarea Calibrărilor
154
-
-
Istoric Alarme
154
-
Încărcarea Setărilor Din Fabrică
156
-
Advertisement
Italtecnica Sirio Entry 230 Owner’s Manual (116 pages)
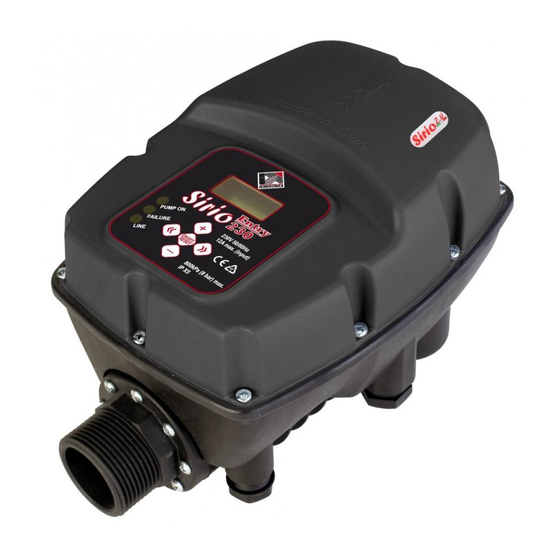
electronic device, employing inverter-based technology, which controls motor pump stopping and starting functions
Brand: Italtecnica
|
Category: Inverter
|
Size: 7.97 MB
Table of Contents
-
Italiano
4
-
Table of Contents
4
-
Indice
5
-
Ingombri — Dimensioni — Identificazione
5
-
Descrizione
6
-
-
Voltar.com.ua Voltar.com.ua Voltar.com.ua Voltar.com.ua
6
-
Dati Tecnici
6
-
Funzionalita
6
-
Protezioni
7
-
Collegamento Idraulico
7
-
Collegamento Elettrico
8
-
-
Voltar.com.ua Voltar.com.ua Voltar.com.ua Voltar.com.ua
12
-
Messa in Funzione
12
-
Descrizione Interfaccia
12
-
Descrizione Tasti
12
-
Struttura Dei Menu
13
-
Descrizione Dei Parametri E Delle Schermate
13
-
Allarmi
16
-
-
Voltar.com.ua Voltar.com.ua Voltar.com.ua Voltar.com.ua
17
-
Anomalie Possibili
17
-
Manutenzione
19
-
-
-
English
22
-
Contents
23
-
Overall Size — Dimensions -Identification
23
-
Description
24
-
-
Voltar.com.ua Voltar.com.ua Voltar.com.ua Voltar.com.ua
24
-
Specifications
24
-
Features
24
-
-
Voltar.com.ua Voltar.com.ua Voltar.com.ua Voltar.com.ua
30
-
Device Protection Features
25
-
Hydraulic Connection
25
-
Electrical Connection
26
-
Start-Up
30
-
-
Programming
30
-
Description of the Interface
30
-
Description of Button Functions
30
-
Menu Structure
31
-
Description of the Parameters and Screen Pages
31
-
Alarms
34
-
-
-
Voltar.com.ua Voltar.com.ua Voltar.com.ua Voltar.com.ua
35
-
Possible Malfunctions
35
-
Maintenance
36
-
-
-
Français
39
-
Table des Matières
40
-
Encombrements — Dimensions -Identification
40
-
Description
41
-
-
Voltar.com.ua Voltar.com.ua Voltar.com.ua Voltar.com.ua
41
-
Données Techniques
41
-
Fonctionnalités
41
-
Protections
42
-
-
Voltar.com.ua Voltar.com.ua Voltar.com.ua Voltar.com.ua
47
-
Installation
42
-
Branchement Hydraulique
42
-
Branchement Électrique
43
-
Mise en Service
47
-
-
Programmation
47
-
Description de L’interface
47
-
Description des Touches
47
-
Structure des Menus
48
-
Description des Paramètres Et des Écrans
48
-
-
Alarmes
51
-
-
Voltar.com.ua Voltar.com.ua Voltar.com.ua Voltar.com.ua
52
-
Anomalies Possibles
52
-
Entretien
53
-
-
-
Deutsch
56
-
Inhaltsverzeichnis
57
-
Platzbedarf — Dimensionen — Identifizierung
57
-
Beschreibung
58
-
-
Voltar.com.ua Voltar.com.ua Voltar.com.ua Voltar.com.ua
58
-
Technische Daten
58
-
Funktionen
58
-
-
Voltar.com.ua Voltar.com.ua Voltar.com.ua Voltar.com.ua
64
-
Schutz
59
-
Wasseranschluss
59
-
Elektrischer Anschluss
60
-
Inbetriebsetzung
64
-
-
Beschreibung der Schnittstelle
64
-
Beschreibung der Tasten
64
-
Aufbau der Menüs
65
-
Beschreibung der Parameter und der Bildschirmseiten
65
-
Alarme
68
-
-
Voltar.com.ua Voltar.com.ua Voltar.com.ua Voltar.com.ua
69
-
Mögliche Störungen
69
-
Wartung
70
-
-
-
Español
73
-
Índice
74
-
Medidas Máximas — Dimensiones — Identificación
74
-
Descripción
75
-
-
Voltar.com.ua Voltar.com.ua Voltar.com.ua Voltar.com.ua
75
-
Datos Ténicos
75
-
Características
75
-
-
Voltar.com.ua Voltar.com.ua Voltar.com.ua Voltar.com.ua
81
-
Protecciones
76
-
Conexión Hidráulica
76
-
Conexión Eléctrica
77
-
Puesta en Funcionamiento
81
-
Descripción de la Interfaz
81
-
Descripción de las Teclas
81
-
Estructura de Los Menús
82
-
Descripción de Los Parámetros y de las Ventana
82
-
Alarmas
85
-
-
-
Voltar.com.ua Voltar.com.ua Voltar.com.ua Voltar.com.ua
86
-
Posibles Desperfectos
86
-
Mantenimiento
87
-
-
-
Русский
90
-
Одержание
91
-
Общий Вид-Габаритные Размеры-Идентификация
91
-
Описание
92
-
-
Voltar.com.ua Voltar.com.ua Voltar.com.ua Voltar.com.ua
92
-
Технические Данные
92
-
Свойства Устройства
92
-
Защитные Функции Устройства
93
-
-
Voltar.com.ua Voltar.com.ua Voltar.com.ua Voltar.com.ua
93
-
Установка
93
-
Идравлические Соединения
93
-
-
-
Voltar.com.ua Voltar.com.ua Voltar.com.ua Voltar.com.ua
98
-
Электрические Соединения
94
-
Описание Внешей Панели Прибора
98
-
Описание Функций Кнопок
98
-
Пуск
98
-
-
-
Voltar.com.ua Voltar.com.ua Voltar.com.ua Voltar.com.ua
103
-
Описание Параментров И Страниц Меню
99
-
Структура Меню
99
-
Сигнальные Системы
102
-
Возможные Причины Неполадок
103
-
Обслуживание
104
-
-
-

Italtecnica Sirio Entry 230 Owner’s Manual (32 pages)
Brand: Italtecnica
|
Category: DC Drives
|
Size: 1.39 MB
Table of Contents
-
Specifications
4
-
Installation
5
-
Hydraulic Connection
5
-
Electrical Connection
6
-
Line Connection
6
-
Possible Malfunctions
13
-
Maintenance
14
-
Donnees Techniques
17
-
Branchement Hydraulique
18
-
Branchement Electrique
19
-
Mise en Service
22
-
Description des Touches
22
-
Anomalies Possibles
26
-
Entretien
27
Advertisement
Advertisement
Related Products
-
Italtecnica Sirio Entry 230 XP
-
Italtecnica Sirio
-
Italtecnica Sirio UNIVERSAL
-
Italtecnica NETTUNO 3P-13A
-
Italtecnica NETTUNO 3P-6A
-
Italtecnica NETTUNO 3P-9A
Italtecnica Categories
Inverter
DC Drives
![]()
Switch
Controller
Remote Control
More Italtecnica Manuals
-
Contents
-
Table of Contents
-
Bookmarks
Quick Links
Set. Lingue 1
Rel. 7.8
Sirio
Sirio
Sirio
Sirio
5 /2014
Entry
Entry
Entry
Entry
230
230
230
230
Manuale d’istruzioni
Owner’s manual
Manuel d’instructions
Bedienungsanweisung
Instrucciones para el uso
Руководство пользователя
230 V~ ±10%
50/60Hz
1×230 V~
1500W max
25÷50Hz
IT
EN
F
DE
E
RUS
Related Manuals for Italtecnica Sirio Entry 230
Summary of Contents for Italtecnica Sirio Entry 230
-
Page 1
230 V~ ±10% 50/60Hz Sirio Sirio Sirio Sirio Entry Entry Entry Entry 1×230 V~ 1500W max 25÷50Hz Manuale d’istruzioni Owner’s manual Manuel d’instructions Bedienungsanweisung Instrucciones para el uso Руководство пользователя Set. Lingue 1 Rel. 7.8 5 /2014… -
Page 3
ATTENZIONE: LEGGERE ATTENTAMENTE QUESTO MANUALE ISTRUZIONI PRIMA DELL’INSTALLAZIONE O MESSA IN FUNZIONE. La ditta costruttrice garantisce il prodotto per un periodo di 24 mesi dalla vendita; l’apparecchio deve essere restituito assieme al presente manuale d’istruzioni riportante nell’ultima pagina la data di installazione e i valori dei parametri programmati. -
Page 4: Table Of Contents
INDICE INGOMBRI — DIMENSIONI — IDENTIFICAZIONE…………………..………..………..5 DESCRIZIONE…………………………………………………………………………………6 DATI TECNICI…………………………………………………………………………………6 FUNZIONALITA’…………………………………………………………………………..6 PROTEZIONI……………………………………………………………………………………7 INSTALLAZIONE COLLEGAMENTO IDRAULICO………………………………………………………..….7 COLLEGAMENTO ELETTRICO……………………………………………………..8 MESSA IN FUNZIONE………………………………………………………..…………12 PROGRAMMAZIONE DESCRIZIONE INTERFACCIA…………………………………………………………….12 DESCRIZIONE TASTI……………………………………………………………………….12 STRUTTURA DEI MENU’……………………………………………………………………13 DESCRIZIONE DEI PARAMETRI E DELLE SCHERMATE…….………………………13 ALLARMI…..………………………………………………………………………………….16 ANOMALIE POSSIBILI……………………………………………………………………..17 MANUTENZIONE…………………………………………………………………………….19…
-
Page 5: Ingombri — Dimensioni — Identificazione
↔ INGOMBRI — DIMENSIONI — IDENTIFICAZIONE…
-
Page 6: Descrizione
DESCRIZIONE Sirio Entry è un dispositivo elettronico che controlla l’avvio e l’arresto di una elettropompa, basato su tecnologia ad inverter. Grazie a questa tecnologia esso è in grado di modulare la frequenza (Hz) della corrente che arriva al motore in modo da farne variare il regime di rotazione giri/minuto a seconda della richiesta di acqua dall’impianto.
-
Page 7: Protezioni
PROTEZIONI √ Marcia a secco √ Sotto-tensione di alimentazione (intervento a circa 200 Volt) √ Sovra-tensione di alimentazione (intervento a circa 260 Volt) √ Corto circuito sui terminali di uscita √ Controllo amperometrico su uscita motore √ Surriscaldamento interno dell’inverter √…
-
Page 8: Collegamento Elettrico
COLLEGAMENTO ELETTRICO: ATTENZIONE: — tutti i collegamenti elettrici devono essere eseguiti da personale specializzato — un collegamento non corretto del motore elettrico può causare il danneggiamento del dispositivo e del motore stesso della pompa. — il mancato rispetto di quanto riportato in questo paragrafo può causare seri danni a cose e/o persone per i quali la ditta costruttrice declina ogni responsabilità.
-
Page 9
Prima di eseguire il collegamento elettrico è necessario preparare opportunamente i cavi con appositi terminali a crimpare. Collegare i due fili di alimentazione del motore della pompa al morsetto bipolare verde contrassegnato dalla scritta “MOTOR”; procedere quindi con l’allacciamento del cavo di terra ad una delle estremità del doppio morsetto di terra, utilizzando appositi terminali ad occhiello. -
Page 10
Nel caso di lunghezze della linea di alimentazione superiori a 5-10 metri, è preferibile usare un cavo con sezione 2,5mm per ridurre le cadute di tensione nel cavo stesso e ridurre le possibilità di intervento della protezione per sotto-alimentazione. Il tipo di cavo elettrico deve corrispondere alle condizioni di impiego (uso in locali domestici, secchi o bagnati, per posa all’interno o all’esterno). -
Page 11
IMPOSTAZIONE PARAMETRO “CONTATTO AUSILIARIO” = “2” — Funzione di avvio ed arresto a distanza Con il parametro “CONTATTO AUSILIARIO” impostato su “2”, Sirio Entry è predisposto per essere avviato ed arrestato a distanza in funzione delle richieste dell’impianto. Questa funzione è utile quando si intende programmare l’avvio dell’elettropompa in CONTATTO concomitanza con l’avvio di altre apparecchiature… -
Page 12: Messa In Funzione
MESSA IN FUNZIONE: ATTENZIONE: alla prima accensione evitare di far funzionare il dispositivo per molto tempo senza acqua per evitare surriscaldamenti dell’inverter! Riempire il tubo di aspirazione della pompa prima di alimentare il sistema. Una volta eseguiti tutti i collegamenti elettrici ed averne controllato la correttezza, chiudere il coperchio dell’unità…
-
Page 13: Struttura Dei Menu
STRUTTURA DEI MENU’ DESCRIZIONE DEI PARAMETRI E DELLE SCHERMATE PARAMETRI UTENTE: Questi parametri sono normalmente accessibili quando il dispositivo è alimentato. Schermata principale: quando Sirio Entry sta funzionando regolarmente, nella prima linea del display vene visualizzata la pressione istantanea rilevata dal sistema; nella seconda linea è visibile un grafico a barre che riproduce la velocità…
-
Page 14
Pmax2: questa pagina appare solo se il parametro “CONTATTO AUSILIARIO” è impostato sul valore “3” ( funzione di doppio set- point); tramite questo parametro è possibile impostare il valore di set-point secondario del dispositivo. Quando il contatto ausiliario viene chiuso esternamente, il valore di pressione impostato in Pmax2 diventa il nuovo set-point, in funzione del quale Sirio Entry regola i giri dell’elettropompa. -
Page 15
desidera invece disattivare completamente il controllo delle perdite, premere il tasto “-“ fino a far apparire la scritta “OFF” sulla riga inferiore di questa pagina. Lingua: è possibile personalizzare la lingua dei menù e dei messaggi di allarme. Agire sui tasti + e – per modificare il valore del parametro. -
Page 16: Allarmi
assorbimento eccessivo. L’arresto avviene anche se la corrente letta durante il funzionamento è inferiore a 0,5 A in seguito all’interruzione del collegamento tra il motore ed il Sirio Entry. Il tempo di intervento della protezione per eccessivo assorbimento è inversamente proporzionale all’entità…
-
Page 17: Anomalie Possibili
Corto Circuito: Questo messaggio appare sul display quando si verifica un corto circuito all’uscita dell’inverter; questo può accadere in seguito al collegamento errato del motore elettrico, ad un danneggiamento dell’isolamento elettrico nei cavi che collegano l’elettropompa al dispositivo o per un guasto al motore elettrico della pompa.
-
Page 18
L’inverter non è più in grado di scambiare calore con l’acqua che attraversa il dispositivo oppure la temperatura del fluido pompato è troppo elevata; controllare la presenza di corpi estranei che blocchino il passaggio dell’acqua ed eventualmente fare controllare il dispositivo dalla casa costruttrice. -
Page 19: Manutenzione
MANUTENZIONE: Sirio Entry è stato progettato per ridurre al minimo la manutenzione. E’ indispensabile attenersi alle seguenti indicazioni per assicurare a lungo la piena funzionalità del dispositivo: — evitare che il dispositivo raggiunga temperature inferiori a 3° C; se ciò non è possibile, assicurarsi che tutta l’acqua al suo interno sia stata scaricata per evitare che, ghiacciandosi, possa danneggiare il corpo in plastica dell’apparecchio stesso;…
-
Page 20
Data …./…./……. Installatore installazione Cliente Marca-modello pompa N° seriale Sirio Entry VALORI IMPOSTATI ALL’INSTALLAZIONE Pmax Pmax2 Pmin Ritardo stop Secondi Tempo auto- Minuti reset Test auto- N° test reset NO SI ( n° max partenze:_________) Partenze/ora NO … -
Page 21
WARNING: READ THIS HANDBOOK CAREFULLY BEFORE INSTALLING OR STARTING THE DEVICE. The manufacturer guarantees this product for a period of 24 months as of the date of sale; if returned, the device must be accompanied by this handbook, with the installation date and programming parameter values entered on the last page. -
Page 22
CONTENTS OVERALL SIZE — DIMENSIONS — IDENTIFICATION………………..………………….23 DESCRIPTION…………………………………………………………………………………24 SPECIFICATIONS …………………………………………………………………………..24 FEATURES……………..…………………………………………………………………..24 DEVICE PROTECTION FEATURES …………..……………………………………………25 INSTALLATION HYDRAULIC CONNECTION ……………………..……………………………………..25 ELECTRICAL CONNECTION ……………………………………………………………26 START-UP…………………………………………………………..……………………….30 PROGRAMMING DESCRIPTION OF THE INTERFACE……………………………………………………30 DESCRIPTION OF BUTTON FUNCTIONS ……………………………………………..30 MENU STRUCTURE………………………………………………………….……………31 DESCRIPTION OF THE PARAMETERS AND SCREEN PAGES ….………..……….31 ALARMS………………….……………………………………………………….…………34 POSSIBLE MALFUNCTIONS ……..………………………………….35 MAINTENANCE……………………………………………………………………………….36… -
Page 23: Overall Size — Dimensions -Identification
↔ OVERALL SIZE — DIMENSIONS -IDENTIFICATION…
-
Page 24: Description
DESCRIPTION Sirio Entry is an electronic device, employing inverter-based technology, which controls motor pump stopping and starting functions. Thanks to the particular type of technology used, it can modulate the frequency (Hz) of the motor’s input current to alter the speed (rpm) according to the water delivery rate required from the system.
-
Page 25: Device Protection Features
DEVICE PROTECTION FEATURES √ Dry running √ Under-voltage on power line (activation at approx. 200 Volt) √ Overvoltage on power line (activation at approx. 260 Volt) √ Output terminal short circuit √ Motor output current control √ Internal overheating in inverter √…
-
Page 26: Electrical Connection
ELECTRICAL CONNECTION: WARNING: — all wiring up must be carried out by specially trained personnel — an incorrect motor pump connection could result in damage to the device or the pump motor. — the manufacturer cannot be held responsible for any kind of damage to people and/or things ensuing from failure to comply with the contents of this paragraph.
-
Page 27
Before making the electrical connection, the cables must be prepared with the supplied crimp terminals. Connect the two power wires from the pump motor to the 2-pole green terminal marked “MOTOR”; then proceed with connection of the earth wire to one end of the double earthing terminal using the special eyelet terminals supplied. -
Page 28
The terminals must be crimped by specialist personnel, using special pliers for the purpose. The recommended wire section is 1.5mm2, which is compatible with motor pumps up to 1.1 kW. For powers over 1.1 kW and up to 1.5 kW a 2.5mm wire section is recommended. -
Page 29
SETTING OF “AUXILIARY CONTACT” PARAMETER = “2” – Remote on/off control function When the “AUXILIARY CONTACT” parameter is set on “2” the Sirio Entry is set to be switched on and off by remote control according to the system EXTERNAL requirements. -
Page 30: Start-Up
START-UP: WARNING: do not allow the pump to run for long without water the first time it is switched on otherwise the inverter will overheat! Prime the pump before switching on the system. Once all the electrical connections have been made and checked to ensure they are correct, close the unit’s cover and switch on the power.
-
Page 31: Menu Structure
MENU STRUCTURE DESCRIPTION OF THE PARAMETERS AND SCREEN PAGES USER PARAMETERS: These parameters are accessible when the device is on. Main screen page: when the Sirio Entry is in the standard operation mode, the first line on the display shows the instant pressure reading;…
-
Page 32
Pmax2: this page is only displayed if the “AUXILIARY CONTACT ” parameter is set on “3” (second set-point function); this parameter is used to set the secondary set-point of the device. When the auxiliary contact is externally closed the Pmax2 pressure value becomes the new set-point according to which the Sirio Entry adjusts the speed of the motor pump. -
Page 33
Language: The language used for the menus and the alarm messages can be selected by the user. Use the + and – buttons to alter the parameter setting. INSTALLER PARAMETERS: These parameters can be found on hidden pages and usually they should only be changed in the installation phase. -
Page 34: Alarms
(manufacturer’s default setting), the page from which to set the maximum current value will be displayed; no action can be carried out until the maximum absorption value has been set. Auxiliary contact: use this parameter to select the function to be associated with the auxiliary contact;…
-
Page 35: Possible Malfunctions
Overload: This alarm appears when the absorption of the motor pump is greater than the maximum current value set (Imax); this may be caused by extremely difficult working conditions for the motor pump, problems related to the motor winding , if the pump is restarted continuously at short intervals or following problems with the wiring of the motor to the Sirio Entry.
-
Page 36: Maintenance
The sensor which detects the valve position is broken. Have the device checked by the manufacturer. The pump is running at top speed but performance levels are low The pump or the capacitor connection is not correct: check the electric wiring. The pump is damaged or there is foreign matter clogging the waterway.
-
Page 37
Installation date …./…./……. Fitter Customer Pump make/model Sirio Entry serial VALUES SET AT INSTALLATION Pmax Pmax2 Pmin Stop delay Seconds Auto-reset Minutes time Auto-reset test Test n. NO YES ( n° max start:_________) Start/hour NO YES Soft Start … -
Page 38
ATTENTION: LIRE ATTENTIVEMENT CE MANUEL AVANT L’INSTALLATION OU LA MISE EN SERVICE. Le fabricant garantit le produit pour une durée de 24 mois à compter de la date de vente, l’appareil doit être rendu avec le présent mode d’emploi en indiquant à la dernière page la date d’installation et les valeurs des paramètres programmés. -
Page 39
TABLE DES MATIÈRES ENCOMBREMENTS — DIMENSIONS — IDENTIFICATION…………….…..……….40 DESCRIPTION……………………………………………………..…………..……..41 DONNÉES TECHNIQUES……………………………………………….…………..…..41 FONCTIONNALITÉS…………………………………………….……………………..41 PROTECTIONS…………………………………………………………………..…..….42 INSTALLATION BRANCHEMENT HYDRAULIQUE……………………………………………………42 BRANCHEMENT ÉLECTRIQUE………………………………………………………43 MISE EN SERVICE……………………………………………………………………….47 PROGRAMMATION DESCRIPTION DE L’INTERFACE……………………………………..…………..47 DESCRIPTION DES TOUCHES…………………………………………………………47 STRUCTURE DES MENUS………………………………………………………………48 DESCRIPTION DES PARAMÈTRES ET DES ÉCRANS………………………………48 ALARMES…………………………………………………………………………………..51 ANOMALIES POSSIBLES……………………………………………………………..52 ENTRETIEN……………………………………..……………………………………………53… -
Page 40: Encombrements — Dimensions -Identification
↔ ENCOMBREMENTS — DIMENSIONS -IDENTIFICATION…
-
Page 41: Description
DESCRIPTION Sirio Entry est un dispositif électronique qui contrôle le démarrage et l’arrêt d’une électropompe, basé sur la technologie à convertisseur. Grâce à cette particularité, il est capable de moduler la fréquence (Hz) du courant qui arrive au moteur afin d’en modifier le régime de rotation en tours/minute selon la demande d’eau de l’installation.
-
Page 42: Protections
PROTECTIONS √ Marche à sec √ Baisse de tension d’alimentation (intervention à environ 200 Volts) √ Surtension d’alimentation (intervention à environ 260 Volts) √ Court circuit sur les bornes de sortie √ Commande ampèremétrique sur sortie moteur √ Surchauffe interne du convertisseur √…
-
Page 43: Branchement Électrique
BRANCHEMENT ÉLECTRIQUE : ATTENTION : — tous les branchements électriques doivent être réalisés par du personnel spécialisé — un branchement incorrect du moteur électrique peut entraîner l’endommagement du dispositif et du moteur même de la pompe. — le non-respect des prescriptions fournies dans ce paragraphe peut entraîner de graves dommages aux biens et/ou personnes, pour lesquels la société…
-
Page 44
Avant d’effectuer le branchement électrique, il faut préparer correctement les câbles avec des cosses à sertir appropriées. Raccorder les deux fils d’alimentation du moteur de la pompe à la borne bipolaire verte identifiée par la mention « MOTOR » ; procéder ensuite avec le raccordement du câble de terre à une des extrémités de la double borne de terre, en utilisant des cosses à… -
Page 45
La section des câbles conseillée est de 1,5 mm , compatible avec des électropompes allant jusqu’à 1,1 kW. Pour des puissances supérieures comprises entre 1,1 kW et 1,5 kW, il est préférable d’utiliser un câble de 2,5 mm Dans le cas de longueurs de la ligne d’alimentation supérieures à 5-10 mètres, il est préférable d’utiliser un câble ayant comme section 2,5 mm pour réduire non seulement les chutes de tension dans le câble, mais aussi les possibilités d’intervention de la protection pour sous-alimentation. -
Page 46
CONFIGURATION PARAMÈTRE “CONTACT AUXILIAIRE” = “2” — Fonction de démarrage et arrêt à distance Avec le paramètre “CONTACT AUXILIAIRE” configuré sur “2”, Sirio Entry est prédisposé pour être mis en marche et arrêté à distance en fonction des CONTACT exigences de l’installation. Cette fonction est utile EXTÉRIEUR quand on entend programmer le démarrage de l’électropompe simultanément avec le démarrage… -
Page 47: Mise En Service
MISE EN SERVICE : ATTENTION : lors de la première mise en service, éviter de faire fonctionner le dispositif sans eau de manière prolongée pour éviter les surchauffes du convertisseur ! Remplir le tuyau d’aspiration de la pompe avant d’alimenter le système. Lorsque tous les branchements électriques ont été…
-
Page 48: Structure Des Menus
STRUCTURE DES MENUS DESCRIPTION DES PARAMÈTRES ET DES ÉCRANS PARAMÈTRES UTILISATEUR : Ces paramètres sont normalement accessibles quand le dispositif est alimenté. Écran principal : lorsque Sirio Entry fonctionne normalement, la première ligne de l’écran affiche la pression instantanée relevée par le système ;…
-
Page 49
Pmax2 : cette page n’apparaît que si le paramètre “CONTACT AUXILIAIRE” est configuré sur la valeur “3” (fonction de double set- point) ; grâce à ce paramètre, il est possible de définir la valeur de set-point secondaire du dispositif. Quand le contact auxiliaire est fermé extérieurement, la valeur de pression configurée dans Pmax2 devient le nouveau set-point, en fonction duquel Sirio Entry règle les tours de l’électropompe. -
Page 50
fréquentes ou non justifiées, il est conseillé d’augmenter le paramètre de cette page en appuyant sur la touche « + » . Tandis que si l’on désire désactiver complètement le contrôle des pertes, appuyer sur la touche « — » jusqu’à visualiser l’inscription «OFF » sur la ligne inférieure de cette page. Langue : il est possible de personnaliser la langue des menus et des messages d’alarme. -
Page 51: Alarmes
la surcharge en cours ; par conséquent, une faible surcharge comporte un temps d’intervention plus long, tandis que une surcharge intense rend l’interruption beaucoup plus rapide. Le paramètre est configurable entre 0,5 et 9,7 A. Lors de la mise en marche du dispositif, si le paramètre Imax est configuré à 0,5 A (configuration d’usine), l’afficheur visualise automatiquement la page de configuration du courant maximal et aucune action n’est permise si une valeur limite d’absorption n’est pas préalablement configurée.
-
Page 52: Anomalies Possibles
du personnel spécialisé. L’erreur ne peut être éliminée qu’en sectionnant l’appareil de la source d’alimentation électrique et en trouvant les causes de la panne. Tenter de faire redémarrer le convertisseur en présence d’un court-circuit à la sortie peut sérieusement endommager l’appareil et être une source de danger pour l’utilisateur.
-
Page 53: Entretien
La pompe a un fonctionnement irrégulier avec des flux d’eau très réduits Le flux a des valeurs trop basses et, ne pouvant être relevé par l’appareil, il entraîne l’arrêt de l’électropompe. Installer un petit vase d’expansion (1-2 litres) pour rendre le système élastique et réduire le nombre de redémarrages.
-
Page 54
— éviter de forcer la marche de la pompe lorsqu’il n’y a pas d’eau en aspiration : dans le cas contraire la pompe et Sirio Entry peuvent être endommagés ; — avant d’utiliser le dispositif avec des liquides différents de l’eau, consulter le constructeur. — ne pas accomplir d’opérations avec le dispositif ouvert — avant d’enlever le couvercle du dispositif, attendre 3 minutes pour permettre la décharge des condensateurs… -
Page 55
ACHTUNG: VORLIEGENDE HANDBUCH INSTALLATION UND/ODER INBETRIEBNAHME GENAU LESEN. Die Herstellerfirma übernimmt die Garantie für das Produkt für eine Zeit von 24 Monaten ab Verkauf; das Gerät muss zusammen mit dem vorliegenden Handbuch zurückgegeben werden, dessen letzte Seite das Installationsdatum und die programmierten Parameterwerte enthalten muss. Die Garantie verfällt, wenn das Gerät geändert, demontiert oder aus Gründen wie unkorrekter Bedienung und/oder unsachgemäße Installation beschädigt oder für einen anderen Einsatz als vorgesehen benutzt oder in unangemessener Umgebung installiert oder an eine mit den gültigen… -
Page 56
INHALTSVERZEICHNIS PLATZBEDARF — DIMENSIONEN — IDENTIFIZIERUNG………………….…………57 BESCHREIBUNG………….……………………………………………………………..58 TECHNISCHE DATEN………………………………………………………………….….58 FUNKTIONEN …………….……………………………………………………………..58 SCHUTZ……………………..…………………………………………………………..….59 INSTALLATION WASSER ANSCHLUSS…………………………………………………………………..59 ELEKTRISCHER ANSCHLUSS……………..………………………………………..60 INBETRIEBSETZUNG ………………………………………………………………….64 PROGRAMMIERUNG BESCHREIBUNG DER SCHNITTSTELLE……………………………..……………..64 BESCHREIBUNG DER TASTEN……………………………….…..………………….….64 AUFBAU DER MENÜS ………………………………………………………………….…65 BESCHREIBUNG DER PARAMETER UND DER BILDSCHIRMSEITEN ………..65 ALARME……………………………………………………………………………………..66 MÖGLICHE STÖRUNGEN…………………………………………………………………69 WARTUNG………………………..………………………………………………………….70… -
Page 57: Platzbedarf — Dimensionen — Identifizierung
↔ PLATZBEDARF — DIMENSIONEN — IDENTIFIZIERUNG…
-
Page 58: Beschreibung
BESCHREIBUNG Sirio Entry ist eine elektronische Vorrichtung, die das Ein- und Ausschalten einer Elektropumpe überwacht und auf Invertertechnologie beruht. Dank dieser Besonderheit ist Sirio Entry imstande, die Frequenz (Hz) des am Motor ankommenden Stroms zu modulieren, so dass dieser seine Drehzahl/Minute je nach Wasseranfrage der Anlage variiert. Auf diese Weise ist der Druck zu den Abnehmern immer konstant und die Motoraufnahme ist immer proportional zur effektiven Anfrage der Anlage, mit einer bedeutenden Energieersparnis im Laufe der Zeit.
-
Page 59: Schutz
SCHUTZ √ Trockenlauf √ Unterspannung der Versorgung (Auslösung bei ca. 200 Volt) √ Überspannung der Versorgung (Auslösung bei ca. 260 Volt) √ Kurzschluss an den Klemmen √ Stromsteuerung auf Motorausgang √ Übertemperatur im Inverter √ Stärkere Leckagen mit ständigen Neustarts der Elektropumpe INSTALLATION WASSERANSCHLUSS: Sirio Entry muss im Auslass der Pumpe in horizontaler oder vertikaler Stellung und unter Einhaltung der…
-
Page 60: Elektrischer Anschluss
ELEKTRISCHER ANSCHLUSS: ACHTUNG: — alle elektrischen Anschlussarbeiten müssen von Fachpersonal ausgeführt werden. — ein unkorrekter Anschluss des E-Motors kann die Vorrichtung und den Pumpenmotor selbst beschädigen. — Die Nichtbeachtung des in diesem Abchnitt Aufgeführten kann zu ernsthaften Sach- und/oder Personenschäden führen, für die der Hersteller keine Haftung übernimmt. — Ist das Zuleitungskabel oder das Kabel zwischen Sirio Entry und der Elektropumpe beschädigt, darf sein Ersatz ausschließlich durch den Gerätehersteller oder einen von ihm Beauftragten oder eine entsprechend qualifizierte Person erfolgen, um eventuellen Gefahren für Sachen und Personen…
-
Page 61
Bevor der elektrische Anschluss vorgenommen wird, sind die Kabel mit speziellen Kabelschuhen zum Crimpen vorzubereiten. Die beiden Versorgungskabel des Pumpenmotors an die grüne, mit dem Schriftzug „MOTOR“ gekennzeichnete bipolare Klemme anschließen; anschließend das Erdungskabel an eines der Enden der Doppelerdungsklemme anschließen, dazu geschlossene Kabelschuhe verwenden.Das Verklemmen der Anschlüsse muss von einem Elektrofachmann unter Verwendung geeigneter Crimp- Werkzeuge durchgeführt werden.Diese Vorrichtung funktioniert mit Pumpen mit einer maximalen Nennfrequenz von 50 Hz (60 Hz auf Anfrage) und einer Leistung bis 1500 Watt. -
Page 62
Das Verklemmen der Anschlüsse muss von einem Elektrofachmann unter Verwendung geeigneter Crimp- Werkzeuge durchgeführt werden. Der empfohlene Kabelabschnitt ist 1,5mm , er ist mit Elektropumpen bis 1,1kW kompatibel. Für Leistungen über 1.1 kW bis 1.5 kW ist vorzugsweise ein Kabel von 2.5mm zu verwenden. -
Page 63
EINSTELLUNG PARAMETER “HILFSKONTAKT” = “2” — Ferngesteuerte Start- und Stoppfunktion Wenn der Parameter “HILFSKONTAKT” auf “2”, Sirio Entry gestellt ist, ist er vorgerüstet, um je nach den Anforderungen der Anlage mit Fernsteuerung EXTERNER gestartet oder gestoppt zu werden. Diese Funktion ist KONTAKT nützlich, wenn der Start der Elektropumpe zusammen mit dem Start anderer Geräte programmiert werden… -
Page 64: Inbetriebsetzung
INBETRIEBSETZUNG: ACHTUNG: beim ersten Einschalten sollte die Vorrichtung nicht langfristig ohne Wasser betrieben werden, um Überhitzungen im Inverter zu vermeiden. Das Ansaugrohr der Pumpe vor der Versorgung der Anlage mit Wasser füllen. Den Deckel der Einheit nach Durchführung aller elektrischer Anschlüsse und Kontrolle ihrer Korrektheit schließen und die Anlage mit Spannung versorgen.
-
Page 65: Aufbau Der Menüs
AUFBAU DER MENÜS BESCHREIBUNG DER PARAMETER UND DER BILDSCHIRMSEITEN BENUTZER-PARAMETER: Diese Parameter sind normalerweise zugänglich, wenn die Vorrichtung versorgt wird. Hauptseite: wenn Sirio Entry ordnungsgemäß funktioniert, wird in der ersten Zeile des Displays der vom System gemessene Momentandruck gezeigt; in der zweiten Zeile kann ein Strichschaubild gesehen werden, das die Geschwindigkeit des Pumpenmotors in Prozenten zeigt.
-
Page 66
Pmax2: Diese Seite erscheint nur, wenn Parameter “HILFSKONTAKT” auf dem Wert “3” eingestellt ist (Funktion des doppelten Set-Point); durch diesen Parameter ist es möglich, den sekundären Set-Point-Wert der Vorrichtung einzustellen. Wenn der Hilfskontakt extern geschlossen wird, wird der im Pmax2 eingestellte Druckwert der neue Set-Point, mit dem Sirio Entry die Drehzahlen der Elektropumpe reguliert. -
Page 67
man dagegen die Kontrolle der Verluste vollständig deaktivieren möchte, wird die Taste “-“ gedrückt, bis “OFF” in der ersten unteren Zeile dieser Seite erscheint. Sprache: die Sprache der Menüs und Alarmmeldungen kann personalisiert werden. Der Wert des Parameters kann durch Betätigung der Tasten + und — geändert werden. -
Page 68: Alarme
0,5 bis 9,7 A eingestellt werden. Wenn der Parameter Imax bei Einschaltung der Vorrichtung auf 0,5 A gestellt ist (Werkseinstellung), erscheint auf dem Display automatisch die Einstellungsseite des Spitzenstroms, und es ist keine Aktion zulässig, wenn nicht vorher ein Aufnahmegrenzwert eingestellt wurde.
-
Page 69: Mögliche Störungen
Überlast: Dieser Alarm erscheint, wenn die Stromaufnahme der Elektropumpe den Spitzenstromwert überschritten hat, der im Wert Imax eingestellt ist; kann infolge extrem schwierigen Betriebsbedingungen Elektropumpe, fortlaufenden Neustartvorgängen mit sehr nahe liegenden Zeitintervallen, bei Problemen der Motoraufwicklung oder aufgrund von Problemen der Stromverbindung zwischen dem Motor und Sirio Entry erfolgen.
-
Page 70: Wartung
Die Pumpe hält nicht an Anlage mit starken Leckagen oder wenn das Rückschlagventil des Geräts durch Schmutz blockiert ist; versuchen, das Rückschlagventil mit den Fingern zu bewegen und prüfen, ob die Feder eine Schließung garantiert. Der Sensor, der die Position des Ventils kontrolliert, ist defekt; das Gerät vom Hersteller kontrollieren lassen.
-
Page 71
ACHTUNG: die Vorrichtung enthält keine Elemente, die der Endbenutzer reparieren oder ersetzen kann. Daher den Schutzdeckel der elektronischen Steuerkarte nicht entfernen, da andernfalls die Garantie ungültig wird! Installationsdatum …./…./……. Installateur Kunde Marke-Modell der Pumpe Seriennr. von Sirio Entry BEI DER INSTALLATION EINGESTELLTE WERTE Pmax Pmax2 Pmin… -
Page 72
ATENCIÓN: LEA DETENIDAMENTE ESTE MANUAL DE INSTRUCCIONES ANTES DE LA INSTALACIÓN O PUESTA EN FUNCIONAMIENTO. El fabricante garantiza el producto durante un período de 24 meses a partir de la venta; el aparato deberá devolverse junto con el presente manual de instrucciones que contiene, en la última página, la fecha de instalación y los valores de los parámetros programados. -
Page 73
ÍNDICE MEDIDAS MÁXIMAS – DIMENSIONES – IDENTIFICACIÓN………..…………74 DESCRIPCIÓN……………………………………………………………….………..…75 DATOS TÉNICOS…………………………………………………………………………..75 CARACTERÍSTICAS……………….…………………………………………………..75 PROTECCIONES………………………………………………………….……………..76 INSTALACIÓN CONEXIÓN HIDRÁULICA .…….………………………………….……………76 CONEXIÓN ELÉCTRICA…….………………………………………….……….77 PUESTA EN FUNCIONAMIENTO………………………………………….…..81 PROGRAMACIÓN DESCRIPCIÓN DE LA INTERFAZ …………………………………………….…..81 DESCRIPCIÓN DE LAS TECLAS……….…………………………………………..81 ESTRUCTURA DE LOS MENÚS…………………………………………………..82 DESCRIPCIÓN DE LOS PARÁMETROS Y DE LAS VENTANA .……….….82 ALARMAS……………………………………………………………………………8 POSIBLES DESPERFECTOS……………………………………………………..………86 MANTENIMIENTO………………………………………………………………….………87… -
Page 74: Medidas Máximas — Dimensiones — Identificación
↔ MEDIDAS MÁXIMAS – DIMENSIONES — IDENTIFICACIÓN…
-
Page 75: Descripción
DESCRIPCIÓN Sirio Entry es un dispositivo electrónico que controla el arranque y la parada de una electrobomba, basado en la tecnología de un variador de velocidad. Gracias a esta peculiaridad es capaz de cambiar la frecuencia (Hz) de la corriente que llega al motor a fin de variar el régimen de rotación r.p.m.
-
Page 76: Protecciones
PROTECCIONES √ Funcionamiento en seco √ Tensión baja de alimentación (desconexión a alrededor de 200 Voltios) √ Sobretensión de alimentación (desconexión a alrededor de 260 Voltios) √ Cortocircuito en los terminales de salida √ Control amperimétrico a la salida del motor √…
-
Page 77: Conexión Eléctrica
CONEXIÓN ELÉCTRICA: ATENCIÓN: — Todas las conexiones eléctricas deben ser hechas por personal experto — Una conexión incorrecta del motor eléctrico puede averiar el dispositivo y el motor de la bomba. — En caso de no respetarse las indicaciones de este párrafo, se pueden provocar daños graves a bienes o personas, no asumiéndose el fabricante ninguna responsabilidad sobre tales.
-
Page 78
Antes de hacer la conexión eléctrica es necesario preparar oportunamente los cables con terminales para engastar. Conecte los dos hilos de alimentación del motor de la bomba al borne bipolar verde marcado “MOTOR”; entonces conecte el cable de tierra a uno de los extremos del doble borne de tierra, utilizando terminales de aro.El engaste de los terminales debe ser hecho por personal experto, utilizando una pinza apropiada.Este dispositivo es capaz de trabajar con bombas con frecuencia nominal máxima de 50Hz (60Hz bajo pedido) y potencia hasta 2200 Vatios. -
Page 79
Si la línea de alimentación midiera más de 5-10 metros de longitud, es preferible utilizar un cable de 2,5mm de sección para reducir las caídas de tensión en el cable y disminuir las posibilidad de desconexión de la protección por subalimentación. El tipo de cable eléctrico debe ser apropiado a las condiciones de empleo (uso en locales domésticos, secos o húmedos, para colocación en interiores o en exteriores). -
Page 80
CONFIGURACIÓN DEL PARÁMETRO “CONTACTO AUXILIAR” = “2” — Función de arranque y parada a distancia parámetro “CONTACTO AUXILIAR” configurado en “2”, Sirio Entry estará preparado para ponerse en marcha y detenerse a distancia según las CONTACTO demandas de la instalación. Esta función es útil EXTERIOR cuando se desea programar el arranque de la electrobomba junto con el arranque de otros equipos… -
Page 81: Puesta En Funcionamiento
PUESTA EN FUNCIONAMIENTO: ¡ATENCIÓN: Cuando se enciende por primera vez no haga funcionar el dispositivo por mucho tiempo sin agua para evitar recalentamientos del inverter! Llene el tubo de aspiración de la bomba antes de alimentar el sistema. Una vez hechas todas las conexiones eléctricas y tras revisar que sean correctas, cierre la tapa de la unidad y conecte la tensión a la instalación.
-
Page 82: Estructura De Los Menús
STRUCTURA DE LOS MENÚS DESCRIPCIÓN DE LOS PARÁMETROS Y DE LAS VENTANAS PARÁMETROS USUARIO: Por lo general se puede acceder a estos parámetros cuando el dispositivo está alimentado. Pantalla principal: Cuando Sirio Entry está funcionando normalmente, en la primera línea se visualiza la presión instantánea medida por el sistema; en la segunda línea aparece un gráfico a barras que reproduce la velocidad del motor de la bomba en porcentaje.
-
Page 83
Pmax2: esta página se abre sólo si el parámetro “CONTACTO AUXILIAR” está configurado en el valor “3” (función de doble set-point); mediante este parámetro se puede configurar el valor de set-point secundario del dispositivo. Cuando el contacto auxiliar fuera cerrado por algún dispositivo exterior, el valor de presión configurado en Pmax2 se convertirá… -
Page 84
Idioma: Es posible personalizar el idioma de los menús y de los mensajes de alarma. Pulse las teclas + y – para modificar el valor del parámetro. PARÁMETROS INSTALADOR: Estos parámetros se encuentran en ventanas ocultas y, por lo general, deberían ser modificados únicamente durante la instalación. -
Page 85: Alarmas
Contacto auxiliar: este parámetro permite seleccionar la función a asociar al contacto auxiliar; los valores configurables son los siguientes: “1 <->” el contacto auxiliar se utiliza para la conexión de dos Sirio Entry dentro de un grupo doble de presurización (configuración de fábrica) “2 <-“…
-
Page 86: Posibles Desperfectos
conexión eléctrica entre el motor y el Sirio Entry. Si esta alarma se activara con frecuencia, se aconseja hacer controlar la instalación por el técnico instalador. POSIBLES DESPERFECTOS: Abriendo uno de los grifos de la instalación la bomba no arranca, o arranca después de algunos segundos El valor de Pmin configurado es muy bajo o se ha montado una válvula de retención después del dispositivo.
-
Page 87: Mantenimiento
La conexión de la bomba o del condensador no es correcta; controle el cableado eléctrico. La bomba está averiada o hay cuerpos extraños que obstruyen el paso del agua. Cuando la instalación demanda mucha agua la presión baja Esta es una condición normal debida al hecho de que el dispositivo no es capaz de forzar la bomba más allá…
-
Page 88
Fecha de instalación …./…./……. Instalador Cliente Marca-modelo bomba N° matrícula Sirio Entry VALORES CONFIGURADOS DURANTE LA INSTALACIÓN Pmax Pmax2 Pmin Retardo parada Seconds Tiempo auto-reset Minutos Test auto-reset N° test NO SI ( n° max arranque:_________) Arranque/Hora max … -
Page 89
Внимание! Перед началом установки или запуском устройства внимательно прочтите данное руководство. Гарантия 2 года от даты продажи; в случае возврата, устройство должно комплектоваться данным руководством, на последней странице которого указывается дата установки и заданные при установке параметры. Гарантийными не считаются следующие случаи: имеются внешние повреждения; устройство разобрано… -
Page 90
ОДЕРЖАНИЕ ОБЩИЙ ВИД-ГАБАРИТНЫЕ РАЗМЕРЫ-ИДЕНТИФИКАЦИЯ ….…………………91 ОПИСАНИЕ …………………………………………………………………………………..92 ТЕХНИЧЕСКИЕ ДАННЫЕ………………………………………………………………….92 СВОЙСТВА УСТРОЙСТВА ………………………………..……………….92 ЗАЩИТНЫЕ ФУНКЦИИ УСТРОЙСТВА…..…………………………………………….93 УСТАНОВКА ИДРАВЛИЧЕСКИЕ СОЕДИНЕНИЯ…………………………………………….93 ЭЛЕКТРИЧЕСКИЕ СОЕДИНЕНИЯ…………………………………………….94 ПУСК………………………………………………………………………….98 ПРОГРАММИРОВАНИЕ ОПИСАНИЕ ВНЕШЕЙ ПАНЕЛИ ПРИБОРА ……………………..……………98 ОПИСАНИЕ ФУНКЦИЙ КНОПОК………………………………………………98 СТРУКТУРА МЕНЮ………………………………………………………….99 ОПИСАНИЕ ПАРАМЕНТРОВ И СТРАНИЦ МЕНЮ…………………………99 СИГНАЛЬНЫЕ СИСТЕМЫ……………………………………………………….102 ВОЗМОЖНЫЕ ПРИЧИНЫ НЕПОЛАДОК …… …………………………………………103 ОБСЛУЖИВАНИЕ……………………………………………………………………………..104… -
Page 91: Общий Вид-Габаритные Размеры-Идентификация
↔ ОБЩИЙ ВИД – ГАБАРИТНЫЕ РАЗМЕРЫ – ИДЕНТИФИКАЦИЯ…
-
Page 92: Описание
ОПИСАНИЕ Sirio Entry – это электронное устройство, контролирующее включение и выключение насоса, работа которого основана на технологии инвертора. Благодаря использованию особой технологии, данное устройство может регулировать частоту (Гц) тока на входе в насос и изменять скорость вращения вала, в зависимости от потребности воды в системе.
-
Page 93: Защитные Функции Устройства
Возможность работы в сдвоенных подкачивающих станциях. ЗАЩИТНЫЕ ФУНКЦИИ УСТРОЙСТВА Сухой ход Пониженное напряжение на линии (активация на уровне приблизительно 200 Вольт) Повышенное напряжение на линии (активация на уровне приблизительно 260 Вольт) Защита от короткого замыкания Амперометрический контроль выходного напряжения двигателя насоса Внутренний…
-
Page 94: Электрические Соединения
ЭЛЕКТРИЧЕСКИЕ СОЕДИНЕНИЯ ВНИМАНИЕ! Все работы по проводным соединениям должны осуществляться специализированным персоналом. Неправильное подсоединение насоса может повлечь за собой повреждение как самого устройства, так и насоса. Несоблюдение рекомендаций, указанных в руководстве, может причинить серьезный вред предметам и /или нанести повреждения людям. Производитель не несет никакой ответственности…
-
Page 95
пометкой “MOTOR”, подсоедините два провода электропитания двигателя; а затем продолжите процедуру подсоединением провода заземления на один конец двойного крепления заземления, используйте для этого специальные клеммы-проушины, поставляемые в комплекте. Провода на данное крепление должны быть предварительно зачищены специалистом с помощью специального устройства. Провода на данное крепление должны быть предварительно зачищены специалистом… -
Page 96
Если кабель питания длиннее 5 – 10 метров, то, во избежание потери электропитания, при уменьшении задержки срабатывания минимальной защиты от недостаточного напряжения, он должен иметь сечение 2.5 мм². Тип кабеля выбирается в зависимости от условий использования (бытовые условия, сухое или влажное… -
Page 97
НАСТРОЙКА ПАРАМЕТРА = «2» «ВСПОМОГАТЕЛЬНОГО КОНТАКТА» — функция дистанционного включения/выключения Когда параметр «ВСПОМОГАТЕЛЬНОГО КОНТАКТА» настроен на «2», тогда устройство Sirio Entry настроено на дистанционное включение и выключение, в соответствии с требованиями системы. Данная функция является полезной, когда нужно запрограммировать включение насоса в одно время с другими… -
Page 98: Пуск
ПУСК: ВНИМАНИЕ: насос при первом включении не должен работать без воды долгое время (индивидуальное для каждой модели насосов), так как это может привести к перегреву инвертора! Наполните насос жидкостью перед подсоединением его к системе. Как только сделаны и проверены все электрические соединения, закройте крышку прибора и включите…
-
Page 99: Структура Меню
Кнопка «–»: уменьшает параметр, показанный на экране, а так же отображает силу тока, потребляемую насосом. СТРУКТУРА МЕНЮ ОПИСАНИЕ ПАРАМЕТРОВ И СТРАНИЦ МЕНЮ ПАРАМЕТРЫ, ЗАДАВАЕМЫЕ ПОЛЬЗОВАТЕЛЕМ: Данные параметры доступны для изменения, когда устройство включено. Главная страница: когда Sirio Entry находится в стандартном рабочем…
-
Page 100
величина Pmax больше, чем макс. напор насоса, то насос будет всегда выключаться, когда краны закрыты. Sirio Entry выключает насос, когда поток воды, проходящий через него, падает ниже минимальных установок (прибл. 2 л/мин), не зависимо от давления, достигнутого в системе. С помощью… -
Page 101
объеме 2.5 литров/мин. Если сигнальная система активизируется слишком часто или же она срабатывает без должной причины, рекомендуется увеличить параметр на этой странице с помощью кнопки «+». Если же, с другой стороны, вы хотите полностью убрать контроль над нарушением герметичности, нажимайте кнопку «–» до тех пор, пока на нижней строчке страницы не… -
Page 102: Сигнальные Системы
время защиты обратно пропорционально значению перегрузки; следовательно, небольшая перегрузка означает отключение с запаздыванием, тогда как серьезная перегрузка приведет к резкому прерыванию работы. Данный параметр может быть настроен на величину от 0.5 до 9.7. Когда устройство включено, если значение I max настроено на 0.5 А (настройка изготовителя), то страница, с…
-
Page 103: Возможные Причины Неполадок
если электрическая изоляция кабелей, с помощью которых электродвигатель насоса подсоединен к устройству, повреждена. Когда появляется данная ошибка, электрическая система должна быть незамедлительно проверена квалифицированным специалистом. Исправить ошибку можно только обесточив устройство, после чего устраняется причина ошибки. Попытка запустить инвертор в процессе КЗ может вывести из строя устройство, а так же представлять…
-
Page 104: Обслуживание
Когда водопотребление невелико, насос плохо работает Поток слишком низкий, устройство не может его определить и выключает насос. Установите в системе небольшой гидроаккумулятор (1-2 литра) для придания ей большей гибкости и уменьшения количество перезапусков. Насос не выключается В системе серьезное нарушение герметичности или обратный клапан устройства…
-
Page 105
не провоцируйте работу насоса без воды на всасывании, так как это может повредить не только насос, но и Sirio Entry; прежде чем использовать устройство с любыми другими жидкостями кроме воды, обратитесь к производителю; не производите никаких операций с устройством, когда оно открыто; подождите… -
Page 106
Sirio Entry Entry Entry Entry Installazione e collegamento in gruppi di pressurizzazione gemellari Installation and connection in twin booster sets Installation et raccordement en groupes de pressurisation jumelés Instalación y conexión en grupos de presurización dobles Installation und Anschluss von gleichen Luftverdichtungsanlagen Установка… -
Page 107
Installazione e collegamento in gruppi di pressurizzazione gemellari INSTALLAZIONE: installare ogni Sirio Entry sulla mandata della rispettiva elettropompa. Collegare il raccordo di uscita di ciascun inverter al collettore della mandata senza interporre alcuna valvola ritegno. Collegare le aspirazioni delle elettropompe collettore comune aspirazione,… -
Page 108
Installation and connection in twin booster sets INSTALLATION: install each Sirio Entry unit on the pressure line of the corresponding electric pump. Connect the outlet union of each inverter to the delivery manifold without interposing a check valve. Connect the suction of the electric pumps to the common intake manifold, interposing a check valve for each pump to prevent it from emptying when… -
Page 109
Installation et raccordement en groupes de pressurisation jumelés INSTALLATION : installer chaque Sirio Entry refoulement l’électropompe respective. Connecter le raccord de sortie de chaque convertisseur collecteur refoulement sans interposer aucun clapet anti-retour. Raccorder les aspirations des électropompes collecteur commun d’aspiration en introduisant un clapet anti- retour pour chaque pompe afin d’éviter son vidage quand on l’arrête. -
Page 110
Instalación y conexión en grupos de presurización dobles INSTALACIÓN: instale cada Sirio Entry en la impulsión electrobomba mcorrespondiente. Conecte el racor de salida de cada inverter al colector de impulsión, sin interponer ninguna válvula de retención. Conecte la aspiración de las electrobombas colector común aspiración,… -
Page 111
Installation und Anschluss von gleichen Luftverdichtungsanlagen INSTALLATION: Jeden Sirio Entry an den Auslass jeweiligen Elektropumpe installieren. Den Ausgangsanschluss jedes Inverters an Auslassrohr anschließen, ohne Rückschlagventile einzusetzen. Ansaugungen der Elektropumpen an das gemeinsame Ansaugrohr schließen und für jede Pumpe Rückschlagventil einsetzen, um ein Entleeren dieser zu vermeiden, wenn sie abgestellt wird. -
Page 112
Установка и подсоединение в сдвоенных подкачивающих станциях. Установка: установите каждый из приборов «Sirio Entry» на напорный выход соответствующего насоса. Подсоедините выходное соединение каждого инвертора к напорной магистрали без установки обратного клапана. Подсоедините входной патрубок насосов к общей напорной магистрали, установив обратный… -
Page 113
MARKIERUNGS-JAHR: 2006/95/EC LVD EN60730-1:2008+A16/EC:2010 EN60730-2-6:2008 2004/108/EC EMC EN 61000-6-4:2007 EN 61000-6-2:2006 2011/65/EC ROHS EN 50581:2012 Tribano, 18 December 2013 Mr. Demetrio Bertazzo Italtecnica srl Viale Europa 31 35020 Tribano (PD) Italy Tel. +39 049 9585388 Fax. +39 049 5342439 www.italtecnica.com… -
Page 114
___________________________________ ___________________________________ ___________________________________ ___________________________________ ___________________________________ ___________________________________ ___________________________________ ___________________________________ ___________________________________ ___________________________________ ___________________________________ ___________________________________ ___________________________________ ___________________________________ ___________________________________ ___________________________________ ___________________________________ ___________________________________ ___________________________________ ___________________________________ ___________________________________ ___________________________________ ___________________________________ ___________________________________… -
Page 116
Italtecnica srl V.le Europa 31, 35020 Tribano (PD) – Italy Tel. +39 049 9585388 Fax. +39 049 5342439 www.italtecnica.com – italtecnica@italtecnica.com…
Table of Contents for Italtecnica Sirio Entry 230:
-
55 ACHTUNG: Die Herstellerfirma übernimmt die Garantie für das Produkt für eine Zeit von 24 Monaten ab Verkauf; das Gerät muss zusammen mit dem vorliegenden Handbuch zurückgegeben werden, dessen letzte Seite das Installationsdatum und die programmierten Parameterwerte enthalten muss. Die Garantie verfällt, wenn das Gerät geändert, demontiert oder aus Gründen wie unkorrekter Bedienung und/oder unsachgemäße Installation beschädigt oder für einen anderen Einsatz als vorgesehen benutzt
-
65 AUFBAU DER MENÜS BESCHREIBUNG DER PARAMETER UND DER BILDSCHIRMSEITEN BENUTZER-PARAMETER: Diese Parameter sind normalerweise zugänglich, wenn die Vorrichtung versorgt wird. Hauptseite: wenn Sirio Entry ordnungsgemäß funktioniert, wird in der ersten Zeile des Displays der vom System gemessene Momentandruck gezeigt; in der zweiten Zeile kann ein Strichschaubild gesehen werden, das die Geschwindigkei
-
28 AUXILIARY CONTACT CONNECTOR The terminals must be crimped by specialist personnel, using special pliers for the purpose. The recommended wire section is 1.5mm2, which is compatible with motor pumps up to 1.1 kW. For powers over 1.1 kW and up to 1.5 kW a 2.5mm 2 wire section is recommended. If the power lead is longer than 5-10 metres, a lead with a 2.5mm2 section should be used to reduce drops in the power supplied by the lead and to reduce the chance of
-
3 ATTENZIONE: La ditta costruttrice garantisce il prodotto per un periodo di 24 mesi dalla vendita; l’apparecchio deve essere restituito assieme al presente manuale d’istruzioni riportante nell’ultima pagina la data di installazione e i valori dei parametri programmati. La garanzia decade nel caso in cui l’apparecchio venga manomesso, smontato o danneggiato per cause imputabili ad un uso non corr
-
104 Когда водопотребление невелико, насос плохо работает Поток слишком низкий, устройство не может его определить и выключает насос. Установите в системе небольшой гидроаккумулятор (1-2 литра) для придания ей большей гибкости и уменьшения количество перезапусков. Насос не вык�
-
67 man dagegen die Kontrolle der Verluste vollständig deaktivieren möchte, wird die Taste “-“ gedrückt, bis “OFF” in der ersten unteren Zeile dieser Seite erscheint. Sprache: die Sprache der Menüs und Alarmmeldungen kann personalisiert werden. Der Wert des Parameters kann durch Betätigung der Tasten + und — geändert werden. PARAMETER FÜR DEN INSTALLATEUR: Diese Parameter sind in versteckte
-
24 DESCRIPTION Sirio Entry is an electronic device, employing inverter-based technology, which controls motor pump stopping and starting functions. Thanks to the particular type of technology used, it can modulate the frequency (Hz) of the motor’s input current to alter the speed (rpm) according to the water delivery rate required from the system. This way, the value of the pressure reaching the user appliances is
-
66 Pmax2: Diese Seite erscheint nur, wenn der Parameter “HILFSKONTAKT” auf dem Wert “3” eingestellt ist (Funktion des doppelten Set-Point); durch diesen Parameter ist es möglich, den sekundären Set-Point-Wert der Vorrichtung einzustellen. Wenn der Hilfskontakt extern geschlossen wird, wird der im Pmax2 eingestellte Druckwert der neue Set-Point, mit dem Sirio Entry die
-
45 La section des câbles conseillée est de 1,5 mm 2 , compatible avec des électropompes allant jusqu’à 1,1 kW. Pour des puissances supérieures comprises entre 1,1 kW et 1,5 kW, il est préférable d’utiliser un câble de 2,5 mm 2 . Dans le cas de longueurs de la ligne d’alimentation supérieures à 5-10 mètres, il est préférable d’utiliser un câble ayant comme section 2,5 mm 2 pour réduire non seulement les chutes de tension dans le câble, mais aussi les possibilités d’intervention de la protection pour sous-alimentation
-
50 fréquentes ou non justifiées, il est conseillé d’augmenter le paramètre de cette page en appuyant sur la touche « + » . Tandis que si l’on désire désactiver complètement le contrôle des pertes, appuyer sur la touche « — » jusqu’à visualiser l’inscription «OFF » sur la ligne inférieure de cette page. Langue : il est possible de personnaliser la langue des menus et des messages d’alarme. App
-
29 SETTING OF “AUXILIARY CONTACT” PARAMETER = “2” – Remote on/off control function When the “AUXILIARY CONTACT” parameter is set on “2” the Sirio Entry is set to be switched on and off by remote control according to the system requirements. This function is useful when there is the need to programme the start of the motor pump at the same time as other devices connected to one same control unit, for example in irrigation systems where the pump is switche
-
98 1 2 4 3 5 ПУСК: ВНИМАНИЕ: насос при первом включении не должен работать без воды долгое время (индивидуальное для каждой модели насосов), так как это может привести к перегреву инвертора! Наполните насо
-
26 ELECTRICAL CONNECTION: WARNING: — all wiring up must be carried out by specially trained personnel — an incorrect motor pump connection could result in damage to the device or the pump motor. — the manufacturer cannot be held responsible for any kind of damage to people and/or things ensuing from failure to comply with the contents of this paragraph. — failure to comply with what is stated in this paragraph may cause serious damage to things and/or serious injurie
-
112 Установка и подсоединение в сдвоенных подкачивающих станциях. Установка: установите каждый из приборов «Sirio Entry» на напорный выход соответствующего насоса. Подсоедините выходное соединение каждого инвертора к напорной магистрали без установки обратного клапана. Подс�
Questions, Opinions and Exploitation Impressions:
You can ask a question, express your opinion or share our experience of Italtecnica Sirio Entry 230 device using right now.
Download Owner’s manual of Italtecnica Sirio Entry 230 DC Drives, Inverter for Free or View it Online on All-Guides.com.

1

2

3

4

5

6

7

8

9

10

11

12

13

14

15

16

17

18

19

20

21

22

23

24

25

26

27

28

29

30

31

32

33

34

35

36

37

38

39

40

41

42

43

44

45

46

47

48

49

50

51

52

53

54

55

56

57

58

59

60

61

62

63

64

65

66

67

68

69

70

71

72

73

74

75

76

77

78

79

80

81

82

83

84

85

86

87

88

89

90

91

92

93

94

95

96

97

98

99

100

101

102

103

104

105

106

107

108

109

110

111

112

113

114

115

116

Sirio
Sirio Sirio
Sirio
Set. Lingue 1 Rel. 7.8 5 /2014
230 V~ ±10%
50/60Hz
1×230 V~
1500W max
25÷50Hz
Instrucciones para el uso
Entry
EntryEntry
Entry
voltar.com.ua
voltar.com.ua
voltar.com.ua
voltar.com.ua
voltar.com.ua
voltar.com.ua
voltar.com.ua
voltar.com.ua
voltar.com.ua
voltar.com.ua
voltar.com.ua
voltar.com.ua
voltar.com.ua
voltar.com.ua
voltar.com.ua
voltar.com.ua
voltar.com.ua
voltar.com.ua
voltar.com.ua
voltar.com.ua
voltar.com.ua
voltar.com.ua
voltar.com.ua
voltar.com.ua
voltar.com.ua
voltar.com.ua
voltar.com.ua
voltar.com.ua
voltar.com.ua
voltar.com.ua
voltar.com.ua
voltar.com.ua
voltar.com.ua
voltar.com.ua
voltar.com.ua
voltar.com.ua
voltar.com.ua
voltar.com.ua
voltar.com.ua
voltar.com.ua
voltar.com.ua
voltar.com.ua
voltar.com.ua
voltar.com.ua
voltar.com.ua
voltar.com.ua
voltar.com.ua
voltar.com.ua
voltar.com.ua
voltar.com.ua
voltar.com.ua
voltar.com.ua
voltar.com.ua
voltar.com.ua
voltar.com.ua
voltar.com.ua
voltar.com.ua
voltar.com.ua
voltar.com.ua
voltar.com.ua
voltar.com.ua
voltar.com.ua
voltar.com.ua
voltar.com.ua
voltar.com.ua
voltar.com.ua
voltar.com.ua
voltar.com.ua
voltar.com.ua
voltar.com.ua
voltar.com.ua
voltar.com.ua
voltar.com.ua
voltar.com.ua
voltar.com.ua
voltar.com.ua
voltar.com.ua
voltar.com.ua
voltar.com.ua
voltar.com.ua
voltar.com.ua
voltar.com.ua
voltar.com.ua
 |
[Page 1] Italtecnica Sirio Entry 230 Sirio Sirio Sirio Sirio EN F DE E Set. Lingue 1 Rel. 7.8 5 /2014 230 V~ ±10% 50/60Hz 1×230 V~ 1500W max 25÷50Hz Ma… |
 |
[Page 2] Italtecnica Sirio Entry 230 2 voltar.com.ua voltar.com.ua voltar.com.ua voltar.com.ua voltar.com.ua voltar.com.ua voltar.com.ua voltar.com.ua voltar.com.ua voltar.com.ua voltar.com.ua voltar.com.ua voltar.com.ua voltar.co… |
 |
[Page 3] Italtecnica Sirio Entry 230 3 ATTENZIONE: La ditta costruttrice garantisce il prodotto per un periodo di 24 mesi dalla vendita; l’apparecchio deve essere restituito assieme al presente manuale d’istruzioni riportante nell’ultima pagina la data… |
 |
[Page 4] Italtecnica Sirio Entry 230 4 INDICE INGOMBRI — DIMENSIONI — IDENTIFICAZIONE…………………..………..………..5 DESCRIZIONE…………………………………………………………………………………6 DATI TECNICI……………�… |
 |
[Page 5] Italtecnica Sirio Entry 230 5 ↔ INGOMBRI — DIMENSIONI — IDENTIFICAZIONE voltar.com.ua voltar.com.ua voltar.com.ua voltar.com.ua voltar.com.ua voltar.com.ua voltar.com.ua voltar.com.ua voltar.com.ua voltar.com…. |
 |
[Page 6] Italtecnica Sirio Entry 230 6 DESCRIZIONE Sirio Entry è un dispositivo elettronico che controlla l’avvio e l’arresto di una elettropompa, basato su tecnologia ad inverter. Grazie a questa tecnologia esso è in grado di modulare la frequenza (Hz) della corren… |
 |
[Page 7] Italtecnica Sirio Entry 230 7 PROTEZIONI √ Marcia a secco √ Sotto-tensione di alimentazione (intervento a circa 200 Volt) √ Sovra-tensione di alimentazione (intervento a circa 260 Volt) √ Corto circuito sui terminali di uscita √ Controllo am… |
 |
[Page 8] Italtecnica Sirio Entry 230 8 COLLEGAMENTO ELETTRICO: ATTENZIONE: — tutti i collegamenti elettrici devono essere eseguiti da personale specializzato — un collegamento non corretto del motore elettrico può causare il danneggiamento del disp… |
 |
[Page 9] Italtecnica Sirio Entry 230 9 Prima di eseguire il collegamento elettrico è necessario preparare opportunamente i cavi con appositi terminali a crimpare. Collegare i due fili di alimentazione del motore della pompa al morsetto bipolare verde … |
 |
[Page 10] Italtecnica Sirio Entry 230 10 CONNETTORE CONTATTO AUSILIARIO Nel caso di lunghezze della linea di alimentazione superiori a 5-10 metri, è preferibile usare un cavo con sezione 2,5mm 2 per ridurre le cadute di tensione nel cavo stesso e ridurre le possibilità … |
 |
[Page 11] Italtecnica Sirio Entry 230 11 IMPOSTAZIONE PARAMETRO “CONTATTO AUSILIARIO” = “2” — Funzione di avvio ed arresto a distanza Con il parametro “CONTATTO AUSILIARIO” impostato su “2”, Sirio Entry è predisposto per essere avviato ed arrestato a … |
 |
[Page 12] Italtecnica Sirio Entry 230 12 MESSA IN FUNZIONE: ATTENZIONE: alla prima accensione evitare di far funzionare il dispositivo per molto tempo senza acqua per evitare surriscaldamenti dell’inverter! Riempire il tubo di aspirazione della pompa prima di a… |
 |
[Page 13] Italtecnica Sirio Entry 230 13 STRUTTURA DEI MENU’ DESCRIZIONE DEI PARAMETRI E DELLE SCHERMATE PARAMETRI UTENTE: Questi parametri sono normalmente accessibili quando il dispositivo è alimentato. S… |
 |
[Page 14] Italtecnica Sirio Entry 230 14 Pmax2: questa pagina appare solo se il parametro “CONTATTO AUSILIARIO” è impostato sul valore “3” ( funzione di doppio set- point); tramite questo parametro è possibile impostare il valore di set-point secondario del… |
 |
[Page 15] Italtecnica Sirio Entry 230 15 desidera invece disattivare completamente il controllo delle perdite, premere il tasto “-“ fino a far apparire la scritta “OFF” sulla riga inferiore di questa pagina. Lingua: è possibile personalizzare la lingua dei menù … |
 |
[Page 16] Italtecnica Sirio Entry 230 16 assorbimento eccessivo. L’arresto avviene anche se la corrente letta durante il funzionamento è inferiore a 0,5 A in seguito all’interruzione del collegamento tra il motore ed il Sirio Entry. Il tempo di intervento della prote… |
 |
[Page 17] Italtecnica Sirio Entry 230 17 Corto Circuito: Questo messaggio appare sul display quando si verifica un corto circuito all’uscita dell’inverter; questo può accadere in seguito al collegamento errato del motore elettrico, ad un danneggiamento dell… |
 |
[Page 18] Italtecnica Sirio Entry 230 18 L’inverter non è più in grado di scambiare calore con l’acqua che attraversa il dispositivo oppure la temperatura del fluido pompato è troppo elevata; controllare la presenza di corpi estranei che blocchino il passaggio dell’acq… |
 |
[Page 19] Italtecnica Sirio Entry 230 19 MANUTENZIONE: Sirio Entry è stato progettato per ridurre al minimo la manutenzione. E’ indispensabile attenersi alle seguenti indicazioni per assicurare a lungo la piena funzionalità del dispositivo: — evitare che il disposi… |
 |
[Page 20] Italtecnica Sirio Entry 230 20 Data installazione …./…./……. Installatore Cliente Marca-modello pompa N° seriale Sirio Entry VALORI IMPOSTATI ALL’INSTALLAZIONE Pmax Bar Pmax2 Bar Pmin Bar Ritardo stop Secondi Tempo au… |
 |
[Page 21] Italtecnica Sirio Entry 230 21 WARNING: The manufacturer guarantees this product for a period of 24 months as of the date of sale; if returned, the device must be accompanied by this handbook, with the installation date … |
 |
[Page 22] Italtecnica Sirio Entry 230 22 CONTENTS OVERALL SIZE — DIMENSIONS — IDENTIFICATION………………..………………….23 DESCRIPTION…………………………………………………………………………………24 SPECIFICATIONS ………�… |
 |
[Page 23] Italtecnica Sirio Entry 230 23 ↔ OVERALL SIZE — DIMENSIONS -IDENTIFICATION voltar.com.ua voltar.com.ua voltar.com.ua voltar.com.ua voltar.com.ua voltar.com.ua voltar.com.ua voltar.com.ua voltar.com.ua voltar.com.ua voltar.com.ua voltar… |
 |
[Page 24] Italtecnica Sirio Entry 230 24 DESCRIPTION Sirio Entry is an electronic device, employing inverter-based technology, which controls motor pump stopping and starting functions. Thanks to the particular type of technology used, it can modulate the … |
 |
[Page 25] Italtecnica Sirio Entry 230 25 DEVICE PROTECTION FEATURES √ Dry running √ Under-voltage on power line (activation at approx. 200 Volt) √ Overvoltage on power line (activation at approx. 260 Volt) √ Output terminal short circuit √ Motor output current … |
 |
[Page 26] Italtecnica Sirio Entry 230 26 ELECTRICAL CONNECTION: WARNING: — all wiring up must be carried out by specially trained personnel — an incorrect motor pump connection could result in damage to the device or the pump motor. — the manufacturer … |
 |
[Page 27] Italtecnica Sirio Entry 230 27 Before making the electrical connection, the cables must be prepared with the supplied crimp terminals. Connect the two power wires from the pump motor to the 2-pole green terminal marked “MOTOR”; then proceed with conne… |
 |
[Page 28] Italtecnica Sirio Entry 230 28 AUXILIARY CONTACT CONNECTOR The terminals must be crimped by specialist personnel, using special pliers for the purpose. The recommended wire section is 1.5mm2, which is compatible with motor pumps up to 1.1 kW. For powers over 1.1 kW a… |
 |
[Page 29] Italtecnica Sirio Entry 230 29 SETTING OF “AUXILIARY CONTACT” PARAMETER = “2” – Remote on/off control function When the “AUXILIARY CONTACT” parameter is set on “2” the Sirio Entry is set to be switched on and off by remote control … |
 |
[Page 30] Italtecnica Sirio Entry 230 30 START-UP: WARNING: do not allow the pump to run for long without water the first time it is switched on otherwise the inverter will overheat! Prime the pump before switching on the system. Once all the electrical… |
 |
[Page 31] Italtecnica Sirio Entry 230 31 MENU STRUCTURE DESCRIPTION OF THE PARAMETERS AND SCREEN PAGES USER PARAMETERS: These parameters are accessible when the device is on. Main screen page: when the Sirio … |
 |
[Page 32] Italtecnica Sirio Entry 230 32 Pmax2: this page is only displayed if the “AUXILIARY CONTACT ” parameter is set on “3” (second set-point function); this parameter is used to set the secondary set-point of the device. When the auxiliary contact is … |
 |
[Page 33] Italtecnica Sirio Entry 230 33 Language: The language used for the menus and the alarm messages can be selected by the user. Use the + and – buttons to alter the parameter setting. INSTALLER PARAMETERS: These parameters can be found on hidden pages a… |
 |
[Page 34] Italtecnica Sirio Entry 230 34 (manufacturer’s default setting), the page from which to set the maximum current value will be displayed; no action can be carried out until the maximum absorption value has been set. Auxiliary contact: use this parameter to select th… |
 |
[Page 35] Italtecnica Sirio Entry 230 35 Overload: This alarm appears when the absorption of the motor pump is greater than the maximum current value set (Imax); this may be caused by extremely difficult working conditions for the motor pump, problems related to the motor winding… |
 |
[Page 36] Italtecnica Sirio Entry 230 36 The sensor which detects the valve position is broken. Have the device checked by the manufacturer. The pump is running at top speed but performance levels are low The pump or the capacitor connection is not correct: … |
 |
[Page 37] Italtecnica Sirio Entry 230 37 Installation date …./…./……. Fitter Customer Pump make/model Sirio Entry serial n. VALUES SET AT INSTALLATION Pmax Bar Pmax2 Bar Pmin Bar Stop delay Seconds Auto-reset tim… |
 |
[Page 38] Italtecnica Sirio Entry 230 38 ATTENTION: Le fabricant garantit le produit pour une durée de 24 mois à compter de la date de vente, l’appareil doit être rendu avec le présent mode d’emploi en indiquant à la dernière page la date d’installation et … |
 |
[Page 39] Italtecnica Sirio Entry 230 39 TABLE DES MATIÈRES ENCOMBREMENTS — DIMENSIONS — IDENTIFICATION…………….…….……….40 DESCRIPTION……………………………………………………..……………..…………..41 DONNÉES TECHNIQUES…… |
 |
[Page 40] Italtecnica Sirio Entry 230 40 ↔ ENCOMBREMENTS — DIMENSIONS -IDENTIFICATION voltar.com.ua voltar.com.ua voltar.com.ua voltar.com.ua voltar.com.ua voltar.com.ua voltar.com.ua voltar.com.ua voltar.com.ua voltar.com.ua voltar.com.ua volta… |
 |
[Page 41] Italtecnica Sirio Entry 230 41 DESCRIPTION Sirio Entry est un dispositif électronique qui contrôle le démarrage et l’arrêt d’une électropompe, basé sur la technologie à convertisseur. Grâce à cette particularité, il est capable de moduler la fréquen… |
 |
[Page 42] Italtecnica Sirio Entry 230 42 PROTECTIONS √ Marche à sec √ Baisse de tension d’alimentation (intervention à environ 200 Volts) √ Surtension d’alimentation (intervention à environ 260 Volts) √ Court circuit sur les bornes de sortie √ C… |
 |
[Page 43] Italtecnica Sirio Entry 230 43 BRANCHEMENT ÉLECTRIQUE : ATTENTION : — tous les branchements électriques doivent être réalisés par du personnel spécialisé — un branchement incorrect du moteur électrique peut entraîner l’endommagement d… |
 |
[Page 44] Italtecnica Sirio Entry 230 44 Avant d’effectuer le branchement électrique, il faut préparer correctement les câbles avec des cosses à sertir appropriées. Raccorder les deux fils d’alimentation du moteur de la pompe à la borne bipolaire verte identifiée par la… |
 |
[Page 45] Italtecnica Sirio Entry 230 45 La section des câbles conseillée est de 1,5 mm 2 , compatible avec des électropompes allant jusqu’à 1,1 kW. Pour des puissances supérieures comprises entre 1,1 kW et 1,5 kW, il est préférable d’utiliser un câble de 2,5 mm … |
 |
[Page 46] Italtecnica Sirio Entry 230 46 CONFIGURATION PARAMÈTRE “CONTACT AUXILIAIRE” = “2” — Fonction de démarrage et arrêt à distance Avec le paramètre “CONTACT AUXILIAIRE” configuré sur “2”, Sirio Entry est prédisposé pour être mis en marche … |
 |
[Page 47] Italtecnica Sirio Entry 230 47 MISE EN SERVICE : ATTENTION : lors de la première mise en service, éviter de faire fonctionner le dispositif sans eau de manière prolongée pour éviter les surchauffes du convertisseur ! Remplir le tuyau d’aspir… |
 |
[Page 48] Italtecnica Sirio Entry 230 48 STRUCTURE DES MENUS DESCRIPTION DES PARAMÈTRES ET DES ÉCRANS PARAMÈTRES UTILISATEUR : Ces paramètres sont normalement accessibles quand le dispositif est alimenté. … |
 |
[Page 49] Italtecnica Sirio Entry 230 49 Pmax2 : cette page n’apparaît que si le paramètre “CONTACT AUXILIAIRE” est configuré sur la valeur “3” (fonction de double set- point) ; grâce à ce paramètre, il est possible de définir la valeur de set… |
 |
[Page 50] Italtecnica Sirio Entry 230 50 fréquentes ou non justifiées, il est conseillé d’augmenter le paramètre de cette page en appuyant sur la touche « + » . Tandis que si l’on désire désactiver complètement le contrôle des pertes, appuyer sur la touche « — » j… |
 |
[Page 51] Italtecnica Sirio Entry 230 51 la surcharge en cours ; par conséquent, une faible surcharge comporte un temps d’intervention plus long, tandis que une surcharge intense rend l’interruption beaucoup plus rapide. Le paramètre est configurable entre 0,5 et 9,7 … |
 |
[Page 52] Italtecnica Sirio Entry 230 52 du personnel spécialisé. L’erreur ne peut être éliminée qu’en sectionnant l’appareil de la source d’alimentation électrique et en trouvant les causes de la panne. Tenter de faire redémarrer le con… |
 |
[Page 53] Italtecnica Sirio Entry 230 53 La pompe a un fonctionnement irrégulier avec des flux d’eau très réduits Le flux a des valeurs trop basses et, ne pouvant être relevé par l’appareil, il entraîne l’arrêt de l’électropompe. Installer un … |
 |
[Page 54] Italtecnica Sirio Entry 230 54 — éviter de forcer la marche de la pompe lorsqu’il n’y a pas d’eau en aspiration : dans le cas contraire la pompe et Sirio Entry peuvent être endommagés ; — avant d’utiliser le dispositif avec des liquides différents de l’ea… |
 |
[Page 55] Italtecnica Sirio Entry 230 55 ACHTUNG: Die Herstellerfirma übernimmt die Garantie für das Produkt für eine Zeit von 24 Monaten ab Verkauf; das Gerät muss zusammen mit dem vorliegenden Handbuch zurückgegeben werden, dessen letzte Seite … |
 |
[Page 56] Italtecnica Sirio Entry 230 56 INHALTSVERZEICHNIS PLATZBEDARF — DIMENSIONEN — IDENTIFIZIERUNG………………….…………57 BESCHREIBUNG………….…………………………………………………………………58 TECHNISCHE DATEN………�… |
 |
[Page 57] Italtecnica Sirio Entry 230 57 ↔ PLATZBEDARF — DIMENSIONEN — IDENTIFIZIERUNG voltar.com.ua voltar.com.ua voltar.com.ua voltar.com.ua voltar.com.ua voltar.com.ua voltar.com.ua voltar.com.ua voltar.com.ua voltar.com.ua voltar.com.ua volt… |
 |
[Page 58] Italtecnica Sirio Entry 230 58 BESCHREIBUNG Sirio Entry ist eine elektronische Vorrichtung, die das Ein- und Ausschalten einer Elektropumpe überwacht und auf Invertertechnologie beruht. Dank dieser Besonderheit ist Sirio Entry imstande, die Fr… |
 |
[Page 59] Italtecnica Sirio Entry 230 59 SCHUTZ √ Trockenlauf √ Unterspannung der Versorgung (Auslösung bei ca. 200 Volt) √ Überspannung der Versorgung (Auslösung bei ca. 260 Volt) √ Kurzschluss an den Klemmen √ Stromsteuerung auf Motorausgang �… |
 |
[Page 60] Italtecnica Sirio Entry 230 60 ELEKTRISCHER ANSCHLUSS: ACHTUNG: — alle elektrischen Anschlussarbeiten müssen von Fachpersonal ausgeführt werden. — ein unkorrekter Anschluss des E-Motors kann die Vorrichtung und den Pumpenmotor selbst beschädi… |
 |
[Page 61] Italtecnica Sirio Entry 230 61 Bevor der elektrische Anschluss vorgenommen wird, sind die Kabel mit speziellen Kabelschuhen zum Crimpen vorzubereiten. Die beiden Versorgungskabel des Pumpenmotors an die grüne, mit dem Schriftzug „MOTOR“ gekennzeichnete bi… |
 |
[Page 62] Italtecnica Sirio Entry 230 62 Das Verklemmen der Anschlüsse muss von einem Elektrofachmann unter Verwendung geeigneter Crimp- Werkzeuge durchgeführt werden. Der empfohlene Kabelabschnitt ist 1,5mm 2 , er ist mit Elektropumpen bis 1,1kW kompatibel. Für L… |
 |
[Page 63] Italtecnica Sirio Entry 230 63 EINSTELLUNG PARAMETER “HILFSKONTAKT” = “2” — Ferngesteuerte Start- und Stoppfunktion Wenn der Parameter “HILFSKONTAKT” auf “2”, Sirio Entry gestellt ist, ist er vorgerüstet, um je nach den Anforderungen der An… |
 |
[Page 64] Italtecnica Sirio Entry 230 64 INBETRIEBSETZUNG: ACHTUNG: beim ersten Einschalten sollte die Vorrichtung nicht langfristig ohne Wasser betrieben werden, um Überhitzungen im Inverter zu vermeiden. Das Ansaugrohr der Pumpe vor der Versorgung der Anlage mi… |
 |
[Page 65] Italtecnica Sirio Entry 230 65 AUFBAU DER MENÜS BESCHREIBUNG DER PARAMETER UND DER BILDSCHIRMSEITEN BENUTZER-PARAMETER: Diese Parameter sind normalerweise zugänglich, wenn die Vorrichtung versorgt wir… |
 |
[Page 66] Italtecnica Sirio Entry 230 66 Pmax2: Diese Seite erscheint nur, wenn der Parameter “HILFSKONTAKT” auf dem Wert “3” eingestellt ist (Funktion des doppelten Set-Point); durch diesen Parameter ist es möglich, den sekundären Set-Point-Wert… |
 |
[Page 67] Italtecnica Sirio Entry 230 67 man dagegen die Kontrolle der Verluste vollständig deaktivieren möchte, wird die Taste “-“ gedrückt, bis “OFF” in der ersten unteren Zeile dieser Seite erscheint. Sprache: die Sprache der Menüs und Alarmmeldungen kann … |
 |
[Page 68] Italtecnica Sirio Entry 230 68 0,5 bis 9,7 A eingestellt werden. Wenn der Parameter Imax bei Einschaltung der Vorrichtung auf 0,5 A gestellt ist (Werkseinstellung), erscheint auf dem Display automatisch die Einstellungsseite des Spitzenstroms, und es ist keine… |
 |
[Page 69] Italtecnica Sirio Entry 230 69 Überlast: Dieser Alarm erscheint, wenn die Stromaufnahme der Elektropumpe den Spitzenstromwert überschritten hat, der im Wert Imax eingestellt ist; das kann infolge von extrem schwierigen Betriebsbedingungen der Elektropu… |
 |
[Page 70] Italtecnica Sirio Entry 230 70 Die Pumpe hält nicht an Anlage mit starken Leckagen oder wenn das Rückschlagventil des Geräts durch Schmutz blockiert ist; versuchen, das Rückschlagventil mit den Fingern zu bewegen und prüfen, ob die Feder eine Schließung garan… |
 |
[Page 71] Italtecnica Sirio Entry 230 71 ACHTUNG: die Vorrichtung enthält keine Elemente, die der Endbenutzer reparieren oder ersetzen kann. Daher den Schutzdeckel der elektronischen Steuerkarte nicht entfernen, da andernfalls die Garantie ungültig wird! Installat… |
 |
[Page 72] Italtecnica Sirio Entry 230 72 ATENCIÓN: El fabricante garantiza el producto durante un período de 24 meses a partir de la venta; el aparato deberá devolverse junto con el presente manual de instrucciones que contiene, en la última página, la fecha de i… |
 |
[Page 73] Italtecnica Sirio Entry 230 73 ÍNDICE MEDIDAS MÁXIMAS – DIMENSIONES – IDENTIFICACIÓN………..………………..74 DESCRIPCIÓN……………………………………………………………….………………75 DATOS TÉNICOS…………�… |
 |
[Page 74] Italtecnica Sirio Entry 230 74 ↔ MEDIDAS MÁXIMAS – DIMENSIONES — IDENTIFICACIÓN voltar.com.ua voltar.com.ua voltar.com.ua voltar.com.ua voltar.com.ua voltar.com.ua voltar.com.ua voltar.com.ua voltar.com.ua voltar.com.ua voltar.com…. |
 |
[Page 75] Italtecnica Sirio Entry 230 75 DESCRIPCIÓN Sirio Entry es un dispositivo electrónico que controla el arranque y la parada de una electrobomba, basado en la tecnología de un variador de velocidad. Gracias a esta peculiaridad es capaz de cambiar la frecuencia (… |
 |
[Page 76] Italtecnica Sirio Entry 230 76 PROTECCIONES √ Funcionamiento en seco √ Tensión baja de alimentación (desconexión a alrededor de 200 Voltios) √ Sobretensión de alimentación (desconexión a alrededor de 260 Voltios) √ Cortocircuito en los term… |
 |
[Page 77] Italtecnica Sirio Entry 230 77 CONEXIÓN ELÉCTRICA: ATENCIÓN: — Todas las conexiones eléctricas deben ser hechas por personal experto — Una conexión incorrecta del motor eléctrico puede averiar el dispositivo y el motor de la bomba. — En ca… |
 |
[Page 78] Italtecnica Sirio Entry 230 78 Antes de hacer la conexión eléctrica es necesario preparar oportunamente los cables con terminales para engastar. Conecte los dos hilos de alimentación del motor de la bomba al borne bipolar verde marcado “MOTOR”; entonces conecte el… |
 |
[Page 79] Italtecnica Sirio Entry 230 79 CONECTOR CONTACTO AUXILIAR Si la línea de alimentación midiera más de 5-10 metros de longitud, es preferible utilizar un cable de 2,5mm 2 de sección para reducir las caídas de tensión en el cable y disminuir las posibilidad de … |
 |
[Page 80] Italtecnica Sirio Entry 230 80 CONFIGURACIÓN DEL PARÁMETRO “CONTACTO AUXILIAR” = “2” — Función de arranque y parada a distancia Con el parámetro “CONTACTO AUXILIAR” configurado en “2”, Sirio Entry estará preparado para ponerse en marcha y… |
 |
[Page 81] Italtecnica Sirio Entry 230 81 PUESTA EN FUNCIONAMIENTO: ¡ATENCIÓN: Cuando se enciende por primera vez no haga funcionar el dispositivo por mucho tiempo sin agua para evitar recalentamientos del inverter! Llene el tubo de aspiración de la bomba ante… |
 |
[Page 82] Italtecnica Sirio Entry 230 82 STRUCTURA DE LOS MENÚS DESCRIPCIÓN DE LOS PARÁMETROS Y DE LAS VENTANAS PARÁMETROS USUARIO: Por lo general se puede acceder a estos parámetros cuando el dispositivo está a… |
 |
[Page 83] Italtecnica Sirio Entry 230 83 Pmax2: esta página se abre sólo si el parámetro “CONTACTO AUXILIAR” está configurado en el valor “3” (función de doble set-point); mediante este parámetro se puede configurar el valor de set-point secundario… |
 |
[Page 84] Italtecnica Sirio Entry 230 84 Idioma: Es posible personalizar el idioma de los menús y de los mensajes de alarma. Pulse las teclas + y – para modificar el valor del parámetro. PARÁMETROS INSTALADOR: Estos parámetros se encuentran en ventanas ocultas y… |
 |
[Page 85] Italtecnica Sirio Entry 230 85 Contacto auxiliar: este parámetro permite seleccionar la función a asociar al contacto auxiliar; los valores configurables son los siguientes: “1 <->” el contacto auxiliar se utiliza para la conexión de dos Sirio Entry dentr… |
 |
[Page 86] Italtecnica Sirio Entry 230 86 conexión eléctrica entre el motor y el Sirio Entry. Si esta alarma se activara con frecuencia, se aconseja hacer controlar la instalación por el técnico instalador. POSIBLES DESPERFECTOS: Abriendo uno de los grifos de la in… |
 |
[Page 87] Italtecnica Sirio Entry 230 87 La conexión de la bomba o del condensador no es correcta; controle el cableado eléctrico. La bomba está averiada o hay cuerpos extraños que obstruyen el paso del agua. Cuando la instalación demanda mucha agua la presión baja E… |
 |
[Page 88] Italtecnica Sirio Entry 230 88 Fecha de instalación …./…./……. Instalador Cliente Marca-modelo bomba N° matrícula Sirio Entry VALORES CONFIGURADOS DURANTE LA INSTALACIÓN Pmax Bar Pmax2 Bar Pmin Bar Retar… |
 |
[Page 89] Italtecnica Sirio Entry 230 89 Внимание! Перед началом установки или запуском устройства внимательно прочтите данное руководство. Гарантия 2 года от д… |
 |
[Page 90] Italtecnica Sirio Entry 230 90 ОДЕРЖАНИЕ ОБЩИЙ ВИД-ГАБАРИТНЫЕ РАЗМЕРЫ-ИДЕНТИФИКАЦИЯ ….…………………91 ОПИСАНИЕ …………………………………………………………………………�… |
 |
[Page 91] Italtecnica Sirio Entry 230 91 ↔ ОБЩИЙ ВИД – ГАБАРИТНЫЕ РАЗМЕРЫ – ИДЕНТИФИКАЦИЯ voltar.com.ua voltar.com.ua voltar.com.ua voltar.com.ua voltar.com.ua voltar.com.ua voltar.com.ua voltar.com.ua vo… |
 |
[Page 92] Italtecnica Sirio Entry 230 92 ОПИСАНИЕ Sirio Entry – это электронное устройство, контролирующее включение и выключение насоса, работа которого основана на … |
 |
[Page 93] Italtecnica Sirio Entry 230 93 Возможность работы в сдвоенных подкачивающих станциях. ЗАЩИТНЫЕ ФУНКЦИИ УСТРОЙСТВА Сухой ход Пониженное напряжение на… |
 |
[Page 94] Italtecnica Sirio Entry 230 94 ЭЛЕКТРИЧЕСКИЕ СОЕДИНЕНИЯ ВНИМАНИЕ! — Все работы по проводным соединениям должны осуществляться специализированн… |
 |
[Page 95] Italtecnica Sirio Entry 230 95 пометкой “MOTOR”, подсоедините два провода электропитания двигателя; а затем продолжите процедуру подсоединением провода заземл�… |
 |
[Page 96] Italtecnica Sirio Entry 230 96 вспомогательный разъем Если кабель питания длиннее 5 – 10 метров, то, во избежание потери электропитания, при уменьшении зад… |
 |
[Page 97] Italtecnica Sirio Entry 230 97 НАСТРОЙКА ПАРАМЕТРА = «2» «ВСПОМОГАТЕЛЬНОГО КОНТАКТА» — функция дистанционного включения/выключения Когда параметр «ВСПОМО�… |
 |
[Page 98] Italtecnica Sirio Entry 230 98 1 2 4 3 5 ПУСК: ВНИМАНИЕ: насос при первом включении не должен работать без воды долгое время (индивидуальное для каж�… |
 |
[Page 99] Italtecnica Sirio Entry 230 99 Кнопка «–»: уменьшает параметр, показанный на экране, а так же отображает силу тока, потребляемую насосом. СТРУКТУРА МЕНЮ … |
 |
[Page 100] Italtecnica Sirio Entry 230 100 величина Pmax больше, чем макс. напор насоса, то насос будет всегда выключаться, когда краны закрыты. Sirio Entry выключает насос, когда �… |