![]() Download Article
Download Article
![]() Download Article
Download Article
Have you ever wanted to build a LEGO dog, but didn’t know where to start? LEGOs are a fantastic toy; they’re fun to play with as well as being a great outlet for creative expression. Once you learn what the different blocks are and all the different ways you can use them, there’s no limit to what you can build.
-

1
Gather your LEGO blocks. To complete the following project, you will need the following bricks. If you don’t have the correct colors, don’t worry. Your dog can be whatever color you want it to be, depending on the options you have in front of you.
- 10 brown 2×2 bricks
- 3 brown 2×4 bricks
- 1 brown 2×3 brick
- 8 brown 1×2 bricks
- 5 black 1×2 brick
- 6 brown 1×1 bricks
- 1 black 2×4 brick
- 1 brown 1×4 brick
- 2 white 1×1 bricks
-
2
Build your dog’s base. Line four brown 2×2 LEGO bricks in a row from left to right.[1]
Then place another four brown 2×2 LEGO bricks next to that (also going from left to right.) The rows should be positioned directly next to one another. When you are finished, you should have eight brown 2×2 LEGO bricks lying side by side in two rows of four each.[2]
Advertisement
-
3
Connect the base. To do this, gather two brown 2×4 bricks. Place one brown 2×4 brick on top of the right side of the base, positioned over the middle two studs and covering the last three studs (the brick should extend past the base by a distance of one stud.) Place another brown 2×4 brick right behind it, still covering the middle studs.
- When you finish, all of the middle studs of the base should be covered, except for the last row of studs on your left.
-
4
Complete the dog’s body. Attach one brown 2×3 brick to the two remaining open middle studs on the left. There should now be an overhang of one stud on the right side of the base and an overhang of two studs on the left side of the base.
- From now on, the right side of the base will be referred to as the tail-end of your dog, while the left side of the base will be referred to as the front-end of your dog.
-
5
Flip your base over. On the underside of your base, attach two brown 2×2 bricks to the bottom of the base. These should be positioned so they’re attached directly in the center of your base, elevating it.[3]


Advertisement

-
1
Build your dog’s tail. Flip your base right side up. Attach two brown 1×2 bricks, laid horizontally, to the last two studs on the tail end of your dog. Connect those bricks by laying one black 1×2 brick vertically over the last two studs on the right.
-
2
Build the dog’s legs. Take a brown 1×2 brick, a black 1×2 brick and a brown 1×1 brick. Position the brown 1×1 brick to the right of the black 1×2 brick, creating a straight line. Position the brown 1×2 brick across both bricks to connect them.[4]
- Repeat this step four times, so you have constructed four identical legs.
-
3
Attach the dog’s legs. Position all four legs so they are attached to the bottom of the base in all four corners. Each of the black “feet” should be facing the front end of your dog.[5]


Advertisement

-
1
Build your dog’s nose. Get a brown 2×4 brick and a black 2×2 brick. Place the black brick on top of the brown brick and attach it to the first row of studs on the left hand side.[6]
- This black brick will serve as your dog’s nose.
-
2
Build your dog’s eyes. Add one brown 1×2 brick, laid vertically, directly behind the dog’s nose. Then add a brown 1×4 brick, laid vertically, behind that. Attach two white 1×1 bricks to the top of the brown 1×2 brick.
- These white bricks will serve as your dog’s eyes.
- If you’re looking for more realistic eyes for your dog, you can buy these separately. Dog eyes can be found in the LEGO classic small box, available online and in stores.[7]
-
3
Build your dog’s ears. In back of the eyes, add one brown 1×2 brick. Position two brown 1×1 bricks on either side of your brown 1×2 brick. These will serve as your dog’s ears.
-
4
Attach the head. Take the head so the dog’s nose is facing towards the front of the room and attach it to the front-end of your dog. The head should be positioned squarely on top of the 2×4 brick on the left side of your dog.[8]


Advertisement

-
1
Play with your dog. Now that the work is completed, it’s time to have fun with your dog. Give them a name and build them a park to play in. If you have extra pieces, build another dog, so they have a companion to play with.
-
2
Build other LEGO animals. A LEGO dog is just the beginning. Challenge yourself by building other LEGO creatures. Try building a cat or an elephant or any other animal you can think of.
-
3
Build a LEGO house. Once you feel confident with your LEGO dog making skills, try building a LEGO house. For instructions on how to build a LEGO house, try going here.


Advertisement
Ask a Question
200 characters left
Include your email address to get a message when this question is answered.
Submit
Advertisement
-
Try working on a flat surface, like a table or the floor. This will allow you the stability to build and will also keep your project from falling over while you work.
-
If you don’t have the correct colors for your dog, don’t worry! It’s your dog and they can be any color you’d like them to be.
Thanks for submitting a tip for review!
Advertisement
-
LEGOs can be a choking hazard for young children. Do not let infants or babies play with LEGOs unsupervised (unless they’re playing with LEGOs designed for that particular age group.)[9]
Advertisement
Things You’ll Need
- LEGO Blocks
References
About This Article
Thanks to all authors for creating a page that has been read 79,985 times.
Did this article help you?
?>
X
Сайт может собирать метаданные пользователя (cookie, данные об IP-адресе и местоположении).
Если, прочитав это сообщение, вы остаетесь на нашем сайте, это означает, что вы не возражаете против использования этих технологий.
LEGO, логотип LEGO, Minifigure (Минифигурка), DUPLO и MINDSTORMS являются торговыми марками и/или охраняемой авторским правом собственностью LEGO Group.
©2023 The LEGO Group. Все права защищены. Использование этого вебсайта подтверждает ваше согласие с этим.
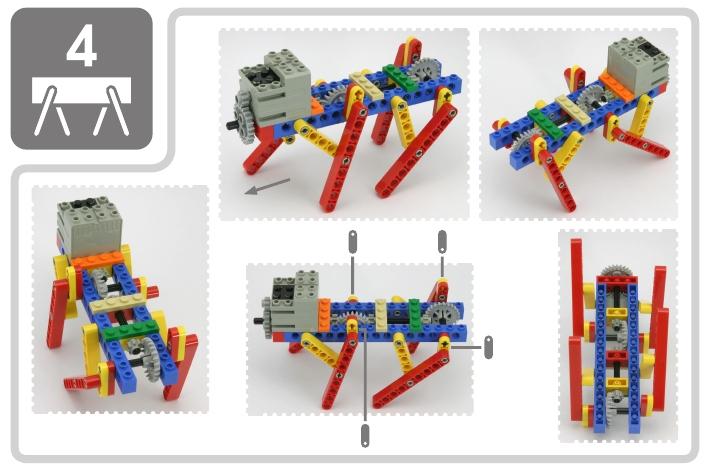
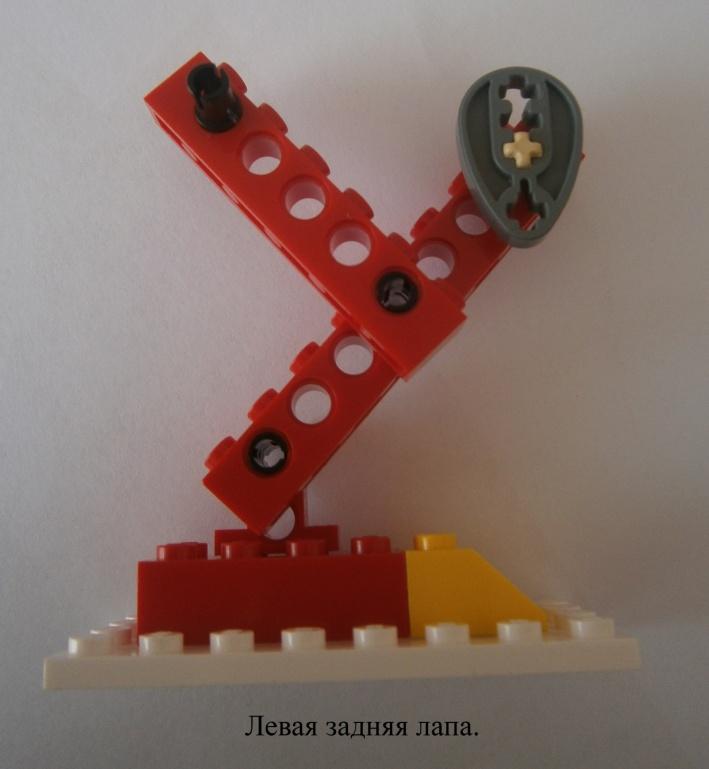
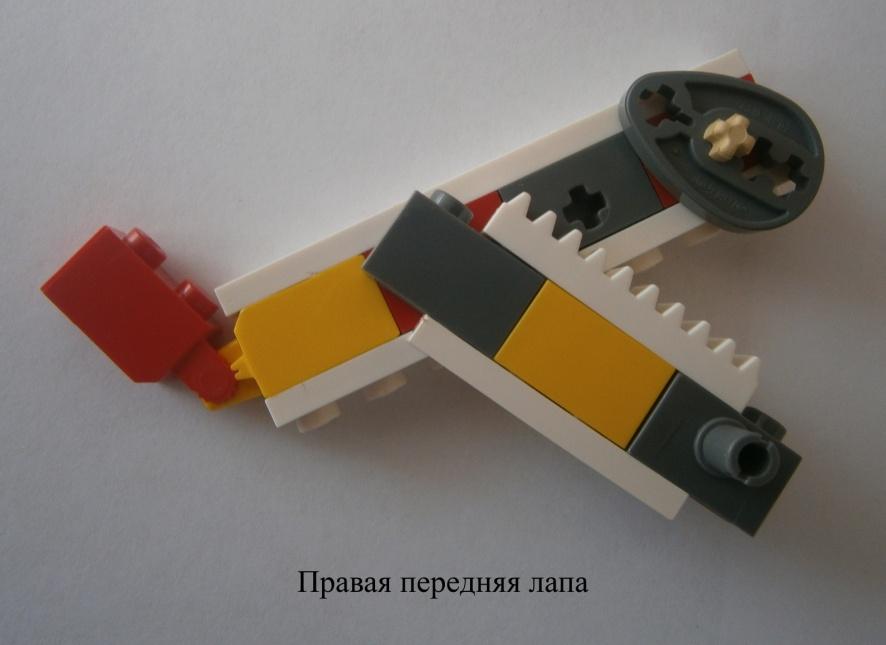
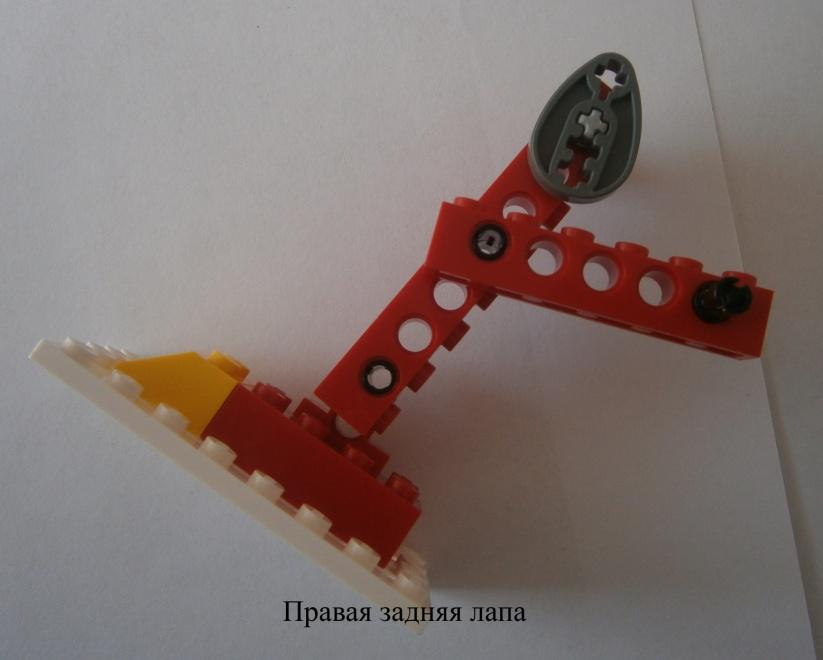
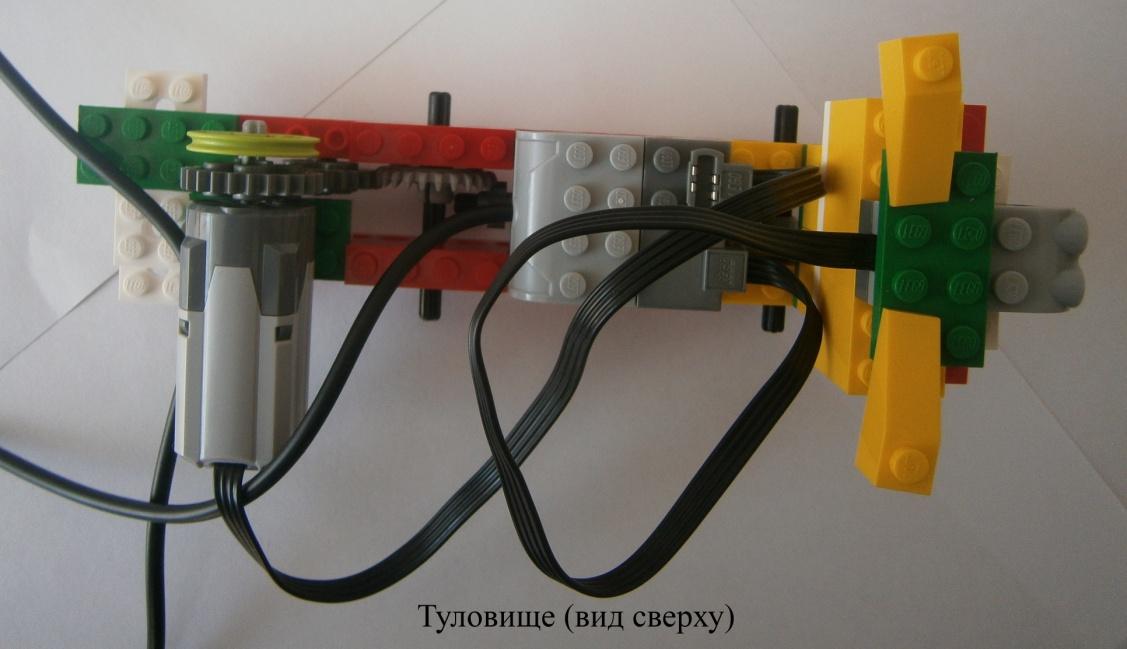
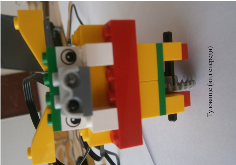
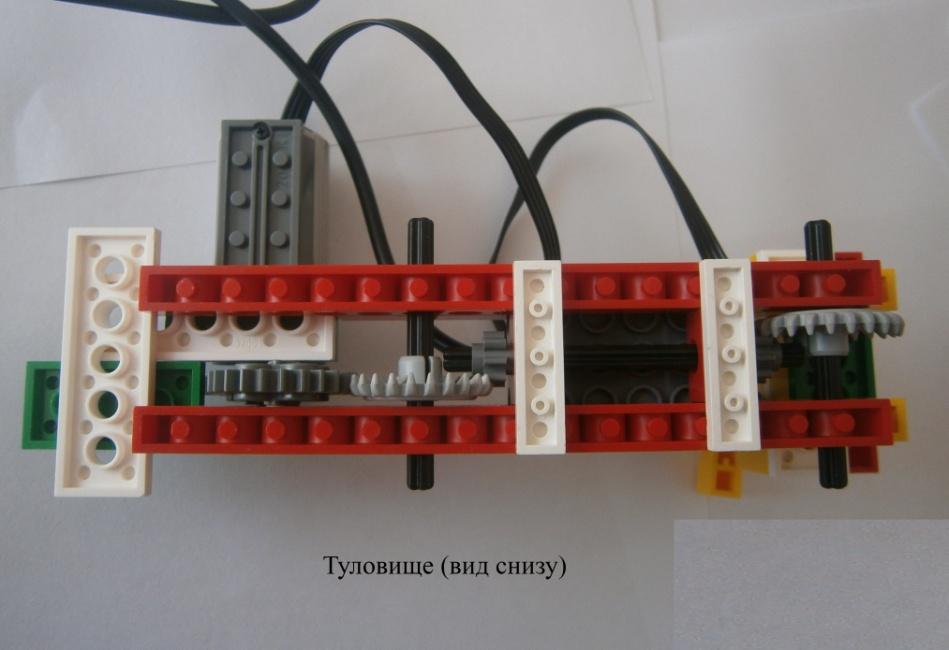
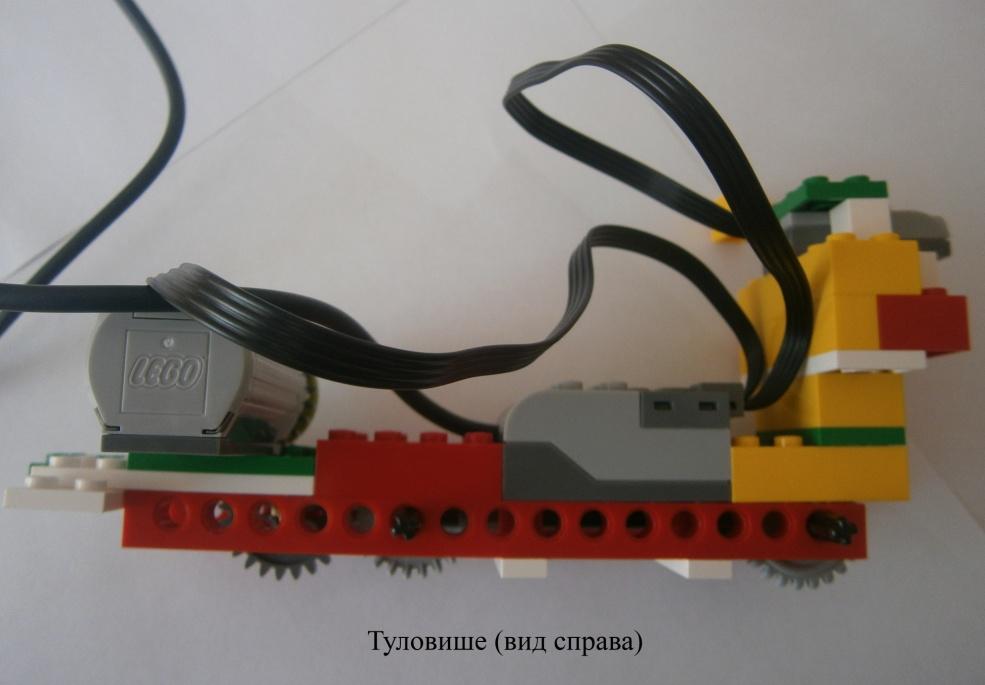
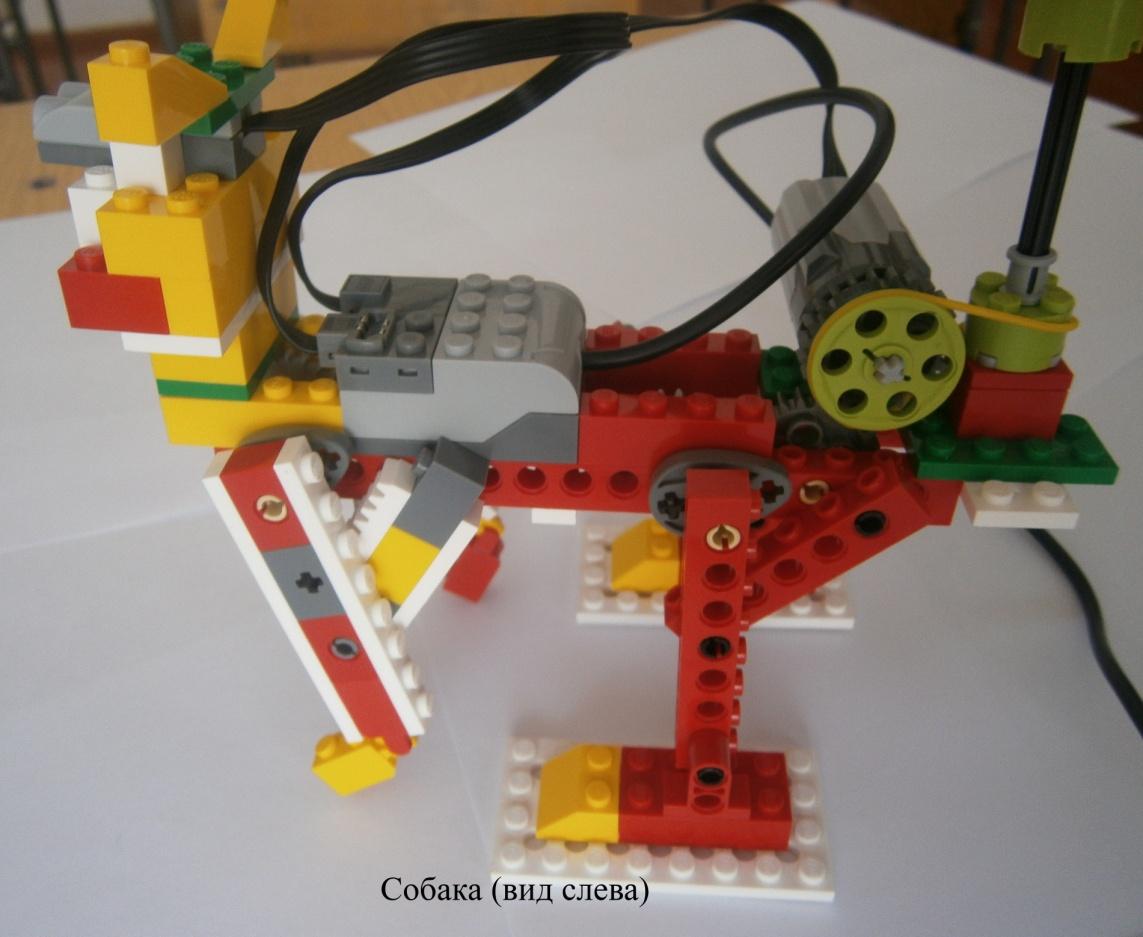
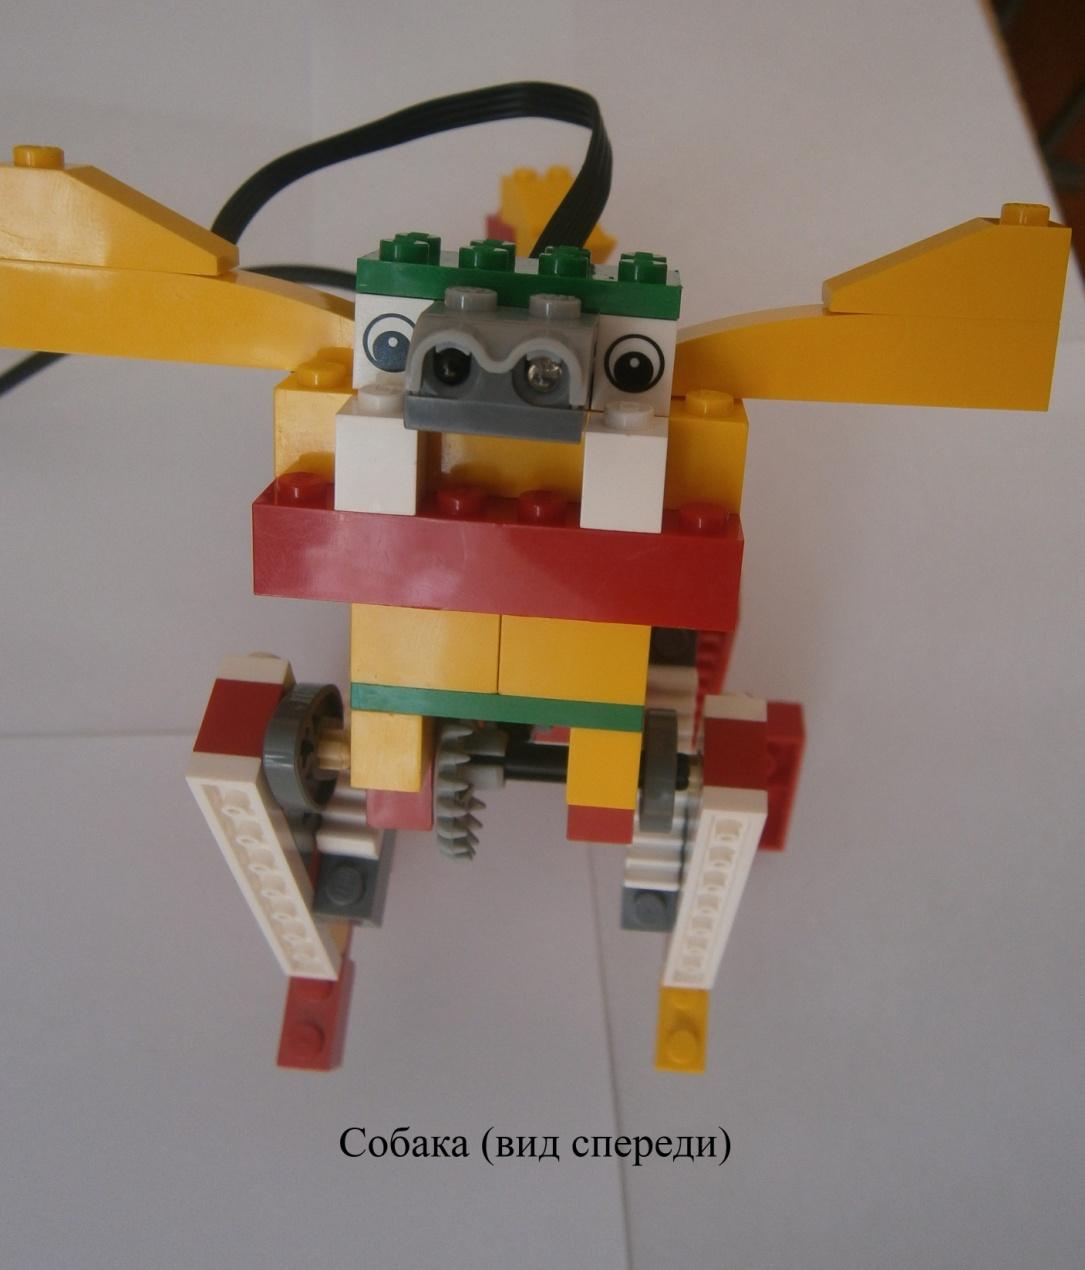
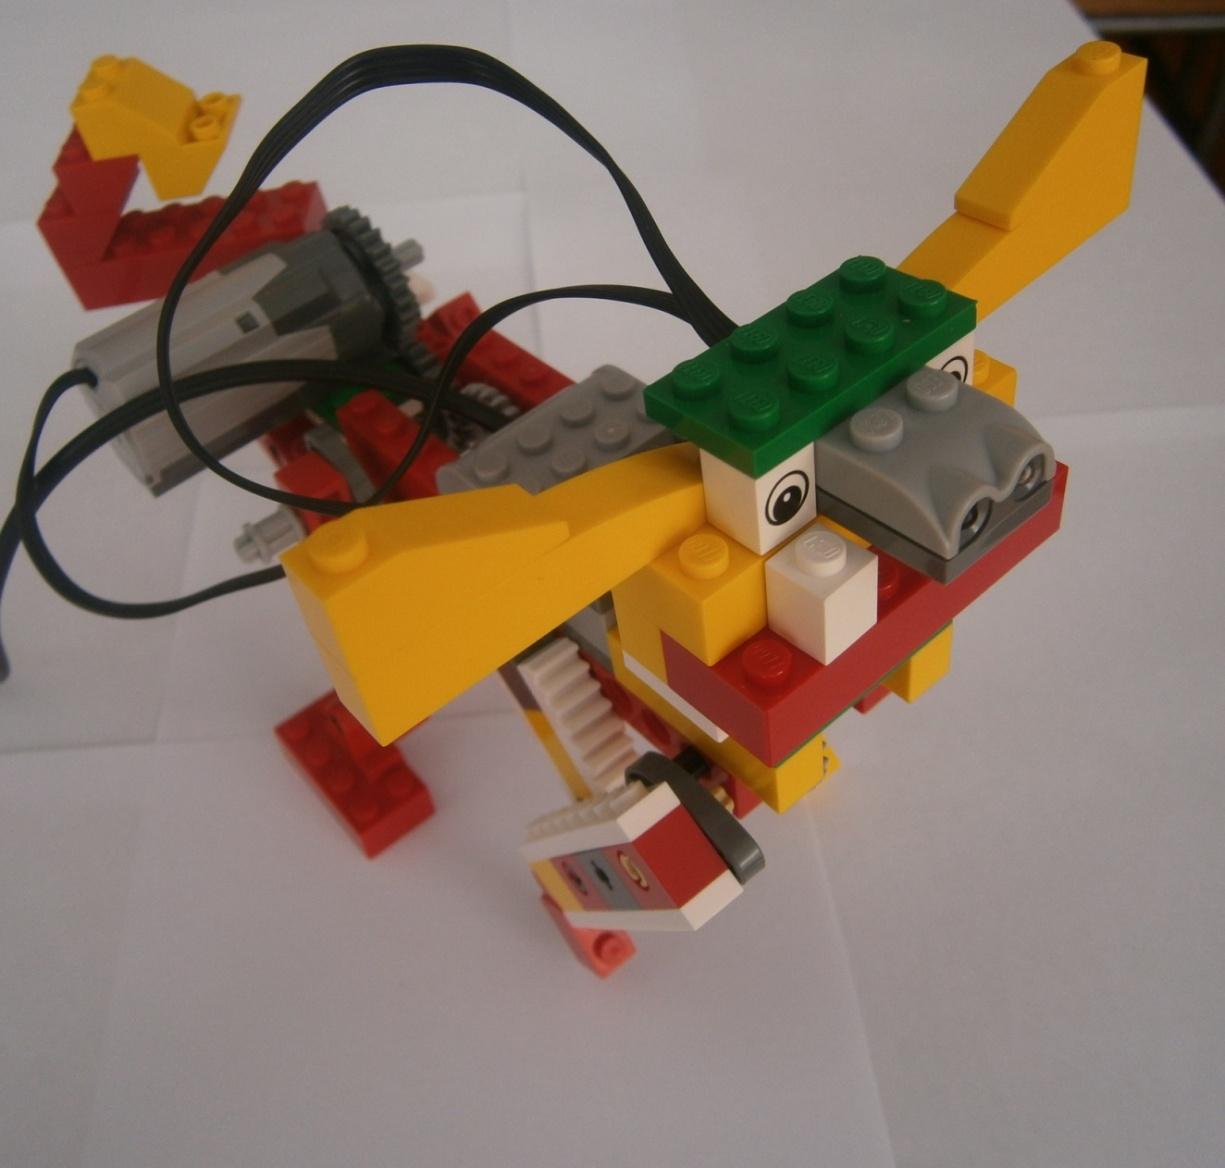
 Представляем вашему вниманию простую пошаговую инструкцию по сборке из набора LEGO Education WeDo 2.0 модель «Щенок». Сборка состоит из 65 деталей и 47 пошаговых слайдов. В конце презентации детей ждут задания по собранной модели. Управляющую программу найдете в презентации.
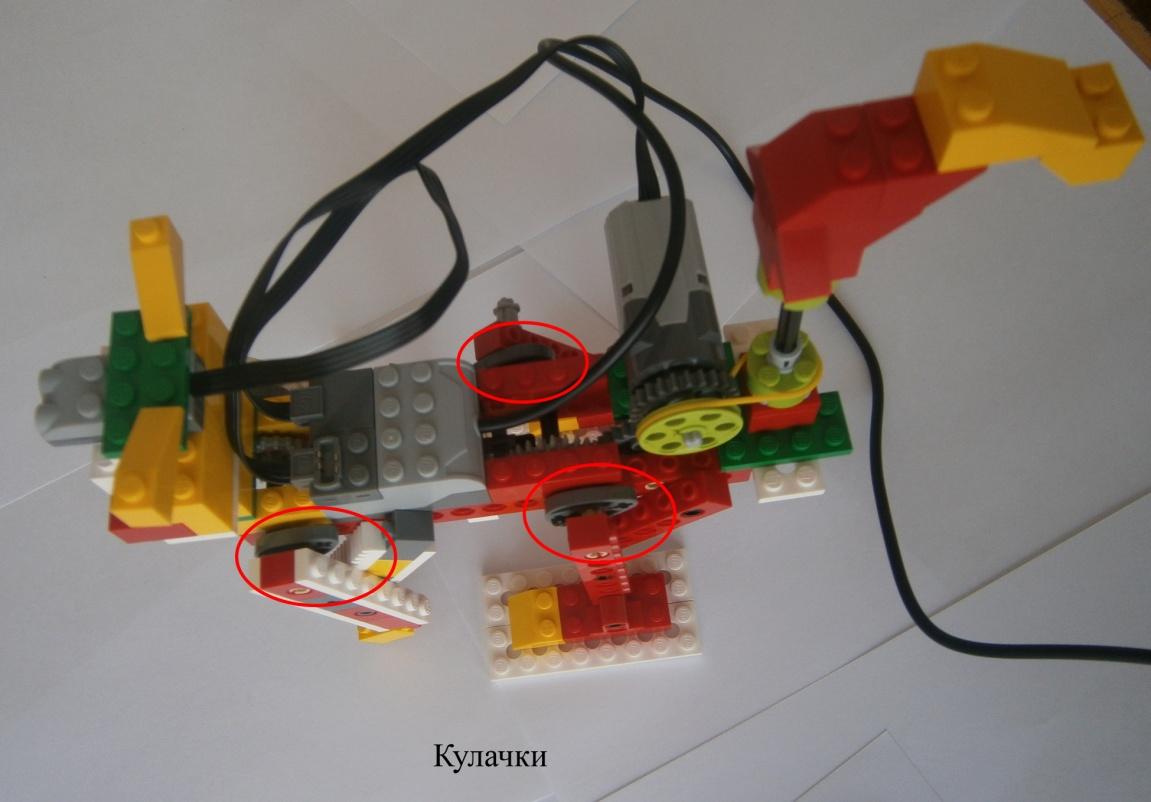
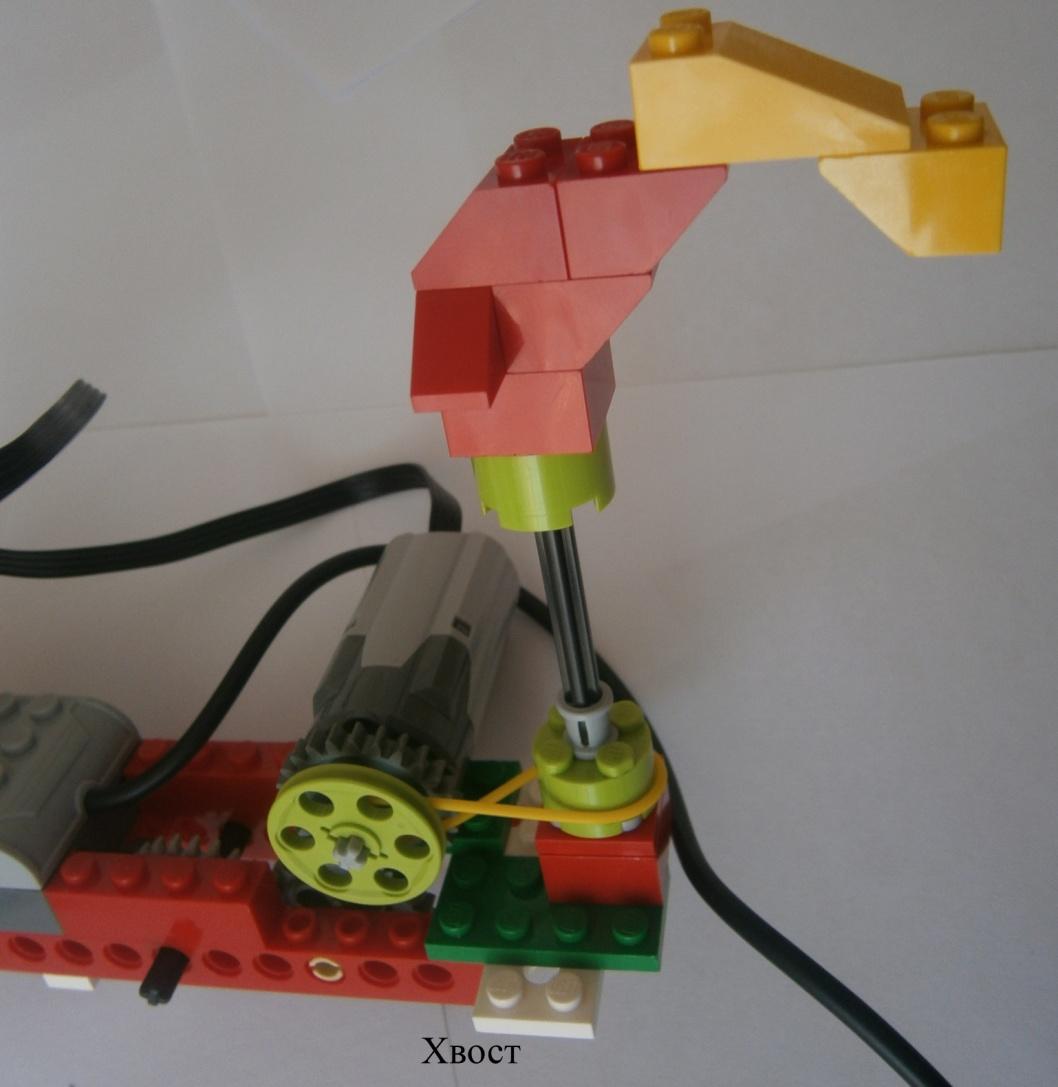
Модель «Щенок» очень простенькая в сборке, подойдет для детей от 7 до 9 лет. Оснащена мотором и датчиком движения. Суть работы щенка проста. Движением руки, вы подаете сигнал датчику, он в свое время дает команду мотору, и щенок начинает свое движение. Мотор работает 2 секунды и щенок останавливается. После чего, вы опять подаете сигнал датчику, и так по кругу. Программа специально поставлена в цикл, чтобы можно было несколько раз повторять алгоритм действий.
В презентации вы найдете два задания для учеников. Первое задание основано на изменении механизма. Второе задание основано на изменении управляющей программы. Для получения быстрого решения заданий, детей можно объединить в пары. Инструкция по сборке щенка рассчитана на один набор LEGO Education WeDo 2.0.
Все детали входят в набор WeDo 2.0. Схема создана в программе Studio 2.0 , но представлена в презентации. Это сделано для большего удобства учителя. Презентацию можно показать в любом классе, в отличие от программы.

Совершенно готовая сборка для показа на уроке детям по дополнительному образованию.
Все материалы проверены. Ошибок и вирусов нет.

Напоминаем, что скачать готовую пошаговую инструкцию по сборке для набора LEGO® Education WeDo 2.0 «Щенок» вы сможете после нажатия на кнопку скачать и просмотра рекламы. За счет рекламы живет наш сайт. Спасибо за понимание!
Предпросмотр:
Щенок
Собака «Тузик».

LEGO Technic Tora no Maki ISOGAWA Yoshihito.
стр. 87 воплощение идеи с помощью 1 конструктора Lego Wedo.
|
|
|
|
|
|
|
|
|
|
|

|
|
|
|
|
|
Удачи в реализации новых идей!
Ссылка на видео: http://www.youtube.com/watch?v=CtfsQCQvHzc