-
Contents
-
Table of Contents
-
Troubleshooting
-
Bookmarks
Quick Links
Camera
Operations Guide
Read this first
© 2004 Sony Corporation
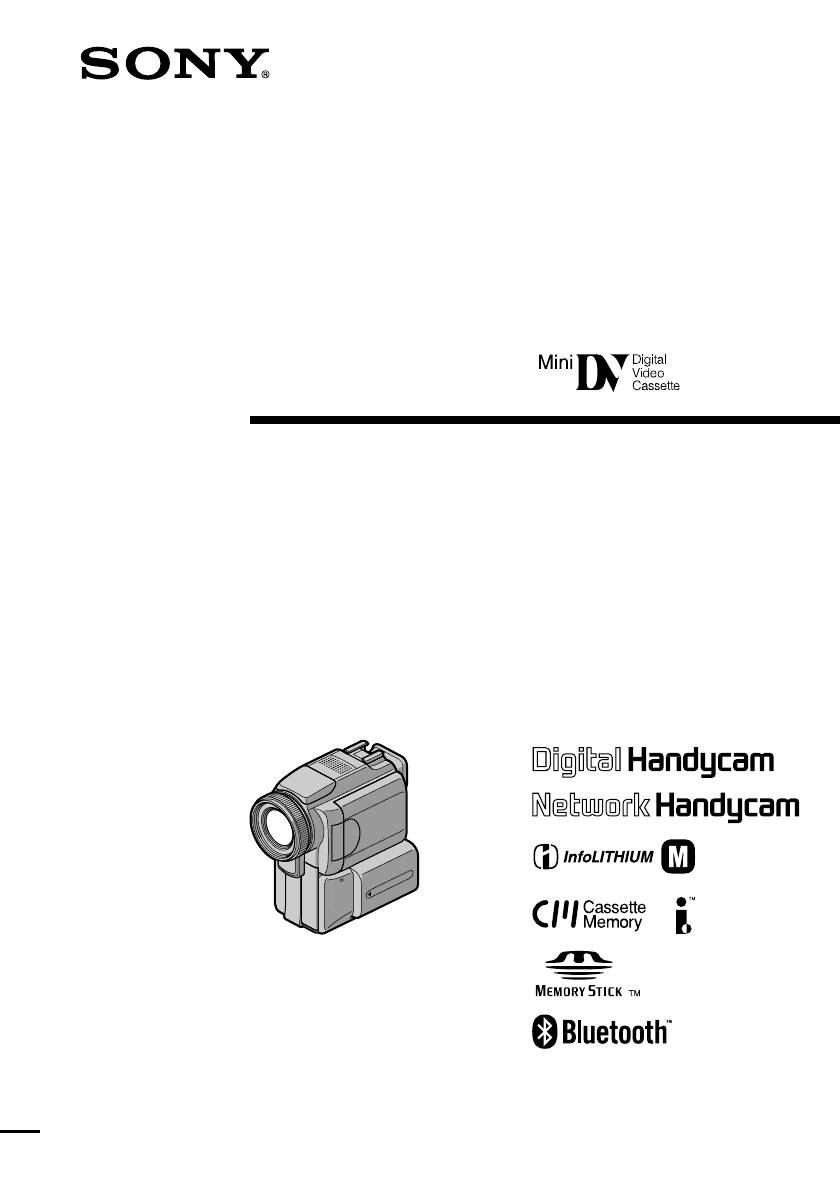
Digital Video Camera Recorder
DCR-HC16E/HC18E/HC20E
3-088-337-11(1)
Related Manuals for Sony Handycam DCR-HC16E
Summary of Contents for Sony Handycam DCR-HC16E
-
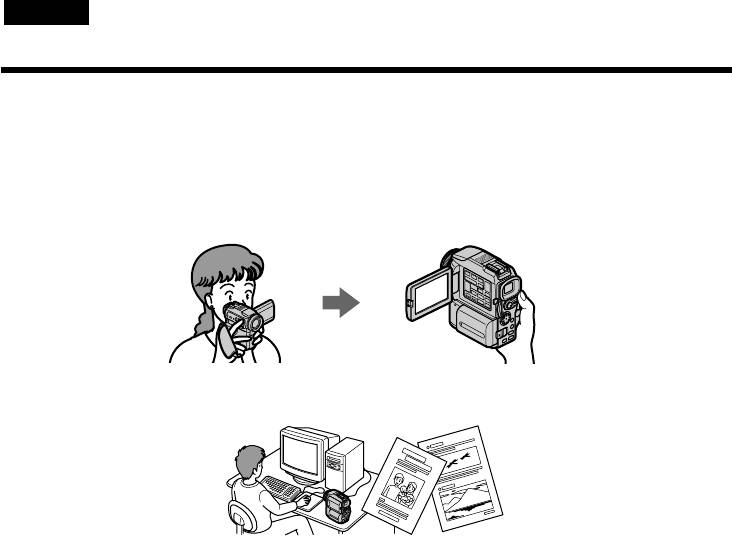
Page 1
Camera Operations Guide Read this first Digital Video Camera Recorder DCR-HC16E/HC18E/HC20E © 2004 Sony Corporation 3-088-337-11(1) -
Page 2: Read This First
Never use the plug without the fuse cover. If you should lose the fuse cover, please contact your nearest Sony service station. FOR CUSTOMERS IN EUROPE ATTENTION The electromagnetic fields at the specific frequencies may influence the picture and sound of this camcorder.
-
Page 3
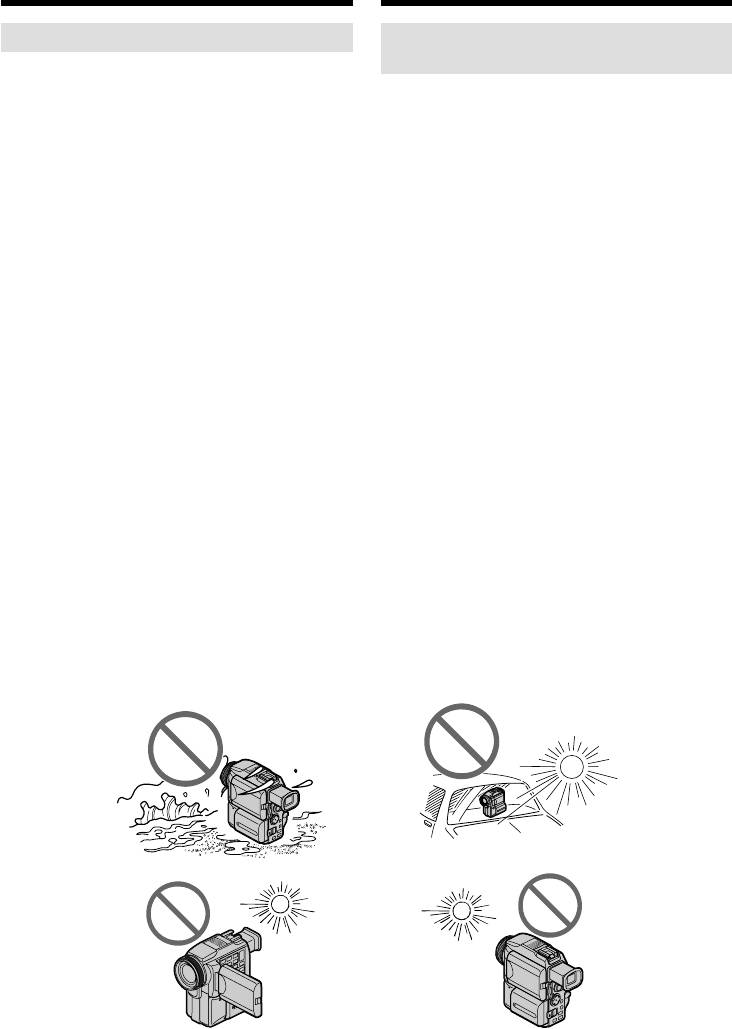
camera, and thus may appear different from what you see. • The illustrations used on this manual are based on the model DCR-HC20E. Notes on using the camcorder • Hold your camcorder correctly. • If the Strap Belt is too long, fasten the Strap Belt as shown in the following illustration. -
Page 4: Table Of Contents
Table of Contents Read this first … 2 Quick Start Guide Recording movies … 8 Recording/Playing back with ease … 10 Getting started Step 1: Checking supplied items… 11 Step 2: Charging the battery pack… 12 Using an outside power source … 14 Step 3: Turning the power on…
-
Page 5
Recording a picture using various effects … 31 Fading in and out of a scene – FADER … 31 Searching for the starting point … 32 Searching for the last scene of the most recent recording – END SEARCH … 32 Searching manually –… -
Page 6
Advanced operations Customizing Your Cam- corder Changing the menu settings … 43 Using the (MANUAL SET) menu – PROGRAM AE/P EFFECT, etc..44 Using the (CAMERA SET) menu – D ZOOM/16:9WIDE, etc..47 Using the (PLAYER SET)/ SET) menu – HiFi SOUND/AUDIO MIX … -
Page 8: Quick Start Guide
Quick Start Guide Recording movies Attach the charged battery pack to the camcorder. To charge the battery, see page 12. Slide the battery pack in the direction of the arrow until it clicks. Insert a cassette into the camcorder. Slide the OPEN/ ZEJECT lever in the direction of the…
-
Page 9: Start Recording While Checking The Subject On The Lcd Screen
Start recording while checking the subject on the LCD screen. The date and time is not set up in the default setting. To set the date and time, see page 17. Set the LENS COVER switch to OPEN. Open the LCD panel. While pressing the green button, slide the POWER switch down to light up…
-
Page 10: Recording/Playing Back With Ease
Recording/Playing back with ease By switching to Easy Handycam operation, recording/playback operation becomes even easier. Easy Handycam operation allows easy recording/playback for even first time users by providing only the basic functions for recording/playback. Press EASY when recording/ playing back. EASY lights up in blue (a) and the screen font size increases (b) during Easy Handycam operation.
-
Page 11: Getting Started
Getting started Step 1: Checking supplied items Make sure you have following items supplied with your camcorder. The number in parentheses indicates the number of that item supplied. AC Adaptor (1) Mains lead (1) Wireless Remote Commander (1) (DCR-HC18E/HC20E) A button-type lithium battery is already installed.
-
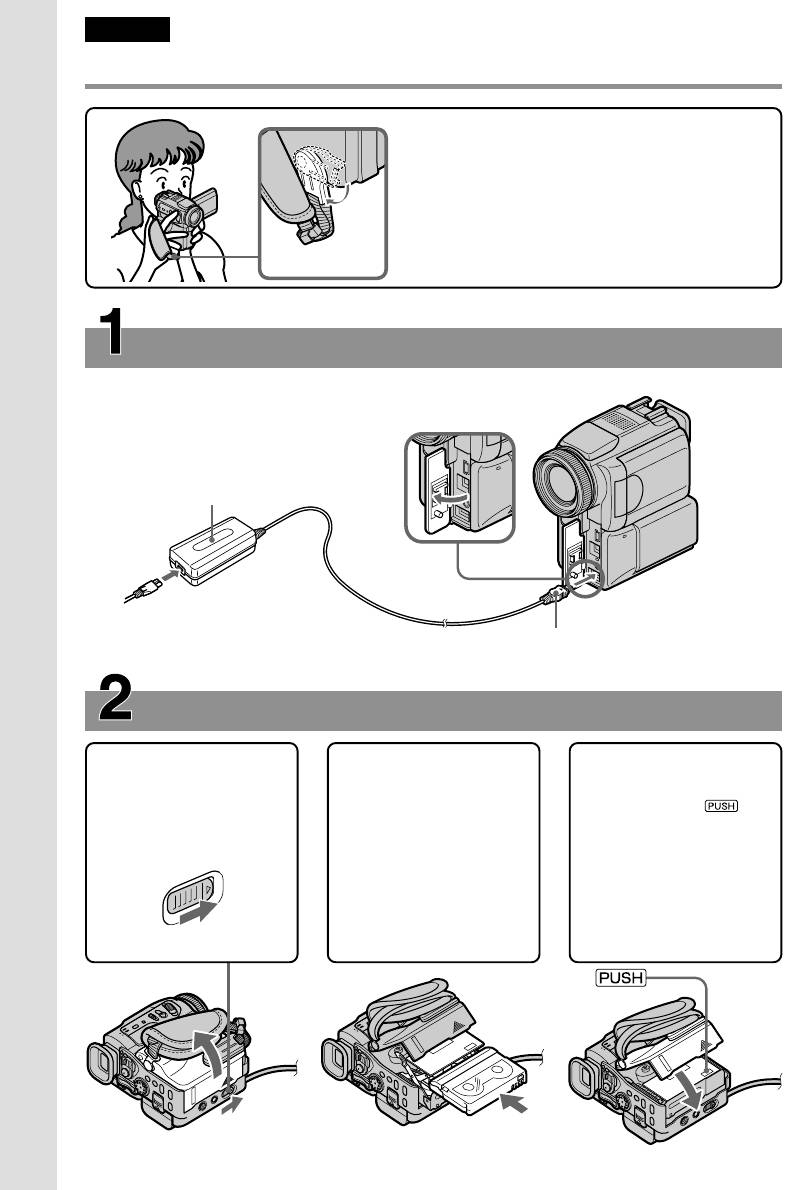
Page 12: Step 2: Charging The Battery Pack
Step 2: Charging the battery pack You can charge the battery by attaching the “InfoLITHIUM” battery pack (P series) to your camcorder. b Notes • You cannot use batteries other than the “InfoLITHIUM” battery pack (P series) (p. 83). • Do not short-circuit the DC plug of the AC Adaptor or battery terminals with any metallic objects.
-
Page 13
To remove the battery pack BATT (battery) POWER release button switch Battery pack Set the POWER switch to OFF (CHG). Slide the battery pack out in the direction of the arrow while pressing the BATT (battery) release button down. b Note •… -
Page 14: Using An Outside Power Source
When LCD BACKLIGHT is set to OFF Battery pack Continuous recording time NP-FP50 (supplied) NP-FP70 NP-FP90 Recording time when recording with the viewfinder Approximate number of minutes available when you use a fully charged battery pack at 25°C (77°F). Battery pack Continuous recording time NP-FP50…
-
Page 15: Step 3: Turning The Power On
Step 3: Turning the power on You need to slide the POWER switch repeatedly to select the desired power mode to record or play. When using this camcorder for the first time, the CLOCK SET screen appears (p. 17). LENS COVER switch POWER switch Set the LENS COVER switch to OPEN.
-
Page 16: Step 4: Adjusting The Lcd Panel And Viewfinder
Step 4: Adjusting the LCD panel and viewfinder Adjusting the LCD panel You can adjust the angle and brightness of the LCD panel to meet various recording situations. Even when there are obstructions between you and the subject, you can check the subject on the LCD screen during recording by adjusting the angle of the LCD panel.
-
Page 17: Step 5: Setting The Date And Time
To use the viewfinder during operation When you are recording, you can adjust the exposure (p. 28) and fader (p. 31) while checking the image on the viewfinder. Have the LCD panel rotated 180 degrees and closed with the screen facing out. Slide the POWER switch to select the CAMERA mode.
-
Page 18
Touch to display PAGE1. 60min 0:00:00 PAGE1 PAGE2 SPOT FOCUS SPOT FOCUS B AL METER MENU FADER EXPO– SURE Touch MENU. MANUAL SET PROGRAM AE P EFFECT FLASH MODE FLASH LVL AUTO SHTR EXEC RET. Select (SETUP MENU) with , then touch EXEC. SETUP MENU CLOCK SET —:—:—… -
Page 19: Step 6: Inserting A Cassette Tape
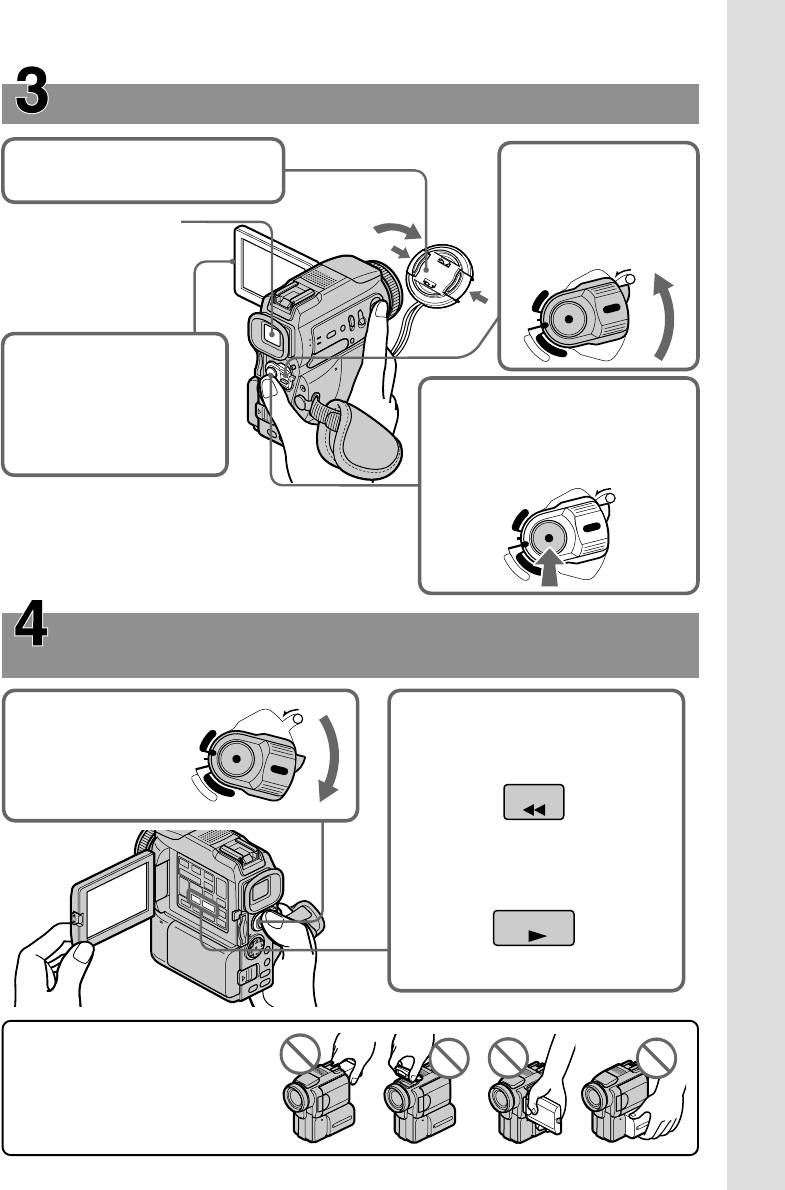
Step 6: Inserting a cassette tape You can use mini DV cassettes only. For details on these cassettes (such as write- protection), see page 81. b Note • Do not force the cassette into the compartment. This may cause a malfunction of your camcorder. Slide the OPEN/ZEJECT the direction of the arrow and open the lid.
-
Page 20: Step 7: Setting The Screen Language
Step 7: Setting the screen language You can select the language to be used on the LCD screen. Turn on your camcorder. Open the LCD panel. Touch to display PAGE1. 60min STBY 0:00:00 PAGE1 PAGE2 SPOT FOCUS SPOT FOCUS B AL METER MENU FADER…
-
Page 21: Recording
Recording Recording movies Before recording, follow steps 1 to 7 in “Getting started” (p. 11 — p. 20). When you are recording, movies will be recorded along with stereo sound. Camera recording lamp LENS COVER switch REC START/STOP REC START/STOP z Tip •…
-
Page 22: Recording For A Longer Time
E Tape photo recording/Time code or tape counter (hour: minute: second) F Recording capacity of the tape (p. 54) G Function button b Notes • Before changing the battery pack, slide the POWER switch up to OFF (CHG). • In the default setting, when you do not operate the camcorder for more than about 5 minutes, the power will automatically turn off to prevent battery loss ([A.SHUT OFF], p.
-
Page 23: Using The Self-Timer
Extend the viewfinder. Open the LCD panel 90 degrees to the camcorder, then rotate it 180 degrees towards the subject. A mirror-image of the subject appears on the LCD screen, but the picture will be normal when recorded. Using the self-timer With the self-timer, you can start recording after a delay of about 10 seconds.
-
Page 24: Recording Still Images — Tape Photo Recording
Recording still images – Tape photo recording You can record still images. Before recording, follow steps 1 to 7 in “Getting started” (p. 11 — p. 20). PHOTO LENS COVER switch POWER switch Set the LENS COVER switch to OPEN. Open the LCD panel.
-
Page 25: Recording With Ease — Easy Handycam
Recording with ease – Easy Handycam With this Easy Handycam operation, most of the camera settings are set to the automatic mode, only basic functions become available, and the screen font size increases for easy viewing. Even first time users can enjoy easy recording.
-
Page 26: Adjusting The Exposure
Adjusting the exposure The exposure is adjusted automatically in the default setting. Adjusting the exposure for backlit subjects When your subject has its back to the sun or other light, you can adjust the exposure to prevent the subject from becoming shadowed.
-
Page 27: Adjusting The White Balance Manually
To return the setting to automatic exposure Follow steps 1 to 3, then touch [ step 4. Or set [EXPOSURE] to [ (p. 28). b Notes • You cannot use the Flexible spot meter together with the NightShot plus function. •…
-
Page 28: Adjusting The Exposure Manually
Adjusting the exposure manually You can fix the brightness of a picture at the best exposure. When recording indoors on a clear day, for instance, you can avoid backlight shadows on people next to the window by manually fixing the exposure to that of the wall side of the room.
-
Page 29: Recording In Dark Places — Nightshot Plus
Recording in dark places – NightShot plus You can record subjects in dark places (such as when capturing the face of your baby sleeping) with this function. Set the NIGHTSHOT PLUS switch to ON. and ”NIGHTSHOT PLUS” appear. To cancel NightShot plus, set the NIGHTSHOT PLUS switch to OFF.
-
Page 30: Adjusting The Focus Manually
To adjust the focus automatically Follow steps 1 to 3, then touch [ step 4. Or, set [FOCUS] to [ b Note • You cannot use the SPOT FOCUS function together with [PROGRAM AE]. z Tip • If you set [SPOT FOCUS], [FOCUS] is automatically set to [MANUAL].
-
Page 31: Recording A Picture Using Various Effects
Recording a picture using various effects POWER switch REC START/ REC START/STOP STOP Fading in and out of a scene – FADER You can add the following effects to currently recording pictures. [BLACK] (black fader) [WHITE] (white fader) [MOSC. FADER] (mosaic fader) [MONOTONE] When fading in, the picture gradually changes from black-and-white to color.
-
Page 32: Searching For The Starting Point
Searching for the starting point Searching for the last scene of the most recent recording – END SEARCH This function is handy when you have played back the tape, for example, but want to start recording right after the most recently recorded scene.
-
Page 33: Reviewing The Most Recently Recorded Scenes — Rec Review
Reviewing the most recently recorded scenes – Rec review You can view a few seconds of the scene recorded just before you stopped the tape. Slide the POWER switch to select the CAMERA mode. Touch to display [PAGE1]. Touch MENU. Select (CAMERA SET), then select [EDITSEARCH] with…
-
Page 34: Playback
Playback Viewing pictures recorded on a tape Make sure you have a recorded tape inserted into your camcorder. When you want to play back recordings on your TV, see page 39. For DCR-HC18E/HC20E: You can control playback using the Remote Commander.
-
Page 35: Playing Back In Various Modes
Indicators displayed during playback 60min 0:00:00:15 60min A Remaining battery time B Recording mode (SP or LP) C Tape transport indicator D Time code (hour: minute: second: frame) or tape counter (hour: minute: second) E Function button F Video operation buttons Playing back in various modes To fast forward or rewind during playback –…
-
Page 36: Playing Back With Ease — Easy Handycam
Playing back with ease – Easy Handycam Easy Handycam operation allows easy playback for even first time users by providing only the basic functions for playback. Also, the screen font size increases for easy viewing. Make sure you have a recorded tape inserted into your camcorder.
-
Page 37: Various Playback Functions
Various playback functions You can display the recorded date and camera setting data. DSPL/BATT INFO POWER switch Displaying the screen indicators You can choose to display the time code, tape counter, and other information on the screen. Press DSPL/BATT INFO. The indicators appear/disappear as you press the button.
-
Page 38
If you record the picture without setting the clock, [— — —-] and [—:—:—] will appear. 60min 0:00:00:00 AUTO F1. 7 A SteadyShot off B Exposure C White balance D Gain E Shutter speed F Aperture value Playback… -
Page 39: Playing The Picture On A Tv
Playing the picture on a TV A/V OUT jack A/V connecting cable (supplied)*1 Signal flow *1 The supplied A/V connecting cable has a video plug and an S video plug for the video connection. *2 This connection produces higher quality DV format pictures.
-
Page 40: Locating A Scene On A Tape For Playback (Dcr-Hc18E/Hc20E)
Locating a scene on a tape for playback (DCR-HC18E/HC20E) Searching quickly for a desired scene – Zero set memory mREW PLAY STOP DISPLAY ZERO SET MEMORY During playback, press ZERO SET MEMORY on the Remote Commander at the point you want to locate later on.
-
Page 41: Searching For A Scene By Date Of Recording — Date Search
Playback starts automatically from the selected title. TITLE SEARCH HAPPY NEW YEAR! PRESENT GOOD MORNING WEDDING NIGHT BASEBALL Point where the playback starts Present point on the tape To cancel the operation Press STOP on the Remote Commander. b Notes •…
-
Page 42: Playing Back Still Images In Sequence — Photo Scan
choosing the recording date on the screen. ([CM SEARCH] is set to [ON] by default). When you are using a cassette that does not have Cassette Memory, your camcorder searches the still image automatically regardless of the recording date. SEARCH M. .
-
Page 43: Customizing Your Camcorder
Advanced operations Customizing Your Camcorder Changing the menu settings You can change various settings or make detailed adjustments using the menu items displayed on the screen. Turn on the power (p. 15). Touch to display [PAGE1]. 60min STBY 0:00:00 PAGE1 PAGE2 SPOT FOCUS…
-
Page 44: Using The (Manual Set) Menu
Using the (MANUAL SET) menu – PROGRAM AE/P EFFECT, etc. You can select items listed below on the MANUAL SET menu. To select items, see “Changing the menu settings” (p. 43). The default settings are marked with G. The indicators in parentheses appear when the PROGRAM AE You can record pictures easily in a situation that requires various techniques by selecting the following settings.
-
Page 45: Flash Mode
**Your camcorder is adjusted to focus only on distant subjects. Note • When you set the NIGHTSHOT PLUS switch to ON, [PROGRAM AE] does not work. (The indicator flashes.) P EFFECT You can add special effects (such as films) to a picture before or after recording. appears when the effect is selected.
-
Page 46
FLASH LVL Note that these settings will not function with external flashes that do not support the following settings. HIGH GNORMAL Note • The setting returns to [NORMAL] when you disconnect the power source from your camcorder for more than 5 minutes. AUTO SHTR Customizing Your Camcorder To make the flash (optional) level higher than normal. -
Page 47: Using The (Camera Set) Menu
Using the (CAMERA SET) menu – D ZOOM/16:9WIDE, etc. You can select items listed below on the CAMERA SET menu. To select items, see “Changing the menu settings” (p. 43). The default settings are marked with G. The indicators in parentheses appear when the D ZOOM You can select the maximum zoom level in case you want to zoom to a level greater than 10 times while recording on a tape.
-
Page 48
When viewed on the LCD screen/viewfinder * The picture appears in full screen when the wide-screen TV switches to full mode. **Played in 4:3 mode. When you play a picture in the wide mode, it appears as you have seen on the LCD screen or in the viewfinder. -
Page 49: Mix
Using the (PLAYER SET)/ (VCR SET) menu SOUND/AUDIO MIX You can select items listed below in the menu (the PLAYER SET menu for DCR-HC16E/ HC18E, the VCR SET menu for DCR-HC20E). To select these items, see “Changing the menu settings” (p. 43). HiFi SOUND You can select how to play back audio recorded on a tape in stereo mode.
-
Page 50
Using the SET) menu – LCD B.L./LCD COLOR/VF B.L. You can select items listed below on the LCD/ VF SET menu. To select items, see “Changing the menu settings” (p. 43). LCD B.L. You can adjust the brightness of the LCD screen’s backlight. The recorded picture will not be affected by this setting. -
Page 51: Using The (Cm Set) Menu
Using the SET) menu – TITLE/TAPE TITLE/ERASE ALL, etc. You can select items listed below on the CM SET menu. To select items, see “Changing the menu settings” (p. 43). TITLE Any titles you have superimposed using this camcorder can only be viewed on a video cassette device with the index titler function.
-
Page 52
Color white t yellow t violet t red t cyan t green t blue Size small y large (You can only select the small size when you are entering more than 13 characters.) Position You can select from 8 to 9 choices. Touch [TITLE OK], then touch [SAVE TITLE]. -
Page 53
CM SEARCH For DCR-HC18E/HC20E: TAPE TITLE You can label a cassette with Cassette Memory (up to 10 letters). The label will be displayed for approximately 5 seconds when you select the CAMERA mode and insert a cassette, or when you select the PLAY/EDIT mode. Up to 4 titles will be displayed at the same time if the cassette has titles superimposed. -
Page 54: Using The (Tape Set) Menu — Rec Mode/Frame Rec/ Int.rec, Etc
Select to record in the SP (Standard Play) mode on a cassette. Select to increase the recording time to 1.5 times the SP mode (Long Play). The use of Sony Excellence/Master mini DV cassette is recommended to get the most out of your camcorder.
-
Page 55
GOFF ON ( Notes • When you use frame recording continuously, the remaining tape time will not be indicated correctly. • The last scene will be longer than other scenes. INT.REC You can record pictures on the tape at a selected interval. You can achieve excellent recordings of flowers blooming, etc. -
Page 56
Tips • If you adjust the focus manually, you may be able to record clear pictures even if the light changes (p. 30). • You can silence the beeps during recording (p. 59). Customizing Your Camcorder… -
Page 57: Using The (Setup Menu) Menu — Clock Set/Usb Stream/ Language, Etc
Using the (SETUP MENU) menu – CLOCK SET/ USB STREAM/LANGUAGE, etc. You can select items listed below on the SETUP MENU menu. To select items, see “Changing the menu settings” (p. 43). CLOCK SET You can set the date and time (p. 17). USB STREAM You can connect a USB cable (supplied) to your camcorder, and view the picture displayed on the screen of your camcorder on your computer (USB Streaming).
-
Page 58
– When a mode other than CAMERA is selected. • If [A.SHUT OFF] is set to [5min] when the camcorder is used on the battery pack, the power will be turned off after approximately 5 minutes (p. 59). Customizing Your Camcorder… -
Page 59: Using The (Others) Menu
Using the (OTHERS) menu TIME, etc. You can select items listed below on the OTHERS menu. To select these items, see “Changing the menu settings” (p. 43). WORLD TIME You can adjust the time difference when using your camcorder abroad. Set the time difference by touching accordance with the time difference.
-
Page 60: Rec Lamp
Note • The setting returns to [ON] when you have the power source disconnected from your camcorder for more than 5 minutes. DISPLAY GLCD V-OUT/LCD REC LAMP VIDEO EDIT Select to make programs and dubbing the selected scenes to a tape on a VCR (p.
-
Page 61: Dubbing/Editing
Dubbing/Editing Connecting to a VCR or TV A/V OUT jack A/V connecting cable (supplied)*1 Signal flow *1 The supplied A/V connecting cable has a video plug and an S video plug for the video connection. *2 This connection produces higher quality DV format pictures.
-
Page 62: Dubbing To Another Tape
transmitted digitally, producing high quality pictures. Note that you cannot record the picture and sound separately. For details, see page 84. Dubbing/Editing Dubbing to another tape You can copy and edit the picture played back on your camcorder to other recording devices (such as VCRs).
-
Page 63: Recording Pictures From A Vcr (Dcr-Hc20E)
Recording pictures from a VCR (DCR-HC20E) You can record and edit pictures from a VCR on a tape inserted in your camcorder via an i.LINK cable. Insert a cassette for recording in your camcorder. Connect your VCR to your camcorder (p.
-
Page 64
• Insert a cassette for recording. • Set the input selector to input mode if your VCR has one. Prepare your camcorder (playing device). • Insert a cassette for editing. • Slide the POWER switch repeatedly to select the PLAY/EDIT mode. Touch to display [PAGE1]. -
Page 65
The following [IR SETUP] codes are recorded on your camcorder by default. (It is set at “3” as the default setting.) Manufacturing [IR SETUP] code company Sony 1, 2, 3, 4, 5, 6 Aiwa 47, 53, 54 Akai 50, 62, 74… -
Page 66
Remove the cassette from your camcorder. Prepare a pen and paper to take notes. Set the VCR to recording pause mode. Skip this step if you have selected i.LINK in step 9 (p. 64). b Note • Run the tape for about 10 seconds before pausing. -
Page 67
Prepare a cassette. Insert a tape to be played back into the camcorder, then insert a cassette for recording into your VCR. Touch to display [PAGE1]. Touch MENU. Select (OTHERS), then select [VIDEO EDIT] with then touch [EXEC] Search for the beginning of the first scene that you want to dub on your camcorder, then pause playback. -
Page 68
To save a program without using it to record Touch [ END] in step 9. The program is stored in memory until the cassette is ejected. To erase programs Follow steps 1 to 4 in “Recording the selected scenes as programs” (p. 66), then touch [UNDO]. -
Page 69: Dubbing Sound To A Recorded Tape
Dubbing sound to a recorded tape Preparing for audio recording Internal microphone Signal flow Record audio in one of the following ways. • Using the internal microphone (no connection required). • Connecting a microphone (optional) to the MIC jack. The audio input to be recorded takes precedence over others in the order of MIC jack t internal microphone.
-
Page 70
Touch (pause) again at the point where you want to start recording the sound. The playback pauses. Touch and select [PAGE3]. Touch [A DUB CTRL]. 60min 0:00:00:00 A DUB CTRL RET. AUDIO Touch [AUDIO DUB]. X mark appears on the LCD A green screen. -
Page 71: Creating Dvds Or Vcds
Creating DVDs or VCDs When your camcorder is connected to a Sony VAIO series personal computer, you can easily burn the picture recorded on the tape to a DVD (Direct Access to “Click to DVD”). And, when…
-
Page 72: Troubleshooting
If the problem persists, disconnect the AC Adaptor from the wall socket and contact your Sony dealer. The battery pack may be damaged. (p. 12) • The temperature of the environment is too low, or the battery pack has not been charged enough.
-
Page 73: Cassette Tapes
Symptom The remaining battery time indicator does not indicate the correct time. The power turns off frequently although the remaining battery indicator indicates that the battery pack has enough power to operate. The power abruptly turns off. A problem occurs when the camcorder is connected to the AC Adaptor.
-
Page 74
Symptom An unknown picture appears on the screen. An unknown indicator appears on the screen. The buttons do not appear on the touch panel. The buttons on the touch panel do not work correctly or do not work at all. The picture in the viewfinder is not clear. -
Page 75
Symptom A vertical band appears when recording a bright subject. The color of the picture is not correctly displayed. Picture appears too bright on the screen, and the subject does not appear on the screen. The screen is too dark for the image to be seen. -
Page 76
Symptom The sound breaks off. For DCR-HC18E/HC20E: Cannot perform Date search with the recording date displayed on the screen. “—” is displayed on the screen. The END SEARCH function does not work. The END SEARCH function does not work correctly. Noises appear and is displayed on the screen. -
Page 77
VCR correctly, then check the connection between your camcorder and the VCR. (p. 61) cWhen your camcorder is connected to a DV device that is not a Sony product via an i.LINK cable, select [IR] in step 9 of “Step 1: Preparing your camcorder and VCR for operation”… -
Page 78: Warning Indicators And Messages
Troubleshooting Cause and/or Corrective Actions Some symptoms can be fixed by yourself. If the problem persists even after you tried a couple of times, contact your Sony dealer or local authorized Sony service facility. C:04:ss cA battery pack that is not an “InfoLITHIUM” battery pack is being used.
-
Page 79
Indication (Warning indicator pertaining to the external flash) * You hear a melody or beep sound when the warning indicators appear on the screen. Cause and/or Corrective Actions Slow flashing: • During charging Fast flashing: • The self-diagnosis display code is displayed (p. 78).* •… -
Page 80: Warning Messages
Warning messages If messages appear on the screen, check the following. See the page in parentheses for details. Subjects Indications Battery Use the ”InfoLITHIUM” battery pack. Battery level is low. Old battery. Use a new one. Z Re-attach the power source. Moisture % Z Moisture condensation.
-
Page 81: Additional Information
Additional Information Using your camcorder abroad Power supply You can use your camcorder in any countries/ regions using the AC Adaptor supplied with your camcorder within AC 100 V to 240 V, 50/60 Hz. On TV color systems Your camcorder is a PAL system-based camcorder.
-
Page 82
z Tip • The memory capacity of the cassette marked with is 4k bits. Your camcorder can accommodate cassettes having a memory capacity of up to 16k bits. Copyright signal When you play back If the cassette you play back on your camcorder contains copyright signals, you cannot copy it to a tape in another video camera connected to your camcorder. -
Page 83: About The «Infolithium» Battery Pack
About the “InfoLITHIUM” battery pack This unit is compatible with the “InfoLITHIUM” battery pack (P series). Your camcorder operates only with the “InfoLITHIUM” battery pack. “InfoLITHIUM” P series battery packs have the mark. What is the “InfoLITHIUM” battery pack? The “InfoLITHIUM” battery pack is a lithium- ion battery pack that has functions for communicating information related to operating conditions between your camcorder and an…
-
Page 84: About I.link
Tips • i.LINK is a more familiar term for the IEEE 1394 data transport bus proposed by Sony, and is a trademark approved by many corporations. • IEEE 1394 is an international standard standardized by the Institute of Electrical and Electronics Engineers.
-
Page 85: Maintenance And Precautions
Interface, see page 61, 62. This unit can also be connected to other i.LINK (DV Interface) compatible device made by Sony (e.g. a VAIO series personal computer) as well as to video device. Before connecting this unit to your computer,…
-
Page 86
• If the following problem occurs, clean the video heads for 10 seconds with the Sony DVM-12CLD cleaning cassette (optional). – Mosaic-pattern noise appears on the playback picture or the screen is displayed in blue. -
Page 87
LCD screen • Do not add excessive pressure on the LCD screen, as it may cause damage. • If your camcorder is used in a cold place, a residual image may appear on the LCD screen. This is not a malfunction. •… -
Page 88: Specification
Procedures Connect your camcorder to a wall socket using the supplied AC Adaptor, and leave it with the POWER switch set to OFF (CHG) for more than 24 hours. Additional Information Specification Video camera recorder System Video recording system 2 rotary heads, Helical scanning system Audio recording system Rotary heads, PCM system Quantization: 12 bits (Fs 32 kHz, stereo 1,…
-
Page 89
AUTO], [ONE PUSH], [INDOOR] (3 200 K), [OUTDOOR] (5 800 K) Minimum illumination 5 lx (lux) (F 1.7) 0 lx (lux) (during the NightShot plus function)* * Objects unable to be seen due to the dark can be shot with infrared lighting. Input/Output connectors Audio/Video output 10-pin connector… -
Page 90
Types of differences DCR-HC DV Interface Remote sensor – z Provided – Not provided Additional Information IN/OUT… -
Page 91: Quick Reference
Quick Reference Identifying parts and controls Camcorder A LCD/Touch panel screen (p. 2, 16) B LCD BACKLIGHT button* (p. 16) C REC START/STOP button (p. 21) D BACK LIGHT button* (p. 26) E DSPL/BATT INFO button (p. 13, 37) F EASY button (p. 25, 36) G Viewfinder (p.
-
Page 92
Your camcorder is equipped with a Carl Zeiss lens which can reproduce fine images. The lens for your camcorder was developed jointly by Carl Zeiss, in Germany, and Sony Corporation. It adopts the MTF measurement system for video cameras and offers a quality as fine as a Carl Zeiss lens. -
Page 93
A PHOTO button (p. 24) B Viewfinder lens adjustment lever (p. 16) C BATT (battery) release button (p. 13) D CHG (charge) lamp (p. 12) E REC START/STOP button (p. 21) F DC IN jack (p. 12) G Power zoom lever H CAMERA, PLAY/EDIT mode lamps (p. -
Page 94
A OPEN/ZEJECT lever (p. 19) B Strap Belt C Cassette lid (p. 19) D Tripod receptacle Make sure that the length of the tripod screw is less than 5.5 mm (7/32 inch). Otherwise, you cannot attach the tripod securely, and the screw may damage your camcorder. -
Page 95
Remote Commander (DCR-HC18E/HC20E) Remove the insulation sheet before using the Remote Commander. A PHOTO button (p. 24) B SEARCH M. button* (p. 40) C ./> buttons* (p. 40) D Video control buttons (Rewind, Playback, Fast-forward, Pause, Stop, Slow) (p. 35) E ZERO SET MEMORY button* (p. -
Page 96
WARNING Battery may explode if mistreated. Do not recharge, disassemble or dispose of in fire. CAUTION Danger of explosion if battery is incorrectly replaced. Replace only with the same or equivalent type recommended by the manufacturer. Discard used batteries according to the manufacturer’s instructions. -
Page 97: Indicators For The Lcd Screen And Viewfinder
Indicators for the LCD screen and viewfinder Following indicators will appear on the LCD screen and viewfinder to indicate the state of your camcorder. Indicators vary depending on your camcorder model. Example: Indicators in the CAMERA mode Time code (p. 22)/Tape counter (p. 22)/Self- diagnosis (p.
-
Page 98: Index
Index Numerics 16:9WIDE mode … 47 21-pin adaptor … 39 A/V connecting cable.. 39, 61 AC Adaptor … 14 Adjusting the viewfinder… 16 Audio dubbing (A DUB CTRL)… 69 AUDIO MIX … 49, 70 AUDIO MODE … 54 Auto shut off function (A.SHUT OFF)…
-
Page 99
Operation confirmation beep See BEEP PAL …81 Photo scan …42 Photo search …41 Picture effect (P EFFECT) …45 Picture search …35 Playback (V SPD PLAY) Double speed …35 Frame…35 Reverse …35 Slow…35 Playing time …14 Power mode …15 PROGRAM AE …44 Rec review …33 REC START/STOP …21 Recording capacity… -
Page 100
Printed on 100% recycled paper using VOC (Volatile Organic Compound)-free vegetable oil based ink. Printed in Japan…
Инструкция к Видеокамере Sony DCR-PC115E
3-070-988-11 (1)
Digital
Video Camera
Recorder
Operating Instructions
Before operating the unit, please read this manual thoroughly,
and retain it for future reference.
ИНСТРУКЦИЯ ПО ЭКСПЛУАТАЦИИ
Перед эксплуатацией аппарата внимательно прочтите, пожалуйста,
данное руководство и сохраните его для дальнейших справок.
TM
SERIES
DCR-PC120E
DCR-PC115E/PC120E
©2001 Sony Corporation
English
Русский
Welcome!
Добро пожаловать!
Congratulations on your purchase of this Sony
Поздравляем Вас с приобретением цифровой
Handycam. With your Handycam you can
видеокамеры Handycam фирмы Sony. С
capture life’s precious moments with superior
помощью Вашей видеокамеры Digital
picture and sound quality.
Handycam Вы сможете запечатлеть дорогие
Your Handycam is loaded with advanced
Вам мгновения жизни с превосходным
features, but at the same time it is very easy to
качеством изображения и звука.
use. You will soon be producing home video that
Ваша цифровая видеокамера Handycam
you can enjoy for years to come.
оснащена усовершенствованными
функциями, но, в то же время, ею очень
легко пользоваться. Вскоре Вы будете
WARNING
создавать семейные видеопрограммы,
To prevent fire or shock hazard, do not expose
которыми сможете наслаждаться все
the unit to rain or moisture.
последующие годы.
To avoid electrical shock, do not open the
ВНИМАНИЕ
cabinet.
Для предотвращения пожара или
Refer servicing to qualified personnel only.
поражения электрическим током не
подвергайте аппарат воздействию дождя
Memory Stick
или влаги.
Во избежание поражения электрическим
N50
током не открывайте корпус.
Обращайтесь за обслуживанием только к
квалифицированному персоналу.
NOTICE ON THE SUPPLIED AC POWER
ADAPTOR FOR CUSTOMERS IN THE
Для покупателей в Европе
UNITED KINGDOM
A moulded plug complying with BS1363 is fitted
to this equipment for your safety and
convenience.
Should the fuse in the plug supplied need to
be replaced, a 5 AMP fuse approved by ASTA
or BSI to BS1362 (i.e., marked with or
mark) must be used.
ВНИМАНИЕ
If the plug supplied with this equipment has a
Электромагнитные поля при определенных
detachable fuse cover, be sure to attach the
частотах могут влиять на качество
fuse cover after you change the fuse. Never
изображения и звука данной цифровой
use the plug without the fuse cover. If you
видеокамеры.
should lose the fuse cover, please contact
your nearest Sony service station.
Это изделие прошло проверку на
соответствие требованиям Директивы ЕМС
For the customers in Europe
для использования соединительных кабелей,
короче 3 метров.
Предупреждение
Если статическое электричество или
электромагнетизм приведет к прерыванию
(невыполнению) передачи данных, то
перезапустите прикладную программу или
отсоедините и подсоедините USB-кабель
опять.
2

ATTENTION
Только для модели DCR-PC120E
The electromagnetic fields at the specific
Вы можете использовать функции доступа к
frequencies may influence the picture and sound
сети только в некоторых странах и регионах.
of this digital camcorder.
Более подробные сведения см. в отдельной
инструкции по эксплуатации сети.
This product has been tested and found
compliant with the limits set out in the EMC
Только для модели DCR-PC115E
regulation for using connection cables shorter
than 3 meters. (9.8 feet)
Notice
If static electricity or electromagnetism causes
data transfer to discontinue midway (fail), restart
the application or disconnect and connect the
USB cable again.
DCR-PC120E only
Hereby, Sony Corporation, declares that this
Handycam is in compliance with the essential
requirements and other relevant provisions of
Directive 1999/5/EC.
Countries and areas where you can use network
functions are restricted. For details, refer to the
separate Network Operating Instructions.
DCR-PC115E only
For the customers in Germany
Directive:EMC Directive 89/336/EEC.
92/31/EEC
This equipment complies with the EMC
regulations when used under the following
circumstances:
•Residential area
•Business district
•Light-industry district
(This equipment complies with the EMC
standard regulations EN55022 Class B.)
3
English
Main Features
Taking moving or still images, and playing them back
•Recording a moving picture on a tape (p. 29)
•Recording a still image on a tape (p. 51)
•Playing back a tape (p. 44)
•Recording still images on “Memory Stick”s (p. 158)
•Recording moving pictures on “Memory Stick”s (p. 178)
•Viewing a still image recorded on “Memory Stick”s (p. 190)
•Viewing a moving picture on “Memory Stick”s (p. 194)
Capturing images on your computer
•Using with an analog video unit and your computer (p. 109)
•Viewing images recorded on “Memory Stick”s using the USB cable (p. 196)
Accessing the Internet via a Bluetooth equipped device (optional)
(DCR-PC120E only)
Accessing the Internet, sending/receiving your e-mail. For details, refer to the Network Function
Operating Instructions supplied with your camcorder. (p. 217)
Other uses
Functions to adjust exposure in the recording mode
•Back light (p. 38)
•NightShot/Super NightShot (p. 39)
•Recording images with the flash (p. 53, 162)
•PROGRAM AE (p. 68)
•Adjusting the exposure manually (p. 71)
Functions to give images more impact
•Digital zoom (p. 34) The default setting is set to OFF. (To zoom greater than 10×, select the digital
zoom power in D ZOOM in the menu settings.)
•Fader (p. 60)
•Picture effect (p. 63)
•Digital effect (p. 65)
•Title (p. 123)
•MEMORY MIX (p. 171)
Functions to give a natural appearance to your recordings
•Manual focus (p. 72)
•Sports lesson (p. 68)
•Landscape (p. 68)
Functions to use on recorded tapes
•END SEARCH/EDITSEARCH/Rec Review (p. 42)
•DATA CODE (p. 45)
•Tape PB ZOOM (p. 81)
•Zero set memory (p. 83)
•Title search (p. 84)
•Digital program editing (p. 94, 184)
4
•HiFi SOUND (p. 238)

Русский
Основные функции
Запись и воспроизведение движущихся и неподвижных изображений
•Запись движущегося изображения на ленту (стр. 29)
•Запись неподвижного изображения на ленту (стр. 51)
•Воспроизведение ленты (стр. 44)
•Запись неподвижных изображений на “Memory Stick” (стр. 158)
•Запись движущихся изображений на “Memory Stick” (стр. 178)
•Просмотр неподвижного изображения, записанных на “Memory Stick” (стр. 190)
•Просмотр движущегося изображения, записанного на “Memory Stick” (стр. 194)
Захват изображений на компьютере
•Совместное использование аналогового видеоустройства и компьютера (стр. 109)
•Просмотр изображений, записанных на “Memory Stick”, с помощью кабеля USB (стр. 196)
Доступ в Интернет по технологии Bluetooth (не прилагаетея) (только в модели
DCR-PC120E)
Доступ в Интернет, отправка и прием сообщений электронной почты. Более подробные
сведения см. в прилагаемой к видеокамере инструкции по работе в сети (стр. 217).
Другие функции
Настройка экспозиции в режиме записи
•Подсветка (стр. 38)
•Ночная съемка NightShot/Super NightShot (стр. 39)
•Запись изображений с применением фотовспышки (стр. 53, 162)
•Функция PROGRAM AE (стр. 68)
•Настройка экспозиции вручную (стр. 71).
Функции, придающие изображению зрелищность
•Цифровой вариообъектив (стр. 34). По умолчанию отключен (OFF). (Если требуется
увеличение более 10×, выберите в меню большее значение параметра D ZOOM.)
•Введение и выведение изображения (стр. 60)
•Спецэффекты (стр. 63)
•Цифровой эффект (стр. 65)
•Титр (стр. 123)
•Функция MEMORY MIX (стр. 171)
Функции, придающие изображению естественность
•Фокусировка вручную (стр. 72)
•Спорт (стр. 68)
•Ландшафт (стр. 68)
Функции для работы с записанными лентами
•Функции END SEARCH/EDITSEARCH/Просмотр записи (стр. 42)
•Функция DATA CODE (стр. 45)
•Функция PB ZOOM ленты (стр. 81)
•Память нулевой отметки (стр. 83)
•Поиск титров (стр. 84)
•Цифровой монтаж (стр. 94, 184)
5
•Функция HiFi SOUND (стр. 238)

English
Table of contents
Main Features ………………………………………. 4
Advanced Playback
Operations
Quick Start Guide …………………………… 10
Playing back a tape with picture effects
……………………………………………………… 78
Getting started
Playing back a tape with digital effects
Using this manual ………………………………. 14
……………………………………………………… 79
Checking supplied accessories……………. 17
Enlarging images recorded on tapes
Step 1 Preparing the power supply…….. 18
– Tape PB ZOOM …………………………. 81
Installing the battery pack…………….. 18
Quickly locating a scene using the zero
Charging the battery pack…………….. 19
set memory function …………………….. 83
Connecting to a wall socket ………….. 23
Searching the boundaries of recorded
Step 2 Setting the date and time …………. 24
tape by title – Title search …………….. 84
Step 3 Inserting a cassette …………………… 27
Searching a recording by date
– Date search ………………………………… 86
Recording – Basics
Searching for a photo
Recording a picture…………………………….. 29
– Photo search/Photo scan …………… 88
Shooting backlit subjects
– BACK LIGHT ………………………. 38
Editing
Shooting in the dark
Dubbing a tape …………………………………… 91
– NightShot/Super NightShot… 39
Dubbing only desired scenes
Self-timer recording ……………………… 41
– Digital program editing (on tapes)
Checking the recording
……………………………………………………… 94
– END SEARCH / EDITSEARCH /
Using with analog video unit and your
Rec Review …………………………………… 42
computer – Signal convert function
……………………………………………………. 109
Playback – Basics
Recording video or TV programmes … 111
Playing back a tape …………………………….. 44
Inserting a scene from a VCR
To display the screen indicators
– Insert editing ……………………………. 115
– Display function ………………….. 45
Audio dubbing …………………………………. 118
Viewing the recording on TV……………… 49
Superimposing a title ……………………….. 123
Making your own titles…………………….. 127
Advanced Recording
Labelling a cassette …………………………… 129
Operations
Customising Your Camcorder
Recording a still image on a tape
Changing the menu settings……………… 132
– Tape Photo recording ………………… 51
Adjusting the white balance manually
“Memory Stick” Operations
……………………………………………………… 57
Using the wide mode …………………………. 59
Using a “Memory Stick” – introduction
Using the fader function …………………….. 60
……………………………………………………. 149
Using special effects – Picture effect …… 63
Recording still images on “Memory
Using special effects – Digital effect……. 65
Stick”s – Memory Photo recording
Using the PROGRAM AE function …….. 68
……………………………………………………. 158
Adjusting the exposure manually ………. 71
Recording an image from a tape
Focusing manually……………………………… 72
as a still image…………………………….. 167
Interval recording ………………………………. 74
Superimposing a still image in the
Frame by frame recording
“Memory Stick” on an image
– Cut recording …………………………….. 76
– MEMORY MIX ………………………… 171
Recording moving pictures on
“Memory Stick”s – MPEG movie
recording ……………………………………. 178
6

Table of contents
Recording a picture from a tape as a
moving picture …………………………… 180
Recording edited pictures as a moving
picture – Digital program editing
(on “Memory Stick”s) …………………. 184
Copying still images from a tape
– Photo save ……………………………….. 188
Viewing a still image
– Memory photo playback ………….. 190
Viewing a moving picture
– MPEG movie playback …………….. 194
Viewing images using computer ………. 196
Copying the image recorded on
“Memory Stick”s to tapes …………… 204
Enlarging still images recorded on
“Memory Stick”s
– Memory PB ZOOM………………….. 206
Playing back images in a continuous
loop – SLIDE SHOW…………………… 208
Preventing accidental erasure
– Image protection………………………. 210
Deleting images………………………………… 211
Writing a print mark – PRINT MARK
……………………………………………………. 213
Using the optional printer ………………… 215
Using the Network function
Accessing the network ……………………… 217
Troubleshooting
Types of trouble and their solutions …. 218
Self-diagnosis display……………………….. 224
Warning indicators and messages…….. 225
Additional Information
Usable cassettes ………………………………… 236
About the “InfoLITHIUM” battery
pack ……………………………………………. 239
About i.LINK ……………………………………. 241
Using your camcorder abroad ………….. 243
Maintenance information and
precautions …………………………………. 244
Specifications ……………………………………. 251
Quick Reference
Identifying the parts and controls …….. 255
Index ………………………………………………… 265
7

Русский
Оглавление
Основные функции …………………………….. 5
Использование функции
PROGRAM AE …………………………….. 68
Краткое руководство для
Настройка экспозиции вручную ………… 71
Фокусировка вручную ………………………. 72
быстрого спользования
………….. 12
Запись с интервалами ………………………. 74
Покадровая запись
Подготовка к эксплуатации
— запись монтажного кадра ……….. 76
Как пользоваться этим руководством
………………………………………………….. 14
Дополнительные функции
Проверка прилагаемых
воспроизведения
принадлежностей ……………………….. 17
Использование эффектов изображения
Пункт 1 Подготовка источника
при воспроизведении ленты ……….. 78
питания ……………………………………… 18
Использование цифровых эффектов при
Как установить батарейный блок
воспроизведении ленты ……………… 79
…………………………………………….. 18
Увеличение изображений, записанных
Как зарядить батарейный блок …… 19
на лентах
Подсоединение к стенной розетке
— Функция PB ZOOM для ленты …. 81
…………………………………………….. 23
Быстрый поиск эпизода с помощью
Пункт 2 Установка даты и времени ….. 24
функции памяти нулевой отметки
Пункт 3 Как вставить кассету ………….. 27
………………………………………………….. 83
Поиск границ записанной ленты по титру
Запись — Основные функции
— Поиск титра ……………………………. 84
Запись изображения ………………………… 29
Поиск записи по дате — Поиск даты … 86
Съемка объектов с задней
Поиск фотокадров
подсветкой
— Фотопоиск/фотосканирование … 88
– Функция BACK LIGHT …………. 38
Съемка в темноте – Функция ночной
Монтаж
съемки NightShot/Super NightShot
Перезапись ленты ……………………………. 91
…………………………………………….. 39
Перезапись выбранных эпизодов
Запись с использованием автоспуска
— Цифровой монтаж программы
…………………………………………….. 41
(на ленту) …………………………………… 94
Проверка записи Функции END SEARCH/
Совместное использование с
EDITSEARCH/Просмотра записи …. 42
аналоговым видеоустройством и
компьютером —функция
Воспроизведение —Основные
преобразования сигнала …………… 109
функции
Запись видео и телепрограмм …………. 111
Вставка эпизода с видеомагнитофона
Воспроизведение ленты …………………… 44
— Монтаж вставки …………………………. 115
Отображение экранных индикаторов
Монтаж звукозаписи ………………………. 118
— Функция индикации…………… 45
Наложение титров ………………………….. 123
Просмотр записи на телевизоре ……….. 49
Создание собственных титров ………… 127
Маркировка кассеты ………………………. 129
Дополнительные функции
записи
Настройка видеокамеры
Запись неподвижных изображений на
Изменение настроек меню ……………… 132
ленту — Фотосъемка на ленту ……. 51
Регулировка баланса белого вручную
Работа с “Memory Stick”
………………………………………………….. 57
Широкоэкранный формат …………………. 59
Как использовать “Memory Stick”
Введение и выведение изображения … 60
— Введение ……………………………… 149
Специальные эффекты
Запись неподвижных изображений на
— Эффекты изображения ………….. 63
“Memory Stick” — Фотосъемка с
Специальные эффекты
сохранением в память ………………. 158
— Цифровой эффект………………….. 65
8

Оглавление
Запись изображения с ленты как
Поиск и устранение
неподвижного изображения ……… 167
неисправностей
Наложение неподвижного изображения с
“Memory Stick” на изображение
Виды неисправностей и их
— Функция MEMORY MIX …………. 171
устранение ……………………………….. 227
Запись движущихся изображений на
Функция вывода самодиагностики ….. 233
“Memory Stick”
Предупреждающие индикаторы и
— Запись фильмов MPEG …………. 178
сообщения ………………………………… 234
Запись изображения с ленты как
движущегося изображения ……….. 180
Дополнительная информация
Запись смонтированных изображений как
Используемые кассеты …………………… 236
движущегося изображения —
О батарейном блоке “InfoLITHIUM” …. 239
Цифровой монтаж программы (на
О стандарте i.LINK …………………………. 241
“Memory Stick”) …………………………. 184
Использование видеокамеры за
Копирование неподвижных
границей …………………………………… 243
изображений с ленты
Информация по уходу и меры
— Сохранение фотоснимков в памяти
предосторожности ……………………. 244
………………………………………………… 188
Технические характеристики ………….. 253
Просмотр неподвижного изображения
— воспроизведение фотоснимков из
памяти ……………………………………… 190
Краткий справочник
Просмотр движущегося изображения
Детали видеокамеры и органы
— Воспроизведение фильма
управления ………………………………. 255
MPEG ……………………………………….. 194
Алфавитный указатель…………………… 266
Просмотр изображений
на компьютере …………………………. 196
Копирование изображений с “Memory
Stick” на ленту ………………………….. 204
Увеличение неподвижных изображений,
записанных на “Memory Stick”
— Функция PB ZOOM памяти ……. 206
Воспроизведение изображений по
замкнутому циклу
— Функция SLIDE SHOW ………….. 208
Предотвращение случайного стирания
— Защита изображения ……………. 210
Удаление изображений ………………….. 211
Запись меток печати
— функция PRINT MARK …………… 213
Использование дополнительного
принтера ………………………………….. 215
Использование функции
доступа к сети
Доступ к сети …………………………………. 217
9
English
Quick Start Guide
This chapter introduces you to the basic features
of your camcorder. See the page in parentheses
“( )” for more information.
Pull down the Holding Grip to hold your
camcorder as illustrated.
Holding Grip
Connecting the mains lead (p. 23)
Use the battery pack when using your camcorder outdoors (p. 18).
Open the jack
cover.
AC power adaptor (supplied)
Quick Start Guide
Connect the plug with its v
mark facing up.
Inserting a cassette (p. 27)
1 Slide OPEN/
2 Push the middle
3 Close the cassette
Z EJECT in the
portion of the back of
compartment by
direction of the arrow
the cassette to insert.
pressing the
and open the lid.
Insert the cassette in a
mark on the cassette
straight line deeply
compartment.
into the cassette
After the cassette
compartment with
compartment goes
the window facing
down completely,
out.
close the lid until it
clicks.
10

Recording a picture (p. 29)
1Remove the lens cap.
2Set the POWER
switch to CAMERA
while pressing the
Viewing a picture with
small green button.
the viewfinder
Close the LCD panel,
POWER
and pull out the
LOCK
viewfinder.
R
C
(CHG)
OFF
V
C
A
M
M
E
E
M
R
O
R
A
Y
3Press OPEN to open the
LCD panel.
4Press START/STOP. Your
The picture appears on
camcorder starts recording. To
the screen.
stop recording, press START/
STOP again.
POWER
LOCK
Quick Start Guide
When you purchase your camcorder, the clock setting
R
C
(CHG)
OFF
V
is set to off. If you want to record the date and time for
a picture, set the clock setting before recording (p. 24).
C
A
M
M
E
E
M
R
O
R
A
Y
Monitoring the playback picture on the LCD
screen (p. 44)
POWER
1Set the POWER
LOCK
2Press m to rewind the tape.
R
C
switch to VCR
(CHG)
OFF
V
while pressing the
C
A
M
small green button.
M
E
E
M
R
O
R
A
Y
REW
3Press N to start playback.
PLAY
NOTE
Do not pick up your camcorder by
holding the viewfinder, the flash, the
LCD panel or the battery pack.
11

Русский
Краткое руководство для быстрого спользования
В этой главе кратко описаны основные
функции видеокамеры. Более подробные
сведения см. на страницах, указанных в
скобках “( )”.
Опустите прижимной ремень, который
позволяет держать камеру так, как показано
Прижимной
на рисунке.
ремень
Как подсоединить кабель питания (стр. 23)
Вне помещения используйте батарейный блок (стр. 18).
Откройте
крышку отсека
разъемов.
Адаптер питания (прилагается)
Краткое руководство для быстрого спользования
Вставьте штекер меткой v
вверх.
Как вставить кассету (стр. 27)
1 Сдвиньте кнопку
2 Нажмите на
3 Закройте кассетный
OPEN/Z EJECT в
середину тыльной
отсек, нажав метку
направлении
стороны кассеты.
на кассетном
стрелки, откройте
Вставьте кассету по
отсеке. Когда
крышку.
прямой линии в
кассетный отсек
глубину кассетного
опустится до конца,
отсека окошком
закройте его
наружу.
крышку до упора,
чтобы она
защелкнулась.
12
Съемка (стр. 29)
2
Нажав маленькую
1Снимите крышку объектива.
зеленую кнопку,
установите
переключатель
Просмотр
изображение с
POWER в положение
использованием
CAMERA.
видоискателя
POWER
Закройте панель ЖК-
LOCK
R
дисплея и вытяните
C
(CHG)
OFF
V
видоискатель.
C
A
M
M
E
E
M
R
O
R
A
Y
3Откройте панель ЖК-
дисплея, нажав кнопку
OPEN.
4Нажмите кнопку START/
На дисплее появится
STOP. Видеокамера начнет
изображение.
запись. Чтобы остановить
запись, нажмите кнопку
START/STOP еще раз.
POWER
LOCK
Краткое руководство для быстрого спользования
По умолчанию запись даты и времени съемки
R
C
(CHG)
OFF
V
отключена. Если требуется эта запись, ее нужно
включать до начала съемки (стр. 24).
C
A
M
M
E
E
M
R
O
R
A
Y
Контроль записи изображения на ЖК-дисплее (стр. 44)
1Нажав маленькую
POWER
зеленую кнопку,
LOCK
2Нажмите кнопку m для
R
C
установите
(CHG)
OFF
V
перемотки ленты назад.
переключатель
C
POWER в
A
M
M
E
E
M
R
O
R
A
Y
положение VCR.
REW
3Нажмите кнопку N для
воспроизведения.
PLAY
ПРИМЕЧАНИЕ
Не поднимайте видеокамеру за
видоискатель, фотовспышку,
панель ЖК-дисплея или
батарейный блок.
13

— Подготовка к эксплуатации —
— Getting started —
Как пользоваться
Using this manual
этим руководством
The instructions in this manual are for the two
В этом руководстве приведены инструкции к
models listed in the table below. Before you start
двум моделям, указанным ниже в таблице.
reading this manual and operating your
Перед тем, как приступить к чтению
camcorder, check the model number by looking
руководства и эксплуатации видеокамеры,
at the bottom of your camcorder. The DCR-
определите ее модель по надписи в нижней
PC120E is the model used for illustration
части видеокамеры. В качестве примера
purposes. Otherwise, the model name is
здесь описана модель DCR-PC120E. В
indicated in the illustrations. Any differences in
случаях, когда речь идет о другой модели, ее
operation are clearly indicated in the text, for
название указано на иллюстрации. Разница
example, “DCR-PC120E only”.
между моделями указывается отдельно,
например, “Только для DCR-PC120E”.
As you read through this manual, buttons and
settings on your camcorder are shown in capital
Названия кнопок и настроек видеокамеры
letters.
набраны прописными буквами.
e.g. Set the POWER switch to CAMERA.
Пример: “Установите переключатель POWER
When you carry out an operation, you can hear a
в положение CAMERA”.
beep sound to indicate that the operation is being
При выполнении операции видеокамера
carried out.
подает звуковой сигнал, подтверждающий
выполнение операции.
Type of differences
DCR- PC115E PC120E
Различия между моделями
Network function — z
DCR- PC115E PC120E
Функция доступа к сети — z
z Provided
— Not provided
z Да
— Нет
Contents of the recording cannot be
compensated if recording or playback is not
Восстановить содержимое записи,
made due to a malfunction of the camcorder,
поврежденное в процессе записи или
storage media, etc.
воспроизведения из-за неисправности
видеокамеры, носителя данных и т.д.,
невозможно.
14

Как пользоваться этим
Using this manual
руководством
Note on Cassette Memory
Примечание о кассетной памяти
Your camcorder is based on the DV format. You
Видеокамера использует формат цифрового
can only use mini DV cassettes with your
видеосигнала (DV). В нее можно вставлять
Getting started Подготовка к эксплуатации
camcorder. We recommend that you use a tape
только мини-кассеты DV. Рекомендуем
with cassette memory .
пользоваться лентами с кассетной памятью
.
The functions which require different operations
depending on whether the tape has the cassette
Ниже перечислены функции, которые
memory or not are:
выполняются по-разному в зависимости от
–End search (p. 42)
наличия в кассете памяти.
– Date search (p. 86)
– Поиск конца (стр. 42)
–Photo search (p. 88)
– Поиск даты (стр. 86)
The functions you can operate only with the
– Поиск фотокадров (стр. 88)
cassette memory are:
Далее перечислены функции, которые
– Title search (p. 84)
доступны только при наличии кассетной
–Superimposing a title (p. 123)
памяти.
–Labelling a cassette (p. 129)
– Поиск титров (стр. 84)
For details, see page 236.
– Наложение титров (стр. 123)
– Создание собственных титров (стр. 129)
You see this mark in the introduction of
Более подробные сведения см. на стр. 236.
the features that are operated only with
cassette memory.
Этим знаком помечено описание тех
функций, которые доступны только
Tapes with cassette memory are marked by
при наличии кассетной памяти.
(Cassette Memory).
Ленты с кассетной памятью помечаются
знаком (кассетная память).
Note on TV colour systems
TV colour systems differ from country to
Примечание о системах цветного
country. To view your recordings on a TV, you
телевидения
need a PAL system-based TV.
В различных странах применяются
Copyright precautions
различные системы цветного телевидения.
Просматривать записи можно только на
Television programmes, films, video tapes, and
телевизорах с системой PAL.
other materials may be copyrighted.
Unauthorised recording of such materials may be
Авторское право
contrary to the provision of the copyright laws.
Телевизионные программы, кино- и
видеофильмы, а также другие материалы
могут быть защищены законом об авторском
праве. Несанкционированная запись таких
материалов может противоречить
положениям закона об авторском праве.
15
Как пользоваться этим
Using this manual
руководством
Precautions on camcorder care
Меры предосторожности при
обращении с видеокамерой
Lens and LCD screen/finder (on
mounted models only)
Объективы, ЖК-дисплей и
•The LCD screen and the finder are
видоискатель (только для
manufactured using extremely high-
определенных моделей)
precision technology, so over 99.99% of the
• В ЖК-дисплее и видоискателе применена
высокоточная технология, благодаря
pixels are operational for effective use.
которой работоспособны более 99,99%
However, there may be some tiny black
пикселов дисплея. Как на ЖК-дисплее,
points and/or bright points (white, red, blue
так на и в видоискателе допускаются
or green in colour) that constantly appear on
постоянные черные и яркие точки
the LCD screen and the finder. These points
(белые, красные, синие и зеленые). Эти
are normal in the manufacturing process and
точки возникают в процессе
do not affect the recording in any way.
изготовления дисплеев и никак не
•Do not let your camcorder get wet. Keep your
влияют на качество записи.
camcorder away from rain and sea water.
• Не допускайте попадания в видеокамеру
Letting your camcorder get wet may cause your
влаги. Предохраняйте видеокамеру от
camcorder to malfunction. Sometimes this
дождя и морской воды. Влага может стать
malfunction cannot be repaired [a].
причиной неисправностей. Некоторые из
•Never leave your camcorder exposed to
этих неисправностей невозможно устранить
[a].
temperatures above 60°C (140°F), such as in a
• Не допускайте нагрева видеокамеры свыше
car parked in the sun or under direct sunlight
60°C, не оставляйте ее в автомобиле под
[b].
солнцем и под прямыми солнечными лучами
•Be careful when placing the camera near a
[b].
window or outdoors. Exposing the LCD screen,
• Старайтесь не держать видеокамеру на
the finder or the lens to direct sunlight for long
подоконнике и в других местах с ярким
periods may cause malfunctions [c].
освещением. Продолжительное
•Do not directly shoot the sun. Doing so might
воздействие прямых солнечных лучей на
cause your camcorder to malfunction. Take
ЖК-дисплей, видоискатель и объективы
pictures of the sun in low light conditions such
может стать причиной неисправностей [c].
as dusk [d].
• Не снимайте солнце напрямую. Это может
вывести видеокамеру из строя. Солнце
можно снимать только в тех случаях, когда
оно неяркое, например, на закате [d].
[a][b]
[c][d]
16

Checking supplied
Проверка прилагаемых
accessories
принадлежностей
Make sure that the following accessories are
Убедитесь, что к видеокамере приложены
supplied with your camcorder.
следующие принадлежности.
12
3
Getting started Подготовка к эксплуатации
45
6
7
8
9 q;
qa
qs
1 AC-L10A/L10B/L10C AC power adaptor (1),
1 Aдаптер питания AC-L10A/L10B/L10C (1),
mains lead (1) (p. 19)
кабель питания (1) (стр. 19).
2 A/V connecting cable (1) (p. 49)
2 Соединительный аудио/видео кабель
(1) (стр. 49).
3 USB cable (1) (p. 198)
3 Кабель USB (1) (стр. 198).
4 Battery terminal cover (1) (p. 18)
4 Крышка-заглушка батарейного отсека
5 NP-FM50 battery pack (1) (p. 18, 19)
(1) (стр. 18).
6 Wireless Remote Commander (1) (p. 261)
5 Батарейный блок NP-FM50 (1) (стр. 18,
7 Size R6 (AA) battery for Remote
19).
Commander (2) (p. 262)
6 Беспроводный пульт дистанционного
8 Lens cap (1) (p. 29)
управления (1) (стр. 261).
9 Lens hood (1) (p. 33)
7 Батарейки R6 (типа АА) для пульта
q; “Memory Stick” (1) (p. 149)
дистанционного управления (2) (стр.
262).
qa CD-ROM (SPVD-004 USB Driver) (1) (p. 197)
8 Крышка объектива (1) (стр. 29).
qs 21-pin adaptor (1) (p. 50)
European models only
9 Бленда (1) (стр. 33).
q; “Memory Stick” (1) (стр. 149).
qa CD-ROM (с драйвером SPVD-004 USB) (1)
(стр. 197).
qs 21-контактный переходник (1) (стр. 50).
Только для европейских моделей.
17
Аннотации для Видеокамеры Sony DCR-PC115E в формате PDF
Топ 10 инструкций
Другие инструкции

PDF инструкция · 216 страниц(ы) русский
инструкцияSony DCR-HC20E

3-088-337-62(1)
© 2004 Sony Corporation
Bruksanvisning för Videokamera [SE] / Руководство по эксплуатации видеокамеры [RU]
Bruksanvisning för
Videokamera
Läs det här först
Digital Video Camera Recorder
DCR-HC16E/HC18E/HC20E
SE
RU
Руководство по
эксплуатации видеокамеры
Прочтите перед началом работы
Посмотреть инструкция для Sony DCR-HC20E бесплатно. Руководство относится к категории видеокамеры, 2 человек(а) дали ему среднюю оценку 7.5. Руководство доступно на следующих языках: русский. У вас есть вопрос о Sony DCR-HC20E или вам нужна помощь? Задайте свой вопрос здесь
- SE
- RU
Главная
| Sony | |
| DCR-HC20E | DCR-HC20E | |
| видеокамера | |
| 4901780883905 | |
| русский | |
| Руководство пользователя (PDF) |
Объектив
| Цифровой зум | 120 x |
| Оптическое увеличение | 10 x |
Датчик изображения
| Всего мегапикселей | 0.68 MP |
| Тип сенсора | CCD |
Экран
| Дисплей | ЖК |
| Диагональ экрана | 2.5 « |
Вес и размеры
| Вес | 380 g |
| Ширина | 50 mm |
| Глубина | 86 mm |
| Высота | 112 mm |
Прочие свойства
| Разрешение | 640 x 480 пикселей |
Камера
| Минимальное освещение | 5 lx |
показать больше
Не можете найти ответ на свой вопрос в руководстве? Вы можете найти ответ на свой вопрос ниже, в разделе часто задаваемых вопросов о Sony DCR-HC20E.
Что означает аббревиатура MП?
Какой вес Sony DCR-HC20E?
Какой размер экрана Sony DCR-HC20E?
Какая высота Sony DCR-HC20E?
Какая ширина Sony DCR-HC20E?
Какая толщина Sony DCR-HC20E?
Инструкция Sony DCR-HC20E доступно в русский?
Не нашли свой вопрос? Задайте свой вопрос здесь