Hide thumbs
Also See for MHC-NX3AV Operating Instructions (primary manual):
- Service manual (97 pages)
-
Contents
-
Table of Contents
-
Troubleshooting
-
Bookmarks
Quick Links
Mini Hi-Fi
Component
System
Operating Instructions
Owner’s Record
The model and serial numbers are located on the rear panel. Record the serial
number in the space provided below. Refer to them whenever you call upon your
Sony dealer regarding this product.
Model No.
MHC-NX3AV
©1999 by Sony Corporation
_______________ Serial No. _______________
3-867-107-14(1)
1
Related Manuals for Sony MHC-NX3AV Operating Instructions (primary manual)
Summary of Contents for Sony MHC-NX3AV Operating Instructions (primary manual)
-
Инструкции по эксплуатации
2
Языки:

SONY MHC-NX3AV инструкция по эксплуатации
(100 страниц)
- Языки:Испанский, Французский
-
Тип:
PDF -
Размер:
1.1 MB
Просмотр

SONY MHC-NX3AV инструкция по эксплуатации
(148 страниц)
- Языки:Итальянский, Нидерландский, Португальский
-
Тип:
PDF -
Размер:
1.65 MB
Просмотр
На NoDevice можно скачать инструкцию по эксплуатации для SONY MHC-NX3AV. Руководство пользователя необходимо для ознакомления с правилами установки и эксплуатации SONY MHC-NX3AV. Инструкции по использованию помогут правильно настроить SONY MHC-NX3AV, исправить ошибки и выявить неполадки.

PDF инструкция · 52 страниц(ы) английский
инструкцияSony MHC-NX3AV

1
©1999 by Sony Corporation
Mini Hi-Fi
Component
System
Operating Instructions
3-867-107-14(1)
MHC-NX3AV
Owner’s Record
The model and serial numbers are located on the rear panel. Record the serial
number in the space provided below. Refer to them whenever you call upon your
Sony dealer regarding this product.
Model No. _______________ Serial No. _______________
Посмотреть инструкция для Sony MHC-NX3AV бесплатно. Руководство относится к категории hi-fi системы, 4 человек(а) дали ему среднюю оценку 7.9. Руководство доступно на следующих языках: английский. У вас есть вопрос о Sony MHC-NX3AV или вам нужна помощь? Задайте свой вопрос здесь
- Table of Contents
Главная
Не можете найти ответ на свой вопрос в руководстве? Вы можете найти ответ на свой вопрос ниже, в разделе часто задаваемых вопросов о Sony MHC-NX3AV.
Когда звук считается слишком громким?
Могут ли устройства разных марок подключаться друг к другу при помощи Bluetooth?
Как лучше всего выполнять чистку hi-fi система?
Инструкция Sony MHC-NX3AV доступно в русский?
Не нашли свой вопрос? Задайте свой вопрос здесь
-
Страница 1
1 ©1999 by Sony Corporation Mini Hi-Fi Component System Operating Instructions 3-867-107- 14 (1) MHC-NX3A V Owner’s Record The model and serial numbers are located on the rear panel. Record the serial number in the space provided below. Refer to them whenever you call upon your Sony dealer regarding this product. Model No. _______________ Serial[…]
-
Страница 2
2 WARNING To prevent fire or shock hazard, do not expose the unit to rain or moisture. To avoid electrical shock, do not open the cabinet. Refer servicing to qualified personnel only. Do not install the appliance in a confined space, such as a bookcase or built-in cabinet. This appliance is classified as a CLASS 1 LASER product. The CLASS 1 LASER P[…]
-
Страница 3
3 T able of Contents Getting Started Step 1: Hooking up the system ………… 4 Step 2: Setting up your speakers ……… 7 Step 3: Setting the time ……………………. 9 Step 4: Presetting radio stations …….. 10 Saving the power in standby mode … 11 Basic Operations Playing a CD ………………………………….. 12 Recording[…]
-
Страница 4
4 2 2 2 34 4 3 6 5 1 7 3 Getting Started Step 1: Hooking up the system Do the following procedure 1 to 7 to hook up your system using the supplied cords and accessories. If you set up the stereo system vertically Be sure to place the A/V control amplifier on top of the CD player/stereo cassette deck. Centre speaker Front speaker (Left) Front speake[…]
-
Страница 5
5 + – R L + Insert only the stripped portion. Black/ Stripe ( ’ ) Red/ Solid ( ‘ ) 1 Connect the flat cord to the SYSTEM CONTROL connectors until it clicks. 2 Connect the front speakers. Connect the speaker cords to the FRONT SPEAKER jacks as below. Note Keep the speaker cords away from the antennas to prevent noise. 3 Connect the rear speake[…]
-
Страница 6
6 6 For models with a voltage selector, set VOLTAGE SELECTOR to position of your local power line voltage. 7 Connect the power cord to a wall outlet. The demonstration appears in the display. When you press 1/u , the system turns on and the demonstration automatically ends. If the supplied adapter on the plug does not fit your wall outlet, detach i[…]
-
Страница 7
7 Step 2: Setting up your speakers Connecting the supplied rear and centre speakers enables you to fully enjoy Dolby Pro Logic Surround sound. Dolby Pro Logic Surround is a decoding system standardized in TV programmes and movies. Dolby Pro Logic Surround improves the sound image by using four separate channels. These channels manipulate the sound […]
-
Страница 8
8 n + – 0 g ) ≠ + – + PRO LOGIC 1 Press PRO LOGIC. “PRO LOGIC ON” appears. 2 Press T. TONE on the remote. The test tone is heard from the speakers in the following order. Adjust the volume of the test tone. LEFT (front) n CENTER n RIGHT (front) REAR 3 From your listening position, press CENTER LEVEL (+/–) and REAR LEVEL (+/–) on th[…]
-
Страница 9
9 1 Press CLOCK/TIMER. The hour indication flashes. 2 Press V or v to set the hour. The clock is on a 24-hour system for the European model and a 12-hour system for other models. 3 Press ENTER. The minute indication flashes. 4 Press V or v to set the minute. 5 Press ENTER. The clock starts working. Tips • If you’ve made a mistake, start over fr[…]
-
Страница 10
10 TUNED STEREO TUNED STEREO MHz – + 0 g ) ≠ + – + n n Preset number Step 4: Presetting r adio stations You can preset the following number of stations: – 2 band model: 20 for FM, 10 for AM. – 3 band model: 20 for FM, 10 for MW, and 10 for SW, or 20 for FM, 10 for AM and 5 for UKV, depending on the model you purchased. 2 3 4 Jog dial 1[…]
-
Страница 11
11 TUNED STEREO – + 0 g ) ≠ + – + POWER SAVE/DEMO (STANDBY) DISPLAY To tune in a station with a weak signal Press + or – repeatedly in step 2 to tune in the station manually. To set another station to the exist preset number Start over from step 1. After step 3, turn the jog dial to select the preset number you want to store the other st[…]
-
Страница 12
12 1 Press one of the CD 1~5 § buttons and place a CD on the disc tray. If a disc is not placed properly it will not be recognized. Press the same button to close the disc tray. To insert other CDs, press § of other numbers to open the disc tray. 2 Press one of the DISC 1~5 buttons. The disc tray closes and play starts. If you press · (or CD · […]
-
Страница 13
Basic Operations 13 1 2 3 4 5 § § § · ª · π ª · π ∏ π DOLBY NR π ª The CD SYNC button lets you record from a CD to a tape easily. You can use TYPE I (normal) or TYPE II (CrO2) tapes. The recording level is adjusted automatically. 1 Press § and insert a recordable tape into deck B. continued […]
-
Страница 14
14 ) 0P + =p · · ª · ª · p =/+ V v b B VOLUME +/– – + 0 g ) ≠ + – + VOLUME STEREO/MONO –/+ 2 Press one of the CD 1~5 § buttons and place a CD. Then press again to close the disc tray. 3 Press CD SYNC. Deck B stands by for recording and the CD player stands by for playback. · (for front side) lights up.[…]
-
Страница 15
Basic Operations 15 TUNED STEREO MHz 1 Press TUNER BAND repeatedly until the band you want appears in the display. The bands you can receive vary depending on the model you purchased. Be sure to check which bands you can receive. Every time you press the button, the band changes as follows: 2 band model: FM ˜ AM 3 band model: FM n MW n SW or FM n […]
-
Страница 16
16 TUNED STEREO MHz – 0 g + ) ≠ + – + 1 2 3 4 5 § § § · ª · π ª · π ∏ π DOLBY NR π ª –/+ 3 Press § and insert a recordable tape into deck B. 4 Press REC PAUSE/START. Deck B stands by for recording. 5 Press DIRECTION repeatedly to select A to record on one side. Select ß (or RELAY[…]
-
Страница 17
Basic Operations 17 ) 0P + =p · · ª · ª · p DECK A ª· p 0/) DECK B ª· V v b B VOLUME +/– Playing a tape continued You can use any type of tape, TYPE I (normal), TYPE II (CrO 2 ) or TYPE IV (metal), since the deck automatically detects the tape type. You can also use the jog dial’s AMS* functions to quic[…]
-
Страница 18
18 DOLBY NR Searching for the beginning of a track (AMS*) During playback, turn the jog dial the same direction as the ª or · indicator to go forward. Turn the opposite direction to go back. (Or press = or + on the remote.) The search direction, + (forward) or – (back), and number of songs being skipped (1~9) appear in the display. Example: sea[…]
-
Страница 19
Basic Operations 19 1 Press § and insert a recorded tape in deck A and a recordable tape in deck B. 2 Press HI DUB. Deck B stands by for recording. 3 Press DIRECTION repeatedly to select A to record on one side. Select ß (or RELAY) to record on both sides. 4 Press REC PAUSE/START. Dubbing starts. To stop dubbing Press π on deck A or B. Tips • […]
-
Страница 20
20 – + 0 g ) ≠ + – + DISPLAY The CD Player n n / Press DISPLAY. Each time you press the button during normal playback or in the stop mode, the display changes as follows: During normal playback Playing time on the current track µ Remaining time on the current track µ Remaining time on current CD (1 DISC mode) or “—.—” display (ALL […]
-
Страница 21
21 – + 0 g ) ≠ + – + 1 2 3 4 5 § § § · ª · π ª · π ∏ π DISC 1~5 – + 0 g ) ≠ + – + REPEAT PLAY MODE Playing the CD tracks in random or der –– Shuffle Play Playing the CD tr acks r epeatedly –– Repeat Play This function lets you repeat a single CD or all CDs in normal play, sh[…]
-
Страница 22
22 – + 0 g ) ≠ + – + 1 2 3 4 5 § § § · ª · π ª · π ∏ π π Pr ogr amming the CD tr acks –– Programme Play You can make a programme of up to 32 tracks from all the CDs in the order you want them to be played. 1/u (power) 1 2 3 4 5 7 To cancel Shuffle Play Press PLAY MODE repeatedly unti[…]
-
Страница 23
23 PROGRAM 1 Press CD, then place a CD. 2 Press PLAY MODE repeatedly until “PROGRAM” appears in the display. 3 Press one of the DISC 1~5 buttons to select a CD. To programme all the tracks on a CD at once, proceed to step 5. 4 Turn the jog dial until the desired track appears in the display. 5 Press ENTER. The track is programmed. The last prog[…]
-
Страница 24
24 You can record from CD, tape, or radio as you like. For example, you can record just the songs you want or record from the middle of the tape. The recording level is adjusted automatically. 1 Insert a recordable tape into deck B. 2 Press one of the function buttons you want to record (e.g., CD). 3 Press REC PAUSE/START. Deck B stands by for reco[…]
-
Страница 25
25 1 Place a CD and insert a recordable tape into deck B. 2 Press CD. 3 Press PLAY MODE repeatedly until “PROGRAM” appears in the display. 4 Press one of the DISC 1~5 buttons to select a CD. 5 Turn the jog dial until the desired track appears in the display. 6 Press ENTER. The track is programmed. The last programmed track number and the total […]
-
Страница 26
26 Selecting tape length automatically — Tape Select Edit You can check the most suitable tape length for recording a CD. Note that you cannot use Tape Select Edit for discs containing more than 20 tracks. 1 Insert a CD. 2 Press CD. 3 Press EDIT (EDIT/PTY on European model) once so that “EDIT” flashes. The required tape length for the current[…]
-
Страница 27
27 – 0 g + ) ≠ + – + GROOVE DBFB PHONES Sound Adjustment For a powerful sound (GROOVE) Press GROOVE. The volume switches to power mode, DBFB is automatically set to full strength, the equalizer curve changes, and GROOVE button lights up. Press GROOVE again to return to the previous volume. Notes • With some songs, the music will sound di[…]
-
Страница 28
28 – + 0 g ) ≠ + – + Selecting the audio emphasis The audio emphasis menu lets you select the sound characteristic according to the sound you are listening to. Selecting the effect from the music menu 1 Press FILE SELECT. The last effect chosen appears in the display. 2 Use the jog dial to select the preset you desire. The preset name appe[…]
-
Страница 29
29 Selecting the surr ound effects You can enjoy surround effect. Changing the brightness of the display You can enjoy changing the brightness of the display while listening to the music. V v b B ) 0P · p DSP ) 0P + =p · · ª · ª · p DIMMER V v b B / Press DSP repeatedly to select the surround effect you desire. SURROUND […]
-
Страница 30
30 Enjoying the Dolby Pr o Logic Surr ound sound You can enjoy the Dolby Pro Logic Surround sound of videos that are Dolby Surround encoded ( q ). Complete the setup and adjustments first (see page 7). / Press PRO LOGIC while playing a program source. The indicator on the front panel’s PRO LOGIC button lights up. – + 0 g ) ≠ + – + PRO LO[…]
-
Страница 31
31 1 DISCS ALL 1 Select the audio emphasis you want for your basic sound (see “Selecting the audio emphasis” on page 28). 2 Press GEQ. 3 Press B or b to select frequency, press V or v for the desired frequency band to adjust level. 4 Press ENTER. Adjusting the gr aphic equalizer You can adjust the sound by raising or lowering the levels of spec[…]
-
Страница 32
32 2 Press P FILE. The personal file number flashes in the display. 3 Press B or b to select the file number (P FILE) where you want to store the sound effect. 4 Press ENTER. The adjusted sound effects are stored under the selected file number. The settings previously stored at this memory location are erased and replaced by the new settings. Makin[…]
-
Страница 33
33 To check the RDS information Each time you press DISPLAY, the display changes as follows: Tip Pressing and holding DISPLAY for 2 seconds or more switches the spectrum analyzer ON/OFF. Locating a station by programme type (PTY) You can locate a station you want by selecting a programme type. The unit tunes in the type of programmes currently bein[…]
-
Страница 34
34 CULTURE Programmes about national or regional culture, language, and social concerns. SCIENCE Programmes about the natural sciences. VARIED Programmes containing celebrity interviews, panel games, and comedy. POP Popular music programmes. ROCK Rock music programmes. EASY MUSIC Easy listening (middle of the road music). L. CLASSICAL Classical mus[…]
-
Страница 35
35 · · ª SLEEP JAZZ Jazz programmes. COUNTRY Country music programmes. NATION Programmes featuring the popular music of the country or region. OLDIES Programmes featuring oldies music. FOLK Folk Music Programmes. DOCUMENTARY Investigative features. ALARM TEST Test signal for emergency broadcasts. ALARM-ALARM Emergency broadcasts. NONE A[…]
-
Страница 36
36 5 Set the time to start playback. Press V or v to set the hour, then press ENTER. The minute indication starts flashing. Press V or v to set the minute, then press ENTER. The hour indication flashes again. 6 Set the time to stop playback following the above procedure. 7 Press V or v until the music source you want appears. The indications change[…]
-
Страница 37
37 4 Set the time to start recording. Press V or v to set the hour, then press ENTER. The minute indication starts flashing. Press V or v to set the minute, then press ENTER. The hour indication flashes again. 5 Set the time to stop recording following the above procedure. The start time appears, followed by the stop time, the recording source and […]
-
Страница 38
38 To the DIGITAL IN jack of the MD deck Optional components Connecting an MD deck for analog recording Make sure to match the color of the plugs and the connectors. To listen to the sound of the connected MD deck, press MD. Tip When you connect a Sony MD deck, you can use the MD · and p buttons on this unit’s remote to perform play and stop ope[…]
-
Страница 39
39 – + 0 g ) ≠ + – + MIC LEVEL MIC To the audio output of the VCR Connecting a VCR Make sure to match the color of the plugs and the connectors. To listen to the sound of the connected VCR, press VIDEO/DVD repeatedly until “VIDEO” appears in the display. Refer to the instructions of each component. To super woofer Connecting a super wo[…]
-
Страница 40
40 – 0 g + ) ≠ + – + DVD 5.1 CH VIDEO/DVD Connecting a DVD player To the front output of the DVD player To the centre output of the DVD player To the woofer output of the DVD player To the rear output of the DVD player When your DVD player has 5.1 channel analog outputs Be sure to match the color of the plugs and the connectors. To listen […]
-
Страница 41
41 Insulated wire (not supplied) Connecting external antennas Connect the external antenna to improve the reception. Refer to the instructions of each component. FM antenna Connect the optional FM external antenna. You can also use the TV antenna instead. Jack type A Jack type B AM antenna Connect a 6- to 15- meter (20- to 50- feet) insulated wire […]
-
Страница 42
42 • When using CDs that have glue or similar tacky substance on the label side of the disc or that used a special ink when the label was printed, there is a chance that the CD or label may become attached to parts inside this unit. When this occurs, it may not be possible to remove the CD, and may also cause this unit to malfunction. Be sure to […]
-
Страница 43
43 T roubleshooting If you run into any problem using this stereo system, use the following check list. First, check that the power cord is connected firmly and the speakers are connected correctly and firmly. Should any problem persist, consult your nearest Sony dealer. General The display starts flashing as soon as you plug in the power cord even[…]
-
Страница 44
44 There is severe hum or noise. • A TV or VCR is placed too close to the stereo system. Move the stereo system away from the TV or VCR. • The A/V control amplifier is placed under the CD player/stereo cassette deck. Place the A/V control amplifier on the top of the CD player/stereo cassette deck. The timer does not function. • Set the clock […]
-
Страница 45
45 Tape Deck The tape does not record. • No tape in the cassette holder. • The tab has been removed from the cassette (see “To save a tape permanently” on page 42). • The tape has reeled to the end. The tape does not record nor play or there is a decrease in sound level. • The heads are dirty. Clean them (see “Cleaning the tape heads?[…]
-
Страница 46
46 Specifications European model Front Speaker: DIN power output (rated) 90 + 90 watts (6 ohms at 1 kHz, DIN) Continuous RMS power output (reference) 110 + 110 watts (6 ohms at 1 kHz, 10% THD) Music power output (reference) 180 + 180 watts (6 ohms at 1 kHz, 10% THD) Center Speaker: DIN power output (rated) 25 watts (8 ohms at 1 kHz, DIN) Continuous[…]
-
Страница 47
47 Inputs VIDEO IN: voltage 250 mV, (phono jacks) impedance 47 kilohms MD IN: voltage 450 mV, (phono jacks) impedance 47 kilohms DVD INPUT: FRONT IN: voltage 450 mV, (phono jacks) impedance 47 kilohms REAR IN: voltage 450 mV, (phono jacks) impedance 47 kilohms CENTER IN: voltage 450 mV, (phono jacks) impedance 47 kilohms WOOFER IN: voltage 450 mV, […]
-
Страница 48
48 Specifications (continued) Speaker Front Speaker (SS-NX1) Speaker system 2-way, bass-reflex type, magnetically shielded type Speaker units Woofer: 17 cm (6 3 / 4 in.), cone type Tweeter: 2.5 cm (1 in.), dome type Nominal impedance 6 ohms Dimensions (w/h/d) Approx. 210 x 402 x 285 mm (8 3 / 8 x 15 7 / 8 x 11 1 / 8 in.) Mass Approx. 7.0 kg (15 lb […]
-
Страница 49
49[…]
-
Страница 50
50[…]
-
Страница 51
51[…]
-
Страница 52
52 Sony Corporation Printed in Malaysia Index A Adjusting the graphic equalizer 31 the sound 27 the volume 8, 13, 18 Aerials 5, 41 Automatic Source Selection 13, 15, 18 B Batteries 6 C CD player 20 CD Synchro Recording 13 Clock setting 9 Connecting. See Hooking up Connecting the speakers 7 D Daily timer 36 DBFB 27 Display 20 Dolby Pro Logic Surroun[…]
В представленном списке руководства для конкретной модели Музыкального центра — Sony MHC-NX3 AV. Вы можете скачать инструкции к себе на компьютер или просмотреть онлайн на страницах сайта бесплатно или распечатать.
В случае если инструкция на русском не полная или нужна дополнительная информация по этому устройству, если вам нужны
дополнительные файлы: драйвера, дополнительное руководство пользователя (производители зачастую для каждого
продукта делают несколько различных документов технической помощи и руководств), свежая версия прошивки, то
вы можете задать вопрос администраторам или всем пользователям сайта, все постараются оперативно отреагировать
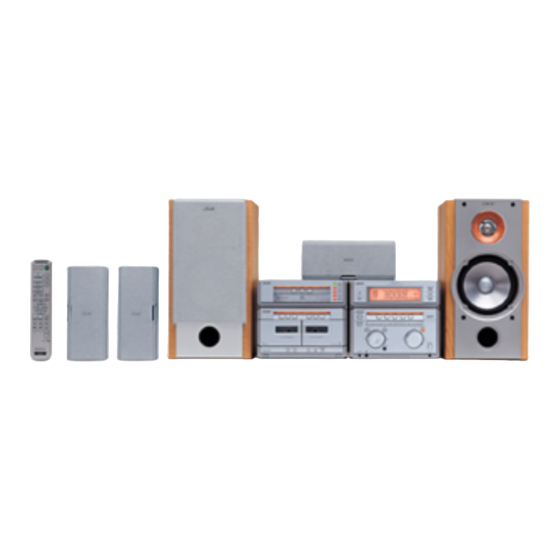
на ваш запрос и как можно быстрее помочь. Ваше устройство имеет характеристики:Тип: минисистема, Тип: двухкассетная с сенсорным управлением, Основной блок: двухблочная система, Оптический привод: CD, Цвет акустических систем: под дерево, Цвет основного блока: серебристый/хром/титан, полные характеристики смотрите в следующей вкладке.
Для многих товаров, для работы с Sony MHC-NX3 AV могут понадобиться различные дополнительные файлы: драйвера, патчи, обновления, программы установки. Вы можете скачать онлайн эти файлы для конкретнй модели Sony MHC-NX3 AV или добавить свои для бесплатного скачивания другим посетителями.
Если вы не нашли файлов и документов для этой модели то можете посмотреть интсрукции для похожих товаров и моделей, так как они зачастую отличаются небольшим изменениями и взаимодополняемы.
Обязательно напишите несколько слов о преобретенном вами товаре, чтобы каждый мог ознакомиться с вашим отзывом или вопросом. Проявляйте активность что как можно бльше людей смогли узнать мнение настоящих людей которые уже пользовались Sony MHC-NX3 AV.

Анатолий
2018-06-01 14:12:41
древний,но качественный.Нет инструкции.
Основные и самые важные характеристики модели собраны из надежных источников и по характеристикам можно найти похожие модели.
| Основные характеристики | ||
| Тип | минисистема | двухкассетная с сенсорным управлением |
| Основной блок | двухблочная система | |
| Оптический привод | CD | |
| Цвет акустических систем | под дерево | |
| Цвет основного блока | серебристый/хром/титан | |
| Аудио | ||
| Комплект акустических систем | 5.0 | |
| Эквалайзер | есть, 15 предустановок | |
| Регулировка | тембра НЧ | |
| Декодеры | Dolby Pro Logic | |
| Акустика | ||
| Мощность фронтальных колонок | 2×100 Вт | |
| Мощность центрального канала | 35 Вт | |
| Мощность тыловых колонок | 2×70 Вт | |
| Количество динамиков в одной акустический системе | 2 динамика | |
| Кассетная дека | ||
| Тип | минисистема | двухкассетная с сенсорным управлением |
| Функции | автореверс | |
| Оптический привод | ||
| Cпособ загрузки/механика | лоток на 5 дисков | |
| Поддерживаемые носители | CD | |
| Радио | ||
| Радио | AM, FM | |
| Количество радиостанций в памяти | 30 | |
| Поддержка RDS | есть | |
| Интерфейсы | ||
| Входы | аудио 5.1CH | |
| Выходы | наушники, на акустику окружающего звучания, сабвуфер, аудио оптический |
Здесь представлен список самых частых и распространенных поломок и неисправностей у Музыкальных центров. Если у вас такая поломка то вам повезло, это типовая неисправность для Sony MHC-NX3 AV и вы можете задать вопрос о том как ее устранить и вам быстро ответят или же прочитайте в вопросах и ответах ниже.
| Название поломки | Описание поломки | Действие |
|---|---|---|
| Нет Звука | ||
| Не Включается | ||
| Не Видит Диск | ||
| Не Показывает Экран | ||
| Gx-505 Yamaha | Есть Выход Сабвуфер Как Его Включить | |
| Денон Сеол Пикколо | Обновить Программное Обеспечение | |
| Не Выключается | На Пульте Д/У Нажимаю Кнопку Выключение На Экране Появляется Надпись Standby И Музыкальный Центр По Новой Включается. | |
| Не Работает Дисковод | Не Видит Диска, Перебирает Все Подряд И Если Внутри Диск То В Чейнджере Он Застревает И Выбивает Крепеж Для Дисков | |
| Нечитает Флешку | ||
| Не Работает Радио | Радиостанция Настоена,Шум Из Колонок Идёт, А Радио Неловит | |
| Вч Динамики | Постоянно Горят Вч Динамик, И Сколько Они Ом И Ватт | |
| Замена Cd — Привода Technics Sc-Eh 750 На Cd — Привод Technics Sc-Eh 790 | При Замене Приводов Звук Стал Очень Тихим И Не Регулируется, На Дисплее Отсутствует Информация О Диске. Как Можно Исправить ? | |
| Замена Cd — Привода Technics Sc-Eh 750 На Cd — Привод Technics Sc-Eh 790 | При Замене Приводов Звук Стал Очень Тихим И Не Регулируется, На Дисплее Отсутствует Информация О Диске. Как Можно Исправить ? | |
| Техникс 790 | Не Реагирует На Пульт(Пульт И Батареи Рабочие) | |
| Не Работают Регуляторы Громкости И Тембра | ||
| Клавиши «Выстреливают» Очень Громко, Или Не Звучат С Первого Прикосновения. Можно Ли Перезагрузить? | ||
| Блок Питания | Неработает Основной Блок Питания | |
| Перестала Работать Одна Из Колонок | Звук Из Одной Колонки | |
| Система Запускается, И Из Динамиков Раздается Щелканье | Система Запускается, И Из Динамиков Раздается Щелканье. После Выключения Переходит В Режим S-Protection | |
| Protect | На Экране Выдает Ошибку Больше Ничего Не Работает Что Делать | |
| Не Работает Касетная Дэка | Max Kt 65 | |
| Не Принимает Диск | На Экране Пишет Readin6 И Выбрасывает Диск | |
| При Включении В Розетку, Хаотично Светится Дисплей, Бегают Буквы.но Муз.центр Выключен. | Что За Неисправность | |
| На Экране Egect | Отключается | |
| Sony Mnc Rg475S | В Дежурном Режиме Потребляет 20 Ватт. |
В нашей базе сейчас зарегестрированно 18 353 сервиса в 513 города России, Беларусии, Казахстана и Украины.

ОН-СЕРВИС
⭐
⭐
⭐
⭐
⭐
Адресс:
ул. Электродная, дом 2, стр.14
Телефон:
74956444767
Сайт:
n/a
Время работы
Время работы не указано
СЕРВИСБОКС
⭐
⭐
⭐
⭐
⭐
Адресс:
Мира пр-т, д. 17
Телефон:
74957777777
Сайт:
n/a
Время работы
Время работы не указано
НИКОМ
⭐
⭐
⭐
⭐
⭐
Адресс:
ул.Менжинского, д.32, стр.2
Телефон:
74959267226
Сайт:
n/a
Время работы
Будни: с 1000 до 2000
Суббота: с 1100 до 1700
Воскресенье: с 1100 до 1700
НИКОМ
⭐
⭐
⭐
⭐
⭐
Адресс:
ул. Отрадная, д.16
Телефон:
74959267226
Сайт:
n/a
Время работы
Будни: с 1000 до 2000
Суббота: с 1100 до 1800
Воскресенье: с 1100 до 1800
МОСРЕМЗОНА.РУ
⭐
⭐
⭐
⭐
⭐
Адресс:
Каширское шоссе, д. 26, кор. 3
Телефон:
74959915852
Сайт:
n/a
Время работы
Будни: с 1000 до 1900
Суббота: с 1000 до 1500
Воскресенье: выходной