SQL
Navigator обладает развитым графическим
пользовательским интерфейсом (рис.3) и
располагает следующими средствами:
-
автоформатирование
операторов PL/SQL и SQL; -
отладчик
PL/SQL; -
средство
просмотра баз данных (браузер); -
поддержка
объектных типов; -
шаблоны
программного текста.
Соединение
с базой данных.
При первом запуске SQL Navigator предлагает
установить соединение с базой данных
посредством определения имени пользователя
и пароля в диалоговом окне Oracle
Logon.
После успешной установки соединения
создается сеанс базы данных и открывается
окно DB
Navigator
(см. рис.3). Пользователь может открыть
это окно командой меню View
| DB
Navigator
или одноименной кнопкой на панели
инструментов.
Профили
соединений автоматически сохраняются
для последующего использования, но
пароль не сохраняется. В SQL Navigator
одновременно поддерживаются несколько
соединений с разными базами данных и
несколько сеансов для пользователей с
различными именами. Новый сеанс создается
командой меню Session
| New
Session
или одноименной кнопкой на панели
инструментов.
Выполнение
SQL и PL/SQL.
Операторы SQL и PL/SQL выполняются из окна
редактора SQL (SQL
Editor),
которое открывается командой меню View
| New
SQL
Editor
или соответствующей кнопкой на панели
инструментов. Это окно может выполнить
либо один оператор, либо целый сценарий.
Блоки PL/SQL, содержащиеся в сценарии,
должны заканчиваться знаком /.
Окно
SQL
Editor
содержит две закладки: SQL
(для ввода и выполнения операторов SQL
или PL/SQL) и Spool
(для отображения сообщений о процессе
выполнения и результатов выполнения
операторов). В верхней части закладки
SQL
набираются операторы, которые запускаются
на выполнение кнопкой Run,
расположенной на панели инструментов
окна SQL
Editor.
В нижней части закладки SQL
отображается таблица результатов
SQL-запросов
и время, затраченное на выполнение
операторов SQL и PL/SQL.

Панель
инструментов
утилиты
SQL
Navigator
Главное
меню
Окно
DB
Navigator
показывает всю
структуру базы данных как дерево с
узлами, которые могут расширяться и
сжиматься, показывая и скрывая информацию
Панель
Details
показывает сведения об элементе,
выбранном в дереве
Окно
Workspace
обеспечивает быстрый доступ к часто
используемым
объектам и
соединениям
Панель
задач
активизирует выбранное окно
Окно
Output
отображает информацию, выводимую
сервером, включая обнаруженные ошибки
Рис.3.
Графический пользовательский интерфейс
утилиты SQL Navigator
Для
просмотра выходных данных, формируемых
процедурой DBMS_OUTPUT. PUT_LINE следует на
инструментальной панели нажать кнопку
Turn
the
server
output
ON или выбрать в меню Session
| Server Output. Эти
выходные данные будут показаны среди
других результатов в окне вывода Output,
которое открывается командой меню View
| Output
Window
или соответствующей кнопкой на панели
инструментов.
Пример создания и заполнения таблиц базы данных
В
качестве примера далее приводится
описание трех связанных между собой
таблиц ARTIST,
CUSTOMER
и CUSTOMER_ARTIST_INT
с информацией о художниках и покупателях
их произведений:
CREATE
TABLE ARTIST (
ArtistId
int PRIMARY KEY,
Name
varchar(25) NOT NULL,
Nationality
varchar(30) NULL,
Birthdate
date NULL);
CREATE
UNIQUE INDEX ArtistNamelndex ON ARTIST(Name);
CREATE
TABLE CUSTOMER (
CustomerID
int NOT NULL,
Name
varchar(25) NOT NULL,
Street
varchar(30) NULL,
City
varchar(35) NULL,
State
varchar(2) NULL,
Zip
varchar(5) NULL,
Area_Code
varchar(3) NULL,
Phone
Number varchar(8) NULL);
ALTER
TABLE CUSTOMER
ADD
CONSTRAINT CustomerPK PRIMARY KEY ( CustomerlD );
CREATE
INDEX CustomerNamelndex ON CUSTOMER(Name);
CREATE
TABLE CUSTOMER_ARTIST_INT(
ArtistID
int NOT NULL,
CustomerlD
int NOT NULL);
ALTER
TABLE CUSTOMER_ARTIST_INT
ADD
CONSTRAINT CustomerArtistPK PRIMARY KEY ( ArtistID, CustomerlD );
ALTER
TABLE CUSTOMER_ARTIST_INT
ADD
CONSTRAINT ArtistlntFK FOREIGN KEY(ArtistlD) REFERENCES ARTIST;
ALTER
TABLE CUSTOMER_ARTIST_INT
ADD
CONSTRAINT CustomerIntFK FOREIGN KEY(CustomerlD) REFERENCES
CUSTOMER;
Текст операторов
можно поместить в файл Createl.sql,
создав его с помощью программы Блокнот.
При использовании утилитыSQL*Plusпосле приглашенияSQL>следует ввести команду
Start
Create1
(Если созданный
файл оказался с расширением, отличным
от .sql, нужно указать его
явно, напримерStartCreatel.txt)
SQL*Plusоткроет файлCreatel.sqlи поместит содержащиеся в немSQL-операторы
в буфер, но выполнять их не будет, пока
не будет введен слэш (/).
Чтобы SQL-операторы
автоматически запускались после
прочтения файла, нужно поместить за
последним оператором слэш в отдельно
строке. Тогда после ввода командыStartсодержащиеся в файле операторы будут
выполнены автоматически.
Созданные таблицы
заполняются данными с помощью SQL-оператораINSERT, например:
INSERT
INTO ARTIST (ArtistID, Name, Nationality) Values
(1,
‘Tobey’, ‘US’);
INSERT
INTO CUSTOMER (CustomerID, Name, Area_Code, Phone_Number) Values
(1001,
‘Jeffrey Janes’, ‘206’, ‘555-1234’);
INSERT
INTO CUSTOMER_ARTIST_INT
(ArtistID, CustomerID) Values (1, 1001);
Соседние файлы в папке OracleМП
- #
- #
- #
- #
- #
- #
- #
SQL Navigator создан компанией Quest Software. Это среда разработки с графическим интерфейсом пользователя, предлагающая следующие
средства:
Автоформатирование операторов PL/SQL и SQL
Отладчик PL/SQL
Средство просмотра баз данных (браузер)
• Поддержка объектных типовОгас1е8 и типов г
т Шаблоны программного текста
• Поддержка систем управления версиями от сторонних производителей
Соединение с базой данных
Подобно DBPartner Debugger, при первом запуске SQL Navigator предлагает установить соединение с базой данных. Профили соединений автоматически сохраняются для последующего использования, но пароль не сохраняется. Окно, применяемое для установления соединений, представлено на рис. 2.19. Если после запуска соединение с базой данных не устанавливается, то будет предложено сделать это после открытия окна редактирования или окна просмотра. В SQL Navigator одновременно поддерживаются несколько соединений с разными базами данных.


Многие свойства SQL Navigator требуют, чтобы на сервере был создан пользователь SQLNAV. Мастер серверной установки (Server Side Installation Wizard) помогает в создании необходимых пользователя и объектов. Мастер может быть выполнен как часть процесса установки, а также после установки по команде Tools | Server Side Installation Wizard. Серверная установка нужна для поддержки плана объяснения, коллективного программирования, систем управления версиями независимых поставщиков и SQL Navigator Tuner. На рис. 2.20 показан начальный экран мастера .
Выполнение SQL и PL/SQL
Операторы SQL и PL/SQL выполняются из окна редактора SQL. Это окно может выполнить либо один оператор, либо целый сценарий. Блоки PL/SQL, содержащиеся в сценарии, должны заканчиваться знаком /. Сценарии поддерживают также переменные подстановки (в смысле
SQL*Plus). Можно выполнять отдельный оператор в сценарии или часть
сценария. На рис. 2.21 показаны окно редактора SQL и окно выходных данных. Окно выходных данных будет содержать результаты каждого оператора (в случае запроса будут выведены данные), и в дополнение в нем могут быть показаны команды SQL или PL/SQL.
Для просмотра выходных данных DBMS_OUTPUT.PUT_LINE следует
нажать кнопку Server Output ON или выбрать в меню Tools [ Server


Output. Выходные данные DBMS_OULPUL.PUL_LINE будут показаны среди других результатов в окне вывода (см. рис. 2.22).
Средства отладки
Чтобы выполнить программу PL/SQL в пошаговом режиме, необходимо включить режим Debug, нажав кнопку Debug ON либо выбрав в меню пункт Debug | PL/SQL Debugging. Выполнение блока будет производиться в отладчике, где можно проверять переменные, задавать контрольные точки и выполнять по шагам код. Пример сеанса отладки показан на рис. 2.23.
SQL Navigator может подключаться к отдельному сеансу для отладки посылаемых им команд PL/SQL. Это требует, чтобы отдельный сеанс вызывал DBMS_DEBUG с заданным именем сеанса, которое используется затем SQL Navigator для идентификации сеанса.
| < Предыдущая | Следующая > |
|---|
SQL Navigator™ 7.2
User Guide
© 2015 Dell Inc.
ALL RIGHTS RESERVED.
This guide contains proprietary information protected by copyright. The software described in this guide is furnished under a software license or nondisclosure agreement. This software may be used or copied only in accordance with the terms of the applicable agreement. No part of this guide may be reproduced or transmitted in any form or by any means, electronic or mechanical, including photocopying and recording for any purpose other than the purchaser’s personal use without the written permission of Dell Software Inc.
The information in this document is provided in connection with Dell Software products. No license, express or implied, by estoppel or otherwise, to any intellectual property right is granted by this document or in connection with the sale of Dell
Software products. EXCEPT AS SET FORTH IN DELL SOFTWARE’S TERMS AND CONDITIONS AS SPECIFIED IN THE LICENSE
AGREEMENT FOR THIS PRODUCT, DELL SOFTWARE ASSUMES NO LIABILITY WHATSOEVER AND DISCLAIMS ANY EXPRESS, IMPLIED
OR STATUTORY WARRANTY RELATING TO ITS PRODUCTS INCLUDING, BUT NOT LIMITED TO, THE IMPLIED WARRANTY OF
MERCHANTABILITY, FITNESS FOR A PARTICULAR PURPOSE, OR NON-INFRINGEMENT. IN NO EVENT SHALL DELL BE LIABLE FOR
ANY DIRECT, INDIRECT, CONSEQUENTIAL, PUNITIVE, SPECIAL OR INCIDENTAL DAMAGES (INCLUDING, WITHOUT LIMITATION,
DAMAGES FOR LOSS OF PROFITS, BUSINESS INTERRUPTION OR LOSS OF INFORMATION) ARISING OUT OF THE USE OR INABILITY
TO USE THIS DOCUMENT, EVEN IF DELL SOFTWARE HAS BEEN ADVISED OF THE POSSIBILITY OF SUCH DAMAGES. Dell Software makes no representations or warranties with respect to the accuracy or completeness of the contents of this document and reserves the right to make changes to specifications and product descriptions at any time without notice. Dell Software does not make any commitment to update the information contained in this document.
If you have any questions regarding your potential use of this material, contact:
Dell Software Inc.
Attn: LEGAL Dept
5 Polaris Way
Aliso Viejo, CA 92656
Refer to our web site ( www.software.dell.com
) for regional and international office information.
Trademarks
Dell, the Dell logo, SQL Navigator, Toad, Toad World and Benchmark Factory are trademarks of Dell Inc.and/or its affiliates. Microsoft, Windows, Windows Vista, Windows Server Internet Explorer and Excel are either registered trademarks or trademarks of Microsoft Corporation in the United States and/or other countries.
Oracle, PL/SQL, SQL*Net and Java are trademarks or registered trademarks of Oracle and/or its affiliates.
Citrix® is a trademark of Citrix Systems, Inc. and/or one or more of its subsidiaries, and may be registered in the United States Patent and Trademark Office and in other countries. Serena and PVCS are registered trademarks of SERENA Software, Inc. Perforce is a trademark of Perforce Software. Apache and Apache
Subversion are trademarks of The Apache Software Foundation. IBM, Rational and ClearCase are registered trademarks of International Business Machines Corporation. Borland and StarTeam are trademarks or registered trademarks of Borland Software Corporation in the United States and other countries. Other trademarks and trade names may be used in this document to refer to either the entities claiming the marks and names or their products. Dell disclaims any proprietary interest in the marks and names of others.
Legend
CAUTION: A CAUTION icon indicates potential damage to hardware or loss of data if instructions are not followed.
WARNING: A WARNING icon indicates a potential for property damage, personal injury, or death.
IMPORTANT NOTE
,
NOTE
,
TIP
,
MOBILE
, or
VIDEO:
An information icon indicates supporting information.
SQL Navigator User Guide
Updated — February 2015
Software Version — 7.2
Contents
Quick Overview
Better code, faster.
Who should use SQL Navigator?
Enter A New Authorization Key
Check for Updates
Working With SQL Navigator
Oracle Sessions
Finding Objects
Working With Objects
Web Development
Java Source Code
Analysis And Tuning
Team Coding And Version Control
Navigation
Main Menu
File Menu
Edit Menu
Search Menu
View Menu
Session Menu
Object Menu
Tools Menu
Team Coding Menu
Help Menu
Task Bar
Toolbars
Component List
Main Menu Keyboard Shortcuts
Customize The Screen Layout
Float / Dock
Toolbars in the Main Window
Main Menu Bar
Oracle Logon
Oracle Logon Dialog
SQL Navigator 7.2
User Guide
3
34
35
39
41
41
32
33
34
42
43
22
23
25
26
29
20
20
20
21
44
44
17
18
18
19
15
15
15
16
14
14
14
14
14
Oracle Client Settings
Connection Parameters
Username / Password
Options
Oracle TNS Configuration
Advanced Service Options Dialog
Address List Options Dialog
DBA Dictionary Views
How SQL Navigator handles the views
Troubleshooting Connections to Oracle
Command Line Parameters
Code Editor
SQL Development
PL/SQL Development
Toolbox
Code Editor SQL
General Code Editor Functions
SQL Specific Functions
Team Coding Version Control
Tools and Applications
Code Editor PL/SQL
General Code Editor Functions
PL/SQL Specific Functions
Team Coding Version Control
Tools and Applications
Edit, Compile And Execute
SQL*Plus command support
Executing Scripts Invoked By At Sign (@) or Double At Sign (@@) SQL*Plus Commands
Connect To A Database Via The Code Editor
Bind Variables
Auto Code Completion
Scan Defines/Substitutions
Specifying substitution variables in SQL statements
DEFINE and UNDEFINE
New Stored Object Dialog
SQL Statement CRUD Matrix Dialog
SQL Query Results
SQL Query Results Data Grid
Rows Retrieved
70
70
71
69
69
70
66
66
67
67
68
60
65
66
57
57
58
59
59
53
55
56
51
51
51
51
52
52
46
47
47
48
49
44
44
45
45
49
49
SQL Navigator 7.2
User Guide
4
Export / Print
Browse
Edit (Updateable Queries)
Group Display
Format
Sort & Display
SQL Query Log (The Spool Tab)
Export Data Dialog
Viewers: LOB, XML, Array
LOB Editor
ARRAY Editor
PL/SQL Execution Console
Run Time Parameters
Run Options
Code Test
PL/SQL Stub
DBMS_OUTPUT
Code Editor Keyboard Shortcuts
Right Click Over The Editing Pane
PL/SQL Debugger Keyboard Shortcuts
Further Shortcuts In The Code Editor Editing Pane
Further Shortcuts Viewing SQL Code Execution Results
Shortcuts In The Code Editor Toolbar
Toolbox
PL/SQL Debugger
Requirements
Debug
Code Explorer
Outline
DB Explorer
Describe
History
Dependencies
Columns
Visual Object Editors
Cluster Editor
Ways to Open The Cluster Editor
Constraint Editor
Using The Editor
SQL Navigator 7.2
User Guide
5
87
87
88
88
84
84
86
89
89
81
82
82
83
83
79
79
81
76
76
77
78
78
74
75
75
73
73
74
74
74
71
72
72
73
90
91
91
91
92
Steps To Create A Constraint
Now the constraint is defined
Ways to Open The Constraint Editor
Database Link Editor
Ways to Open The Database Link Editor
Index Editor
Ways to Open The Index Editor
Nested Table Editor
Profile Editor
Requirements
Ways to Open The Profile Editor
Redo Log Group Editor
Ways to Open The Redo Log Group Editor
Role Editor
Requirements
Ways to Open The Role Editor
Materialized View Editor
Using The Editor
Editor Toolbar
Editor Tabs
Ways to Open The Materialized View Editor
Sequence Editor
Ways to Open The Sequence Editor
Synonym Editor
Ways to Open The Synonym Editor
Table Editor
Ways to Open The Table Editor
User Editor
Requirements
Ways to Open The User Editor
Varray Editor
View Editor
Using The Editor
Editor Toolbar
Editor Tabs
Ways to Open The View Editor
Java Editor
Ways to open the Java Editor
Instance Property Editor
SQL Navigator 7.2
User Guide
6
100
101
101
101
102
102
102
103
99
99
99
99
100
98
98
98
103
103
104
104
104
105
96
97
97
97
97
96
96
96
94
94
95
95
95
92
93
93
93
Using The Editor
Instance Property
Editor Toolbar
Details Tab
Ways to Open The Instance Property Editor
Team Coding and Version Control Support
Code Control Groups
How do CCGs work?
Example 1: A Single Application
Example 2: Multiple Applications
Code Collections Viewer
Toolbar
Code Collection Viewer
Toolbar
Linking a CCG to a user schema
Example — Linking a CCG to a user schema
Import Dialog
Export Dialog
Team Coding Viewer
Toolbar
List of Objects — Status Codes
Version Control Browser
Toolbar
TC Locks option
Check In / Check Out Dialog
Different Files Dialog
Team Coding Settings
Configuration
File Extension Options
General
Team Coding Status Dialog
Version Control Products
Concurrent Versions Systems (CVS)
CVS Configurations Options
CVS Login Window
Updating Working Folders
Multiple Connections And CVS Logins
Authentication Methods and the CVS Root
SSH Authentication Using The ext Method
121
121
123
123
123
123
126
127
116
117
117
118
119
119
120
120
127
127
128
110
111
112
113
113
114
115
115
107
107
107
107
109
109
110
105
105
105
106
106
SQL Navigator 7.2
User Guide
7
Modules, Windows And Dialogs
Analyze Tool
Collect Statistics
Validate Structure
List Chained Rows
Auto Describe Tool
Benchmark Factory
Bookmarks Dialog
Capture Web Output
Start Capturing Web Output
While Capturing Web Output
Change Logon Password
Code Analysis
Access to Code Analysis
Rules and Rule Sets
Code Analysis Metrics
Code Analysis Window
Code Analysis Rule Sets
Create and Edit
Import and Export
Code Analysis Rules
Create or Clone
Edit
Import and Export
Code Assistant
Move a code snippet into the editor
Locate a code snippet in the Code Assistant
The Code Assistant Toolbar
Add to Catalog / Edit Dialog
Code Road Map
Code Road Map Toolbar
The Code Model
Model Code Dialog
Code Templates
Standard code routines for which templates have been provided:
Code Shortcuts And Templates Dialog
Default Templates
Code Test
Test Case Properties
138
138
139
139
139
140
140
141
135
135
135
136
137
137
137
138
146
147
148
149
141
143
144
145
145
132
133
133
133
134
134
134
134
130
130
130
131
131
131
SQL Navigator 7.2
User Guide
8
Database Source Code Search
DB Navigator
DB Navigator Toolbar
Using DB Navigator
Filter Properties Dialog
Select filter
Select filter settings.
Describe
Difference Viewer
The Difference Viewer Toolbar
View Differences Dialog
Viewer Options
Appearance | Color Scheme
Appearance | Find Next Difference
File Comparison Rules
General
Define Minor
Edit Data
ER Diagram
ER Diagram Toolbar
ER Diagram Display Area
For each table in the model
To add tables to the diagram
Create ER Diagram
Explain Plan Tool
Explain Plan Window
Print the Explain Plan tree
Export Table
Find and Replace
Find objects Dialog
What To Search For
Now Objects Are Found
Find Recycle Bin Objects Dialog
What To Search For
Now Objects Are Found
Formatting Options
Formatting Options Toolbar
Set formatting options
HTML Viewer
SQL Navigator 7.2
User Guide
9
161
162
162
165
166
166
166
167
158
158
159
159
159
160
160
161
167
167
167
168
168
169
155
156
156
156
157
157
157
158
152
153
153
153
154
149
150
151
151
Stored Procedure > HTML
Import HTML as PL/SQL
Sample code for displaying query results in a HTML page
Import Table
Java Manager
Job Scheduler
Jobs Tab
Programs Tab
Schedules Tab
Windows Tab
Window Groups Tab
Job Classes Tab
Job Log Tab
Window Log Tab
Job Scheduler (Requirements)
Job Scheduler system privileges
INIT.ORA configuration file
Locate In Tree
Output Window
Interpreting the output display
Actions
PL/SQL Profiler
Toolbar
Runs Tab
Groups Tab
Select PL/SQL Code on the Runs or Groups Tab
Profiler Filter/Preferences Dialog
Data Filters
Chart Options
New Group / Group Properties Dialog
PL/SQL Profiler Requirements
Profile Manager
To backup a profile
To restore a profile
Project Manager
Project Manager Toolbar
Manage Your Projects
Actions on Items in the Project Manager
Keyboard Shortcuts In The Project Manager Window
186
187
187
188
188
188
189
189
183
183
183
184
184
184
185
186
189
190
190
190
191
191
179
180
180
181
181
182
182
182
176
176
177
178
179
169
170
171
172
SQL Navigator 7.2
User Guide
10
Project Filter Dialog
Publish Java to PL/SQL
Quick Browse
Rename Object
Search Knowledge Xpert
Knowledge Xpert
Select DB Object Dialog
Server Output
Tips For Use
Server Side Installation Wizard
Install Server Side Objects for Team Coding
Run the Wizard
Grant the roles
Session Browser
Session Browser Toolbar
Sessions Grid
Session Information
Source Preview
SQL Modeler
SQL Modeler Toolbar
View Joins Dialog
Global WHERE Conditions Window
Global HAVING Conditions Window
Model Area
Add objects
Build a query
Create a table join
Menus in the Model Area
Tabs
Criteria Tab
Generated Query Tab
Query Results Tab
SQL Optimizer
Task Manager
Web Support Configuration Dialog
Wrap Code
View | Preferences
General
General | User Interface
204
205
205
207
207
209
209
209
198
199
200
201
202
202
203
204
210
211
211
194
194
195
196
196
196
197
198
193
193
193
193
194
192
192
192
192
212
213
213
SQL Navigator 7.2
User Guide
11
User Interface
Pin at Start
Automatically Show Output Window
Startup
ER Diagrammer
Task Manager
General | «Drop» and «Truncate» safety options
Drop and Truncate
General | Session
Session
Trace
General | Default Tables
Default Tables
General | Explain Plan
Explain Plan
General | Code Assistant
Code Assistant
Displayed Pages
General | Printing
Printing
Editor
DB Navigator
General | Object Editors
Object Editors
General | Task Bar
Task Bar
Extract DDL
Extract DDL | General
Extract DDL/MetaData
Extract DDL
Extract DDL | Table/View Specific
Table/View specific
Partitioning
Extract DDL | Constraints
Constraints
Extract DDL | Materialized Views/Snapshots
Materialized Views/Snapshots
Extract DDL | Users
Users
223
224
224
224
225
226
226
227
221
221
221
222
222
223
223
223
227
227
228
228
228
228
216
219
220
220
220
220
220
220
215
216
216
216
216
213
215
215
215
SQL Navigator 7.2
User Guide
12
Project Manager
Project Manager
Auto add items to Project Manager
Code Editor
Code Editor | General
General
Code Editor | SQL Scripts
SQL Scripts
Code Completion
Drag & Drop
Code Analysis
Lob Viewer
Team Coding
General
Advanced
Keyboard Shortcuts (View | Preferences)
About Dell
Contacting Dell
Technical support resources
233
233
233
233
233
235
236
229
229
231
231
232
228
228
228
229
237
237
237
SQL Navigator 7.2
User Guide
13
1
Quick Overview
Better code, faster.
SQL Navigator™ provides an integrated environment for developing and testing Oracle® stored programs and procedures, schemas, objects, SQL scripts, and more—all from an easy-to-use graphical user interface.
The SQL Navigator family of products is a complete development environment for Oracle server-side development and management. It has been conceived, designed and developed by Oracle developers and
DBAs with hands-on experience in the most common problems facing Oracle developers.
Who should use SQL Navigator?
SQL Navigator is intended for use by qualified Oracle developers and DBAs. (You know who you are!)
The developers of this product assume that the user has a good level of competence with Oracle relational database concepts, designs, and methods, including SQL and its procedural extension PL/SQL, Oracle database objects and datatypes.
Every attempt has been made to ensure that SQL Navigator is easy for developers and DBAs to install and use, and is supported by comprehensive user assistance materials.
In the online help materials, we have not attempted to teach basic Oracle RDBMS skills nor to duplicate information that is readily available from Oracle Corporation and from third-party publishers.
Enter A New Authorization Key
Click Tools | Product Authorization to enter a new product authorization key.
Check for Updates
Click Help | Check for Updates to check for the latest version of SQL Navigator available.
Is there a newer version to download from the web site?
SQL Navigator 7.2
User Guide
14
2
Working With SQL Navigator
Oracle Sessions
Icon Menu
Session
Menu
|
New
Session
Session
Menu |
Select
Send to
Session
Task
Manager
Description
Connect to an Oracle database instance / Open a new Oracle session. Manage your database connections.
Open the
Oracle Logon Dialog .
TIP:
SQL Navigator saves your connection profiles in the
Project Manager
window for easy access.
Switch between open Oracle Sessions.
TIP:
l
You can set up multiple sessions with one or many database instances.
l
Each session-related window (code editor, object editor, and so on) remembers and automatically opens in the appropriate database session.
Inside the Code Editor, while editing SQL code, you can send the current Code Editor tab or a selected piece of code to another session. Highlight the code and click Send to New
Session. For more information, see Code Editor SQL on page 52 .
SQL Navigator executes long-running tasks in separate threads in the background. The Task
Manager is a display of all active and complete tasks for the current session.
TIP:
Manage sessions in the
Session Browser .
Finding Objects
SQL Navigator gives you several convenient point-and-click options for quick access to database objects.
Icon Tool Description
DB
Navigator
Explore the entire database structure as a tree with expandable nodes.
TIP:
Highlight a DB Navigator node and press F11 to find objects in that node.
SQL Navigator 7.2
User Guide
15
Icon Tool
Find objects
Dialog
Description
Find objects by means of a search argument.
TIP:
To show a dynamic list of all objects in a schema — Select the schema node in DB
Navigator before you click Search | Find Objects.
Database
Source
Code
Search
Locate In
Tree
Search stored programs, triggers and views for a character string in the source code.
TIP:
You can use this utility to perform a quick «where-used» impact analysis.
Show the location of the current database object (for example, the one you are editing) in the DB Navigator hierarchy. Expand all intermediate nodes in the DB Navigator tree and display the object’s detail view.
Find
Recycle
Bin
Objects
Dialog
Locate objects dropped in the recycle bin.
Requires Oracle 10g or 11g.
Project
Manager
The Project Manager provides instant access to your frequently used database objects and connections. Projects are holding areas where you can store shortcuts to things that you frequently need to work with instead of searching for them in various lists and directories.
TIP:
To find an object in DB Navigator from Project Manager: Right click on the object in Project Manager and select Locate in DB Navigator. This opens the DB
Navigator window, expands tree nodes as necessary, and displays the details of the selected object.
TIP:
l
Use the Find Objects Dialog or DB Navigator for multiple-selection of objects.
l
Your view of the Oracle Data Dictionary determines what objects you can see. For more information, see DBA Dictionary Views on page 48 .
Working With Objects
When you select an object, SQL Navigator enables all the appropriate menu or toolbar commands. The available actions vary depending upon the type of object selected.
Icon Tool Description
DB
Navigator
Double click on an object to open it for editing.
TIP:
Another way to open an object for editing — drag the object from: l
DB Navigator
SQL Navigator 7.2
User Guide
16
Icon Tool Description
l
Find objects Dialog
l
Project Manager
Drop the object on the application desktop.
Describe
The Oracle DESCRIBE command reports the attributes, methods and arguments of an object type. With the SQL Navigator Describe command you can describe not only procedures, functions, packages, synonyms, and object types, but also tables, indexes, clusters and objects.
SQL Navigator editing tools for database objects.
Visual
Object
Editors
Code
Editor
Quick
Browse
Maintain SQL and PL/SQL code.
Execute SQL queries. Debug PL/SQL code, prepare test data, run stored programs against the database, and immediately view the results. Compilation errors are precisely highlighted.
View chained rows information.
Edit Data
Edit data in a table object.
It is possible to display and edit multi byte data. National Language Support can be applied to data in the
Table Editor
and Code Editor | Data Grid ( SQL Query Results Data Grid
).
Copy an object from one schema to another
1. Open a second DB Navigator window.
2. Drag the object from the source window to the target window.
3. Execute the DDL displayed in the editing window
Web Development
The SQL Navigator Web Development module provides an integrated development environment with advanced coding, testing, and viewing of PL/SQL programs for the Oracle Web server. This allows users to develop the
PL/SQL code independent of the web server and view the HTML in an integrated web browser, thereby eliminating the need to switch from their coding environment to an external browser. The stored procedure will output the HTML code via the Oracle Web Cartridge.
Icon Tool
Capture Web
Output
Description
Enable the web server. Each time you execute PL/SQL code, the generated HTML is displayed in the HTML viewer.
SQL Navigator 7.2
User Guide
17
Icon Tool
Web Support
Configuration
Dialog
Code Editor
Description
Enter details of your Web server’s configuration.
HTML Viewer
Import HTML as
PL/SQL
Code Web Server Procedures. The editor includes drag and drop coding for Web toolkit packages, including htp and htf items. Execute the procedure.
View HTML pages.
Convert a HTML file into a PL/SQL stored procedure.
Java Source Code
Icon Tool
DB Navigator
Database Source Code Search
Java Editor
Description
View Java-related objects (sources, classes, resources)
Object Menu
Java Manager
| Extract DDL
Publish Java to PL/SQL
Edit Java source stored in the database.
Compile Java objects
Extract SQL DDL of Java Source
Load Java classes (Oracle LoadJava utility)
Drop Java classes (Oracle DropJava utility)
Create a PL/SQL package from a Java class stored in the database.
Analysis And Tuning
SQL Navigator provides useful tools for tuning and database management. These tools are intended to be used in conjunction with each other.
Icon Tool Description
Analyze Tool
View and collect statistics, validate structure and list chained rows for database structures such as tables, clusters and indexes.
Explain Plan
Tool
Analyze the execution of a single SQL statement. By examining the execution plan, you can see exactly how Oracle executes your SQL statement, and how it can be improved.
ER Diagram
Model a table and graphically see the dependencies and joins to other tables.
Code Road
Map
Display the complex PL/SQL inter-dependencies within a database.
SQL Navigator 7.2
User Guide
18
Icon Tool
Integration with
Benchmark
Factory
Description
Benchmark Factory™ is a highly scalable load testing, capacity planning and performance tuning tool capable of simulating thousands of users accessing your database, file, Internet and messaging servers.
Team Coding And Version Control
SQL Navigator provides extensive and flexible Team Coding controls, including integration with third-party
version control systems. For more information, see Team Coding Menu on page 32 .
Icon Tool
Connection
Settings
Team
Coding
Viewer
Code
Collections
Viewer
Version
Control
Browser
Description
Enable / Configure Team Coding. For more information, see
Team Coding Settings on page 120 .
Show details of objects under Team Coding control, including which objects are currently checked out and when they were last checked in.
Use Code Control Groups to organize controlled objects into groups associated with development projects.
Show the version control repository. Drill down to any revision of any file, view revision histories, check files in or out, and view differences between revisions.
You can also integrate with third party version control products. Refer to the SQL
Navigator Release Notes for more information.
SQL Navigator 7.2
User Guide
19
3
Navigation
Main Menu
File Menu
Operations on files and projects, plus the Exit command.
Menu
Icon
Menu Name More Information
New File
Menu Icon Menu Name
HTML File
SQL Script
More Information
HTML Viewer
Code Editor
New Project Open a new project window. See also
Project Manager .
Use File | Reopen Project to return to the previous project.
Open File Open an external file in the
Code Editor
.
Reopen Project Reopen a project window. See also
Project Manager
.
Rename
Project
Rename the current project window. See also
Project Manager
Delete Project Delete the current project window. See also
Project Manager
.
.
Save File Save the file to disk.
Save File As
Print Preview
Print Setup
Save the file to disk. Optionally change the file name and location before saving.
Print the file.
Preview the file before printing.
Enter setup options for printing.
Exit Close SQL Navigator
SQL Navigator 7.2
User Guide
20
Edit Menu
Common text and code-editing actions.
Menu
Icon
Menu Name More Information
Undo
Redo
Cut
Reverse the previous editing action.
Reapply the previous editing action
Remove selected text and place it on the clipboard
Copy
Paste
Select All
Copy selected text to the clipboard
Insert the clipboard contents at the cursor location.
Select all text in the item being edited
Nil
Indent
Unindent
Indent the current line
To increase or decrease the indent of selected text in the editor
Unindent the current line
To increase or decrease the indent of selected text in the editor
Comment Enclose the selected text inside PL/SQL comment marks
Uncomment Remove the PL/SQL comment marks from the selected text
Upper Case Convert selected text to upper case
Lower Case Convert selected text to lower case
Convert
Keywords to
Upper Case
Convert all keywords and reserved words in the program to uppercase
Convert
Keywords to
Lower Case
Convert all keywords and reserved words in the program to lowercase
Place selected text in the
Code Editor
Open
Selected
Text in
Code Editor
Insert
Menu
Icon
Menu Name
More Information
File Insert a text file at the current cursor location.
DBMS_
OUTPUT.PUT_
LINE(«)
Insert DBMS_OUTPUT.PUT_LINE(») at the current cursor location.
This procedure displays program output after execution. For more information, see DBMS_OUTPUT on page 78 .
SQL Navigator 7.2
User Guide
21
Menu
Icon
Menu Name More Information
Menu
Icon
Menu Name
Debug
Variable
More Information
Create a debugging statement for the variable at the current cursor location.
l
The statement is copied to the clipboard.
l
Use Edit | Paste to place the statement in the code.
CRUD Matrix Insert a CRUD (Create-Update-Delete) matrix, enclosed in comment markers, at the current cursor location in the
Code Editor
.
This provides a convenient method of documenting a procedure.
SQL Statement CRUD Matrix Dialog
Got to Line Move to a specific line number in the editor.
Move to the other bracket within a given pair of brackets Jump to
Matching
Bracket
Toggle
Bookmark
Go to
Bookmark
List
Bookmarks
Open
Object at
Cursor
Describe
Object at
Cursor
Place a bookmark at the current line.
You can set up to ten bookmarks (identified numerically 0-9).
Return to a bookmarked line in the code.
Example Scenario: Set bookmark number 1 in the DECLARE section and bookmark number 2 at your current editing location. To return to the DECLARE section press
Ctrl+1. After looking at your variable or cursor declarations, return to your editing location by pressing Ctrl+2.
View / Go to / Delete bookmarked lines in the code.
Bookmarks Dialog
Open the database object referenced at the current cursor location.
Use to instantly find objects from stored programs or scripts, and open them in the
Visual Object Editors .
Show DESCRIBE information for the database object referenced at the current cursor location.
See also
Describe
.
Search Menu
Find text, code and database objects.
SQL Navigator 7.2
User Guide
22
Menu Icon Menu Name
Find
Replace
More Information
Find a text string.
Find and Replace
Find a text string and replace it with another.
Find and Replace
Find the next occurrence as per
Find and Replace
Find Next
Find previous Find the previous occurrence as per
Find and Replace
Code Search
Find Objects
Find source code in the database.
Database Source Code Search
Find one or more database objects matching a search argument.
Find objects Dialog
Find Recycle Bin Objects
Find Recycle Bin Objects Dialog
Requires Oracle 10g or later.
View Menu
Control what is displayed in the main application area.
More Information Menu
Icon
Menu Name
DB Navigator
Code Editor
Visual Object
Editor
Open / Focus
DB Navigator
Open / Focus
Code Editor
Visual Object Editors
Menu
Icon
Menu Name More Information
Cluster Editor Open a new instance of the
Cluster Editor
Constraint Editor
Index Editor
Open a new instance of the
Constraint Editor
DataBase Link Editor Open a new instance of the
Database Link
Editor
Open a new instance of the
Index Editor
Nested Table Editor Open a new instance of the
Nested Table
Editor
SQL Navigator 7.2
User Guide
23
Menu
Icon
Menu Name More Information
Menu
Icon
Menu Name More Information
Profile Editor
Redo Log Group
Editor
Role Editor
Materialized View
Editor
Sequence Editor
Synonym Editor
Table Editor user Editor
Varray Editor
Open a new instance of the
Profile Editor
Open a new instance of the
Redo Log Group
Editor
Open a new instance of the
Role Editor
Open a new instance of the
Materialized View
Editor
Open a new instance of the
Sequence Editor
Open a new instance of the
Synonym Editor
Open a new instance of the
Table Editor
Open a new instance of the
User Editor
Open a new instance of the
Varray Editor
View Editor Open a new instance of the
View Editor
Java Editor
Instance Property
Editor
Project
Manager
Window
Task Manager
Show / Hide
Project Manager
Show / Hide
Task Manager
Output Window Show / Hide
Output Window
Code Assistant Show / Hide
Code Assistant
Open a new instance of the
Java Editor
Open a new instance of the
Editor
Instance Property
Code
Templates
Show / Hide
Code Templates
Auto-Describe
Tool
Show / Hide
Auto Describe Tool
Source Preview Show / Hide
Source Preview
Preferences
Set SQL Navigator Preferences:
View | Preferences
Screen Layout
Save up to ten layouts of dockable windows and recall them. For more information, see Customize The Screen Layout on page 41 .
SQL Navigator 7.2
User Guide
24
Menu
Icon
Menu Name More Information
Menu
Icon
Menu
Name
Nil Layout
0-9
More Information
The current layout number is highlighted.
When you select a different layout number the current layout is saved before the screen layout switches to the selected layout.
Use Layout 0 as a general-purpose default layout.
Reset
Docking
Restore the current layout to the SQL Navigator default.
Session Menu
Manage and configure your connection to the database.
Menu
Icon
Menu Name More Information
New Session Connect to an Oracle database instance / Open a new Oracle session. Manage your database connections, including to create a database connection.
Oracle Logon Dialog
Select Switch between open Oracle Sessions. Show the current Oracle session.
You can set up multiple sessions with one or many database instances.
Server
Output
Include
Debug Info
Toggle On / Off
Server Output
Capture Web
Output
Start/Stop
Capture Web Output
Watch, evaluate or modify a stored program variable.
1. Toggle On Include Debug Info.
2. Compile the program in the
Code Editor
.
See also:
PL/SQL Debugger
Web
Configuration
Set up Oracle Web development support.
Web Support Configuration Dialog
Wallet
Operations
Features to decrypt the table keys to encrypt or decrypt application data
SQL Navigator 7.2
User Guide
25
Menu
Icon
Menu Name More Information
Suspend
Stop
Commit
Rollback
Change
Password
Menu Icon Menu Name
Generate Master Key
Open Wallet
Close Wallet
Suspend execution of the stored program.
PL/SQL Execution Console
Terminate execution of the stored program.
PL/SQL Execution Console
Commit all pending changes in all open editors for the current Oracle session.
Release any row or table locks held by the session.
Undo some or all of the changes made to the database during the current Oracle session.
Release any row or table locks held by the session.
Modify the logon password of the current Oracle session.
Change Logon Password
Empty the recycle bin for the current Oracle session.
Empty
Recycle Bin
Reconnect
Close
Close All
Re-establish the database connection.
Close the current session. Close the Oracle connection. Disconnect from the Oracle instance.
You can disconnect from an Oracle instance and remain connected to other instances.
Close all open sessions.
Object Menu
Operations on database objects.
Menu
Icon
Menu
Name
More Information
Create DB
Object
Create a database object.
Open
DB Object
Locate and open a database object.
Select DB Object Dialog
SQL Navigator 7.2
User Guide
26
Menu
Icon
Menu
Name
Open
Describe
Rename
Drop
Open the selected database object for editing.
Not all database objects can be altered. You may need to drop the object and create a new one.
Show attributes, methods and arguments of the selected procedure, function, package, synonym, table, index or cluster.
Ensure the required database connection is active.
Describe
See also
Auto Describe Tool
Rename the selected object.
Rename Object
Remove the selected object from the database.
To disable the Drop command:
View | Preferences
|
General | «Drop» and «Truncate» safety options
(Oracle 10g and later): A recycle bin is available for handling and restoring dropped objects. You can use
DB Navigator
to retrieve objects dropped from the database. See also
Find Recycle Bin Objects Dialog .
Remove the selected object from the database permanently. Do not place the object in the Recycle Bin.
Drop with
Purge
Flashback Restore the selected object from the Recycle Bin.
Use
DB Navigator
to select an object in the Recycle Bin.
You can type a new name for the object in the New Name column if required.
Extract
DDL
Extract the DDL or other SQL statements that define the selected object or access control. On requesting Extract DDL the SQL Navigator Preferences open:
View |
Preferences
| Extract DDL | General
.
SQL Navigator encloses non-alphanumeric and mixed-case object names inside doublequotes
You may like to use
DB Navigator
to select object(s).
Extract DDL runs as a background task. See
Task Manager .
Get the metadata of the selected object(s).
Get
Metadata
Publish
Java to
PL/SQL
Import
Table
Export
More Information
Create a PL/SQL package from the selected Java class stored in the database.
Publish Java to PL/SQL
Import objects from a DMP file.
Import Table
Export objects to a DMP file.
SQL Navigator 7.2
User Guide
27
Menu
Icon
Menu
Name
Table
Compile
More Information
Export Table
Compile/Rebuild the selected object.
Menu
Icon
Menu Name More Information
Compile/Rebuild Compile the selected object.
Compile
Dependents
Compile
Dependencies
Compile dependents of the selected object.
This eliminates the need to find and compile all dependent objects that became invalid when altering a procedure, table, or other structure.
Compile dependencies of the selected object.
Execute
SQL
Modeler
Quick
Browse
See also
Task Manager
,
Code Editor
.
Watch for feedback in the
Output Window . If the object compiles with errors, open it in
the Code Editor and compile to make use of the Code Editor’s error handling facilities.
If the object has been modified, you will need to save it before you can compile it. This is to ensure that the changes in the object have been applied to the database.
Execute the selected stored program and display the results in the
PL/SQL Execution
Console .
Open the selected object in
SQL Modeler
.
Scenario Example: Select a table in DB Navigator. Open the table in SQL Modeler. Build a query by selecting and dragging columns.
Execute the SQL query for the selected table object in the
Code Editor
to view chained rows information.
See
Quick Browse
,
SQL Query Results Data Grid
Edit Data Execute the SQL query for the selected table object in the
Code Editor
with Updateable switched on.
See
Edit Data
,
SQL Query Results Data Grid
Analyze View and collect statistics, validate structure and list chained rows for database structures such as tables, clusters and indexes.
Analyze Tool
Truncate Remove all rows from a table and reset the STORAGE parameters to the values when the table or cluster was created.
See also
Task Manager
.
To disable the Truncate command:
View | Preferences
|
General | «Drop» and «Truncate» safety options
SQL Navigator 7.2
User Guide
28
Menu
Icon
Menu
Name
Storage
More Information
Oracle allocates space to objects in segments. Segments consist of contiguous sections called extents.
Menu
Icon
Menu
Name
Allocate
More Information
Explicitly allocate a new extent for a selected table or index.
Deallocate Deallocate unused space at «the end» of a segment and make that space available for other segments within the tablespace.
Coalasce Put together discontinuous fragmented extents.
Enable
Disable
Grant
For more information, see the Oracle documentation on the ALTER TABLE and ALTER
INDEX commands.
Enable/Disable the selected constraint object.
If a constraint is enabled, Oracle automatically enforces it. If a constraint is disabled,
Oracle does not enforce it.
See also
Constraint Editor .
See also
Task Manager
.
Locate objects of type Constraint using
Find objects Dialog .
Grant object privileges for the selected object.
Revoke Revoke object privileges for the selected object.
Locate in
Tree
When an object is open in an editing window, and you want to see where that object resides in the schema, you can use Locate in Tree to jump to that object’s node in
DB
Navigator .
Locate In Tree
Properties Show the properties of the selected object
Add to
Project
Add the selected object to the
Project Manager
Tools Menu
Invoke and control integrated tools.
Menu
Icon
Menu Name
Code Test
More Information
The Code Test panel automates the process of testing PL/SQL programs.
Code Test
SQL Navigator 7.2
User Guide
29
Menu
Icon
Menu Name More Information
Code Analysis Code Analysis analyzes code against a set of rules for best practices.
Code Analysis
View
Difference
Compare two scripts / two objects.
View Differences Dialog
Formatter
Tools
Format PL/SQL, SQL*Forms, Oracle Forms, and SQL*Plus source code.
Menu
Icon
Menu
Name
Format
Code
More Information
Format the entire source currently in the editor.
To format just a selection, select the text you want to format.
Output is displayed in the
Output Window .
Syntax
Check
Profile
Code
Multi-File
Formatting
Formatting
Options
Check the syntax. Output is displayed in the
Output Window
.
If syntax errors are detected, the text stays unchanged. The errors are displayed in the Output Window.
Create a summary of the code statistics. You can copy to clipboard or save to file.
Open the Multi-File Formatting Selection dialog.
l
Select Folder and enter the folder that directly contains the files you want to format. Or l
Select Files and enter the files you want to format.
Select Backup files to folder to create a backup copy of the files you are about to format.
Define how the Formatter Tool formats code.
Formatting Options
Wrap Code
Session
Browser
Access Oracle’s Wrap Code utility.
Wrap Code
Manage sessions in the Session Browser.
Session Browser
Search
Knowledge
Xpert
Knowledge Xpert (formerly RevealNet) is a library of more than 900 pre-built PL/SQL routines, written by some of the world’s leading PL/SQL experts, that can be integrated into the standard PL/SQL environment.
Search Knowledge Xpert
SQL Optimizer Analyze and tune the execution of SQL scripts.
SQL Navigator 7.2
User Guide
30
Menu
Icon
Menu Name More Information
Explain Plan
Tool
PL/SQL
Profiler
SQL Optimizer
Requires installation of SQL Optimizer for Oracle®.
Create, store and browse execution plans.
Explain Plan Tool
Analyze the execution time and efficiency of your stored programs.
PL/SQL Profiler
SQL Modeler Create the framework of a Select, Insert, Update, or Delete statement.
SQL Modeler
Code Road
Map
ER Diagram
Job
Scheduler
Java Manager Load and unload multiple Java source files, classes, resources and archives. This is a convenient alternative to the Oracle LoadJava and UnloadJava command line utilities.
Java Manager
Import HTML as PL/SQL
Work with Oracle Job Manager.
Job Scheduler
Convert a HTML file into a PL/SQL stored procedure, to be output via the Oracle Web
Cartridge.
Import HTML as PL/SQL
Dell Code
Tester
Benchmark
Factory
Show the complex PL/SQL inter dependencies within a database.
Code Road Map
Model a table and graphically see the dependencies and joins to other tables.
ER Diagram
Open Code Tester for Oracle®.
Requires installation of Code Tester for Oracle®.
Open
Benchmark Factory .
Requires installation of
Benchmark Factory .
Toad Data
Modeler
Profile
Manager
SQL Tracker
Server Side
Installation
Open Toad™ Data Modeler.
Requires installation of Toad™ Data Modeler.
Backup and restore SQL Navigator profiles.
Profile Manager
Open SQL Tracker.
Requires installation of SQL Tracker.
Install the server-side components of SQL Navigator
SQL Navigator 7.2
User Guide
31
Menu
Icon
Menu Name
Wizard
Product
Authorization
More Information
Server Side Installation Wizard
Enter A New Authorization Key .
Team Coding Menu
Extensive and flexible Team Coding controls, including integration with third-party version control systems.
NOTE:
Before enabling Team Coding:
Install Server Side Objects for Team Coding .
Menu
Icon
Menu
Name
More Information
Code
Control
Groups
Team
Coding
Viewer
Version
Control
Browser
Get Latest
Revision
Use Code Control Groups to organize controlled objects into groups associated with development projects.
Open
Code Collections Viewer
Show details of objects under Team Coding control, including which objects are currently checked out and when they were last checked in.
Open the
Team Coding Viewer
Show the version control repository. Drill down to any revision of any file, view revision histories, check files in or out, and view differences between revisions.
Open the
Version Control Browser .
Get the latest version of an object or script as it is held in the Version Control repository.
The Get Latest Revision command overwrites the version of the object or script in the database, replacing it with the latest version held in the VCS repository. You can use the
View Differences Dialog
to compare versions before overwriting the object.
Check Out Use to check out and check in an object or script.
Open: Check In / Check Out Dialog
To indicate the object or script to check in or check out:
Check In l
Select the object in DB Navigator, Find Objects, Version Control Browser, Team
Coding Viewer, Object editing windows l
Open the object in one of the
Visual Object Editors
or
Code Editor
.
Not applicable when Automatic Check-Out and Automatic Check-In are enabled. For more information, see Team Coding Settings on page 120 .
Undo
Check Out
Cancel the check-out. You are prompted to confirm that you want to discard any changes you have made and restore the database version of the item as it was prior to check-out.
SQL Navigator 7.2
User Guide
32
Menu
Icon
Menu
Name
More Information
Confirm
Yes
You have made and saved changes to the object and you want to discard those changes.
Confirm
No
You have made and saved changes to the object and you want those changes to be retained in the database. As a result the version saved in the third party version control repository will be different from the version saved in the database.
Check in all changes.
Check In
All
Compare
To VCS
Select a database object (in
DB Navigator
for example) and compare it with the latest
VCS revision
Click Compare to VCS
Click SHIFT + Compare to
VCS
Compare the selected object with the latest VCS revision
Compare the selected object with a VCS revision that you select
Requires that a version control product is in use and the selected database object is included in a Code Control Group.
Connection
Settings
Enable and further configure Team Coding.
Open
Team Coding Settings
Status
Provider
Login
Show connection details and the privileges granted to the current user.
Open the
Team Coding Status Dialog
Logon to the Version Control Product.
Requires that a version control product is in use.
Help Menu
Access to user-assistance
Menu
Icon
Menu Name
Contents
More Information
General and How-To information
Context Help Open context-sensitive help for the current window or dialog
Not all windows and dialogs are linked to help topics.
Shortcuts &
Function Keys
Look up keyboard shortcuts and function keys
Open
Main Menu Keyboard Shortcuts
Find a
Command
Locate SQL Navigator commands
SQL Navigator 7.2
User Guide
33
Menu
Icon
Menu Name More Information
SQL Navigator
Community
Contact
Support
Create
Support
Bundle Files
Open
Component List
Visit for all the latest product information, including tips and techniques.
Open the Support Portal. Log issues, search the knowledge base and download products.
http://software.dell.com/support/
Create the support bundle file: SupportBundle.dta.
This file will contain information about your environment and installation of SQL
Navigator. If you log an issue with support then they may request this file.
Check for Updates
Check For
Updates
About SQL
Navigator
SQL Navigator version, licensing version and options, and contact information.
Task Bar
The Task Bar lists all active SQL Navigator windows for the current project.
Use the Task Bar to select a SQL Navigator window to work on. That window is bought to the foreground, giving it focus.
TIP:
l
To show / hide the Task Bar, right click over the Main Menu or Task Bar and click Task Bar (List
of Windows).
l
Point to an item on the Task Bar with your mouse to see a Tool Tip for the associated window.
l
When there are lots of open SQL Navigator windows you may want to organize them on the Task
Bar. Active windows are grouped by session, with the most recent session’s windows appearing on the left.
Toolbars
The following toolbars are available in the main window.
To show / hide a toolbar, right click over the Main Menu, any toolbar or task bar and select the toolbars to show.
Toolbar
Session Toolbar
Description
Duplicates some of the commands from the
Session Menu .
SQL Navigator 7.2
User Guide
34
Toolbar Description
TIP:
Pause/Resume and Stop buttons on the Session toolbar allow you to interrupt execution of a current task. A hint on the Stop button dynamically shows which task is running and (if applicable) its current progress.
Edit Toolbar Duplicates some of the commands from the
File Menu
and
Edit Menu
.
Functions Toolbar Duplicates some of the commands from the
View Menu
,
Tools Menu
and
Help Menu
.
Object Toolbar
Team Coding
Duplicates some of the commands from the
Object Menu
and shows the current schema.
Duplicates some of the commands from the
Team Coding Menu
.
TIP:
l
Some modules within SQL Navigator have their own toolbars. You should refer to the module’s documentation for more information.
l
To see a Tool Tip about an item on the toolbar, point to it with the mouse.
Component List
Icon Component
Name
Description
Analyze Tool
View and collect statistics, validate structure and list chained rows for database structures such as tables, clusters and indexes.
Auto
Describe Tool
Report on the attributes, methods and arguments of an object type.
See also
Describe
.
Benchmark
Factory
Bookmarks
Dialog
Simulate user transactions before and during application deployments, enabling performance issues to be addressed before end users are affected.
View / Jump to / Delete bookmarks.
See also
Edit Menu
.
Browse Data View chained rows information.
See
Quick Browse
.
Change
Logon
Password
Cluster
Editor
Modify the logon password of the current session.
Join tables that are closely related for storing on the same area of the disk. This lets you interleave the rows of two or more tables together into a single area called a cluster.
Code Analysis
Analyze code against a set of rules for best practices.
Code
Assistant
Drag and drop PL/SQL syntax, SQL functions, column names, and database object names into code.
SQL Navigator 7.2
User Guide
35
Icon Component
Name
Code Editor
Description
Edit SQL and PL/SQL code.
Code
Explorer
Show a hierarchical view the code.
See Code Editor | Toolbox |
Code Explorer .
Code Road
Map
Show the complex PL/SQL interdependencies within a database.
Code Search
See
Database Source Code Search
.
Code
Templates
Code Test
Insert ready-made code segments into any active editor window.
Automate the process of testing PL/SQL programs.
Constraint
Editor
Database
Link Editor
Database
Source Code
Search
Use the Constraint Editor to specify table constraints.
Use the Database Link Editor to view, create or define database links.
Search stored programs, triggers and views for a character string in the source code.
DB Explorer Find and open database objects.
See Code Editor | Toolbox |
DB Explorer
.
DB Navigator
Show the entire database structure as a tree with expandable nodes.
Describe
Report on the attributes, methods and arguments of an object type.
See also
Auto Describe Tool .
Compare objects in a split view.
Difference
Viewer
Edit Data
ER Diagram
Edit data in a table object.
Model a table and graphically see the dependencies and joins to other tables.
Explain Plan
Tool
Analyze the execution of a single SQL statement.
Export Table
Export selected tables.
Extract DDL
See also
Object Menu
.
See also SQL Navigator Preferences:
View | Preferences
| Extract DDL | General .
Find and
Replace
Find objects
Dialog
Find or replace text strings in the current text file.
Find objects in any schema.
Find Recycle
Search for objects in the recycle bin.
SQL Navigator 7.2
User Guide
36
Icon Component
Name
Bin Objects
Dialog
Description
Formatting
Options
Configure how the Formatter Tool formats code.
Formatter tools are available from the
Tools Menu
.
HTML Viewer
Show HTML in the integrated viewer.
Import HTML as PL/SQL
Convert a HTML file into a PL/SQL stored procedure. The stored procedure will in turn output the HTML code via the Oracle Web Toolkit.
Import Table
Import tables.
Index Editor
Use the Index Editor to view, create or alter indexes, and to set storage allocation.
Instance
Property
Editor
Java Editor
Use the Instance Property Editor to view or specify the startup parameters for the instance.
View and edit Java source.
Java Manager
Load and unload multiple Java source files, classes, resources and archives.
Job
Scheduler
Locate In
Tree
Materialized
View Editor
Access the Oracle Job Scheduler.
Jump to the selected object’s node in the
DB Navigator
tree.
Use the Materialized (Snapshot) View Editor to view, create or define snapshots.
Nested Table
Editor
Use the nested table editor when you require a large, efficient collection.
Open DB
Object
Select and open a database object similar to the standard Windows File | Open command.
See
Select DB Object Dialog
.
See
Edit Menu
.
Open Object at Cursor
Oracle Logon
Dialog
Outline
Manage your database connections, including to create a database connection.
Show the syntax tree of the current source.
See Code Editor | Toolbox |
Outline
.
Show SQL Navigator messages and server output including Oracle errors.
Output
Window
PL/SQL
Debugger
Tools and features for debugging stored programs.
See Code Editor | Toolbox |
PL/SQL Debugger .
SQL Navigator 7.2
User Guide
37
Icon Component
Name
Description
PL/SQL
Profiler
Analyze the execution time and efficiency of your stored programs.
Profile Editor
Use the Profile Editor to view, create or alter profiles.
Profile
Manager
Backup and Restore SQL Navigator profiles.
Product
Authorization
See
Enter A New Authorization Key
.
Project
Manager
Publish Java to PL/SQL
The Project Manager window provides instant access to your frequently used database objects and connections.
Create a PL/SQL package from a Java class stored in the database.
Quick Browse
View chained rows information.
Redo Log
Group Editor
Role Editor
Use the Redo Log Editor to view, create, or alter Redo Logs.
Use the Role Editor to view or create roles.
Screen
Layout
Save up to ten layouts of dockable windows and recall them.
See
View Menu
| Screen Layout
Search
Knowledge
Xpert
Sequence
Editor
Server Side
Installation
Wizard
Select DB
Object Dialog
Drag and drop optimized routines directly into your program editor.
Use the Sequence Editor to view, create, or alter sequences.
Install server side objects.
Select and open a database object similar to the standard Windows File | Open command.
Switch between open Oracle Sessions.
Select
Session
Session
Browser
Source
Preview
Manage sessions in the Session Browser.
SQL History
Preview the source code of text objects (stored programs, triggers and views), or a package’s individual entry points.
The History tool lists successfully executed SELECT, UPDATE, DELETE commands and
PL/SQL blocks up to 1000 of the most recent ones in the current session.
See Code Editor | Toolbox |
History
SQL Modeler
SQL Modeler dialog provides a fast means for creating the framework of a Select,
Insert, Update, or Delete statement. You can select Tables, Views, or Synonyms, join columns, select columns, and create the desired type of statement.
SQL Navigator 7.2
User Guide
38
Icon Component
Name
Description
SQL
Optimizer
The SQL Optimizer makes observations about a selected SQL statement and the underlying database environment, then recommends several options to improve performance.
Synonym
Editor
Use the Synonym Editor to view or create synonyms.
Table Editor
Use the Table Editor to create, alter, or define tables.
Task Manager
SQL Navigator executes long-running tasks in separate threads in the background. The
Task Manager is a display of all active and complete tasks for the current session.
User Editor
Use the User Editor to create, grant or revoke roles and privileges to users, including forcing a password to expire.
Varray Editor
Use the Varray Type Editor to create varying arrays.
View Editor
Use the View Editor to view, create, or alter views.
View
Difference
The Difference Viewer displays the compared objects in a split window.
See
Difference Viewer .
SQL Navigator’s editing tools for database objects.
Visual Object
Editors
Wrap Code
The Wrap Code utility provides an easy way to access Oracle’s Wrap Code utility.
Main Menu Keyboard Shortcuts
Generally available keyboard shortcuts are: Close Current Window = CTRL+F4 | Refresh = F5.
Icon Main Menu
File | Open File
File | Print
Edit | Undo
Edit | Redo
Edit | Indent
Edit | Unindent
Edit | Comment
Edit | Uncomment
Edit | Upper Case
Edit | Lower Case
Keyboard Shortcut
CTRL+O
CTRL+P
ALT+Backspace
SHIFT+ALT+Backspace
CTRL+I
CTRL+U
ALT+F7
CTRL+ALT+F7
CTRL+ALT+U
CTRL+ALT+L
SQL Navigator 7.2
User Guide
39
Icon Main Menu
Edit | Insert | DBMS_OUTPUT.PUT_LINE(»)
Edit | Insert | Debug Variable
Edit | Go to Line
Edit | Jump to Matching Bracket
Edit | Toggle Bookmark | Bookmark
Edit | Go to Bookmark | Bookmark
Edit | List Bookmarks
Edit | Open Object at Cursor
Edit | Describe Object at Cursor
Search | Find
Search | Replace
Search | Find Next
Search | Find Previous
Search | Find Objects
Search | Find Recycle Bin Objects
View | Project Manager Window
View | Code Editor
View | DB Navigator
Session | Stop
Object | Create DB Object
Object | Open DB Object
Object | Open
Object | Describe
Object | Drop
Object | Drop with Purge
Object | Extract DDL
Object | Compile | Compile/Rebuild
Keyboard Shortcut
CTRL+D
F2
CTRL+G
CTRL+J
SHIFT+CTRL+n
CTRL+n
ALT+B
CTRL+Enter
CTRL+F3
CTRL+F
CTRL+H
F3
SHIFT+F3
CTRL+ALT+O
CTRL+ALT+B
CTRL+W
CTRL+M
F12
Scroll Lock
Alt+Insert
CTRL+ALT+D
CTRL+F2
CTRL+F3
ALT+Delete
SHIFT+Delete
CTRL+D
CTRL+F9
SQL Navigator 7.2
User Guide
40
Icon Main Menu
Object | SQL Modeler
Open the selected object in SQL Modeler.
Object | Quick Browse
Object | Edit Data
Object | Grant
Object | Locate in Tree
Tools | View Difference
Tools | Formatter Tools | Format Code
Tools | Search Knowledge Expert
Window | More Windows
Help | Contents
Help | Context Help
Keyboard Shortcut
CTRL+B
F3
CTRL+E
ALT+G
CTRL+L
CTRL+ALT+V
CTRL+R
CTRL+K
ALT+0
CTRL+F1
F1
TIP:
Many additional shortcuts are available for the various modules of SQL Navigator. For example, see the
Code Editor Keyboard Shortcuts
.
Customize The Screen Layout
Float / Dock
You can save multiple screen layouts of floating / docked items as per the
View Menu
| Screen Layout.
TIP:
While moving a dockable item you can prevent it from docking by holding down the CTRL key.
Items that can be floating or docked
More Information
Main Menu Bar The main menu bar can be floating or docked.
Dockable
Windows
The following windows are dockable. They can be docked to any side of the SQL Navigator application window or any other dockable window. You can dock several windows to the same site.
l
Auto Describe Tool
SQL Navigator 7.2
User Guide
41
Items that can be floating or docked
More Information
l
Code Assistant
l
Output Window
l
Project Manager
l
Source Preview
l
Task Manager
Dockable windows open in the same state (floating or docked) and in the same screen position or at the same site as when they were last closed. Dockable windows retain size and position between sessions.
The size and location of dockable windows are remembered in screen layouts as per
View
Menu
| Screen Layout.
NOTE:
l
The size and location of the Output Window is remembered only when docked.
l
When the Output Window is docked, the Output Window remains visible («on top») when other windows are opened. When the Output Window is not docked it can be hidden behind the current window.
Toolbars available in the
Main Window
The toolbars can be docked to any side of the SQL Navigator application window or can float on top of the current window.
Task Bar The task bar can be docked to any side of the SQL Navigator application window or can float
Toolbars in the Main Window
Customizations
Show/Hide Buttons
Add/Remove Toolbars.
Reorder Items.
Add items from a master list.
Description
1. If the toolbar is docked, click the down arrow to the far right of the toolbar.
If the toolbar is floating, click the down arrow on the title bar.
2. Click Add or Remove Buttons.
3. Select the buttons to show.
1. If the toolbar is docked, click the down arrow to the far right of the toolbar.
If the toolbar is floating, click the down arrow on the title bar.
2. Click Add or Remove Buttons | Customize.
SQL Navigator 7.2
User Guide
42
Customizations
Reset the Toolbar to Default.
Description
TIP:
While the Customize dialog is open, move the mouse pointer over a toolbar button and right click. Choose an option from the shortcut menu. Reset the toolbar, delete or rename the button, change its appearance or add a separator.
1. If the toolbar is docked, click the down arrow to the far right of the toolbar.
If the toolbar is floating, click the down arrow on the title bar.
2. Click Add or Remove Buttons | Reset Toolbar.
Main Menu Bar
Customizations More Information
Customizable
Menu Items
While the menu is docked, click the down arrow in the far right corner. If the menu is floating, click the down arrow on the title bar.
SQL Navigator 7.2
User Guide
43
4
Oracle Logon
Oracle Logon Dialog
Manage your database connections, including to create a database connection.
Oracle Client Settings
Field
Oracle Home/Client
TNSNAMES/LDAP/SQLNET Configuration File Path
Names.Directory_Path
Description
Select from the list of available Oracle Home names.
The location of your Oracle configuration files.
As specified in your sqlnet.ora file.
Connection Parameters
Fill in the fields for one of the TNS, Direct or LDAP tabs.
TNS
Field
Database
Description
Select from the list of database connections in the TNSNAMES.ora file.
Direct
DIRECT is used for Direct Connection.
Field
Host
Port
Description
Enter the name or IP address of the machine which hosts the Oracle server.
Enter the port number for the Oracle server.
SQL Navigator 7.2
User Guide
44
Field
Service
Name
SID
Description
Enter the service name of the Oracle server.
Enter the Oracle System Identifier (SID) of the Oracle server. Use this option when connecting to an instance running a version earlier than Oracle 8.1.
LDAP
Select from the databases on the LDAP server.
Username / Password
Field Description
Username Your Oracle username to the database.
When Save Password is selected the username field automatically recalls username/password combinations based on the first letter(s) entered into the field.
Password Your Oracle password to the database/username combination.
Save password
Select to save the password for this database/username combination.
NOTE:
l
Your password is saved in encrypted format.
l
Ensure you have safeguards in place to prevent other users from physical access to your computer (for example, automatic keyboard locking).
l
If you have saved a password then deselect Save Password to delete it.
TNSNames
Editor
Add a new service and configure the TNSNames.ora file:
Oracle TNS Configuration
.
TIP:
To change the logon password for the active connection: Close this dialog. Select Session | Change
Password to open
Change Logon Password
.
Options
Option Description
Bytes per
Character
Allow the system to automatically detect the number of bytes per character for the connection or select from the list of available numbers.
The default preference is set in
View | Preferences
|
General | Session
. If you receive ORA-01026
SQL Navigator 7.2
User Guide
45
Option
Connect
As
Description
errors (or similar) when working with the database, we recommend setting this preference to the minimum possible value (2, 3 or 4) that eliminates the errors.
Select the type of system privileges you want to use for this connection—Normal, SYSDBA, or
SYSOPER.
Your Username must first be granted these privileges. For information about system privileges, see the Oracle Database Administrator’s guide.
Enable using DBA views
Selected
Not Selected
Use DBA views to query the Oracle Data Dictionary.
Use ALL views to query the Oracle Data Dictionary.
Enable
Trace
For more information, see DBA Dictionary Views on page 48 .
Your Username must first be granted appropriate Oracle privileges.
When selected, SQL Navigator generates a log file of database operations and results. Dell
Support may request you enable trace for troubleshooting purposes.
Enabling Trace slows down your access to the database.
Oracle TNS Configuration
Field
Name
Description
The service name of the database.
Click Add to create a new configuration —
Oracle TNS Configuration
Service configuration
Field
SID
Service name
Connection type
Use Oracle 8i release 8.0
Description
Specify the Oracle Instance.
Click Advanced to open the
Advanced Service Options Dialog
.
This field is visible if Use Oracle 8i release 8.0 Compatible Identification is selected.
Type the service name.
This field is visible if Use Oracle 8i release 8.0 Compatible Identification is clear.
Select a database connection type from the Connection Type list for the net service name.
Oracle Corporation recommends you use the default setting of Database
Default.
Select if the destination service is prior to release 8.1, then type its SID in
SQL Navigator 7.2
User Guide
46
Field
Compatible Identification
Description
the SID field.
Clear if the destination service is an Oracle release 8.1 database, then type the service name in the Service Name field.
Address configuration
Field
Protocol
Host Name
Port Number
Add
Advanced
Description
Select a protocol from the list.
The host name of the computer where the database is located.
The TCP/IP port number. The default is 1521.
Add an address configuration.
Address List Options Dialog
Advanced Service Options Dialog
Option
Instance Name
Session Data Unit
Use for Heterogeneous
Services
Description
Type the database instance to access
Type the SDU (Session Data Unit) to optimize the transfer rate of data packets being sent across the network.
Select this option, if you want an Oracle8i server to access a non-Oracle system.
For further information see the Oracle Administrator’s Guide.
Address List Options Dialog
Option
Try each address in order, until one succeeds
Randomly try each address until one succeeds
Try one address selected at random
Use each address in order until a
Description Compatibly with Net8
8.0 Clients
FAILOVER=ON for release 8.1 clients
SOURCE_ROUTE=OFF for pre-release
8.1 clients.
LOAD_BALANCE=ON
FAILOVER=ON
Yes
No
LOAD_BALANCE=ON
SOURCE_ROUTE=ON
No
Yes
SQL Navigator 7.2
User Guide
47
Option Description Compatibly with Net8
8.0 Clients
destination is reached
Use only the first address LOAD_BALANCE=OFF
FAILOVER=OFF
SOURCE_ROUTE=OFF
No
Best Practice: Unless multiple address options are configured, the first address in the list is contacted.
DBA Dictionary Views
By default, SQL Navigator gives you USER object data dictionary views, meaning you can see only objects you own or for which you have been granted object privileges.
When you Enable DBA views in SQL
Navigator you can…
Edit Profiles, Roles, and Users.
View the following nodes of the DB Navigator tree: l
Roles l
Some nodes under Users l
Datafiles under Tablespaces l
Redo Log Groups l
Rollback Segments l
Partitioned tables in another user’s schema
Oracle Logon Dialog
| Enable DBA Views How to enable DBA views in SQL
Navigator
Oracle requirements to query DBA views
Your username must have one of the following roles or privileges: l
DBA Role l
SELECT_CATALOG_ROLE Role l
SELECT ANY TABLE Privilege
DBA role and SELECT_CATALOG_ROLE role must be defined as the default roles in
Oracle.
In addition to the SELECT ANY TABLE privilege, Oracle 9i may also require the user to have the SELECT ANY DICTIONARY privilege if the O7_DICTIONARY_ACCESSIBILITY initialization parameter is set to FALSE.
For information about system privileges, see the Oracle Database Administrator’s
guide.
SQL Navigator 7.2
User Guide
48
NOTE:
Enabling DBA dictionary views may affect performance for some Oracle instances, depending on the number of users and objects, as well as other environmental factors.
How SQL Navigator handles the views
When DBA dictionary views are selected, SQL Navigator interrogates the data dictionary differently:
Regardless of DBA View setting, SQL Navigator uses USER_% views for the logged-on user’s objects.
Without DBA Views, SQL Navigator uses ALL_% views for other user’s objects.
With DBA Views, SQL Navigator uses SYS.DBA_% views for other user’s objects.
Troubleshooting Connections to Oracle
Message
Directory not in path
Oracle
Required
Support Files not installed
Connect strings for local and remote database
Solution
Ensure that the Oracle bin directory is specified in the path.
Enter the path command in the DOS prompt to check the path. If the directory is not in the path, add it to the path in autoexec.bat and reboot the system.
Ensure that at least one of the 32 bit Oracle Required Support Files are installed. These files are installed by default when you install any of the 32 bit Oracle products such as SQL*Net and SQL*Plus.
To verify whether the Required Support Files are installed, start the Oracle installer. All installed components are listed in the right side of the dialog box. If the Required Support
Files do not appear on the right-hand side list box, install these files from Oracle software media.
If you are connecting to a local database use 2: (or a blank) as the connect string. If you are connecting to a remote database:
• Ensure that the 32 bit SQL*Net client is installed
• Ensure that the file tnsnames.ora has been properly configured using the SQL*Net Easy
Configuration
• Ensure that proper network connectivity is available to the remote computer. Use the
TNSPING Utility from Oracle. Open a command prompt and enter tnsping <instance name> 6.
If correctly configured, SQL*Net responds with 6 OK messages and measured response times.
• Ensure that the SQL*Net listener application is running on the remote computer.
Command Line Parameters
Connection details can be passed via command line parameters. In addition, a key parameter /EXEC can be passed along with the file name in the command line to force execution of a script.
SQL Navigator 7.2
User Guide
49
TIP:
Avoid storing your password in a Windows startup shortcut unless your computer is protected from unauthorized access.
To connect to the database immediately on startup and bypass the
Oracle Logon Dialog , pass the parameter in
the command line when starting SQL Navigator. Use the following format:
CONNECT=USERNAME/[email protected]_string
Note the upper-case username. For example:
CONNECT=SCOTT/[email protected]
There is an alternative method, using /u, /p and /cs parameters (user, password, and connect string, respectively). For example, you could create a Windows shortcut with the following Target property:
«C:Program FilesDellSQL Navigator for Oraclesqlnavigator.exe» /u=scott /p=tiger /cs=Marvin817
SQL Navigator 7.2
User Guide
50
5
Code Editor
SQL Development
The Code Editor opens ready to edit SQL code.
More Information Brief Description
Code Editor SQL
The Code Editor toolbar in SQL development.
Edit, Compile And Execute
Write SQL code. Compile the code.
SQL Query Results Data Grid
Browse the results of executed SQL queries.
SQL Query Log (The Spool Tab)
View a log of executed SQL statements. Retrieve executed SQL statements.
PL/SQL Development
The Code Editor layout for PL/SQL development is used when a stored object is opened or is being created.
More Information
Code Editor PL/SQL
Edit, Compile And Execute
PL/SQL Execution Console
Brief Description
The Code Editor toolbar in PL/SQL development.
Write PL/SQL code. Compile the code.
Set input parameters. Run the PL/SQL program.
Toolbox
Icon More
Information
Brief Description
Code Explorer
Show a hierarchical view the code.
SQL Navigator 7.2
User Guide
51
Icon More
Information
Outline
Brief Description
Show the syntax tree of the current source.
DB Explorer
Describe
Find and open database objects.
Show the data structure for tables, indexes, views and synonyms.
History
Show the most recent successfully executed SELECT, UPDATE, DELETE commands and
PL/SQL blocks in the current session.
Dependencies
Show the Dependants and Depends On objects of the current script.
Columns
Show/hide columns of the retrieved table in the data grid.
PL/SQL
Debugger
Tools and features for debugging stored programs.
Show/Hide the PL/SQL Debugger in the Toolbox from the Code Editor toolbar.
TIP:
l
Align the Toolbox left or right of the Code Editor (Right Click on the Toolbox).
l
Pin/Unpin the Toolbox to allow more editing space.
Code Editor SQL
The Code Editor opens ready to edit SQL code. The toolbar is appropriate to SQL development. Each of the
toolbar icons is described below. In addition, all standard editing functions are available. See For more information, see Edit, Compile And Execute on page 60 . for more information.
General Code Editor Functions
Icon Tool Tip
Back
Forward
New SQL
Description
Navigate between hyperlinked database objects (in the editing pane) and their dependent objects and components.
New
Stored
Object
Open File
Write a single SQL statement or a series of SQL statements in a new editing pane. The toolbar will open for SQL development.
Create a stored object. Open the
New Stored Object Dialog
.
Open an external file in the Code Editor.
An alternative way to open file is to drag and drop a file from Windows Explorer to the
SQL Navigator window.
SQL Navigator 7.2
User Guide
52
Icon Tool Tip Description
Save to File Save the contents of the current Code Editor pane to an external file.
Open
Object
Auto Code
Completion
Vertical
Split
Locate a stored object using the
Select DB Object Dialog
and open the object in the editing pane.
Turn On/Off
Auto Code Completion
. When turned on, the Code Editor matches variables,
parameters, procedures and types as you type.
Adjust the layout of the editing pane.
Select from the options to split the editing pane in half either horizontally or vertically.
The content of the editing pane will be visible in both panes. You can scroll the panes independent of each other.
TIP:
To open a different script in one of the panes:
1. Open the second script in a new editing pane of the Code Editor.
2. Return to the split panes. In the pane to load the second script right-click and select Split/Compare | Second Source.
3. Select the second source from the list of all scripts currently open in the
Code Editor.
SQL Specific Functions
Icon Tool Tip
Send to Session
Description
Switch to other sessions and continue working within the same window, with the same script. This feature allows you to run the same script against different databases without the need to copy it into another instance of the
Code Editor. It also allows you to correct the oversight of opening a file into the wrong session.
You can choose from a list of current sessions or start a brand new session.
NOTE:
l
When you run that window (execute the SQL or compile the
PL/SQL code, for example), SQL Navigator will prompt you to change to the new (current) session. It allows you to quickly correct the oversight of opening a file into the «wrong» session.
l
You can change session while editing SQL scripts only. This option is not available to stored programs.
SQL Navigator 7.2
User Guide
53
Icon Tool Tip
Add Condition
Remove All
Conditions
Updateable
Stop on Error
Description
Insert Where clause conditions in the SQL script using a graphical interface.
1. Type the SQL statement up to the where clause (Select * from emp_table
).
2. Click Add Condition to open the Add Filter window.
3. Select and fill in the field, operator and value(s) accordingly.
4. Click Ok to insert the where clause.
The Value(s) field is shown depending on which Operator has been selected.
Use when there is no semicolon (;) in the script.
On Edit the data returned by SQL queries. Update, delete and insert new records and save your changes back to the database. This feature is particularly useful for creating test data.
TIP:
l
Updateable requires simple SELECT statements with no joins, subqueries in select clause, calculated fields, group by, having, count(), substr or DISTINCT.
l
Updateable queries are slow to execute.
Off Data returned by SQL queries is read-only.
Use in conjunction with Execute to End to validate syntax.
Not
Selected
Execute all SQL statements. Highlight all erroneous statements.
Selected Stop execution of SQL statements on encountering the first error.
Highlight the offending code.
Limit the rows retrieved on execution of the SQL statement: Fetch All
Not Selected Retrieve enough rows to fill the visible area of the grid.
Fetch additional rows on scroll down requests.
Selected Retrieve all rows.
Spool Screen Select to capture a log of executed SQL statements in the
SQL Query Log (The
Spool Tab)
.
Scan
Defines/Substitutions
Turn On/Off
Scan Defines/Substitutions
Turn on Scan Defines/Substitutions if your script uses variables or text that contain the characters &, &&, or = :[bind variable]. Otherwise, the statements containing the variables will generate an error.
Echo SQL On/Off
SQL Navigator 7.2
User Guide
54
Icon Tool Tip
SQL History
Expand SQL Pane
Description
Show/Hide the Toolbox
History
If the Toolbox is unpinned, showing History will not make History visible until the Toolbox is shown.
Maximize screen real estate of the SQL pane.
Skip to Top
Skip to Previous
Execute to End
Execute Step
Stop
Skip to Next
Skip to Bottom
Execution Control Buttons: l
The location of the cursor marks the execution start point.
l
Use Skip to Previous and Skip to Next to move the cursor through the
SQL statements.
l
Click Execute to End or press F9 to run the script to the end.
l
Click Execute Step or press F8 to execute the current statement.
l
To work with the result see
SQL Query Results Data Grid
.
TIP:
l
You cannot run multiple queries within the same session simultaneously. If you need to run multiple queries simultaneously, you can open another connection to the same database.
l
To validate syntax use Execute to End in conjunction with Stop
on Error.
PL/SQL Debugger Show/Hide the Toolbox
PL/SQL Debugger
If the Toolbox is unpinned, showing the PL/SQL debugger will not make the
PL/SQL debugger visible until the Toolbox is shown.
Abort Debug Session For more on debug see
PL/SQL Debugger
.
Team Coding Version Control
To enable Team Coding see
Team Coding Settings
.
Icon Tool
Tip
Description
Get
Latest
Revision
Get the latest version of an object or script as it is held in the Version Control repository.
The Get Latest Revision command overwrites the version of the object or script in the database, replacing it with the latest version held in the VCS repository. You can use the
View Differences Dialog
to compare versions before overwriting the object.
Check
Out
Check out or check in the current object or script.
Open:
Check In / Check Out Dialog
SQL Navigator 7.2
User Guide
55
Icon Tool
Tip
Check
In
Undo
Check
Out
Description
Cancel the check-out. You are prompted to confirm that you want to discard any changes you have made and restore the database version of the item as it was prior to check-out.
Confirm
Yes
You have made and saved changes to the object and you want to discard those changes.
Confirm
No
You have made and saved changes to the object and you want those changes to be retained in the database. As a result the version saved in the third party version control repository will be different from the version saved in the database.
Tools and Applications
Icon Tool Tip
SQL Optimizer
Explain Plan
PL/SQL Formatter
Description
SQL Optimizer
Explain Plan Tool
Format PL/SQL, SQL*Forms, Oracle Forms, and SQL*Plus source code.
Menu
Icon
Menu
Name
Format
Text
Syntax
Check
Profile
Code
More Information
Format the entire source currently in the editor.
To format just a selection, select the text you want to format.
Output is displayed in the
Output Window
.
Check the syntax. Output is displayed in the
Output
Window
.
If syntax errors are detected, the text stays unchanged. The errors are displayed in the Output
Window.
Create a summary of the code statistics. You can copy to clipboard or save to file.
Multi-File
Formatting
Open the Multi-File Formatting Selection dialog.
l
Select Folder and enter the folder that directly
SQL Navigator 7.2
User Guide
56
Icon Tool Tip
Knowledge Xpert
Code Analysis
Description
Menu
Icon
Menu
Name
More Information
Format
Options contains the files you want to format. Or l
Select Files and enter the files you want to format.
Select Backup files to folder to create a backup copy of the files you are about to format.
Define how the Formatter Tool formats code.
Formatting Options
Search Knowledge Xpert
Code Analysis
Code Editor PL/SQL
The toolbar appropriate to PL/SQL development opens when you create / open a stored object in the Code
Editor. Each of the toolbar icons is described below. In addition, all standard editing functions are available. For more information, see Edit, Compile And Execute on page 60 .
General Code Editor Functions
Icon Tool Tip
Back
Description
Navigate between hyperlinked database objects (in the editing pane) and their dependent objects and components.
Forward
New SQL Write a single SQL statement or a series of SQL statements in a new editing pane. The toolbar will open for SQL development.
Create a stored object. Open the
New Stored Object Dialog
.
New
Stored
Object
Open File Open an external file in the Code Editor.
An alternative way to open file is to drag and drop a file from Windows Explorer to the
SQL Navigator window.
Save to File Save the contents of the current Code Editor pane to an external file.
Open Locate a stored object using the
Select DB Object Dialog
and open the object in the
SQL Navigator 7.2
User Guide
57
Icon Tool Tip Description
Object
Auto Code
Completion editing pane.
Turn On/Off
Auto Code Completion
. When turned on, the Code Editor matches variables,
parameters, procedures and types as you type.
Vertical
Split
Adjust the layout of the editing pane.
Select from the options to split the editing pane in half either horizontally or vertically.
The content of the editing pane will be visible in both panes. You can scroll the panes independent of each other.
TIP:
To open a different script in one of the panes:
1. Open the second script in a new editing pane of the Code Editor.
2. Return to the split panes. In the pane to load the second script right-click and select Split/Compare | Second Source.
3. Select the second source from the list of all scripts currently open in the
Code Editor.
PL/SQL Specific Functions
Icon Tool Tip Description
Open/Create
Package Body
Navigate to a function/procedure inside the package body.
Entry Move the cursor to the function / procedure definition in the code.
Undo all changes Undo all changes since the last save.
Generate DDL script
Generate a DDL script of the procedure / function / package. Switch between the
DDL script and procedure / function / package using the tabs at the bottom of the screen. While the DDL script is on view the Code Editor toolbar adjusts to editing
SQL code.
Save to Database Save changes. Submit the PL/SQL to the database, compile, and report errors
Save to Database
As (Clone)
Execute
Procedure /
Function
Save (clone) the object. The new stored program will have a definition identical to the stored program currently open in the editor. Optionally select a new schema and name for the object.
Open the
PL/SQL Execution Console
from editing mode.
If the PL/SQL Execution Console is already open then execute the code.
TIP:
Once you have opened the PL/SQL Execution Console, toggle between execution and editing mode via the tabs at the bottom of the screen.
Use if required to stop execution of the procedure before it finishes.
Stop procedure execution
Toggle Add / Remove breakpoint on the selected line of code. For more on debug see
SQL Navigator 7.2
User Guide
58
Icon Tool Tip Description
Breakpoint
PL/SQL Debugger
.
PL/SQL Debugger You can watch the result values during runtime. You can run stored programs in parallel by opening additional sessions within SQL Navigator.
Show/Hide the Toolbox
PL/SQL Debugger
Abort Debug
Session
For more on debug see
PL/SQL Debugger
.
Team Coding Version Control
To enable Team Coding see
Team Coding Settings
.
Icon Tool
Tip
Description
Get
Latest
Revision
Get the latest version of an object or script as it is held in the Version Control repository.
The Get Latest Revision command overwrites the version of the object or script in the database, replacing it with the latest version held in the VCS repository. You can use the
View Differences Dialog
to compare versions before overwriting the object.
Check
Out
Check
In
Check out or check in the current object or script.
Open:
Check In / Check Out Dialog
Undo
Check
Out
Cancel the check-out. You are prompted to confirm that you want to discard any changes you have made and restore the database version of the item as it was prior to check-out.
Confirm
Yes
You have made and saved changes to the object and you want to discard those changes.
Confirm
No
You have made and saved changes to the object and you want those changes to be retained in the database. As a result the version saved in the third party version control repository will be different from the version saved in the database.
Tools and Applications
Icon Tool Tip
SQL Optimizer
Description
SQL Optimizer
SQL Navigator 7.2
User Guide
59
Icon Tool Tip
Explain Plan
PL/SQL Formatter
Knowledge Xpert
Code Analysis
Description
Explain Plan Tool
Format PL/SQL, SQL*Forms, Oracle Forms, and SQL*Plus source code.
Menu
Icon
Menu
Name
Format
Text
Syntax
Check
More Information
Format the entire source currently in the editor.
To format just a selection, select the text you want to format.
Output is displayed in the
Output Window
.
Check the syntax. Output is displayed in the
Output
Window
.
If syntax errors are detected, the text stays unchanged. The errors are displayed in the Output
Window.
Create a summary of the code statistics. You can copy to clipboard or save to file.
Profile
Code
Multi-File
Formatting
Open the Multi-File Formatting Selection dialog.
l
Select Folder and enter the folder that directly contains the files you want to format. Or
Format
Options l
Select Files and enter the files you want to format.
Select Backup files to folder to create a backup copy of the files you are about to format.
Define how the Formatter Tool formats code.
Formatting Options
Search Knowledge Xpert
Code Analysis
Edit, Compile And Execute
The Code Editor opens ready to edit SQL code. You will see the SQL Toolbar (
Code Editor SQL
) and a blank canvas to write SQL code. If you create / open objects requiring PL/SQL code you will see the PL/SQL Toolbar
( Code Editor PL/SQL
).
Features
Standard
Description
All standard editing functions are available.
SQL Navigator 7.2
User Guide
60
Features
Editing
Functions
Description
See:
Control the contents of the Code Editor window
Manage objects in schemas
Handle text-and code
Search for code or objects
Access to various SQL Navigator windows and tools
Manage database sessions
Access add-ons, integrated applications and additional tools
Working with objects
Toolbars for
PL/SQL
Code Editor SQL
as appropriate.
Main Menu |
Main Menu |
Main Menu |
Main Menu |
Main Menu |
Main Menu |
Object Menu
Edit Menu
Search Menu
View Menu
Session Menu
Tools Menu
or
Code Editor
See also: l
Main Menu Keyboard Shortcuts
l
Code Editor Keyboard Shortcuts
l
Toolbars
Some functions are duplicated on the shortcut menu. Right click in the editing pane to open the shortcut menu.
Drag and drop objects from the following SQL Navigator modules into the editing pane.
l
DB Explorer
l
Project Manager
l
DB Navigator
Show the definition of the object at the cursor location:
1. Right click on the object in the editing pane and select Go to Definition.
2. The result is shown in the
Output Window
.
Describe the object at the current cursor location:
1. Press CTRL and click the object’s name.
2. This opens
Describe
for the object.
TIP:
l
To construct SQL statements, drag and drop column names from the Describe tool into the editing pane.
l
If the described object is a text object (view, procedure, function, package or packaged procedure/function) and the
Source Preview
window is open, the object’s source is automatically previewed.
SQL Navigator 7.2
User Guide
61
Features
Automated
Coding
Assistance
Description
Auto Code
Completion
As you type an identifier the editor displays a selectable list of matching symbols (variables, parameters, procedures, types) in the current scope.
TIP:
Turn on/off code completion from the Code Editor Toolbar.
Dot-lookup Type a dot character after a name of variable. The editor automatically displays a selectable list of members of a PL/SQL record, cursor, package or %ROWTYPE record.
Code
Explorer
The Code Explorer displays a hierarchical list of all symbols in the package or procedure, and highlights the procedure the cursor is currently in. Doubleclick on a symbol to navigate within the program. It dynamically parses and checks syntax.
Hyperlinks To see the declaration of an identifier, press Ctrl+click. The text cursor automatically jumps to the declaration of the symbol if it’s defined within the same program. If it’s a name of an external database object, an Auto Describe opens.
Syntax tool tips
Point to a variable, parameter or procedure with the cursor to see a description of it.
Insert ready made code
Insert ready made code into the editor.
1. Place the cursor in the editor window where you want the code to be inserted
2. Press Ctrl+J. The template names display in a drop-down list.
3. Select the name of the template you want to insert from the drop-down list.
4. Press Enter.
To manage, create and edit the ready made code, see
Code Templates .
Drag and drop PL/SQL syntax, SQL functions, column names, and database object names into code using the
Code Assistant .
Code with multiple
SQL statements and
PL/SQL blocks
Code
SQL
Description
If you write multiple SQL statements in the editing pane then ensure each SQL statement ends with either: l l a semicolon (;)
» / » on the next line.
TIP:
There is a quick way to construct SELECT statements for multiple tables. Highlight the tables in
DB Explorer , drag and drop them into the
editing pane. This behavior is set in View | Preferences |
Code Editor |
General
| Drag & Drop.
PL/SQL PL/SQL blocks entered into the script must have either l a forward slash / l or a period mark .
SQL Navigator 7.2
User Guide
62
Features Description
Code Description
following the last line of the block.
This is necessary because the PL/SQL blocks can themselves contain blank lines and semicolons.
When you create or execute a PL/SQL anonymous block, the semicolons are required in the SQL statement. For example
BEGIN
Test_procedure;
END;
Execute the SQL query or
Compile the PL/SQL code
Execute the SQL query
See: The toolbar: Code Editor SQL
.
Compile the PL/SQL code
See:
Code Editor PL/SQL ,
PL/SQL Debugger ,
DBMS_OUTPUT
.
You can compile a program that is stored in the database. While the program is being edited, use the Save command to compile and store it. Once the program has been modified, you will need to save the program prior to any further usage of the Compile/Rebuild functionality — This is to ensure that the changes in the program have been applied to the database.
SQL Navigator displays all syntax and compiler errors in a separate scrollable pane. Click on the error text to show the source code at the source of the error. Double click on the error text to show the error message description, cause and actions as per the Oracle documentation.
Also watch for feedback in the
Output Window
.
Auto Reparse
Many features of the Code Editor, including the Code Explorer window, code completion, tool tip display of program arguments, bracket matching, collapse loops/blocks, and others, rely on automatic parsing of the PL/SQL code and internally generating a symbol table. This parsing occurs when the editor first loads the objects, and it also occurs in the background in order to maintain the symbol table as the user edits the code.
You can also manually trigger a full reparsing (updating of the internal symbol table) at any time by right-click and select Auto Reparse from the shortcut menu. However, when loading a really large script having this option on will slow down SQL Navigator. Hence, to avoid wasting
CPU resources, you should turn this option off when editing large scripts.
Symbols in the gutter margin
Symbols in the gutter margin provide a visual indication of the statement’s status.
SQL Navigator 7.2
User Guide
63
Features
Look and
Feel
Description
Icon Description
Enabled breakpoint. For more on debug see
PL/SQL Debugger
.
Disabled breakpoint. For more on debug see
PL/SQL Debugger
.
Current execution line
Invalid breakpoint. For more on debug see
PL/SQL Debugger
.
This statement executed with errors.
Information about the error is displayed. Double click on this information to open the
Oracle Error Information dialog.
This SELECT statement produced results.
TIP:
l
Double click on the icon to jump to the associated results tab (Press
CTRL+F11).
l
There can be multiple results displays, one per statement executed.
Each result set is displayed in a separate tab.
l
See
SQL Query Results Data Grid
l
When a result tab is selected, the corresponding statement will be focused.
This non-select statement executed successfully.
This statement was executed with warnings.
Feature
Collapse /
Expand
Statements
Description
You can collapse/expand a block, procedure, loop or IF statement by clicking on the — or + symbols to hide/show codes.
TIP:
When the script is exceptionally long the collapse/expand codes may slow down the application. You can choose to disable this feature in View | Preferences |
Code Editor | General
| Enable Code
Collapsing.
Syntax highlighting
Bookmarks
The Code Editor uses colors to highlight PL/SQL and SQL keywords, text and comments.
When you set the cursor at a bracket within an expression, the matching bracket is automatically highlighted.
Lines of code can be bookmarked so you can return to them easily.
l
To add / list / go to bookmarks see the
Edit Menu .
l
(0-9) in the gutter margin indicate Bookedmarked lines.
SQL Navigator 7.2
User Guide
64
Features Description
Feature Description
Variable declarations
To move the cursor to the declaration of a variable (or Auto Describe it if it’s the name of an external database)
Press CTRL and point to the variable with the mouse.
To return to the former position in the text, press ALT+Left Arrow.
Switch between specification and body
Press CTRL+SHIFT plus the down or up arrow to move the cursor between the specification and the body.
Formatter
Tools
Automatic
Indentation
SQL Navigator’s Formatter Tools is a unique utility for reformatting existing
PL/SQL, SQL*Forms, Oracle Forms, and SQL*Plus source code. See the Code
Editor toolbar:
Code Editor SQL
or
Code Editor PL/SQL
.
When you insert multi-line text into the editor, the text is placed at the same indentation level as the current cursor position. For best results, before inserting text, place the cursor at the location and indentation level where you want the inserted text to appear.
Manipulate rectangular blocks of code
Right click on the code and select Edit | Selection Mode | Block or press
ALT+F7.
The block selection is limited to the length of the last line. To overcome this limitation select View | Preferences |
Code Editor | General
| Allow Caret
after EOL.
Right click on the code and select Edit | Show Tabs/Eol/Eof Show/hide invisible characters
Switch between tabs and spaces
Right click on the code and select Edit | Tabs/Spaces and select from the available options.
Requires View | Preferences | selected.
Code Editor | General
| Use Tab Characters
SQL*Plus command support
The Code Editor supports the following SQL*Plus commands: l
Comment Delimiters (/*…*/) l
Double Hyphen (- -) l
At Sign (@) l
Double At Sign (@@) l
Forward Slash (/) l
CONNECT
SQL Navigator 7.2
User Guide
65
l
DESCRIBE l
DISCONNECT l
EXECUTE l
REMARK
NOTE:
Consult Oracle documentation for details about Oracle’s SQL*Plus utility.
SQL Navigator also allows large scripts or SQL statements to be executed in the background, allowing you to perform other functions on your PC simultaneously.
Executing Scripts Invoked By At Sign (@) or Double At Sign
(@@) SQL*Plus Commands
Ensure that all the required scripts are in the same directory and in the correct SQL format.
In the Code Editor, invoke the master script using the @ command.
The output of the executed scripts will be displayed in the appropriate window of SQL Navigator, for example
the output of a SELECT statement will appear in the grid ( SQL Query Results Data Grid ), while the output of a
CREATE statement will appear under the appropriate node in
DB Navigator
.
Connect To A Database Via The Code Editor
To execute a SQL statement or script within the Code Editor, you must first be connected to the relevant database.
It is possible to connect and disconnect databases from within the Code Editor using SQL*Plus commands.
Connect Open a new Code Editor tab, and then type and execute a connect statement using the following SQL*Plus format
Connect name/[email protected]
Disconnect Open a new Code Editor tab, and then type and execute a disconnect statement using the following SQL*Plus format
Disconnect name/[email protected]
NOTE:
If you type and execute the disconnect statement without specifying any database details, the current session you are using will be disconnected.
Bind Variables
A bind variable is a variable in a SQL statement that must be replaced with a valid value or address of a value in order for the statement to successfully execute.
SQL Navigator 7.2
User Guide
66
Bind variables enable you to use PL/SQL in a SQL*Plus script. They provide a mechanism for returning data from a PL/SQL block so that it can be used in subsequent queries.
The Code Editor supports bind variables; use them the same way as you would use them in SQL*Plus.
Here is an example of how to declare a bind variable:
VARIABLE s_table_name varchar2(30)
To reference a bind variable in a PL/SQL block, preface it with a colon ( : )
BEGIN
:s_table_name := ‘EMPLOYEE’;
END;
/
Auto Code Completion
Scenario: Use Point-And-Click to insert column names for a database object into your code.
1. Ensure Auto Code Completion is turned on.
2. Place the cursor in the editor window where you want the column names to be inserted.
3. Type the name of the object followed by a period mark (.).
4. Select the name of the column you want to insert from the drop-down list.
5. Press Enter.
Scenario: Show a parameters list for a procedure or function.
1. Ensure Auto Code Completion is turned on.
2. Type in the name of the procedure or function followed by an open bracket ‘(‘.
3. Automatic code completion brings up a list of parameters (including alternative lists for overloaded procs/funcs).
Scenario: Dot lookup for record members.
1. Ensure Auto Code Completion is turned on.
2. Type in the name of the variable followed by a full stop.
3. SQL Navigator displays a list of matching members. Dot-lookup automatically displays a ‘pick’ list of members of a PL/SQL record, cursor, package or %ROWTYPE record.
Scan Defines/Substitutions
SQL Navigator 7.2
User Guide
67
The Code Editor lets you use substitution variables in SQL statements—similar to the way SQL*Plus handles them.
NOTE:
Turn on Scan Defines/Substitutions when using variables or text that contain the characters &,
&&, or = :[bind variable]. Otherwise, the statements containing the variables will generate an error.
Specifying substitution variables in SQL statements
Use substitution variables for flexible SQL statements. Flexible SQL statements are a powerful way to improve productivity.
Feature Example
CREATE
USER
&&UNAME
IDENTIFIED
BY &PASS;
GRANT ALL
ON EMP TO
&&UNAME;
&&UNAME
Description
Use the & symbol followed by a variable name to specify a substitution variable.
&EMPNUM
An example of a SQL statement demonstrating the use of a substitution variable
SELECT *
FROM EMP
WHERE
EMPNUM =
‘&EMPNUM’;
When you execute this SQL statement, the
Code Editor prompts you to enter the value for the employee name. This allows you to create generic SQL statements that can be reused.
You can use substitution variables in any part of the SQL statement.
SELECT
&COL1,
&COL2
FROM &TAB;
You can use &EMPNUM as a valid substitution variable name.
When you execute this SQL statement, the
Code Editor prompts you to enter the column names, as well as the table name.
You can use this concept to create other types of generic SQL statements or scripts.
One practical application of this concept is creating a generic script for creating user codes at your site.
You can use the double ampersand the same way as the single ampersand with some differences.
When you execute this SQL statement l
The first time the Code Editor encounters the && variable, it looks up the variable to determine whether it has already been defined in either a
DEFINE statement or in a previous && variable.
l
If the variable is defined, Code Editor substitutes the value in the SQL statement.
l
If the variable is undefined, the Code
SQL Navigator 7.2
User Guide
68
Feature Example Description
Editor prompts you to enter the value of the variable, defines the variable for future look-ups, and substitutes the value in the SQL statement.
l
Once a && variable is defined, you are no longer prompted to enter its value in the same session until you UNDEFINE the variable.
DEFINE and UNDEFINE
You can use the terms DEFINE and UNDEFINE to define and undefine numeric and character variables in
SQL scripts.
Statement Example
DEFINE DEFINE EMP_
NAME=‘SCOTT’
DEFINE EMP_NUM=4467
UNDEFINE UNDEFINE EMP_NAME
Description
Define a substitution variable.
A character/varchar substitution variable definition uses single quotes.
Undefine a previously defined substitution variable.
TIP:
Alternatively, right click in the editing pane and select SQL Script Options | Substitutions to open the Substitutions dialog.
New Stored Object Dialog
Select the object type:
Procedure A procedure is a sequence of executable statements that performs a particular action.
Procedures can be stored in the database (where they are also executed) and reused; they are then referred to as stored procedures. Stored procedures cannot be embedded in a SQL statement.
Function A function is a block that returns a value. Functions can be stored in the database and reused. Stored functions can be called from within a SQL statement.
Package+Body A package is an encapsulated collection of related schema objects, including modules and other constructs, such as cursors, variables, exceptions, and records. Packages allow procedures, functions, variables, and cursors that share common or related functions to be compiled and stored as a single schema object.
l
Packages allow encapsulation of internal subroutines and variables.
SQL Navigator 7.2
User Guide
69
Type+Body
Trigger l
With packages, you can specify which code is publicly available to programmers and which data should be hidden. In addition, you can implement global variables, data structures, and values; these persist for the duration of a user session.
l
Packages have both a specification and a body. The package specification declares procedures, functions, cursors, and variables.
l
The package body contains the implementation of the public procedures and functions, together with internal and private programs and variables.
Object types are user-defined data types, equivalent to «classes» in object-oriented languages, that may consist of composite data types or collections such as repeating groups or complex record types. Object types may be associated with member functions and procedures that are implemented in PL/SQL. These modules implement the methods of the object type.
Like packages, object types have both a specification and a body.
l
The specification lists the object’s attributes and member functions.
l
The body contains the actual code for the methods.
A trigger is a named PL/SQL unit that is stored in the database and executed in response to a specified event that occurs in the database.
TIP:
For each object type, SQL Navigator provides a ready made template or «shell» to make coding easier. You can modify these templates. The template name and location is defined in the opening comments when the new object is created.
SQL Statement CRUD Matrix Dialog
Insert a CRUD (Create/Update/Delete) worksheet into the code editor.
The CRUD matrix is inserted as commented text at the current cursor position. This can be a convenient way of documenting and analyzing your procedures.
SQL Query Results
SQL Query Results Data Grid
Browse the results of an executed SQL query in a dynamic grid with options for viewing, sorting and navigating.
There can be multiple results displayed, one per statement executed. Each result set is displayed in a separate tab.
NOTE:
l
When a result tab is selected, the SQL query statement that generated the result is focused.
l
If the data is LOB, XML or Array then double click on the data cell for more information. For more information, see Viewers: LOB, XML, Array on page 74 .
SQL Navigator 7.2
User Guide
70
l
The Data Grid supports National Language Support (NLS). Display and edit multi byte data.
l
To display the results of a SQL query as text see
SQL Query Log (The Spool Tab) .
Rows Retrieved
Icon Tool Tip
Count Dataset
Rows
Fetch More
Fetch All
Stop Fetching
Refresh Data
Description
The value appears in bold in the Status bar at the bottom of the Code Editor window.
Retrieve more rows.
Retrieve all rows.
Use when it takes too long to fetch more/all rows.
Populate the grid with the latest data.
Export / Print
Icon Tool Tip
Print Data Grid
Description
Print the SQL query results.
TIP:
l
Format the data grid as required for the printed page before you print.
l
To print preview, click the cursor in the data grid and click File | Print Preview.
l
Set printing preferences at View |
Preferences |
General | Printing .
Open the
Export Data Dialog
.
Export Data
TIP:
Right click on the data grid to select a row or column or the entire data grid. You can copy selected data to the clipboard. There is an option to include the row number or column heading with the copied data.
SQL Navigator 7.2
User Guide
71
Browse
Icon Tool Tip
Top
Prior Row
Next Row
Bottom
Description
Display the first, previous, next or last record.
Edit (Updateable Queries)
Turn ON Updateable in the SQL Editor Toolbar ( Code Editor SQL
) before you execute the SQL query. The status panel at the bottom of the Code Editor window says «Updateable» if the results can be edited. It says «Read
Only» if the results cannot be edited.
TIP:
l
Press F2, Space or Enter to edit straight from the cell.
l
A calendar opens for a date field (on pressing F2 or Space). Press Space to switch between the
Date field and Time field.
l
Double click on the cell if a wider editing space is required.
l
Right click on the data grid for more options.
Requirements
l
The SELECT statement must be a simple SELECT statement (no joins, subqueries in select clause, calculated fields, group by, having, count(), substr or DISTINCT). If you get an error message such as
TOKEN:.(12121,2) then your query does not conform to the restrictions for updateable queries.
l
You must have the appropriate privileges to update the table or view.
Icon Tool Tip
Add Row
Duplicate Selected Rows
Delete Selected Rows
Commit Transaction
Rollback Transaction
Description
Insert a new row before the selected row.
Duplicate the selected row(s).
The duplicated data is highlighted in the grid until it is committed.
Put the cursor on the row you want to delete and click .
Save new or modified data to the database.
Undo changes made to grid.
SQL Navigator 7.2
User Guide
72
Group Display
To create a group display, right click the data grid and select Group by this column.
Icon Tool Tip
Cancel Grouping
Description
Cancel the group display.
Format
Icon Tool Tip
Default/User Defined
Column Formatting
Format Columns By Data
Width
Description
User-defined column width. Overrides automatic column width setting.
Drag the separators to set column width.
Set the column widths to show the widest cell data.
Column names may appear truncated.
Format Columns By Name
Width
Set the column widths to show the widest column name.
Table data may appear truncated.
Format Columns By Names
And Data
Set the column widths to show the widest column data or column name
(whichever is greater).
TIP:
The formatted widths are based on the results currently visible. The column widths may change as you scroll down, retrieving new rows. To prevent the column widths from changing when scrolling,
Fetch All rows before scrolling.
Sort & Display
Icon Tool Tip
Grid View
Description
Display multiple rows in a data sheet format
TIP:
Click any column header to sort and change the sort options.
Single Row View Display details of the selected record.
Expand Data Grid Maximize screen real estate of the data grid.
Auto Refresh Select to refresh the SQL Results Data Grid every (number specified) seconds.
SQL Navigator 7.2
User Guide
73
SQL Query Log (The Spool Tab)
View a log of executed SQL statements. Retrieve executed SQL statements.
1. Enable Spool to Screen. For more information, see Code Editor SQL on page 52 .
2. Execute the SQL query. For more information, see Code Editor SQL on page 52 .
3. Click the Spool tab to view the log.
TIP:
Right click on the log to Select / Copy / Save / Print / Clear the log.
Export Data Dialog
Export the SQL query results
Options
Export to:
Columns
Rows
Description
l
Format l
HTML l
Excel® l
XML l
Spool Text l
Table INSERTs l
Delimited Text l
Unicode -Select to export the data in unicode format.
l
Open exported file — Select to open the file after it is exported.
l
Clipboard — Select to copy the data to the clipboard for subsequent pasting.
Select the columns to export.
Export all records or a specific range. The records can be sorted.
Viewers: LOB, XML, Array
View the contents of a large object (LOB, XML, Array) that is a cell in a table or result of a SQL query. Click on the cell containing the large object.
LOB Editor
You can work with the following Oracle8i LOB datatypes.
SQL Navigator 7.2
User Guide
74
Datatype
BLOB (binary)
CLOB (character)
BFILE (external)
NCLOB (multibyte character)
View
Y
Y
Y
Y
Edit
N
N
N
Y
You can use toolbar buttons to perform actions on LOBs. The actions available depend on the LOB and include: l
Copy to clipboard l
Save to disk file l
Save, then view in external application l
View in preview window l
Mask or show ASCII values between 128 and 255 l
View BFILE as image or HEX
NOTE:
SQL Navigator does not support working with LOB or Object table columns when using an Oracle 7 client connected to Oracle 8 database. For full functionality, use an Oracle 8 client to connect to an
Oracle 8 database.
ARRAY Editor
l
Click on +/- to add/remove items in the array.
l
Select any item and click the arrow buttons to reorder the list.
PL/SQL Execution Console
From the Execution Console you can select an entry point (for packages), enter the parameter input values, and choose various run options, such as profiling and directing the results to DBMS_OUTPUT.
The Execution Console helps you set various parameters for wrapping an anonymous block around a stored program so that you can execute it. If you generate an anonymous block, the Console assigns a file name to your block in the form: <Schema name>.<procedure name>.STB. If the anonymous block is for a packaged procedure, then the assigned name has an additional component—the entry point.
NOTE:
If an error occurs when trying to run a generated code block (for example, due to a syntax error), the text is opened in the
Output Window
.
SQL Navigator 7.2
User Guide
75
Run Time Parameters
Option
Parameter
Input
Load/Save
Save
Reset
Description
Name and type of each input parameter.
Define input values for each parameter.
Field Description
Def
Null
Select to use the default input value.
Select to use a Null input value.
Exp Select to use a PL/SQL Expression.
Value/Expression When Exp is selected, enter a value or expression in the
Value/Expression column.
Click to load the input parameter values from an external file.
Click to save the input parameter values to an external file.
Click to Reset changes to the parameter values.
Run Options
Command Description
Auto-create test case after code execution
When selected a test case is automatically created (when you click Execute) based on the parameter values (both input and output) currently displayed in the grid.
For more information, see Code Test on page 148 .
Use Profiler Select to use the
PL/SQL Profiler
.
Analyze the execution time and efficiency of your stored programs.
Click (…) to open the Profiler Options dialog.
Option
Collect Session
Statistics when
Creating the Profiling
Run
Before Creating the
Profiling Run …
Description
Select to store session statistics in a table.
Select when measuring performance and tuning.
Re-initialize the execution environment after a previous run, giving you a better basis for comparison between one run and another.
SQL Navigator 7.2
User Guide
76
Command
Direct results to
Output
Include exception block
Description
For more information, see PL/SQL Profiler on page 184 .
Select Generate a DBMS_OUTPUT PUT statement for each OUT parameter.
Clear Generate a Bind variable for each OUT parameter. This is useful when you want to view complex data returned by the procedure, such as REF cursors and LOBs.
For more information, see DBMS_OUTPUT on page 78 .
Select to populate the Exception block when the Stub tab is generated.
TIP:
Click Preview to generate the Stub tab.
Commit changes after code execution
Preview
Once the procedure has finished executing, do you want to COMMIT / ROLLBACK changes made by the procedure?
Show the code to be executed.
Execute
NOTE:
This generates the Stub tab. For more information, see PL/SQL Stub on page 78 . Toggle between the Code / Run / Stub tabs at the bottom of the
screen.
Execute the PL/SQL code.
If Use Profiler is selected, opens
PL/SQL Profiler .
Code Test
The Code Test panel automates the process of testing PL/SQL programs. See also the module:
Code Test
.
Command Description
Test Case Select the test case to work on.
In/Out Display the in/out parameters and associated values for the selected test case.
New
Edit
Create a test case. Open
Test Case Properties
Edit the selected test case. Open
Test Case Properties
Delete
Test >
Param
Param >
Test
Manage
Delete the selected test case.
Upload the selected test case into the parameters.
Update the selected test case with the current parameters.
Run Test
Clone and edit existing test cases, create new test cases and run multiple test cases at once.
Open
Code Test
Run the selected test case. The result of the test is displayed in the Test case status pane.
SQL Navigator 7.2
User Guide
77
Command Description
Run All
Tests
Run all code tests available for the current object.
PL/SQL Stub
Instead of using the Execution Console, you can generate and preview a PL/SQL block to execute a stored program.
To generate a stub
From the
PL/SQL Execution Console
1. Enter the run time parameters.
2. Select Include exception block to populate the exception block when the stub is generated.
3. Click Preview.
NOTE:
Different stubs are generated depending on the selected options.
DBMS_OUTPUT
The DBMS_OUTPUT package is a standard package provided by Oracle specifically for the purpose of debugging stored programs.
Feature Description
Insert a DBMS_OUTPUT.PUT_LINE statement in the code
Edit Menu
| Insert | DBMS_OUTPUT.PUT_LINE (»)
Create a DBMS_OUTPUT.PUT_LINE statement for the selected variable in the editor.
In the
Code Editor
1. Place the cursor on the variable.
2. Click Edit |Insert | Debug Variable. The debug statement is generated and copied to the clipboard.
3. Place the curser where you would like to insert the debug statement in your code. Click Edit |
Paste.
Capture output from DBMS_OUTPUT The SQL Navigator
Output Window
captures output from
DBMS_OUTPUT.
NOTE:
The SYS schema owns this package. To view the procedure and parameter definitions of this package you can display it in the Code editor.
SQL Navigator 7.2
User Guide
78
Code Editor Keyboard Shortcuts
Right Click Over The Editing Pane
Icon Right Click
Cut
Copy
Paste
Nil Select All
Auto Code
Completion
Go to
Definition
Keyboard Shortcut
CTRL+X
CTRL+C
CTRL+V
CTRL+A
CTRL+ALT+A
CTRL+Enter
Describe
Object at
Cursor
CTRL+F3
Nil Toolbox |
Next Page
CTRL+ALT+N
Nil Toolbox |
Previous Page
CTRL+ALT+P
File | New SQL
Tab
CTRL+T
CTRL+O File | Open
File
File | Save to
File
CTRL+S
Description
Remove the selected text from the editing pane. Place on the Clipboard ready to Paste elsewhere.
Alternative shortcut: CTRL+Insert
Alternative shortcut: SHIFT+Insert
Select all the text in the editing pane. This is usually followed by Cut or Copy.
Turn on/off Auto Code Completion. ( Auto Code
Completion
)
Use SHIFT+Spacebar to force code completion.
Open the selected object in an appropriate editor: Visual
Object Editors .
Errors are sent to the
Output Window .
Open
Describe
.
As per Object | Describe.
Scroll through the pages of the Code Editor toolbox.
Toolbox:
PL/SQL Debugger
| Code Explorer
|
Outline
|
DB
Explorer
|
Describe
|
History
|
Dependencies
|
Columns
Open a new tab for a SQL script in the Code Editor.
Open a file from Windows Explorer.
Save the file.
This option is enabled once the file has a name. For an
Untitlted tab, save the file using File | Save to File As first.
Create a stored object.
Object | New
Stored Object
Object |
Open/Create
Package Body
Object |
CTRL+N
ALT+N
F9
Create a body for an existing package or (object) type
Opens
PL/SQL Execution Console
.
SQL Navigator 7.2
User Guide
79
Icon Right Click Keyboard Shortcut Description
Execute
Object |
Generate
Execution
Stub
Object | Save to Database
Edit |
Duplicate Line
Edit | Format
Text
Edit |
Comment
Selection
Edit |
Uncomment
Selection
Edit | Jump to
Matching
Bracket
Bookmarks |
Toggle
Bookmark
Bookmarks |
Go To
Bookmark
SHIFT+F9
CTRL+S
ALT+Y
CTRL+R
ALT+F7
CTRL+ALT+F7
CTRL+]
Ctrl+Shift+0…Ctrl+Shift+9 Set a bookmark. The gutter margin in the Code Editor marks the bookmark.
Ctrl+0…Ctrl+9
Generate
PL/SQL Stub
.
Save the object to the database.
As per
Tools Menu
| Formatter Tools | Format Code
Enclose the selected text in comments.
Remove comment markers from the selected text.
Jump to matching Bracket.
Go to the set bookmark.
See also Edit | List Bookmarks ALT+B.
Split/Compare
| Vertical
Split
SHIFT+ALT+F11
Split/Compare
| Horizontal
Split
SHIFT+F11
Split/Compare
| No Split
SHIFT+CTRL+F11
Execute | Skip to Top
SHIFT+F7
Adjust the layout of the editing pane.
Select from the options to split the editing pane in half either horizontally or vertically. The content of the editing pane will be visible in both panes. You can scroll the panes independent of each other.
Execute SQL statement in Code Editor.
As per
Code Editor SQL
Execute | Skip to Previous
Execute
| Execute to
End
Execute
| Execute
SHIFT+F8
F9
F8
SQL Navigator 7.2
User Guide
80
Icon Right Click Keyboard Shortcut
Step
Execute | Skip to Next
Execute | Skip to Bottom
F10
F11
Description
PL/SQL Debugger Keyboard Shortcuts
For more information, see PL/SQL Debugger on page 83 .
Icon Right Click
PL/SQL Debugger
Toggle Breakpoint
Abort Debug Session
Trace Into
Step Over
Add Watch
Trace Out
Run to Cursor
Stop on Exception
Auto Step Over
Auto Trace Into
Pause Auto Stepping
Keyboard Shortcut
CTRL+ALT+S
F5
SHIFT+CTRL+F9
F7
F8
CTRL+F5
SHIFT+F8
F4
CTRL+ALT+X
SHIFT+CTRL+F8
SHIFT+CTRL+F7
ALT+P
Further Shortcuts In The Code Editor Editing Pane
Keyboard Shortcut
CTRL+Home
CTRL+End
Home
End
CTRL+Right Arrow
CTRL+Left Arrow
Description
Go to the top of the file
Go to the bottom of the file
Go to the beginning of the line
Go to the end of the line
Go to the next word
Go to the previous word
SQL Navigator 7.2
User Guide
81
Keyboard Shortcut
CTRL+I
CTRL+U
F6
SHIFT+F6
Description
Indent current line/selection
Unindent current line/Selection
Go to the next tab
Go to the previous tab
Further Shortcuts Viewing SQL Code Execution Results
Keyboard Shortcut
ALT+n
CTRL+F11
ALT+Enter
Description
Following a SQL query with many result tabs, go to the result tab numbered n.
Switch between the Query and Results page.
Edit Cell Data.
Shortcuts In The Code Editor Toolbar
Icon Tool Tip Keyboard
Shortcut
New SQL Tab CTRL+T
New Stored
Object
File | Open
File
File | Save to
File
CTRL+N
CTRL+O
CTRL+S
Description
Open a new tab for a SQL script in the Code Editor.
Create a stored object.
Open a file from Windows Explorer.
Auto Code
Completion
CTRL+ALT+A
Save the file.
This option is enabled once the file has a name. For an Untitlted tab, save the file using File | Save to File As first.
Turn on/off Auto Code Completion. ( Auto Code Completion
)
Use SHIFT+Spacebar to force code completion.
Split/Compare
| Vertical
Split
Split/Compare
| Horizontal
Split
SHIFT+ALT+F11 Adjust the layout of the editing pane.
SHIFT+F11
Select from the options to split the editing pane in half either horizontally or vertically. The content of the editing pane will be visible in both panes. You can scroll the panes independent of each other.
Split/Compare
| No Split
SQL History
SHIFT+CTRL+F11
CTRL+ALT+R Recall SQL statement.
Open in the Toolbox:
History
SQL Navigator 7.2
User Guide
82
Icon Tool Tip Keyboard
Shortcut
Description
PL/SQL
Debugger
Execute | Skip to Top
CTRL+ALT+S
SHIFT+F7
Open in the Toolbox:
PL/SQL Debugger
Execute SQL statement in Code Editor.
As per
Code Editor SQL
Execute | Skip to Previous
Execute
| Execute to
End
Execute
| Execute
Step
Execute | Skip to Next
Execute | Skip to Bottom
Object |
Open/Create
Package Body
Save to
Database
Execute
Procedure /
Function
Toggle
Breakpoint
PL/SQL
Debugger
Abort Debug
Session
SHIFT+F8
F9
F8
F10
F11
ALT+N
CTRL+S
F9
F5
CTRL+ALT+S
Create a body for an existing package or (object) type
Save the object to the database.
Opens
PL/SQL Execution Console
Add / Remove breakpoint on the selected line of code.
Open in the Toolbox:
.
PL/SQL Debugger
SHIFT+CTRL+F9 For more information see
PL/SQL Debugger
.
Toolbox
PL/SQL Debugger
NOTE:
Show/Hide PL/SQL Debugger in the Toolbox from the Code Editor toolbar.
All the tools and features for debugging stored programs can be found inside the PL/SQL Debugger window.
SQL Navigator 7.2
User Guide
83
Use the debugger to perform the following functions: l
Run to the end or to the next breakpoint.
l
Step over code.
l
Step into code, when other procedures are called from the current line.
l
Display the execution stack.
l
View and modify any variable value.
l
Set watch variables.
l
Set and remove breakpoint on the fly as the code is executing, except in an anonymous block.
l
Stop a running procedure.
l
Set an option to either stop execution if an exception occurs, or ignore exceptions.
Requirements
Area
Oracle server connection
Requirement
Debugging is functional only when you are connected to an Oracle server via a SQL*Net connection. If you are using a local database, such as Personal Oracle, use the loopback
SQL*Net connection to perform interactive debugging.
Oracle
Permissions create session alter session
Debug on/off
Successful compile
To watch, evaluate, or modify variables of a stored program:
Compile the program with debug information:
Session Menu
| Include Debug Info.
If the procedure fails to compile, it is displayed in red in
DB Navigator . It cannot be debugged.
Debug
r e t u
F Description e a l a
L
Use the Locals tab to test the effect of different variable values in your procedure.
o c
Example Scenario: Your procedure performs a computation. Start the procedure, enter a starting value and watch how the procedure handles the result. If you want to see a «what if» computation, enter a new value for the variable in the Locals tab and repeat the procedure.
SQL Navigator 7.2
User Guide
84
l e a b s i r v a t a b
r e t u
F Description e a s
NOTE:
l
If you see an error such as «Not compiled with debug info» instead of the variable value, you need to recompile the procedure with the Debug information and re-execute it in the debugger to see the value of variables. See
Session Menu
| Include Debug Info for more information.
l
The values in the Locals tab are only populated when the code is running.
l
The values of the input parameters cannot be modified in the Locals tab.
l
When you evaluate a variable in a current breakpoint, remember that the current breakpoint has not yet been executed.
R When evaluating/watching a variable of REF CURSOR type, its value is displayed in the following format:
E
F flags:FFF, rowcount:RRR.
RRR determines the number of records fetched so far by the examined cursor.
C
U
FFF is a combination of cursor status flags:
R
%ISOPEN
S
%FOUND
O
R
%NOTFOUND p e t y
If the user enters the watched variable names as C1%NOTFOUND, C1%FOUND, C1%ISOPEN, C1%ROWCOUNT, the displayed value is the same as would result from watching the cursor itself. (C1 is the name of the cursor) a t
Add/remove breakpoints by clicking in the gutter margin left of the code.
For more information, see Edit, Compile And Execute on page 60 . There is also an icon on the toolbar to toggle on/off breakpoints.
s
For more information, see Code Editor PL/SQL
c
When execution of a procedure is paused at a breakpoint, you can evaluate or modify any scalar variable within procedure code. If you change the value of a variable, you can confirm the new value of the scalar variable by evaluating the variable again.
h e
NOTE:
on page 57 .
l
You can open multiple editors and set breakpoints in several stored programs simultaneously.
SQL Navigator 7.2
User Guide
85
i o k p e a
B r n t s a n d
r e t u
F Description e a
l
When you evaluate a variable in a current breakpoint, remember that the current breakpoint has not yet been executed.
l
Variable values in the «watch» window are updated only at the breakpoint, so strategically place breakpoints after the watch variable.
l
Increasing the number of variables in the watch list may result in slower debugger performance.
Code Explorer
Make your work with packages, procedures, and functions more efficient and error-free.
Features
Code Explorer: l
Is based on an advanced parsing technique that understands PL/SQL syntax.
l
Displays detailed information about a package’s components, such as variables and parameters, their types, structure and cursors.
l
Highlights the packaged procedure you are currently in.
l
Supports drag-and-drop into the editor.
l
Combines information from the specification and body.
l
Distinguishes non-published procedures and functions (by icon).
Working with packages
Work with packages is fast and easy in the Code Editor with the integrated Code Explorer.
The Code Explorer graphically displays a tree-structure view of the package currently in the editor. It shows variables, parameters, record structures, types, cursors, and so on.
SQL Navigator 7.2
User Guide
86
The tree-view is synchronized with the editing cursor in the code-editing window, so when you click any package component in the tree-view, you can see the corresponding PL/SQL code in the editing window.
Likewise, as you move the cursor in the editing window, the tree-view changes to show the object corresponding to the PL/SQL code at the cursor location.
Auto Reparse
PL/SQL parsing occurs when the editor first loads objects, and in the background as the user edits the code.
You can also manually trigger a full reparsing (updating of the internal symbol table) at any time by right-click and select Auto Reparse from the shortcut menu. However, when loading a really large script having this option on will slow down SQL Navigator. Hence, to avoid wasting CPU resources, you should turn this option off when editing large scripts.
Outline
A graphic representation of the syntax tree of the current source.
DB Explorer
Find and open objects.
Icon Tool Tip Description
Refresh Refresh the tree data.
Use if you have created new objects that are not visible in the tree yet.
Type in a filter phrase (for example c% to filter all objects with names starting with c).
Name
Filter
Upper case filter
Click to toggle between Upper case filter and Mixed case filter.
The upper case filter is selected by default. Use the mixed case filter to find objects with names that are mixed case, lower case or have special characters.
Filter Open the Filter Properties dialog.
Filter Properties Dialog
DB Explorer is similar appearance to DB Navigator. DB Explorer is a light version of DB Navigator, integrated into the Code Editor for extra convenience.
TIP:
l
Expand the tree nodes to display the filtered objects.
l
Drag and drop objects from DB Explorer into the Code Editor.
l
Set the behavior of dragging and dropping table names from View | Preferences |
Code Editor |
SQL Scripts
| Drag & Drop.
SQL Navigator 7.2
User Guide
87
Describe
Show the data structure for tables, indexes, views and synonyms.
NOTE:
To increase response time, the drop down list is not populated with objects when the tool is first activated.
Icon Tool
Tip
Description
Filter To show the complete list, leave the Filter blank and press Enter.
You can use wildcards to filter the objects. For example, type t% and press Enter to display only objects with names starting with «t». Select an object from the list to show its column names and types.
Quick
Browse
View the chained rows information as per
Object Menu
| Quick Browse.
Select the object to Describe.
The results show in
SQL Query Results Data Grid .
Edit
Data
Edit data in a table object as per
Object Menu
| Edit Data.
Select the object to Describe.
The results show in
SQL Query Results Data Grid .
The Edit Data command executes an Updateable query.
History
The History tool lists successfully executed SELECT, UPDATE, DELETE commands and PL/SQL blocks up to 1000 of the most recent ones in the current session. In the History window, each SQL statement is accompanied with the date, time and the schema that they were executed on.
You can easily recall the most recent SQL statements that have been executed in the current session.
1. Select the statement you want to recall.
TIP:
You can press Ctrl+up arrow to move back in the sequence, and Ctrl + down arrow to move forward.
2. Take action.
Button
New Tab
Insert
Description
Open a new Code Editor tab and paste the statement into it.
Add the recalled statement to the current contents.
SQL Navigator 7.2
User Guide
88
Button Description
Replace Replace the current contents of the editing window with the selected SQL statement.
Clipboard Copy the statement to the clipboard, ready to paste the statement into another location.
Delete Drop the statement from the SQL History list.
Double
Click…
Select an action (New Tab, Insert, Replace or Clipboard) that will be executed on double-clicking an entry in History.
TIP:
You can also insert the statements by dragging and dropping them into the Code Editor.
Dependencies
Lists the Dependants and Depends On objects of the current script.
NOTE:
Objects with a large amount of dependant and depends on objects will take more time to load.
To improve the performance, hide this pane when opening those objects.
TIP:
Right click over the Dependents or Depends On lists to view available commands to manipulate objects in the lists.
Columns
The Columns window provides an easy-to-use tool to arrange and hide/show columns of the retrieved table in the data grid.
TIP:
Run a valid query statement to populate the window.
Action
Show/Hide columns
Select column
Arrange columns
Description
Show selected columns. Hide deselected columns.
Click on the column’s name.
Click Move Up or Move Down.
NOTE:
The settings will be saved and taken into account when you refresh or rollback the query.
However if you rerun the query, the settings will be set back to default.
SQL Navigator 7.2
User Guide
89
6
Visual Object Editors
SQL Navigator’s editing tools for database objects: l
Are visual. They give you a graphical representation of a database object definition. This makes it easy to see relationships and properties.
l
Allow you to view database object definitions and create or alter database objects via a point-and-click interface, eliminating the need to remember SQL syntax and write SQL statements manually.
l
Generate the DDL or other database code automatically when you create or alter a database object.
You can also and edit the code directly, if needed.
When opened, a visual object editor connects to the active database session ( Session Menu
| Select).
Object
Schema
Non-Schema
Object Type
Indexes
Database Links
Materialized (Snapshot) Views
Sequences
Synonyms
Varying arrays
Triggers
Views
Users
Roles
Profiles
Instance properties
Redo Log Groups
SQL Navigator Visual Object Editor
Index Editor
Database Link Editor
Materialized View Editor
Sequence Editor
Object Type
Tables
Constraints
Nested tables
Clusters
Varray Editor
Now in the
Code Editor
.
View Editor
User Editor
Role Editor
Profile Editor
Instance Property Editor
Redo Log Group Editor
Editor
Table Editor
Constraint Editor
Nested Table Editor
Cluster Editor
SQL Navigator 7.2
User Guide
90
Cluster Editor
Use the cluster editor to join tables that are closely related for storing on the same area of the disk. This lets you interleave the rows of two or more tables together into a single area called a cluster.
About
Cluster
Objects
The cluster key is the column or columns by which the tables are usually joined in a query. You can only cluster together tables that you own.
You can create either an index cluster or a hash cluster. With an indexed table or index cluster,
Oracle locates the rows in a table using key values that Oracle stores in a separate index. To use hashing, you create a hash cluster and load tables into it. Oracle physically stores the rows of a table in a hash cluster and retrieves them according to the results of a hash function.
The characteristics and usage of this database object are described in the Oracle documentation.
Ways to Open The Cluster Editor
Icon Action
From the Main Menu
View Menu
|
Visual Object Editors
| Cluster
Editor
From
DB Navigator
or
Find objects Dialog
Right click on a Cluster object and click Open.
Description
Open the Cluster Editor.
Open the selected Cluster object in the Cluster
Editor.
Constraint Editor
Use the Constraint Editor to specify table constraints.
About
Constraints
In Oracle, a constraint is a rule applied to an object that restricts the data allowed in any instance of the object.
The characteristics and usage of this database object are described in the Oracle documentation.
NOTE:
l
SQL Navigator’s visual constraint editor is intended to be used only for table-related constraints.
SQL Navigator 7.2
User Guide
91
l
Once a constraint has been defined and saved to the database, it cannot be altered in the constraint editor. To change the constraint it is necessary to drop it and then create a new constraint with the necessary properties. Use
DB Navigator
or
Find objects Dialog
to locate a constraint then
Object Menu
| Drop to drop the constraint.
Using The Editor
Steps To Create A Constraint
1. Click Create a new constraint to open the New Constraint dialog.
Field
Parent Schema
Parent Object
Name
Constraint Type
Description
Select the parent schema for the new constraint.
Select the parent object (table) for the new constraint.
Name the new constraint.
Type
Check
Primary
Key
Unique
Foreign
Key
Purpose
Specifies a condition that each row in the table must satisfy
Designates a column or combination of columns as a table’s primary key
Designates a column or combination of columns as a table’s unique key
Designates a column or combination of columns as the foreign key
2. More on the Constraint Type.
Type Action
Check Enter the check condition following Oracle syntax conventions. Example: (loc is not null)
Primary
Key
Designate the column(s) to be used as the Unique, Primary Key, or Foreign key.
Unique
To add columns to the constraint, use the arrow button to move one or more selected columns from the Available Table Columns pane to the Constraint Columns pane. The double arrow adds all available columns to the constraint.
Foreign
Key
3. If the constraint type is Foreign key: l
Designate the Unique or Primary Key in the Reference field.
l
If desired, select the On Delete Cascade property.
SQL Navigator 7.2
User Guide
92
NOTE:
Before selecting the On Delete Cascade property, be sure you understand the potential consequences of using this option. It could result in lost data. Consult your Oracle documentation for information about the DELETE CASCADE command.
Now the constraint is defined
Icon Tool Tip
Generate SQL for changes
Revert to previous constraint
Description
Extract the DDL for the new constraint and place it into the Code Editor.
Apply changes to
DB
Enable current constraint
Undo your entries without saving them.
After saving your changes, you will not be able to use the Revert command.
Save your new constraint definition to the database. SQL Navigator generates the
DDL and commits it to the database.
This duplicates Enable/Disable Constraint on the
Object Menu .
Ways to Open The Constraint Editor
Icon Action Description
From the Main Menu
View Menu
|
Visual Object Editors
| Constraint
Editor
Open the Constraint Editor.
From
DB Navigator
or
Find objects Dialog
Right click on a Constraint object and click
Open.
Open the selected Constraint object in the Constraint
Editor.
Database Link Editor
Use the Database Link Editor to view, create or define database links.
About
Database
Links
A database link allows access to a username on a remote database through the local database. A public database link (which only a DBA can create) allows the remote database access to all users of the local database.
The characteristics and usage of this database object are described in Oracle documentation.
SQL Navigator 7.2
User Guide
93
NOTE:
l
The SQL Navigator Database Link editor will try to automatically add the domain name when required by the server. However if the user cannot see the view v$parameter, then the domain name is not automatically added. The user should enter a fully qualified database link name in the New Database Link dialog.
l
Due to limitations in the Oracle Data Dictionary it is not possible for Extract DDL to correctly apply the SHARED and AUTHENTICATED clauses in a CREATE DATABASE LINK statement
Ways to Open The Database Link Editor
Icon Action
From the Main Menu
View Menu
|
Visual Object Editors
| Database
Link Editor
From
DB Navigator
or
Find objects Dialog
Right click on a Database Link object and click Open.
Description
Open the Database Link Editor.
Open the selected Database Link object in the
Database Link Editor.
Index Editor
Use the Index Editor to view, create or alter indexes, and to set storage allocation.
About
Index
Objects
An index is a sorted map of selected columns in a table or object. Therefore an index is similar to a table, and the columns in an index refer to the rows and columns of the associated table. By indexing columns frequently used in queries, you can improve data retrieval performance.
An index can be either unique or non-unique.
l
A unique index validates every new or changed row in a table for a unique value in the column(s) in the index.
l
A non-unique index allows duplicate values in rows.
A non-unique index often enables faster queries.
Oracle8 supports a type of index called a bitmap index. A bitmap index uses a compressed bitstream storage technique that allows very fast retrieval.
The characteristics and usage of this database object are described in Oracle documentation.
SQL Navigator 7.2
User Guide
94
Ways to Open The Index Editor
Icon Action
From the Main Menu
View Menu
|
Visual Object Editors
| Index Editor
From
DB Navigator
or
Find objects Dialog
Right click on an Index object and click Open.
Description
Open the Index Editor.
Open the selected Index object in the Index Editor.
Nested Table Editor
Use the nested table editor when you require a large, efficient collection.
About
Nested
Tables
A nested table type is an unordered set of elements. The elements may be built-in datatypes or user-defined types. You can view a nested table as a single-column table or, if the nested table is an object type, as a multicolumn table, with a column representing each attribute of the object type.
A nested table definition does not allocate space. It defines a datatype, which can then be used to declare: l columns of a relational table l object type attributes l
PL/SQL variables, parameters, and function return values.
When a nested table appears as the type of a column in a relational table or as an attribute of the underlying object type of an object table, Oracle stores all of the nested table data in a single table, which it associates with the enclosing relational or object table.
The characteristics and usage of this database object are described in Oracle documentation.
Profile Editor
Use the Profile Editor to view, create or alter profiles.
About
Profiles
A profile is a set of limits on the use of database resources that can be applied to a user. If you assign the profile to a user, that user cannot exceed those limits. If a user exceeds a limit, Oracle aborts and rolls back the transaction, and then ends the session. Profile settings include connect time, password lifetime and reuse, idle time, and similar restrictions.
The characteristics and usage of this database object are described in Oracle documentation.
SQL Navigator 7.2
User Guide
95
Requirements
To edit profiles: l
You must have the CREATE PROFILE system privilege.
l
Query the Oracle Data Dictionary with DBA Views. For more information, see DBA Dictionary
Views on page 48 .
Ways to Open The Profile Editor
Icon Action
From the Main Menu
View Menu
|
Visual Object Editors
| Profile
Editor
From
DB Navigator
Right click on a Profile object and click Open.
Description
Open the Profile Editor.
Open the selected Profile object in the Profile
Editor.
Redo Log Group Editor
Use the Redo Log Editor to view, create, or alter Redo Logs.
About
Redo
Logs
Every Oracle database has a set of two or more redo log files, collectively known as the database’s redo log. Oracle uses the redo log to record all changes made to data.
The characteristics and usage of this database object are described in Oracle documentation.
Ways to Open The Redo Log Group Editor
Icon Action Description
From the Main Menu
View Menu
|
Visual Object Editors
| Redo Log
Group Editor
Open the Redo Log Group Editor.
From
DB Navigator
Right click on a Redo Log Group object and click Open.
Open the selected Redo Log Group object in the Redo
Log Group Editor.
SQL Navigator 7.2
User Guide
96
Role Editor
Use the Role Editor to view or create roles.
About
Roles
A Role is a set of privileges that can be assigned to or removed from a user. (Use the
User Editor
to create and grant or revoke roles and privileges to users.)
The characteristics and usage of this database object are described in Oracle documentation.
Requirements
To edit roles: l
You must have the CREATE ROLE system privilege.
l
Query the Oracle Data Dictionary with DBA Views. For more information, see DBA Dictionary
Views on page 48 .
Ways to Open The Role Editor
Icon Action
From the Main Menu
View Menu
|
Visual Object Editors
| Role Editor
From
DB Navigator
Right click on a Role object and click Open.
Description
Open the Role Editor.
Open the selected Role object in the Role Editor.
Materialized View Editor
Use the Materialized (Snapshot) View Editor to view, create or define snapshots.
About
Snapshots
A snapshot is a segment that contains the result of a query. The snapshot typically contains local copies of remote objects. From Oracle 8i onwards a materialized view is equivalent to a snapshot but allows queries to be dynamically and transparently rewritten to use the materialized view.
SQL Navigator 7.2
User Guide
97
Using The Editor
Editor Toolbar
Icon Tool Tip
Create new
Materialized view
Description
Open the New Materialized View dialog.
Field Description
Schema Select the parent schema for the new Materialized view.
Name Name the new Materialized view.
Open object from DB Open the Select Materialized View dialog.
Select the materialized view from the database.
Clone current
Materialized view
Revert to pervious
Materialized view
Create a clone of the selected materialized view. You will be prompted in the
New Materialized View dialog to enter new name.
Undo or revert any modifications made to the view.
Generate SQL for changes
Generate SQL code for the changes made.
Apply changes to DB Apply changes to the database.
Editor Tabs
Tab
Details
Refresh
Storage
Master
Info
Description
1. Select the Updateable and Query Rewrite options to include them in the query’s DLL.
2. Set the Parallel options and turn Logging and Cache on or off.
1. Set the frequency of the refresh.
2. Set the rollback segments to be included.
3. Set when to populate the materialized view.
1. Set the Physical Attributes for the materialized view log.
2. Set the Storage Clause options for the materialized view log.
Display the owner, table and links for the materialized view (after the materialized view has been saved).
SQL Navigator 7.2
User Guide
98
Ways to Open The Materialized View Editor
Icon Action
From the Main Menu
View Menu
|
Visual Object Editors
|
Materialized View Editor
From
DB Navigator
or
Find objects Dialog
Right click on a Materialized View object and click Open.
Description
Open the Materialized View Editor.
Open the selected Materialized View object in the
Materialized View Editor.
Sequence Editor
Use the Sequence Editor to view, create, or alter sequences.
About
Sequence
Objects
A sequence is an Oracle object that delivers a unique number, incremented by some specified amount, every time it is requested. Sequences are usually used to generate a primary key for a table or for a set of tables. You can use the sequence to create unique number that you can use in your tables as primary identifiers.
The characteristics and usage of this database object are described in Oracle documentation.
Ways to Open The Sequence Editor
Icon Action
From the Main Menu
View Menu
|
Visual Object Editors
| Sequence
Editor
From
DB Navigator
or
Find objects Dialog
Right click on a Sequence object and click Open.
Description
Open the Sequence Editor.
Open the selected object in the Sequence
Editor.
Synonym Editor
Use the Synonym Editor to view or create synonyms.
SQL Navigator 7.2
User Guide
99
About synonym
Objects
A synonym is an alternate name for a table or view. A synonym can be private (for use only by its creator) or public (for use by any user). Primarily, synonyms enable multiple users to reference an object without adding the schema as a prefix to the object. They can also allow different applications to reference the same object using different names.
You can make synonyms for the following database objects: l tables l views l other synonyms l functions l packages l procedures l sequences l database links
The characteristics and usage of this database object are described in Oracle documentation.
Ways to Open The Synonym Editor
Icon Action
From
DB Navigator
or
Find objects Dialog
Right click on a Synonym object and click Open.
Description
From the Main Menu
View Menu
|
Visual Object Editors
| Synonym Editor
Open the Synonym Editor.
Open the selected object in the Synonym Editor.
Table Editor
Use the Table Editor to create, alter, or define tables. Functionality includes: l
Adding and deleting columns l
Defining column properties l
Setting tablespace storage parameters l
Setting partitioning properties
Although you won’t need to type any PL/SQL code when editing tables in SQL Navigator, you should be familiar with Oracle rules and guidelines for using tables.
SQL Navigator 7.2
User Guide
100
NOTE:
l
Be sure to place quote marks («xxx») around any non-numerical data you enter in the default column. If non-numerical data is not enclosed in quotes, then error message ‘ORA-00984: column not allowed here’ is returned.
l
It is possible to display and edit multi byte data in the Table Editor through National Language
Support (NLS).
l
The Data tab operates as per the
SQL Query Results Data Grid
.
Ways to Open The Table Editor
Icon Action
From the Main Menu
View Menu
|
Visual Object Editors
| Table Editor
From
DB Navigator
or
Find objects Dialog
Right click on a Table object and click Open.
Description
Open the Table Editor.
Open the selected object in the Table Editor.
User Editor
Use the User Editor to create, grant or revoke roles and privileges to users, including forcing a password to expire.
About
Oracle Users
In Oracle, a User is simply a unique log-in name. A user’s capabilities inside the database are determined by the User’s role assignments.
The characteristics and usage of this object are described in Oracle documentation.
Requirements
To edit users: l
You must have the CREATE USER system privilege.
l
Query the Oracle Data Dictionary with DBA Views. For more information, see DBA Dictionary
Views on page 48 .
SQL Navigator 7.2
User Guide
101
Ways to Open The User Editor
Icon Action
From the Main Menu
View Menu
|
Visual Object Editors
| User Editor
From
DB Navigator
or
Find objects Dialog
Right click on a User object and click Open.
Description
Open the User Editor.
Open the selected object in the User Editor.
Varray Editor
Use the VArray Type Editor to create varying arrays that can be used to: l loop through the elements in order l store only a fixed number of items l retrieve and manipulate the entire collection as a value.
About
Varying
Array
Objects
The varying array is a collection type you can use when you want to retrieve entire collections as a whole. They are best suited for small collections. If you require a large, efficient collection, you would be better to use a nested table collection type (see Editing a nested table).
You must set a maximum number of elements for a varying array but you can change this limit.
A varying array object is normally stored in line, that is, in the same tablespace as the other data in its row.
The characteristics and usage of this database object are described in Oracle documentation.
View Editor
Use the View Editor to view, create, or alter views.
About
Views
A view is a query that is named in the database so that it can be used as if it were a table. It can be thought of as a virtual table in the database whose contents are defined by the Select query.
You can use views to rearrange, filter and select the way you see data in tables without creating any copies of that data. Views help make data access simpler by hiding complexities. They can also help separate data for different users as a security measure.
SQL Navigator’s view editor makes it easy to create and alter views. Although you won’t need to type any PL/SQL code when editing views in SQL Navigator, you should be familiar with Oracle rules and
SQL Navigator 7.2
User Guide
102
guidelines for using views.
The attributes of this database object are described in Oracle documentation.
Using The Editor
Editor Toolbar
Icon Tool Tip Description
Create new view Click to open the New View dialog.
Open object from
DB
Open an existing view.
Clone current view Create a clone of the selected view. You will be prompted in the New View dialog to enter a new name.
Revert to pervious view
Undo or revert any modifications made to the view.
Generate SQL code for the changes made.
Generate SQL for changes
Apply changes to
DB
Apply changes to the database.
Editor Tabs
Tab
Text
Columns
Description
Field Description
Create
View (
Enter the view column names, separated by commas.
) AS Type the SQL for the view.
If you enter the Select * syntax to include all the table columns in the view, then all the table column names from the Select * table appear automatically in the CREATE VIEW pane.
1. Select a column.
2. Right click and select Edit Comments
3. Enter any comments required.
4. Repeat for each column as appropriate.
SQL Navigator 7.2
User Guide
103
Tab
Options
Comment
Description
Select from the available options to be applied to the view.
Enter any comments related to the view.
Ways to Open The View Editor
Icon Action
From the Main Menu
View Menu
|
Visual Object Editors
| View Editor
From
DB Navigator
or
Find objects Dialog
Right click on a View object and click Open.
Description
Open the View Editor.
Open the selected object in the View Editor.
Java Editor
Features: l
Load a Java source file from the database into the editor l
Create a new Java source file l
Clone an existing Java source l
View and edit Java source with color syntax highlighting l
Compile the Java object l
Save the Java class to the database.
To see tooltips describing the toolbar buttons, simply point to them.
Ways to open the Java Editor
Icon Action
From the Main Menu
View Menu
|
Visual Object Editors
| Java Editor
From
DB Navigator
or
Find objects Dialog
Right click on a Java Source object and click
Open.
Description
Open the Java Editor with a new Java source.
Open the selected Java Source object in the Java
Editor.
SQL Navigator 7.2
User Guide
104
Instance Property Editor
Use the Instance Property Editor to view or specify the startup parameters for the instance.
About
Instance
Properties
The characteristics of the Oracle database instance are specified during startup. These parameters are stored in a file called init.ora. This file may, in turn, call a corresponding config.ora file.
The Instance Property Editor is based on what the Oracle v$parameter data dictionary view reports. Some attributes are Session Modifiable, which means that they are applied immediately to the current session, but are not permanent. Others are System Modifiable and further may be Immediate or Deferred (requiring a server shutdown/restart). Some are not modifiable at all.
These parameters and the rules governing their usage are described in Oracle reference sources.
Using The Editor
Instance Property
Select the Instance Property you want to view. Not all properties can be modified.
Icon Description
The Property can be modified.
The Property cannot be modified.
Editor Toolbar
Icon Tool Tip
Create new Instance property
Open object from DB
Clone current Instance property
Revert to pervious Instance property
Description
N/A to the Instance Property Editor. Oracle does not allow this action.
Open the property from the current database
N/A to the Instance Property Editor. Oracle does not allow this action.
Undo changes made to the property.
SQL Navigator 7.2
User Guide
105
Icon Tool Tip
Generate SQL for changes
Apply changes to DB
Description
Generate SQL code for the changes made
Apply the changes to the database
Details Tab
Attribute Description
Description Brief description of the parameter
Is Default Whether this parameter has been specified by the user as an initialization parameter
System
Modifiable
Session
Modifiable
Whether this parameter can be modified at an instance-wide level dynamically after the instance has started
Whether this parameter can be modified at the session level
Is Modified Whether this parameter has been modified after instance startup, and if so, whether it was modified at the session level or at the instance (system) level
Is Adjusted Whether Oracle has adjusted a value specified by the user
Type The Oracle datatype
Value
Alter For
Current value for this session (if modified within the session); otherwise, the instance-wide value
Whether the new value is to be current for this session or instance-wide
Ways to Open The Instance Property Editor
Icon Action
From the Main Menu
View Menu
|
Visual Object Editors
| Instance
Property Editor
From
DB Navigator
Right click on a Property object and click Open.
Description
Open the Instance Property Editor.
Open the selected object in the Instance
Property Editor.
SQL Navigator 7.2
User Guide
106
7
Team Coding and Version Control
Support
Code Control Groups
How do CCGs work?
SQL Navigator’s code control groups (CCGs) are the most powerful and flexible feature of Team Coding.
Following are examples of how CCGs can be useful.
Example 1: A Single Application
Suppose you have a schema containing stored programs that all relate to a single application on your Oracle instance. You can easily create a CCG that includes all objects in that schema, and map it to a Version Control project in your provider’s repository.
Example 1 Using CCGs to map objects from multiple schemas to one VCP Project
SQL Navigator 7.2
User Guide
107
Excluding objects
If the schema also contains some objects that you do not want controlled (for example, you may have some test packages which don’t form part of your application), it is a simple matter to add an exclusion reference (Object
Mask) in your CCG. For more information, see Code Collection Viewer on page 110 .
Including certain object types and schemas
If your application contains some objects located in a different schema, it is easy to modify the CCG to include those objects. To take this a step further, you can also configure your CCG so that it contains any of the following: l object Masks based on a particular schema l stored programs of any type or a particular type (such as Trigger) l objects of any name or using a name mask (such as ACC_%).
Any object mask can used to exclude as well as include, so you can readily include a group of objects, but exclude (for instance) all objects of name like DBG_%
Scripts
If your application involves ancillary scripts, you can include references to these scripts in your CCG. As with other objects, you can use wildcard masks and exclusions.
SQL Navigator 7.2
User Guide
108
Example 2: Multiple Applications
If you subsequently start development of a second application, using objects stored in the same schema as the one used for the first application, you can then simply create a second CCG. This new CCG would contain object masks for the stored programs that are related to your new application, and you would associate the new CCG to a different project in your version control repository.
For example, if second application is made up of procedures whose names all begin with a common prefix such as «ACC», your second CCG would contain an Object mask for all procedures in the schema with a name like
ACC%. Team programming automatically recognizes objects with names matching the new object mask and maps them to the second VCP project rather than the first.
Example 2 Using CCGs to map objects from one schema to different VCP projects
Code Collections Viewer
Use Code Control Groups to organize your controlled objects into groups associated with development projects.
For example, you can create multiple Code Control Groups for a single Oracle instance, each group pointing to the stored programs relating to a particular customer application.
TIP:
Enable Code Control Groups from
Team Coding Menu
|
Team Coding Settings .
SQL Navigator 7.2
User Guide
109
Toolbar
Icon Tool tip
Add Group
Description
Create a Code Control Group.
In the New Group dialog
l
Enter a descriptive name for the Group.
l
If you are using a third party version control product then select that product from the VCS Project list.
Open:
Code Collection Viewer .
Open Group View or Modify the selected Code Control Group.
Open:
Code Collection Viewer .
Delete Group Delete the selected Code Control Group.
Remap Group Change the descriptive name for the selected Code Control Group.
Change the third party version control product associated with the selected Code
Control Group.
Refresh Refresh the list of Code Control Groups.
Export to VCS Export objects to the third party version control product repository.
Open:
Export Dialog
Import to
Database
Update your Oracle instance, or generate an import script, from the version control project for the selected Code Control Group.
TIP:
Use after you Map to group to update the objects in your schema.
Mirror to group
List all mapped users
Open:
Import Dialog
Map the current user (the user logged on to the Oracle Instance) to the selected Code
Control Group.
Note: If the Code Control Group contains Object Masks for multiple schemas then you will be prompted to select the schema.
Open:
Linking a CCG to a user schema
Show the users mapped to the selected Code Control Group.
NOTE:
If the Code Control Group contains Object Masks for multiple schemas then show the selected schema.
Code Collection Viewer
SQL Navigator 7.2
User Guide
110
Define a Code Control Group: a set of database object masks and script masks identifying which objects are under Team Coding control.
TIP:
Enable Code Control Groups from
Team Coding Menu
|
Team Coding Settings .
Toolbar
Icon Tool tip
Add DB
Object
Mask
Description
Specify an object or group of objects to be included in the Code Control Group.
Object masks are the symbolic references that define the Code Control Group. When
Team Coding processes a CCG, it associates a certain ranking with object masks in order to determine which database objects belong to that CCG.
In the Mask Properties dialog:
Option Description
Object
Type
Choose from View, Procedure, Function, Package, Package Body or All.
Schema Pick a user from the list, or type a schema name. You can use the % wildcard character.
Object
Name
You can type an object name, including the % wildcard. Alternatively, you can launch the
Select DB Object Dialog
to choose an object matching the
Object Type and Schema settings.
Excluded Select to exclude any objects matching this object mask from the CCG.
Object mask ranking
Object masks are ranked based on the number of wildcards they contain. Highest ranking is given to the most specific mask, and when there are duplicate matching masks of different ranking the highest ranking mask takes precedence. Only when duplicate masks of the same ranking are encountered is it not possible to resolve the object to the CCG for which it belongs.
The mask rankings are, from highest to lowest:
Specific object reference:
Trigger SCHEMA.NAME
One wildcard only:
Any Type SCHEMA.NAME
Trigger SCHEMA%.NAME
Trigger SCHEMA.NAME%
Two wildcards:
Any Type SCHEMA%.NAME
SQL Navigator 7.2
User Guide
111
Icon Tool tip Description
Any Type SCHEMA.NAME%
Trigger SCHEMA%.NAME%
Three wildcards:
Any Type SCHEMA%.NAME%
Add Script
Mask
Specify a group of file server scripts (or a specific script) to include in the selected Code
Control Group.
In the Mask Properties Dialog:
Option Description
File
Name/Mask
Type a file name or mask using the * wild card, or browse to a file by clicking the ellipse (…) button.
Include
Path
File Path
If this option is selected, the mask will apply only to files in the directory specified under File Path. If this option is not selected, the mask will apply to files in the user’s working directory.
The directory to which this mask applies. Requires that Include Path (see above) be selected.
Exclude from the CCG any files matching this object mask.
Excluded
Delete
Mask
Edit Mask
Properties
Refresh
Mask
Delete the selected mask.
Edit the selected mask.
Refresh the list of masks.
TIP:
To create a code control group for all objects in the schema except procedures, you have to create two masks. The first one is to include all objects in that schema. The second one is to exclude the procedures. If only the second mask is created, it will not have any effect on the procedures at all.
Linking a CCG to a user schema
Team Coding allows developers to associate their own schemas with a Code Control Groups. When you open an object in your own schema, SQL Navigator searches for the object in the mapped CCG and opens it just as if as if you had opened the object from the original schema. If you check out the object, the archive for the original schema becomes Locked to other users, and the database object status is Locked for both schemas.
This is useful in cases where you often work in your own schema on projects containing objects that actually exist in another schema, or work on more than one project over a short period.
In essence, mapping a user to a CCG is equivalent to creating a new CCG identical to the mapped CCG, but with all Object masks pointing to a particular user schema. The same Version Control archive is shared between the user schema and the other (production or development) schema.
SQL Navigator 7.2
User Guide
112
TIP:
l
If the CCG contains Object Masks for multiple schemas, follow the prompts to select the schema you want.
l
Click Import to Database to update the objects in your schema.
Example — Linking a CCG to a user schema
Can developers work on common code in their own schema? Yes—Team Coding accommodates this requirement through User Mapping.
For example, assume you have common schema(s) containing all the code for your development environment, but you would prefer that your developers check code in and out of your source control product using their own schema. Then at an appropriate time, you would update your «master» schema(s) for testing purposes before moving your code to Production.
User Mapping allows developers to work on their own copies of objects existing in a schema (the «master») that is controlled by a CCG (Code Control Group). This means that the objects in the master schema can remain unchanged during development, until the master schema is updated from the version control system using the
Import function. (Note: the CCG must be exported to the version control system before it can be imported into the master schema.
This example shows how a developer can map to the REPORTS schema, for which a CCG has been created. To add copies of the master schema’s objects to the developers’ schemas, each developer must import the CCG.
Mapping the developer Scott to a CCG called REPORTS
1. Log in as the developer SCOTT.
2. From the Team Coding menu, open the Code Control Groups window and select the REPORTS Group.
3. Click the Map to Group button, and verify that the user mapping icon appears beside the group name.
4. In the Code Control Groups window, click the Import to Database button.
5. In the Import into Database window, select the objects to import. Only those objects found in the VCS for this CCG are shown. When selection is complete, click OK.
6. In the Import Options window, select the Update another schema option, and click OK to begin the import.
Done! Scott can now check out the REPORTS objects from his own schema. When a user-mapped object is checked out or checked in, the Team Coding Check Out/In dialog will show the object’s Master Owner.
When a developer has a copy of a user-mapped object checked out, other developers are not allowed to check out their copies, and neither is the master owner.
Import Dialog
Import objects from your third party version control product.
SQL Navigator 7.2
User Guide
113
In the Import dialog
Select and exclude objects for import. The Import listing is populated based on existing archives contained in the third party version control product repository (objects do not have to exist on the Oracle instance), but filtered down to only those objects defined in the Code Control Group.
Select import options
The following options are available:
Description
Create or update objects in the original location in the Oracle instance, as per the Code
Control Group and archive file names.
Option
Update original schema
Update another schema
Add new revision to
VCS
Update database
Generate import script
Choose an alternate destination schema. All objects will be created in this schema regardless of the original object for which the archive was created.
You must have the appropriate privileges to create objects in the destination schema.
Create a new revision in the third party version control product repository for each archive, using the comment entered here to indicate the reason for the new revision
Update the objects in the selected schema.
Instead of updating the database, generate an import script and open it in the
Code Editor .
TIP:
Save or print the status report as required.
Export Dialog
Once you have configured code control groups (CCGs), you can l
Construct a first revision of an application development project in your version control repository.
l
Create a new revision in your repository for all objects—for example, when you have completed your project and updated your production server.
TIP:
You should have access to all the objects referenced by the CCG. Otherwise, the process will need to be launched multiple times by all the different owners of the objects.
In the Export dialog
Select and exclude objects for export.
SQL Navigator 7.2
User Guide
114
Select Export options
The following options are available:
Option Description
Add objects not existing in the repository
Allows new stored programs to be added to the VCP repository. Any objects for which there are already VCP archives will not be updated
Create a new revision for existing objects
Forces all existing archives within the repository to be updated, as well as adding new archives for any new database objects
Create a revision only if the object has changed
Compares the object in the database with the archive in the repository, updating it only if it differs. This is useful when objects have been modified by a tool other than
SQL Navigator
Prompt individually for all existing objects
Comment
Permits the you to choose for each object that already exists in the repository whether or not it will be updated.
Lets you enter a comment to be applied to all new revisions created in the repository.
TIP:
Save or print the status report as required.
Team Coding Viewer
The Team Coding Viewer shows details of objects under Team Coding control, including which objects are currently checked out and when they were last checked in.
TIP:
Enable Team Coding and the objects under Team Coding control from
Team Coding Menu
|
Team
Coding Settings .
Toolbar
Icon Tool Tip
Refresh List
Filter
Description
Refresh the list of objects in the Team Coding Viewer.
Show only the object types that you are interested in.
Click to open the Team Group Filter window.
l
Select the schema object types you want to see.
l
Clear the schema object types you do not want to see.
SQL Navigator 7.2
User Guide
115
Icon Tool Tip
Get Latest Revision of Object
Check Out Object
Check In Object
Description
Get the latest version of an object or script as it is held in the Version Control repository.
The Get Latest Revision command overwrites the version of the object or script in the database, replacing it with the latest version held in the VCS repository.
You can use the
View Differences Dialog
to compare versions before overwriting the object.
Check out or check in the selected object or script.
Open:
Check In / Check Out Dialog
Undo Checkout Cancel the check-out. You are prompted to confirm that you want to discard any changes you have made and restore the database version of the item as it was prior to check-out.
Freeze Object
Un-Freeze Object
Open Object
Delete Record
View Differences between Object /
Script and latest
VCS revision
Confirm
Yes
You have made and saved changes to the object and you want to discard those changes.
Confirm
No
You have made and saved changes to the object and you want those changes to be retained in the database. As a result the version saved in the third party version control repository will be different from the version saved in the database.
Users with the LEADER role can freeze and unfreeze objects.
When you freeze an object other users are prevented from checking it in or out.
Open the selected object. May open the
Different Files Dialog .
Users with the LEADER role can delete objects.
Compare the selected database object with the latest VCS revision
Click Compare to VCS
Click SHIFT + Compare to VCS
Compare the selected object with the latest VCS revision
Compare the selected object with a VCS revision that you select
Requires that a version control product is in use and the selected database object is included in a Code Control Group.
View Object Details View team coding details of the selected object.
TIP:
You can make changes to a selection of multiple objects simultaneously.
List of Objects — Status Codes
In the List of Objects the Status column is of particular interest.
SQL Navigator 7.2
User Guide
116
Status
Checked Out
Locked
Frozen
Disabled
Meaning
Uncontrolled The object is not under Team Coding control
Available The object is available for check-out
The object is checked out to you
The object is checked out to another user
The object cannot be checked out or in by any user
The object is disabled due to a Team Coding specific error
Editable?
Actions allowed
editable None read only Check out
Freeze editable Undo checkout
Check in
Freeze read only Freeze read only Unfreeze read only None
Version Control Browser
Show version control archives. Show differences between revisions. Check out objects and scripts.
NOTE:
Refer to the SQL Navigator Release Notes for more information on Third Party Version Control products. This topic is not applicable to users of SCC API Team Coding support. Refer instead to the documentation for the third-party product in use.
Toolbar
Icon Tool Tip
Refresh
Description
Refresh the list.
Get Latest
Revision of
Object
Check Out
Object
Check In
Object
Undo
Checkout
Get the latest version of an object or script as it is held in the Version Control repository.
The Get Latest Revision command overwrites the version of the object or script in the database, replacing it with the latest version held in the VCS repository. You can use the
View Differences Dialog
to compare versions before overwriting the object.
Check out or check in the selected object or script.
Open:
Check In / Check Out Dialog
Cancel the check-out. You are prompted to confirm that you want to discard any changes you have made and restore the database version of the item as it was prior to check-out.
SQL Navigator 7.2
User Guide
117
Icon Tool Tip Description
Confirm
Yes
You have made and saved changes to the object and you want to discard those changes.
Confirm
No
You have made and saved changes to the object and you want those changes to be retained in the database. As a result the version saved in the third party version control repository will be different from the version saved in the database.
Open
Object
Open the selected object. May open the
Different Files Dialog
.
View
Differences
Open the View Differences dialog. Select to: l
View differences between two specified revisions l
View differences between the selected revision and the database object (via
Code Control Groups) l
View differences between the selected revision and any database object or file system script
Click OK to open the
Difference Viewer .
TC Locks option
On the Version Control Browser, there is an option of setting TC locks. The setting on this option determines how SQL Navigator decides the status of the files under version control.
This option can significantly increase the time it takes to expand a project node. However, this option can be particularly useful when using CVS as the Version Control Provider, since CVS does not support locking of files.
In this case, using Show TC Locks is the only way you can see what files Team Coding has locked under CVS.
Note: After selecting the Show TC Locks option, remember to refresh any project nodes which have already been expanded, as this does not happen automatically.
The state of the Show TC Locks option will be saved when the VCS Browser is closed.
TC Locks not selected
When this option is not selected, the VCS Browser determines which files are locked by querying the Version Control Provider; essentially it is just showing the status of each file as it would look in the provider’s own GUI.
TC Locks selected
When Show TC Locks is selected, the VCS Browser will attempt to determine if a file is locked by
Team Coding, through its association with an object. In this case, the file’s icon is changed to either a Team Coding checked out icon if the object is locked by the current user, or a Team
Coding locked icon, if the object is locked by another user. These icons are the same as those used in the Team Coding Viewer.
If the VCS Browser does not determine that a TC lock affects the file, it will still show the usual
Version Control Provider locks, using a different locked icon, where appropriate.
SQL Navigator 7.2
User Guide
118
Check In / Check Out Dialog
Option Description
Comments Enter comments about the modifications.
The comments entered at check-in time will be visible in the Team Coding Viewer. If a thirdparty version control system is in use, the comments are also logged against the new revision in the repository.
Applicable when multiple objects are selected.
Select to apply a single comment to multiple objects.
Apply to
All Items
Same
Comment for All
Force
Revision
When using a third-party version control system select this option so objects that are unchanged are updated in the database, so that new or changed comments can be stored.
On checkout: Follow the prompts to check the item out or choose Cancel to open it in read-only mode.
Different Files Dialog
When you open an object or script, Team Coding compares it with the latest revision in the VCP repository
(unless it is checked out). Team Coding advises when the database object or script differs from the version saved to the VCP repository.
Such differences might be due to a number of factors; for example: l
Another tool may have been used to edit the object l
A script may have been executed that modified the object l
The archive in the VCP repository may have been updated by another developer, or by some other means
You can choose one of the following options in the Different Files dialog.
Option Description
View Differences Open the
Difference Viewer
so that you can compare the two objects.
Open Database
Version
Load the database version into the VOE or Code Editor in Read Only mode.
Open VCS Version Update the database with the VCP repository version and load it into the VOE or Script
Editor in Read Only mode.
Make editable
NOTE:
Opening the version from the repository will cause the object in the database to be updated.
Check the selected item out for editing
SQL Navigator 7.2
User Guide
119
Team Coding Settings
Configure Team Coding for the current connection for all users. The options set here apply to all users.
NOTE:
Before enabling Team Coding:
Install Server Side Objects for Team Coding .
Configuration
Option
Enable Team
Coding
Use Code Control
Groups
Use 3rd Party
Version Control
Apply Team
Description
Select to enable Team Coding for the current connection for all users.
In the basic mode of operation, the following rules apply: l
Every supported object in every schema on the database must be checked out before being edited.
l
Supported objects are: l
Procedures l
Functions l
Packages and package bodies l
Triggers l
Views l
Object Types l
Object Type Bodies l
An object can be checked out to only one user at a time.
l
No Revision History is maintained.
NOTE:
The user enabling Team Coding should be granted the «Administrator» role.
A Code Control Group is a set of database object masks and script masks identifying which objects are under Team Coding control. Code Control Groups help you organize your controlled objects into groups associated with development projects.
NOTE:
When selected only objects referenced by a CCG are under Team Coding control.
Integrate with a third-party version control product.
When selected, individual CCGs can be related to a VCS project in the selected provider’s version control repository. This option also permits scripts residing on the file system to be managed by Team Coding. You can add references to scripts to CCGs.
When selected, objects not defined in a CCG can be controlled (but without revision
SQL Navigator 7.2
User Guide
120
Option
Coding to all
Objects
Version Control
Provider — Only
Show Installed
Providers
Description
history). All stored program objects will be under Team Coding control and must be checked out before they can be edited
When Use 3rd Party Version Control is selected, a list of all 3rd party Version Control
Providers is displayed. Select Version Control Provider — Only Show Installed
Providers to limit the list to providers installed on the current system.
NOTE:
When you select a provider on this list, selection does not in itself allow for maintenance of revision histories. The 3rd party version control product must also be installed on the current system.
File Extension Options
Specify the file name extensions to be used for database objects: Views, Procedures, Functions, Packages,
Package Bodies and Triggers.
These extensions are used to create the work files that are stored in the VCP project. Objects are stored in files named according to the following convention: SCHEMA.NAME.EXT
For example, the procedure MYPROC in schema DEV would be stored in a file in the VCP repository as
DEV.MYPROC.PRC
There is generally no need to modify these settings. Note that any change will also affect SQL Navigator
3.2 clients.
NOTE:
Do not change the file extensions after exporting objects to the VCP repository.
PVCS versions 5.2 through 6.0 will replace the last character of the file extension with ‘V’ when creating its internal archive. For this reason, it is important to ensure that: l
The first two characters of the file extension are unique (hence the default extensions for packages are not PKS and PKB) l
The character ‘V’ is not used as an extension (hence the default extension for views is not VEW)
General
Define how Team Coding should handle objects and scripts.
Default Settings for User Preferences
Option
Working
Directory
Description
Specifies a default workstation directory in which to store work files checked out from a version control product.
A local preference is also available to override this setting.
SQL Navigator 7.2
User Guide
121
Option Description
NOTE:
The version control product may override both these settings.
Automatic
Check Out
Select
Initiates a Check Out whenever the user opens the
Visual Object Editors
or
Code
Editor
for an object or script.
Open
Check In / Check Out Dialog . Follow the prompts to check the item in.
Clear Check out the object from the
Team Coding Menu
.
Automatic
Check In
Force New
Revision on
Check-in
Select Initiates a Check-In whenever the user closes the
Visual Object Editors
or
Code
Editor
for a modified and checked-out object or script.
Open
Check In / Check Out Dialog . Follow the prompts to check the item out or
choose Cancel to open it in read-only mode.
Clear Check in the object from the
Team Coding Menu
.
Allows a «comments-only» revision to be created in the repository. In other words, allows a new revision to be created in the VCP even if there has been no change to the object or script itself, but only to the comments.
NOTE:
The check-in dialog also provides this option; this setting simply sets the default behavior.
Global Settings
Option Description
Update database after Check-In
Use Trigger
Description for
DDL
Forces the database object to be updated after a check-in so that it is identical to the checked-in work file. This option is useful when the version control product performs keyword-expansion when files are checked in.
When using Team Coding with triggers, EXTRACT DDL is used to store the DDL of the object in the VCP repository. For triggers, though, there are two ways this text can be created.
l
Construct the DDL from the Data Dictionary. (default) l
Use the complete DDL from the description field in the Data Dictionary.
When selected, the Check-In dialog requires that the user enter a comment before the dialog can be closed.
Force comment during Check-In
Deny «Drop» for
Checked-
Out/Frozen
Objects
When selected, disallows the Drop action on objects that are checked out or frozen.
NOTE:
l
This will not prevent objects from being dropped by means of the Oracle
«drop» command executed by user DDL.
l
The
General | «Drop» and «Truncate» safety options
| No drop for Stored
Programs/Triggers preference takes priority over this preference.
SQL Navigator 7.2
User Guide
122
Script File Extensions
Specify the extensions that will appear in the «Files of type» drop-down list for Script Files when you add script masks to a CCG.
Use a semicolon as a separator; for example:
*.SQL; *.DDL
Team Coding Status Dialog
Show the privileges granted to the current user.
Show connection details, such as l which features are available l which version control product support DLLs are installed l which one is currently in use.
Click Settings to open
Team Coding Settings
.
If system errors exist, click Errors to view error details.
Version Control Products
Concurrent Versions Systems (CVS)
You can use Concurrent Versions System (CVS) with SQL Navigator’s Team Coding feature.
To do this, you need to perform some basic configuration tasks. For more information, see CVS Configurations
Options on page 123 .
In addition, you must have a CVS client installed on your system (for example, WinCVS, CVSNT, TortoiseCVS).
Team Coding has been tested with: l
CVS clients 1.11.9 and 1.11.17 and CVSNT clients 2.0.8 and 2.0.41a with the pserver authentication method.
l
CVS client 1.11.12 with pserver and ssh.
l
CVSNT clients 2.0.11, 2.0.26, 2.0.34, and 2.0.41 with sserver, pserver, and sspi.
l
CVSNT client 2.0.14 with sserver, pserver, sspi, ssh, ext, and local.
CVS Configurations Options
On the CVS Configuration Options dialog box there are several options you can use to configure how SQL
Navigator works with CVS.
SQL Navigator 7.2
User Guide
123
CVS
Option Description
CVS
Executable
Enter the name of the CVS program file here. The default is CVS.EXE. If your file is different, you can enter it here.
You can specify the full path to the file, such as C:Program FilesCVScvs.exe. This will force
SQL Navigator to use the specified program.
If you enter only the file name, rather than the entire path, the location of the program file must be in your system path. SQL Navigator will then use the first occurrence it finds of the specified file name.
Global
Options
Use this option to specify any global options you want SQL Navigator to pass to CVS whenever a
CVS command is executed by SQL Navigator. For example, the default option of -f tells CVS to ignore your .cvsrc options file.
The default is -f.
You can use more than one option. Separate multiple options with a space.
NOTE:
Do NOT enter a -d CVSROOT option here. SQL Navigator adds this option automatically, using the CVSROOT you provide in the
CVS Login Window
.
Dates and Times in CVS Output
Option Description
Date
Format/Separator,
Time
Format/Separator
These options tell SQL Navigator how CVS will send dates and times. This lets SQL
Navigator present correct revision date and time stamps in windows such as the VCS
Browser.
The default for Date Format is: yyyymmdd
The default for Date Separator is: /
The default for Time Format us: hhnnss
The default for Time Separator is: :
Available
Date/Time formats
Format
d dd m mm yy yyyy
Display
Day as a number without a leading zero (1-31)
Day as a number with a leading zero (01-31)
Month as a number without a leading zero (1-12)
Month as a number with a leading zero (01-12)
Year as a two-digit number (00-99)
Year as a four-digit number (0000-9999)
SQL Navigator 7.2
User Guide
124
Option
Time Zone
Login
Login
Automatically
Password Prompt
Timeout
Login Timeout
Time Between
Keypresses
Description
Format
s ss h hh n nn
Display
Hour without a leading zero (0-23)
Hour with a leading zero (00-23)
Minute without a leading zero (0-59)
Minute with a leading zero (00-59)
Second without a leading zero (0-59)
Second with a leading zero (00-59)
This option tells SQL Navigator to adjust the time stamps read from the output of CVS commands. For example, to subtract eight hours from all timestamps, specify a value of —
800. To add three hours, enter a value of 300.
The default is 0000.
These options control SQL Navigator’s behavior when attempting to log into CVS. SQL
Navigator creates a console window and executes the CVS Login command at the command prompt. When the password prompt appears, SQL Navigator sends the password you have specified.
When this option is checked, upon connecting to the database SQL Navigator logs in to
CVS without prompting you. The most recently used CVSRoot will be used.
To use this option, the following must be true:
l
The Team Coding option «Disable Login Prompt on Connection» is UNCHECKED l
The TC=NO command-line option is NOT used l
You have previously logged into CVS in SQL Navigator l
The previous login used an authentication method not requiring a password
OR: You checked the Save Password option on the login form
Enter the amount of time, in seconds, you want SQL Navigator to wait for the CVS password prompt. If the timeout expires before the password prompt appears, the login will fail.
The default is 10.
Enter the amount of time, in seconds, that you want SQL Navigator to wait for a login result to be returned after the password is sent. If the timeout expires before a result is returned, the login will fail.
The default is 10.
This option controls the amount of time (in milliseconds) SQL Navigator pauses after sending each character of the password to the CVS password prompt.
The default is zero.
NOTE:
If you find that CVS is returning «invalid password» errors, you may need to increase this number. A suggested figure is 100 milliseconds.
SQL Navigator 7.2
User Guide
125
Option
Restore Defaults
Description
Click Restore Defaults to restore all options to their default values.
CVS Login Window
By default, when you have Team Coding with CVS set up, SQL Navigator will automatically display the CVS login prompt when you connect to the database.
NOTE:
l
If you do not want to connect automatically, then select Disable Login Prompt on Connection from View | Preferences |
Team Coding .
l
When you log into CVS from within SQL Navigator, SQL Navigator opens a command prompt window to send the password to the CVS server. This window may open in the background instead of the foreground causing the login to fail. If this happens, select
Team Coding Menu
|
Provider Logon and log in again.
To display the login prompt manually
Select
Team Coding Menu
| Provider Logon
To login to CVS
Option
Select the root you want to use.
Description
Use
$CVSROOT
Environment variable
Specify
CVSROOT
SQL Navigator attempts to use your CVSROOT environment variable. When you select this option, your current CVSROOT environment variable is displayed in the first box.
NOTE:
This cannot be edited in SQL Navigator ; for instructions on changing environment variables, see you Windows Help.
Select this to specify which CVSROOT to use when issuing CVS commands. SQL
Navigator passes this to CVS using the -d option. Up to ten of the most recently used CVS ROOT values will be remembered. You can select from these by clicking the arrow in the right of the box.
Path Enter a path to your chosen working directory in the Working Directory box.
TIP:
Click Select to select a directory rather than entering the entire path by hand.
Password
Save
Password
Enter your password for the specified CVSROOT. If you have specified a CVSROOT that does not use password authentication (for example, the :local:method) you can leave this box blank. In this case, SQL Navigator will not issue a CVS login command.
If selected, SQL Navigator stores the password in an encrypted form in the CVS.INI file.
SQL Navigator 7.2
User Guide
126
Click OK to proceed with CVS login or Cancel to stop the login process.
NOTE:
Selecting Team Coding | Provider Logon will log you out of CVS for the current connection, even if you click Cancel at the logon prompt. To reconnect, click OK without changing any values.
Updating Working Folders
SQL Navigator requires that your working folders are up-to-date so that it can determine what files and folders are in your CVS repository.
You must update your working folders manually.
To update your working folders
Perform a full checkout and update with your CVS client. You can do this from the CVS command-line client by issuing the following CVS commands in your root working folder: cvs co .
cvs update .
Multiple Connections And CVS Logins
From one SQL Navigator instance, you can connect to multiple databases.
You can: l
Establish different CVS logins for each database l
Share the same login between several instances
After you have logged into CVS once, you will remain logged in, and SQL Navigator will not display the CVS Login dialog box as long as the first instance remains connected.
NOTE:
Each time a new connection to the database is established in SQL Navigator , the CVS login of the most recently established connection will be used.
To log into a different CVSROOT after initial logon, select Team Coding | Provider Logon. See
CVS
Login Window
.
Authentication Methods and the CVS Root
Most CVS servers support several different authentication methods. The authentication method used to access a CVS server is specified in the first part of the CVSRoot. The CVSRoot contains the following sections
:authentication method:[email protected]:port:/path
All sections except path are optional. The following rules apply: l
A CVSRoot consisting only of a path will use the local authentication method. It is synonymous with:
:local:/path l
If the user section is omitted, the CVS client will use your Window login name.
l
The host section must be included for all methods other than local.
SQL Navigator 7.2
User Guide
127
l
The port section is only necessary when the CVS server is listening on a port other than the default port, which is 2401.
CVS Authentication Methods tested with SQL Navigator
SQL Navigator has been tested with the following CVS authentication methods: l pserver l sserver l ssh l sspi l ext l local
Using pserver and sserver methods
Using pserver and sserver is straight-forward.
l
Both require a username and password.
l
With both, SQL Navigator executes the CVS login command.
l
With sspi, username is optional. If a username is supplied, SQL Navigator executes the CVS login command. If no username is supplied, SQL Navigator will not execute the CVS login command.
Using local and ext methods
The local and ext methods do not require a password.
l
The local method is used to access a local CVS repository. This method is assumed if no authentication method is specified.
l
The ext method is used for SSH authentication. For more on using SSH, see
SSH Authentication Using The ext Method .
SSH Authentication Using The ext Method
SQL Navigator supports the use of SSH (Secure Shell) with the ext method as long as the following conditions are met: l
An external SSH client and SSH Authentication Agent must be installed and configured.
l
SSH authentication must be transparent. Toad cannot respond to requests for private key or passphrase.
l
The CVS_RSH user environment variable must be set to specify the SSH client program if the SSH client program is anything other than «ssh».
Example SSH configuration steps:
This configuration uses Plink as the SSH client and Pageant as the SSH authentication agent. Plink, Pageant and
PuttyGen are parts of the PuTTy software package by Simon Tathem.
This is just one sample configuration.
SQL Navigator 7.2
User Guide
128
1. Install PuTTy (including Plink and Pageant)
2. Generate public and private keys using PuttyGen.
3. Upload public key to the CVS server, which must be running SSHD.
4. Load Pageant and register your private key with it. Keep Pageant running whenever SSH is being used.
5. Set CVS_RSH environment variable to the path to plink.exe (for example: c:program filesPuttyplink.exe).
6. Set CVSRoot to :ext:[email protected]:port:/path, where user = your SSH login name on the CVS server host = the CVS server hostname or IP address port = the CVS server port (optional) path = the path to the CVS repository on the server
(for example: :ext:[email protected]:2401:/usr/local/cvs/project).
SQL Navigator 7.2
User Guide
129
8
Modules, Windows And Dialogs
Analyze Tool
Use the Analyze tool to view and collect statistics, validate structure and list chained rows for database structures such as tables, clusters and indexes.
Ways to open the Analyze Tool
From DB Navigator
From the Explain Plan Tool
1. Select a table, cluster or index node in
DB Navigator .
2. Click Object | Analyze or right click Analyze.
1. Select a node in the
Explain Plan Tool .
2. Click Show/Collect Statistics.
Collect Statistics
Select the collection method.
Description Collection
Method
Compute
Statistics
Estimate
Statistics
Delete
Statistics
The entire object is scanned to gather data. The larger the object, the longer it takes to complete the analysis.
Select this option only if the object is small.
Sample by rows or percentage of the object. The accuracy of the statistics depends on the representatives of the sampling.
This option suits large objects.
Delete the statistics gathered for the object.
SQL Navigator 7.2
User Guide
130
Validate Structure
Use to verify the integrity of the selected object.
Select Cascade to additionally verify dependent objects. For example, if you validate the structure of a cluster and select Cascade, SQL Navigator checks all tables and indexes in the cluster.
NOTE:
Oracle returns an error message if it encounters corruption in the structure of an object. To fix errors: Drop and recreate the object from the commands on the
Object Menu .
List Chained Rows
Use to identify migrated or chained rows in a table or cluster. Having a high percentage of chained rows can impair application performance. UPDATE statements that cause migration and chaining perform poorly.
Queries that select migrated or chained rows must perform more I/O than those that do not. For these reasons, it is important to detect and correct them. See Oracle documentation on the possible ways of fixing chained-rows problems.
1. The default name for the table that will contain the chained rows information is CHAINED_ROWS. This is defined at View | Preferences |
General | Default Tables .
2. Click Create Chained Rows Table to create the table. Watch for verification in the
Output Window .
3. Click List Chained Rows to collect the information. Watch for verification in the
Output Window .
4. To view the information select the CHAINED_ROWS table in
DB Navigator
and click
Object Menu
|
Quick Browse .
Auto Describe Tool
The Oracle DESCRIBE command reports the attributes, methods and arguments of an object type. The SQL
Navigator Describe command works with more objects than does the SQL*Plus version of the command. You can describe not only procedures, functions, packages, synonyms, and object types, but also tables, indexes, clusters and objects.
Ways to open the Auto Describe Tool
From the
View
Menu
From the
Code
1. Click View | Auto Describe Tool.
2. Ensure the required database connection is active.
3. Select the object to describe. The object may be in DB Navigator, Project Manager, (for example).
1. Press and hold CTRL.
2. Click on the object’s name.
SQL Navigator 7.2
User Guide
131
Editor
If the object is a text object (view, procedure, function, package or packaged procedure/function) and the Source Preview window is open then the object’s source is automatically previewed.
TIP:
l
Can be used to provide a quick summary of a table or view and all its column names and data types.
l
The Auto Describe Tool is dockable. For more information, see Customize The Screen Layout on page 41 .
l
The Auto Describe Tool always stays on top of the application window.
l
Select the following to automatically display the Auto Describe Tool when you press CTRL and click on an object name and create a hyperlink:
View | Preferences
|
Code Editor | General
|
Describe Object at Hyperlink.
Tips to use the Auto Describe Tool
A quick way to construct a SELECT statement
In the Code Editor
To drag column names into a Select statement
1. Open the Auto Describe Tool.
2. In the Code Editor select the table name.
3. Drag and drop column names from the Describe window into the SELECT statement.
To move the text cursor to the declaration of a variable (or Auto Describe it if it’s the name of an external database) press CTRL and point to the variable with the mouse.
To return to the former position in the text, press Alt+Left Arrow.
Describe Command or Auto Describe Tool
Use either the Describe command or the Auto Describe Tool to describe an object
View Menu |
Auto Describe
Tool
Object menu
| Describe
Automatically see a description of any object you select.
A dockable Describe window opens and stays on top of the application window.
As you select various objects you will automatically see a description of the selected object in the Auto Describe window.
Click the Describe command on the Object menu whenever needed. It opens a describe window for a single selected object and will not update automatically when you select another object.
Benchmark Factory
SQL Navigator 7.2
User Guide
132
Benchmark Factory™ is a highly scalable load testing, capacity planning and performance tuning tool capable of simulating thousands of users accessing your database, file, Internet and messaging servers. Benchmark Factory can simulate user transactions before and during application deployments, enabling performance issues to be addressed before end users are affected.
l
Allows IT professionals to determine system capacity and isolate system stress related problems l
Common interface displays the testing of databases, Internet, e-mail and file servers.
l
Simulates the maximum number of users on a minimal amount of hardware l
Enables IT professionals to discern problems before and after applications are deployed l
Comprehensive tutorials cover load testing, benchmarking, capacity planning and performance tuning, including information on configuring your system and analyzing results.
NOTE:
Requires installation of Benchmark Factory. Benchmark Factory is installed independent of SQL
Navigator.
Bookmarks Dialog
View / Go to / Delete bookmarked lines in the code.
Option
List of bookmarks
Jump
Delete
Description
Click on a bookmark to highlight it.
View the highlighted bookmark in an editor.
Delete the highlighted bookmark.
TIP:
More bookmark actions can be found on the
Edit Menu .
Capture Web Output
When you first log in to SQL Navigator, the Web server is not enabled for use.
Start Capturing Web Output
1. Click Session | Capture Web Output.
2. Verify that the Oracle Web Toolkit is installed and visible to the schema. Check the
Output Window
for a confirmation message.
SQL Navigator 7.2
User Guide
133
While Capturing Web Output
Each time you execute PL/SQL code that generates HTML output, the generated HTML is displayed in the
HTML Viewer .
NOTE:
If the PL/SQL procedure is run under the debugger, the HTML output is not visible until the procedure is complete.
Change Logon Password
Modify the logon password of the current session.
Option Description
Old password The password you used to logon to the Oracle session.
New password
What you want to change the password to.
Verification Type the new password twice: once in the New password box and then again in the
Verification box.
Code Analysis
Code Analysis is an automated code review and analysis tool. It enables individual developers, team leads, and managers to ensure that the quality, performance, maintainability, and reliability of their code meets and exceeds their best practice standards.
NOTE:
This feature is available in the Professional Edition and higher.
Access to Code Analysis
Code
Editor
Code Analysis is available in the Code Editor, which ensures code quality from the beginning of the development cycle. In the Code Editor, Code Analysis evaluates how well a developer’s code adheres to project coding standards and best practices by automatically highlighting errors and suggesting smarter ways to build and test the code.
Code
Analysis
Window
SQL Navigator also provides a dedicated Code Analysis window, where you can perform more detailed analysis, evaluate multiple scripts at the same time, and view a detailed report of the analysis.
SQL Navigator 7.2
User Guide
134
Rules and Rule Sets
Code Analysis compares code against a set of rules (
Code Analysis Rules ) for best practices. These rules are
stored in rule sets ( Code Analysis Rule Sets ).
The Code Analysis rules and rule sets can be adjusted to suit the requirements of different projects.
Regardless of whether developers are responsible for their own code quality or if this needs to be managed centrally, Code Analysis can be adapted to fit either need.
Code Analysis Metrics
Code Analysis uses a variety of metrics to evaluate code, including the following: l
Computational Complexity (Halstead Volume)—Measures a program module’s complexity directly from source code, with emphasis on computational complexity. The measures were developed by the late
Maurice Halstead as a means of determining a quantitative measure of complexity directly from the operators and operands in the module. Among the earliest software metrics, they are strong indicators of code complexity. Because they are applied to code, they are most often used as a maintenance metric.
l
Cyclomatic Complexity (McCabe’s)—Cyclomatic complexity is the most widely used member of a class of static software metrics. It measures the number of linearly-independent paths through a program module. This measure provides a single ordinal number that can be compared to the complexity of other programs. It is independent of language and language format.
l
Maintainability Index (MI)—Quantitative measurement of an operational system’s maintainability is desirable both as an instantaneous measure and as a predictor of maintainability over time. This measurement helps reduce or reverse a system’s tendency toward «code entropy» or degraded integrity, and to indicate when it becomes cheaper and/or less risky to rewrite the code than to change it. Applying the MI measurement during software development can help reduce lifecycle costs.
The Code Analysis Report includes detailed descriptions of the code metrics and how they work. For more information, see Code Analysis Window on page 135 .
Code Analysis Window
The Code Analysis window provides detailed analysis, including a results dashboard, report, and tree view with violations and code properties. You can also simultaneously analyze multiple files from this window.
NOTE:
This feature is available in the Professional Edition and higher.
To perform detailed code analysis
1. Click Tools | Code Analysis.
2. Load files or objects to analyze.
SQL Navigator 7.2
User Guide
135
Open files.
Load objects from the database. You can click the drop-down arrow beside this button to load all objects or choose a group of objects to load.
3. Select the rule set you want to use in the Code Analysis toolbar (the default is Top 20).
4. To evaluate statements’ complexity and validity, select Run SQL Scan in the Run Review list on the
Code Analysis toolbar.
5. Select the items to analyze in the grid.
Use SHIFT or CTRL to select multiple items.
6. Analyze code for all selected items. Click or press F9. (Ensure Run Review is selected.)
Alternatively, to apply your selection to all items press F5.
7. Review the Code Analysis results.
Send code back to the Code Editor from the selected file or object. SQL Navigator displays the Code
Analysis errors and violations in the tabs below the Code Editor.
Additional details
Grid
Dashboard
The right side of the grid displays a dashboard of violations and statistics. The dashboard includes the item’s Toad Code Rating (TCR), which is a composite of several rating criteria. The score ranges from 1 (best) to 4 (worst). It provides a quick reference for how your code has performed in the analysis.
Result tab The Results tab displays the analysis results in a tree view. Expand each node for details on the violations. If you select a violation in the tree view, the preview on the right displays the corresponding code.
The Result tab displays the results for the item selected in the grid. If you analyzed multiple items and select them in the grid, the tab displays the results for all of the selected items.
NOTE:
Click in the Code Analysis toolbar to view an icon legend.
Report tab
The Reports tab summarizes the analysis results and includes rule definitions. Items in the table of contents are hyperlinked so you can easily navigate the report.
NOTE:
By default, the Report tab only displays the analysis for one item. However, you can select Display all selected results on Report tab to include multiple items in the report.
Code Analysis Rule Sets
A rule set is a collection of rules that Code Analysis uses to evaluate code. You can create your own rule set and determine which rules to include. You can also import existing rule sets from outside SQL Navigator, and export user-defined rule sets.
SQL Navigator 7.2
User Guide
136
1. From the
Tools Menu , click Tools | Code Analysis.
2. From the Code Analysis toolbar, click .
Create and Edit
Icon Description
Edit the selected rule set.
NOTE:
You cannot edit SQL Navigator’s standard rule sets.
Create a rule set
Use the selected rule set as your template
For each rule in the rule set, select the rule to include it, deselect the rule to exclude it.
Import and Export
Icon Description
Import a rule set. Navigate to the location of the rule set and click Open.
If the rule set has user defined rules then when importing you will be asked if a rule-export file exists, and you want to import it. If so the rules are imported. If any rule numbering has to occur because of conflicts, the rule set is automatically updated to the new rule numbers.
Export a user-defined rule set.
If the rule set has user defined rules then when exporting you will be asked if you want to export those user-defined rules with the rule set. If so the rules are saved as RuleExport.XML in the same directory as the exported rule set.
Code Analysis Rules
You can use existing Code Analysis rules or clone them and customize them to confirm your code meets your code review requirements. you can import and export rules.
1. From the
Tools Menu , click Tools | Code Analysis.
2. From the Code Analysis toolbar, click .
SQL Navigator 7.2
User Guide
137
Create or Clone
Icon Description
Create a rule
Clone the selected rule
The Code Analysis Rule Builder
Rule IDs are automatically generated sequentially from 7000 to 9000.
Enter the Description and specify the Rule Tip.
l
Specify Rule Severity, Rule Objective, and Rule Category.
l
Click to display the XML that SQL Navigator generates. This is helpful for use in an external XPath parser such as SketchPath to refine the XPath expression.
l
Create the XPath Expression. To test the rule, click .
A checked box in the User Defined column will be displayed for the rule you created.
Edit
Select the rule to edit. Edit the fields as necessary.
Field
Code Preview
XPath Expression
Description
Enter code to use for testing the rule.
Edit the XPath. If this field is blank, then you cannot edit the XPath for the rule.
To test the rule, click .
To restore a rule or all rules, you can select the rule and click the ‘Restore Original Rule Value’ button, or the double-arrow ‘Restore All Original Rule Values’ button.
Import and Export
Icon Description
Import a rule. Navigate to the location of the rule and click Open.
NOTE:
l
If a modified SQL Navigator rule is imported, the changes are applied to the rule in place.
l
If a user-defined rule has a number that already exists, the imported rule is given the next available rule number and added.
SQL Navigator 7.2
User Guide
138
Icon Description
Export the selected user-defined rule.
Code Assistant
Drag and drop PL/SQL syntax, SQL functions, column names, and database object names into code.
Move a code snippet into the editor
1. Click
View Menu
| Code Assistant.
2. Click the cursor in the editor where you would like the snippet inserted.
3. Select the code snippet in Code Assistant. Double click on the code snippet or drag it into the editor.
Locate a code snippet in the Code Assistant
Code Snippets are stored in catalogs. The catalogs are as follows.
Catalog Description
Syntax and Web
Catalog
Browse the ready-to-use library of PL/SQL syntax. The Knowledge Xpert gives SQL Navigator users a library of more than 900 pre-built PL/SQL routines that can eliminate hours of low-level coding and debugging while enhancing application performance and reliability.
PL/Vision
Catalog
Knowledge Xpert products are available as optional add-on modules. For more information, see
Search Knowledge Xpert on page 193 .
Code and
SQL
Catalog
Store your own frequently used SQL statements and code fragments here.
For example, you can store your frequently-used cursor declarations or variable declarations.
TIP:
The catalog sorts the folders and items alphabetically by name. Use your own naming conventions or prefixes to group similar snippets together.
Syn- IF THEN ELSIF …
Syn- WHERE clause …
Syn- SQL — Correlated subquery
Etc.
SQL Navigator 7.2
User Guide
139
The Code Assistant Toolbar
Icon Tool Tip Description
Add new item or node Add a code snippet or SQL statement. Open the
Add to Catalog / Edit Dialog
.
Edit item or node
Delete item or node
Edit the selected item. Open the
Add to Catalog / Edit Dialog
.
NOTE:
l
To quickly rename an item: select it in the catalog then click on it.
l
You cannot rename the top level folders in the tree.
Delete the selected item.
NOTE:
You cannot delete the top level nodes of the tree.
Paste snippet into editor
Show information window
Capture code
Save all catalogs to disk
Use to paste a code snippet into an editor:
1. Click the cursor in the editor where you would like the snippet inserted.
2. Click Paste snippet into editor.
TIP:
Alternatively drag and drop the snippet into the editor.
Show/Hide the information pane.
The information pane shows detailed information on the selected item.
Use to add a code snippet or SQL statement from an editor window into the catalog:
1. Select the code in the editor window.
2. Click Capture Code.
This opens the
Add to Catalog / Edit Dialog
with the selected code already inserted.
Save changes.
Add to Catalog / Edit Dialog
Add a code snippet or folder to the Code Assistant Code and SQL Catalog. Manage items in the catalog.
Field
Name
Description
Make the name descriptive.
Names can be up to 35 characters long and contain uppercase letters, lowercase letters, and
SQL Navigator 7.2
User Guide
140
Field
Snippet
Description
any of the following characters:
_ — & space < > / , ‘ ( ) ..
Entry Type Select Code Snippet or Folder.
The snippet of code.
NOTE:
For code snippets only.
Information The text to be displayed in the Code Assistant Information pane.
Hint
Image
The text to be used as a hint in the status bar at the bottom of the Code Assistant window.
The icon to identify the code snippet in the catalog (Generic, Function, or Procedure).
NOTE:
For code snippets only.
Code Road Map
The Code Road Map graphically displays the complex PL/SQL interdependencies within a database.
Code Road Map Toolbar
Icon Tool Tip
New code road map
Clear diagram
Open file
Save file as
Save file
Save diagram as text file
Description
This opens the
Model Code Dialog
.
Clear the model window. Revert to the initial start up state.
Open a saved map file (Extension: .crm).
Save the map with a new name (Extension: .crm).
Save the map (Extension: .crm).
Save the map as a text file.
The file consists of a list of the objects and what they reference.
For example the following might be the results of a small code map:
PROCEDURE CRM_TEST EX_PROC_1 —> PACKAGE CRM_TEST EX_
PACK_2
SQL Navigator 7.2
User Guide
141
Icon Tool Tip
Save diagram as bitmap
Print diagram
Print preview
Code road map info
Collapse packages
Description
PROCEDURE CRM_TEST EX_PROC_1 —> PROCEDURE CRM_TEST EX_
PROC_2
PROCEDURE CRM_TEST EX_PROC_1 —> PROCEDURE CRM_TEST EX_
PROC_3
PROCEDURE CRM_TEST EX_PROC_1 —> TABLE CRM_TEST EMP_
SNAPSHOT
PROCEDURE CRM_TEST EX_PROC_1 —> VIEW CRM_TEST SALES
The map is laid out as follows where the arrow means «calls».
OBJECT-TYPE SCHEMA OBJECT NAME —> OBJECT-TYPE SCHEMA
OBJECT NAME
Create a bitmap version of the map.
TIP:
You could copy the image to the clipboard. Right click over the map and select Copy Image to Clipboard.
Print the model side of the map.
Preview before printing.
Add a comment to your code map.
Collapse/Expand Package View.
Icon Tool Tip
Collapse
Packages
Expand
Packages
Description
Show/Hide referenced sub units under the object type.
NOTE:
Applicable to Code Type | Package as set in the
Model Code Dialog
.
Refresh the diagram.
Refresh diagram
Choose colors for database objects Color code database objects.
Zoom Zoom in or out of the model.
Previous auto layout / Next auto layout
Scroll through layouts of the Code Road Map.
SQL Navigator 7.2
User Guide
142
The Code Model
The code model consists of two panels. The left panel shows a list of components in a hierarchical tree. The right panel shows a graphic model of the code. The design is similar to models created using
SQL Modeler .
Hierarchical Tree
The hierarchical tree is organized by object type. All procedures are listed under the Procedures node, and all tables under the Tables node.
Click on an object to highlight it in the
Graphical Model.
Graphical Model
Each object listing contains the name of the object, the schema where it resides, and the type of object. For Code Type | Package in Collapse Package view, any sub units that are referenced will be included under the object type. For example:
Lines indicate where an object is dependent on another. Lines have a knob end (the referencing object) and an arrow end (the referenced object).
In this example, DISK_UTIL references the library NT_KERNEL, specifically from the function GET_DISK_FREE_SPACE. The model is in Collapse Package view.
A self-recursive reference is shown with the arrow returning back to the object, as follows:
Actions: l
Click on an object in the tree view and the Graphic Model centers on that object.
l
Right-click on an object to
Actions: l
Right-click on an object to display the popup menu from the
Schema Browser for that object type.
l
F2 toggles full screen mode.
l
F4 or Double-clicking on an object performs a Describe, if SQL
SQL Navigator 7.2
User Guide
143
Hierarchical Tree
display the popup menu from the Schema Browser for that object.
l
F4 performs a Describe, if SQL
Navigator supports Describes on that object type.
l
Double-click an object to perform a Describe.
Graphical Model
Navigator supports Describes on that object type.
Model Code Dialog
Select the code to map and the options to use when the code is mapped.
Field
Schema
Code Type
Code Unit
Sub Unit
Description
The schema where the code is located.
Select from: function, package, procedure and trigger.
The options depend on the Code Type selected.
The various parts of the package, sorted alphabetically. The first sub unit is selected by default.
NOTE:
Visible for Code Type | Package.
Levels to
Model
Display Mode
The number of levels to model down from the starting object. The default is ten.
Option Description
Code
Only
Model the code the object calls.
Display a graphical representation of the run-time, call-stack dependencies.
Code +
Data
Model both the code called and data (tables, views, and so on) referenced by the object.
Display the database objects the code references and in what manner (for example, read versus write). You can also include pertinent triggers and views.
Views are essentially treated as tables.
Display
Options
Select as appropriate. These options affect the visual display of the map. The data in the map is not affected.
l
Expand packages and types for calls into them l
Include triggers (for Code + Data) l
Include views (for Code + Data) l
Include calls to SYS-owned objects
SQL Navigator 7.2
User Guide
144
Field Description
l
Include calls to other schema PL/SQL
Code Templates
Insert ready-made code segments into any active editor window.
Action
Insert code from a template into an active editor window.
Add / Edit / Delete code templates.
Description
1. In the editor, place the cursor where you want to insert the code segment.
2. Choose one of the following: l
Type the shortcut key to the code template.
l
Type the full or partial name of the code template and press
Ctrl+J to either insert the matching code template or select from a list of matches.
l
Press Ctrl+J. Select the template name from the drop-down list and press Enter.
Click View | Code Templates | Edit Code Templates. This opens the
Code
Shortcuts And Templates Dialog
Each template is a file in the SQL Navigator installation Templates directory.
The maximum number of templates allowed, including preformatted templates, is 100.
Standard code routines for which templates have been provided:
Code Description
Basic Loop Statement
Boolean Statement
Close Cursor Statement
DBMS_OUTPUT.Put_Line
Exception
Exit When Statement
Shortcut Key
Shift+Ctrl+L
Shift+Ctrl+B
Shift+Ctrl+C
Shift+Ctrl+D
Shift+Ctrl+E
Shift+Ctrl+X
SQL Navigator 7.2
User Guide
145
Code Description
For Loop Statement
GOTO Label Statement
IF Statement
MLSLABEL Statement
Number Statement
Open_Cursor Statement
Raise_Exception
SQLCODE Statement
VARCHAR2 Statement
Variable_name
While Condition Statement
Shortcut Key
Shift+Ctrl+F
Shift+Ctrl+G
Shift+Ctrl+A
Shift+Ctrl+M
Shift+Ctrl+N
Shift+Ctrl+O
Shift+Ctrl+R
Shift+Ctrl+S
Shift+Ctrl+V
Shift+Ctrl+T
Shift+Ctrl+W
Code Shortcuts And Templates Dialog
Create your own code templates. Edit or delete existing code templates. Change the shortcut key definitions attached to a template.
Option Description
Templates Click on a template to select it.
Code
Add
Delete
Column
Name
Description
The name of the template. A template name is a single word with no spaces.
You cannot change a template name. Instead, you can delete an existing template and create another like it with a different name.
Description A short description of the template.
Click in the Description field to edit it.
Shortcut key
The shortcut key combination used to insert the template code into an editor.
Click in the field to change the Shortcut key. Select from those available. To have no shortcut key select None.
View / Edit the SQL code for the selected template.
Create a new template.
Delete the selected template.
You cannot delete all the templates. There must be at least one template remaining in the
Code Shortcuts and Templates dialog.
SQL Navigator 7.2
User Guide
146
Default Templates
Name
Basic Loop
Description
Basic Loop Statement
Boolean Boolean Statement
Close Cursor Close Cursor Statement
DBMS_PutLine DBMS_OUTPUT.Put_Line
Exception Exception Statement
Exit_When
For_Loop
GOTO_Label
IF
MLSLABEL
Number
Open_Cursor
SQLCODE
VARCHAR2
Exit When Statement
For Loop Statement
GOTO Label Statement
IF Statement
MSLABEL Statement
Number Statement
Open_Cursor Statement
Raise_Exception Raise_Exception
SQLCODE Statement
VARCHAR2 Statement
Variable_name Variable_name
While_ While
Code
LOOP
statements;
END LOOP;
Boolean;
Shortcut Key
SHIFT+CTRL+L
CLOSE cursor_name;
DBMS_OUTPUT.Put_Line(string);
EXCEPTION
WHEN exception_name THEN
statements;
WHEN no_data_found THEN
statements;
WHEN others THEN— Handles all
exceptions
statements;
SHIFT+CTRL+B
SHIFT+CTRL+C
SHIFT+CTRL+D
SHIFT+CTRL+E
EXIT WHEN condition_is_true ; — To exit loop SHIFT+CTRL+X
FOR J IN 1..12 LOOP
statements;
END LOOP;
SHIFT+CTRL+F
GOTO label_name ;
IF condition_is_true THEN
statements;
SHIFT+CTRL+G
SHIFT+CTRL+A
MSLABEL;
NUMBER( precision , scale ),
SHIFT+CTRL+M
SHIFT+CTRL+N
OPEN cursor_name ;
RAISE exception_name ;
SQLCODE;
VARCHAR2( size ), variable_name ColName%TYPE;
WHILE condition_is_true LOOP
SHIFT+CTRL+O
SHIFT+CTRL+R
SHIFT+CTRL+S
SHIFT+CTRL+V
SHIFT+CTRL+T
SHIFT+CTRL+W
SQL Navigator 7.2
User Guide
147
Name
Condition
Unassigned
Unassigned
Unassigned
Unassigned
Unassigned
Unassigned
Unassigned
Description
Condition Statement
Code
statements;
END LOOP ;
Shortcut Key
SHIFT+CTRL+H
SHIFT+CTRL+J
SHIFT+CTRL+K
SHIFT+CTRL+P
SHIFT+CTRL+Q
SHIFT+CTRL+Y
SHIFT+CTRL+Z
Code Test
The Code Test panel automates the process of testing PL/SQL programs.
To open the Code Test module
1. Open a procedure or function to test in the
Code Editor
.
2. Click Tools | Code Test
3. All test cases currently defined for the procedure / function are displayed. Packages are grouped by entry point.
Icon Tool Tip
Open and
Select
Object
Refresh
Description
Opens the
Select DB Object Dialog
.
Refresh the list of test cases against the current object.
Create
New Test
Case
Edit Test
Case
Clone Test
Case
Run
Selected
Opens
Test Case Properties
. Create a new test case.
The first time you create a test case, you are prompted to install the Code Tester for
Oracle® repository. Installation of this repository is required. Complete the wizard that is launched.
Opens
Test Case Properties
. Includes the properties of the highlighted test case.
Opens
Test Case Properties
. Renames the test case. Includes the properties of the highlighted test case.
Runs the selected test cases.
SQL Navigator 7.2
User Guide
148
Icon Tool Tip
Test Cases
Description
l
Test Case Selected l
Test Case Not Selected
As test cases are run, the status of each is shown.
TIP:
l
Right click on the test case for further options.
l
Use the search facility to search for test cases by name or parameter.
l
Test cases created in SQL Navigator can also be used in Code Tester for Oracle®.
Test Case Properties
You describe the expected behavior of a program and then SQL Navigator generates the required code for the test case.
Field
Test Name
Description
The name of the test case selected or a new name. This field is editable.
Configure input parameters and expected outputs.
Parameter, Input & Expected
Output
Test & Result
Exception Outcome
Field
No Exception
Exception
Expected
Description
Select if you do not expect the test to raise an exception.
Select if you expect the test to raise an exception.
Fill in the expected Error Code as a number.
Elapsed Time Outcome
Field Description
Check Select to test the time taken to execute the code.
Time
(ms)
The maximum time allowed for the code to complete execution (in milliseconds).
Database Source Code Search
Search stored programs, triggers and views for a character string in the source code.
SQL Navigator 7.2
User Guide
149
TIP:
You can use this utility to perform a quick «where-used» impact analysis.
Open the Database Source Code Search dialog
Select Search | Code Search.
Define the search criteria
1. From the What tab define the search string.
2. From the Where tab select the schema and object type.
3. Click Search.
You can stop/suspend the search from the
Session Menu
or toolbar.
Now objects have been found
Take actions on found object(s)
Icon Action
Edit
Describe
Add to
Project
Manager
Source
Preview
Description
Double click on the object.
The object opens in the corresponding editor with the cursor at the line containing the
search string. For more information, see Visual Object Editors on page 90 .
View Describe information on the object.
Right-click on a row in the results set to see
Describe
information.
Save a shortcut to the code location.
Drag the selection from the result list to the
Project Manager
.
Open
Source Preview
.
Select found text objects to view their source code.
DB Navigator
DB Navigator shows the entire database structure as a tree with expandable nodes.
SQL Navigator 7.2
User Guide
150
DB Navigator Toolbar
Icon Tool Tip
Back and
Forward
Up One
Level
Description
Retrace your steps. Navigate between hyperlinked database objects and their dependent objects and components. Move between— l
An object and its dependencies, and vice-versa l
An index or trigger and the table to which it refers, and vice-versa l
A collector type and the base type of table it is related to l
A synonym and its base object
You can also use the Forward and Back buttons in conjunction with Up One Level.
Change hierarchy levels in the DB Navigator tree.
TIP:
Use Back to return to the level where you first used moved up.
DB
Navigator
Preferences
Set and Save filters to limit the objects displayed in the tree.
Open the
Filter Properties Dialog
.
Expand the selected DB Navigator node and all its descendants.
Fully
Expand
Node from
DB
Refresh from
Current
Node
Show/Hide
Details
Panel
Refresh the selected DB Navigator node.
Show / Hide details about the selected DB Navigator node.
l
When you select a Schema node or Object Type node (for example, Tables or
Indexes) the details pane shows a list of objects contained in that node. This list allows for selection of multiple objects for batch operations like Drop, Extract
DDL, or Compile.
l
When you select a specific object the details pane shows attributes of the selected object.
Using DB Navigator
DB Navigator displays all types of Oracle objects, giving you a hierarchical view of any schema, including dependent objects. The tree view includes nodes for «My Schema,» «All Schemas,» and «Current Instance.»
SQL Navigator 7.2
User Guide
151
This symbol Indicates
The node can be expanded.
Click + to drill down to underlying objects or data.
Alternatively, press the right arrow key or the space bar while the node is selected.
The node can be collapsed.
Click the – sign.
Alternatively, press the left arrow key while the node is selected.
(Grayed text) The database object at that node is disabled or offline.
(Red text) The database object at that node is invalid.
TIP:
l
Drag objects or connections that you use frequently to the
Project Manager
for fast access.
l
Double click on an object to open it for editing ( Visual Object Editors
,
Code Editor
).
l
Further commands are available on a selected object (or objects). Try the
Object Menu . Right
click on the object.
l
When a property is a reference to another database object (for example the base table for an index, or synonym’s base object), click on the reference in the Value column to jump to the referenced object’s node and display its properties.
l
To move around in the Navigator window you can use the keyboard arrow keys. Use Page Up and
Page Down to scroll multiple lines.
l
To purge objects: Select the object(s) in the Recycle Bin and right click Purge. Alternatively, right-click on the Recycle Bin node and select Empty Recycle Bin.
l
To copy an object from one schema to another:
1. Open a second DB Navigator window.
2. Drag the object from the source window to the target window.
3. Execute the DDL displayed in the editing window l
To switch to another session’s DB Navigator window, select the session and click View | DB
Navigator.
l
Your view of the Oracle Data Dictionary determines what objects you can see. For more information, see DBA Dictionary Views on page 48 .
Filter Properties Dialog
Create or modify DB Navigator filters that restrict the display of objects in the DB Navigator tree. You can save your filters, so that they will be available from the DB Navigator toolbar.
SQL Navigator 7.2
User Guide
152
Select filter
Field
Filter Name
Description
Select an existing filter name or enter a new one.
Select filter settings.
Tab Description
General Selected schemas will be visible in the DB Navigator tree when the filter is applied.
Global
Filters
Selected top level nodes will be visible in DB Navigator when the filter is applied.
Object
Filters
Selected object types will be visible in the DB Navigator window when the filter is applied.
Application of name masks
Type the name mask in the Filter box.
Name masks are specified according to Oracle’s LIKE operator definition. For example, setting the name mask ABC% will result in displaying only those objects with names beginning with the characters «ABC».
The name mask is applied to all selected object types. Click Assign Globally.to
apply the name mask to all objects.
Describe
The Oracle DESCRIBE command reports the attributes, methods and arguments of an object type. The SQL
Navigator Describe command works with more objects than does the SQL*Plus version of the command. You can describe not only procedures, functions, packages, synonyms, and object types, but also tables, indexes, clusters and objects.
To open the Describe window
Object Menu
DB Navigator
Project Manager
Code Editor
1. Ensure the required database connection is active.
2. Select the database object.
3. Click Object | Describe.
Right click the object in DB Navigator and select Describe.
Right click the object in Project Manager and select Describe.
Right click the object in Code Editor and select Describe Object at Cursor.
SQL Navigator 7.2
User Guide
153
Shortcut Ctrl+F3
TIP:
To keep the existing Describe window open while opening additional Describe windows, click the
Pin toolbar icon in the Describe window. Set the default pin behavior in View | Preferences | General
| User Interface.
l
Can be used to provide a quick summary of a table or view and all its column names and data types.
Tips to use the Describe window
A quick way to construct a SELECT statement
To drag column names into the Select statement
1. In the editing window, click the cursor on the table name.
2. Open the Describe window.
3. Drag and drop column names from the Describe window into the SELECT statement.
Describe Command or Auto Describe Tool
Use either the Describe command or the Auto Describe Tool to describe an object
Auto
Describe
Tool
Automatically see a description of any object you select.
A dockable Describe window opens and stays on top of the application window.
As you select various objects you will automatically see a description of the selected object in the
Auto Describe window.
Object |
Describe
Click the Describe command on the Object menu whenever needed. It opens a describe window for a single selected object and will not update automatically when you select another object.
Difference Viewer
The Difference Viewer displays the compared objects in a split window. Differences between the objects are highlighted, and the toolbars and menus give you access to controls for customizing the view and creating reports.
SQL Navigator 7.2
User Guide
154
The Difference Viewer Toolbar
Icon Tool Tip Description
Reload and recompare files
Reload the external SQL/text files. Recompare.
Open files Open an external SQL/text file.
Save Save to an external SQL/text file.
Switch sides
Find
Previous
Difference
Find Next
Difference
Show All
Switch left and right sides.
Go to the previous difference.
Go to the next difference.
Show all lines of the compared objects.
Just Show
Differences
Show only lines with differences.
Just show major differences
Show only lines with major differences (as defined by
File Comparison Rules
).
Show only matching lines.
Just show matching lines
Find Find a text string.
Find again Find the next occurrence of the text string.
Go to line number
Copy To
Right
Copy To
Left
Delete left text
Delete right text
Undo
Go to a specific line number.
Replace the selected line (right) with the selected line (left).
Replace the selected line (left) with the selected line (right).
Delete the selected line (left).
Delete the selected line (right).
Undo the change made to the selected line.
Produce file differences
Generate a report of differences.
SQL Navigator 7.2
User Guide
155
Icon Tool Tip Description
report
Comparison summary
Compare similarities and differences in a summary.
Show whitespace
Show/Hide space characters as tilde (~) characters.
Show/Hide line numbers.
Show line numbers
Show thumbnail view
Show/Hide thumbnail view.
The thumbnail view (to the left of the viewing window) is a visual summary of differences. Colored lines show the relative position of line mismatches. A white rectangle represents the part of the text currently visible in the Difference Viewer window. You can click on the thumbnail view to position the viewer at that point.
Use to quickly change locations within the viewing window.
Show line details
File comparison rules
Options
Show full details of the current line below the viewing window (so you don’t have to scroll to see the entire line)
Open
File Comparison Rules
.
Open
Viewer Options
.
View Differences Dialog
Select objects or scripts to compare in the
Difference Viewer
.
Viewer Options
Appearance | Color Scheme
1. Select a color scheme for each of: l
Matching Text l
Similar Text l
Different Text
2. Define how missing text should be displayed.
Select Color and click Select Color to choose the color block to show to represent missing text.
Alternatively, select Blank.
SQL Navigator 7.2
User Guide
156
3. Click Font to customize the font, font style, font size and script.
4. Select Horizontal Lines Between Mismatches if desired.
TIP:
All changes to the appearance can be previewed in the sample viewer display in the Viewer
Options window.
Appearance | Find Next Difference
Customize finding the next difference.
File Comparison Rules
General
Option Description
Tab Stops Set the width of Tab Stops displayed in the Difference Viewer.
Synchronization
Settings
The Synchronization Settings control the workings of the comparison engine that reports differences and similarities between the two files. You can set the synchronization parameters low to allow more efficient searches for small differences, or higher for handling larger files or files with large differences. Unless you are experienced in manipulating comparison synchronization algorithms, you will probably find that the default settings work well enough for most situations.
Option Description
Initial Match
Requirement
The minimum number of lines that need to match in order for text synchronization to occur.
Skew
Tolerance
Suppress
Recursion
The number of lines the Difference Viewer will search forward or backward when searching for matches. Smaller numbers improve performance.
Suppress Recursion refers to the method used to scan for matches.
Recursion improves the ability to match up larger as well as smaller sections of text, but it can take longer.
Ignore Minor
Differences
Selected Ignore minor differences so you can focus only on significant differences.
Not
Selected
Highlight minor differences in the Difference Viewer window. Minor
Differences are as defined in the Define Minor tab.
SQL Navigator 7.2
User Guide
157
Define Minor
Option
Case
Leading Whitespace
Trailing Whitespace
Embedded Whitespace
/* Text within Slash-Asterisk
*/
(* Text within Parenthesis-
Asterisk *)
{ Text within Curly Braces }
Text Beginning With
Fortran Comments
Description
Select the items you want highlighted as minor differences. Items not selected will be ignored.
Ensure General | Ignore Minor Differences is not selected.
Edit Data
Use to edit data in a table object.
1. Select the table object.
2. Click Object | Edit Data.
3. The Code Editor opens. The query is run with Updateable switched on. For more information, see SQL
Query Results Data Grid on page 70 .
ER Diagram
The ER (Entity Relationship) diagrammer lets you quickly model a table and graphically see the dependencies and joins to other tables.
NOTE:
To ensure indexes are delivered in the correct order in a diagram, ensure the Oracle Data
Dictionary is queried with DBA Views. For more information, see DBA Dictionary Views on page 48 .
SQL Navigator 7.2
User Guide
158
ER Diagram Toolbar
Icon Tool Tip
New ER Diagram
Clear ER Diagram
Description
Opens
Create ER Diagram
.
Clear the ER Diagram window.
Open File
Save File As
Open a saved ER Diagram.
Save the ER Diagram.
Save File
Save Diagram as Bitmap
Print Diagram
Print Preview
Print the ER Diagram.
ER Diagram Info Show detail of the ER Diagram.
Load ER Diagram in the SQL
Modeler
For more information on the SQL Modeler, see
SQL Modeler
.
Find Table Dependencies Show joins between tables.
This feature does not add new objects to the diagram; it only finds joins between objects already displayed.
Refresh Diagram Refresh the ER Diagram window.
Scale Zoom in / out of the window.
Previous auto-layout /
Next auto-layout
Scroll through the layouts.
ER Diagram Display Area
For each table in the model
Diagram
Part
Description
Title Bar The name of the table and schema it resides.
Body Area The columns in the table, the column type, whether the column is indexed, and icons as applicable and selected in
Create ER Diagram
.
SQL Navigator 7.2
User Guide
159
Diagram
Part
Description
Connector
Lines
Lines connect tables that are dependent on each other. Lines have a knob end and an arrow end. The referencing table resides at the knob end, and the referenced table at the arrow end.
To add tables to the diagram
Drag-and-drop from: l
DB Navigator
l
From the tree, drag a single object only.
l
From the Details pane, drag a list of objects.
l
Find objects Dialog
l
Project Manager
Create ER Diagram
Field
Schema
Table
How many levels of referential tables do you want to load?
Display Options
Description
Select the Schema where the table resides.
Select the table to diagram.
Select as appropriate.
The more levels of referential tables you load, the more complicated the diagram will become, and the longer SQL Navigator will take to create the diagram.
Select from: l
Show primary keys l
Show foreign keys l
Show unique keys l
Show data type l
Show not nullable l
Show indexes
If the display option has an icon associated with it, the icon is displayed to the right of the option. In the diagram, the appropriate icon will appear to the left of the table name.
SQL Navigator 7.2
User Guide
160
Explain Plan Tool
Use the Explain Plan tool to analyze the execution of a single SQL statement. By examining the execution plan, you can see exactly how Oracle executes your SQL statement, and how it can be improved.
This tool lets you: l generate plans and save them in the table of your choice l organize your saved plans by various criteria, such as type (for example, online SQL statements, batch
SQL statements, and so on), module, or subsystem l build separate plan tables for different subsystems in your project l browse each table separately.
TIP:
The
Analyze Tool
can be used in conjunction with the Explain Plan tool. The Explain Plan Tool does not analyze tables itself prior to executing the Explain Plan, but it does have a toolbar button for manual launch of the Analyze Tool.
Explain Plan Window
Generate Plans Drag a SQL Statement into the editor on this tab.
Option
Stmt ID
Description
If required, you can enter a Statement ID to identify the statement within the current plan table.
Select to save the SQL when saving the generated plan.
Save SQL text
Comment
Plan Table
Owner
Name
Optionally, comment on the plan.
Enter the Plan Table Owner or use the default listed.
Enter the Plan Table Name or use the default listed.
TIP:
If specifying a new plan table, use the Create Table button to create the table.
Click to view the Oracle execution plan for the statement.
Generate
Browse previously saved execution plans.
Browse Saved
Plans
Operation
Description
Plan
Explain the node selected in the Explain Plan tree. Show how each SQL operation is executed in relation in the Explain Plan.
Show / Hide in Generate Plans | Show Description.
The generated execution plan. Click on nodes to expand and collapse them.
SQL Navigator 7.2
User Guide
161
Print the Explain Plan tree
Use File | Print.
The following data is printed: l
The SQL Statement from which the explain plan tree was derived l
Statement ID, Type, Cost and Time stamp l
The Explain Plan tree, including the execution sequence numbers in brackets
TIP:
l
When the printout exceeds one page, the headings (such as the SQL Text and statement ID lines) are not repeated. This makes it easy for you to ’tile’ multiple pages together to display the explain plan tree as a single diagram.
l
Use File | Print Preview to preview your output.
Export Table
Open the Export Tables window
Open the Export Tables window from
Object Menu
| Export Table.
TIP:
Select the objects to be exported before you open the Export Tables window. Use for example
DB
Navigator ,
DB Explorer
,
Project Manager
, a list of results after finding objects.
Select the tables to export (1)
In the Export Tables window, tables in the Selected Tables list are exported.
Ways to move tables to this list (from the Browse Table to Export list): l
Double-click on a table.
l
Selecting one or more tables and click >.
l
Select one or more schemas and click >. This adds all tables in the selected schemas.
l
Click >>. This adds all tables in all schemas.
l
Select objects before you open the Export Tables window.
SQL Navigator 7.2
User Guide
162
Select export options (2)
Option
Objects to export
Additional Parameters
Description
Select the objects you want exported from the database to the DMP file.
Field
Direct
Consistent
Record
Description
Data is extracted directly, bypassing the SQL Commandprocessing layer. This method may be faster that a conventional path export.
Uses the SET TRANSACTION READ ONLY statement to ensure the data does not change during the execution of the export command.
Select this parameter if you anticipate other applications will update the data after an export has started.
NOTE:
Tables are usually exported in a single transaction. However, nested and partitioned tables may be exported as separate transactions. If nested or partitioned tables are being updated by other applications, the exported data may be inconsistent.
To minimize this possibility without selecting the
Consistent parameter, export those tables at a time when updates are not being performed.
Records an incremental or cumulative export in the system tables SYS.INCEXP, SYS.INCFIL, and SYS.INCVID.
Compress
Selected Flags table data for consolidation into one initial extent upon import. If extent sizes are large (for example, because of the
PCTINCREASE parameter), the allocated space will be larger than the space required to hold the data.
Not
Selected
Export uses the current storage parameters, including the values of initial extent size and next extent size. The values of the parameters may be the values specified in the CREATE
TABLE or ALTER TABLE statements or the values modified by the database system. For example, the NEXT extent size value may be modified if the table grows and if the PCTINCREASE parameter is nonzero.
NOTE:
SQL Navigator 7.2
User Guide
163
Option Description
Field
Buffer size
(leave blank for default)
Record Length
Description
l
Although the actual consolidation is performed upon import, you can specify the
COMPRESS parameter only when you export, not when you import. The Export utility, not the Import utility, generates the data definitions, including the storage parameter definitions. Therefore, if you do not select
Compress when you export, you can import the data in consolidated form only.
l
Neither LOB data nor subpartition data is compressed. Rather, values of initial extent size and next extent size at the time of export are used.
The size, in bytes, of the buffer used to fetch rows. This parameter determines the maximum number of rows in an array fetched by Export.
Use the following formula to calculate the buffer size: buffer_size = rows_in_array * maximum_row_size
If you specify zero, Export Tables fetches only one row at a time.
Tables with columns of type LOBs, LONG, BFILE, REF, ROWID,
LOGICAL ROWID, or DATE are fetched one row at a time.
NOTE:
See your Oracle operating system-specific documentation to determine the default value for this parameter.
The length, in bytes, of the file record. The RECORDLENGTH parameter is necessary when you must transfer the export file to another operating system that uses a different default value.
If you do not define this parameter, it defaults to your platform-dependent value for buffer size.
You can set RECORDLENGTH to any value equal to or greater than your system’s buffer size. (The highest value is 64 KB.)
Changing the RECORDLENGTH parameter affects only the size of data that accumulates before writing to the disk. It does not affect the operating system file block size.
You can use this parameter to specify the size of the Export
I/O buffer.
SQL Navigator 7.2
User Guide
164
Option
Specify files
Description
Field
Statistics
Provide a feedback dot each time n rows are exported
Field
Output file name
(.dmp)
Parameter file name
(.dat)
Log file name (.log)
Description
NOTE:
See your Oracle operating system-specific documentation to determine the proper value or how to create a file with a different record size.
Select the type of database optimizer statistics to generate when the exported data is imported.
Export should display a progress meter in the form of a period for n number of rows exported.
For example, if you specify FEEDBACK=10, Export displays a period each time 10 rows are exported.
NOTE:
The FEEDBACK value applies to all tables being exported; it cannot be set individually for each table.
Description
The names of the export dump files.
This field is mandatory.
A name for the file that contains a list of import parameters.
This field is mandatory.
The name of the log file.
All informational and error messages are written to the log file.
Results (3)
When execution is complete there are three tabs in the Export Tables window. The results of the export are shown on the Output tab. The Log and Parameter file tabs show the contents of their respective files.
Find and Replace
Find or replace text strings in the current text file.
NOTE:
Select Regular expressions if you want your strings to be recognized as Regular Expressions.
Regular Expressions are a widely-used method of specifying patterns of text to search for. Special metacharacters allow you to specify, for instance, that a particular string you are looking for occurs at the beginning or end of a line, or contains >n< recurrences of a certain character.
SQL Navigator 7.2
User Guide
165
Find objects Dialog
Find objects in any schema.
What To Search For
You can construct a search argument for any database object.
l
You can use wild-card characters %» and «_» (according to SQL LIKE operator definitions).
l
You can filter by schema, object type, date last modified and status.
TIP:
To display a dynamic list of all objects in a schema
1. In
DB Navigator
, select a schema node in the top level of the DB Navigator tree.
2. Click Search | Find Objects.
Now Objects Are Found
Task Action
Describe View a description of object structure ( index, cluster, procedure, function, or package).
Use
Describe
or
Auto Describe Tool
on the selected object.
Sort Sort on any column (name, owner, type, creation/modification date, status) in ascending or descending order.
Click the column header.
Open the object for editing
Double click on the object.
See
Visual Object Editors
or the
Code Editor
for more information.
Locate in schema
Display the selected object in DB Navigator.
For more information, see Locate In Tree on page 183 .
Batch selection and update
On selecting multiple objects you can l apply commands like Copy Text, Drop, Extract DDL, Compile, Get Metadata, Properties,
Send to Code Analysis, Add to Project Manager, Enable, Disable, and Truncate to the
entire batch of objects. For more information, see Object Menu on page 26 .
l drag the group of objects into a text editor or
DB Navigator
.
SQL Navigator 7.2
User Guide
166
TIP:
Other actions are available. Right-click on the object and select a command from the shortcut menu
Find Recycle Bin Objects Dialog
Search for objects in the recycle bin.
NOTE:
Requires Oracle 10g or later.
What To Search For
You can construct a search argument for any database object.
l
You can use wild-card characters %» and «_» (according to SQL LIKE operator definitions).
l
You can filter by schema, object type, drop date and System Change Number (SCN).
Now Objects Are Found
Task
Sort
Open the object for editing
Batch selection and update
Action
Sort on any column (name, owner, type, creation/modification date, status) in ascending or descending order.
Click the column header.
Double click on the object.
See
Visual Object Editors
or
Code Editor
for more information.
When multiple objects are selected, you can apply commands like Copy Text, Purge and
Flashback to the entire batch of objects.
TIP:
Other actions are available. Right-click on the object and select a command from the shortcut menu
Formatting Options
Configure how the Formatter Tool formats code. Formatter Tools are available from the
Tools Menu .
SQL Navigator 7.2
User Guide
167
Formatting Options Toolbar
Icon Tool Tip
Open
Save
Reset Pane to
Recommended Defaults
Description
Open a previously saved file of SQL Navigator formatting options.
Save the currently selected formatting options to the SQL Navigator installation folder, filename FmtOptions.opt.
TIP:
Click File | Save as in the Formatting Options window to save the options to a different file name or location.
Reset the Formatting Options to the default values
TIP:
SQL Navigator loads the Formatting Options from the default file (FmtOptions.opt) and default location each time the Formatting Tool Options window is opened and when the Formatter Tool performs formatting. The default location for Formatting Options is in the SQL Navigator installation folder.
Set formatting options
Category
Oracle
Formatter
Options
Header
Spacing
Options in the Category
Tooltips
Show tooltips when the mouse cursor is hovered over certain options.
Copy Options to Clipboard
Copy the options in both INI and XML format to clipboard for backup or reviewing purposes.
Show the Example Window
Show an example window when navigating different pages of the Formatter Options window.
You can specify a script file to be formatted as an example, or select the Document per
Pane option to use the example scripts from the Example document folder.
You can modify the example scripts in the Example window. Changes are saved automatically.
Select Enable to generate a header tagline after formatting the script. You can specify some text to be included in the header tagline. Do not use /* or */ in the text.
Note: The date time options are currently not in use.
Set physical output characteristics such as tab size, margins, and indents.
SQL Navigator 7.2
User Guide
168
Category
Comments
Case
Options in the Category
Select this option to align trailing comments to the right margin.
Modify the lowercase, uppercase, or initial capitals of various syntax elements.
Operators &
Punctuations
Alignments
Specify the behavior of various operators and punctuations.
Set alignments of various syntax elements.
List
Arrangements
Define list attributes such as parentheses, commas and folding/stacking characteristics.
HTML Viewer
Show HTML in the integrated viewer.
This eliminates the need to switch from your coding environment to an external browser.
TIP:
l
Enable
Capture Web Output
so each time you execute PL/SQL code, the generated HTML is displayed in the integrated viewer. If the PL/SQL procedure is run under the debugger, the
HTML output is not visible until the procedure is complete.
l
You can select links and submit forms from the integrated viewer. If the link or submit target is another PL/SQL generated page then that page appears in the viewer. If it is an external link then an error message will appear. You must fill in the
Web Support Configuration Dialog
for this to work correctly.
l
Use the
Web Support Configuration Dialog
to specify where images can be loaded or enter the details of your web server’s configuration.
l
Click View in External Web Browser to open the page in your default Windows web browser.
This is useful for testing links to pages that are not PL/SQL generated. SQL Navigator will map images as defined in the
Web Support Configuration Dialog , but this mapping will only apply to
the generated page. All links, frame sources and your browser and Web server, not SQL
Navigator, will handle form posting.
l
Click File | Print to print the page.
Stored Procedure > HTML
Developing Oracle Web server applications involves programming with PL/SQL using the PL/SQL Web toolkit supplied with Oracle Web Server. SQL Navigator provides an integrated development environment with advanced coding, testing and debugging of PL/SQL programs for Oracle Web server.
SQL Navigator 7.2
User Guide
169
Actions
Enable the web server
Open the procedure for editing.
Description
Select Session |
Capture Web Output .
Code Web Server Procedures in the
Code Editor .
The editor includes drag and drop coding for Web toolkit packages, including htp and htf items.
Execute the procedure.
Execute the procedure in the
Code Editor .
Preview HTML output
NOTE:
You can use the SQL Navigator Debugger to step through the stored procedure, if you want to debug the generation of HTML. However, the HTML will not be displayed until the stored program has completed execution.
View the translated HTML page in the HTML Viewer
Compile and save your script.
TIP:
Use the drag and drop feature as you would for any script development. The Web Server Syntax allows you to drag Web server syntax directly into your script. The results of dragging and dropping syntax into your program are displayed.
Use the
Code Editor .
See also
Import HTML as PL/SQL
for HTML > Stored Procedure.
Import HTML as PL/SQL
Convert a HTML file into a PL/SQL stored procedure. The stored procedure will in turn output the HTML code via the Oracle Web Toolkit.
Actions Description
Enable the web server
Open the Code
Editor.
New Stored
Object
Select Session |
Click View |
Capture Web Output
Code Editor
.
.
Create a new stored object in the Code Editor. Enter the name and the parent schema of the new procedure.
Import HTML file as PL/SQL
Click Tools | Import HTML as PL/SQL
The import process wraps each line of the imported HTML file inside the htp.print ( … ); markers.
PL/SQL statements can be embedded in HTML code inside comments; for example:
<!—PLSQL a_random_plsql_statement; —>
These comments must start with the string
SQL Navigator 7.2
User Guide
170
Actions
Save the program to the database.
Description
<!—PLSQL and end with
—>
You can put things in the declaration section of the procedure (to declare a cursor, for example) by ensuring they come first in the file, before the first <HTML> tag. For example:
<!—PLSQL
CURSOR emp_cur IS
SELECT ename
FROM emp;
When the HTML is imported into the stored program, you can save the program to the database.
See also
HTML Viewer
for Stored Procedure > HTML.
Sample code for displaying query results in a HTML page
The following example code will display details from a query in a web browser.
First, create a table named emp with a column ename. Add some data to the ename column, and then run the following procedure with the SQL Navigator Web Development Module enabled.
PROCEDURE PLH_EXAM1 is—this procedure generated from «\phanevski1c$docsEXEone.HTM».—warning: any changes made to this procedure will not be—reflected in the original HTML file.
CURSOR emp_cur IS
SELECT ename
FROM emp; begin htp.print(‘ ‘); htp.print(‘<HTML>’); htp.print(‘<HEAD>’); htp.print(‘<TITLE>Embedded PL/SQL Example</TITLE>’); htp.print(‘</HEAD>’); htp.print(‘<BODY>’);
SQL Navigator 7.2
User Guide
171
htp.print(‘<H1>Employee Names</H1>’); htp.print(‘<TABLE>’); htp.print(‘ ‘);
FOR emp_rec IN emp_cur LOOP htp.print(‘ <TR>’); htp.print(‘ <TD>’); htp.print(emp_rec.ename); htp.print(‘</TD>’); htp.print(‘ </TR>’); htp.print(‘ ‘);
END LOOP; htp.print(‘</TABLE>’); htp.print(‘</BODY>’); htp.print(‘</HTML>’); end;
Import Table
Open the Import Tables window
Open the Import Tables window from
Object Menu
| Import Table.
Select the tables to import (1)
Option Further Options and Description
Import all tables Import all tables in the DMP file into the current user’s schema regardless of which user the tables belong to.
Specify From User To
User
Import all the tables owned by the From User to the To User. Specify the from and to users in the relevant fields.
To import tables from more than one user, use a space or comma (,) to separate the user names.
Manually enter table names
Type the names of the tables to import and click Add.
Do not include the schema prefix in the table name.
SQL Navigator 7.2
User Guide
172
Select import options (2)
Option
Objects to export
Additional Parameters
Description
Select the objects you want imported to the database from the DMP file.
Field Description
Reuse existing data files
Reuses the existing datafiles making up the database. Selecting this parameter causes the Import utility to include the Reuse parameter in the datafile clause of the CREATE TABLESPACE statement. This results in the Import utility reusing the original database’s datafiles after deleting their contents.
Commit after each array insert
NOTE:
l
The export file contains the datafile names used in each tablespace. If you select this parameter and attempt to create a second database on the same system the Import utility will overwrite the first database’s datafiles when it creates the tablespace.
In this situation, it is recommended that this parameter is deselected so that an error occurs if the datafiles already exist when the tablespace is created. In addition, if you need to import into the original database, select the Ignore errors parameter to add to the existing datafiles without replacing them.
l
If datafiles are stored on a raw device, deselecting this parameter does not prevent files from being overwritten.
Sets the Import utility to commit after each array insert.
By default, the Import utility commits only after loading each table.
If an error occurs, a rollback is performed before continuing with the next object.
Selecting this parameter prevents rollback segments from growing inordinately large and improves the performance of large imports. If the table has a uniqueness constraint it is recommended that this parameter is selected. If a table does not have a uniqueness constraint, the Import utility could produce duplicate rows if you reimport the data.
If a table has nested table columns or attributes, the contents of the nested tables are imported as separate tables. Therefore, the contents of the nested tables are always committed in a transaction distinct from the transaction used to commit the outer table.
If this parameter is not selected and a table is partitioned, each partition and subpartition in the export file are imported in a separate transaction.
SQL Navigator 7.2
User Guide
173
Option Description
Field
Ignore errors
Description
For tables containing LONG, LOB, BFILE, REF, ROWID, UROWID, or
DATE columns, array inserts are not done. If this parameter is selected, the Import utility commits these tables after each row.
Specifies how object creation errors should be handled. If selected, the Import utility overlooks object creation errors when it attempts to create database objects, and continues without reporting the errors. Note that only object creation errors are ignored; other errors, such as operating system, database, and SQL errors, are not ignored and may cause processing to stop.
In situations where multiple refreshes from a single export file are done and this parameter is selected, certain objects may be created multiple times (although they will have unique systemdefined names). You can prevent this for certain objects (for example, constraints) by deselecting the Constraints parameter when importing. If you do a full import with the Constraints parameter deselected, no constraints for any tables are imported.
If a table already exists and the Ignore errors parameter is selected, then rows are imported into existing tables without any errors or messages being given. This may be helpful when importing data into tables that already exist in order to use new storage parameters or because you have already created the table in a cluster.
If this parameter is not selected, the Import utility logs or displays object creation errors before continuing. If a table already exists, then errors are reported and the table is skipped with no rows inserted. Objects dependent on tables, such as indexes, grants, and constraints, will not be created.
NOTE:
When importing into existing tables, if no column in the table is uniquely indexed, rows may be duplicated.
Show export file contents only
When this parameter is selected the contents of the export file are displayed and not imported. The SQL statements contained in the export are displayed in the order in which the Import utility will execute them.
Buffer size
(leave blank for default)
The size of the buffer, in bytes, through which the data rows are transferred.
BUFFER determines the number of rows in the array inserted by the
Import utility. The following formula gives an approximation of the buffer size that inserts a given array of rows: buffer_size = rows_in_array * maximum_row_size
SQL Navigator 7.2
User Guide
174
Option
Specify files
Description
Field Description
For tables containing LONG, LOB, BFILE, REF, ROWID, UROWID, or
DATE columns, rows are inserted individually.
The size of the buffer must be large enough to contain the entire row, except for LOB and LONG columns. If the buffer cannot hold the longest row in a table, the Import utility attempts to allocate a larger buffer.
NOTE:
See your Oracle operating system-specific documentation to determine the default value for this parameter.
Record
Length
The length, in bytes, of the file record.
The RECORDLENGTH parameter is necessary when you must transfer the export file to another operating system that uses a different default value.
If you do not define this parameter, it defaults to your platformdependent value for BUFSIZ. For more information about the BUFSIZ default value, see your Oracle operating system-specific documentation.
You can set RECORDLENGTH to any value equal to or greater than your system’s BUFSIZ. (The highest value is 64 KB.)
Changing the RECORDLENGTH parameter affects only the size of data that accumulates before writing to the database. It does not affect the operating system file block size.
You can also use this parameter to specify the size of the Import I/O buffer.
NOTE:
Note: See your Oracle operating system-specific documentation to determine the proper value or how to create a file with a different record size.
Provide a feedback dot each time n rows are exported
Displays a period each time the number of specified rows has been imported.
For example, if you specify 10, Import displays a period each time 10 rows have been imported.
NOTE:
The FEEDBACK value applies to all tables being imported; it cannot be set on a per-table basis.
Field
Dump file name
Description
The name of the export file to import.
The default file extension is .dmp. This field is mandatory.
SQL Navigator 7.2
User Guide
175
Option Description
Field
Parameter file name (.dat)
Description
The name of the file that contains the list of import parameters.
This field is mandatory.
Log file name (.log) The name of the log file.
All informational and error messages are written to the log file (if specified).
Results (3)
When execution is complete there are three tabs in the Import Tables window. The results of the import are shown on the Output tab. The Log and Parameter file tabs show the contents of their respective files.
Java Manager
The Java Manager is a convenient alternative to the Oracle LoadJava and UnloadJava command line utilities.
Use the Java Manager to load and unload multiple Java source files, classes, resources and archives.
Field
Files to Load, Add &
Remove
Options
Description
Manage the list of objects to load.
Set the command line switches found in the Oracle LoadJava and UnloadJava command line utilities.
For details, consult the Oracle documentation.
Job Scheduler
Access the Oracle Job Scheduler.
A job assigns a task to a schedule. The job tells the schedule which tasks — either one-time tasks created «on the fly,» or predefined programs — to run. A specific program can be assigned to one, multiple, or no schedule
(s); likewise, a schedule may be connected to one, multiple, or no program(s).
SQL Navigator 7.2
User Guide
176
Tab Description Oracle
Jobs Tab
Check the status and settings of existing jobs.
Create, run, schedule, edit and remove jobs.
All Oracle releases
Programs
Tab
Schedules
Tab
Windows
Tab
Window
Groups Tab
Define or select programs to be executed.
Define the frequency with which the Scheduler will execute a particular set of tasks.
Define time windows during which resource plans will be activated.
Oracle 10g release or later
Oracle 10g release or later
Create a named group with containing windows with similar scheduling properties for ease of management
Oracle 10g release or later
Oracle 10g release or later
Job Classes
Tab
Group together jobs that have similar resource demands into job classes to ensure best utilization of resources.
Job Log Tab
Show the current status and information about jobs over a specified date range or by owner.
Window Log
Tab
Show the current status and information about Windows over a specified date range.
Oracle 10g release or later
Oracle 10g release or later
Oracle 10g release or later
Jobs Tab
The Jobs function in the Job Scheduler allows you to create, run or schedule jobs.
Note that some of the functionality below is only available in Oracle 10g or later releases.
Button
New
Save
Description
Click to create a job. This opens the New Job Wizard:
1. Enter a Job Name (for 10g or later)
2. Select a Job Type (PS/SQL Block or Stored Procedure — in 10g or later)
3. Click Next (for 10g or later)
4. Enter the PL/SQL code or select a stored procedure to run
5. Click Next
6. Specify a start date, start time and frequency for your job to run
7. Select a repeat frequency if desired
8. Click Finish.
The new job will appear in the Jobs window.
To attach a program, schedule or job class to a job (for 10g or later)
1. Select the job to be scheduled.
2. Select the program, schedule or job class to be attached to the job.
SQL Navigator 7.2
User Guide
177
Button
Advanced
Clone
Run
Drop
Description
3. Click Save.
To schedule a job (for 10g or later)
1. Select the job to be scheduled.
2. Click En (Enabled) next to the job.
3. Select Start and End date and time.
4. Click Calendar, choose the frequency and intervals for the job and click
5. Click Save.
Edit available Attribute Values for the selected item (for 10g or later).
Create a copy of the selected item (for 10g or later).
To run a job
1. Select the job to be run.
2. Click Enabled next to the job.
3. Click Run.
Remove the selected item from the database (for 10g or later).
Programs Tab
(Only for Oracle 10g release or later)
A program defines what the Scheduler will execute. A program’s attributes include its name, type (for example: a PL/SQL procedure or anonymous block), and the action it is expected to perform. A program can also accept zero to many arguments, which makes it a flexible building block for constructing schemes of tasks to be scheduled.
Button
New
Save
Description
Click to create a program
1. Enter a Program Name.
2. Select a Type, that is PL/SQL Block, Stored Procedure or Executable.
3. If you do not want the program to be enabled by default, clear the Enabled check box.
4. Define the Action the program is to perform.
5. For PL/SQL Block or Executable, enter the relevant command string.
6. For Stored Procedure, select one of the available stored procedures from the database.
7. Enter any Comments if required
8. Click Save.
Save changes to a selected program or a new program.
SQL Navigator 7.2
User Guide
178
Button Description
Advanced Edit available Attribute Values for the selected item.
Drop Remove the selected item from the database.
Schedules Tab
(Only for Oracle 10g release or later)
A schedule defines when and at what frequency the Scheduler will execute a particular set of tasks. A schedule’s attributes include the date on which a set of tasks should begin, how often the tasks should be repeated and when the set of tasks should no longer be executed, either as of a specified date and time, or after a specified number of repetitions.
Button
New
Save
Advanced
Drop
Description
Click to create a schedule
1. Enter a Schedule Name.
2. Select Start and End dates and times.
3. Click Calender, select the required Frequency and Interval and click OK.
4. Enter any Comments if required
5. Click Save.
Save changes to a selected schedule or a new schedule.
Edit available Attribute Values for the selected item.
Remove the selected item from the database.
Windows Tab
(Only for Oracle 10g release or later)
Assign resource plans to activate at different times such as during specific peak or off-peak periods.
Button
New
Description
Click to create a window
1. Enter a Window Name
2. Select a Resource Plan from the drop-down list
3. Select a Priority from the drop-down list
4. Select a Schedule to attach to run during the window as appropriate
5. Select the Duration (days, hours, months) for the window
6. Specify a start date/time and end date/time for the window
7. Select a repeat interval if desired
SQL Navigator 7.2
User Guide
179
Button Description
Click Save.
The new window will appear in the Windows list above.
Click Enabled to activate the window.
Save Save changes to a selected window or a new window.
Advanced Edit available Attribute Values for the selected item.
Open
Close
Drop
Activate the selected Window and commence running the scheduled jobs based on the durations currently entered. You can change the duration values if required.
Stop the currently active window. Any jobs using that window as their schedule which were started at the beginning of this window and have indicated that they must be stopped on closing of the window will be stopped.
Remove the selected item from the database.
Window Groups Tab
(Only for Oracle 10g release or later)
Create a named windows group to which you can assign any number of previously created windows on the
Windows Tab
Button Description
New
Save
Drop
Click to create a window group
1. Enter a Group Name
2. Enter any Comments relevant to that windows group
Click Save.
The new group name will appear in the Window Group Name list on the left-hand side.
Select those Windows listed in the right pane that you want included in the group.
Click Enabled to activate the window group .
Save the window group.
Remove the selected item from the database.
Job Classes Tab
(Only for Oracle 10g release or later)
The Scheduler provides the capability to group together jobs that have similar resource demands into job classes. A job class can be used to ensure all jobs within it utilize the same job class attributes, execute at a higher or lower priority than other jobs in other job classes and only allow jobs in the job class to start if there are sufficient resources available.
SQL Navigator 7.2
User Guide
180
Button
New
Save
Advanced
Drop
Description
Click create a job class
1. Enter a Job Class Name.
2. Select the appropriate Resource Consumer Group as defined for the database.
3. Select the appropriate Service as defined for the database.
4. Select a Logging Level for the database.
l
Off l
Runs l
Full
5. Select the number of days the Log History will be retained.
6. Enter any required Comments
Click Save.
Save the job class.
Edit available Attribute Values for the selected item.
Remove the selected item from the database.
Job Log Tab
(Only for Oracle 10g release or later)
You can view a history of the Job Scheduler transactions over a range of dates, including all job owners if desired.
Field
From date / To date
Owner
Refresh
Description
Select the Start and End date range to view.
Select job owner to use in log display.
Update the display.
Window Log Tab
(Only for Oracle 10g release or later)
You can view a history of the Job Scheduler window transactions over a range of dates.
Field
From date / To date
Refresh
Description
Select the Start and End date range to view.
Update the display.
SQL Navigator 7.2
User Guide
181
Job Scheduler (Requirements)
Specific system privileges are required in order for you to manage the Job Scheduler for connections to Oracle
10g and later.
Job Scheduler system privileges
The system privileges associated with the Job Scheduler (for Oracle 10g and later) are as follows:
System
Privilege
Purpose…
CREATE JOB Enables you to create jobs, schedules and programs in your own schema.
Note: You can always alter and drop jobs, schedules and programs which you own, even when you do not have the CREATE JOB privilege.
CREATE ANY
JOB
EXECUTE
ANY
PROGRAM
EXECUTE
ANY CLASS
MANAGE
SCHEDULER
Enables you to create jobs, schedules, and programs in any schema. This effectively gives the grantee the ability to run code as any user so it must be issued with care.
Enables jobs the ability to use programs from any schema.
Enables jobs to run under any job class.
Enables you to create, alter and drop job classes, windows and window groups. It also enables you to purge scheduler logs and modify scheduler attributes.
INIT.ORA configuration file
In order to successfully use the Job Scheduler, you may also need to adjust the settings on your server in the
INIT.ORA configuration file to allow use of the DBMS_JOBS package (Oracle 9.2 and earlier) or the DBMS_
SCHEDULER (Oracle 10g and later).
The following minimum settings are recommended: job_queue_processes = 2 job_queue_interval = 10 job_queue_keep_connections = false
(Remember to restart your server to apply these settings.)
SQL Navigator 7.2
User Guide
182
Locate In Tree
When an object is open in an editing window, and you want to see where that object resides in the schema, you can use Locate in Tree to jump to that object’s node in the DB Navigator tree. This action expands all intermediate nodes and displays the object’s details—such as privileges and columns.
Locate in Tree is available from the following windows: l
DB Navigator
l
Find objects Dialog
l
Database Source Code Search
l
Project Manager
l
Describe
l
Analyze Tool
l
Quick Browse
l
Edit Data
l
Visual Object Editors
Output Window
The Output Window displays SQL Navigator messages and server output including Oracle errors.
Interpreting the output display
User Interface
Tabbed Pages
Icons & Color
Coding
Description
There are tabs for each session, plus one for general messages not related to any particular session.
The types of output are distinguished by font color. Icon markers make them even more noticeable.
Color
Blue
Red
Black
Data type
Server output
Error Messages
Other processing messages
SQL Navigator 7.2
User Guide
183
NOTE:
The Output window displays the results of program compilation and execution, including errors.
You can view the full Oracle error description by double-clicking the error code in the Output window.
The resulting dialog contains the error message description, cause and recommended actions, just as they appear in Oracle documentation.
Actions
Action
Copy to the Clipboard
Clear
Print Contents
Description
Select the text you want to copy. Right-click the selection and select Copy.
Right-click in the Output window and select Clear.
Right-click in the Output window and select Print.
PL/SQL Profiler
Analyze the execution time and efficiency of your stored programs. The Profiler is particularly useful for finding bottlenecks in stored code and quality assurance and testing.
NOTE:
l
Requires Oracle 8.1.5 or higher.
l
Before using the Profiler, debug your stored program, as there is no editing capability from within the Profiler.
Toolbar
TIP:
Use the Runs / Groups tabs to select Runs and Groups.
Icon Tool Tip
Refresh
Description
Update both Run and Group tree views with the latest profiling data.
Keyboard
Shortcut
Alt+R
Filters /
Preferences
Open the
Profiler Filter/Preferences Dialog
.
You can sort and filter the result data according to thresholds that you set.
This makes it easy to limit the amount of data displayed, and to isolate the most significant items. For example, you can select lines that were not called during the run, or runs with total times higher than average.
Alt+P
SQL Navigator 7.2
User Guide
184
Icon Tool Tip
Delete
Create New
Group
Delete the data for the selected run.
If a group is selected then delete the group. Removing the group does not remove the associated run data.
Del
Create a new group. Open the
New Group / Group Properties Dialog .
Create groups to logically connect code units and runs. You determine which units and runs belong to a group. You can combine data for a single code unit across multiple runs in order to determine the real coverage and execution times. This is useful when testing stored code in several different runs with different parameters.
Ins
Locate the selected object in
DB Navigator
Open
DB Navigator
with the tree expanded to highlight the selected object.
See where the object is in the database tree.
Open the selected object
Properties
Description
Open the selected object in the
Select a line of source code in the Source Viewer tab to open the Code
Editor at that line.
Code Editor .
Open the
New Group / Group Properties Dialog
to modify the selected group.
Open SQL Optimizer for Oracle.
Keyboard
Shortcut
Alt+F2
Launch
Xpert tuning
Runs Tab
A run contains all code units that are called during execution. If a procedure or function is a part of a package, the whole package becomes part of the run. The same rule applies to type methods.
Selection Description of information
All Runs
Run
Totals across all the available runs.
Coverage
Time Statistics
Basic run characteristics (comment, date, number of lines, etc…), totals across all the run units.
Coverage
Time Statistics
SQL Navigator 7.2
User Guide
185
Groups Tab
For each group, you have the option of displaying the data either separately by run, or with runs combined.
Selection
All Groups
Group
Description of information
Totals across all the groups.
Time Statistics
Basic group characteristics, totals across the group units and runs.
Coverage
Time Statistics
Select PL/SQL Code on the Runs or Groups Tab
A PL/SQL code unit can be a stand-alone procedure or function, a package body, a type body or an anonymous block. A package body and type body contains further procedures and functions. For a procedure or function, it is sometimes possible to determine how many times it has been called during a run by parsing the available source code and combining the data about the lines where the procedure/function is called.
The Profiler will show you a line-by line analysis of the execution, including the number of times each line was executed and the time required for execution.
The Profiler: l stores data about each code unit executed during a run, down to the level of source code lines l divides all the available profiling data into hierarchically organized logical items l displays profiling and coverage statistics about each item and compares them with others
The Profiler displays the profiling data alongside the actual source code. (This feature is not available if the source code has changed since it was last tested in the currently selected run, or if it is not identical across the runs in a group.)
Selection
Procedure,
Function, Trigger
Body
Type Body,
Package Body
Description
Basic characteristics, totals across the runs. Combines the group runs if Combine Runs in
Group Result Sets is selected in the
Profiler Filter/Preferences Dialog
.
Time Statistics
Call Distribution
Source Viewer
Basic characteristics, total across the runs. Combines the group runs if Combine Runs in
Group Result Sets is selected in the
Profiler Filter/Preferences Dialog
.
Coverage
Call Distribution
SQL Navigator 7.2
User Guide
186
Selection Description
Time Statistics
Source Viewer
NOTE:
The Profiler uses the Oracle session it was activated in.
Profiler Filter/Preferences Dialog
Use the PL/SQL Profiler Filters/Preferences dialog to set the data filter options, sorting and chart drawing properties.
Data Filters
TIP:
Threshold and sorting works only if there is a single series to be displayed in the Runs tree and
‘Combine Runs in Group Result Sets’ is enabled for the Groups tree.
Option
Data Value Filter in
Runs Tree View
Show Anonymous
Blocks
Parse Packages for
Subroutines
Display Line Data
Description
Option
Display only items with value
More than, Less than, Equal to Zero, Nonzero
50 or other value
Description
When selected, charts and lists display only the items with the value specified
Set the method of filtering
Total/Average
Set the Threshold value.
Applicable when More than and Less than are selected.
Set the value against which the threshold value is to be compared.
Applicable when More than and Less than are selected.
Set the tree views to display the anonymous blocks executed during runs.
Set the profiler to break package data down to discrete procedures/functions.
Set the data displays to always show line data for the selected tree view item.
SQL Navigator 7.2
User Guide
187
Option
Directly
Sort Result Sets in
Runs Tree View
Combine Runs in
Group Result Sets
Description
For example, when a run is selected, the charts/lists will show all the lines executed in the run, not the run units.
Enable sorting of the result data in the Runs display.
When selected, you can control the sort order by your selection of the Descending
Order option.
Enable the combining of data from different Runs in the Group (for example, to obtain correct coverage value across the Runs).
Chart Options
Option Description
3D
Run Chart Series
Select to add a 3D look and feel to the charts.
Group Chart Series Select the color generation method for the chart series when displaying Group data
(Groups tree view).
Select the color generation method for the chart series when displaying Run data (Runs tree view).
Chart Panel Control the chart background color.
Series Color
Gradient
Series Color
Sequence
Select the colors used when Gradient is selected.
Select the colors used when Sequence is selected.
TIP:
Click on the color selection rectangles. Select a color from the Windowsstandard color selection dialog.
New Group / Group Properties Dialog
Use the Group Properties dialog to set group name, comment, used units and runs.
The Group Units and Group Runs list boxes display the units/runs used for analysis in the given group. You must specify at least one group unit.
PL/SQL Profiler Requirements
SQL Navigator 7.2
User Guide
188
Required Oracle Conditions
To run the PL/SQL
Profiler
To collect session statistics
For schemas that use the
PL/SQL Profiler
The DBMS_PROFILER package needs to be installed under SYS.
This is does not happen by default on a new instance.
The users need access to V$SESSION, V$SESSTAT and V$STATNAME.
This condition is satisfied when the users have SELECT privilege on system views
V_$SESSION, V_$SESSTAT and V_$STATNAME.
The profiler server side objectsInstalling_server_side_objects (tables and sequences) need to be installed.
Profile Manager
Profiles saved in SQL Navigator can be: l
Re-used in other versions of SQL Navigator.
l
Made available to other users of SQL Navigator.
l
Used on other computers.
l
Made available to support staff to help resolve issues.
To backup a profile
1. Open the Profile Manager: Windows Start | All Programs | Dell | SQL Navigator | Profile Manager
2. Select Backup User Profile.
3. Select the version of SQL Navigator which has the preferences you want to save.
4. Select the directory into which the backup file is to be saved.
5. Enter a name for the backup file, or accept the name displayed.
6. Click Backup.
NOTE:
The file is saved into the designated folder and has an extension of .prof.
To restore a profile
1. Open the Profile Manager: Windows Start | All Programs | Dell | SQL Navigator | Profile Manager
2. Select Restore User Profile.
3. Select the directory from which the backup file is to be restored.
SQL Navigator 7.2
User Guide
189
4. Select the file containing the backed-up profile file. Click Next.
5. Select the version of SQL Navigator that you want the backed-up to replace. Click Restore.
Project Manager
The Project Manager provides instant access to your frequently used database objects and connections.
Projects are holding areas where you can store shortcuts to things that you frequently need to work with instead of searching for them in various lists and directories.
Project Manager Toolbar
Icon Tool Tip
Select types of items to display
Sort items by specified field
Display items in a list
Display extra details about each item
View Tree
Description
See the
Project Filter Dialog
.
Sort items.
Show/Hide item details.
Go Up One Level
Create New Folder
Show/Hide Tree View.
Navigate between projects. Navigate folders in projects.
Navigate the Project Manager.
Organize items in the project in folders.
Manage Your Projects
Action
File Menu
| New Project
File Menu
| Rename Project
File Menu
| Delete Project
Drag and drop into the Project Manager window.
Description
Create a project.
Rename the current project.
TIP:
Change the current project in the Project
Manager window.
Delete the current project.
Add items to the current project: l
Objects from
DB Navigator
.
l
Objects from
Find objects Dialog
.
SQL Navigator 7.2
User Guide
190
Action Description
l
Code Selection from
Database Source Code Search
l
A file from Windows Explorer.
l
An Oracle Connection shortcut.
(username/connection strings)
These items can include: l schemas (in particular connections) l schema objects l code location bookmarks within stored programs l schema object templates
Actions on Items in the Project Manager
Select an object in Project Manager and …
Action
Preview the source code of text objects
Description
Source Preview
To connect to a database from the Project
Manager
You can select a database object in your Project Manager and open it for viewing or editing.
SQL Navigator automatically opens the required database connection and displays the object’s properties in an object editing window. Double click on the shortcut to open the connection.
Code Location shortcuts
Drop an object
Drag the selection from the result list in
Manager.
Database Source Code Search
1. Select the object in the Project Manager window.
2. Locate the object in DB Navigator.
3. Drop the object in DB Navigator.
to the Project
Keyboard Shortcuts In The Project Manager Window
TIP:
Right click in the Project Manager window to see all options available.
SQL Navigator 7.2
User Guide
191
Keyboard
Shortcut
Ins
Shift+Ins
Ctrl+H
Ctrl+U
Description
Add Objects in Project Manager. Open
Select DB Object Dialog
.
Add Files in Project Manager
Hide items of the selected type (Requires you to select an object in the Project
Manager).
Go up one level (Requires you to have navigated to a sub-folder in the Project Manager window).
Project Filter Dialog
Select the object types you want to display in the project manager window.
Publish Java to PL/SQL
Create a PL/SQL package from a Java class stored in the database.
1. Select a Java Class stored in the database. Use
DB Navigator
or the
Find objects Dialog .
2. Click Object | Publish Java to PL/SQL.
3. Follow the prompts to generate a PL/SQL package that stores the procedures and functions used to call
Java methods for handling the stored object.
4. The package is generated and displayed in the window. Do you want to open it for editing before saving it to the database, or save it as shown?
Quick Browse
View chained rows information.
1. Select the table object.
2. Click Object | Quick Browse.
3. The Code Editor opens. The query is run. For more information, see SQL Query Results Data
Grid on page 70 .
Rename Object
SQL Navigator 7.2
User Guide
192
1. Select the object.
2. Click Object | Rename.
Search Knowledge Xpert
Drag and drop optimized routines directly into your program editor.
Knowledge Xpert is a library of more than 900 pre-built PL/SQL routines, written by some of the world’s leading
PL/SQL experts, that can be integrated into the standard PL/SQL environment. The complete PL/SQL Code
Library can eliminate hours of low-level coding and debugging while enhancing application performance and reliability.
Knowledge Xpert
SQL Navigator users can now access 5,400 technical topics, error messages, pre-built and tested code solutions, and code formatting technology. Using the
Code Assistant , you can drag and drop these optimized routines
directly into your program editor.
For example: l
Knowledge Xpert for Oracle® Administration A complete and essential resource for Oracle DBAs.
l
Knowledge Xpert for PL/SQL Comprehensive PL/SQL knowledge combined with an extensive PL/SQL code library.
TIP:
Knowledge Xpert add-on modules are available directly from your Dell representative.
Select DB Object Dialog
Select and open a database object similar to the standard Windows File | Open command.
l
Enter the name of the object or type in a name mask using the SQL wildcard (%) l
Specify the object type (optional) l
Select the object from a list of matches
Server Output
Capture output from the Oracle server and display it in the
Output Window .
SQL Navigator 7.2
User Guide
193
Tips For Use
Toggle on/off
Output
Window
Oracle
Sessions l
Toggle on/off capturing server output from the
Session Menu .
l
Click Session | Server Output to toggle On/Off Server output.
l
When toggled ON the
Output Window
opens if it is not already open.
l
Closing the Output Window does not stop the capturing of Server Output.
l
The Output Window reopens automatically if you execute a stored program in a session capturing server output.
l
The default size of the run time buffer is 32k bytes.
l
Output is captured for the current Oracle session.
l
Server Output is captured individually for each session. Capturing it in one session does not automatically capture it in other concurrent sessions.
Server Side Installation Wizard
Installing server side objects.
The wizard requires connection as a DBA user so that the SQLNAV user can be created, as well as a number of roles. The wizard permits you to specify a password of your choice for this user. Note that the option «Base
SQLNAV Repository» must be selected on at least one occasion to allow the other support features to be installed. All objects installed by the wizard are installed into the SQLNAV schema.
For example: Install Server Side Objects for Team Coding
Install Server Side Objects for Team Coding
Before you can use Team Coding features, you need to install server-side objects on each Oracle instance where these features are to be used.
You can perform these steps from the
Tools Menu
|
Server Side Installation Wizard .
After running the Server Side Installation Wizard, you will need to grant the roles.
NOTE:
Before running the Server Side Installation wizard, close all sessions that are Team-Coding enabled.
SQL Navigator 7.2
User Guide
194
Run the Wizard
Window
Install or Remove scripts?
Description
Select to Install Scripts
Which scripts would you like the
Wizard to install?
Select for Team Coding l
Base SQLNAV Repository l
Team Coding Support
Which Database and Tablespace do you want to install the scripts to?
For security the Base SQLNAV repository requires a user password. Please enter and confirm a password.
Supply a password for the SQLNav User. This user is the owner of the objects required for Team Coding support.
Select migration preferences
Connect as a DBA user to the database where Team Coding is to be installed.
In the Migrate from VCS 3.2 to Team Coding dialog, if you are not migrating existing VCS Option data from SQL Navigator 3.2 to SQL
Navigator 4, just press Next.
If you are migrating existing VCS Option data, select a migration preference.
Create Team Coding Roles
TIP:
Click More Info for more information on the migration preferences. Also see the VCSMigrate documents in the Doc folder within the SQL Navigator installation folder.
Team Coding uses Oracle table and column privileges to control access.
You can create the following default roles using settings that represent the most likely desired use of these privileges: l
Administrator l
Project Manager l
Team Leader
For each set of privileges, you can choose to create a new role, use an existing role (you may already have appropriate roles for your users), grant them to public, or to skip privilege assignment completely.
Default roles
The default roles created by the Wizard have the following Team
Coding privileges: l
Administrator Can configure the instance to define how Team
Coding operates, which VCP (if any) is used, etc. This role is automatically assigned to the SQLNAV user.
l
Manager Can create and delete code control groups (CCGs) and relate them to a VCP project.
SQL Navigator 7.2
User Guide
195
Window Description
l
Leader Can modify CCGs, defining which objects or scripts are included in the group, and freeze objects. Can also delete rows from the Team Coding Viewer.
After creating the roles, you need to grant them to users.
Grant the roles
You can use the SQL Navigator User Editor or the Code Editor to grant the Team Coding roles created by the
Server Side Installation Wizard to individual users. You must be connected as a DBA user.
For example: l grant SQLNAV_ADMIN to DBA l grant SQLNAV_MGR to JOHN l grant SQLNAV_LDR to ARTHUR l grant SQLNAV_LDR to SUSAN
Session Browser
Manage sessions in the Session Browser.
To open the Session Browser click Tools | Session Browser.
Session Browser Toolbar
Icon Tool Tip
New Session
Current Session
Shortcut Description
As per Session | New Session, open the
Oracle Logon Dialog
Show the current session. Use to switch to a different session.
Include NULL and
SYSTEM OS User
Refresh
Auto Refresh Every…
F5
Show / Hide NULL and System OS users.
Refresh the Session Browser.
Refresh the Session Browser automatically. Select Auto-Refresh
every and enter the refresh interval in seconds.
SQL Navigator 7.2
User Guide
196
Sessions Grid
The current session is displayed in pink.
Action
Select / Highlight a session
Sort / Group
Sessions
Show / Hide
Columns
Filter Sessions
Kill Sessions
Description
The tabbed pages show details of the selected session. For more information, see
Session Information on page 198 .
l
Click the column heading you would like to sort by.
l
Drag the column you would like to group the sessions by to the gray area above the grid.
Right click on the grid and select Visible Columns. All columns are listed. Only selected columns are visible on the grid.
TIP:
You can rearrange the columns. Drag and drop the column header into the location you want.
When a filter is applied, only sessions that meet the criteria are displayed.
1. Click the arrow alongside the column heading you want to apply the filter to.
2. Select the value you want to filter by.
3. Apply additional filters if required.
To apply custom filters
1. Click the arrow alongside the column heading you want to apply the filter to and select (Custom…).
2. Create a conditional expression from the menu options provided.
l
Values are case sensitive.
l
Use And / Or to related multiple conditions.
NOTE:
l
The filtered columns are given a blue arrow. Click the blue arrow and select (All) to remove all filters applied to the column.
l
The filter expression is displayed below the Sessions grid. Click X to remove all filters.
Right-click the session and select Kill Sessions.
NOTE:
l
When you kill a top level node you kill all sessions below it.
l
You must have appropriate permissions (ALTER SYSTEM) to kill sessions.
l
You cannot kill the current session (displayed in pink).
l
The following query is used to kill sessions: ALTER SYSTEM KILL SESSION
<SID, SERIAL#> IMMEDIATE
SQL Navigator 7.2
User Guide
197
Session Information
Select a session on the
Sessions Grid
. Details for the selected session are displayed in the tabbed pages.
Tab Description
Session Further session information for the selected session.
Process Process information for the selected session.
IO
Waits
IO information for the selected session.
Waits information for the selected session.
NOTE:
WAIT_TIME = -2 on platforms that do not support a fast timing mechanism. If you using one of these platforms and you want this column to reflect true wait times, you must set the TIMED_STATISTICS parameter to TRUE. Doing this has a small negative effect on system performance.
The current SQL statement and explain plan for the select session.
Current
SQL
Access
Open
Cursors
Objects in the database currently locked by the selected session.
RBS
Usage
Parallel
Session
Locks
Transaction information for online rollback segments for the selected session.
Parent and slave sessions belonging to a parallel session.
User and system locks. Locks are displayed in groups; Blocking, Blocked By, System, and All Locks.
Long Ops Operations that run for longer than six seconds in absolute time, including some backup and recovery functions, statistics gathering, and query execution.
Cursors that the selected session has opened and parsed.
Source Preview
Preview the source code of text objects (stored programs, triggers and views), or a package’s individual entry points.
SQL Navigator 7.2
User Guide
198
1. Select the object
Module
In the
Code Editor
In
DB Navigator
In the
Find objects Dialog
results
In
Database Source Code Search
results
In the
Project Manager
In
DB Explorer
How to select the object
Press CTRL and click on the object name
Click on the object
Click on the object
Click on the object
Click on the object
Click on the object
2. Click View | Source Preview.
TIP:
l
While the Source Preview window is open, you can select objects in any of the windows named above, and the object’s source code will automatically appear in the Source Preview window.
l
Use a bookmark to conveniently mark various locations in the source code and quickly move about in the text without searching through the code and without losing your current editing location. You can set up to ten bookmarks. See
Edit Menu .
SQL Modeler
The SQL Modeler provides a fast means for creating the framework of a Select, Insert, Update, or Delete statement. You can select Tables, Views or Synonyms, join columns, select columns, and create the desired type of statement.
Section Description
Model Area
Used to graphically lay out a query.
SQL
Modeler
Toolbar
Most frequently used Modeler functions.
Criteria
Tab
Generated
Query Tab
Criteria used in generating the model.
Automatically generated SQL as a result of the model.
SPLITTERS The SQL Modeler has two splitters to change how you divide the screen.
l
There is a horizontal splitter between the Model Area and the Criteria/Generated
Query/Query Results tabs. Drag it up or down and release to see more or less detail.
l
There is a vertical splitter between the Model Area and the Table Selector List. Drag it left or right to see more or less detail.
SQL Navigator 7.2
User Guide
199
SQL Modeler Toolbar
Icon Tool tip
New model
Open an existing model
Save current model as…
Save model
Model information
Edit calculated fields
Generate a
SELECT statement
Description
Clear the modeler window ready to create a new query.
Open a saved query.
Save the query. Specify the filename and location.
Save the query to the current filename and location.
Edit current model information
Edit calculated fields
Select the type of statement you want to create.
If the query in the SQL Modeler is an UPDATE, DELETE or INSERT statement, a rollback will occur automatically.
Use to test the query. The results show in
Query Results Tab
.
Execute query
Explain plan Open the
Explain Plan Tool
.
Load in the
Code Editor
Show Table
List
Save sub query and return to master query
Copy the new query to the
Code Editor
.
Show/Hide the Table Selector.
The Table Selector lists the tables, views and synonyms available to you for inclusion in your SQL Model. You can select from the current schema or any other schema. Only those tables, views or synonyms for which you have SELECT privilege will be listed.
To add a table, view or synonym, double click on it or drag and drop it onto the
Model
Area
.
Save sub query and return to master query
SQL Navigator 7.2
User Guide
200
Icon Tool tip
Cancel sub query and return to master query
Edit global where clauses
Edit global having clauses
View joins
Description
Cancel sub query and return to master query
Edit global WHERE clauses.
Open the
Global WHERE Conditions Window
.
Set Global HAVING conditions (Must have a Group By condition set in the
Criteria Tab
.)
Open the
Global HAVING Conditions Window .
View Joins Dialog
Auto join objects
Auto join objects
Percentage of zoom for modeler pane
View Joins Dialog
From this dialog you can see individual joins, browse through the joins, and make changes to the joins.
Dialog
Section
Description
From / To
Join Type
The join fields, joined from one table to another.
You can change the Join Type from Inner to Outer. The line color denotes the type of join.
Outer Join On If you have selected an Outer join, you can change which table the outer join is performed on.
Join Test You can change the test for the join.
You can make it Less than, Greater than, etc. instead of Equal to.
Buttons
Previous Join
Next join
Delete Join
OK
Delete the current join.
Move forward in the join list.
Move backward.
Close the window and return to the SQL Modeler.
To open this dialog, click View Joins on the SQL Modeler toolbar. Alternatively, double click on a join line in the
Model Area
.
SQL Navigator 7.2
User Guide
201
Global WHERE Conditions Window
Add, Edit, Delete global where conditions as per the toolbar.
The Add and Edit buttons open the Global WHERE Definition dialog. Global Where entries are in the form of
<expression1> <operator> <expression2>.
TIP:
You could alternatively populate the WHERE clause via the
Criteria Tab . Entries into the cells of the
Criteria tab should be in the form of <operator> <expression2>.
Example
Construct the following query
SELECT dept.deptno, dept.dname, dept.loc
FROM scott.dept
WHERE ((dept.deptno BETWEEN 1 AND 25)
AND (dept.deptno < 40)
AND (dept.loc IS NOT NULL)
Follow the numbered steps
1. Open the SQL Modeler (as SCOTT/TIGER).
2. Double-click DEPT to add it to the model.
3. Right-click DEPT and choose Select All.
4. On the criteria tab, double click the Where Cond. cell under DEPTNO.
5. Choose < and fill in the value 40. Click OK.
6. On the criteria tab, double click the Where Cond. cell under LOC and then choose the Expert tab and click Yes at the warning dialog.
7. In the top edit box, enter IS NULL. Click OK.
8. On the criteria tab, double-click the OR cell under LOC. Choose the Expert tab and click Yes at the warning dialog.
9. In the top edit box, enter = ‘CHICAGO’
10. In the table model area (the area around the table images), right-click and choose SQL>Global Where
11. In the top edit box, enter Data Field DEPT.DEPTNO. Click OK.
12. From the SQL Function panel, select BETWEEN _Const_ AND _Const_. Replace the constants with values, for example 1 and 25 respectively. Click OK twice.
13. View the generated query. It should appear as described above.
Global HAVING Conditions Window
SQL Navigator 7.2
User Guide
202
Add, Edit, Delete global having conditions as per the toolbar.
The Add and Edit buttons open the Global HAVING Definition dialog. Global Having entries are in the form of
<expression1> <operator> <expression2>.
TIP:
You could alternatively populate the HAVING clause via the
Criteria Tab
. First set a GROUPed BY field. Then set the Having clause for that field by entering it in the group cond. row. This has the limitation that you can only have the selected field on the left side of the relational operator. If you need to have multiple fields on that side of the operator, use the Global Having feature.
Example
Construct the following query
SELECT emp.empno, emp.ename, emp.job, emp.mgr, emp.sal, emp.comm, emp.deptno
FROM emp
GROUP BY emp.deptno, emp.comm, emp.sal, emp.mgr, emp.job, emp.ename, emp.empno
HAVING ((emp.sal + NVL (emp.comm, 0) > 4000))
Follow the numbered steps
1. Open the SQL Modeler (as SCOTT/TIGER).
2. Double-click EMP to add it to the model.
3. Right-click EMP and choose Select All, then deselect Hiredate.
4. In the Criteria tab, double-click the Group By field for DEPTNO.
5. Double-click the Group By fields for COMM, SAL, MGR, JOB, ENAME and EMPNO as well.
6. Click the Global Having button in the toolbar. Click the Add button to add a new Having clause.
7. Enter the Having clause to say: l
EMP.SAL + NVL(EMP.COMM, 0) > 4000
8. Click OK.
View the generated query.
It should appear as described above. This query selects all the employees whose salary plus commission is greater than 4000. The NVL command substitutes a null value in the specified column with the specified value, in this case, 0.
Model Area
Use the model area to visually join or manipulate the Tables, Views and Synonyms.
SQL Navigator 7.2
User Guide
203
Add objects
Show/Hide the Table Selector on the
SQL Modeler Toolbar
. It lists the tables, views and synonyms available to you for inclusion in your SQL Model. Double-click each desired Table, View, Synonym, OR drag and drop them from the list to the model area. As the objects are presented on the model area, join lines are drawn from any established foreign keys in the DDL.
Additionally, drag-and-drop objects from: l
DB Navigator
tree (single object only) l
DB Navigator
details pane (when a list is displayed) l
Find objects Dialog
l
Project Manager
TIP:
l
To open SQL Modeler with a table, select the table in
DB Navigator
then click
Object Menu
| SQL
Modeler.
l
You can click in a table header and drag and drop the table where you want it in the Model Area.
Build a query
Steps
Clear an existing query from the Model
Area, if required.
Define the type of statement you want to create.
Add objects to the Model Area.
Description
Click New Model on the
SQL Modeler Toolbar
.
Choose SELECT, UPDATE, DELETE, or INSERT from the
SQL Modeler
Toolbar
.
Drag and drop Tables, Views, or Synonyms from the Table
Selector to the modeling area.
You can show/hide the Table Selector on the
SQL Modeler
Toolbar .
Specify table columns to be used in the query.
Select column names in the tables in the Model Area.
NOTE:
If no table columns are selected, then all columns will be included in the query.
Set criteria for the query
View your query as SQL code or as a data grid.
Save the model
See the
Criteria Tab
.
Click the
Generated Query Tab
and
Query Results Tab
.
Save the model from the
SQL Modeler Toolbar .
SQL Navigator 7.2
User Guide
204
TIP:
You can use the
SQL Modeler Toolbar
to copy the query to the Code Editor window.
Create a table join
1. Add two table names to the Model Area.
2. In the first table, click the column name that you want to join. Drag it to the corresponding column name in the second table.
3. When the join is successfully created, SQL Modeler draws a connecting line that represents the join between the two table columns.
TIP:
To specify criteria for a table join, double-click on the connecting line joining the two columns. This opens the
View Joins Dialog .
Menus in the Model Area
Right click the model
Menu
Copy Model Image To
Clipboard
Tables
Description
Copy a bitmap image of the model to the Windows Clipboard
Visibility
Calculated
Fields
Show / Hide tables in the model.
Hidden tables are not included in the Generated Query
( Generated Query Tab ).
Add calculated fields based on other table columns.
Show
Join Text
Adjust Model
Origin
Primary Key
Indexes
Show Field
Type
Show the column names that comprise the joins.
Move the model so the upper left object is in the upper left of the Model Area.
Show the Table Primary Keys. Show PK next to each
Primary Key column.
Show the Table Indexes. Show IDX next to each Index column.
Show the column data type in each table.
SQL Navigator 7.2
User Guide
205
Menu
SQL
Auto Join All Objects
Hide fields
Zoom to table
Toggle Full Screen Mode
Optimize All Table Sizes
Arrange Tables
Description
Run Query in Thread
Global
Where
Clauses
Global
Having
Clauses
Run the query in a way that allows you to halt it in the middle if necessary.
Open the
Global WHERE Conditions Window
. Use to add a
WHERE clause to the query.
Open the
Global HAVING Conditions Window . Use to add a
HAVING clause to the query.
TIP:
Use the
Criteria Tab
to set GROUP BY first.
Query
Variables
Add variables. These variables are used in the Global WHERE
Definition Dialog and Global HAVING Definition Dialog.
Join all tables based on DDL Foreign Key Constraints.
Show / Hide the list of columns in the table in the model area.
Select a table to focus.
Show / Hide the Table Select List and Criteria/Generated Query/Query
Results tabs.
Minimize the size of the tables in the Model Area.
Arrange the tables in the Model Area.
Right click the Table object
Menu
Set Table Alias
Alias Field Names
Description
Set the Table Alias. The value is added to the
Criteria Tab
.
Set the Field Alias for each column in the table. The values are added to the
Criteria Tab
.
Automatically join this table to others based on DDL Foreign Key Constraints.
Shows / Hide the schema name in the Generated Query (
Generated Query Tab
).
Auto Join
Show Schema Name in
SQL
Remove Table
Select All
Unselect All
Invert Selection
Optimize Size
Hide
Remove this table from the model.
Select / unselect columns in the table.
Restore the size of the table to its default size.
Temporarily hide the table from the model.
While the table is hidden it will not be included in the Generated Query
( Generated Query Tab ).
TIP:
To hide multiple tables or show hidden tables, right click on the Model
Area and select Tables | Visibility.
SQL Navigator 7.2
User Guide
206
Keyboard Shortcuts
Key
Up and down arrow keys
Space bar
Tab
Shift-Tab
Action
Move you around in lists
Select / Unselect boxes
Move forward one area (table, menu, list, etc)
Move back one area (table, menu, list, etc)
Tabs
Criteria Tab
1. Add tables, views and synonyms to the
Model Area .
2. In these tables, views and synonyms, select the columns you want to add to the Criteria tab. Only
Selected columns appear on the Criteria tab.
TIP:
To rearrange the order of the columns on the Criteria tab, drag and drop them left or right.
Field
Only fetch unique records
Schema
Description
Select to apply the DISTINCT command to the query.
The schema cannot be edited.
Null Value
Subst.
Double click in the cell to enter a value to substitute for any null values.
To clear the cell, highlight it and press Delete.
Aggregate F.
Double click in the cell to select an aggregate column function, such as Average, Count, Max,
Min, or Sum.
To clear the cell, highlight it and press Delete.
Where Cond.
Double-click in the cell to open the WHERE Definition dialog.
Section Description
Conditions Set a condition which tests if a column is equal to (or <, >, <=, >=, <>, LIKE,
BETWEEN) a constant or another field _or_ a condition where the selected field is in a sub query.
Clear
Form
Click to reset the dialog box and begin the WHERE condition again.
SQL Navigator 7.2
User Guide
207
Field Description
Section
Remove
Condition
Description
Click to remove the WHERE definition.
TIP:
A quick way to remove the WHERE definition is to highlight the cell and press
Delete.
Or
Group By
Double-click in the cell to open the WHERE Definition dialog (as above).
This WHERE criteria will be OR’ed together with the above WHERE criteria.
If you want to AND multiple column criteria together, then select Expert from the
WHERE Definition dialog. For more information, see Global WHERE Conditions Window on page
202 .
Double-click in the cell to select it as a GROUP BY column.
A number in parentheses indicates the order of the columns in the GROUP BY clause.
See also The Having Cond. cell.
To clear the cell, highlight it and press Delete.
Having
Aggregate
Double click in the cell to select an aggregate column function (such as Average, Count, Max,
Min, or Sum) for the HAVING clause.
This allows for the following type of query:
SELECT emp.job_id
FROM employee emp
GROUP BY emp.job_id
HAVING ((AVG (emp.salary) > 1500))
To clear the cell, highlight it and press Delete.
Having Cond.
Double click in the cell to open the GROUP BY Definition dialog.
NOTE:
Requires a value in the Group By cell. To create more complex Having conditions see
Global HAVING Conditions Window
for more information.
Sort
Visible
Field Alias
Table Alias
To clear the cell, highlight it and press Delete.
Double click in the cell to sort this column as Ascending, Descending, or no sort.
To clear the cell, highlight it and press Delete.
Double click in the cell to have it be visible / hidden. When visible the column is returned in the column list.
Double click in the cell to change the field name alias.
Double click in the cell to enter a value for the table alias.
To clear the cell, highlight it and press Delete.
SQL Navigator 7.2
User Guide
208
Right-click over the Criteria grid:
Menu
Suppress Current Column
Best Fit (All Columns)
Default Width (All Columns)
Copy Query Grid Image to Clipboard
Description
Remove this column from the query
Set the column width of the Criteria grid to show all text
Set the column width of the Criteria grid to the default width
Copy the Criteria grid to the clipboard
Generated Query Tab
This tab lists the automatically generated SQL statement.
NOTE:
l
Any changes made to the
Model Area
or
Criteria Tab
will automatically regenerate this SQL statement.
l
You cannot directly edit the SQL on the Generated Query tab.
Right-click over the query
Menu
Copy
Save As
View Query in Code Editor
Description
Copy the query to the clipboard.
Save the query to a file.
Copy the query directly to the
Code Editor
.
Query Results Tab
Show the results of executing the generated query.
NOTE:
l
Insert, Update, and Delete queries can only be executed in the
Code Editor .
l
Making changes to the Tables or Columns, then clicking on the Query Results tab will prompt you whether or not to re-query the data.
SQL Optimizer
SQL Navigator 7.2
User Guide
209
SQL Optimizer supplements Oracle tuning skills for developers. The SQL Optimizer makes observations about a selected SQL statement and the underlying database environment, then recommends several options to improve performance. Users can then view the logic behind the advice, implement the recommendation, apply it to the database, and see the results. The SQL Optimizer module automatically produces all necessary SQL to effect the corresponding change.
NOTE:
l
SQL Optimizer can be used to analyze the execution of SQL scripts containing more than one statement.
l
SQL Optimizer is an external application. It is installed independently of SQL Navigator.
l
Example Scenario: in the
Code Editor
highlight the text of the SQL statement you want to investigate and click SQL Optimizer.
l
For more details, see the online help supplied with the SQL Optimizer product.
Task Manager
SQL Navigator executes long-running tasks in separate threads in the background. They lock only the current session. Background execution happens automatically, and means that all the application’s functionality remains available to the user while the task is running in a separate session.
The Task Manager is a display of all active and complete tasks for the current session.
The following background tasks can be managed through the Task Manager:
More Information
Object Menu
Background Tasks
Batch commands on database objects, such as Drop, Compile, Truncate and
Extract DDL
Enable
Execute PL/SQL code
View Differences
Full expansion of a node in DB Navigator
Source Code Search
Find Objects
Constraint Editor
PL/SQL Execution Console
Difference Viewer
DB Navigator
Database Source Code
Search
Find and Replace
NOTE:
l
Right click on a task to Suspend, Resume, End or Delete.
l
Ending some tasks, such as compiling dependants in a complex table, may appear to «hang.» This is due to SQL Navigator waiting for a response from the Oracle server. Even though there may be a delay, control will ultimately be returned to SQL Navigator.
SQL Navigator 7.2
User Guide
210
Web Support Configuration Dialog
Specify a local directory where images can be loaded or enter details of your Web server’s configuration.
This is required to view images and follow hyperlinks in your documents.
Wrap Code
The Wrap Code utility provides an easy way to access Oracle’s Wrap Code utility. This window is connection independent so you do not need an open database session to use it.
To wrap code
1. Click
Tools Menu
| Wrap Code to open the Wrap Code window.
2. Input File details:
Field
Input File
Description
Enter the file (of PL/SQL code) you want to wrap, including the full path.
TIP:
Click the drill down button to browse for the file.
Input File Text When you have selected the file, the text of the file appears here.
TIP:
Right-click in the text area to copy the code to the clipboard.
Output File By default this is given the same name as the input file, but with extension .plb.
3. Click Wrap Code.
Field
Output File
Text
Description
The wrapped code appears in the Output File Text area and is automatically saved to the specified Output File.
TIP:
Right-click in the text area to copy the code to the clipboard.
SQL Navigator 7.2
User Guide
211
9
View | Preferences
Section
General
Extract DDL
Project Manager
Code Editor
LOB Viewer
Team Coding
Topic
General | User Interface
General | «Drop» and «Truncate» safety options
General | Session
General | Default Tables
General | Explain Plan
General | Code Assistant
General | Printing
General | Object Editors
General | Task Bar
Extract DDL | General
Extract DDL | Table/View Specific
Extract DDL | Constraints
Extract DDL | Materialized Views/Snapshots
Extract DDL | Users
Project Manager
Code Editor | General
Code Editor | SQL Scripts
Lob Viewer
Team Coding
NOTE:
Settings in View | Preferences can be changed by any user and apply to the current user only unless otherwise stated.
SQL Navigator 7.2
User Guide
212
General
General | User Interface
Set SQL Navigator preferences.
User Interface
Option
Style
Tutorial Messages
Hints
Description
Select the look and feel of SQL Navigator windows from the following styles: l
Standard l
Flat l
XP l
Native (the default style) l
Office 2003
Select to display tutorial messages automatically for windows. First-time users may find these messages especially helpful.
Select to show Tool Tips. Tool Tips are labels that pop up when you point to a button or other control.
Select the font to use in SQL Navigator windows.
Select the preferred layout for showing dates.
Font
Date Displayed
Format
Time Displayed
Format
Display time in
DATE fields
Bold Folders in
DB Navigator Tree
Select the preferred layout for showing the time.
Should DATE fields include the time?
Default Directory
Background Color
Select to show folders as bold in the DB Navigator tree. Showing the folders as bold may help clarify the structure of a complex tree.
Used by:
DB Navigator
.
The default directory SQL Navigator points to for Open and Save operations.
Used by:
File Menu
,
Toolbars ,
Code Editor
,
HTML Viewer
.
The color of the background area.
Data Grid
Related to:
Code Editor
|
SQL Query Results Data Grid
,
Edit Data ,
Quick Browse
SQL Navigator 7.2
User Guide
213
Option
Show Row #
Display Long columns
Description
Select to show row numbers in the data grid.
Select the display for LONG columns.
Trim column width while pasting
On demand
(in pop-up editor)
Data in a LONG column is displayed in a separate pop-up editor.
For each cell:
The word
«MEMO» in upper case
Indicates the cell has data. Double-click the word to display the data in a pop-up editor.
The word
«memo» in lower case
Indicates there is no data to display.
Full text
(within cells)
Columns are effectively treated like normal string (VARCHAR2) columns, that is, data is displayed within the corresponding cells as a single string.
When an object is copied from the
Code Editor
or one of the
Visual Object Editors
and pasted to another tool, for example Note Pad…
Selected The length of each pasted column is trimmed to approximately the length of the longest character string in the column.
Not
Selected
The pasted data reflects the actual length of the column as defined in the object.
Display NULL values as (Null)
Data Grid Font
Show Row
Background Color
Selected
Not Selected
Show Null values as «(Null)» in the data grid.
Show Null values as empty cells in the data grid.
The font used in the data grid result set.
Set up an alternate row color in the data grid.
SQL Navigator 7.2
User Guide
214
Pin at Start
Option
Analyze
Describe
Explain Plan
Object Editors
Tool
Analyze Tool
Describe
Explain Plan Tool
Visual Object Editors
Description
Selected The window is pinned.
Open multiple instances of the tool at the same time.
Not
Selected
The window is not pinned.
If you reopen the tool, the newly opened instance of the tool will replace the current instance.
NOTE:
Once a window of the selected type is open, you can pin or unpin it at any time.
Automatically Show Output Window
Related To:
Output Window .
Option
Errors
Server Output
Information
Description
Show the Output window automatically when errors are sent to it.
Show the Output window automatically when server output is sent to it.
Show the Output window automatically when informational text is sent to it.
Startup
Option Description
Show Splash screen Select to show the Splash screen when you launch SQL Navigator.
Reopen active windows Select to show all active windows from the last time SQL Navigator was used.
Show Welcome Screen Select to show the welcome screen when you launch SQL Navigator.
ER Diagrammer
Related To:
ER Diagram
.
Option
Show real index names
Description
Show real index name instead of the one generated by the system.
SQL Navigator 7.2
User Guide
215
Task Manager
Related To:
Task Manager
.
Option
Auto delete complete&more-thanone-day tasks
Description
Remove completed tasks, and still running tasks that started more than one day ago.
General | «Drop» and «Truncate» safety options
Drop and Truncate
Related to:
Object Menu
| Drop and
Object Menu
| Truncate.
Option Description
No «Drop» or «Truncate» for
Table/Cluster
Select to disable the Delete option for table and cluster objects.
No «Drop» for Stored Programs/Triggers Select to disable the Drop command for stored programs and triggers.
General | Session
Session
Option
Allow multi Code Editor windows per Session
Description
Related To: Code Editor
.
Selected Allow multiple Code Editor windows per Session.
Not
Selected
Show multiple instances of the Code Editor in the same window as tabs.
Show Logon Dialog startup
Show code editor after connection
Select to show the
Oracle Logon Dialog
when you launch SQL Navigator.
Selected Show the
Code Editor
after a connection is made.
Not Selected Show the
DB Navigator
after a connection is made.
Default date format Select the default date format, for example, MM/DD/YYYY.
Used when a date-to-string conversion request is explicitly made; for example, in SELECT TO_CHAR(SYSDATE) FROM DUAL.
Otherwise a binary format is used for date/time handling. On screen
SQL Navigator 7.2
User Guide
216
Option
DBMS Output On by default
DBMS Output buffer (bytes)
Cache Capacity
Optimizer Goal/Mode
Immediate load in Open Object
Dialog
Close when last session window closes
Show Users in Schema Lists
Description
date/time representation is made using the client machine’s Regional
Settings (set in the Windows Control Panel).
NOTE:
<Same as Displayed Date Format Setting> refers to
View | Preferences |
General | User Interface
| Date
Displayed Format.
Related To:
Server Output
.
Selected
Not
Selected
Server Output is switched on, on connecting to the database.
Server Output is switched off, on connecting to the database.
Change the buffer size for server output. Set the desired upper limit for the DBMS Output Buffer (Bytes).
Related To:
Output Window .
The number of database objects that can be placed in the cache before the cache refreshes itself and accesses the database.
The approach the Oracle optimizer uses to optimize a SQL statement.
For more information, see the ORACLE 7 SERVER Concepts Manual.
Related To: Select DB Object Dialog
.
Selected SQL Navigator automatically builds a pick-list of all available database objects.
Not
Selected
Specify selection parameters before loading the pick list of database objects.
This saves time and resources.
Selected SQL Navigator terminates a session when all session windows are closed.
SQL Navigator prompts you before terminating the session, unless you have disabled the prompt previously.
Not
Selected
A session can still be active when all its windows are closed.
Related To: l
The All Schemas node in
DB Navigator .
l
The Current Schema drop-down list in the Object toolbar
( Toolbars
).
l
The drop-down lists in the editing windows.
SQL Navigator 7.2
User Guide
217
Option Description
Selected
The lists of schemas will be populated with Users— regardless of whether those users own any objects.
Not
Selected
The schema lists will include only users with objects.
Retrieve large numbers as strings
Show All Constraints
Selected Numeric fields from the database with a precision exceeding 15 digits will be converted to strings on the server.
Not
Selected
These numbers will be represented in scientific notation.
The advantage of converting large numbers to strings rather than displaying them in scientific notation is to avoid loss of precision in screen displays and reports. However, note that converting numbers to strings means that they: l
Will be left-aligned in windows and dialogs l
Will be sorted alphabetically rather than numerically in sorted lists l
Cannot be used with SQL Navigator calendar functions
NOTE:
The related View | Preferences |
Code Editor | SQL
Scripts
| Retrieve all result fields as strings overrides this preference.
Related To: DB Navigator
Bytes per character
Retrieve tablespace usage info
Selected Show system-defined constraint names for NOT NULL attributes.
Exclude system-defined constraint names.
Not
Selected
The number of bytes to allocate per character. If you select
Autodetect then SQL Navigator attempts to determine the actual number of bytes per character while establishing connection.
NOTE:
You can override this preference for specific connections from the
Oracle Logon Dialog
. If you receive ORA-01026 errors (or similar) when working with the database, we recommend setting this preference to the minimum possible value (2, 3 or 4) that eliminates the errors.
Select to add the following columns to the tablespace details pane: l size_mb – the allocated size of the tablespace in megabytes l used_mb – the number of megabytes currently used by the tablespace
SQL Navigator 7.2
User Guide
218
Option Description
l used_percent – the percentage of the tablespace currently used.
NOTE:
Available only for users with access to DBA views. For more information, see DBA Dictionary Views on page 48 .
National Language Support (To make this option changes effective right away, shut down SQL
Navigator then restart)
Read Buffer Size
Use user’s dictionary views
No
Support
NLS is not supported by default.
Display and
Edit multibyte data
Display and enter data in the
Code Editor
Data Grid (
SQL
Query Results Data Grid
) in any language supported by
Windows. This option is not applicable with the column or object names. However, multiple languages can be displayed without making any changes to the system environment.
The number of records SQL Navigator reads per database request.
This preference is specific to background queries to list objects and to get object details for the logged in user’s schema
Selected SQL Navigator uses USER views to query the Oracle Data
Dictionary.
Not
Selected
SQL Navigator uses ALL or DBA views to query the Oracle
Data Dictionary, dependent on the value of Enable DBA
Views in the
Oracle Logon Dialog
.
Keep existing sessions alive
Option
Issuing ‘select * from dual’ every interval (minutes)
Description
Auto run script at connect
Option
Auto run script at connect
Close script on successful execution
Description
Run the named script on connecting to the database.
Select for the named script to close automatically when it has finished running.
Trace
Option Description
Enable Select to log all transactions with the database to a file. This is useful for debugging purposes.
Level Select the type of messages the trace file will record.
SQL Navigator 7.2
User Guide
219
General | Default Tables
Default Tables
Option
Exception Table Owner
Exception Table
Chained Rows Table Owner
Chained Rows Table
Description
Name of the schema where the exception table is to be stored.
Name of the exception table.
Name of the schema where the chained rows are to be stored.
Name of the chained rows table.
General | Explain Plan
Explain Plan
Option Description
Explain Plan Table
Owner
User name of the owner of the default plan table.
Explain Plan Table Name of the default plan table.
Table Access Full warning Threshold
The number of rows that must exist in a table before the icon in the execution plan is changed from green to red to draw your attention to the full table scan.
Abbreviate Join
Text
Select to abbreviate the text that is displayed in the execution plan for table joins.
The abbreviation feature reduces the large amount of join text associated with a large query so that you can focus on the overall steps in the execution plan.
Explain Plan Color The color of the individual items in the execution plan.
TIP:
Click the … button, then click the Color column in the row of an item to select a new color.
General | Code Assistant
Code Assistant
Option
Auto Start with Editors and
Explain Plan
Description
Open Code Assistant automatically when an editor or the
Explain Plan
Tool
is opened.
SQL Navigator 7.2
User Guide
220
Option
Standards Catalog Directory
Shared Catalog Directory
Description
The directory path for the Standards Catalog.
The directory path for the Shared Catalog.
Displayed Pages
Option
Syntax Catalog
Web Catalog
Code Catalog
SQL Catalog
Description
Show the Syntax Catalog in the Code Assistant.
Show the Web Catalog in the Code Assistant.
Show the Code Catalog in the Code Assistant.
Show the SQL Catalog in the Code Assistant.
PL / Vision Catalog
Option
PL / Vision Lite
PL / Vision Professional
Description
Show the PL / Vision Lite Catalog in the Code Assistant
Show the PL / Vision Professional Catalog in the Code Assistant.
General | Printing
The printing preferences control the appearance of printer output from various SQL Navigator windows, dialogs and reports.
NOTE:
Of all the options in this section, only General | Printing | Editors options are applicable to the
Code Editor
.
Printing
Option
Measurement Units
Header and footer
Font
Description
The measurement unit for margin width and other print settings.
Enable/Disable headers and footers on printed output.
NOTE:
Header and footer properties are specified separately (see below).
The font to be used for printing SQL Navigator output.
SQL Navigator 7.2
User Guide
221
Margins
Option
Left Margin
Right Margin
Top Margin
Bottom Margin
Description
The width or height of the page margins using the Measurement Unit specified above.
Header
Option Description
Font
Alignment
The page header properties.
Be sure to enable Header and Footer (above) if you want headers and footers to be printed.
Footer
Option Description
Font
Page Number
Date
The page footer properties.
Be sure to enable Header and Footer (above) if you want headers and footers to be printed.
Editor
Option Description
Syntax highlighting Applicable to output printed from an editing window; for example, the
Code Editor
.
Show line numbers
DB Navigator
Applicable to output printed from
DB Navigator .
Option Description
Header
Selection
Type the text you want to appear as header text in the printed output from DB Navigator.
Orientation If you select a printer orientation other than Default, your setting will override any setting made in the Print Setup dialog when you print.
Print the selected item or the entire DB Navigator Tree.
SQL Navigator 7.2
User Guide
222
General | Object Editors
Object Editors
Option
Auto Recompile
Dependents
Description
Selected Automatically recompile dependent objects when an object is altered.
Not
Selected
Force a manual recompile of dependent objects based on your preference. This is the default.
Auto Recompile
Invalid Only
Apply changes
Save on clone
Selected Automatically recompiles only the dependent objects that have a status of invalid.
Not
Selected
Force all dependent objects to recompile automatically when using the debugger feature.
This option specifies the conditions necessary for the Apply Changes toolbar button to be available. Select to have the button available l only when you have made changes to valid objects, or l when you have made changes to any objects (valid or invalid), or l available at all times.
Select to automatically save a cloned object without prompting.
General | Task Bar
Task Bar
Option
Group Similar
Taskbar Buttons
Group Similar
Taskbar Button
Threshold
Description
Display buttons with similar functionality into groups.
Specified the maximum numbers of separate items on taskbar before grouping is performed. (if the threshold is 4 and there are 4 items on the taskbar, when another window is opened, it will be grouped).
NOTE:
Requires selection of group functionality (above).
Order Taskbar Items by Session
Selected Task bar items of one session are grouped close together followed by items of other sessions.
Not
Selected
All items of the same type will be grouped together regardless of their sessions.
SQL Navigator 7.2
User Guide
223
Option Description
Reverse Order of
Taskbar Items
Rotate Taskbar Item caption when vertical
Allow Taskbar Items to expand onto multiple lines
When selected, new Task bar items will be populated on the left hand side.
Horizontal / Vertical direction of Task bar item captions.
Display Task bar items on multiple lines if the current line is full.
Extract DDL
Extract DDL | General
NOTE:
Preferences preceded by an asterisk (*) are applicable to team coding operations when the Team
Coding preference (see Use Extract DDL Preferences) is checked.
Extract DDL/MetaData
Option
Show this window before performing the task
<schema>, <object> File Name Prefix
Description
Show the preferences before the DDL is extracted from the object.
Selected The default file name will be prefixed with the schema name and object name.
Not
Selected
The default file name will be the same as the object name.
New tab in the Code Editor for each object
Selected
Not
Selected
Show a new tab for each object that is extracted DDL.
All the objects’ extracted DDLs will be on the same tab.
Extract DDL to the same tab in the Code
Editor
Selected The script is inserted into the current tab in the
Code Editor
.
Not
Selected
A new tab is created with the SQL scripts.
SQL Navigator 7.2
User Guide
224
Extract DDL
Option
Extract DDL on drag & drop within
DB Navigator
Keywords case
Names case
Generate comments
Prefix with
Schema name
Include Drop
Description
Allow drag & drop of the extracted DDL to another database within the same
Navigator
tree.
DB
Select the case used for keywords in the DDL.
Select the case used for names in the DDL.
Show pre-generated comments in the DDL. Can be helpful to identify different parts of the script.
Any Object Name that is displayed within the DDL is prefixed with the Schema Name.
Include the drop statement at the beginning of the DDL to drop the object first.
Option
Include «Cascade Constraints» with DROP
Description
Include «Force» with TYPE DROP
Use «CREATE
OR REPLACE»
Include
«Tablespace name»
Include «Storage clause» (Only Non-
Default Values for
Partitioned
Tables)*
Include «Physical
Attributes
Clause»*
Include Drop with Force in the DLL statement for type objects.
Add Create or Replace to the start of the object, rather than just having Create.
Include the Tablespace name in the DDL.
Include the Storage clause in the DDL.
Include the Physical Attributes clause in the DDL.
Include «Grants»* Include the Grants in the DDL.
Option Description
Include Object Grants (for Users) Includes any object grants for users in the DDL.
Body and Spec for
Packages/Objects
Show Trigger
Snapshot
Includes DDL for both the body and the specification when extracting from packages or objects. The package specification declares procedures, functions, cursors, and variables. The package body contains the implementation of the public procedures and functions, together with internal and private programs and variables.
The Oracle Data Dictionary stores the DDL used to create a trigger in the all_triggers_ view, along with all the other trigger parameters.
SQL Navigator 7.2
User Guide
225
Option
Separator
Character
Format Output
(will not include
Inline Advice)
Description
Selected SQL Navigator extracts the DDL as stored in the all_triggers_view.
Any user comments stored in the DDL are retained when extracting the
DDL.
Not
Selected
SQL Navigator constructs the DDL from the object’s parameters, and any user comments will not be retained.
Select the character to be used as the separator in the DDL. If you extract DDL for several objects, the DDL for each object will be separated using the selected separator.
NOTE:
The ‘/’ character is used automatically when extracting DDL for objects without stored code.
Format the DDL according to
Formatting Options
.
Inline advice is never included even if Tools | Formatter Tools | Enable Inline Advice is selected.
Extract DDL | Table/View Specific
Table/View specific
NOTE:
Preferences preceded by an asterisk (*) are applicable to team coding operations when the Team
Coding preference (see Use Extract DDL Preferences) is checked.
Option
Include «Constraints»
Include «Triggers»
Include «Indexes»
Include «Comments»
Include «Primary Key in
Table Definition»
Include «Synonyms»
Exclude Table column default values*
Include
ENCRYPTION clause
Description
* Includes any constraints for the object in the DDL.
Option Description
Disable «Constraints» *Generate DDL with constraints in a disabled state.
*Includes any triggers for the object in the DDL.
Includes any indexes for the object in the DDL.
*Includes any comments for the object in the DDL.
Includes the Primary Key for the table in the DDL.
Includes any Synonyms for the object in the DDL.
*Excludes all default values for the object from the DDL.
Includes any encryption-related clauses (such as encryption algorithm to be used, salting and so forth) for the object in the DDL.
SQL Navigator 7.2
User Guide
226
Option Description
Include FORCE clause
Include datatype definition for table column
Include Byte/Char for
Table Columns
Select the measurement unit you want to use for specifying margin width and other print settings.
Include datatype definition for any columns that are of complex type.
Display Byte or Char as length for a column.
Partitioning
Option Description
Include «Storage Clause» for
Partitions
Include «Storage Clause» for Index
Partitions
Storage Clause Options
Includes any Partition settings from the Storage Clause for the object in the DDL.
Includes any Index Partition settings from the Storage Clause for the object in the DDL.
Include storage clauses with either non-default values or all values in the DDL.
Include «Tablespace Name» for
Partitions
Include «Tablespace Name» for Index
Partitions
Includes the Tablespace names any Partition for the object in the
DDL.
Includes the Tablespace names in any Indexed Partition for the object in the DDL.
Exclude Partition List for Local Index Excludes Local Index Partitions for the object in the DDL.
NOTE:
Not applicable when Include «storage Clause» for
Index Partitions (above) is selected.
List Individual Hash Partitions
Selected
Not
Selected
The «individual_hash_partitions» clause will be used.
The «hash_partitions_by_quantity» clause will be used.
Extract DDL | Constraints
Constraints
Option
Include ON DELETE SET NULL clause
Description
Includes the ON DELETE SET NULL clause in the DDL.
SQL Navigator 7.2
User Guide
227
Extract DDL | Materialized Views/Snapshots
Materialized Views/Snapshots
Option
Include BUILD clause
Description
Choose the type of build clause used for snapshots.
Extract DDL | Users
Users
Option Description
Include encrypted password Select to include the user’s password (encrypted) in the extract ddl script.
Project Manager
Project Manager
Option
Hide inactive project windows
Hide Project Manager after connecting
Remember Oracle
Home/Client for each connection
Description
Only display the selected Project Manager window.
Once a connection has been made successfully, close the Project Manager window.
Displays the Home/Client column. Remembers the Oracle client for each connection and automatically connects the next time the item is opened (if the connection is closed).
Auto add items to Project Manager
Option
On Connect
On Create/Open
Description
Once a connection has been made successfully, add the connection to the Project
Manager.
Direct connections are not added to the Project Manager.
Once an object has been created or opened it is added to the Project Manager Window.
SQL Navigator 7.2
User Guide
228
Option Description
object
On Create/Open file
Once a file has been created or opened it is added to the Project Manager window.
On Browse/Edit
Data
If the user browses data in a table, then the table is added to the Project Manager
Window.
On Describe object If the user chooses to describe an object, then the object is added to the Project
Manager Window.
On Execute object If the user executes a procedure or function, then that object is added to the Project
Manager Window.
Code Editor
Code Editor | General
General
Option
Find Text at Cursor
Font
Code Convention
Lowercase
Auto Indent
Indent Size
Use TAB Characters
Tab Size
Smart Tab
Description
Automatically place the word at the current cursor position into the Find box.
The font used in the Code Editor window.
Paste objects in lower case into the editor. Also affects column names in the drop down list as part of code completion in any of the text editors, as upper or lower case, when you type in a table name with the ‘.’ operator.
The preference was previously known as Drag and Drop Objects to Lowercase.
Position the cursor under the first nonblank character of the preceding nonblank line when user presses Enter.
Indent Size used when Indenting selected text using CTRL + I.
Not applicable if Use TAB Characters is selected.
Selected
Not Selected
Insert tab characters.
Insert space characters.
If Smart TAB is selected this option is off.
The horizontal width of the Tab space in number of characters.
Tab to the first character in the preceding line.
If Use TAB Characters is selected this option is off.
SQL Navigator 7.2
User Guide
229
Option
Smart Fill
Description
Begins every auto-indented line with the minimum number of characters possible, using tabs and spaces as necessary.
Convert all keywords to uppercase as they are typed into the editor.
Keywords to
Uppercase
Syntax highlighting Enable the highlighting of syntax within the editor.
Option
Highlighting
Style
Colors
Description
Default Styles with color schemes for syntax highlighting.
Set a custom style for syntax highlighting. Also set the highlighting style to custom.
Column Track When selected the cursor «remembers» its starting column position and moves to the same position when you move it up or down to a new line.
Use together with Allow Caret after EOL.
Hot Links
Allow Caret after EOL
When selected the user can open an object from the SQL text via Ctrl+Click.
Selected The user can move the cursor beyond the end of the current line. The cursor’s vertical movement ignores the EOL position of the line current line.
Use together with Column Track.
Not
Selected
The user cannot move the cursor beyond the end of the current line.
The cursor’s vertical movement is constrained by the EOL position of each line.
Show Line Numbers
Show Right Margin
Show line numbers in the Code Editor.
When selected, draw a vertical line in your editing window representing the righthand page boundary.
Option Description
Right Margin Width Placement is controlled by the Right Margin Width setting.
Templates
Describe Object at
Hyperlink
Highlight Current
Line
Allow Tab Items to
Expand onto Multiple
Lines
Enable Code
Open the
Code Shortcuts And Templates Dialog .
Create, edit, or delete templates.
When selected, open the Describe window ( on an object name and create a hyperlink.
Describe
) when press Ctrl and right-click
When selected, the line containing the cursor is highlighted.
Display Tab items on multiple lines if the current line is full. Select for ease of navigating through multiple open PL/SQL objects and SQL queries.
Related to: Edit, Compile And Execute
SQL Navigator 7.2
User Guide
230
Option
Collapsing
Description
When selected, the Code Collapsing functionality is turned on allowing the user to collapse/expand blocks of code.
Option
Disable Code Collapsing when line count exceeds
Description
When a script/object exceeds the specified number of lines, Code Collapsing is disabled to improve performance.
Save successfully executed sql in the
History tool
Turn Off Variable
Hints
Scan
Defines/Substitutions
Select to save a copy of successfully executed queries in C:Documents and
Settings<username>Application DataDellSQL NavigatorUnified Editorhistory.
Select turn off the pop up hints that are displayed when you hover the mouse over function or procedure names, or variables.
Related to:
Scan Defines/Substitutions
Sub-tab row location Specify the position of the sub-tab to be displayed.
Close Code Editor when last tab closes
When selected, the Code Editor closes when the last tab in the editor is closed.
Code Editor | SQL Scripts
SQL Scripts
Option
Spool Output
Split Window to Display Results
Description
When selected, returned results are sent to the spool pane ( SQL Query
Log (The Spool Tab) ) of the Code Editor on query execution.
This option does not turn on/off the Spool option of the existing code editor tabs.
Option
Default
Rows
Displayed
Bring to front after execution
Description
Specifies how many rows of returned results are sent to the spool pane of the Code Editor on query execution when
Fetch All is set to OFF.
When selected, the Spool tab is shown on top after the execution of a PL/SQL block.
Selected
Not Selected
The data grid is shown below the script tab.
The data grid is shown in a whole window.
SQL Navigator 7.2
User Guide
231
Option
Fetch All
Description
Selected Retrieve all results and display in the data grid.
Not
Selected
Retrieve the number of rows that can be displayed in the data grid. Scroll down the grid to retrieve more rows.
Show Errors in Output Window
Retrieve all result fields as strings
Use Table Alias
Cursor focus stays in the SQL query after single execution
Highlight query for corresponding data result
Focus query for corresponding data result
Allow session switching
Selected Show a brief error message in the Execution Status pane below the editing area. Show detailed error messages in the
Output Window
.
Not
Selected
Show a brief error message in the Execution Status pane only.
When selected, this option causes all numeric fields to be converted to strings on the server.
Select to use table aliases in the SQL statements generated by
Quick
Browse
and
Edit Data
.
When selected, the cursor will stay in the Script area instead of moving to the data grid.
When selected, the SQL that has been executed, and corresponds to the data shown in the data grid, is highlighted.
When selected, the cursor will stay in the Script area instead of moving to the data grid.
Selected You can switch sessions for an open editor. This means you can easily run the same SQL statement(s) against multiple databases.
Not
Selected
You will need to open multiple editing windows to accomplish this task.
Code Completion
Option
Delay
(milliseconds)
Automatic
Code
Completion
Automatic Dot
Lookup
Description
When selected,a ‘pick’ list of matching symbols (variables, parameters, procedures, types) in the current scope is displayed when you start typing in an identifier.
When selected, it will also include Automatic Dot-Lookup.
when selected, a ‘pick’ list of members of a PL/SQL record, cursor, package or %ROWTYPE record are displayed when you type a dot character after a name of variable.
Automatic Dot Lookup can be selected as a stand-alone option.
SQL Navigator 7.2
User Guide
232
Drag & Drop
Option
Drag & Drop of Tables or Views nodes
Drag and Drop arguments with code objects
Description
Specifies what will be inserted when a table node is dragged and dropped from
DB
Explorer
into the Code Editor.
If this preference is set to insert a query statement for each table, using Ctrl or Shift key while drag and drop will not have any effect on the format of the queries.
When selected, drag & drop code objects (such as procedure, function) will include their arguments (such as Input parameters, Output parameters)
Code Analysis
Module:
Code Analysis
Option
Embed Code Analysis in editor windows
Description
When selected, a Code Analysis tab appears in the editor window next to the
Code tab which you can open as required.
Lob Viewer
Option
Hex Dump Mask
LOB Save Path
Text Font
Fixed Font
Description
Filter for ASCII characters.
Specify the default location to save the lob content.
Specify the font attributes to be used for displaying text content.
Specify the font attributes to be used for displaying non-text content.
Team Coding
General
Option
Disable Team
Coding
Detection on
Connection
Description
Selected Team Coding is disabled for the connection. The Oracle connection will run faster.
SQL Navigator 7.2
User Guide
233
Option Description
Not selected
Queries are run against the Oracle connection to detect the Oracle server team coding settings. This is the default behavior.
Related to:
Check In / Check Out Dialog
.
Automatic
Check In
Selected Initiates a Check-In whenever the user closes the
Visual Object Editors
or
Code Editor
for a modified and checked-out object or script.
Not selected
Check in the object from the
Team Coding Menu
| Check in.
Related to:
Check In / Check Out Dialog
.
Automatic
Check Out
Selected Initiates a Check Out whenever the user opens the
Visual Object Editors
or
Code Editor
for an object or script.
Not selected
Check out the object from the
Team Coding Menu
| Check out.
Confirm Check
In
Show in
DB Navigator
Prompt for
Check In All
Prompt for
Check Out
Comment
Prompt for
Check In
Comment
Schema
Selected This option is useful only for users of IBM® Rational® ClearCase®. SQL
Navigator performs an extra step to verify that each check-in is successful. If the check-in is not successful, SQL Navigator automatically performs an Undo of the check-in to ensure that SQL Navigator and ClearCase remain in synchronization.
NOTE:
l
There may be a performance issue when this option is in use.
l
This confirmation is not necessary with VCS providers other than Rational ClearCase.
Not
Selected
Appropriate when no VCS provider is in use or for VCS providers other than
Rational ClearCase.
When Rational ClearCase is in use and an unmodified file is checked in,
Rational ClearCase may fail the check-in without notifying SQL Navigator.
Select to add Team Coding functions to the
DB Navigator
right-click menu.
Selecting this may have a performance impact.
When selected, you are prompted you to check in all checked-out files when you close a session.
Selected Prompt for comment on Check In and Check Out even if there has been no change to the object or script.
Not selected
To provide a comment on Check In and Check Out if there has been no change to the object or script, press SHIFT with Check In / Check Out.
Applies to cloning and importing of stored code.
SQL Navigator 7.2
User Guide
234
Option
replacement for Stored
Code
Description
Selected The reference to the parent schema of a cloned object is automatically changed from the source schema to the destination schema.
Not selected
The reference to the source parent schema of a cloned object remains unchanged when the object is cloned into a new schema.
Applies to cloning and importing of views.
Schema
Replacement for Views
Selected The reference to the parent schema of a cloned object is automatically changed from the source schema to the destination schema.
Not selected
The reference to the source parent schema of a cloned object remains unchanged when the object is cloned into a new schema.
Schema
Replacement for Triggers
Applies to cloning and importing of triggers.
Selected The reference to the parent schema of a cloned object is automatically changed from the source schema to the destination schema.
Not selected
The reference to the source parent schema of a cloned object remains unchanged when the object is cloned into a new schema.
Simultaneously
Check In/Out
Spec and Body
When selected, and you check in or check out a package specification, the package body will automatically be checked in or out at the same time. The same goes for the reverse— checking in or checking out the body automatically checks in or out the specification.
Disable Login
Prompt on
Connection
When selected, the team coding third-party provider login prompt will not appear on connection.
Disable
Upgrade
Prompt on
Connection
Local Working
Directory
When selected, the team coding upgrade notification will not appear on connection.
Set the working directory for the current user.
Advanced
Option Description
Prompt to Remap on Check Out
When selected and you check out an object that is not in your schema, and not in a schema you are mapped to, show a prompt asking whether you want to be re-mapped to the other schema.
Automatic
Transfer of
CheckOut Status
Selected Automatically (without prompting) transfer check out status of the master object when you open a cloned object in your own schema. (This assumes that you have the master object checked out.) The check-out status is automatically transferred to the cloned object.
SQL Navigator 7.2
User Guide
235
Option
VCS Provider
Options
Global
Connection
Settings
Description
Not selected
Show the Transfer Checkout prompt when you open the cloned object.
List all of the options available from the current selected version control provider.
Click the Connection Settings (ellipsis) button to open
Team Coding Settings
.
Keyboard Shortcuts (View | Preferences)
Action
Select next item
Toggle: Selected / Not Selected
Open drop down boxes
Close drop down boxes
Expand subgroup
Close expanded subgroup
Decrement values in numeric spin controls
Increment values in numeric spin controls
Keyboard Shortcut
CTRL+Enter
Spacebar
ALT+Down Arrow key
ALT+Up Arrow key
+ on number pad
– on number pad
CTRL+Down Arrow
CTRL+Up Arrow
SQL Navigator 7.2
User Guide
236
10
A b o u t D e ll
Dell listens to customers and delivers worldwide innovative technology, business solutions and services they trust and value. For more information, visit www.software.dell.com
.
Contacting Dell
Technical Support:
Online Support
Product Questions and Sales:
(800) 306-9329
Email:
[email protected]
Technical support resources
Technical support is available to customers who have purchased Dell software with a valid maintenance contract and to customers who have trial versions. To access the Support Portal, go to http://software.dell.com/support/ .
The Support Portal provides self-help tools you can use to solve problems quickly and independently, 24 hours a day, 365 days a year. In addition, the portal provides direct access to product support engineers through an online Service Request system.
The site enables you to: l
Create, update, and manage Service Requests (cases) l
View Knowledge Base articles l
Obtain product notifications l
Download software. For trial software, go to Trial Downloads .
l
View how-to videos l
Engage in community discussions l
Chat with a support engineer
SQL Navigator 7.2
User Guide
237
Инструменты для разработчиков приложений с базами данных
Введение
Инструменты для авторов решений на основе Oracle
SQL Navigator (Quest Software)
TOAD (Quest Software)
Hora (Keep Tool)
PL/SQL Developer (Allround Automation)
OraPowerTools (DKG Advanced Solutions)
Заключение
Введение
 риложения,
использующие базы данных, сейчас составляют, наверное, подавляющее большинство
коммерческих продуктов и заказных разработок, и вопросы, связанные с самими
базами данных и с созданием использующих их приложений, освещаются в нашем издании
достаточно регулярно вот уже более десятка лет — мы неоднократно писали и о
средствах проектирования данных, и о технологиях доступа к данным, и о самих
СУБД, и о средствах разработки приложений, которые обращаются к данным, и о
генераторах отчетов и средствах анализа данных.
Сегодня мне хотелось бы рассмотреть еще одну категорию инструментов, считающихся
вспомогательными, но при этом широко применяющихся при разработке приложений
с базами данных, — утилиты, предназначенные для так называемой post-case-обработки
баз данных, то есть для разнообразных манипуляций с базой данных, которые выполняются
после ее проектирования в процессе разработки приложений. К таким манипуляциям
могут относиться создание части серверного кода, реализующей нестандартную функциональность,
внесение несложных изменений в структуру данных с целью исправления незначительных
ошибок проектирования, заполнение данными части таблиц (например, справочников),
генерация окончательной версии скрипта для поставки его конечным пользователям
и ряд других операций.
Сейчас трудно найти СУБД, в комплект поставки которой не входят утилиты для
администрирования баз данных и простейших манипуляций, таких как создание таблиц,
ввод данных, создание серверного кода. Как минимум, приложение, позволяющее
создавать пустую базу данных, вводить и выполнять SQL-запросы, имеется в составе
почти любой серверной СУБД, а в большинстве случаев можно найти утилиты, предоставляющие
более удобный интерфейс для манипуляции метаданными и данными, нежели ввод SQL-запросов.
Правда, в ряде случаев административные утилиты могут включаться в наиболее
дорогие версии серверных СУБД и не входить в состав стандартных или персональных
версий. Вот тут-то и пригодятся продукты независимых производителей, способные
заменить административные утилиты и во многих случаях оказывающиеся гораздо
более удобными для разработчиков приложений.
Первая статья данного цикла будет посвящена инструментам, предназначенным для
разработчиков решений на основе СУБД Oracle. В последующих статьях мы обсудим
утилиты, полезные авторам приложений, использующих другие серверные СУБД.
Инструменты для авторов решений на основе Oracle
 орпорацией
Oracle создано довольно удобное многофункциональное приложение Oracle Enterprise
Manager, позволяющее осуществлять вышеперечисленные действия с базами данных,
управляемыми тремя последними версиями этой СУБД. Однако это приложение входит
в комплект наиболее дорогих редакций этой СУБД — Oracle 8i Enterprise Edition,
Oracle 9i Enterprise Edition, Oracle 10g Enterprise Edition. Пользователям же
остальных редакций, равно как и разработчикам приложений на их основе, предлагается
главным образом набор утилит, позволяющих осуществлять манипуляции с базой данных
из командной строки, либо простейший редактор SQL-запросов SQL Plus. Но утилит,
реализующих некоторые функции Enterprise Manager, равно как и ряд других функций,
существует немало. Ниже мы рассмотрим некоторые из них.
SQL Navigator (Quest Software)
SQL Navigator for Oracle 4.5 — весьма удобный инструмент для визуального редактирования
данных и метаданных, генерации скриптов (в том числе и скриптов для заполнения
таблиц данными). Этот инструмент содержит средства синтаксического выделения
кода SQL и PL/SQL, инициирования компиляции кода, редактирования данных, экспорта
результатов запросов в различные форматы, поддерживает многие особенности Oracle
10g (новые ключевые слова, типы данных, отображение хранения базы данных на
нескольких дисках).
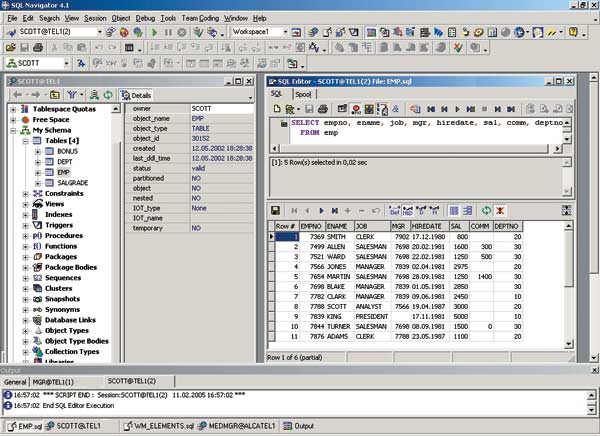
SQL Navigator (Quest Software)
Данный продукт позволяет значительно повысить продуктивность создания и тестирования
кода PL/SQL, осуществлять поиск объектов в базе данных, выполнять запросы в
отдельном потоке. Отметим, что этот продукт очень популярен среди разработчиков.
TOAD (Quest Software)
Утилита TOAD (Tool for Oracle Application Developers) предназначена для разработчиков
и администраторов баз данных. Она предоставляет удобную среду создания кода
Oracle, использующую профилировщик и отладчик кода самой компании Oracle, позволяет
осуществлять мониторинг базы данных, управлять файлами, в том числе и с помощью
протокола FTP, уведомлять администратора базы данных о возникших проблемах,
осуществлять поиск нужного объекта в базе данных.
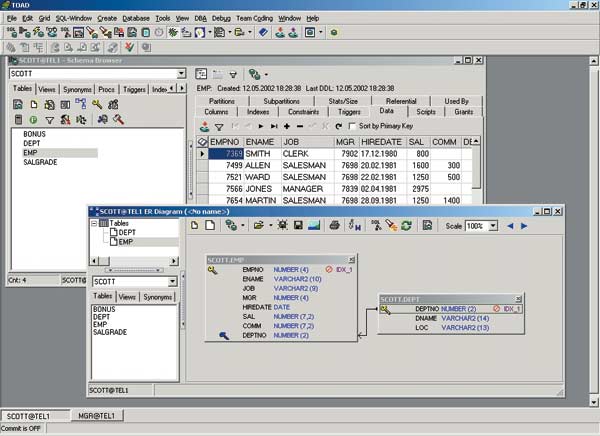
TOAD (Quest Software)
TOAD содержит три основных компонента: Database Browser, SQL Editor и PL/SQL
Procedure Editor, а также панель SQL Modeller, позволяющую отобразить структуру
базы данных в графическом виде. Для администраторов TOAD предоставляет удобный
графический пользовательский интерфейс ко многим утилитам командной строки самой
Oracle.
Hora (Keep Tool)
Hora (Handy Oracle Tool) представляет собой интегрированную среду для разработчиков
и администраторов и позволяет осуществлять все наиболее часто встречающиеся
операции. Данный продукт поддерживает отладку кода SQL и PL/SQL, генерацию отчетов,
импорт и экспорт данных. Этот инструмент содержит графический построитель запросов,
средства просмотра данных, словарей БД, импорта результатов запросов в различные
форматы (Excel, PDF, XML).
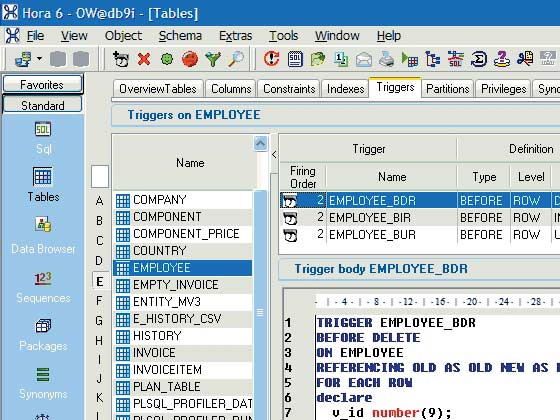
Hora (Keep Tool)
В качестве дополнения к этому инструменту предусмотрено несколько вызываемых
из него утилит того же производителя для генерации диаграмм баз данных (ER Diagrammer),
документации в формате HTML (HTML Documentation Generator), инструменты для
обратного проектирования баз данных и редактирования скриптов, средства отладки
кода PL/SQL (PL/SQL Debugger).
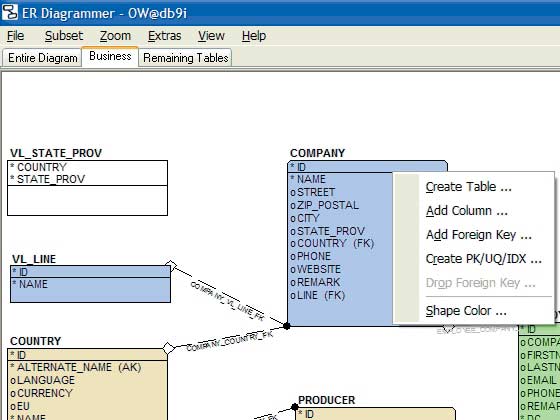
ER Diagrammer (Keep Tool)

PL/SQL Debugger (Keep Tool)
PL/SQL Developer (Allround Automation)
PL/SQL Developer, отличающийся относительно невысокой ценой, представляет собой
среду разработки для авторов кода PL/SQL. В отличие от рассмотренных выше продуктов,
он не содержит большого количества инструментов администрирования. PL/SQL Developer
предназначен главным образом для разработчиков, и в этом плане данный инструмент
оказывается весьма привлекательным — в его составе есть средства автоматического
завершения кода, инструменты для создания шаблонов кода, графический интерфейс
к отладчику и профилировщику Oracle, инструмент для графического построения
запросов. В этот продукт удачно интегрирована документация Oracle.
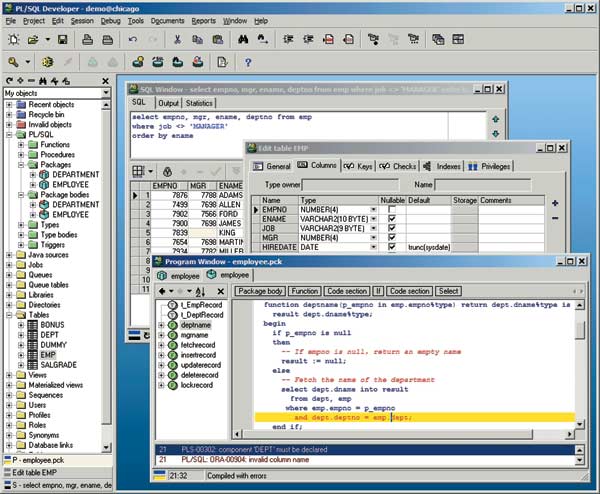
PL/SQL Developer (Allround Automation)
OraPowerTools (DKG Advanced Solutions)
OraPowerTools компании DKG Advanced Solutions представляет собой набор утилит
для разработчиков решений на основе Oracle и администраторов этой СУБД. Этот
набор содержит утилиты OraEdit PRO — среду разработки баз данных и кода PL/SQL,
DBDiff for Oracle — утилиту сравнения двух баз данных (в том числе управляемых
разными версиями сервера) и создания обновлений на основе найденных различий
и утилиту DBScripter for Oracle, позволяющую создавать скрипты для генерации
баз данных и заполнения их данными. Все эти утилиты доступны и по отдельности.
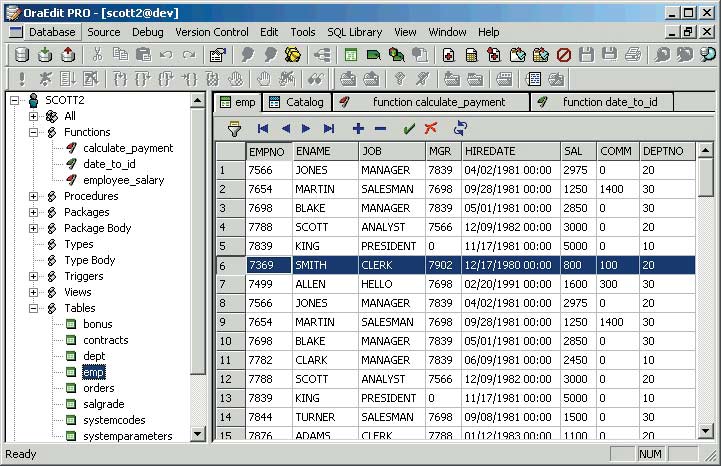
DBDiff for Oracle (DKG Advanced Solutions)
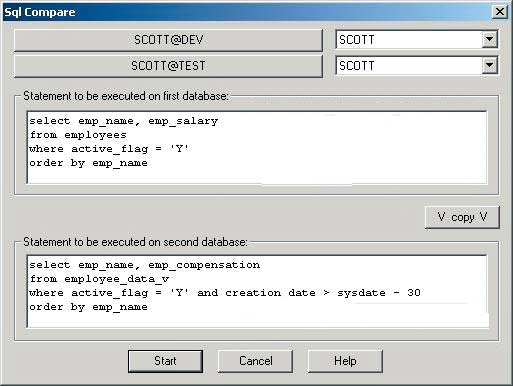
OraEdit PRO (DKG Advanced Solutions)
Помимо указанных утилит, разработчикам доступна и бесплатная утилита OraEdit
того же производителя.
Заключение

настоящем мини-обзоре мы рассмотрели несколько утилит, предназначенных для разработчиков
решений на основе Oracle. Отметим, что список доступных утилит не ограничивается
вошедшими в обзор — помимо них существует еще несколько интересных инструментов,
таких как Unicenter Database Management (Computer Associates), SQL Programmer
for Oracle (BMC Software), Expediter/SQL (Compuware), RapidSQL (Embarcadero),
а также инструменты для Linux, такие как Procedit (OraSoft) и KORA (Ullrich
Wagner).
В следующей статье данного цикла мы рассмотрим утилиты, предназначенные для
разработчиков решений на основе Microsoft SQL Server.
КомпьютерПресс 3’2005
|
3 / 3 / 0 Регистрация: 09.09.2012 Сообщений: 91 |
|
|
1 |
|
|
22.12.2013, 23:13. Показов 8734. Ответов 2
Форумчане, подскажите пожалуйста, где можно скачать мануал по SQL Navigator на русском?
0 |

|
Модератор 4212 / 3053 / 581 Регистрация: 21.01.2011 Сообщений: 13,199 |
|
|
23.12.2013, 11:51 |
2 |
|
Честно говоря, не видал. Но по опыту могу сказать, что если хочешь работать с Oracle, то об источниках на русском лучше забыть. Если что-то и существует, то весьма мало, как правило по старым версиям или платно.
0 |
")
|
3 / 3 / 0 Регистрация: 09.09.2012 Сообщений: 91 |
|
|
23.12.2013, 23:13 [ТС] |
3 |
|
Grossmeister, Добавлено через 3 минуты
0 |
 подойдет даже мануал к старым версиям