-
Инструкции по эксплуатации
1

Bosch Logixx 7 Sensitive WIS 28440 инструкция по эксплуатации
(8 страниц)
- Языки:Русский
-
Тип:
PDF -
Размер:
2.58 MB -
Описание:
Стиральная машина
Просмотр
На NoDevice можно скачать инструкцию по эксплуатации для Bosch Logixx 7 Sensitive WIS 28440. Руководство пользователя необходимо для ознакомления с правилами установки и эксплуатации Bosch Logixx 7 Sensitive WIS 28440. Инструкции по использованию помогут правильно настроить Bosch Logixx 7 Sensitive WIS 28440, исправить ошибки и выявить неполадки.
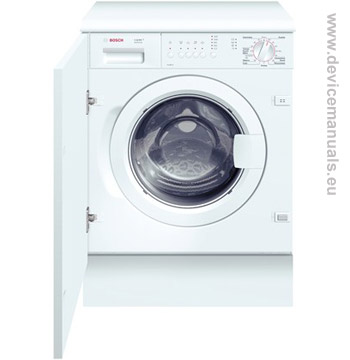
Встраиваемая Стиральная машина Bosch WIS24140OE Logixx 7 Sensitive инструкция пользователя

скачать руководство пользователя
Bosch WIS24140OE в формате PDF: WIS24140OE-RU
Особенности модели
- Класс стирки A / Класс отжима B
- Максимальная загрузка: 7 кг
- Энергопотребление: на 10% экономичнее класса «А»
- Скорость отжима: 1200 об/мин
- AquaStop — защита от протечек с гарантией
- Клавиши специальных функций: Старт, Интенсивная стирка, Предварительная стирка, Легко гладить, Выбор скорости отжима
- Контроль пенообразования
- Подавление дисбаланса при отжиме — автоматика стабилизации с 3D-сенсором
- Возможность перенавешивания мебельной дверцы
- Программы
- Основные программы: Смешанная загрузка, Шерсть, Тонкое белье
- 3D-AquaSpar
- Непрерывная система дозирования воды по степени загрузки и типу ткани
- Подавление дисбаланса при отжиме
- Акустический сигнал окончания программы
- Диаметр люка 30 см, угол открывания 110°
- Параметры потребления: 1.19 кВт/ч, 49 л
- Размеры (В х Ш х Г): 81.8 x 60 x 57 см
возможность перенавешивания мебельной дверцы

.&»2DE>8% 7″3&%;9$
12$&N: 7″/&:7%H8%/%
EL3″ 2%74%58%
-=E% 7″5″9% -$E>$
.%E8%#9>L %93&%;9$
2%1%O&%2%18=; 3&»8 %/8:9
DED O$&$5″9 IE»8/ 1EM
O%1″HD 2%1= .&%4%;9$
#$9H»9=; GDE>9&
)
#EDI3%4 8D73%$ 1″2E$8D$
2%1=
.&%2$1D9$ HD#93:
8″#%#» 1EM #ED2″
&»#92%&» 4%LJ$/%
#&$1#92″
)
#ED28″M 9&:-» #ED28%;
IE»8/ 7″#%&DED#>
(%1″ 2 O%11%8$
8″&:I$8″
/$&4$9DH8%#9>
4″ID8= (=7%2D9$
#O$ND»ED#9%2
#$&2D#8%/% N$89&»
DED
DED
&3 ,$,4,3
(=3ELHD9$ 4″ID8: O%1%51D9$ %3 # D #8%2″ 23ELHD9$ #ED 1″88″M
D81D3″NDM O%M2D9#M #8%2″ 2=7%2D9$ #O$ND»ED#9″ $&2D#8%; #E:5-=
.()*#7/6
8*)(«#
)
*$D#O&»28%#9> 12D/»9$EM
(=7%2D9$ #O$ND»ED#9%2
#$&2D#8%/% N$89&»
%,-)$3 0,$
*$%&4,3 5 15-&%4,,
%,-)$&2 0,$& !$ ,%) 15-&%4,2 %-) 5-
5/%$,3 $$’ *$%&4,,
/%,% %! %-)$&2 *$%&4,2 5 &%$
(5-$3’% &#$,3 5 #5$%, 5,$$( $ %$,4
* %» * # *# «)
.&%9&D9$ 4M/3%; 2E»58%; 9&MO3%;
*$E>7M O%E>7%2″9>#M #»EG$93″4D /:-3″4D # I$&%’%2″9%; O%2$&’8%#9>L » 9″35$
«-&»7D28=4D HD#9MJD4D #&$1#92″4D #&$1#92» 1EM HD#93D O%2$&’8%#9D D7 8$&5″2$LJ$;
#9″ED
&»7: 5$ :1″EM;9$ %#9″93D 4%LJ$/% D HD#9MJ$/% #&$1#92
@D#9D9> 4″ID8: #9&:$; 2%1= 7″O&$J$8%
( #) (&» # $»»
$#ED 2 8$; 8″3%ODED#> %#9″93D 4%LJ$/% #&$1#92″ DED3%81DND%8$&»
?72E$3D9$ 8″O%E%2D8: 8″54D9$ 8″ 2#9″23: D72E$3D9$ O%E8%#9>L
?72E$3D9$ 2#9″23: 8″1″2D9$ 8″ 8$$ O»E>N»4D 2 8″O&»2E$8DD #8D7: 22$&’
.&%4%;9$ 2″88%H3: 3L2$9= D 2#9″23: 2 2%1$ # O%4%J>L J$93D
DO&%#:ID9$ D’
,#9″8%2D9$ 2#9″23: 8″ 4$#9% D 7″GD3#D&:;9$ $$ 8″#»1D9$NDED81& 8″
8″O&»2EMLJD; I9=&>
,#9″8%2D9$ 3L2$9: 8″ 4$#9%
#9″2>9$ 3L2$9: %93&=9%; H9%-= D#O»&DED#> %#9″93D 2%1=
«# %»
#9″2>9$ 12$&N: 7″/&:7%H8%/% %92$	DM %93&=9%; H9%-= -«&»-«8 O&%#%’
.%M2DED#> OM98″ &5″2HD8=
:1″ED9$ # O%4%J>L HD#9MJ$/% #&$1#92″ -$7#%1$&5″8DM ‘E%&»
#9″E>8%; #$93%; O%E>7%2″9>#M 8$E>7M
# » «*»+
$2/( ( !0%( ,)- 0-6
9O»1″$9 O&D O&»2DE>8%; 1%7D&%23$ 4%LJ$/% #&$1#92″ #ED 2#$9″3D 2 K9%4 2%78D3E»
8$%-‘%1D4%#9> O%#9:O»;9$ #%/E»#8% :3″7″8DM4 D7/%9%2D9$EM #&$1#92″ 1EM:1″E$8DM 8″3DOD
O% $/% O&»2DE>8%4: O&D4$8$8DL
«) » # «»
#*$
«
‘»//$)/
)
$!0/
62:HD9
#D/8″E
D
4D/»L9
E»4O%H3D
D81D3″NDD
#3%&%#9D
2&»J$8DM
N$89&DG:/D
«$
#»»
#) #» (&
.$&$2$1D9$ &:H3: 2=-%&» O&%/&»44 2 O%E%5$8D$
(-
D72E$3D9$ 2DE3:
D7 &%7$93D
?72E$3D9$ D7 1$&5″9$EM #ED28%; IE»8/
93&%;9$ 3%8$N IE»8/» #E$;9$ &»#92%& 4%LJ$/%
#&$1#92″
6″3&%;9$ IE»8/ O&%-3%;
#9%&%58% %93&:9D9$ 3&=I3: 8″#%#» O%E8%#9>L
2 8$4 $J$ 4%/:9 -=9> %#9″93D 2%1=
.&%2$1D9$ HD#93: 8″#%#» D78:9&D O%HD#9D9$ &$7>-: 3&=I3D 8″#%#» D $/%
3%&O:# 3&=E>H»93″ 8″#%#» 1%E58″ #2%-%18% 2&»J»9>#M
,#9″8%2D9$ 8″ 4$#9% 3&=I3: 8″#%#» D O&%H8% 7″3&:9D9$ $$ &:H3″ 3&=I3D
1%E58″ &»#O%E»/»9>#M 2$&9D3″E>8% (#9″2>9$ #ED28%; IE»8/ 21$&5″9$E>
@9%-= O&D #E$1:LJ$; #9D&3$ &»#92%& 4%LJ$/% #&$1#92″ 8$ 2=ED2″E#M 8$D#O%E> 7%2″88=4
H$&$7 #ED28%$ :#9&%;#92% 7″E$;9$ ED9& 2%1= 2 MH$;3: D 23ELHD9$ O&%/&»44:
-,
«# » *$»
*
&3/)( *)+)» (0-‘6 8*%)-
‘# «$
» «!* » ($ /$)6 40#)/1#/+ #08(
-&%#>9$ 1″2E$8D$ 2%1= 2 O%1″LJ$4 IE»8/$
6″3&%;9$ 2%1%O&%2%18=; 3&»8
(3ELHD9$ EL-:L D7 O&%/&»44
95D4 ED2
8″54D9$ 8″ 38%O3:
M
%%
.»:7″ .&$&2D9$ O&%/&»44: O&D4$&8% H$&$7 #$3:81
.$&$2$1D9$ &:H3: 2=-%&» O&%/&»44 2 O%E%5$8D$
(-
?72E$3D9$ 2DE3: D7&%7$93D
@D#93″ GDE>9&»
7″2D#D4%#9D %9 4%1$ED 4″ID8=
8D4D9$ IE»8/ # 2%1%O&%2%18%/% 3&»8″ .&%2$1D9$
HD#93: GDE>9&» # O%4%J>L 4″E$8>3%; J$93D
DED
%9#%$1D8D9$ IE»8/ %9 7″18$; #9$83D 4″ID8=
?72E$3D9$ GDE>9& # O%4%J>L JDON%2 D O&%4%;9$
$/%
.&D#%$1D8D9$ IE»8/ D O&%2$&>9$ 4$#9″ #%$1D8$8DM 8″
/$&4$9DH8%#9>
! # #»
F
(%1″ 2=9$3″$9
.&%H8% 7″3&$OD9$ 7″4$8D9$ #ED28%; IE»8/
6″9M8D9$ &$7>-%2%$ #%$1D8$8D$ O%1″LJ$/% IE»8/» # 4″ID8%;
F
(%1″ 8$ O%#9:O»$9
)%LJ$$ #&$1#92% 8$
#4=2″$9#M
*$ 8″5″9″ 38%O3″
M
%%&#
*$ %93&=9 2%1%O&%2%18=; 3&»8
(%74%58% 7″#%&DE#M GDE>9& .&%2$1D9$ $/% HD#93:
)
.%1″LJD; IE»8/ O$&$/8:9 DED 7″5″9
F
&=I3: 7″/&:7%H8%/%
%92$	DM 8$ :1″$9#M
%93&=9>
(3ELH$8″ 7″JD98″M G:83NDM
.&%/&»44″ O&$&2″8″
)
(=-&»8″
L
#9″8%23″ O%E%#3″8DM -$7 %3%8H»9$E>8%/%
%95D4″
)
93&=2″8D$ 2%74%58% 9%E>3% # O%4%J>L «2»&D;8%;
&»7-E%3D&%23D
)
F
.&%/&»44″ 8$
23ELH»$9#M
*»5″9″ 38%O3″
M
%%&#
6″3&=9 7″/&:7%H8=; EL3
F
«#92%& 4%LJ$/%
#&$1#92″ 8$ #ED2″$9#M
.&%2$1D9$ HD#93: 8″#%#»
)
.&%2$1D9$ HD#93: 2%1%#9%H8%; 9&:-= D DED #ED28%/% IE»8/»
F
(%1″ 28:9&D -«&»-«8» 8$
2D18″
B9% 8$ 8$D#O&»28%#9> (%1″ 8″‘%1D9#M 7″ O&$1$E»4D
2D1D4%#9D
F
$7:E>9″9 %95D4″
8$:1%2E$92%&D9$E>8=;
9D&»;9$ 2O$&$4$53: 3&:O8=$ D 4$E3D$ 2$JD
(=-&»8″ G:83NDM
e
-E$/H$8D$
/E»5$8DM
)
,#9″8%2E$8″ #EDI3%4 8D73″M #3%&%#9> 2&»J$8DM N$89&DG:/D
)
F
)8%/%3&»98=$ O%O=93D
O&%2$1$8DM %95D4″
B9% 8$ 8$D#O&»28%#9> D#9$4″ 3%89&%EM D7-«2EM$9#M
%91D#-«E»8#»
F
CH$;3″
8$ O%E8%#9>L
O&%4=9″
?72E$3D9$ 2#9″23: .&%2$1D9$ HD#93: 3L2$9= 1EM 4%LJD’
#&$1#92 D 2#9″23D
)
F
?7 #9D&»E>8%; 4″ID8=
8$O&DM98% O»‘8$9
(=O%E8D9$ O&%/&»44:
-5
-$7 -$E>M
?2%#O%E>7:;9$#> :8D2$&#»E>8=4 4%LJD4 #&$1#92%4
F
?7 3L2$9= 1EM 4%LJD’
#&$1#92 2=#9:O»$9 O$8″
6″/&:7DED #EDI3%4 48%/% 4%LJ$/% #&$1#92″
4$I»;9$ #9%E%2:L E%53: 3%81DND%8$&» #
ED9&» 2%1=
D7″E$;9$ &»#92%& 2 MH$;3: 3L2$9= 1EM 4%LJD’ #&$1#92
.&D #E$1:LJ$; #9D&3$ 7″/&:7D9$ 4$8>I$ 4%LJ$/% #&$1#92″
F
DE>8=$ I:4= 2D-&»NDM
D #<$75″8D$ 4″ID8= #
4$#9″ 2%2&$4M %95D4″
*%53D 4″ID8= 7″GD3#D&%2″8= 6″GD3#D&:;9$ 8%53D 4″ID8=
.()*#7/6 8 *)(«# )
&»8#O%&98=$ 3&$OE$8DM #8M9= 8D4D9$ 9&»8#O%&98=$
3&$OE$8DM
.()*#7/6 8 *)(«# )
F
?81D3″9%&8=$ E»4O%H3D
8$ G:83ND%8D&:L9 2%
2&$4M &»-%9= 4″ID8=
93ELHDED KE$39&%K8$&/DL
&»-%9″E O&$1%’&»8D9$E> (3ELHD9$ 7″4$8D9$ O&$1%’&»8D9$E>
#ED 8$D#O&»28%#9> O%M2D9#M #8%2″ %-&»9D9$#> 7″ O%4%J>L
2:O%E8%4%H$88=; #$&2D#8=; N$89&
F
.&%/&»44″ 2=O%E8M$9#M
1%E>I$ H$4 %-=H8%
B9% 8$ 8$D#O&»28%#9> )8%/%3&»98% &»#O&$1$EMM -$E>$ 28:9&D
-«&»-«8″ #D#9$4» 3%89&%EM O=9″$9#M 9$4 #»4=4 #O&»2D9>#M
#1D#-«E»8#%4
B9% 8$ 8$D#O&»28%#9>
(3ELHDE»#> #D#9$4″ 3%89&%EM :&%28M
O$8=
-:1$9 O&%2%1D9>#M 1%O%E8D9$E>8%$ O%E%#3″8D$
F
*» -$E>$ %#9″93D
4%LJ$/% #&$1#92″
*$3%9%&=$ G%#G»9%#%1$&5″JD$ 4%LJD$ #&$1#92″ 23ELH»L9
2#$-M 8$&»#92%&D4=$ 2 2%1$ 3%4O%8$89=
(3ELHD9$
-$,
DED O%HD#9D9$ -$E>$ O%#E$ #9D&3D
J$93%;
F
(%
2&$4M
O$&$&=2″
%H$8>
-=#9&%
4D/»$9
3E»2DI»
M
9″&9 .»:7″ D
72:HD9
O&$1:O&$1D9$E>8=;
#D/8″E
,&%2$8>
2%1=
#EDI3%4
2=#%3D;
0%7″/&:73″
-$E>M
8$2%74%58″
.&D
8$%-‘%1D4%#9D
12$&N:
7″/&:7%H8%/%
EL3″
#E$1:$9
#&»7:
5$
7″3&=9>
@9%-=
O&%1%E5D9>
2=O%E8$8D$
O&%/&»44=
8″54D9$
8″
38%O3:
9″&9 .»:7″
F
#ED («4 8$ :1″E%#> :#9&»8D9> 8$D#O&»28%#9> #»4%#9%M9$E>8% DED 2%78D3E» 8$%-‘%1D4%#9>
2 &$4%89$ 4″ID8=
O$&$2$1D9$ &:H3: 2=-%&» O&%/&»44 2 O%E%5$8D$
(-
D D72E$3D9$ 2DE3: D7&%7$93D
7″3&%;9$ 2%1%O&%2%18=; 3&»8 D O%72%8D9$ 2 E:5-: #$&2D#»
.()*#7/6 8*)(«#
)
«) * *»
.&%H9D9$ D8#9&:3NDD O% K3#OE:»9″NDD D :#9″8%23$ D 2#$ O&%HD$ D8G%&4″ND%88=$
-&%IL&= O&DE»/»$4=$ 3 #9D&»E>8%; 4″ID8$ D O%#9:O»;9$ 2 #%%92$9#92DD
#O&D2$1$88=4D 2 8D’ :3″7″8DM4D
%’&»8D9$ 1%3:4$89″NDL 2 8″1$58%4 4$#9$ 8″ #E:H»; $#ED %8″ O%718$$ O%8″1%-D9#M
5$%)
1-%,/
&
?72E$3″;9$ 2DE3: 9%E>3% 7″ 3%&O:# 8D3%/1″ 8$ 9M8D9$ 7″#$9$2%; I8:&
*D3%/1″ 8$ 2#9″2EM;9$ D72E$3″;9$ 2DE3: 4%3&=4D &:3″4D
5$%)
-3 !,#$,
0EM %9#E:5D2ID’ #2%; #&%3 -=9%2=’ O&D-%&%2
?72E$3D9$ 2DE3: D7 &%7$93D
9&$5>9$ #$9$2%; I8:& D :-$&D9$ $/% 24$#9$ # 2DE3%; O%1″E>I$
E%4″;9$ 7″4%3 12$&N= 7″/&:7%H8%/% %92$	DM ( &$7:E>9″9$ 4″E$8>3D$
1$9D 8$ #4%/:9 7″O$&$9>#M 2 4″ID8$ D O%12$&/8:9> 9$4 #»4=4 #2%L 5D78>
%O»#8%#9D
5$%)
&&0)3
«&9%88:L :O»3%23: :O»3%2%H8:L OE$83: D O&%HD$ 1$9″ED :O»3%23D #E$1:$9
1$&5″9> O%1″E>I$ %9 1$9$;
5$%)
%-$,3
!&»8D9$ 4%LJD$ #&$1#92″ D #&$1#92″ O% :’%1: 7″ -$E>$4 28$1%#9:O8%4
1EM 1$9$; 4$#9$
#(
5$%)
($JD O&$12″&D9$E>8% %-&»-%9″88=$ HD#9MJD4D #&$1#92″4D #%1$&5″JD4D
&»#92%&D9$ED 8″O& OM98%2=2%1D9$E$4 O&%4=2%H8=4 -$87D8%4 4%/:9 O%#E$
7″/&:73D 2 4″ID8: O&D2$#9D 327&=2: .%K9%4: O$&$1 #9D&3%; 24″ID8$
9″3D$ 2$JD #E$1:$9 9J»9$E>8% 2=#9D&»9> 2&:H8:L
5$%)
%,
$,3
02$&N» 7″/&:7%H8%/% %92$	DM 4%5$9 %H$8> #DE>8% 8″/&$9>#M
#9%&%58% O&D #ED2$ /%&MH$/% &»#92%&» 4%LJ$/% #&$1#92″
*$ 2#9″2″;9$ 8″ #9D&»E>8:L 4″ID8:
*$ %OD&»;9$#> 8″ %93&=9:L 12$&N: 7″/&:7%H8%/% %92$	DM
*$ 2#9″2EM;9$ &:3: 2 -«&»-«8 4″ID8= O%3» %8 $J$ 2&»J»$9#M
5
.&$4,3
«&#
+-%
1$,3
**
**
-!,%
5(
**
!E%O%3
°
.M98″
3/
3(9H
E
H
!E%O%3
°
.M98″
3/
3(9H
E
H
!E%O%3
°
.M98″
3/
3(9H
E
H
B3%
°
.M98″
3/
3(9H
E
H
!E%O%3
°
.M98″
3/
3(9H
E
H
D89$9D3″
°
.M98″
3/
3(9H
E
H
D89$9D3″
°
4%58% D#O%E>7%»9> 9″35$
3″H$#9$
%’ 5(
3/
3(9H
E
H
+%83%$ -$E>F AFE3
°
3/
3(9H
E
H
A$	>
‘%E%18″M
3/
3(9H
E
H
A$	>
°
3/
3(9H
E
H
0EM O&%2$&3D 7″1″$9#M O&%/&»44″ D :#9″8″2ED2″$9#M 4″3#D4″E>8% 2%74%58%$ HD#E% %-%&%9%2
N$89&DG:/D 3″3 :3″7″8% 2 1$;#92:LJ$; $2&%O$;#3%; 8%&4″9D28%; 1%3:4$89″NDD O%1 8%4$&%4
.&D2$1$88=$ 2 9″-EDN$ 78″H$8DM O»&»4$9&%2 %9EDH»L9#M %9 G»39DH$#3D’ 2 7″2D#D4%#9D %9
1″2E$8DM 5$#93%#9D D 9$4O$&»9:&= O%1″2″$4%; 2%1= 9$4O$&»9:&= %3&:5″LJ$; #&$1= 2D1″
3%EDH$#92″ D #9$O$8D 7″/&M78$88%#9D -$E>M D#O%E>7:$4%/% 4%LJ$/% #&$1#92″ 3%E$-«8D;
8″O&M5$8DM 2 #$9D D 2=-&»88=’ 1%O%E8D9$E>8=’ G:83ND;
8()- 40#)/1# *!
.'»0#+) «/0#* /’ ‘)#/
‘,»8()- /##/ )»/)0+
8
8()- 28/»(/6
+) )»* $53 !)» ),)-
&#+) «!8»!(,+ #(
9
10
11
°
#&
°
?:
5+#?L%
D%?#DLMICH%
LB<%MLS
D%?#DLMICH%
LB<%MLS
LB
2M+V?!
LMLMIC!
V,L:+<CH%
<MS
X
9SDC!
P
9,%<>!,LD%MIC!S
#DL,?!
e
8M%:O%CL%
:M!A%CLS
!
°
?:
LB<%MLS
LB
2M+V?!
LMLMIC!
V,L:+<CH%
<MS
?LVSO%CLS
e
8M%:O%CL%
:M!A%CLS
R
;+8!>M%CL%
>+<H
«»
°
6%?#DLMICH%
LB<%MLS
LB
2M+V?!
MIC!
#LCD%DL?L
LML
#@%P!CCH2
>+M+?+C
X
9SDC!
P
9,%<>!,LD%MIC!S
#DL,?!
e
8M%:O%CL%
:M!A%CLS
R
;+8!>M%CL%
>+<H
%
#$
°
?:
6%?#DLMICH%
LB<%MLS
LB
2M+V?!
LLB<%MLS
C%
D,%8ERQL%
+#+8+:+
E2+<!
X
9SDC!
P
9,%<>!,LD%MIC!S
#DL,?!
e
8M%:O%CL%
:M!A%CLS
R
;+8!>M%CL%
>+<H
,!BMLOCH%
>L<H
8%MIS
@+AC+
#DL,!DI
>@%#D%
#$ $#
°
?:
;MS
=OE>#D>LD%MICH2F
V,L:+<CH2
<MS@!PLCC+G
#DL,?L
D%?#DLMICH2
LB<%MLG
C!V,W
LB
P%M?!
#!DLC!
#LCD%DL?L
LML
#@%P!CCH2
>+M+?+C
C!V,
:!,<LC
X
9SDC!
P
9,%<>!,LD%MIC!S
#DL,?!
e
8M%:O%CL%
:M!A%CLS
R
;+8!>M%CL%
>+<H
@%A<E
V+M+#?!CLS@L
MLPI
M%:?LG
+DAL@
u
2+M+<C!S
°
?:
6%?#DLMICH%
LB<%MLS
LB
P%,#DL
LML
##+<%,A!CL%@
P%,#DL
V,L:+<CH%
<MS,EOC+G
LML
@!PLCC+G
#DL,?L
+#+8%CC+
Q!<SQ!S
V,+:,!@@!
#DL,?L
>+
LB8%A!CL%
E#!<?L
#
V,+<+MALD%MICH@L
V%,%,H>!@L
D%?#DLMICH%
LB<%MLS
+#D!RD#S
>
,!#D>+,%
@+RQ%:+
#,%<#D>!
&#»#
&
#»
»
#»
i
9,+<+MALD%MIC+#DI
V,+:,!@@
+VDL@!MIC+
V+<2+<LD
<MS
#DL,?L
#M%:?!
B!:,SBC%CCH2
D%?#DLMICH2
LB<%MLG
9,L
8+M%%
#LMIC+@
B!:,SBC%CLL
B!:,EA!GD%
@%CIP%
8%MIS
LML
>?MROLD%
<+V+MCLD%MICER
NEC?ULR
C!V,
X
9SDC!
4
V,+:,!@@!2
8%B
V,%<>!,LD%MIC+G
#DL,?L
B!:,EA!GD%
@+RQ%%
#,%<#D>+
>
SO%G?E
>
V,+:,!@@!2
#
V,%<>!,LD%MIC+G
#DL,?+G
,!#V,%<%MSGD%
@+RQ%%
#,%<#D>+
V+
SO%G?!@
L
9,L
#DL,?%
?:
8%M+:+
L
U>%DC+:+
2M+VO!D+8E@!AC+:+
8%MIS
>?MRO!GD%
<+V+MCLD%MICER
NEC?ULR
X
9SDC!
7+M%%
V+<,+8CER
LCN+,@!ULR
L
+8B+,
C!P%G
V,+<E?ULL
4H
C!G<%D%
>JCD%,C%D
C!
C!P%@
#!GD%
‘//,111″+.#'»/-0
LML
V+MEOLD%
>+<C+@
LB
EV+MC+@+O%CCH2
#%,>L#CH2
U%CD,+>
+»%-/
+.#’
!0.&%-K/%
)»
!-( %-3/-
T*#’%*%0/.#'(!*$

д
Указания по технике безопасности
Стиральная машина очень тяжелая — поднимайте ее осторожно.
Внимание: замерзшие шланги могут разорваться/потрескаться. Не устанавливайте
стиральную машину на открытом воздухе или в местах, где существует угроза
замерзания.
Это может привести к повреждению стиральной машины. Запрещается поднимать
стиральную машину за выступающие части (например за загрузочное окно).
Помимо приведенных здесь указаний могут действовать особые предписания служб
энергоснабжения и водного хозяйства.
В случае возникновения сомнений вызовите для подключения специалиста.
Поверхность, на которой устанавливается стиральная машина, не должна иметь
следов разлома.
Прокладывайте шланги и провода таким образом, чтобы о них никто не спотыкался.
Экологичная утилизация
При утилизации упаковки соблюдайте правила экологической безопасности.
Данный прибор имеет отметку о соответствии европейским нормам 2002/96/EG для
электрических и электронных приборов (waste electrical and electronic equipment —
WEEE). Данные нормы определяют действующие на территории Европейского союза
правила возврата и утилизации старой бытовой техники.
Объем поставки
в зависимости от модели
с системой
Aqua-Stop
Присутствие влаги в барабане
связано с проведением последней
проверки машины на
заводе-изготовителе.
с системой
Aqua-Secure
Стандартное
исполнение
Сетевой кабель
Поверхность для установки
стиральной машины
— Устойчивость имеет большое значение, иначе машина будет “гулять» во время работы!
— Площадка для установки должна быть ровной и устойчивой.
— Пол с мягким покрытием или из мягкого материала не подходит для установки.
Встраивание с использованием полозьев*
Полозья облегчают задвигание
стиральной машины в мебельную нишу.
*для заказа: запасная деталь № 66 1827
Перед встраиванием машины увлажните
полозья раствором воды с моющим
средством. Не используйте жиры и/или масла!
А
А
Установка на удлиненные опоры** -> см. с. 3
** № для заказа WZ 20440, WMZ 20440, Z 7060Х 0
Установка на цоколь
Передние опоры машины нужно обязательно закрепить кронштейнами***.
***№ для заказа. WMZ 2200, WX 975600, CZ110600, Z 7080Х 0
Установка на деревянном балочном перекрытии
—
По возможности установите стиральную машину в углу.
— Прикрутите водостойкий деревянный настил (толщиной не менее 30 мм) к полу.
При этом учитывайте высоту поверхности, на которой устанавливается стиральная
машина!
— Передние опоры машины нужно обязательно закрепить кронштейнами***.
***№ для заказа. WMZ 2200, WX 975600, CZ110600,
Z
7080Х 0
Накладки с
держателями шлангов
Гаечный ключ
Изогнутый держатель
J
для фиксации
^
сливного шланга
Хомут для шланга
для фиксации сливного шланга
-> см. с. 5
Детали для монтажа -> см. с. 8 — 13
2х
|е1| 2Х
® 8х
/1
•Tjl

1
Safety instructions
The washer dryer is heavy take care when lifting it.
Warning: frozen hoses may tear/burst. Do not install the washer dryer outdoors or in areas
where there is a risk of frost.
The washer dryer may be damaged. Do not lift by projecting components (e.g. washer dryer
door).
In addition to the instructions mentioned here, special regulations of the relevant water and
power supply companies may apply.
If in doubt, have the appliance connected by a technician.
Lay hoses and cables in such a way that there is no risk that they can be tripped over.
Environmental disposal
Dispose of packaging in an environmentally friendly manner.
This appliance has been identified in accordance with the European Directive
2002/96/EEC on Waste Electrical and Electronic Equipment (WEEE). The Directive
specifies aâframework for the return and recycling of waste appliances and is valid
throughout Europe.
Scope of delivery according to model
Humidity in the drum is caused
byâthe final inspection.
Depending on the connection
Aâ2440 mm dia. hose clip may also be required for connecting the siphon (available from
specialist retailers). aPageâ4: Water connection
Useful tool
Spirit level for aligning the washer dryer.
Wrench for adjusting the machine feet.
Water drainage
Power cord
Water supply
Covers
Hose holder
Aqua-Stop Aqua-Secure Standard
2
Installation area
Stability is important to prevent the machine from wandering.
The installation area must be firm and level.
Soft floors/floor coverings are not suitable.
Ensure the area is well ventilated to achieve good drying performance.
If installing the appliance on a pedestal
It is essential to secure the washer dryer feet with holding bracketsâ*.
If installing the appliance on a wooden joist floor
If possible, install the washer dryer in a corner.
Screw a water-resistant wooden panel (min. 30 mm thick) to the floor.
It is essential to secure the washer dryer feet with holding bracketsâ*.
*âorder no. WMZ 2200, WX 9756
Hose and cable lengths
Connection on left side or Connection on right side
Note: if hose holders are used, the hose lengths may be reduced.
Available from dealer/customer service:
Aqua-Stop extension hoseâ**, approx. 2.50 m.
Longer supply hose, approx. 2.20 m, for standard model.
**âorder no. WMZ 2380, WZ 10130
Built-under/Built-in appliance
Build-under/build-in before connection to the power supply.Installed in between kitchen units (built-under or built-in)
Dimension requirement of kitchen unit:
aâ=â650âmm, bâ=â620âmm, câ=â850âmm
Install washer dryer only under a continuous worktop that
is connected firmly to the adjacent cupboards.
The installation area must be well ventilated, otherwise the
washer dryer will operate below optimum performance.
Dimension of ventilation cross-section:
d x e = 200 mm x 100 mm, f = 365âmm
Distance between wall and machine: 50âmm
~140 cm
~160 cm
~140 cm
~90 cm
~165 cm
~95 cm
max. 100 cm
min. 60 cm
3
Removing transport bolts
Before using the appliance for the first time, always remove and retain
all 4 transport bolts.
If transporting the appliance subsequently, always re-install the
transport bolts this prevents damage to the machine. aPageâ6
Retain the screw and sleeve.
1. Take the hoses out of the holder and the elbow.
2. Undo and remove all 4 transport bolts.
3. Take the power cord out of the holders. Remove the sleeves.
4. Insert the covers and lock them in place by pressing on the locking hook. Insert the hose
holders.
5. Fix the hoses in the hose holders.
4
Water connection
Risk of electric shock! Do not immerse the Aqua-Stop safety device in water
(containsâanâelectric valve).
To prevent leakage or water damage, follow the instructions in this chapter.
Attention: operate the washer dryer with cold drinking water only.
Do not connect to the mixer tap of a pressureless hot-water heater.
Do not use a used inlet hose. Only use the inlet hose supplied or one which
was purchased from an authorised specialist dealer.
If in doubt, have the appliance connected by a technician.
Water supply
Water inlet hose:
Attention: do not kink, crush, modify or cut through (strength is no longer guaranteed).
Optimum water pressure in the mains: 1001000 kPa (110 bar)
When the tap is turned on, the water flow is at least 8 l/min.
If the water pressure is higher, install a pressure reducing valve.
Model: Aqua-Stop
Aqua-Secure
Standard
1. Connect the water supply hose to the tap.
Tighten plastic screw fittings by hand only.
2. Carefully turn on the tap and check that the
connection points are not leaking.
Attention: the screw connection is under
water mains pressure.
Water drainage
Water drainage hose:
Attention: do not kink or stretch.
Height difference between installation area and outlet: 60100 cm
Drainage into a sink/bath tub:
Attention: secure the drainage hose to prevent it from slipping out
ofâtheâsink.
Attention: the plug must not be in the plug hole. When the water is being
pumped out of the washer dryer, check that the water drains away quickly
enough. Do not immerse the end of the drainage hose in the water that has
been pumped out. There is a risk that water will be drawn back into the
washer dryer.
Drainage into a siphon:
Attention: secure the connection with a 2440 mm dia. hose clip (available
from a specialist retailer).
Drainage into a plastic pipe with rubber sleeve:
Attention: Secure the drainage hose to prevent it from slipping out
ofâtheâdrain.
3/4
min. 10 mm
max.
9
0°
max.
9
0°
3/4
min 10 mm
5
Manufacturer (see Operating instructions) 0312 / 9000 479252
Alignment
High levels of noise, intense vibrations and wandering may be due to incorrect alignment.
Alignment will be carried out by customer service or authorised technicians, if you want
toâalign the machine by yourself please use a spirit level.
Aligning the washer dryer with a spirit level.
1. Undo the lock nut in a clockwise direction using a wrench.
2. Adjust the height by turning the appliance foot.
All four appliance feet must be placed firmly on the floor.
The washer dryer must not be able to wobble.
Check the alignment of the washer dryer with a spirit level andâ
correct if necessary.
3. Tighten the lock nut against the housing.
Hold the foot in place and make sure that the height is not adjusted.
The lock nuts on all four appliance feet must be screwed tightly against
the housing.
Electrical connection
ʑ
Connect the washer dryer to an alternating current via a correctly installed earthed socket
only.
ʑ
The mains voltage and specifications on the washer dryer must match.
aPageâ6: Technical specifications
ʑ
For information about the connected load and required fuse.
aPageâ6: Technical specifications
ʑ
Ensure that:
the mains plug and socket are compatible,
the cable cross-section is adequate,
the earthing system has been installed correctly.
ʑ
A damaged power cord may be replaced by an electrician only.
A replacement power cord is available from customer service.
ʑ
Do not use multiple plugs/connectors or extension cables.
ʑ
If a residual current operated circuit-breaker is used, use only a type which guarantees
compliance with the currently valid regulations.
ʑ
Mains plug:
do not insert into/pull out of the socket with damp hands.
do not pull the plug out of the socket by pulling on the power cord.
never pull out the plug while the appliance is in operation.