-
Bookmarks
Quick Links
SuperSealer
FREE
Maintenance Kit
See Warranty
Card
SERIAL NUMBER:
______________
REVIEW ENCLOSED INSTRUCTIONS CAREFULLY
620 S. 1325 W., OREM UT 84058 • US TOLL FREE: (800) 284-9727 • METRO (801) 225-8040
S H R I N K
OWNER’S GUIDE
PURCHASE DATE:
_______________
ABC Office
142 West Flint Meadow Drive
Kaysville, Utah 84037
www.abcoffice.com
BEFORE USING THE SUPER SEALER™
W R A P
PURCHASED FROM:
__________________
Tel: +1 (800) 658-8788
Fax: +1 (801) 927-3037
customerservice@abcoffice.com
S Y S T E M
c
DEALER PH NUMBER:
__________________
™
Summary of Contents for Traco SuperSealer SS-13
This manual is also suitable for:
Supersealer ss-18Supersealer ss-24Supersealer ss-40Supersealer ss-32
-
Contents
-
Table of Contents
-
Troubleshooting
-
Bookmarks
Quick Links
Related Manuals for Super Sealer REI-90F

Summary of Contents for Super Sealer REI-90F
-
Page 2
REI-90 tray sealer. Any troubleshooting or repairs other than cleaning must be referred to Super Sealer service center. Please contact Super Sealer Australia on 03 9013 2688 if you have any questions. Updated: 10 October, 2009 Page 2… -
Page 3: Table Of Contents
Introduction………………….4 Main Parts ………………….4 ………………….5 Specifications Operation …………………..5 Control Panel………………….6 Resetting Computer Program …………….7 Roll Film Set-Up………………..10 Date Printer/Coder ………………..10 Mould Removal and Replacement…………..11 ………………….11 Upper Mould ………………….12 Lower Mould Maintenance and Cleaning……………..12 ………………..13 Daily Maintenance ………………13 Air Pressure Controller Trouble Shooting Guide………………13 Wiring Diagram………………..16 Updated: 10 October, 2009…
-
Page 4: Introduction
Introduction Super Sealer REI-90F tabletop gas flushing sealing machine models are suitable for films from reel. Ideally suited for small to medium batch operations, new product development, testing and market samples. The machine offers superior quality machine suitable for small and medium food processing factories.
-
Page 5: Specifications
2.1 Specifications REI-90F Machine Construction Stainless Steel/ Aluminium Alloy Output Capability Up to 8 cycles per minute Air Requirement 2HP (600KPa, 20L/M, 80 psig) Machine Dimension ~ 430Lmmx660Wmmx710Hmm Machine Weight ~ 80 kg Power Requirement 1Phase, 220-240Vac @ 10Amps Roll Diameter…
-
Page 6: Control Panel
Control Panel Image 2. Sample Control Panel The control panel is where some of the functions of the machine could be adjusted and/or modified based on your specific machine requirements. Please note that the machine is delivered with predefined feature parameters and you may not need to change any of the defined settings. POWER ON/ OFF The power on/off switch to start/stop the operation of the machine.
-
Page 7: Resetting Computer Program
ON OR OFF SELECTIONS The machine will not be performed the function when the setting is set to OFF. FILL GAS FLUSH ”RESET” Changes the computer operating function. Right display: displays the temperature in the normal operation, when an error occurs it shows the error code, and displays parameter values when the machine is under set mode.
-
Page 8
B1. Press ¦ S ET § until the left display shows P1-1, the right display shows “Temperature in degree celcius ” of the 1 set upper mould, press “▲” or “▼ ” to set up the new temperature. B2. Press ¦… -
Page 9
display shows and the right display will give a value between”001~255”, set the correct value for the length of film to be sealed and cut, press the “set” key to get and choose printer type. (5) Non-printed film with printer printing once each cycle. Press the ¦… -
Page 10: Roll Film Set-Up
Roll Film Set-Up Setting Up the film roll is a simple step of following the direction as per the images below – with printer or without the printer. Wit Date Printer Without the Date Printer Date Printer/Coder Specification Type Manual Hot Ink Stamp Maximum Number of Lines Font / Font Size Times Roman 12 font…
-
Page 11: Mould Removal And Replacement
Printer Ribbon Setting Mould Removal and Replacement ELECTRICAL HAZARD Always REMOVE the machine from the power outlet before performing any maintenance or cleaning works. BURN HAZARD • Cleaning and maintenance should be performed by your trained personnel only • Allow unit to cool at least 90 minutes before normal cleaning •…
-
Page 12: Lower Mould
Removing the black screw • Holding the bottom part of the upper mould, slowly pull/ slide out • Lower Mould Lower Mould Function The main function of the lower mould is to hold the containers on their position for the sealing and the cutting function.
-
Page 13: Daily Maintenance
S. E20: DC power circuit short (P.C board error). B. If any error occurs, an alarm will sound. To stop the alarm, please off the power for five seconds, then turn on the power again, if the alarm remains on, please contact your Super Sealer for service. ERROR…
-
Page 14
¨ ¨ system error. 2 P.C.B error 2 Change P.C.B © © Temperature control Power on failed Reboot the power on key. If fail system error. again then. P.C.B error Heater not turned on after power is on. Change P.C.B ©… -
Page 15
© © Film eye-mark sensor in wrong Adjust the eye-mark sensor Sealing film stop at position position and clean the sensor. wrong position Film stop is in wrong position. Adjust the film roll and after sealing. clamp. © © Film material is not suitable for the Change the film material. -
Page 16: Wiring Diagram
11. Wiring Diagram Updated: 10 October, 2009 Page 16 REF: REI-90-0611…
-
Page 17
Updated: 10 October, 2009 Page 17 REF: REI-90-0611…

“When You Need More Than Staples.”
Toll Free: 800-658-8788
Fax: 801-927-3037
[email protected]
Super-Sealer™ Shrink Wrap System
Owner’s Guide
1
Model
Number
Applications
Length of
Sealing Area
Max. Film
Width
Max. Film
Weight
Film Core
Diameter
Power
Supply
(primary)
Voltage
(secondary)
Amperage
Cycles
SS-13
Video Cassettes,
Computer Software,
CDs/Tapes,
Books/Magazines
SS-18
SS-24
SS-32
SS-40
Printing,
General
packaging,
Damaged
packaging,
Recovery
24”
Art/Frame,
Gift Baskets,
Posters,
Retail
Packaging
Art/Frame,
Gift Baskets,
Posters,
Retail
Packaging
13”
Printing
Computer
Software,
Manuals,
CDs/Tapes,
Hardware
18”
32”
40”
13”
18”
24”
32”
40”
100 lbs
100 lbs
100 lbs
100 lbs
100 lbs
1-7/8” & 3”
1-7/8” & 3”
1-7/8” & 3”
1-7/8” & 3”
1-7/8” & 3”
110 VAC
110 VAC
110 VAC
110 VAC
110/220
VAC
14 VAC
20 VAC
30 VAC
36 VAC
38 VAC
6 amps
50/60 Hz, 1 phase
6 amps
50/60 Hz, 1
phase
6 amps
6 amps
6 amps
50/60 Hz, 1
50/60 Hz, 1
50/60 Hz, 1
phase
phase
phase
110 A/C – 60 Hz – 1100 watts – Temperature
range 450º F / 1100º F. Weight: 1 lb 8 oz
110 A/C – 60Hz – 1100 watts – Temperature
range 250º F / 1100º F. Weight: 2 lbs
Deluxe Heat Gun
Var. Temp Heat Gun
Safety Instructions
Before using your new Super Sealer, please take a few minutes to carefully read all the
instructions. Pay close attention to safety guidelines and warnings included for your
protection.
SAVE THESE INSTRUCTIONS FOR FUTURE REFERCE.
2
Warning:
•
•
•
•
•
•
•
•
•
•
•
•
•
•
•
•
•
•
•
•
•
•
•
•
•
•
For safe operation, read manual thoroughly.
A live heating element is located on the underside of the arm under the Teflon tape. Use caution
during operation. DO NOT TOUCH THE ELEMENT.
Know your work environment. Make sure the work area is clean and dry before using the sealer.
This electrical appliance and can be potential shock or fire hazard, especially if operated near
refuse or in a wet environment.
Never operate the machine barefoot. Doing so greatly increases your risk of electrical shock.
Sealer should only be connected to a standard 110 volt 15 amp wall receptacle. No other form of
wiring is safe or advisable.
To reduce the risk of fire or electric shock, do not expose to rain or moisture. Store indoors.
Stay alert! Always pay attention to the work at hand and use common sense when operating this
and all tools. Do not operate the sealer when you are tired or taking medication or drugs that may
make you drowsy.
Disconnect the sealer when not in use. Avoid unintentional starting. A sealer if left on could start
and burn if the arm came down due to a broken spring or if something fell on the arm.
If the sealer stops during operation or otherwise ceases to function properly, disconnect from the
power supply and call a qualified service technician.
Never attempt any repairs on the sealer. A qualified service technician must do all repairs. The
parts supplied in your maintenance parts kit are for maintenance of the machine to keep it in good
operating condition and may be an exception to this rule.
Inspect power cords periodically and if damaged, have repaired by a qualified service technician.
Never yank the cord from an electrical outlet or use it to tie down the arm, or any other purpose
other than that for which if was intended.
Guard against electric shock by preventing contact with grounded surfaces or other appliances.
Keep children and visitors away from the work area and the sealer and its accessories.
Keep work area well lighted.
Always store sealer in a safe place, out of the reach of children.
Never try to seal anything other than plastic films intended for use on this sealer.
Never use the sealer after partial failure.
Maintain proper footing and balance at all times.
Do not wear loose-fitting clothing or jewelry. Wear non-skid footwear and a protective hair
covering to contain long hair.
Always wear eye protection and protective work gloves at all times.
Never use the sealer near flammable materials or gases.
When servicing, use only identical replacement parts.
If arm spring breaks, disconnect sealer from power supply immediately and call a qualified service
technician.
Only use AC outlet on side of machine with accessories intended for that purpose and rated to the
capacity listed by the outlet.
Only use fuse of capacity listed by the fuse holder.
Cleaning:
•
•
Never use anything abrasive to clean the heating element, (i.e. steel wool, emery cloth or board,
etc.). These can damage the wire and cause premature breakage.
To clean the heating wire – first remove the pad from the channel under the arm. Then pull the
arm down and allow the residue to burn off the arm. Wipe anything still clinging to the arm off
with a piece of cardboard. After the wire has cooled and is visibly clean, cover with a new piece
of 3 mil Teflon tape. NOTE: Teflon tape over the wire is only required when using PVC Shrink
film or Polyethylene to prevent build-up on wire and excessive smoking. When using Polyolefin
type films it is not required or suggested. The 10 mil Teflon tape on the sealing pad is always
required for every application.
3
•
•
•
To clean other exterior parts of the sealer, any non-flammable spray cleaner will suffice.
Cleaning the sealer internally is not suggested or advised.
If Teflon tape appears to be burnt, worn or damaged replace with a new piece of tape.
Super Sealer Shrink Packaging Systems Operation Instructions
1)
2)
3)
4)
5)
6)
7)
Plug power cord into 110 VAC 15A wall outlet.
Turn power on by depressing rocker switch. No warm-up time is required.
Plug the heat gun into AC outlet on left hand side of box.
Separate film and place around spreader bar. (If model is equipped with the optional perf roller,
first load film between the perf wheel and plate, then around the spreader bar.)
Pull film to the desired length on the left hand side of sealing arm and sealing pad. Open film and
insert package. Roll excess film back onto the roll so that package is approximately even with
edge of sealing pad.
Holding package in left hand bring the sealing arm down film onto the film and pad. With the arm
in the down position, gently pull package away in a teaming motion from the pad until package is
completely separated from pad. (When using the Deluxe Machine with timer, adjust dial to proper
setting and bring the arm down until LED indicator turns off. Release arm and your cut and seal is
now complete.) IF THE CUTTING AND SEALING PROCESS TAKES LONGER THAN 3 TO
5 SECONDS YOU ARE USING THE MACHINE INCORRECTLY AND YOU SHOULD
CALL YOUR LOCAL REPRESENTATIVE FOR ASSISTANCE. Turn package counter
clockwise and repeat procedure to cut and seal the remaining edge of the film. (If model comes
with the optional cutting blade located on the sealing arm, first position the blade to the middle of
the film you are cutting. Next bring the sealing arm firmly down so the blade punctures the film,
and then slide the blade from side to side. With the arm still in the down position, gently pull
package away from the pad.)
To shrink film around the product, adjust heat gun to desired temperature. Holding gun
approximately 12” from product begins to shrink film around the seams first and then toward the
middle in a circular motion until package has a glass-like appearance.
DO NOT HOLD GUN IN THE SAME POSITION FOR MORE THAN A FEW SECONDS.
THIS WILL CAUSE THE FILM TO BURN RATHER THAN TO SHRINK.
Warning: Heat gun should not be left on when air intake vents are blocked or for a prolonged
period of time to prevent overheating! Make certain that switch is in the off position to ensure that
both the blower and heating element are shut off, or heat damage may occur.
8)
Always turn your Super Sealer Shrink Packaging System off when not in use.
Trouble shooting / recommendations
Symptom: Centerfold shrink film will not separate or open.
4
Recommendation: If shrink film appears to be single sheet, place a strip of tape on top of the film and on
the bottom and pull apart to initially separate.
Symptom: Film appears to smoke or is sticking to wire when seal is made.
Recommendation: This can mean one of several things:
1) With PP or PO film, wire must be kept clean by removing sealing pad and depressing arm until
wire burns clean all film reside. No Teflon tape required on arm.
2) PVC film will smoke when seal is made. Teflon tape over the heating element will prevent the
film from smoking and will occasionally need to be replaced. For Teflon tape or other parts,
call the service number.
Symptom: Burning holes in the shrink film with the heat gun.
Recommendation: If gun is set on high temperature and held in the same spot for more than a few seconds,
the film will burn. Gun should be continually moving in a circular spiral motion from the outside edges of
the package first, and to the middle of the package last.
Symptom: Arm is not properly cutting and sealing shrink film.
Recommendation:
1) On/Off switch may not be turned on.
2) Timer on Deluxe Model may not be set properly.
3) Arm may not be in complete contact with pad. (Gentle Pressure).
4) Excessive pressure applied to sealing arm.
5) Wire may need cleaning.
Symptom: Setting timer properly on the Deluxe Model.
Recommendation: Timer should be set to allow the minimal amount of time necessary to cut and seal the
film. The setting will vary according to type of film in use. Setting timer too high will burn the film. PVC
film will require a lower setting than most other films. Timer may need to be adjusted to lower setting as
machine is used in a continuous or rapid manner.
The air inside the package expands as the film is
heated. The quickest way to vent the film is to cut
what amounts to the asterisk (*) into the closed end
of the centerfold. The smaller your package, the
more lines you should cut to make sure every
package has at least one vent hole. This will prevent
package from ballooning.
5
2 User Guides and Manuals (PDF) for Super Sealer Food Saver (2 Models)
-
Super Sealer REI-90F
# Type of Document Pages Size Views Downloads 1 Operation & maintenance manual 17 — 817 123 -
Super Sealer REI-85
# Type of Document Pages Size Views Downloads 1 Operation manual 24 — 654 151
Similar Equipment:


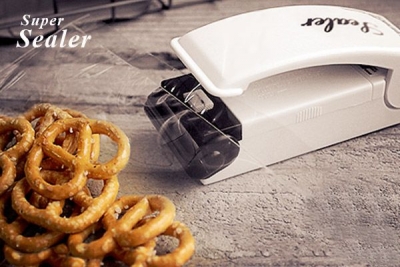
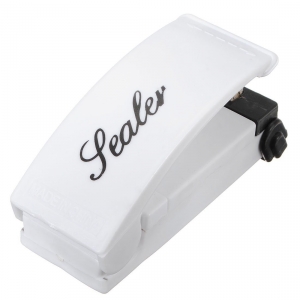
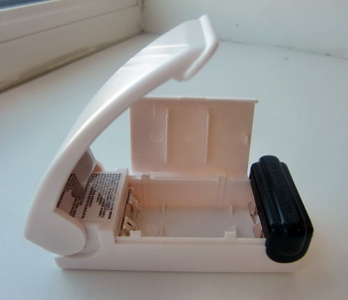
Мини запайщик пакетов — Super Sealer (портативный сшиватель для кульков, ручной склеиватель пакетов и упаковок)

Цена: 2.5$
Как и где купить: Aliexpress
Бесплатная доставка по всему миру (Free Shipping)
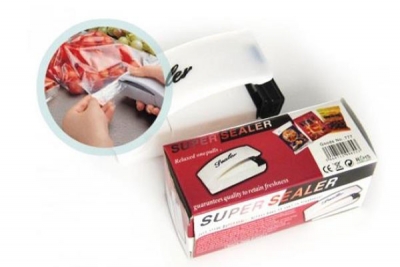
С таким девайсом можно легко подшутить над знакомыми или друзьями, беретё пустую пачку чипсов, надуваете её и запаиваете с помощью Super Sealer, а потом дарите знакомому лопуху который открыв чипсы очень удивится, особенно если туда ещё что-то подложить..
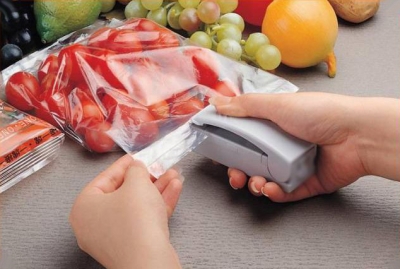
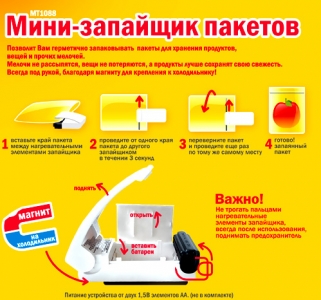
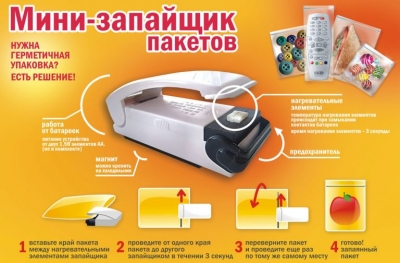
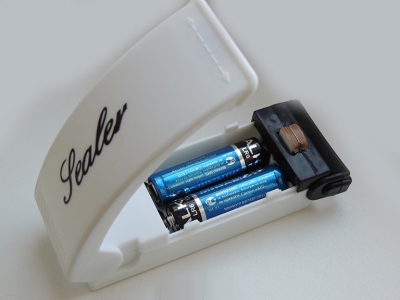
Портативный сшиватель пакетов и кульков это очень полезная вещь которая позволяет склеивать буквально любые упаковки. Ручной мини запайщик для пакетов очень удобен для использования в магазине, на рынке и в домашних условиях для упаковки продуктов питания, одежды, подарков и других вещей. Очень прост в использовании, легко помещается в кармане и работает всего от 2х пальчиковых батареек типа АА по 1.5в, а мощность самого устройства 3 вата, что вполне достаточно для склеивания любого целофана и полиэтилена. Для начала работы, возьмите любой пакет и проведите по той части пакетика которую нужно запаять, лёгким движением руки всё будет быстро и герметично склеено за секунды. Это универсальный гаджет, можно сшивать пакеты с под чипсов, орешков, обычные кульки и целофан, а также герметично запаковывать подарки.
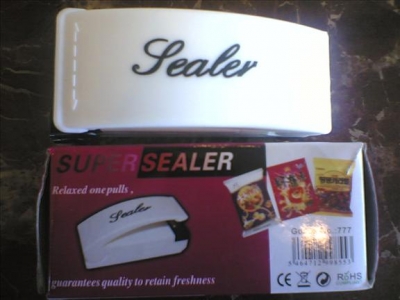
Фотографии и картинки товара:
2014-12-27 21:48:29 | Автор: ID1
Тип материала: Мини запайщик пакетов — Super Sealer (портативный сшиватель для кульков, ручной склеиватель пакетов и упаковок) | Обзор товаров, прикольные и необычные товары, вещи, штуки, гаджеты и подарки
Обзоры прикольных товаров по категориям:
Электроника
|
Мобильные телефоны
|
Автотовары
|
Для дома
|
Мода и стиль
|
Аксессуары
|
Спорт и развлечения
|
Всё для детей
|
Товары для животных
|


Помнишь такую игру? Спорим не выиграешь?
Страница сгенерировалась за 0.0133 сек.