- Manuals
- Brands
- King-Meter Manuals
- Bicycle Accessories
- SW-LCD
- User manual
-
Contents
-
Table of Contents
-
Bookmarks
Quick Links
KING-METER
USER GUIDE
SW-LCD
Related Manuals for King-Meter SW-LCD
Summary of Contents for King-Meter SW-LCD
-
Page 1
KING-METER USER GUIDE SW-LCD… -
Page 2: Table Of Contents
Contents 1. Preface ………………………………………….3 2. Appearance and Size……………………………4 2.1 Material and Color…………………………… 2.2 Display Size and Installation Size ………… 3. Function Summary and Button Definition…5 3.1 Preset and Default Items ……………………. 5 3.2 Display Figures ……………………………… 5 3.3 Button Definition…………………………..… 6 4.
-
Page 3
6.6 Push cruise control………… …………………13 6.7 Turn On and Turn Off the Backlight…………14 6.8 Power of the Display……………………………… .14 6.9 Error Code Display………………………..15 7 . At t e n t i o n f o r U s i n g … … … … … . … … . 1 6 FAQ Answers…………………………………16 9. -
Page 4: Preface
1、Preface Dear users, To ensure better performance of your e-bike, please read through the SW-LCD product introduction carefully before using it. We will use the brief words to inform you of all the details (including hardware installation, setting and normal use of the display)when using our display.
-
Page 5: Appearance And Size
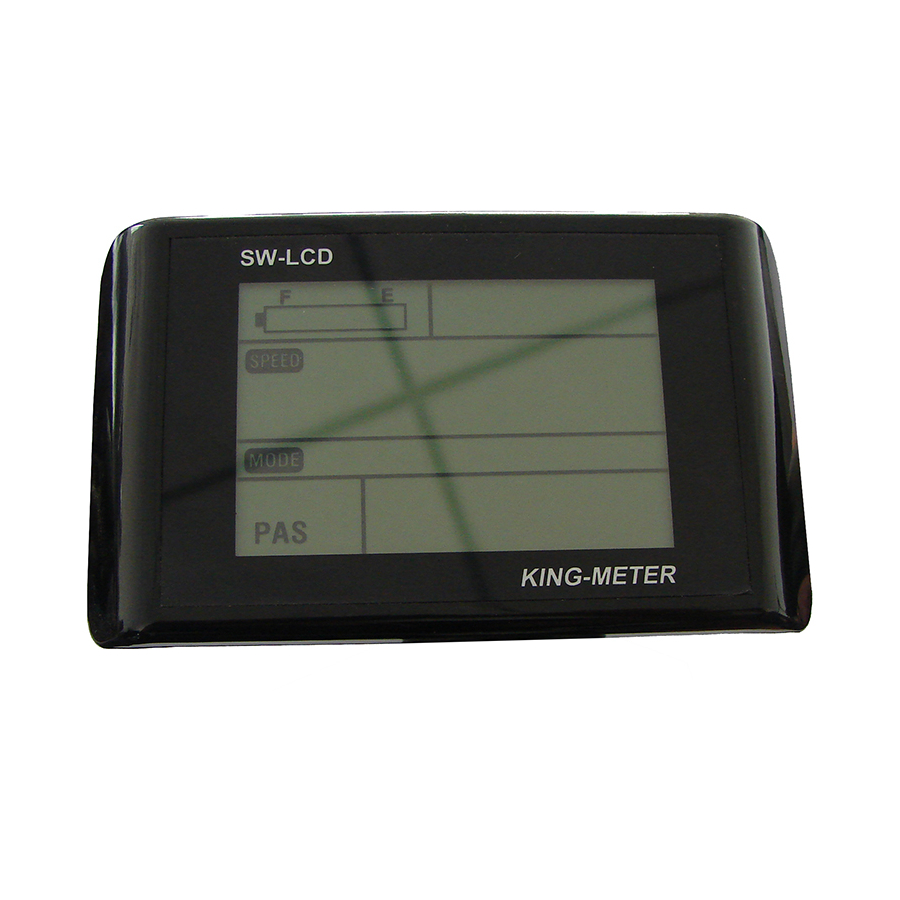
2、Appearance and Size 2.1 Material and Color SW-LCD housing material: PC. And the color of housing is white or black. Working temperature scope: -20℃—+60℃, the shell material can ensure normal use and good mechanical performance of the products. 2.2 Display Size and Installation Size(Unit:mm)…
-
Page 6: Function Summary And Button Definition
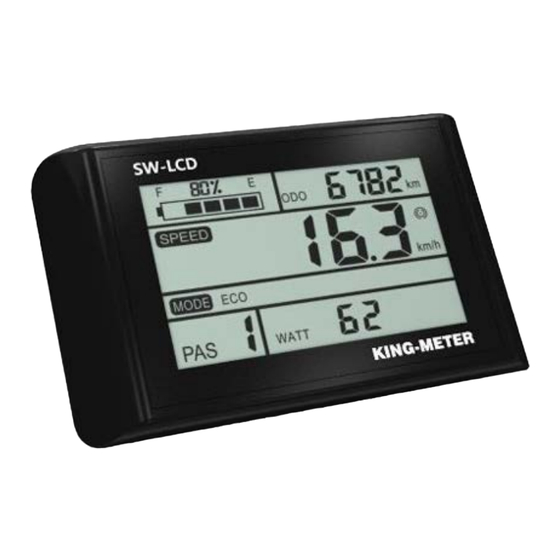
3、Function Summary and Button Definition 3.1 Preset and Default Items SW-LCD user settings include: wheel diameter ( 18-28inch ) ; max speed; LCD backlight contrast; choice of display unit. 3.2 Display Figures: Display content: battery capacity, motor power ratio, riding speed, riding distance, power, PUSH cruise control, and error code display of the electronic control system.
-
Page 7: Button Definition
SW-LCD is equipped with special 30-button unit. This operating button is suit for both L/R hand, button instruction figures as follows: 30-button unit is connected to the bottom of the SW-LCD display via lead cable. In the following introduction, is named as “MODE”.
-
Page 8: Installation Instruction
4、Installation Instruction Fix the display and 30-button unit on the handlebar and adjust to an appropriate visual angle. Match display connector with controller connector. 5、Set up 5.1 Preparation for Starting the Display Make sure connector linked properly to the motor controller on the bike.
-
Page 9: Max Speed
Press UP or DOWN to choose a right diameter(18-28inch) for the bike. Default set is 26 inch. After confirmation of wheel size, press MODE to reserve it and enter into the max speed set. 5.4 Max Speed The second setting parameter is Max Speed. The interface is as below: Re-set speed should be in accordance with the local regulation speed.
-
Page 10: Backlight Brightness
factory is 25 Km/h. Speed option: 12-40Km/h, use UP or DOWN then confirm by MODE. Then enter into the interface of backlight brightness. 5.5 Backlight Brightness The third setting parameter is backlight brightness. The interface is as below: Press UP or DOWN to modify the backlight brightness. You can choose from level 1 to level 3.
-
Page 11: Quit From Set Up
Press UP or DOWN to choose a display unit. The unit could be MPH or Km/H. The range unit will change accordingly with the speed unit. 5.7 Quit from set up In the setting state, press MODE for 3 seconds to confirm the input, save current setting and exit.
-
Page 12: Speed Display (Current Speed/Average Speed/Max Speed)
battery segment will flash at 1 Hz. It indicates that the battery is severely low in voltage condition and needs to be recharged immediately. Low Voltage Flash 6.3 Speed Display (Current Speed/Average Speed/Max Speed) When the e-bike starts, the display will automatically show the current speed.
-
Page 13: Assisted Power Select Or Throttle Level Select
The interface of switching speeds 6.4 Assisted Power Select or Throttle Level Select Press UP or DOWN to change the output power of the motor. The power ranges from Level 1 to Level 5. Level 1 is the minimum power. Level 5 is the maximum power. The default level is Level 1.
-
Page 14: Distance Display
6.5 Distance Display (Riding Distance / Total Distance) Press MODE to switch between riding distance and total distance. This function is convenient for users to check the riding distance (TRIP) and the total distance (ODO). Range Interface 6.6 Push Cruise Control Press DOWN for a while to get into power assist mode, and the bike will travel at fixed speed 6Km/h.
-
Page 15: Turn On And Turn Off The Backlight
SW-LCD backlight, when the surrounding light is not enough or it is in the evening. Hold both UP and MODE for 3 seconds again and you can turn off the SW-LCD backlight. When the backlight power ON, the headlight also power on (if the bike assembles with a headlight).
-
Page 16: Error Code Display
6.9 Error Code Display If there is something wrong with the electronic control system, the display will show the error code automatically. The following is the definition of the error code. Code number Definition Abnormal current Throttle fault Motor phase problem Motor Hall defect Brake Failed Abnormal Communication…
-
Page 17: At T E N T I O N F O R U S I N
Error Code Display Display return to normal only after problem being fixed and bike will not run before fixing the problem. 7、Attention for Using Ride your bike in a safe way. Don’t hit or knock the display. Keep away from the bad environments when use, such as downpour, large snowflakes and solarization.
-
Page 18: Quality Warranty And Coverage
9、 Quality Warranty and Coverage We are not responsible for the scratched or broken shell after the products are delivered out of the factory. We don’t repair scratched or broken lead wires. The LCD display function warranty: 24 months from the delivery time of the display out of the factory.
- Manuals
- Brands
- King-Meter Manuals
- Bicycle Accessories
- SW-U LCD
- User manual
-
Contents
-
Table of Contents
-
Bookmarks
Quick Links
KING-METER TECHNOLOGY CO., LTD
No.15, Chenchang Road, Beichen Dist.Tianjin,300134,CN
Fax:+0086 022 8478 0358 Tel: +0086 022 8478 0378
USERS GUIDE
SW-U LCD
Related Manuals for King-Meter SW-U LCD
Summary of Contents for King-Meter SW-U LCD
-
Page 1
KING-METER TECHNOLOGY CO., LTD No.15, Chenchang Road, Beichen Dist.Tianjin,300134,CN Fax:+0086 022 8478 0358 Tel: +0086 022 8478 0378 USERS GUIDE SW-U LCD… -
Page 2: Table Of Contents
KING-METER TECHNOLOGY CO., LTD No.15, Chenchang Road, Beichen Dist.Tianjin,300134,CN Fax:+0086 022 8478 0358 Tel: +0086 022 8478 0378 Content Preface …………………………3 1. Appearance and Size ……………………. 4 1.1 Material and color ……………………4 2 Function Summary and Button Definition ………………4 2.1 Function description …………………….
-
Page 3
KING-METER TECHNOLOGY CO., LTD No.15, Chenchang Road, Beichen Dist.Tianjin,300134,CN Fax:+0086 022 8478 0358 Tel: +0086 022 8478 0378 8.5 Personalized Parameter Setting ………………16 8.5.1 Personalized password input ………………16 8.5.2 Battery power setting ………………..17 8.5.3 PAS level setting ………………….17 8.5.4 Current limiting value setting ……………… -
Page 4: Preface
KING-METER TECHNOLOGY CO., LTD No.15, Chenchang Road, Beichen Dist.Tianjin,300134,CN Fax:+0086 022 8478 0358 Tel: +0086 022 8478 0378 Preface Dear user, To ensure better performance of your e-bike, please read through the SW-U product introduction carefully before using. We will use the most concise words to inform you of all the details (including the hardware installation, setting and normal operation use of the display)…
-
Page 5: Appearance And Size
KING-METER TECHNOLOGY CO., LTD No.15, Chenchang Road, Beichen Dist.Tianjin,300134,CN Fax:+0086 022 8478 0358 Tel: +0086 022 8478 0378 1. Appearance and Size 1.1 Material and color SW-U products are made of PC. Under the temperature of -20 to 60℃, the shell material can ensure normal usage and good mechanical performance.
-
Page 6: Monitor Area
SW-U-II LCD normal monitor interface Button Definition SW-U LCD is equipped with special 30 keys or N3 keys. The buttons can be installed on the left side of the handlebar or on the right side of the handlebar. 30 button shape is as follows:…
-
Page 7
No.15, Chenchang Road, Beichen Dist.Tianjin,300134,CN Fax:+0086 022 8478 0358 Tel: +0086 022 8478 0378 N3-button unit is connected to the bottom of the SW-U LCD display via lead cable. In the following instructions, the key is named as “MODE” .The key is named as «UP», and the key… -
Page 8: User Reminder
KING-METER TECHNOLOGY CO., LTD No.15, Chenchang Road, Beichen Dist.Tianjin,300134,CN Fax:+0086 022 8478 0358 Tel: +0086 022 8478 0378 3. User reminder Pay attention to the safety during the use of the product, and do not plug or unplug the display while the power is on.
-
Page 9: User Interface
KING-METER TECHNOLOGY CO., LTD No.15, Chenchang Road, Beichen Dist.Tianjin,300134,CN Fax:+0086 022 8478 0358 Tel: +0086 022 8478 0378 5.2 User interface After starting up the display, show the following interface: 5.3 Single Trip / Odometer Press MODE to switch between Single Trip and accumulated total mileage.This function is convenient for users to view the current trip and total mileage (ODO).
-
Page 10: Push Cruise Control
KING-METER TECHNOLOGY CO., LTD No.15, Chenchang Road, Beichen Dist.Tianjin,300134,CN Fax:+0086 022 8478 0358 Tel: +0086 022 8478 0378 Push Cruise Control Hold DOWN for 2 seconds to enter the mode of power assistant walk. The e-bike will go on at a uniform speed of 6 Km/h.
-
Page 11: Pas Level Selection
KING-METER TECHNOLOGY CO., LTD No.15, Chenchang Road, Beichen Dist.Tianjin,300134,CN Fax:+0086 022 8478 0358 Tel: +0086 022 8478 0378 PAS Level Selection Short press the UP or DOWN button to switch the power gear of the Ebike and change the output power of the motor. The default output power range of the display is 0-5, and the default gear of the display is 1.
-
Page 12: Error Code Information
KING-METER TECHNOLOGY CO., LTD No.15, Chenchang Road, Beichen Dist.Tianjin,300134,CN Fax:+0086 022 8478 0358 Tel: +0086 022 8478 0378 Error Code Information If there is something wrong with the electronic control system, the error code will appear automatically. Here is the detail information of the error code in Table 1 attached.
-
Page 13: User Settings
KING-METER TECHNOLOGY CO., LTD No.15, Chenchang Road, Beichen Dist.Tianjin,300134,CN Fax:+0086 022 8478 0358 Tel: +0086 022 8478 0378 8. User settings 8.1 Preparation before starting Make sure that the connector is firmly connected and turn on the Ebike power. 8.2 General settings Press MODE button to start the display, then hold both UP and DOWN for 2 seconds to enter the setting menu.
-
Page 14: Unit Display
KING-METER TECHNOLOGY CO., LTD No.15, Chenchang Road, Beichen Dist.Tianjin,300134,CN Fax:+0086 022 8478 0358 Tel: +0086 022 8478 0378 setting parameter can be changed by UP / DOWN.1 is the darkest and 3 is the brightest. 8.2.3 Unit display Setting parameter of metric /imperial unit can be set,.The display is metric by default.The metric and imperial unit can be selected by UP / DOWN.
-
Page 15: Password Use
KING-METER TECHNOLOGY CO., LTD No.15, Chenchang Road, Beichen Dist.Tianjin,300134,CN Fax:+0086 022 8478 0358 Tel: +0086 022 8478 0378 8.3.1 Password use Select Y / N through UP / DOWN. Y indicates that the power on password is required, and N indicates that the power on password is not required.Short press MODE to confirm and enter…
-
Page 16: Wheel Diameter Setting
KING-METER TECHNOLOGY CO., LTD No.15, Chenchang Road, Beichen Dist.Tianjin,300134,CN Fax:+0086 022 8478 0358 Tel: +0086 022 8478 0378 The screen prompt «PSD. 1» indicates that the authority password needs to be input.Short press the MODE key to shift and input the value through UP / DOWN.After the 4-digit password is input, press the MODE key to confirm.If the password is correct, enter the…
-
Page 17: Personalized Parameter Setting
KING-METER TECHNOLOGY CO., LTD No.15, Chenchang Road, Beichen Dist.Tianjin,300134,CN Fax:+0086 022 8478 0358 Tel: +0086 022 8478 0378 8.5 Personalized Parameter Setting In order to improve the personalized use of this product, we specially add this setting.It can be set according to different requirements of users.This setting includes the setting of battery power bar setting, PAS level, current limit, PAS sensor, speed sensor, Throttle function and system setting.There are seven items in total.
-
Page 18: Battery Power Setting
KING-METER TECHNOLOGY CO., LTD No.15, Chenchang Road, Beichen Dist.Tianjin,300134,CN Fax:+0086 022 8478 0358 Tel: +0086 022 8478 0378 8.5.2 Battery power setting VOL is the battery power setting.The voltage values from 1 to 5 sections are required to be input one by one.Take the first power value as an example: «1» in the screen represents the first voltage and «31.5»…
-
Page 19: Current Limiting Value Setting
KING-METER TECHNOLOGY CO., LTD No.15, Chenchang Road, Beichen Dist.Tianjin,300134,CN Fax:+0086 022 8478 0358 Tel: +0086 022 8478 0378 Assist proportion value setting The speed of each gear can be adjusted by setting the assist proportion value.To meet the needs of different riders.
-
Page 20: Speed Sensor Settings
KING-METER TECHNOLOGY CO., LTD No.15, Chenchang Road, Beichen Dist.Tianjin,300134,CN Fax:+0086 022 8478 0358 Tel: +0086 022 8478 0378 The Sensitivity of PAS Setting SCN means the sensitivity of PAS, and 2 to 9 can be selected.2 is strongest, 9 is the weakest.
-
Page 21: Throttle Function Setting
KING-METER TECHNOLOGY CO., LTD No.15, Chenchang Road, Beichen Dist.Tianjin,300134,CN Fax:+0086 022 8478 0358 Tel: +0086 022 8478 0378 8.5.7 Throttle function setting Throttle Enable/Disable HL means that the throttle pushing assist .HL: n indicates that the throttle has no pushing assist function, and HL: y indicates that the throttle has a pushing function, that means, when the handle is turned, the display will enter the pushing assist mode.Y / N can be switched…
-
Page 22
KING-METER TECHNOLOGY CO., LTD No.15, Chenchang Road, Beichen Dist.Tianjin,300134,CN Fax:+0086 022 8478 0358 Tel: +0086 022 8478 0378 selected as 3 / 6 / 12s.Short press MODE to confirm and enter the max speed limit setting interface.The default time is 3S. -
Page 23: Exit Settings
KING-METER TECHNOLOGY CO., LTD No.15, Chenchang Road, Beichen Dist.Tianjin,300134,CN Fax:+0086 022 8478 0358 Tel: +0086 022 8478 0378 setting interface.The default value of the display is 25 (output 25%). Slowly start up setting SSP indicates the slowly start up setting. The adjustable range is 1-4.
-
Page 24: Faq
KING-METER TECHNOLOGY CO., LTD No.15, Chenchang Road, Beichen Dist.Tianjin,300134,CN Fax:+0086 022 8478 0358 Tel: +0086 022 8478 0378 The authority password is: 0368.Short press MODE to shift and input the value through UP / DOWN.After the 4-digit password is input, short press MODE to confirm.The display will exit automatically after successful recovery.
-
Page 25: Quality Assurance And Warranty
6、Beyond Warranty period. 11. Version number This operating instruction is a general-purpose version of KING-METER TECHNOLOGYCO.,LTD(V1.0).Some of the version for the display software will be different from the specification, which should depend on the actual use version.
-
Page 26
KING-METER TECHNOLOGY CO., LTD No.15, Chenchang Road, Beichen Dist.Tianjin,300134,CN Fax:+0086 022 8478 0358 Tel: +0086 022 8478 0378 Table 1: Error code definition table Error Code Definition Current Abnormality Throttle Abnormality Motor Abnormality Motor Hall Signal Abnormality Brake Abnormality Communication Abnormality… -
Page 27
KING-METER TECHNOLOGY CO., LTD No.15, Chenchang Road, Beichen Dist.Tianjin,300134,CN Fax:+0086 022 8478 0358 Tel: +0086 022 8478 0378 Table 2: Password quick reference table Screen display password Meaning Using parameter setting 0512 password(fixed) Factory Power on password default (modifiable) 1234… -
Page 28
KING-METER TECHNOLOGY CO., LTD No.15, Chenchang Road, Beichen Dist.Tianjin,300134,CN Fax:+0086 022 8478 0358 Tel: +0086 022 8478 0378 Table 3: Personalized setting table Screen Set item Set content display Battery Five battery power value power setting Power assist level selection… -
Page 29
KING-METER TECHNOLOGY CO., LTD No.15, Chenchang Road, Beichen Dist.Tianjin,300134,CN Fax:+0086 022 8478 0358 Tel: +0086 022 8478 0378 Continued Table 3: Screen Set item Set content display Throttle Enable/Disable Throttle turning Throttle vector Enable/Disable function setting Time of battery power delay… -
Page 30
KING-METER TECHNOLOGY CO., LTD No.15, Chenchang Road, Beichen Dist.Tianjin,300134,CN Fax:+0086 022 8478 0358 Tel: +0086 022 8478 0378 Table 4: Default value table of PAS gear ratio Gear Gear options 0-3/ 1-3 — — — — — — 0-5/ 1-5 —… -
Page 31
KING-METER TECHNOLOGY CO., LTD No.15, Chenchang Road, Beichen Dist.Tianjin,300134,CN Fax:+0086 022 8478 0358 Tel: +0086 022 8478 0378 KING-DISPLAY…
Table of Contents for King-Meter SW-LCD:
-
5 3、Function Summary and Button Definition 3.1 Preset and Default Items SW-LCD user settings include: wheel diameter ( 18-28inch) ; max speed; LCD backlight contrast; choice of display unit. 3.2 Display Figures: Display content: battery capacity, motor power ratio, riding speed, riding distance, power, PUSH cruise control, and error code display of the electronic control system.
-
17 9、 Quality Warranty and Coverage We are not responsible for the scratched or broken shell after the products are delivered out of the factory. We don’t repair scratched or broken lead wires. The LCD display function warranty: 24 months from the delivery time of the display out of the factory. 10、Circuit Block Diagram Red: 24V/36V; Blue: lock wire; Black: GND; Green/ Yellow: RX / TX wire. Due to the use of the waterproof co
-
10 Press UP or DOWN to choose a display unit. The unit could be MPH or Km/H. The range unit will change accordingly with the speed unit. 5.7 Quit from set up In the setting state, press MODE for 3 seconds to confirm the input, save current setting and exit. 6、Standard Operation 6.1 ON / OFF Press MODE, then the display starts to work and supply power to controller, long press MODE then switch off power. In the status of OFF, display and controller no longe
-
KING-METER USER GUIDE SW-LCD
-
6 3.3 Button Definition SW-LCD is equipped with special 30-button unit. This operating button is suit for both L/R hand, button instruction figures as follows: 30-button unit is connected to the bottom of the SW-LCD display via lead cable. In the following introduction, is named as “MODE”. is named as “UP” and is named as “DOWN”.
-
3 1、Preface Dear users, To ensure better performance of your e-bike, please read through the SW-LCD product introduction carefully before using it. We will use the brief words to inform you of all the details (including hardware installation, setting and normal use of the display)when using our display. Meanwhile, the introduction will also help you solve possible confusion and barriers.
-
15 6.9 Error Code Display If there is something wrong with the electronic control system, the display will show the error code automatically. The following is the definition of the error code. Code number Definition 21 Abnormal current 22 Throttle fault 23 Motor phase problem 24 Motor Hall defect 25 Brake Failed 30 Abnormal Communication Definition Diagram of Error Codes
-
2 6.6 Push cruise control………… …………………13 6.7 Turn On and Turn Off the Backlight…………14 6.8 Power of the Display……………………………… .14 6.9 Error Code Display…………………………….15 7. Attention for Using… … … … … . … … .16 8. FAQ Answers…………………………………16 9. Quality Warranty and Coverage…………….17 10. Circuit Block Diagram……………………………..17 11.
-
4 2、Appearance and Size 2.1 Material and Color SW-LCD housing material: PC. And the color of housing is white or black. Working temperature scope: -20℃—+60℃, the shell material can ensure normal use and good mechanical performance of the products. 2.2 Display Size and Installation Size(Unit:mm)
-
8 Press UP or DOWN to choose a right diameter(18-28inch) for the bike. Default set is 26 inch. After confirmation of wheel size, press MODE to reserve it and enter into the max speed set. 5.4 Max Speed The second setting parameter is Max Speed. The interface is as below: Re-set speed should be in accordance with the local regulation speed. If exceed your re-set figure, the bike will travel at the max speed of reset. Default max speed in
-
1 Contents 1. Preface ………………………………………….3 2. Appearance and Size……………………………4 2.1 Material and Color……………………………4 2.2 Display Size and Installation Size …………4 3. Function Summary and Button Definition…5 3.1 Preset and Default Items ……………………. 5 3.2 Display Figures …………………………
-
11 battery segment will flash at 1 Hz. It indicates that the battery is severely low in voltage condition and needs to be recharged immediately. Low Voltage Flash 6.3 Speed Display (Current Speed/Average Speed/Max Speed) When the e-bike starts, the display will automatically show the current speed. Hold UP and the display will show the MAX speed during this ride. Hold UP ag
-
13 6.5 Distance Display (Riding Distance / Total Distance) Press MODE to switch between riding distance and total distance. This function is convenient for users to check the riding distance (TRIP) and the total distance (ODO). Range Interface 6.6 Push Cruise Control Press DOWN for a while to get into power assist mode, and the bike will travel at fixed speed 6Km/h. Interface of power assist walk
Questions, Opinions and Exploitation Impressions:
You can ask a question, express your opinion or share our experience of King-Meter SW-LCD device using right now.
K
ING-METER
USER GUIDE
SW-LCD
Contents
1. Preface
………………………………………….3
2. Appearance and Size
……………………………4
2.1 Material and
Color……………………………
4
2.2 Display Size and Installation Size …………
4
3. Function Summary and Button Definition
…5
3.1 Preset and Default Items ……………………. 5
3.2 Display Figures ……………………………… 5
3.3 Button Definition…………………………..… 6
4. Installation Instruction
………………………….7
5. Set up
…………………………… ………………..7
5.1 Preparation before Starting the Display………7
5.2 Start and Entry Setting State…………………7
5 . 3 W h e e l D i a m e t e r
… … … … … … … … … … . . 7
5 . 4 M a x S p e e d … … … … … … … … … … … … 8
5.5 Backlight Brightness.
…………………………9
5.6 Choice of
Display Unit… ……………………9
5.7 Quit from Set up………………………………10
6. Standard operation
……………………………..10
6.1
Power ON / OFF………………………………10
6.2
Power Display………………………………………. 10
6.3 Speed Display (Current Speed/Average Speed/Max
Speed)
………………………………………………11
6.4 Assisted Power Select or Throttle Level
Select ………………………………………………. 12
6.5
Distance Display …………………………………..13
1
6.6
Push cruise control………… …………………13
6.7
Turn On and Turn Off the Backlight…………14
6.8
Power of the Display……………………………… .14
6.9
Error Code Display…………………………….15
7 . A t t e n t i o n f o r U s i n g
… … … … … . … … . 16
8. FAQ Answers
…………………………………16
9. Quality Warranty and Coverage
…………….17
10. Circuit Block Diagram
……………………………..17
11. Software Version
…………………………17
2
1
、
Preface
Dear users,
To ensure better performance of your e-bike, please read through the SW-LCD product introduction carefully before using it. We will use the brief words to inform you of all the details
( including hardware installation, setting and normal use of the display
) when using our display. Meanwhile, the introduction will also help you solve possible confusion and barriers.
3
2
、
Appearance and Size
2.1 Material and Color
SW-LCD housing material: PC. And the color of housing is white or black. Working temperature scope: -20
℃
—+60
℃
, the shell material can ensure normal use and good mechanical performance of the products.
2.2 Display Size and Installation Size
(
Unit
: mm
)
4
3
、
Function Summary and Button Definition
3.1 Preset and Default Items
SW-LCD user settings include: wheel diameter
(
18-28inch
)
; max speed; LCD backlight contrast; choice of display unit.
3.2 Display Figures:
Display content: battery capacity, motor power ratio, riding speed, riding distance, power, PUSH cruise control, and error code display of the electronic control system.
5
3.3 Button Definition
SW-LCD is equipped with special 30-button unit. This operating button is suit for both L/R hand, button instruction figures as follows:
30-button unit is connected to the bottom of the SW-LCD display via lead cable.
In the following introduction, is named as
“
MODE
”.
is named as “
UP
” and named as “
DOWN
”.
6
is
4
、
Installation Instruction
Fix the display and 30-button unit on the handlebar and adjust to an appropriate visual angle. Match display connector with controller connector.
5
、
Set up
5.1 Preparation for Starting the Display
Make sure connector linked properly to the motor controller on the bike.
5.2 Start and Entry Setting State
Press the
MODE
button for 1.5 seconds and start the display.
After start-up, please hold both
UP
and
DOWN
for 2.5 seconds at the same time, LCD will enter into the setting state
, and the settable parameter will flash. The parameter can be set circularly.
5.3 Wheel Diameter
The first setting parameter is wheel diameter. The interface is as follows:
7
Press
UP
or
DOWN
to choose a right diameter
(
18-28inch
) for the bike. Default set is 26 inch. After confirmation of wheel size, press
MODE
to reserve it and enter into the max speed set.
5.4 Max Speed
The second setting parameter is Max Speed. The interface is as below:
Re-set speed should be in accordance with the local regulation speed. If exceed your re-set figure, the bike will travel at the max speed of reset. Default max speed in
8
factory is 25 Km/h.
Speed option: 12-40Km/h, use
UP
or
DOWN
then confirm by
MODE
. Then enter into the interface of backlight brightness.
5.5 Backlight Brightness
The third setting parameter is backlight brightness. The interface is as below:
Press
UP
or
DOWN
to modify the backlight brightness. You can choose from level 1 to level 3. Level 1 is the minimum brightness. Level 3 is the maximum brightness. The default value of the backlight brightness is level 1. Press the
MODE
to confirm the backlight brightness, then entry into the interface of Choice of Display Unit.
5.6 Choice of Display Unit (Metric system / British system)
The fourth setting parameter is Choice of Display Unit. The interface is as below:
9
Press
UP
or
DOWN
to choose a display unit.
The unit could be MPH or Km/H. The range unit will change accordingly with the speed unit.
5.7 Quit from set up
In the setting state, press
MODE
for 3 seconds to confirm the input, save current setting and exit.
6
、
Standard Operation
6.1 ON / OFF
Press
MODE,
then the display starts to work and supply power to controller, long press
MODE
then switch off power.
In the status of OFF, display and controller no longer consume battery power.
6.2 Capacity Display
When the battery capacity is high, the five battery segments are all light. When the battery is in low voltage, the last
10
battery segment will flash at 1 Hz. It indicates that the battery is severely low in voltage condition and needs to be recharged immediately.
Low Voltage Flash
6.3 Speed Display (Current Speed/Average Speed/Max
Speed)
When the e-bike starts, the display will automatically show the current speed.
Hold
UP
and the display will show the MAX speed during this ride. Hold
UP
again and the display will show the AVG speed during this ride. Hold
UP
again and the display will turn to the current speed display.
11
The interface of switching speeds
6.4 Assisted Power Select or Throttle Level Select
Press
UP
or
DOWN
to change the output power of the motor.
The power ranges from Level 1 to Level 5. Level 1 is the minimum power. Level 5 is the maximum power.
The default level is Level 1.
The choice of motor power rate
12
6.5 Distance Display (Riding Distance / Total Distance)
Press
MODE
to switch between riding distance and total distance. This function is convenient for users to check the riding distance (TRIP) and the total distance (ODO).
Range Interface
6.6 Push Cruise Control
Press
DOWN
for a while to get into power assist mode, and the bike will travel at fixed speed 6Km/h.
Interface of power assist walk
13
Warning
:
Push cruise control mode is recommended under push state, not for riding mode.
6.7 Turn On and Turn Off the Backlight
Hold both
UP
and
MODE
for 3 seconds and turn on the
SW-LCD backlight, when the surrounding light is not enough or it is in the evening. Hold both
UP
and
MODE
for 3 seconds again and you can turn off the SW-LCD backlight.
When the backlight power ON, the headlight also power on
(if the bike assembles with a headlight). And the function could be customized.
6.8 Power of the Display
Display the real time power consumption of the riding for electric bike. The interface below:
14
6.9 Error Code Display
If there is something wrong with the electronic control system, the display will show the error code automatically.
The following is the definition of the error code.
Code number Definition
21
22
23
24
Abnormal current
Throttle fault
Motor phase problem
Motor Hall defect
25
30
Brake Failed
Abnormal Communication
Definition Diagram of Error Codes
15
Error Code Display
Display return to normal only after problem being fixed and bike will not run before fixing the problem.
7
、
Attention for Using
Ride your bike in a safe way. Don’t hit or knock the display.
Keep away from the bad environments when use, such as downpour, large snowflakes and solarization.
Try not to use in under-voltage condition. The screen will get dark along with the temperature reduction when temperature below -10
℃
. The screen will return to normal when the temperature rises again.
8
、
FAQ Answers
Q
:
Why can’t turn on the display?
A
:
Please check if the cable is well connected with the controller.
Q
:
How to deal with the error code display?
A
:
Contact the e-bike maintenance station in time.
16
9
、
Quality Warranty and Coverage
We are not responsible for the scratched or broken shell after the products are delivered out of the factory.
We don’t repair scratched or broken lead wires.
The LCD display function warranty: 24 months from the delivery time of the display out of the factory.
10
、
Circuit Block Diagram
Red: 24V/36V; Blue: lock wire; Black: GND; Green/ Yellow:
RX / TX wire.
Due to the use of the waterproof connector of part products, users cannot see the leads color of the internal wiring.
11
、
Software Version
This operating instruction is a general-purpose software
(version V2.0). Some of the version of the e-bike LCD may have slightly difference, all with actual use version.
17
Download Operation & user’s manual of King-Meter SW-LCD Bicycle Accessories for Free or View it Online on All-Guides.com.

1

2

3

4

5

6

7

8

9

10

11

12

13

14

15

16

17

18
