-
Contents
-
Table of Contents
-
Bookmarks
Quick Links
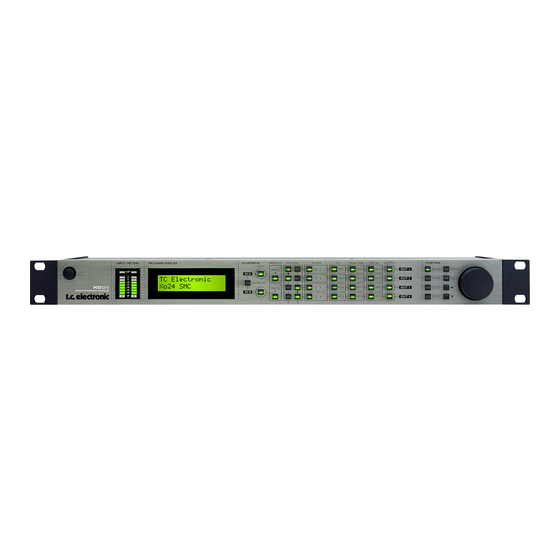
XO24
S
M
C
PEAKER
ANAGEMENT
ONTROLLER
U U s s e e r r s s m m a a n n u u a a l l
Related Manuals for TC Electronic XO24
Summary of Contents for TC Electronic XO24
-
Page 1
XO24 PEAKER ANAGEMENT ONTROLLER U U s s e e r r s s m m a a n n u u a a l l… -
Page 3: Important Safety Instructions
IMPORTANT SAFETY INSTRUCTIONS The lightning flash with an arrowhead The exclamation point within an symbol within an equilateral triangle, is equilateral triangle is intended to alert the intended to alert the user to the user to the presence of important presence of uninsulated «dangerous volt- operating and maintenance (servicing) age»…
-
Page 4: Certificate Of Conformity
Class B Digital device, pursuant to part 15 of the FCC rules. Certificate Of Conformity These limits are designed to provide TC Electronic A/S, Sindalsvej 34, 8240 reasonable protection against harmful Risskov, Denmark, — hereby declares on interference in residential installations. This…
-
Page 5: Table Of Contents
TABLE OF CONTENTS INTRODUCTION Important Safety Instructions & Certificate of conformity ..a-b Table of Contents ….3 Introduction .
-
Page 7: Introduction
Read through this operation manual to get more information about the specific features available in XO24, or start to use the XO24 right out of the box and get back to these pages in case you seek answers to specific features.
-
Page 8: Front Panel Overview
DIGITAL IN select distribute Input channels A/B Press the DIGITAL IN key and to any of the four Output the XO24 will try to lock to the LIMITER channels. On/Off keys for the Limiter Digital Input. If a valid digital…
-
Page 9
LOCK On/Off keys on the Output for The LOCK key is used to each of the four channels. lock/unlock the XO24 front panel keys. Default setting is In Edit mode these keys give “locked”. access to edit the Output level parameter. -
Page 10: Rear Panel Overview
REAR PANEL Balanced Inputs Balanced Digital Com port for data Power Input. on XLR for Outputs 1-4 S/PDIF In transfer. The internal channels A/B. on XLR. and Thru NO user application. switchmode Use channel A on RCA powersupply accepts for mono Input. phono.
-
Page 11: Signal Flow Diagram
SIGNAL FLOW…
-
Page 12: Typical Setups
TYPICAL SETUPS Stereo Setup — with subs This is a typical stereo setup with a set of subs. Analog: • Input signal is fed on Inputs A/B. • Configure Routing section as illustrated below. • Output channels 1 and 2 feed the front loudspeakers.
-
Page 13
TYPICAL SETUPS Stereo Setup This setup is a typical small 2-way system. Analog • Input signal is fed to Inputs A and B. • Configure Routing section as illustrated below. • Output channels 1 and 2 feed loudspeaker set A. •… -
Page 14
SETUPS 3/4 way setup — Bi-Amp Mid/High This example shows how 2 XO24s can be used in conjunction to distribute Input signals to a 3 or 4 way system per side. For each side: • Source signal can be connected to either Inputs A or B as only one Input per side is used. -
Page 15
SETUPS System Distribution — with delay Configuration overview This example is similar to the previous example. However, the idea here is to distribute the signal with delay settings corresponding to the positioning of the speakers. Using the Digital Input For each side: •… -
Page 16
SETUPS Dual Source Mono — Dual Zone This setup is used where two different zones or rooms need to be covered. In this case Stereo is not the object. • Source 1 is connected to Input A and Source 2 to Input B. •… -
Page 17: Control Section
CONTROL SECTION 4 Now you may; — either press ENTER again to confirm and end the store operation — or dial in a preset name of your choice using the CURSOR keys and ADJUST encoder and then press ENTER. 5 The display indicates “Preset Stored” for a successful store operation.
-
Page 18: Front Panel Operation
Input Bypass A/B — Input Trim The XO24 accepts digital Input at 44.1 or Signal from the two Inputs A and B will be 48kHz. Per default the XO24 is set to analog passed to the Routing section if the LEDs in the Inputs.
-
Page 19
A typical example of a stereo setup with split in both sides. More examples on pages 10 to 13. For optimal settings please refer to your X-Over speaker specifications. The XO24 may hold presets that perfectly match your speaker configuration. X-Over A,B: Type: Gain Freq:… -
Page 20
FRONT PANEL OPERATION Parametric EQ (Speaker EQ) EQ 1-4 Type: Gain Freq: Width/Slope: Band 1 Hi Pass ±18 dB 20 Hz – 20 kHz 2nd order Par EQ ±18 dB 20 Hz – 20 kHz 0,03 – 4 Oct Band 2 Par EQ ±18 dB 20 Hz –… -
Page 21: Appendix
APPENDIX — TECHNICAL SPECIFICATIONS Analog Inputs Connectors: Impedance, Bal / Unbal: 21 kOhm / 13 kOhm Max. / Min. Input Level @ 0 dBFS: +24 dBu / 0 dBu Sensitivity Range @ 12 dB headroom: -12 dBu to +12 dBu A to D Conversion: 24 bit, 128 x oversampling bitstream A to D Delay:…
-
Page 22: Preset List
PRESET LIST The XO24 factory presets are listed below. The presets are generic and should be perceived at excellent «starting points». To achieve optimal performance of your setup, the presets probably require some adjustment and fine-tuning according to the specifications of your…
-
Page 23
PRESET LIST…

249 ₽
Инструкция (руководство пользователя) на Контролер акустических систем TC electronic XO24
-
Описание
-
Детали
Описание
Инструкцию по эксплуатации TC electronic XO24 на русском языке можно будет скачать в личном кабинете после оформления и оплаты заказа.
Детали
| Формат файла |
|
|---|---|
| Размер инструкции в кб |
737 |
инструкцияTC Electronic XO24

XO24
SPEAKER MANAGEMENT CONTROLLER
UUsseerrss mmaannuuaall
XO24 US_3101.qxd 31-01-2005 10:59 Page 1
Посмотреть инструкция для TC Electronic XO24 бесплатно. Руководство относится к категории без категории, 1 человек(а) дали ему среднюю оценку 7.5. Руководство доступно на следующих языках: английский. У вас есть вопрос о TC Electronic XO24 или вам нужна помощь? Задайте свой вопрос здесь
Нужна помощь?
У вас есть вопрос о TC Electronic а ответа нет в руководстве? Задайте свой вопрос здесь Дай исчерпывающее описание проблемы и четко задайте свой вопрос. Чем детальнее описание проблемы или вопроса, тем легче будет другим пользователям TC Electronic предоставить вам исчерпывающий ответ.
Количество вопросов: 0

Главная
Не можете найти ответ на свой вопрос в руководстве? Вы можете найти ответ на свой вопрос ниже, в разделе часто задаваемых вопросов о TC Electronic XO24.
Инструкция TC Electronic XO24 доступно в русский?
Не нашли свой вопрос? Задайте свой вопрос здесь
The lightning flash with an arrowhead
symbol within an equilateral triangle, is
intended to alert the user to the
presence of uninsulated «dangerous volt-
age» within the product’s enclosure that may be of
sufficient magnitude to constitute a risk of
electric shock to persons.
1
Read these instructions.
2
Keep these instructions.
3
Heed all warnings.
4
Follow all instructions.
5
Do not use this apparatus near water.
6
Clean only with dry cloth.
7
Do not block any ventilation openings. Install
in accordance with the manufacturer’s
instructions.
8
Do not install near any heat sources such
as radiators, heat registers, stoves, or other
apparatus (including amplifiers) that produce
heat.
9
Do not defeat the safety purpose of the
polarized or grounding-type plug. A
polarized plug has two blades with one
wider than the other. A grounding type plug
has two blades and a third grounding prong.
The wide blade or the third prong are provided
for your safety. If the provided plug does not fit
into your outlet, consult an electrician for
replacement of the obsolete outlet.
10 Protect the power cord from being walked
on or pinched particularly at plugs,
convenience receptacles, and the point
where they exit from the apparatus.
11 Only use attachments/accessories specified
by the manufacturer.
12
Use only with the cart, stand, tripod,
bracket, or table specified by the
manufacturer, or sold with the
apparatus. When a cart is used, use
caution when moving the cart/apparatus
combination to avoid injury from tip-over.
13 Unplug this apparatus during lightning storms
or when unused for long periods of time.
14 Refer all servicing to qualified service
personnel. Servicing is required when the
apparatus has been damaged in any way,
such as power-supply cord or plug is
damaged, liquid has been spilled or objects
have fallen into the apparatus, the
apparatus has been exposed to rain or
moisture, does not operate normally, or has
been dropped.
The exclamation point within an
equilateral triangle is intended to alert the
user to the presence of important
operating and maintenance (servicing)
instructions in the literature accompanying the
product.
Warning!
•
To reduce the risk of fire or electrical shock,
do not expose this equipment to dripping or
splashing and ensure that no objects filled
with liquids, such as vases, are placed on the
equipment.
•
This apparatus must be earthed.
•
Use a three wire grounding type line cord
like the one supplied with the product.
•
Be advised that different operating voltages
require the use of different types of line
cord and attachment plugs.
•
Check the voltage in your area and use the
correct type. See table below:
Voltage
Line plug according to standard
110-125V UL817 and CSA C22.2 no 42.
220-230V CEE 7 page VII, SR section
107-2-D1/IEC 83 page C4.
240V
BS 1363 of 1984.
Specification for 13A fused
plugs and switched and
unswitched socket outlets.
•
This equipment should be installed near the
socket outlet and disconnection of the device
should be easily accessible.
•
To completely disconnect from AC mains,
disconnect the power supply cord from the AC
receptable.
•
The mains plug of the power supply shall
remain readily operable.
•
Do not install in a confined space.
•
Do not open the unit — risk of electric shock
inside.
Caution:
You are cautioned that any change or
modifications not expressly approved in this
manual could void your authority to operate this
equipment.
Service
•
There are no user-serviceable parts inside.
•
All service must be performed by qualified
personnel.
a