-
Contents
-
Table of Contents
-
Bookmarks
Quick Links
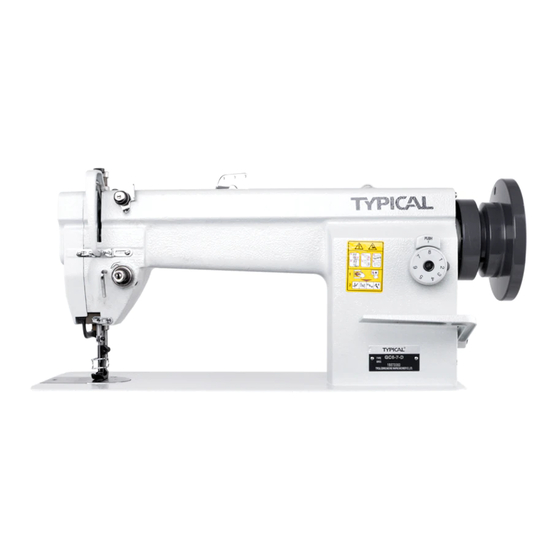
GC6-7D
INSTRUCTION BOOK // PARTS CATALOGUE
Related Manuals for typical GC6-7D
Summary of Contents for typical GC6-7D
-
Page 1
GC6-7D INSTRUCTION BOOK // PARTS CATALOGUE… -
Page 2
1 .Main technical specifications 2.Preparation Application: medium and heavy-duty (1)Cleaning machine Max sewing speed :3000 spm Clean off the grease and dusts on the Surface of ma- Max stitch length: 0~8mm chine with gasoline and soft cloth. ≥ Presser foot lift: hand 6.5mm,knee controlled 13mm (2)Inspection Needle: Model DPX17#18~#22 Before use a thorugh inspection should be done… -
Page 3
5 .Installi ng belt guard(Fi g.3) The belt guard should be installed for safety. 6 .Installi ng the bobbin wi nder (Fig .4) Align pulley (B) of the bobbin winder with the outside of the belt, and there should be a proper clearance between them, so that pulley (B) can be contacted with the belt when stop latch thumb lever (A) is depressed, thereby the belt drives pulley (B) -
Page 4
8 .Trial run (Fig.6) The machine is designed specially with plunger automtic lubricating system, so it can run with nor- mal speed. In ordervto increasing the using time of machine, when the machine left outvof operation for a quite long time is used again. Turn off the rubber plug top of the machine head, oil it thoroughly, then lift the presser foot and run at a low speed with 1500 spm, observe the spurt through oil flow window,… -
Page 5
9 .Rotating hook okl amount adju stme nt ( Fig. 7) The hook oil amount can be adjusted by screw “ ” (A). Turn it clockwise ( + ) to increase amount: counter-clockwise ( — ) to decrease. The oil amount “… -
Page 6
1 1.Ins tal ling the needle (Fig. 9) Turn the balance wheel to lift the needle bar to its highest point, loosen needle set screw 1, making the needle groove turn to the left side of an opera- tor, fully insert the needle shank up to the bottom of needle socket, then tighten needle set screw 1. -
Page 7
(2) To left pass down thru the right hole, to left up thru the middle hole and to left down thru the left hole of thread retainer ② ③ (3) Pass down thru between two tension disc (4) To left and up pass thru the hook of thread ④… -
Page 8
15.Se tt in g t he s tit ch l en g th and controlling the reverse sew in g (F i g Stitch length can be set by turning stitch length regulating dial (A). The stitch length is longer when turning stitch length regulation dial (A) counter clock- wise. -
Page 9
18.Adjusting the thread tension (Fig.16、17) In general, the thread tension s to be adjusted in accordance with materials thread and others. In practice, the thread tension is adjusted ac- cording to the stitches resulted and has the normal stitches. The needle thread tension should be adjusted with referance to the bobbin thread tension. -
Page 10
2) Adjusting the sewing range of t hread take-up spring (Fig.19) Loosen set screw (B), turn tension complete (C) clockwise to increase the sewing range or turn tension complete (C) counter clockwise to decrease the sewing range. Before delivery, the thread take-up spring is properly adjusted, Readjustment is needed only in the case of sewing special materials or with special thread. -
Page 11
(b) The needle thread tension is too weak or the bobbin threal is too strong, turn the tension regulating thumb nut clockwise to make the needle thread get more tension or turn the bobbin case tension regulating screw counter clockwise with small plastic screw driver to make the bobbin thread get less tension (Fig.22) (c) Other abnormal stitches as shown in Fig.20… -
Page 12
2 Adjusting rotating hook point timing with 1.2mm needle. The motive relation between rotating hook and needle affects the sewing quality. Standard timing relation is : turn the balance wheel to locate needle 2.5mm bar to its lowest position, and lift back 2.5mm the rotating hook point (D) should be coincides with needle center line (C), and hook point (D) is 1.2mm above the upper edge (E) of needle eye. -
Page 13
To adjust the position of feed dog, move feed dog to the front end of throat plate. Loosen Screw A (See Fig.29b), move feed dog support B in the di- rection shown by arrow to adjust After adjustment tighten Screw A. 2 4.Fee d do g horizontal Adjustmen t (Fi g.3 0) Feed dog is 0.8~1.2mm above the surface of throat plate horizontally. -
Page 14
26.Feed timing (Fig.32、33、34) 1 Standard position Turn balance wheel to lower Feed dog A till it is horizontal with the surface B of throat plate, at the moment, the tip of needle C should be horizontal with the surfaces of throat plate and feed dog. Adjustment can be done by adjusting the position of feed cam and feed dog lift cam. -
Page 15
2 7.Adj ust ing the tension releasi ng me cha nism ( Fig .35) The tension discs should be pushed apart to open when the presser foot is lifted. But the open timing of the tension discs can be adjusted as follows: Romove face plate and the rubber plug at rear side Right Left… -
Page 16
29.Ad ju st in g pr ess er foo t al ter nate lift mechanism (Fig.38 ) The alternate lift mechanism can be adjusted according to the nature of material in a certain range. Of common heavy and medium sewing machine, the presser foot lift amount is about 2.5mm and that of the follow presser foot is within 5mm. -
Page 17
31.Adjusting the clearance between presser foot and follow presser foot (Fig.4 In sewing operation, for prevent the follow pre- sser foot from striking on presser foot at the end of feeding, a proper clearance C of approx. 1mm should be maintained between them. When the clearance is too small or too big nec- essary to adjust, loosen the crank clampin screw and turn down the needle bar shaft, then the follow… -
Page 18
1.Arm and bed 50 49 12 14 13 38 39 51 52 10 34 45 44 26 25 17 18 -17-… -
Page 19
1、Machine Arm And Bed 1.Arm and bed Part number Name Remark 6WF4-001 4WF1-001 6WF1-002 Trade Mark Rivet 35T4-402a Face Plate 22T1-003C2 Gasket For Face Plate Φ 22T1-003C3 Rubber Plug ( 19) 22T1-003C4 Rubber Plug Rubber Plug 22T1-003C5 Thread Finger 22T1-003C6 Screw 22T1-004 Screw… -
Page 20
2.Needle bar and thread take-up Arm shaft and vertical shaft -19-… -
Page 21
2.Needle bar and thread take-up Arm shaft and vertical shaft 2、Arm And Vertical Shafts, Needle ber Threed Take-up Parts Part number Name Remark 4WF1-001A Arm Shaft 22T3-001A2 Rubber Plug Φ 7.4~10 22T3-002B1 Colla 22T3-002B2 Screw 33T1-007D1 Front Bushing 4WF1-002 Middle Bushing Screw J0.0.40 22T3-005… -
Page 22
3.Feed dog lift and feed and thread looping -21-… -
Page 23
3、Feed Dog Lift And Feed And Thread Looping 3.Feed dog lift and feed and thread looping Part number Name Remark 35T2-201 Feed Dog 36T4-001AIa Feed Dog Support Complete 51T5-001AIb Washer 36T4-001A2 Eccentric Shaft J0.051 Screw 4WF2-002 Feed Dog Suppout Crank J0.0.71 Screw 22T2-019… -
Page 24
4.Feed adjustment -23-… -
Page 25
4.Feed adjustment 4、Feed Mechanism Part number Name Remark 36T5-001 Link Pin 4WF2-005 Stitch Length Bracket 22T6-008D3 Screw 22T5-010D4 Screw 5WF1-003 Bushing 22T5-004 Shaft For Stitch Length Bracket 36T5-003 Rubber Plug J0.0.40 Set Screw 36T5-004B1 Reverse Feed Lever Crank 22T5-012E10 Shaft For Block 22T5-012E2 Spring 22T5-013… -
Page 26
5.Presser foot -25-… -
Page 27
5、Presser Foot 5.Presser foot Part number Name Remark 33T3-003 Presser Foot Lift Bar 22T7-001A2 Screw 4WF3-001 Presser Bar Lever Cam Oil Seal 22T7-004B1 Knee Lifter Lever (left) Complete 22T7-004B1a Lever (left ) 22T7-004B1b Thread Releasing Cam 22T7-004B1c Screw 22T7-004B2 Screw 22T7-004B3 Knee Lifter Drawing Bar 22T7-005A… -
Page 28
6.Upper feed -27-… -
Page 29
6 Upper Feed Parts 、 6.Upper feed Part number Name Remark 34T5-501 Oil Felt 35T5-503 Screw 34T5-503 35T5-501 Spring J0.0.40 Screw 35T5-504 Shaft For Needle Bar Motion Bracket 35T5-505 Reel For Spring 35T5-507 Link 35T5-508 Adaptor 6WF5-002 Slot For Sliding Block 33T1-013 Sliding Block 34T5-507… -
Page 30
7.Oil pump -29-… -
Page 31
7 Oil Pump 、 7.Oil pump Name Part number Remark 22T8-001 Oil Pump 22T8-002 Screw 22T8-003 Screw 22T8-004 Screw Washer 22T8-006 Cover For Oil Pump 22T8-007 Adjusting Plate For Oil Pump 22T8-008A Filter Complete 22T8-009 Screw 22T8-010B Oil Pipe 22T8-11C Oil Wick Set Plate Complete 22T8-012 Screw… -
Page 32
8.Oil reservoir and accessories -31-… -
Page 33
8、Oil Reservoir And Accessories 8.Oil reservoir and accessories Name Part number Remark 4WF5-001 Oil Reservoir 22T9-001A2 Screw 22T9-001A3 Washer 2KT9-008 Gasket 22T9-001A6 Hinge Pin 22T9-001A7 Spring 22T9-001A8 Knee Lifter Stop Bracket 22T9-001A9 Screw 22T9-001A10 22T3-007C2 Screw 22T9-003B1 Knee Lifter Prop Bar 22T9-003B3 Connector 22T9-003B4… -
Page 34
Certifi cate of the Certifi cate of the Certifi cate for Certifi cate for Energy international ISO9001 ISO14001 international CE Ecolabelling Product Conservation Product XI´AN TYPICAL EUROPE GmbH Hertelsbrunnenring 9 D-67657 Kaiserslautern Tel.: +49 (0)631 316019-0 Fax: +49 (0)631 316019-11 E-mail: sales@typical-europe.com www.typical-europe.com…
1 1.Ins tal ling the needle (Fig. 9)
Turn the balance wheel to lift the needle bar to
its highest point, loosen needle set screw 1, making
the needle groove turn to the left side of an opera-
tor, fully insert the needle shank up to the bottom
of needle socket, then tighten needle set screw 1.
Note: Fig.12 (b) insufficient insertion
Fig.12 (c) Wrong direction of groove
12.Coordination among the needle、the thread and the material (Fig.10)
The needle thread is left-twisted, the bobbin
thread is left or rigth-twisted. Holding the thread,
twist it with right hand in the direction of arrow
shown in Fig.10, if it is tight, it is left-twisted,
contrarily, it is right-twisted.
The Needle is DP X 17 or 135
the needle number must be fitted for the materials.
Sewing too heavy the weight of materials. The needle
would be breaking and skipping stitch and thread
breaking for its too thin, if the needle is too thick,
it would damage the clothes for its large needle hole.
Therefore, the selection of needle and thread must be
fitted for the materials.
13.Threading the needle thread (Fig .11)
When threading the needle thread, raise the needle bar to its highest position, lead the thread from the spool
and pass it in the order instructed (Fig.11)
(1) Lead the thread from the spool, pass down through the right side of thread guide plate
up thru the middle hole of thread guide plate
the left hole of thread guide plate
X
5Nm 110 ~ 180
①
, to left pass thru between two small tension disc and pass down
①
.
-5-
Long groove leftward
Clearance
b
9
a
c
10
①
, to left pass
GC6-7D
INSTRUCTION BOOK // PARTS CATALOGUE
1 . M a i n t e c h n i c a l s p e c i f i c a t i o n s 2.Preparation
Application: medium and heavy-duty
Max sewing speed :3000 spm
Max stitch length: 0~8mm
Presser foot lift: hand 6.5mm,knee controlled ≥ 13mm
Needle: Model DPX17#18~#22
Hook: big rotating hook
Lubrication:auto lubrication
Motor power 370W (clutch motor).
(1)Cleaning machine
Clean off the grease and dusts on the Surface of machine with gasoline and soft cloth.
(2)Inspection
Before use a thorugh inspection should be done upon the machine.Turn balance wheel slowly to see if there is any obstruction,collision and uneven resistance between pars. If there is , adjustment should be done before operation.
3 . I n s t a l l i n g t h e m o t o r ( F i g . 1 )
Align machine balance wheel belt groove (A) with motor pulley belt groove (B) by moving the motor leftward of rightward. Be sure the belt is not touch with table.
1
A
B
C
4.Connecting the clutch lever to the pedal (Fig.2) a. The optimum tilt angle of pedal with floor is approx 15 degree.
b. Adjust the clutch of the motor so that clutch.
machine would have stabel motion and long using.
c. The machine balance wheel should rotate counter clockwise for normal seweng when view from opposite side of the balance wheel. The motor rotates in the same direction. The rotation can be reversed by reversing (turm over 180 deg.) the plug of the motor.
d. Adjust the tension of V-belt F by moving the motor vertically. The proper tension if V-belt is a slack of 10 ~ 12mm when the belt is depressed (at the belt pan) by finger.
E
D
C
B
A
G
F
10~12mm
15
-1-
2
5 . I n s t a l l i n g b e l t g u a r d ( F i g . 3 )
The belt guard should be installed for safety.
3
6 . I n s t a l l i n g t h e b o b b i n w i n d e r ( F i g . 4 )
Align pulley (B) of the bobbin winder with the outside of the belt, and there should be a proper clearance between them, so that pulley (B) can be contacted with the belt when stop latch thumb lever
(A) is depressed, thereby the belt drives pulley (B) while the machine running, the bobbin winder should be parallel with belt slit (E) of the table, then fasten with two wood screw (D).
7.Lubrication(Fig.5) a.Oil amount
Oil amount must be oiled according to the mark of drip pan. Mark (A) is the highest situation, Mark
(B) is the lowest situation, Note that oil amount of machine will apper heat and dead point for not gaining oil.
b.Oiling
In lubruation, HA-8 sewing mcahien oil or
HJ-7 machine oil must be used. Before running, the machine must be oiled at the mark(A).
c.Changing
oil and the dust of drip pan, then fasten the screw
-2-
A B
C
B
A
E
D
C
D
4
5
8 . T r i a l r u n ( F i g . 6 )
The machine is designed specially with plunger automtic lubricating system, so it can run with normal speed. In ordervto increasing the using time of machine, when the machine left outvof operation for a quite long time is used again. Turn off the rubber plug top of the machine head, oil it thoroughly, then lift the presser foot and run at a low speed with
1500 spm, observe the spurt through oil flow window, as the lubrication si well, keep the running test at the low speed about 20 mintues, increase the speed gradually, after month ’ s running, according to the conditions which operate, then increase up to proper sewing speed.
A
C
6
-3-
9 . R o t a t i n g h o o k o k l a m o u n t a d j u s t m e n t ( F i g . 7 )
The hook oil amount can be adjusted by screw
(A). Turn it clockwise ( + ) to increase amount: counter-clockwise ( ) to decrease. The oil amount is adjusted in the range of five turns of screw (A):
Tightning for more; Loosening for less.
A
7
1 0 . O i l p u m p s u p l y a d j u s t m e n t ( F i g . 8 )
Generally no adjustment is for oil pump. When the machine is running at a low speed, observe the oil screen. If no oil splashing, close the clearance.
Adjusting plate
Standard clearance
0.5-1.0
By-pass oil hole
8
-4-
1 1 . I n s t a l l i n g t h e n e e d l e ( F i g . 9 )
Turn the balance wheel to lift the needle bar to its highest point, loosen needle set screw 1, making the needle groove turn to the left side of an operator, fully insert the needle shank up to the bottom of needle socket, then tighten needle set screw 1.
Note: Fig.12 (b) insufficient insertion
Fig.12 (c) Wrong direction of groove
Long groove leftward a
Clearance
9 c b
12.Coordination among the needle、the thread and the material (Fig.10)
The needle thread is left-twisted, the bobbin thread is left or rigth-twisted. Holding the thread, twist it with right hand in the direction of arrow shown in Fig.10, if it is tight, it is left-twisted, contrarily, it is right-twisted.
The Needle is DP X 17 or 135
X
5Nm 110 ~ 180 the needle number must be fitted for the materials.
Sewing too heavy the weight of materials. The needle would be breaking and skipping stitch and thread breaking for its too thin, if the needle is too thick, it would damage the clothes for its large needle hole.
Therefore, the selection of needle and thread must be fitted for the materials.
10
1 3 . T h r e a d i n g t h e n e e d l e t h r e a d ( F i g . 1 1 )
When threading the needle thread, raise the needle bar to its highest position, lead the thread from the spool and pass it in the order instructed (Fig.11)
(1) Lead the thread from the spool, pass down through the right side of thread guide plate
①
, to left pass up thru the middle hole of thread guide plate
①
, to left pass thru between two small tension disc and pass down the left hole of thread guide plate ① .
-5-
(2) To left pass down thru the right hole, to left up thru the middle hole and to left down thru the left hole of thread retainer
②
.
(3) Pass down thru between two tension disc
③
.
(4) To left and up pass thru the hook of thread take-up spring ④ . Turn to left pass thru underneath slack thread regulator ⑤ , then up pass thru thread guide ⑥ and up to left pass thru the hole of thread take-up lever
⑦
.
(5) Turn down to left pass thru thread guide
⑧
, pass down thru thread guard ⑨ of the needle bar bushing ( lower ) and needle bar thread guide ⑩ , then pass the thread from the left thru the eye of needle 11 , afterwards, draw out the thread from the needle eye approx 100mm.
When drawing the bobbin thread, hold the tip of the needle thread by hand, turn the balance wheel to lower the needle bar and then to lift it to its highest position. Pull the needle thread and then the bobbin thread is drawn up. Put the tips of the needle and bobbin thread toward front under the presser foot.
1 4 . W i n d i n g a d j u s t m e n t ( F i g . 1 2 )
The wound bobbin thread should be neat and tight . If not, adjust the thread tension by turning tension stud thumb nut of the bobbin winder tension bracket (A) . If the wound bobbin is not neat, tension bracket (C). can be moved to be adjusted. When adjusting, loosen screw (B) first, then move the bracket leftward or rightward if the thread is wound to one side as shown in Fig.15 (b), move the tension bracket rigtward, while if the thread is wound to one side as shown in Fig.15 ( C ) . move the tension bracket leftward until the thread is wound neatly as shown in Fig.15(a), tighten screw (B).
Note: Nylon or polyester thread should be wound with light tension. Otherwise bobbin (D) might be broken or deformed.
Don ’ t overfill the bobbin, because it make its thread loosening down from the bobbin. The optimum capacity of thread will fill about 80% of bobbin outside diameter, and this can be adjusted by stop latch screw (E).
9
10
1 a
2
11
8
5
A
B
C
1 b c d
6
4
3
D
E
11
12
-6-
1 5 . S e t t i n g t h e s t i t c h l e n g t h a n d c o n t r o l l i n g t h e r e v e r s e s e w i n g ( F i g
Stitch length can be set by turning stitch length regulating dial (A). The stitch length is longer when turning stitch length regulation dial (A) counter clockwise. And the stitch length is shorter when turning dial (A) clockwise. The figures on the stitch length regulation dial plane (B) indicate the stitch length.
Reverse sewing can be obtained when feed reverse lever (C) is depressed and forward sewing can be restored automatically when feed reverse lever ( C) is released.
A
C
B
13
1 6 . T h r e a d t a k e — u p o i l i n g ( F i g . 1 4 )
Thread take-up area adopts woolen thread oiling.
After long timi of use, function lost, so replace with a new one.
Open the face plate, remvoe the pressure screw, lock nut and presser bar.
Remove Hinge (A) and lever (B).
Draw out Oil Wick (C).
Loosen the wick fix screw on thearm top , and take out Set Plate (D).
Replate with a new one.
Installing is a reverse sequence.
D
B
A
C
14
1 7 . A d j u s t i n g t h e p r e s s u r e o f p r e s s e r f o o t ( F i g . 1 5 )
Pressure on presser foot is to be adjusted in accordance with materials to be sewn. Loosen lock nut (A) . If heavy materials to be sewn, turn pressure regulating thumb screw clockwise as shown Fig.20
(a) to increase the pressure. While light materials to be sewn, turn the pressure regulating thumb screw counter clockwise as shown in Fig.20 (b) to decrease the pressure on presser foot, then tighten lock nut
(A).
The sewing materials must be feed normaly with proper pressure of presser foot and the pressure should be decreased as possibly.
A A
a
-7b
15
18.Adjusting the thread tension (Fig.16、17) in accordance with materials thread and others.
In practice, the thread tension is adjusted according to the stitches resulted and has the normal stitches.
The needle thread tension should be adjusted with referance to the bobbin thread tension. when adjusting the bobbin thread tension, turn bobbin case tension spring screw (A) ( Fig.16 ) clockwise for more tension or turn the screw counter clockwise for less tension.
It is a common practice to check the bobbin thread tension. In case of polyester thread 14 tex
(42s), hold the end of the thread and vibrate the bobbin case up and down. If the bobbin case falls down slowly (Fig.17), the proper tension is obtained.
The needle thread tension can be adjusted by changing tension of the thread take-up spring, tension of tension disc, and the position of thread guide, all these adjustments will be described as follows.
A
B
A
16
17
19.Adjusting the thread take-up spring (Fig.18、19)
The normal sewing range of the thread take-up sprina is 5~8 mm. For sewing light weight materials (short stitch), weaken the spring tension and widen the sewing range of spring, while for sewing heavy weight materials, strengthen the spring tension and shorten the sewing range of spring.
1) Adjusting the thread take-up spring tension(Fig.18)
18
Loosen tension stud set screw (A), turn tension stud (B) clockwise to make the spring get more tension, or turn the tension stud counter clockwise
C to make the spring get less tension . After adjustment,
Be sure to tight tension stud set screw (A).
The method of adjustment:
Loosen set screw (A) first, then to turn tension stud (B) counter clockwise to reduce the tension of thread take-up spring (C) to zero, and to turn tension stud (B) clockwise until spring (C) just comes into contact with the stopper on the thread take -up spring regulator, then to further turn tension stud (B) clockwise by turn. After adjustment, tighten tension stud set screw (A).
B
A
-8-
2) Adjusting the sewing range of t hread take-up spring (Fig.19)
Loosen set screw (B), turn tension complete (C) clockwise to increase the sewing range or turn tension complete (C) counter clockwise to decrease the sewing range.
Before delivery, the thread take-up spring is properly adjusted, Readjustment is needed only in the case of sewing special materials or with special thread.
5-8mm
A
B
C
D
19
20.Adjusting the thread of needle thread & bobbin thread (Fig.20、21、22)
The position of the thread guide affects sewing quality, so it must be adjusted according to the materials to be sewn.
Leftward Center Rightward
Thread guide position
Material
Heavy
Medium Light
Fig.20 shows the various type of stitch forms.
Normal stitch form should be as shoun in Fig.
20(a). When adnormal stitches occur with pucke ring or thread breakage, the tension of needle thread and bobbin thread must be adjusted accoringly.
(a) The needle thread tension is too strong or the bobbin thread tension is too weak, turn the tension regulating thumb nut counter clockwise to make the needle thread get less tension or tighten the bobbin case tension regulating screw with small plastic screw driver to make the bobbin thread get more tension (Fig.21).
a b c d e
20
21
-9-
(b) The needle thread tension is too weak or the bobbin threal is too strong, turn the tension regulating thumb nut clockwise to make the needle thread get more tension or turn the bobbin case tension regulating screw counter clockwise with small plastic screw driver to make the bobbin thread get less tension
(Fig.22)
(c) Other abnormal stitches as shown in Fig.20
(d) .(e), adjustment can be made which reference to the above methods.
22
2 1 . T i m i n g b e t w e e n t h e n e e d l e a n d t h e r o t a t i n g h o o k ( F i g . 2 3、2 4、2 5、 2
1.Adjusting the position of needle bar
Turn the balance wheel to locate the needle bar
(C) at its lowest position, remove the rubber plug in the face plate (A), then loosen the needle bar (C) connecting stud clamping screw (B) and move the needle bar (C) vertically to locate the timing position
(The timing position of the needle bar is : when the needle bar at its lowest position, the center of needle eye (D) coincide with inside surface (E) of bobbin case bolder as shown in Fig.24). Tighten clamping screw (B), plug the rubber plug.
A
B
C
23
24
D
E
-10-
2 Adjusting rotating hook point timing with needle.
The motive relation between rotating hook and needle affects the sewing quality. Standard timing relation is : turn the balance wheel to locate needle bar to its lowest position, and lift back 2.5mm the rotating hook point (D) should be coincides with needle center line (C), and hook point (D) is 1.2mm
above the upper edge (E) of needle eye.
When adjusting the rotating hook point timing also to note the clearance between notch bottom of needle (D) and hook point (C) of approx 0.05min
must be maintained. (Fig.26)
C
D
E
D
1.2mm
2.5mm
25
26
C
B
A
0.05mm
2 2 . R e m o v i n g a n d i n s t a l l i n g t h e r o t a t i n g h o o k ( F i g . 2 7 )
Lift the needle bar to its highest position, remove the throat plate, take down the needle and the bobbin case. Loosen rotaing hook bobbin case holder plsition bracket screw (C) and take down position bracket (A), then loosen three set screws (D) of rotating hook, At this point, it took out the rotating hook, it would be obstructed by feed bar. So that turn the balance wheel first to raise the feed bar to its highest position, then take down the rotating hook slowly while to turn it to step aside of the feed bar, Installing the rotating hook can be done in reverse sequence.
The projecting flange of the position bracket (A) should be engaged in the notch (B) of the bobbin case holder, and maintain a clearance of 0.5~0.7mm
between projecting flange top and the bottom of notch while installing.
B
A
0.5-0.7mm
C
D
23.Installing feed dog (Fig.28、29)
When feed amount is at the max the front end of feed dog A is near the front of throat plate slot, the gauge between the two is 1.5mm this is the standard position of feed dog.
1.5mm
A
27
28
-11-
To adjust the position of feed dog, move feed dog to the front end of throat plate. Loosen Screw
A (See Fig.29b), move feed dog support B in the direction shown by arrow to adjust After adjustment tighten Screw A.
B
29 a
C b
A
2 4 . F e e d d o g h o r i z o n t a l A d j u s t m e n t ( F i g . 3 0 )
Feed dog is 0.8~1.2mm above the surface of throat plate horizontally.
When sewing condition requires tilting, adjust like this: loosen Screw A
Press against the slot of eccentric shaft with a screwdriver to turn eccentric shaft left and right.
Tighten Screw A.
The front of feed dog is higher, which can prevent perckering and no skipping.
The front of it is lower, which can prevent material sliding and no breakage of bobbin thread.
Mark
30
Eccentric shaft mark position
Horizontal
Above
Under
Feed dog
Standard
The front up to the max
The front down to the max
2 5 . S t i t c h l e n g t h e r r o r a d j u s t m e n t ( F i g . 3 1 )
Loosen Screw (A) and (B), take out the link pin, and loosen Screw (C) to adjust Cam (D) with a screwdriver through the crank hole.
Turn right: forward stitch length shorten reverse stitch length enlarged;
Turn left: forward stitch length enlarged reverse stitch length shorten.
D
C
31
B
A
-12-
26.Feed timing (Fig.32、33、34)
1 Standard position
Turn balance wheel to lower Feed dog A till it is horizontal with the surface B of throat plate, at the moment, the tip of needle C should be horizontal with the surfaces of throat plate and feed dog.
Adjustment can be done by adjusting the position of feed cam and feed dog lift cam.
B
A
C
32
33
2 Installing feed dog lift cam (See Fig.33)
Open the back side cover, turn balance wheel by left hand counter-clockwise, take Screw A as for standard, the center of Screw B is slightly a little lower than the center of Screw A.
3 Insatlling feed cam (See Fig.34)
Continously turn balance wheel, take screw B as for standard, the center of Screw C is slightly a little higher than the center of Screw B.
-13-
C
B
34
2 7 . A d j u s t i n g t h e t e n s i o n r e l e a s i n g m e c h a n i s m ( F i g . 3 5 )
The tension discs should be pushed apart to open when the presser foot is lifted. But the open timing of the tension discs can be adjusted as follows:
Romove face plate and the rubber plug at rear side of arm and loosen screw (A) of the knee lifting lever
(left), then the tension releasing cam can be moved leftward or rightward when the cam is moved rightward, it is later to open, otherwise it is earlier to open.
Left
Right
35
D
28.Adjusting feed timing of needle bar, Presser foot and feed dog (Fig.36、37)
(A) Lift presser foot, make the stitch length to the maximum, turn balance wheel slowly to lower needle down into hole of feed dog, observe whether needle is at the center of feed dog hole or not.
A
B
C
Forward
B
Needle
(B) Keep on turning balance wheel, move the needle forward a stitch lengty. If the needle is at position B, shows timing feed of the three; if at A, indicates the feed amount of needldbar and presser foot is larger than that of feed dog, then reduce L; if at C, indicates the feed amount of needle bar and presser foot is smaller than that of feed dog, ten enlarge L till the needle arrives at B.
36
37
-14-
2 9 . A d j u s t i n g p r e s s e r f o o t a l t e r n a t e l i f t m e c h a n i s m ( F i g . 3 8 )
The alternate lift mechanism can be adjusted according to the nature of material in a certain range.
Of common heavy and medium sewing machine, the presser foot lift amount is about 2.5mm and that of the follow presser foot is within 5mm. The presser foot lift amount increase then the follow foot amount reduce; the presser foot lift amount reduce, then the follow foot lift amount increase.
According to the sewing process, to increase the presser foot lift amount and reduce the follow foot lift amount, loosen the screw for crank and turn down the crank slot with referance to the presser foot lift shaft, otherwise turn up. The adjustment is limited in a range and not too.
Above
Under
38
30.Adjusting the lift amount of presser foot with the follow presser foot (Fig
Loosen nut, then adjust the center distance B between the presser foot lift shaft and the screw of the nut. To increase the lift amount of the both feet, then reduce B; on the countrary, the lift amount wil be reduced. The adjustment is limited in a range and not too large. After the adjustment, tighten the nut.
39
C
Above
Under
-15-
31.Adjusting the clearance between presser foot and follow presser foot (Fig.4
In sewing operation, for prevent the follow presser foot from striking on presser foot at the end of feeding, a proper clearance C of approx. 1mm should be maintained between them.
When the clearance is too small or too big necessary to adjust, loosen the crank clampin screw and turn down the needle bar shaft, then the follow presser foot move near the presser bar, and note the needle and the needle hole center ofeed dog, see the figure if the needle is off the hole center, then loosen feed crank set screw, move the feed dog to the right position. After the adjustment, tighten the set screw. For the right and left position, to loosen screw (A) to obtain.
C
Up
40
Down
31.Periodical cleaning (Fig.41、42、43)
Clean the feed dog the rotating hook, the bobbin case, the oil pump filter screen and the like perodically according to customer s usage.
1.Cleaning the feed dog
Remove the throat plate, clean off all the dust and lint on the slit of the feed dog , the installing the throat plate.
41
A
42
2 Cleaning the rotating hook
Clean off all the dust around the rotating hook, and clean the bobbin case with soft cloth.
A
43
3 Cleaning the oil pump filter screen (Fig.46)
Take off the oil filter, clean off the dust of filter screen with gasoline.
A
-16-
1
1.Arm and bed
38
5
8
6
7
36
40
38 39
21
7
14 13
51 52
50 49 12
11
35
10
53
10 34
35
36
42
41
9
8
44
46
45
44
30
1
4
22
31
27
26
25
32
24
48
47
3
37
2
19
20
15
16
17 18
33
29
28
23
-17-
No.
38
39
40
41
42
43
44
45
32
33
34
35
36
37
46
47
48
49
50
51
52
53
27
28
29
30
31
21
22
23
24
25
26
13
14
15
16
17
18
19
20
9
10
11
12
3
4
5
1
2
6
7
8
Part number
6WF4-001
4WF1-001
6WF1-002
35T4-402a
22T1-003C2
22T1-003C3
22T1-003C4
22T1-003C5
22T1-003C6
22T1-004
22T1-004H
36T2-004
36T2-005
36T2-006D
36T2-006D1
36T2-006D2
22T1-009E3
36T2-006D3
36T2-006D4
22T1-011
22T1-012F
22T1-012F1
22T1-012F2
22T1-012F3
22T1-012F4
22T1-012F5
22T1-012F6
22T1-012F7
22T1-012F8
22T1-012F9
22T1-012F10
22T1-012F11
22T1-013
22T1-014
22T1-015
22T1-016
22T1-017
33T4-007
22T2-004
4WF-006
22T2-020
61-04-01/B7/Z1
61-04-01/B7/Z102
61-04-01/B7/Z103
22T1-021G1
4WF4-007
5WF3-002A
22T1-005D2
22T1-006
22T1-007
35T4-405
Name
Arm
Bed
Trade Mark
Rivet
Face Plate
Gasket For Face Plate
Rubber Plug ( Φ 19)
Rubber Plug
Rubber Plug
Thread Finger
Screw
Screw
Oil Screen Complete
Tree-eye Finger
Screw
Thread Tension Complete
Thread Pass-by Plate
Screw
Tension Disc
Spring
Nut
Set Screw
Thread Tension Complete
Screw
Nut
Spring
Thread Releasing Plate
Thread Tension Disc
Thread Take-up Spring
Thread Tension Adjusting Bracket
Screw
Thread Releasing Pin
Stopping plate
O-type Ring
Set Screw
Thread Finger
Rubber Plug ( Φ 8.8)
Rubber Plug ( Φ 2.7)
Rubber Plug (
Φ
5.7)
Thread Take-up Lever Guard
Screw
Throat Plate
Screw
Sliding Plate Complete
Spring
Screw
Sliding Plate
Bed Leg
Washer
Back Side Cover Complete
Seal Gasket
Screw
Washer
Thread Finger
-18-
Qt.
1
1
1
1
1
1
1
1
1
2
1
1
1
3
2
1
1
1
1
1
1
3
1
1
1
2
3
3
1
1
2
1
7
1
1
7
1
2
1
2
1
1
2
2
1
1
1
1
1
1
1
1
2
1
Remark
2.Needle bar and thread take-up Arm shaft and vertical shaft
2
-19-
No.
28
29
30
31
23
24
25
26
27
19
20
21
22
15
16
17
18
36
37
38
32
33
34
35
12
13
14
10
11
8
9
6
7
4
5
1
2
3
Part number
4WF1-001A
22T3-001A2
22T3-002B1
22T3-002B2
33T1-007D1
4WF1-002
J0.0.40
22T3-005
22T3-006F
22T3-007C1
22T3-007C2
36T3-003D1
36T3-003D2
36T3-004
22T3-09D1C
22T3-010E1
22T3-010E2a1-2
22T3-010E2a2-2
22T2-005B3
22T3-010E2b1-2
22T3-010E2b2-2
4WF1-003A
33T1-023P
33T1-023A
J0.0.40
33T1-002
33T1-006C1
33T1-006C3
22T2-005B3
33T1-006C2
61-04-01/B2
33T1-001
22T2-001A6
130032
33T1-017
22T2-015
22T2-016
22T2-017
Name
Arm Shaft
Rubber Plug Φ 7.4~10
Colla r
Screw
Front Bushing
Middle Bushing
Screw
Rear Bushing
Oil Seal Complete
Balance Wheel
Screw
Feed Dog Lift Cam
Screw
Seperating Piece For Cam
Link
Vertical Shaft
Bever Gear
Vertical Shaft Bevel Gear (upper)
Screw
Rock Shaft Bever Gear
Vertical Shaft Bevel Gear (lower)
Vertical Shaft Bushing (upper) Complete
Vertical Shaft Bushing (lower) Complete
Tread Take Lever Complete
Screw
Hinge Pin
Needle Bar Crank
Screw
Set Screw
Screw
Set Screw
Thread Take-up Crank
Screw
Needle Bar Adaptor
Needle Bar
Thread Finger
Needle
Screw
Qt.
1
1
1
1
1
1
1
1
1
1
1
1
1
1
1
1
1
1
1
1
1
1
1
8
1
2
1
3
1
1
1
3
1
1
1
2
1
2
Remark
-20-
3.Feed dog lift and feed and thread looping
3
-21-
No.
41
42
43
44
45
46
47
48
35
36
37
38
39
40
49
50
51
52
53
54
30
31
32
33
34
24
25
26
27
28
29
16
17
18
19
20
21
22
23
10
11
12
13
14
15
5
6
7
8
9
1
2
3
4
Part number
35T2-201
36T4-001AIa
51T5-001AIb
36T4-001A2
J0.051
4WF2-002
J0.0.71
22T2-019
36T4-002
22T6-004
22T6-005B1
22T3-002B2
4WF2-006
36T5-004H01
36T5-008E5
22T6-08D3
33T1-028R
33T1-028R
33T1-027
33T1-018J
33T1-018J3
36T4-008D1
22T4-001A1a1
22T4-001A1a2
22T4-003
4WF1-05
22T4-005
22T4-006
22T4-002B1
J0.0.35
4WF1-004
22T4-007C2
36T4-015
36T4-016
36T4-010
22T8-009
22T6-007
4WF2-003
J0.0.71
22T6-012
22T6-013
36T4-018H101
36T4-018H2
36T1-029
22T4-015
J0.0.35
22T1-013
J0.0.40
22T6-005B1
22T3-002B2
22T6-008D4
Name
Feed Dog
Feed Dog Support Complete
Washer
Eccentric Shaft
Screw
Feed Dog Suppout Crank
Screw
Screw
Feed Shaft
Stop Ring
Bushing
Collar
Screw
Feed Shaft Rear Crank
Link Pin
Screw
Tension Screw
Bobbin Case Complete
Bobbin
Hook Complete
Hook Screw
Rock Shatf
Screw
Plug
Oil Seal
Front Bushing
Screw
Spring
Collar
Screw
Rear Bushing
Oil Tube
Plunge
Spring
Stopper
Washer
Screw
Hinge Pin
Feed Dog Lift Near Crank
Screw
Feed Dog Lift Shaft Front Bushing
Washer
Feed Dog Lift Fork
Feed Dog Lift Shaft
Hook Set Bracket
Screw
Screw
Screw
Screw
Collar
Screw
Stop Ring
Screw
Oil Wick
-22-
Qt.
1
1
1
1
1
1
1
1
1
1
2
1
1
1
1
1
1
1
1
1
2
1
1
1
1
1
1
1
1
1
1
1
1
3
1
1
1
1
1
2
1
1
1
1
1
2
1
2
1
1
1
1
1
1
Remark
4.Feed adjustment
4
27
28
31
23
24
21
7
6
5
20
19
26
44
25
45
8
22
10
2
4
10
6
16
17
18
15
14
29
32
34
13
33
35
43
42
39
36
37
40
41
38
9
12
11
4
2
3
30
1
-23-
No.
29
30
31
32
25
26
27
28
21
22
23
24
17
18
19
20
12
13
14
15
16
8
9
10
11
6
7
4
5
1
2
3
37
38
39
40
33
34
35
36
41
42
43
44
45
Part number
36T5-001
4WF2-005
22T6-008D3
22T5-010D4
5WF1-003
22T5-004
36T5-003
J0.0.40
36T5-004B1
22T5-012E10
22T5-012E2
22T5-013
4WF2-007A
22T5-010D2a
22T2-010D2b
22T-010D3
17T5-016
17T5-017
36T5-007D1
22T5-006C4
36T5-007D2
4WF2-004A
36T5-007D4
36T5-007D5
36T5-012
22T5-009
36T3-003D2
36T5-008E1
4WF2-009A
4WF2-009B
36T4-004H02
36T5-008E4H02
36T5-008E5
36T5-008E4H01
36T5-008E6
36T5-008E7
36T5-008E8
36T5-008E9
36T5-008E10
5WF1-002
22T6-008D3
5WF1-001
22T5-008D3
36T5-010
36T5-011
Name
Link Pin
Stitch Length Bracket
Screw
Screw
Bushing
Shaft For Stitch Length Bracket
Rubber Plug
Set Screw
Reverse Feed Lever Crank
Shaft For Block
Spring
Screw
Reverse Feed Lever
Pin Shaft
O-type Ring
Tension Screw
Set Screw
Screw
Screw Bolt For Stitch Length
O-type Rubber Ring
Dial Cup
Dial Face
Screw Bushing
Screw
Stop Pin
SD Pring
Screw
Feed Cam
Feed Link
Stitch Adjusting Link
Pin
Link
Screw
Link
Pin For Link
Screw
Screw
Link Eccentric Shaft
Stitch Length Adjusting Crank
Set Pin (left)
Screw
Set Pin (right)
Screw
Push Lever
Spring
-24-
Qt.
1
1
1
1
1
3
1
1
1
1
1
1
1
1
1
1
1
1
1
1
1
1
1
1
1
1
1
1
1
1
1
1
1
1
1
1
1
1
1
1
1
2
1
2
1
Remark
5.Presser foot
5
-25-
No.
21
22
23
24
18
19
20
25
26
27
14
15
16
17
9
10
11
12
13
7
8
5
6
1
2
3
4
Part number
33T3-003
22T7-001A2
4WF3-001
22T7-004B1
22T7-004B1a
22T7-004B1b
22T7-004B1c
22T7-004B2
22T7-004B3
22T7-005A
22T7-006
22T7-007C1
22T7-007C2
4WF3-001
22T7-008
22T7-005B
35T3-303
35T3-302
35T3-301
J0.0.40
22T2-013
34T3-302
34T3-301
22T7-014E2
22T7-015
35T3-304
Name
Presser Foot Lift Bar
Screw
Presser Bar Lever Cam
Oil Seal
Knee Lifter Lever (left) Complete
Lever (left )
Thread Releasing Cam
Screw
Screw
Knee Lifter Drawing Bar
Screw
Tread Releasing Lever
Knee Lifter Lever (right)
Spring
Connecting Rod
Pin
Screw
Bushing For Presser Bar
Presser Bar
Presser Block For Presser Bar
Screw
Screw
Spring
Screw
Nut
Screw
Presser Foot
Qt.
1
1
2
1
1
1
1
1
1
1
1
1
1
1
2
1
2
1
1
1
1
1
1
1
1
1
1
Remark
-26-
6.Upper feed
6
36
-27-
6 、 Upper Feed Parts
No.
24
25
26
27
18
19
30
31
32
15
16
17
18
19
20
21
22
23
8
9
10
11
12
13
14
3
4
5
1
2
6
7
40
41
42
43
44
45
46
33
34
35
36
37
38
39
47
48
49
50
51
52
53
54
55
56
57
58
Part number
34T5-501
35T5-503
34T5-503
35T5-501
J0.0.40
35T5-504
35T5-505
35T5-507
35T5-508
6WF5-002
33T1-013
34T5-507
22T2-019
35T5-511
6WF5-001
34T5-518
34T5-519
34T5-520
34T5-516
01/B602
34T5-521
34T5-538a
34T5-517
34T5-540
J0.0.35
34T5-536c
34T5-536b
34T5-536a
34T5-537
34T5-522
34T5-535
34T5-534
34T5-513b
34T5-506
34T5-506
35T3-301
34T5-527
34T5-539
17T4-002
34T5-523
61-04-01/B06
34T5-538b
34T5-538c
34T5-532
22T3-002B2
34T5-533
34T5-541
34T5-531
34T5-529
34T5-530
35T5-512
35T5-502
22T2-004
5WF4-003
36T5-008E3
J0.0.71
5WF4-001
5WF4-004
Name
Oil Felt
Screw
Nut
Spring
Screw
Shaft For Needle Bar Motion Bracket
Reel For Spring
Link
Adaptor
Slot For Sliding Block
Sliding Block
Screw
Screw
Guide Rail
Needle Bar Motion Bracket
Nut
Washer
Link For Eccentric
Presser Foot Lift Eccentric
Screw
Washer
Rear Bushing
Rear Crank
Screw
Screw
Cotton Rope
Oil Felt
Front Bushing
Shaft
Screw
Front Crabnk
Link
Screw
Plate For Presser Foot Lift
Nut
Set Block
Screw
Needle Bar Motion Shaft
Screw
Rear Crank
Nut
Oil Felt
Cotton Rope
Collar
Screw
Front Crank
Screw
Sliding Block Complete
Fork Lever
Pin
Link
Follow Presser Foot
Screw
Link
Screw
Screw
Connecting Pin
Feed Shaft Crank
-28-
Qt.
2
2
2
3
5
1
1
1
1
1
1
1
1
2
2
1
2
1
1
3
4
1
1
1
1
1
1
1
1
1
1
1
2
1
2
1
1
1
2
2
1
1
1
1
1
1
1
1
1
1
1
1
1
1
1
1
1
1
Remark
7.Oil pump
7
12
11
16
14
15
-29-
10
7 、 Oil Pump
No.
14
15
16
9
10
11
12
13
7
8
5
6
1
2
3
4
Part number
22T8-001
22T8-002
22T8-003
22T8-004
22T8-006
22T8-007
22T8-008A
22T8-009
22T8-010B
22T8-11C
22T8-012
22T8-013D
22T8-014
22T8-015
22T8-016
Name
Oil Pump
Screw
Screw
Screw
Washer
Cover For Oil Pump
Adjusting Plate For Oil Pump
Filter Complete
Screw
Oil Pipe
Oil Wick Set Plate Complete
Screw
Oil Pipe
Oil Return Pipe
Oil Felt
Pipe Clamp
Qt.
1
1
1
1
2
1
1
1
1
1
1
1
1
1
1
3
Remark
-30-
8.Oil reservoir and accessories
8
25
36
39
26
28
38
34
31
32
40
41
35
29
24
11
30
27
2
3
4
37
33
1
5
8
9
7
19
18
10
6
14
17
15
16
13
12
-31-
22
21
23
20
No.
30
31
32
33
34
26
27
28
29
.39
40
41
35
36
37
38
13
14
15
16
17
9
10
11
12
5
6
7
8
3
4
1
2
22
23
24
25
18
19
20
21
33TF-013
33TF-014
33TF-015
Part number
4WF5-001
22T9-001A2
22T9-001A3
2KT9-008
22T9-001A6
22T9-001A7
22T9-001A8
22T9-001A9
22T9-001A10
22T3-007C2
22T9-003B1
22T9-003B3
22T9-003B4
22T9-003B2
22T9-003B5
22T9-003B6
22T9-003B7
22T9-003B8
33TF-021
S14420020
GJX-2
22T9-017
22T9-013
22T9-012
22T9-009
22T9-010
33T1-002
22T9-007F2
33T1-027
Name
Oil Reservoir
Screw
Washer
Gasket
Hinge Pin
Spring
Knee Lifter Stop Bracket
Screw
Nut
Screw
Knee Lifter Prop Bar
Connector
Screw
Bent Rod
Bell
Bell Bracket
Screw
Pat
Split Stop Ring
Belt Guard Complete
Screw
Washer
Screw
Thread Winder Complete
Spool Stand Complete
Oil Tank
Magnet
Oil Pot
CUSHION
CUSHION
Hinge
Rubber Coat
Parts Bag
Bobbin
V-type Belt
Needle
Screwdriver (big)
Screwdriver
Screwdriver (small)
Wood Screw
Washer
-32-
Qt.
2
1
5
2
2
1
2
1
1
1
1 Pack
1
1
1
4
2
1
1
1
2
1
1
1
2
1
1
1
1
2
2
1
1
2
2
2
1
1
1
2
1
1
Remark
GC6-7D
This machine may only be operated by adequately trained operators only after having completely read and understood the instruction manual.
Parts are subject to changes in design without prior notice.
Certifi cate of the international ISO9001
Certifi cate of the
ISO14001
Certifi cate of the international CE
Certifi cate for
Ecolabelling Product
Certifi cate for Energy
Conservation Product
XI´AN TYPICAL EUROPE GmbH
Hertelsbrunnenring 9
D-67657 Kaiserslautern
Tel.: +49 (0)631 316019-0
Fax: +49 (0)631 316019-11
E-mail: [email protected]
www.typical-europe.com
Similar to typical GC6-7D Manuals, User Guides and Instructions:
-
Singer Athena
11. Un appareil ne devrait jamais être laissé sans surveillance lorsqu’il est branché. Débranchez toujours l’appareil de la prise externe de courant immédiatement après usage et avant le nettoyage.Lorsqu’un appareil électrique est en usage, il faut toujours observer certaines mesures élémentaires de sé …
Athena Sewing Machine, 68
-
Garudan GF-1130-4412 MH
User Manual GF-1130-4412 MH GF-2230-4412 MH ANITA B s.r.o. Průmyslová 2453/7 680 01 Boskovice Czech republic tel: +420 516 454 774 +420 516 453 496 fax: +420 516 452 751 e-mail: [email protected] MP04800EN,MP04900EN_200204 …
GF-1130-4412 MH Sewing Machine, 71
-
Minerva Boskovice 1183i-7
Instruction manual1183i — 7Minerva Boskovice, a.s., Sokolská 60, CZ — 680 17 BoskoviceTel.: +420-516-453434, 453433, 494111 Fax: +420-516-452165 http://www.minerva-boskovice.comEdition/Vydáno/Herausgegeben/Edition/Editado: 04/2010 Printed/Tisk/Druck/Imprimé/Impressão: Czech Repub …
1183i-7 Sewing Machine, 38
-
Brother XL5000
Step 3Winding the bobbin. (Your machine may be supplied with a fully woundbobbin, but you may want to fill another bobbin with your own thread.)Step 4Lower threading. (Your machine may be supplied with a threaded bobbin,but you may want to use another bobbin with your own thread.)• Set the power switch to on (I).Plac …
XL5000 Sewing Machine, 2