ИГРА A350 Trail Camera

- В КОРОБКЕ
1 x Камера, - 1 х крепежный ремень,
- 1 х Руководство по эксплуатации,
- 1 х мини-USB-кабель
Примечание: Карта памяти и батарейки в комплект не входят (приобретаются пользователем).
ВАЖНО
- Требуется восемь (8) щелочных или литиевых батарей 1.5 В AA. Мы рекомендуем использовать в этой камере литиевые батареи Energizer AA, чтобы продлить срок службы батареи.
- Не смешивайте старые и новые батарейки.
- Не смешивайте типы батарей.
- Не рекомендуется использовать перезаряжаемые батареи NiMH AA, так как они имеют меньшую емкость.tage (обычно 1.2 В), которые они производят, может вызвать проблемы в работе.
- Извлекайте батареи, когда камера НЕ используется.
- Требуется обычная карта памяти SD (максимальная емкость 512 ГБ, класс 10). Мы рекомендуем использовать в камере карты памяти SanDisk SDHC/Class32 емкостью 10 ГБ, чтобы получить наилучшее соотношение цены и качества.
- Перед использованием аккуратно снимите защитные пленки с передней панели камеры, чтобы получить наилучшую производительность, отформатируйте SD-карту в камере.
ВВЕДЕНИЕ
О КАМЕРЕ
Следовая камера A350 — это цифровая разведывательная камера нового поколения. Она может срабатывать при любом движении дичи в локации, обнаруживаться высокочувствительным пассивным инфракрасным (PIR) датчиком движения, а затем делать снимки высокого качества (до 32-мегапиксельные фотографии) или видеоклипы 1296P H.264 со звуком.
В камере реализована новая инновационная и сверхчеткая технология обработки изображений. Камера включает в себя все новые программные инновации, технологию интеллектуального освещения, технологию уменьшения размытости, автоматическое шумоподавление и технологию динамической экспозиции для обеспечения качества изображения с высоким разрешением.
ОСНОВНЫЕ ХАРАКТЕРИСТИКИ
- Высококачественные изображения (фотографии до 32 МП), видеоклипы 1296P 20 кадров в секунду или 1080P 30 кадров в секунду H.264 со звуком
- Четкое ночное видение, дальность вспышки 100 футов. Камера оснащена 36 высокопроизводительными инфракрасными светодиодами без свечения 940 нм, которые работают как вспышка, невидимая для глаз.
- Широкий view угол – 70°
- Прост в использовании благодаря продуманным кнопкам управления и встроенному 2.4-дюймовому цветному экрану, легкоview фото и видео на экране
- Два режима работы — обнаружение движения и таймлапс
- Быстрое время срабатывания ок. 0.1 ~ 0.6 секунды (предварительно активированная технология с 3 датчиками PIR), быстрое время восстановления менее 0.5 секунды, большое расстояние срабатывания до 90 футов.
- Информационная полоса на каждом снимке: дата, время, температура и фаза луны.
- Часы работы, Циклическая запись, Защита паролем
- Создан для любого климата — водонепроницаемый IP66, предназначенный для использования вне помещений и устойчивый к дождю и снегу. Рабочая температура: -4~140°F
- Поддержка карт памяти SD/SDHC/SDXC, максимальная емкость 512 ГБ (предоставляется пользователем)
- Чрезвычайно долгий срок службы батареи в полевых условиях до 8 месяцев в режиме ожидания с 8 батареями AA 1.5 В (приобретаются пользователем)
ПРИМЕНЕНИЕ
Камеру можно использовать следующим образом:
- Для охоты и отслеживания следов или привычек животных
- Для наблюдения и исследования дикой природы, захватывает фотографии и видео диких животных
- Как спортивная камера, для верховой езды, вождения, campили исследуя
- В качестве камеры безопасности, срабатывающей по движению, для дома, фермы, офиса и сообщества.
- Любое другое внутреннее и наружное наблюдение, где необходимы доказательства вторжения
ЧАСТИ И УПРАВЛЕНИЕ
Камера оснащена 36 высокоэффективными инфракрасными светодиодами, светодиодными индикаторами, объективом, датчиками PIR, отверстиями для блокировки спереди. view (Рис. 1).
НАКОНЕЧНИК: Во время использования, если черная линза PIR загрязняется, это не влияет на производительность. Если вам необходимо почистить его, попробуйте сдуть его или слегка удалить грязь. Не пытайтесь протереть его, это может привести к новым царапинам. Благодаря надежной конструкции линзы PIR царапины не снижают эффективность обнаружения PIR.
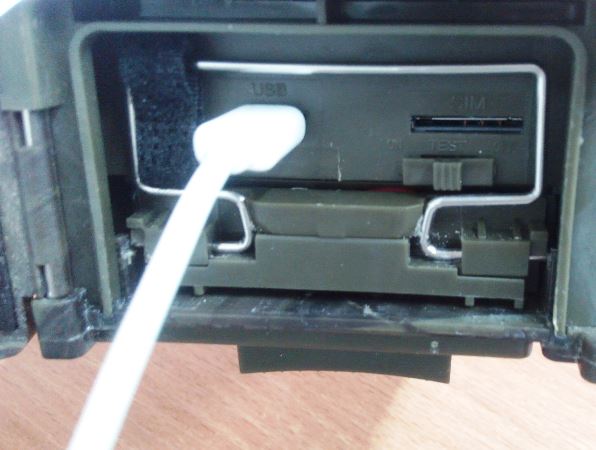
 Камера обеспечивает следующие подключения для внешних устройств: порт мини-USB, слот для SD-карты и т. д. (Рисунок 2).
  Камера имеет одно отверстие для троса безопасности и два отверстия для ремешка на задней панели. Ремешок можно продеть через отверстия для ремешка и надежно закрепить вокруг ствола дерева, сильно потянув за конец ремешка (Рисунок 3).
 Камера имеет 2.4-дюймовый встроенный ЖК-экран, который можно использовать для реviewизображения или видео и отображение меню, а также эксклюзивный дизайн клавиатуры для простоты программирования и работы, поддержка 8 слотов для батареек типа АА (рис. 4).
 Выключатель питания используется для включения (режим ON) или выключения камеры (режим OFF). Кнопка СТАРТ используется для быстрого перевода камеры в режим наблюдения (обнаружение движения или интервальная съемка в соответствии с вашими настройками (рис. 5). Когда камера находится в режиме наблюдения, нажмите кнопку СТАРТ, чтобы разбудить камеру.
УСТАНОВКА БАТАРЕЙ И КАРТЫ SD
Прежде чем вы начнете учиться пользоваться камерой, вам сначала необходимо установить комплект батарей и вставить SD-карту. Хотя это может занять у вас всего минуту, есть несколько важных замечаний об аккумуляторах и SD-картах, о которых вам следует знать, поэтому, пожалуйста, найдите время, чтобы прочитать следующие указания и предостережения:
ЗАГРУЗКА БАТАРЕЙ
Открыв крышку батарейного отсека, вы увидите, что камера имеет восемь слотов для батареек (Рисунок 6). Для работы камеры необходимо установить полные восемь батарей. Обязательно вставляйте каждую батарею с соблюдением полярности (отрицательный или «плоский» конец против длинной пружины каждого батарейного отсека).
В режиме ON, когда уровень заряда батареи становится низким, на экране отображается сообщение «Низкий заряд батареи», замените батареи. Если индикатор батареи светится КРАСНЫМ цветом, это означает, что батареи не могут управлять ИК-светодиодами ночью, однако батареи продолжают работать днем до тех пор, пока не появится сообщение «Низкий заряд батареи». Если вы хотите продолжить ночное видение, замените батарейки.  ВСТАВКА SD-КАРТЫ
Вставьте SD-карту (при выключенной камере) перед началом эксплуатации камеры. Не вставляйте и не извлекайте SD-карту, когда камера включена или находится в режиме наблюдения. (Рисунок 7). Ниже описано, как вставлять и извлекать SD-карту:
- Вставьте SD-карту в слот для карты стороной с этикеткой вверх. Звук «щелчка» означает, что карта установлена успешно. Если изнаночная сторона карты обращена вверх, вы не сможете вставить ее без силы, есть только один правильный способ вставки карты. Если SD-карта установлена неправильно, устройство не будет отображать значок SD-карты на экране во включенном режиме. Перед первым использованием рекомендуется отформатировать SD-карту с помощью пункта меню камеры «Форматировать SD-карту», особенно если карта уже использовалась в других устройствах.
- Чтобы вынуть SD-карту, просто аккуратно нажмите на карту (не пытайтесь вытащить ее, не надавив сначала). Карта выйдет из слота и будет готова к извлечению, когда вы услышите щелчок. Убедитесь, что питание камеры выключено, прежде чем вставлять или извлекать SD-карты или батареи.
ИСПОЛЬЗОВАНИЕ КАМЕРЫ
После того, как вы подготовили свою камеру, правильно установив батареи и SD-карту, вы можете просто вынести ее на улицу, привязать к дереву (или не привязывать — в зависимости от вашего сценария применения), включить ее, нажать кнопку СТАРТ и уйти. вы можете получить отличные фотографии, которые именно то, что вы хотели. Тем не менее, мы настоятельно рекомендуем вам сначала провести дополнительное время в помещении с этим руководством и вашей камерой, пока вы не узнаете немного больше о том, что делают эти клавиши управления. Если ничего другого, вы, вероятно, захотите хотя бы установить дату и время, чтобы камера запечатлела их (или нет — это ваш выбор) на ваших фотографиях по мере их съемки, узнайте, как вместо этого настроить камеру на съемку видеоклипов. фотографий, если хотите, и прочтите несколько советов по установке на дерево.
ВЫКЛ., ВКЛ. И РЕЖИМЫ НАБЛЮДЕНИЯ
Камера имеет три основных режима работы:
- Режим OFF: выключатель питания в положении OFF (камера выключена).
- Режим ON: выключатель питания в положении ON (камера включена, и ее экран включен).
- Режим НАБЛЮДЕНИЯ: Когда камера включена, нажмите кнопку СТАРТ, чтобы войти в режим наблюдения. Когда экран выключен, камера переходит в режим ожидания и будет работать в соответствии с вашими настройками.
ВЫКЛЮЧЕННЫЙ РЕЖИМ
Режим OFF — это «безопасный» режим, когда необходимо предпринять какие-либо действия, например, заменить SD-карту или батареи или транспортировать устройство. И, конечно же, когда вы храните камеру или не используете ее, вы выключите ее. Обратите внимание, что в выключенном режиме камера потребляет мало энергии. Рекомендуется вынимать батарейки из батарейного отсека, если камера не будет использоваться в течение длительного времени.
В РЕЖИМЕ
В режиме ON вы можете проверять и изменять настройки камеры с помощью встроенного в нее экрана. Эти настройки, которые можно найти в меню при нажатии клавиши МЕНЮ, позволяют изменить разрешение фото или видео, интервал между фотографиями, включить отпечаток времени и т. д. (подробнее см. в разделе 8 ДОПОЛНИТЕЛЬНЫЕ НАСТРОЙКИ).
На экране дисплея вы увидите информационный экран, который показывает, сколько изображений было сделано, уровень заряда батареи, режим камеры или видео и т. д.
Внимание: В режиме ON камера автоматически переходит в режим НАБЛЮДЕНИЯ, если в течение 5 минут не выполняется никаких действий (нажатие клавиш). Тогда камера выполнит ваши настройки в меню.
В режиме ON вы можете подключить камеру к USB-порту компьютера для загрузки изображений.
РЕЖИМ НАБЛЮДЕНИЯ
В любое время после установки батарей и SD-карты вы можете включить камеру. При нажатии кнопки СТАРТ камера перейдет в режим НАБЛЮДЕНИЯ. Если режим в настройках установлен как «Детектор движения», камера будет отсчитывать 30-секундную задержку, а затем будет готова к съемке изображений.
Если режим установлен как «Замедленная съемка», 30-секундный обратный отсчет не будет, и камера будет готова к переходу в режим «Замедленная съемка».
В режиме НАБЛЮДЕНИЯ ручное управление не требуется или невозможно (клавиши управления не действуют). Камера будет снимать фото или видео автоматически (в соответствии с текущими настройками параметров).
Вы можете снова нажать кнопку СТАРТ, чтобы разбудить камеру и при необходимости перепрограммировать камеру.
РАСШИРЕННЫЕ НАСТРОЙКИ
Камера следа поставляется с предустановленными заводскими настройками. Вы можете изменить настройки в соответствии с вашими требованиями. Когда экран камеры включен, нажмите кнопку MENU, чтобы войти/выйти из меню.
Нажмите клавишу ВВЕРХ/ВНИЗ, чтобы переместить маркер, нажмите клавишу ВЛЕВО/ВПРАВО, чтобы изменить настройку, и нажмите клавишу OK, чтобы подтвердить изменение. Всегда не забывайте нажимать OK, чтобы сохранить изменения. В противном случае вы потеряете новую настройку.
|
Параметр |
Настройки
(Жирный = по умолчанию) |
Описание |
|
режим |
Определение движения, Промежуток времени |
In Определение движения режиме камера будет снимать фотографии или видео после срабатывания. В Длительная В этом режиме камера будет периодически снимать фотографии или видео в соответствии с заданным вами параметром «Timelapse Interval». |
|
Фото или видео |
Фото, Видео, Фото+
Видео |
Выберите, будут ли сниматься фотографии или видеоклипы. |
|
Качество фото |
32MP
24MP 16MP 8MP 4MP |
Выберите желаемое разрешение для фотографий. Чем выше разрешение, тем лучше качество фотографий, но больше размер. files, которые занимают больше места на SD-карте. Больше fileДля записи на SD-карту требуется больше времени, что немного замедляет скорость затвора. |
| Фото
Съемка |
01, 02, 03,
04, 05 |
Выберите количество фотографий, сделанных в
последовательность на триггер. |
|
Качество видео |
1296P
1080P 720P |
Выберите разрешение видео (пикселей на кадр). Чем выше разрешение, тем лучше качество видео, но больше fileэто берет
больше емкости SD-карты. |
| Продолжительность видео | 10
секунды, По желанию |
Выберите продолжительность видеозаписи.
Примечание. Настоятельно рекомендуется установить продолжительность ночного видео менее 30 секунд. |
| от 3с до 5м | так как ИК-светодиоды будут потреблять больше энергии аккумулятора. | |
| Видео звук | On
от |
Выбор On будет записывать видео со звуком. |
|
Формат видео |
MP4 MOV |
MP4 — это основной формат в видеоиндустрии, более совместимый с любым плеером. Выберите MOV, если какой-либо устаревший цифровой
программное обеспечение камеры должно работать с видео в формате MOV. |
|
Задержка обнаружения |
10 секунды, опционально от 0 с до 60 м |
Выберите самый короткий период времени, в течение которого камера будет ждать, пока она не ответит на любые последующие триггеры от датчика PIR после первого обнаружения игры. В течение выбранного интервала камера не будет снимать / снимать видео. Это предотвращает заполнение SD-карты слишком большим количеством избыточных изображений.
Примечание. Этот параметр недействителен, если режим установлен как «Замедленная съемка». |
|
ПИР чувствительность |
High, Средний Низкий |
Выберите чувствительность датчика PIR. Температура влияет на чувствительность. Настройка «Высокая» подходит, когда температура окружающей среды теплая или вы хотите запечатлеть удаленный объект или захватить больше, а настройка «Средняя/Низкая» полезна в холодную погоду. Примечание: эта опция недействительна, если
режим установлен как «Замедленная съемка». |
|
Датчики бокового движения |
Вкл выкл |
Выбор On активирует боковые датчики движения. Он обеспечивает более высокую скорость срабатывания и помогает захватывать быстро движущихся животных. Когда любой из двух боковых датчиков движения обнаруживает
событие движения, камера будет |
| предварительно активированный. Когда животное входит в зону обнаружения центрального датчика движения, камера начинает делать фотографии или
ролики. Выбирать от для экономии заряда батарей. |
||
| Тест движения | Эта функция помогает вам направить камеру на целевую область. Пожалуйста, обратитесь к деталям
в разделе 9.2. |
|
|
Интервал таймлапса |
1 час, опционально от 2с до 24ч |
Установка временного интервала. Вступает в силу ТОЛЬКО когда режим установлено значение Time Lapse, камера будет автоматически снимать фото/видео в соответствии с установленным интервалом, независимо от того, обнаружил ли датчик PIR какую-либо игру. Это полезно при наблюдении за хладнокровными животными, такими как змеи, за процессом цветения и т. д.
Примечание. Этот параметр недействителен, если режим установлен как «Детектор движения». |
|
Дата / время |
М/Д/Г чч:мм AM/PM |
М – Месяц, Д – День, Г – Год чч – Часы, мм – Минуты
Примечание. Используйте «ЛЕВО ПРАВО” для переключения параметров, используйте “ВВЕРХ / ВНИЗ», чтобы установить текущую дату и время. Формат ввода даты может поменяться. Пожалуйста, обратитесь к «Формат даты» настройки параметров соответственно. |
| Формат даты | Д/М/Г
М/Д/Г Г / М / Д |
Выберите формат даты, который будет отображаться на экране и для каждого снимка. |
| Формат времени | 12h
24h |
Выберите формат времени, который будет отображаться на экране и при каждом захвате.
12ч – AM/PM |
| Имя камеры | On
от |
Выберите On для назначения 4-значной длины в форме заглавной буквы AZ, 0-9 для записи |
| местоположение на фотографиях (например, A123 для парка Йеллоу Стоун). Это помогает
многокамерные пользователи определяют местоположение когда повторноviewфото. |
||
| Информационная полоса | On
от |
Выберите On показывать дату, время, температуру, фазу луны при каждом снимке. |
|
Циклическая запись |
On от |
Выбор On опция вызовет самый старый files перезаписываться новыми снимками, когда SD-карта заполняется.
Работы С Нами от выбрана опция, камера прекратит захват изображений, как только SD-карта заполнится. |
|
Часы работы |
On от |
Выберите On если вы хотите, чтобы камера работала только в течение определенного периода времени каждый день. Например, если время начала установлено на 18:35, а время окончания — на 8:25, камера будет работать с 18:35 текущего дня до 8:25 следующего дня. за пределами
период времени, когда камера не будет срабатывать или снимать фото/видео. |
|
Пароль |
On от |
Установите 4-значный пароль для защиты камеры от неавторизованных пользователей. Если код утерян, вы можете связаться с клиентом
поддержка для сброса пароля. |
|
Форматировать SD-карту |
Да Нет |
Все files будут удалены после форматирования SD-карты. Настоятельно рекомендуется отформатировать SD-карту, если она ранее использовалась на других устройствах. Внимание: убедитесь, что хотите files на SD-карте были
резервное копирование в первую очередь! |
| Сброс всех настроек | Да
Нет |
Выбор Да вернет все ваши предыдущие настройки обратно к значениям производителя по умолчанию. |
| Версия | Определенный | Отобразите версию камеры. |
МОНТАЖ И РАЗМЕЩЕНИЕ
КРЕПЛЕНИЯ
После того, как вы настроили параметры камеры в соответствии со своими личными предпочтениями дома, вы готовы вынести ее на улицу, и камера находится в режиме НАБЛЮДЕНИЯ. При настройке камеры для скаутской игры или других мероприятий на открытом воздухе вы должны быть уверены, что установили ее на место правильно и надежно.
Мы рекомендуем устанавливать камеру на прочное дерево диаметром около 6 дюймов. (15см). Чтобы получить оптимальное качество изображения, дерево должно быть около 16-17 футов. (5 м) от места наблюдения, с камерой, расположенной на высоте 2.5-3.5 фута. (0.75-1м). Кроме того, имейте в виду, что вы получите наилучшие результаты ночью, когда объект находится в идеальном диапазоне вспышки, не дальше 100 футов. (30 м) и не ближе 10 футов (3 м) от камеры.
Камеру можно установить двумя способами: с помощью прилагаемой регулируемой web ремень или гнездо для штатива.
Регулируемый ремешок:
иллюстрирует использование ремешка на камере. Проденьте один конец ремешка через две скобы на задней панели камеры. Проденьте конец ремешка через пряжку. Надежно закрепите ремень вокруг ствола дерева, сильно потянув за конец ремня, чтобы не оставалось провисания (Рисунок 8).
Использование гнезда для штатива:
Камера оснащена гнездом на нижнем конце для установки на штатив или другие монтажные приспособления с помощью стандартного винта с резьбой UNC 1/4-20 (предоставляется пользователем).
 ЧУВСТВИТЕЛЬНЫЙ УГОЛ И ИСПЫТАНИЕ РАССТОЯНИЯ
Чтобы проверить, может ли камера эффективно контролировать выбранную вами область, рекомендуется использовать этот тест для проверки угла обзора и расстояния наблюдения камеры. Чтобы выполнить тест:
- Переключите камеру в режим ON.
- Нажмите кнопку МЕНЮ, перейдите к «Тест движения». Камера будет отсчитывать максимум 30 секунд и будет готова к захвату движения. (Примечание: время задержки может быть менее 30 секунд, в зависимости от фактического времени активации датчика движения. Время задержки составляет 30 секунд минус время включения.)
- Закройте дверцу камеры.
- Делайте движения перед камерой в нескольких местах в пределах области, где вы ожидаете, что игра или объекты будут. Попробуйте разные расстояния и углы от камеры.
- Если индикатор движения мигает КРАСНЫМ светом, это означает, что положение может быть определено. Если он не мигает, это положение находится за пределами зоны обнаружения.
- В этих тестах на чувствительность камера делала снимки сразу после захвата движения. Когда вы открываете камеру, на экране отображается количество срабатываний, вы можете повторноview картинки на экране. (Примечание: красный индикатор будет мигать только тогда, когда движение находится в зоне действия центрального ИК-датчика. Угол обнаружения центрального датчика составляет view составляет 60°. Каждый из боковых датчиков имеет угол 30° view, который используется только для предварительной активации камеры и ускорения скорости срабатывания, КРАСНЫЙ индикатор не мигает независимо от того, что каждый из боковых датчиков обнаруживает движение.)
Результаты вашего тестирования помогут вам найти наилучшее место для установки и наведения камеры. Высота от земли для размещения устройства должна изменяться в зависимости от размера животного. В общем, предпочтительнее от 3 до 6 футов.
Вы можете избежать потенциальных ложных срабатываний из-за колебаний температуры и движения перед камерой, не направляя камеру на источник тепла, близлежащие ветки деревьев или кусты (особенно в ветреную погоду).
ЗАПРЕЩАЕТСЯ устанавливать камеру за стеклянным окном, так как это не позволит обнаружить какое-либо движение. Не направляйте камеру на стеклянные предметы.
ЗАПУСК
Камера поддерживает два рабочих режима «Детектор движения» и «Интервал». Нажмите кнопку СТАРТ, чтобы войти в режим наблюдения.
- Если в меню установить режим работы камеры «Детектор движения», камера отсчитывает время с 30-секундной задержкой, после чего будет готова перейти в режим ожидания (наблюдение) и произвести съемку. Любое обнаруженное им движение вызовет захват изображений, как запрограммировано в меню. Убедитесь, что вы прочитали описание параметров задержки обнаружения и чувствительности ИК-датчика.
- Если вы установите в меню рабочий режим камеры как «Time Lapse», камера вскоре будет готова перейти в режим «Time Lapse», затем периодически делать снимки в соответствии с заданным вами параметром «Timelapse Interval», независимо от настроек « Задержка обнаружения».
REVIEW ФОТО ИЛИ ВИДЕО
После того, как вы настроили, установили и активировали КАМЕРУ, вам, конечно же, захочется вернуться позже и зановоview изображения, которые он захватил для вас. Фото и видео камера сохраняет в папке DCIM100MEDIA на SD-карте. Фотографии сохраняются с file имена, такие как DSCF0001.JPG, и видео, такие как DSCF0001.MP4. Видео MP4 files можно воспроизводить на большинстве популярных медиаплееров, таких как Windows Media Player, QuickTime, VLC и т. д.
Это можно сделать разными способами.
Вы можете напрямуюview фото или видео на экране камеры.
Или камера включена, вы можете использовать прилагаемый USB-кабель для загрузки files к компьютеру.
Или вы можете вставить SD-карту в «считыватель» SD-карт (предоставляется пользователем), подключить компьютер и просматривать files на компьютере без загрузки.
ТЕХНИЧЕСКИЕ ХАРАКТЕРИСТИКИ
| Элемент | Описание |
| Работы режим | Обнаружение движения или таймлапс |
| Максимум. Размер пикселя | 32MP |
| объектив | F=1.6, FOV=70°, автоматическая ИК-обрезка |
| ИК-вспышка | 100 футов. (30 м) |
| ЖК-экран | 2.4-дюймовый цветной экран |
| Клавиатура | 7 клавиш, 1 выключатель питания |
| Память | SD, SDHC или SDXC Обычная карта памяти (не входит в комплект), максимальная емкость 512 ГБ |
| Разрешение изображения | 32 МП, 24 МП, 16 МП, 8 МП, 4 МП |
| Разрешение видео | 2304 x 1296P@20fps (16:9),
1920 x 1080P@30fps (16:9), 1080 x 720P@30fps (16:9) |
| ПИР
чувствительность |
Высокий / Нормальный / Низкий |
| Расстояние обнаружения PIR | 90 футов (ниже 77°F/25°C) |
| Угол срабатывания PIR | Всего 120° (при включенных боковых датчиках движения) Центральная зона: 60°, Левая сторона: 30°, Правая сторона: 30° |
| Время триггера | прибл. 0.1~0.6 секунды
(0.1 с при включенных боковых датчиках движения) |
| Интервал триггера | 0сек-60мин, программируемый |
| Номера для стрельбы | 1 ~ 5 |
| Продолжительность видео | 3сек ~ 5мин., программируемый |
| Информационная полоса | Вкл выкл |
| Эксплуатация
Часов |
Вкл./выкл., определенный рабочий период времени |
| Пароль | 4-значный код |
| Имя камеры | 4-значный (AZ, 0-9) |
| Интервал замедленной съемки | 2 секунды ~ 24 часа |
| Напряжение питания | 8 батареек AA 1.5 В (не входят в комплект) |
| Резервный Продолжительность | 8 месяца |
| Автоматический режим ожидания | Автоматический переход в режим ожидания (режим наблюдения) через 5 минут при отсутствии операций в ON Режим |
|
Низкая батарея |
8V — Низкий заряд батареи (батареи разряжаются)
9V — ночное видение недоступно на низкой громкостиtagе (почти умереть) |
|
Интерфейс |
Mini-USB, обычный держатель SD-карты,
Внешнее питание (12 В пост. тока/1 А, штекер 5.5×2.1 мм) |
| Исполнение | Ремешок, основание штатива (1/4-20) |
| Водонепроницаемый | IP66 |
| Рабочая Температура | -4~140°F/-20~60°C |
| Эксплуатационная влажность | 5% ~ 95% |
| Сертификация | FCC и CE и RoHS |
| Размеры продукта | 5.6 х 4.2 х 2.86 дюйма |
УСТРАНЕНИЕ
Если ваша камера не работает должным образом или у вас возникли проблемы с качеством фото/видео, запустите простую и быструю проверку:
- Убедитесь, что камера включена и находится в правильном режиме.
- Отформатируйте SD-карту в камере или замените SD-карту, поскольку SD-карта является носителем информации и иногда может работать нестабильно.
- Замените батареи, если ночное видение не работает должным образом
Если с вашим устройством по-прежнему возникают проблемы, свяжитесь с нами, указав номер вашего заказа. Пожалуйста, будьте уверены, мы сделаем все правильно для вас.
ГАРАНТИИ
ОГРАНИЧЕННАЯ ГАРАНТИЯ НА ОДИН ГОД
Гарантия на камеру Trail Camera распространяется на вашу камеру Trail в течение одного года после первоначальной даты покупки. Мы гарантируем, что ваша камера не будет иметь дефектов материалов и изготовления при нормальном использовании и условиях. Эта гарантия не распространяется на повреждения, вызванные потребителем, такие как неправильное использование, злоупотребление, неправильное обращение или установка, повреждения, вызванные дикими животными, или попытки ремонта кем-либо, кроме наших уполномоченных технических специалистов.
Мы по своему усмотрению в течение гарантийного срока бесплатно отремонтируем вашу камеру или заменим ее на такую же или аналогичную модель. Эта гарантия распространяется только на первоначального розничного покупателя у нашего авторизованного дилера. Для получения гарантийных преимуществ требуется квитанция о покупке, номер заказа или другое подтверждение даты первоначальной покупки. Гарантия на любой замененный продукт, предоставляемый по первоначальной гарантии, распространяется на оставшуюся часть гарантийного периода, применимого к оригинальному продукту.
Эта гарантия распространяется исключительно на отказы, вызванные дефектами материалов или изготовления при нормальном использовании. Она не распространяется на нормальный износ изделия.
Если вам необходимо вернуть продукт по данной гарантии, обратитесь к своему дилеру или нашему дистрибьютору.
Документы / Ресурсы
Обновлено: 23.04.2023
Изначально написано Diminator:
А что могли сломатся? . Может есть возможность как то их полностью сбросить? Так сказать в состояние из коробки.
там есть в меню пункт сброса в заводские установки! вряд ли сломаться это акорн )
Изначально написано 7ibratow:
Всем добра. Похоже слетела прога на LTL 5210a-снимает только по таймеру. Ткните носом где качнуть. Заранее огромное спасибо.
в меню есть пункт сброса в заводские установки.
Ноль эмоций, всё точно так же как и было. На лазер только реагирует, точка загорается. Батарейки новый, флешки форматировал по сто раз. Разные пробовал. Фактически всё перепробовал. Параметр скачивал, две камеры и обе ноль эмоций. Тупик..
Изначально написано PavelExpedition:
Ноль эмоций, всё точно так же как и было. На лазер только реагирует, точка загорается. Батарейки новый, флешки форматировал по сто раз. Разные пробовал. Фактически всё перепробовал. Параметр скачивал, две камеры и обе ноль эмоций. Тупик..
Добрый день, уважаемое сообщество!
Попала в руки фотоловушка по виду похожая на Ltl-5210M, но на задней стенка написано 8310G.
В смежной теме сказали, что это Bestok 8310.
Делает снимок один раз в 3. 4 минуты.
Прошивка, через программу от Acorn не помогает.
Ловушка её просто не воспринимает, от слова СОВСЕМ.
Может кто сталкивался с данной ловушкой и проблемой.
Прошу помощи! В Контакте уже написал.
Всем с уважением!
Изначально написано Воткактотак:
Добрый день, уважаемое сообщество!
Попала в руки фотоловушка по виду похожая на Ltl-5210M, но на задней стенка написано 8310G.
В смежной теме сказали, что это Bestok 8310.
Делает снимок один раз в 3. 4 минуты.
Прошивка, через программу от Acorn не помогает.
Ловушка её просто не воспринимает, от слова СОВСЕМ.
Может кто сталкивался с данной ловушкой и проблемой.
Прошу помощи! В Контакте уже написал.
Всем с уважением!
тогда у вас не НЕ001 а HT001B они совсем по разному настраиваются!
Зайдите на канал
Здравствуйте! вопросик появился,если оператор не поддерживает ммс — будет ли фотоловушка отправлять фото на почту по инет соединению?
Изначально написано cerp88:
Здравствуйте! вопросик появился,если оператор не поддерживает ммс — будет ли фотоловушка отправлять фото на почту по инет соединению?
MMS и отправка SMTP ( на электронную почту ) ни как не связаны они вообще через разные протоколы работают. У всех операторов если они не блокируют передачу данных на данном ТП в фотоловушки будут отправляться фото на почту.
Внимание! Фотоловушки Филин реагируют не на движение, а на изменение теплового излучения окружающей среды. В связи с этим, если устанавливаете камеру в помещении, нельзя направлять ее на окна, отопительные приборы. Нельзя располагать камеру за окном, чтобы снимать улицу, т.к. PIR-датчик будет реагировать только на температуру стекла, а в ночное время оно будет создавать блик и слепить камеру. При установке на улице, проследите, чтобы перед камерой не было веток, которые, нагреваясь на солнце, обеспечат ложное срабатывание датчика.
Фотоловушки Филин (модели Филин, Филин 120, Филин 120 MMS, Филин 120 MMS 3G, Филин MMS, Филин MMS 3G) настраиваются одним способом, при помощи программы MMS Config, которая идет в комплекте с камерой на диске.
Алгоритм настройки
- Подключаем карту памяти SD/microSD (в зависимости от модели) к компьютеру;
- Запускаем на компьютере программу MMS Config (ее можно скачать ниже, либо с диска, идущего в комплекте с камерой);
- Выставляем в программе нужные параметры и сохраняем конфигурационный файл на карту памяти;
- Вставляем карту памяти в фотоловушку, запускаем переключателем в режим «Test», проверяем, выставились ли параметры.
Необходимо использовать ту программу, которая идет с камерой в комплекте!
Если у вас в комплекте программы нет, то можете попробовать скачать ее:
Программы для фотоловушек Филин
Совместимость с вашей камерой не гарантируется. Если камера не видит настройки, обратитесь к продавцу за актуальной версией ПО.
| Модель фотоловушки | Ссылка на программу |
| Филин 120 (HC-550A) | MMS Config |
| Филин 120 MMS (HC-550M) | MMS Config |
| Филин 120 MMS 3G (HC-550G) | MMS Config |
| Филин Мини (HT-001) | MMSCONFIG2.5.5 |
| Филин (HC-300A) | MMS Config |
| Филин MMS (HC-300M) | MMS Config |
| Филин MMS 3G (HC-300G) | MMS Config |
| Филин 120 PRO Edition (HC-550G) | MMS Config |
| Филин 200 (HC-800A) | MMSCONFIG 2G/3G |
| Филин 200 MMS (HC-800M) | MMSCONFIG 2G/3G |
| Филин 200 MMS 3G (HC-800G) | MMSCONFIG 2G/3G |
| Филин 200 4G (HC-800LTE) | MMSCONFIG 4G |
Начало работы
Подключение карты памяти к компьютеру возможно двумя способами:
Перед началом работы необходимо вставить батарейки и карту памяти microSD в камеру, подключить кабелем microUSB к компьютеру и перевести выключатель питания в среднее положение (Test).
На компьютере она определяется как USB накопитель.
Либо также возможно вставить карту памяти microSD в переходник (картридер), без камеры, и подключить его к USB порту компьютера, если по какой-либо причине у вас не получилось подключить фотоловушку к ПК через USB кабель.
Настройки программы
Распаковываем архив mmsconfig на рабочий стол. Открываем папку mmsconfig и запускаем файл MMSCONFIG.exe:

Открывается главное окно программы:

Пункты меню
Камера
- Разрешение (8,12,16 мегапикселей) — разрешение съемки фотографий.
- Интервал 1,5,10,30 секунд/1,5,10,30 минут. Важный параметр, влияющий на энергопотребление камеры. Выставленное здесь значение — это длительность паузы в работе камеры. Например, если выставить 5 минут, то камера, зафиксировав движение, сделает снимок и уйдет в ждущий режим на 5 минут. Через 5 минут она снова сделает фото, при условии, что перед ней есть объект (человек, животное, автомобиль). Если выставить минимальное значение — 1 секунду, фотоловушка будет «щелкать» без остановки, быстро посадит батарейки и, если настроена отправка на телефон, стремительно потратит баланс сим-карты.
- Мульти (один, 3 фото, 6 фото, 9 фото) — настройка количества фотографий которое камера сделает за 1 раз.
- ISO — светочувствительность (AUTO, 100, 200, 400). Можно выставить режим AUTO.
- ID — уникальный номер камеры. Если у вас несколько камер, позволяет отличить их по ID.
Видео
- Разрешение (QVGA, WVGA, 720P, 1080P) — качество съемки видео.
- Длина видео (10,30,60,90 секунд) — длительность видео ролика.
- Звук (вкл/выкл) — запись видео со звуком или без.
Настройка
- Выбор (камера,видео,камера+видео) — режим работы фотоловушки. Режим «камера» — съемка только фото. Режим «видео» — съемка только видео. Режим «камера+видео» — съемка фото и видео. В комбинированном режиме фотоловушка Филин сначала снимает фотографию, затем записывает ролик.
- Язык — выбор языка меню.
- Дистанция (высокая,средняя,низкая) — настройка чувствительности датчика движения. В зимнее время рекомендуется устанавливать низкую чувствительность, т.к разница температур между окружающей средой и живым объектом высокая. А в летнее время рекомендуется устанавливать высокую чувствительность, из-за низкой разницы температур живого объекта и окружающей среды. Если тестируете камеру в помещении — рекомендуем устанавливать высокую чувствительность.
- ТВ выход (PAL/NTSC) — для моделей с AV выходом на телевизор можно выбрать формат выходного видеосигнала.
- Дата/время — настройка даты и времени на камере. Программа автоматически берет эти данные с вашего компьютера.
- Формат даты — формат отображения даты на фотографиях и видео.
- Пароль — настройка пароля для фотоловушки. Если задать пароль, то его необходимо будет вводить каждый раз при включении камеры в тестовый режим, для изменения настроек и просмотра фотографий на встроенном дисплее.
Таймер
В данном пункте настраивается расписание работы камеры. Например, необходимо настроить чтобы камера работала только ночью, с 23 часов до 6 утра, в таком случае в графе «начало» указываем 23:00, а в графе «конец» — 6:00.
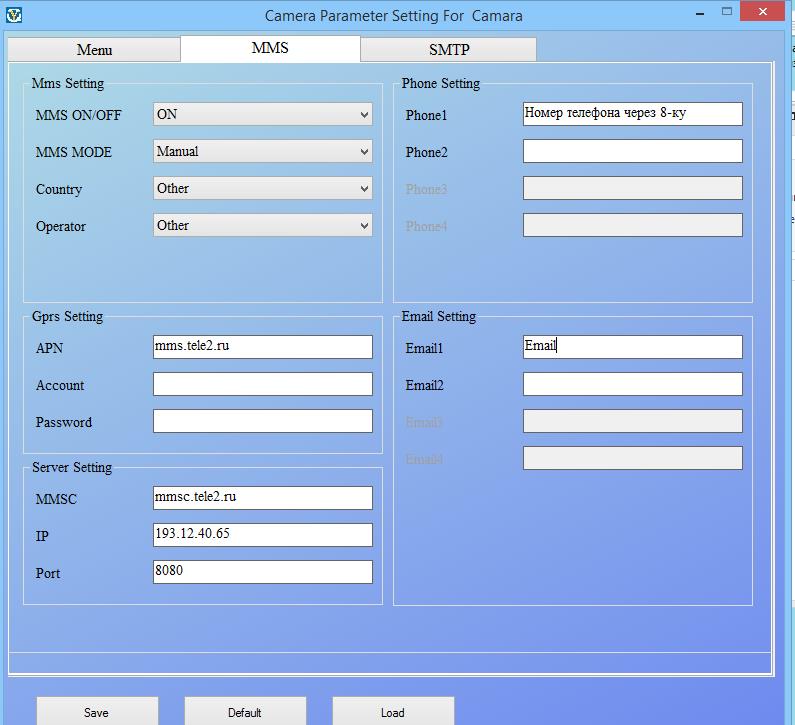
Настройки MMS
Фотоловушки Филин имеют функцию отправки фотографий на телефон через MMS канал. Для отправки достаточно будет слабого или среднего сигнала сотовой сети. Все настройки необходимо вводить в ручном режиме.

MMS settings
MMS on/off — выбор, включена будет функция MMS или выключена. Обычно, если фотоловушка имеет GPRS/3G модуль и функцию отправки фотографий на электронную почту через Интернет, то лучше отключить MMS и настроить параметры мобильного Интернета.
MMS Mode — режим настроек, рекомендуем устанавливать «Manual» (ручной), т.к предустановленные настройки содержат только параметры МТС и Билайн, но и они могут работать не во всех регионах, поэтому лучше прописать их самостоятельно.
Country и Operator — при выборе ручного режима становятся неактивны.
GPRS settings
APN — точка доступа MMS оператора. Account и Password — логин и пароль MMS оператора.
Server settings
MMSC — адрес сервера MMS. IP — ip адрес сервера MMS. Port — порт сервера MMS, обычно всегда он имеет значение 8080.
Phone settings
Email settings
Здесь необходимо указать адреса электронной почты. Отправка будет производиться не через Интернет, а через MMS канал.
Настройки MMS различных операторов
Как говорилось ранее, настройки MMS лучше прописывать в ручном режиме, поскольку предустановленные параметры есть не для всех операторов. Ниже приводим настройки для различных операторов.
Настройки MMS Мотив
Как это выглядит в настройках программы:

Настройки MMS Мегафон
Как это выглядит в настройках программы:

Настройки MMS Билайн
Как это выглядит в настройках программы:

Настройки MMS МТС
Как это выглядит в настройках программы:

Настройки MMS Tele2
Как это выглядит в настройках программы:
Настройки отправки через SMTP

SMTP Settings
SMTP on/off — включение/выключение функции отправки через SMTP.
SMTP Mode — режим настройки параметров. Рекомендуется выставлять «manual», т.е, ручной.
Country и Operator — предустановленные значения, которые при выборе ручного режима становятся неактивными.
Server Settings
Здесь находятся настройки SMTP сервера, который фотоловушка будет использовать для отправки снимков на ваш E-mail.
Type — набор предустановленных почтовых сервисов типа Hotmail и Gmail, рекомендуем выставить «Other», для настройки в ручном режиме.
NO SSL/SSL/STARTTLS — режимы шифрования данных.
Server — адрес Smtp сервера. Port — порт Smtp сервера. Email — ящик электронной почты, с которой будем отправлять фотографии. Он должен отличаться от вашего email, на который вы планируете получать снимки! Рекомендуем завести ящик на сервисе Яндекс, т.к с ним фотоловушки работают более корректно.
Password — пароль от указанного выше ящика.
GPRS settings
APN — точка доступа Интернета оператора связи.
Account/Password — логин и пароль оператора для доступа к Интернет соединению.
Email settings
Здесь необходимо указать ваш адрес электронной почты, на которые будут приходить фотографии.
Настройки SMTP для различных почтовых сервисов
Прежде, чем производить настройку вашей фотоловушки, убедитесь что провайдер вашей почты не блокирует подключение к учетной записи через сторонние программы. Не рекомендуется использовать адреса e-mail, у которых до знака @ имеется символ тире или точки!
Настройки SMTP Yandex
Рекомендуем в качестве сервера отправки использовать yandex, при этом адрес отправителя и получателя должны отличаться! Заведите отдельный ящик для фотоловушки, чтобы она могла отправлять с него фотографии на ваш email.
Пароли приложений
Недавно яндекс ввел возможность создания отдельных паролей для устройств и программ. Для создания пароля необходимо перейти в профиль на яндексе, пункт «Пароли приложений». Создайте пароль с произвольным названием и выберите тип устройства — «почта, smtp». Важно! Затем необходимо в настройках почты яндекса в пункте «Почтовые программы» отметить галочку «Разрешить доступ к почтовому ящику через программы».
Настройки Интернет для мобильных операторов
При выборе тарифов для вашей фотоловушки, выбирайте сим карту без опций, которые позволяют ей работать только в смартфонах и планшетах.
Если вы планируете настраивать отправку по MMS, ни к чему брать тариф с 20Гб Интернета, достаточно будет приобрести посекундный/поминутный тариф без абонентской оплаты.
Для отправки по SMTP также не нужны дорогие тарифы — 1 фотография имеет объем от 100кб до 300кб, поэтому 1Гб хватит на 3 тысячи фотографий.
Настройки GPRS Мегафон
Настройки GPRS МТС
Настройки GPRS Билайн
Настройки GPRS Мотив
Настройки GPRS ТЕЛЕ2
После всех вышеперечисленных настроек необходимо нажать кнопку внизу окна программы «Сохранить (Save)» и выбрать в проводнике Windows вашу флешку, после чего снова нажать «Сохранить». Важно! Если этого не сделать или сохранить файл не в то место, то камера работать не будет.

Типовые проблемы и их решение
Несмотря на все рекомендации и видео инструкции, размещенные в Интернете, довольно часто покупателям так и не удается настроить камеру. Рассмотрим ниже типовые проблемы при настройке камеры и их решение.
Фотоловушка не присылает фотографии через MMS
Фотоловушка не присылает фотографии через SMTP на почту
Фотоловушка не реагирует на смс-команды или реагирует через раз
Данная неисправность встречается довольно часто и выражается следующим образом: камера реагирует на какую-либо команду, а затем перестает отвечать. В качестве решения мы предлагаем своим клиентам перенастроить камеру на английский язык. После этого фотоловушка начинает корректно обрабатывать смс команды.
В первую очередь данная статья будет полезна владельцам фотоловушек с возможностью удалённого управления и передачи данных, таких как фотоловушка BolyGuard MG984G-36M, BG584G-24mHD, Seelock S328, S358, S378.
Перед тем, как приступить к перенастройке фотоловушки, убедитесь что:
Вы всё проверили? Уверены, что в камере установлена SIM с подходящим тарифом? Нашли эту статью в интернете, потому что по прежнему ничего не работает? Прежде чем продолжить чтение и попытаться ещё раз побороть фотоловушку, а точнее — настройки почтового сервиса Яндекса, Мейл или Gmail:
Ну а если у вас фотоловушка без поддержки SSL — вам не обойтись без этого облачного сервиса!
Настройка фотоловушек для отправки MMS:
Параметры настроек MMS для Bolyguard (Scoutguard)
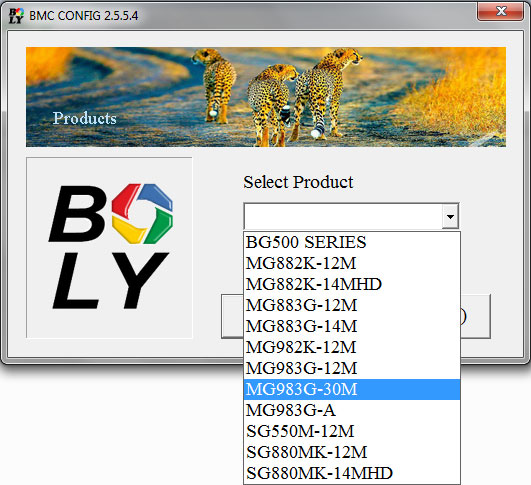
Настраивать MMS в фотоловушках Bolymedia (BolyGuard, ScoutGuard) можно как вручную через меню фотоловушки, так и с помощью специальной программы для компьютера, что конечно намного удобнее. Самую последнюю программу для настройки фотоловушек Bolymedia можно найти тут.
1. Установите карту памяти в компьютер (подключите через кардридер или с помощью прилагаемого USB-кабеля)
2. Запустите программы настройки, укажите нужную модель фотоловушки и нажмите ОК:
2. В списке стран необходимо выбрать «Others», после чего сразу же откроется диалоговое окно WAP / Internet Parameters:

Программисты компании Bolymedia периодически «забывают» заполнить или неверно указывают настройки оператора той или иной страны и в итоге выбор конкретного оператора не всегда спасает. Например, на момент написания данной статьи программа настройки фотоловушек Bolymedia забыла GPRS параметры операторов Билайн и Мегафон. Поэтому надёжнее указать настройки с параметрами вашего оператора вручную.
- Пример настроек MMS в фотоловушках Bolyguard (Scoutguard) для оператора Билайн:

В поле PASSWORD указан пароль beeline
В поле GPRS PASSWORD также указан пароль beeline
В поле SEND EMAIL PWD указан пароль e-mail адреса, с которого будет отправляться почта в режиме GPRS.
- Пример настроек MMS в фотоловушках Bolyguard (Scoutguard) для оператора Мегафон:

В поле PASSWORD указан пароль mms
В поле GPRS PASSWORD указан пароль gdata
В поле SEND EMAIL PWD указан пароль e-mail адреса, с которого будет отправляться почта в режиме GPRS.
- Пример настроек MMS в фотоловушках Bolyguard (Scoutguard) для оператора МТС:

В поле PASSWORD указан пароль mts
В поле GPRS PASSWORD также указан пароль mts
В поле SEND EMAIL PWD указан пароль e-mail адреса, с которого будет отправляться почта в режиме GPRS.
- Пример настроек MMS в фотоловушках Bolyguard (Scoutguard) для оператора TELE2:

В поле ACCOUNT, PASSWORD, GPRS ACCOUNT, GPRS PASSWORD оператор TELE2 не требует ввода логина и пароля
В поле SEND EMAIL PWD указан пароль e-mail адреса, с которого будет отправляться почта в режиме GPRS.
Параметры настроек MMS для LTL-Acorn
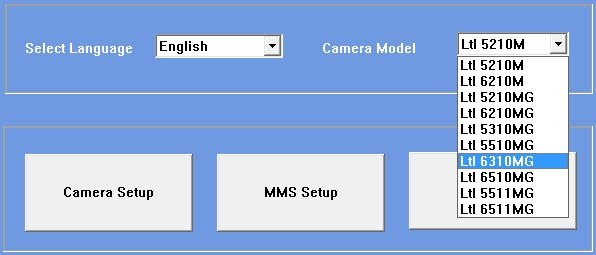
Фотоловушки Ltl-Acorn также можно настроить через меню камеры в полевых условиях. Это требует некоторых усилий, но в целом возможно. Однако мы всё-же рекомендуем производить настройку камер LTL на компьютере с помощью программы Ltl-Acorn-Setup, свежая версия программы доступна в разделе «Руководства».
1. Установите карту памяти в компьютер (подключите через кардридер или с помощью прилагаемого USB-кабеля)
2. Запустите программы настройки, укажите нужную модель фотоловушки:
- Пример настроек MMS в фотоловушках LTL Acorn для оператора Билайн:

- Пример настроек MMS в фотоловушках LTL Acorn для оператора Мегафон:

- Пример настроек MMS в фотоловушках LTL Acorn для оператора МТС:

5. Установите карту памяти в фотоловушку, включите её в тестовой режим для загрузки настроек.
Особые параметры:
- Picture No./ day — максимальное количество кадров, отсылаемых за сутки. Укажите 0 для неограниченной отправки
- SMS remote Control — удалённое управление, 0 — постоянная работа, 1-24 — проверка входящих смс с периодичностью от одного раза в час до одного раза в сутки, Off — удалённое управление отключено. Данная функция увеличивает энергопотребление фотоловушки!
Параметры настроек MMS для фотоловушек Сокол
Параметры настроек MMS для фотоловушек Филин
Настройка ММС в фотоловушке Филин ничем не отличается от настройки фотоловушек Scoutguard и LTL-Acorn. Единственная проблема заключается в том, что фотоловушка Филин, в отличие от своих «старших» братьев может отправлять изображение в разрешении не более 640*480 точек. Программу для настройки этих фотоловушек можно скачать на сайте китайского завода-производителя Shenzhen Jiayijie Technology Co., Ltd. или запросить у его российских представителей.
Настройка фотоловушек для отправки e-mail:
1. Необходимо правильно указать параметры Internet вашего оператора связи. Настройки APN для первой тройки Российских операторов, а также TELE2 приведены в таблице:
Настройка e-mail в фотоловушках Bolyguard (Scoutguard)
Настраивать параметры GPRS через меню самой фотоловушки Bolymedia (BolyGuard, ScoutGuard) можно далеко не во всех моделях, например модель MG983G-30M может быть настроена только с помощью специальной программы для компьютера или через SMS-управления с заранее заданного номера администратора. Поэтому для настройки фотоловушки потребуется персональный компьютер под управлением Windows и сама программа, которую можно скачать из соответствующего раздела нашего сайта. Для успешной настройки необходимо выполнить следующие действия:

- В списке стран необходимо выбрать «Others», после чего сразу же откроется диалоговое окно WAP / Internet Parameters:

- В диалоговом окно WAP / Internet Parameters необходимо указать настройки оператора связи (параметры MMS, интернет), адрес почтового сервера, e-mail отправителя и пароль от этого e-mail, а также обязательно включить поддержку SSL (для этого необходимо нажать кнопку Advanced и поставить галку рядом с параметром This service requires SSL)

- Пример настроек e-mail в фотоловушках Bolyguard (Scoutguard) для оператора Билайн:

В поле PASSWORD указан пароль beeline
В поле GPRS PASSWORD также указан пароль beeline
В поле SEND EMAIL PWD указан пароль e-mail адреса, с которого будет отправляться почта в режиме GPRS.
- Пример настроек e-mail в фотоловушках Bolyguard (Scoutguard) для оператора Мегафон:

В поле PASSWORD указан пароль mms
В поле GPRS PASSWORD указан пароль gdata
В поле SEND EMAIL PWD указан пароль e-mail адреса, с которого будет отправляться почта в режиме GPRS.
- Пример настроек e-mail в фотоловушках Bolyguard (Scoutguard) для оператора МТС:

В поле PASSWORD указан пароль mts
В поле GPRS PASSWORD также указан пароль mts
В поле SEND EMAIL PWD указан пароль e-mail адреса, с которого будет отправляться почта в режиме GPRS.


Настройка e-mail в фотоловушках LTL-Acorn
Настраивать параметры GPRS можно как через меню самой фотоловушки LTL Acorn, так и с помощью специальной программы для компьютера. Программу настройки можно скачать из соответствующего раздела нашего сайта.
Иcпользование почтового ящика GMAIL
При использовании в настройках фотоловушки почтового ящика в google, необходимо поставить галочку в разделе разрешений: управление аккаутом Google -> Безопасность


Выбрать: Ненадежные приложения, у которых есть доступ к аккаунту — открыть доступ:

Настройка отправки фотографий в облако Molnus
Настроить фотоловушки производства завода Bolymedia на работу с облаком Molnus вам поможет подробная статья или видео:
. to be continued
Последнее обновление статьи: 04.08.2021
2 комментария

Филин / Филин 120
Филин MMS / Филин 120 MMS
Филин PRO Edition
Филин Transformer
Филин SM 4G
Внешний вид камеры
Камера имеет разъемы: USBпорт, слот SD-карты, TV-выход, разъем внешнего питания.

| 1) Нижняя крышка 2) SD-карта 3) USB порт 4) TV выход 5) PIR(датчик движения) 6) ИК вспышка 7) Объектив |
9)2″ цветной LCD дисплей 10) Микрофон 11) SIM карта 12) Замок 13) Переключатель питания 14) Отсек батарей 15) Пульт ДУ |
ВНИМАНИЕ: Если вы планируете не использовать камеру в течение долгого периода времени, мы настоятельно рекомендуем вытащить аккумуляторы, чтобы избежать возможного протекания содержимого, которое может повредить камеру и нарушает гарантийные условия.
Установка SIM-карты
(для фотоловушек с передачей по MMS)
Вам необходимо купить SIM-карту у местного оператора мобильной связи, убедитесь, что оператор предоставляет услугу MMS.
Для работы с MMS/SMS/E-mail, установите разблокированную SIM-карту в слот.

Установка аккумуляторов
Откройте нижнюю крышку. Убедитесь что переключатель питания в положении OFF, потяните на себя отсек батарей и извлеките контейнер , вставьте батарейки в порядке указанном на контейнере (соблюдайте полярность. ). Вставьте контейнер с батареями в камеру.
В режиме Test, камера автоматически выключается через 3 минуты бездействия, она снова включится при любом движении перед ней .
При разряде батарей камера тоже автоматически выключится. Если Вы настроили MMS функции, камера отправит SMS или Emai при низком заряде батарей.
Установка карты памяти SD
Вставьте карту памяти SD в слот для карты, отмеченной стороной вверх. Обратите внимание, что карта SD может быть вставлена только в одном направлении. Убедитесь, что переключатель защиты от записи карты SD находится в положении «запись».
ВНИМАНИЕ: всегда выключайте камеру перед установкой или удалением карты памяти и/или аккумуляторов.
После того, как камера будет включена, в течение 15 сек будет мигать светодиодная индикация (красная). 15 сек – это время настройки автоматической съемки фотографий и видео, например, чтобы закрыть нижнюю крышку, зафиксировать камеру на дереве и отойти в сторону.
В режиме ON камера будет производить съемку фото и видео автоматически в соответствии с настройками по умолчанию, или последними пользовательскими настройками. Камера может записывать звук, поэтому видео будет записываться со звуком
Формат файлов
Изображения и видео сохраняются раздельно в специально созданной папке с названием (104MEDIA). Нумерация файлов образуется посредством добавления единицы к последнему номеру каждого изображения или видео. Имя сохраненного файла будет выглядеть так: PTDC0001.JPB или PTDC0001.AVI. По расширению можно определить изображение это (расширение .jpg) или видео (расширение.avi).
Изменение настроек камеры на ПК
В комплекте с фотоловушкой GSM идет диск с программой MMSCONFIG.exe в папке MMSCONFIG2.5.5. Запускаем программу на ПК, появляется простая менюшка с тремя вкладками.

При переходе между вкладками нужно сохранять настройки. Важный момент. Файл с сохраненными настройками получается Parameter.dat — его нужно переместить на карту памяти в фотоловушку прямо в корневую папку. Я из папки MMSCONFIG2.5.5 с диска перебросил все файлы в корневую папку на карту памяти. Кабель microUSB-USB идет в комплекте, можно его подключить к фотоловушке и ПК, включить переключать в положение config (test), тогда на компьютере видите карту памяти. Либо карту памяти напрямую подключить к ПК, перекинуть на нее файлы и вставить в фотоловушку.
Установка функции MMS на ПК
Переходим на вкладку ММС программы MMSCONFIG.exe, выставляем параметры ММС авто, страна Россия, а операторов предлагают только два beeline и A-mobile (это МТС). Выбираем нашего оператора и снизу подтягиваются автоматически настройки соответственно BeeLine либо МТС. Справа выставляем телефон и/или почту куда будет приходить ММС-ка (до 4 телефонов и 4 электронок).
Ниже представлены настройки ММС для фотоловушки с сим-картой МТС.

Если оператор Мегафон, то настройки нужно выбирать не авто, а Ручная. И все настройки заводить вручную. Ниже представлены настройки ММС для фотоловушки с сим-картой Мегафон.

Настройка электронной почты
На почту письма приходят если мы вбили в настройках ММС свою электронку. Но если хотим обойтись без ММС или сэкономить деньги за использование ММС, то можно настроить отправку писем на электронку через вкладку SMTP. Для операторов Beeline и МТС настройки в правой части подставляются автоматически при выборе страны Россия и соответствующего оператора. А для Мегафона снова нужно заполнять все вручную (рис ниже).
Вбиваем Вашу почту (она должна быть на соответствующем почтовике) и пароль от почты. А справа вбиваем почту на которую хотим, чтобы приходили письма с фото (можно почту эту же самую, до 4 ящиков).
Читайте также:
- Как создать js файл в pycharm
- Process framework что это
- Как перенести учебники на планшет
- Onedrive standalone update task что это
- Libegl dll что это

Model # I8
602 Fountain Parkway
Grand Prairie, TX 75050
800.847.8269
“Wildgame Innovations” and the “Button Logo” are TM trademarks of Wildgame Innovations, LLC.
“Sport Responsible” , “Redux” and “Flextime” are TM trademarks of WGI Innovations, LTD. User’s Manual
Infrared Digital Scouting Camera
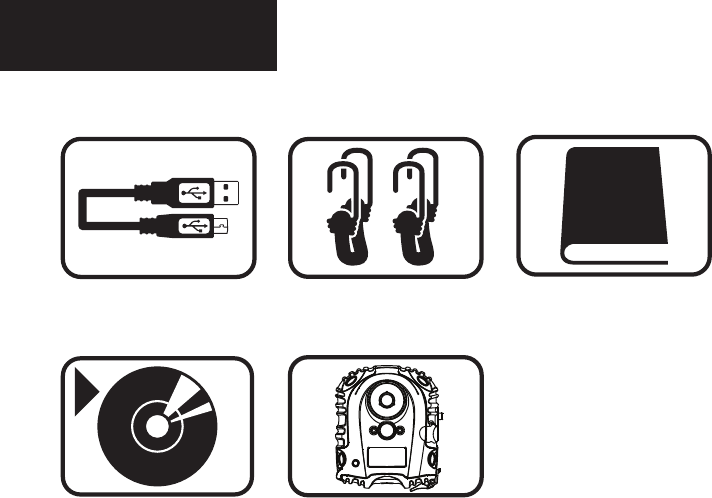
Includes
USB Cable 2 — Bungee Cords User Manual
Camera UnitFlextime Player
Software
RESOLUTION
FLASH
FLASH RANGE
SENSOR
SENSOR RANGE
IMAGE FORMAT
MEMORY
USB
IMAGE RESOLUTION
POWER SUPPLY
AUXILIARY POWER
BATTERY LIFE
ONBOARD POWER
HOUSING
MOUNTING
REDUX
MAX: 8 MP Still
30 High Intensity Infrared LED’s
up to 55 feet
Passive Infrared Sensor (PIR) Motion and Heat
up to 60 feet
JPEG — Digital Stills/ AVI-Digital Video
up to 32GB SD Card (not included and required)
Class 4 and above recommended
5-PIN Mini USB style — included
High (8 MP)
Medium (6 MP)
Low (4 MP)
4 C-Cell batteries (not included and required)
Alkaline recommended
External power port
Estimated up to 1 year or 40,000 photos
Built in battery to retain Date and Time
Weather resistant with rubber gaskets
2 Bungee cords — included
Technology to reduce motion blur during
transition time
page 1
NOTE: Flextime Player Software is optional.
Flextime files can be played by using most
media players.
Note: Battery life will vary depending on camera settings as well as environ-
mental conditions. Camera settings such as shorter delay periods or even using
Flextime mode are examples of settings that can reduce overall battery life.
Environmental conditions such as extreme cold can also inuence battery life.

Features
USB Cable 2 — Bungee Cords User Manual
Camera UnitFlextime Player
Software
RESOLUTION
FLASH
FLASH RANGE
SENSOR
SENSOR RANGE
IMAGE FORMAT
MEMORY
USB
IMAGE RESOLUTION
POWER SUPPLY
AUXILIARY POWER
BATTERY LIFE
ONBOARD POWER
HOUSING
MOUNTING
REDUX
MAX: 8 MP Still
30 High Intensity Infrared LED’s
up to 55 feet
Passive Infrared Sensor (PIR) Motion and Heat
up to 60 feet
JPEG — Digital Stills/ AVI-Digital Video
up to 32GB SD Card (not included and required)
Class 4 and above recommended
5-PIN Mini USB style — included
High (8 MP)
Medium (6 MP)
Low (4 MP)
4 C-Cell batteries (not included and required)
Alkaline recommended
External power port
Estimated up to 1 year or 40,000 photos
Built in battery to retain Date and Time
Weather resistant with rubber gaskets
2 Bungee cords — included
Technology to reduce motion blur during
transition time
page 2
NOTE: Flextime Player Software is optional.
Flextime files can be played by using most
media players.
Note: Battery life will vary depending on camera settings as well as environ-
mental conditions. Camera settings such as shorter delay periods or even using
Flextime mode are examples of settings that can reduce overall battery life.
Environmental conditions such as extreme cold can also inuence battery life.
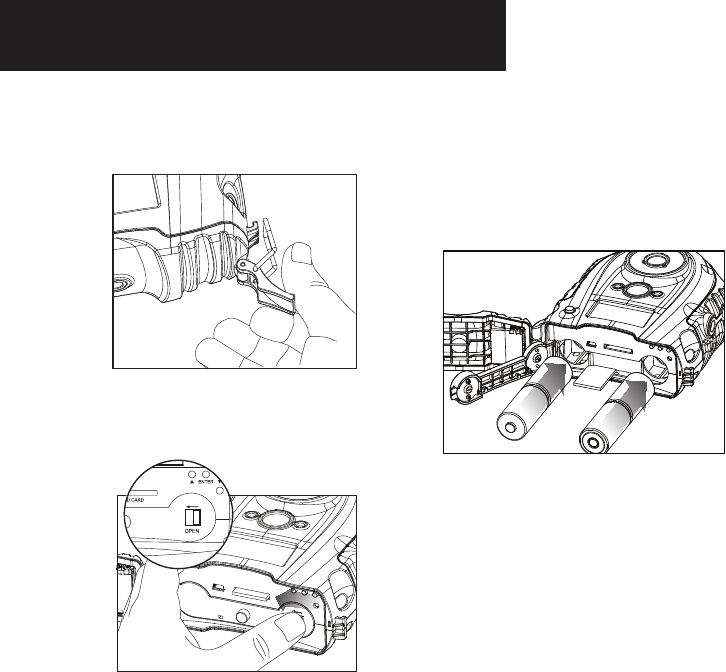
Installing Batteries
Open the door at the bottom of
the camera by unlatching the
locking tab.
1.
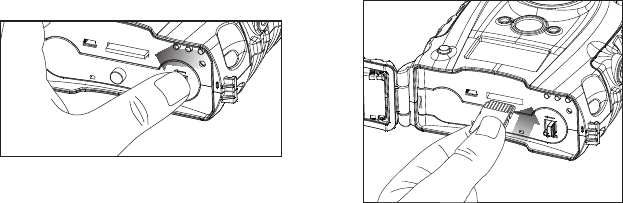
Close battery compartment cover. To
latch the cover simply pull the latch
slightly to the left as you close the
battery compartment cover.
4. Load SD memory card (up to 32GB not
included) into the SD card slot with
the connectors facing up.
5.
With the camera facing up, open
the battery compartment cover
by sliding the latch to the left.
2.
With the bottom of the camera
towards you, load two C-cell batteries
with the positive ends towards you in
the left battery chamber and load two
C-cell batteries with the negative
ends towards you in the right battery
chamber.
3.
NOTE:
Do not mix old and new batteries. Do not mix
alkaline, standard (carbon-zinc) or rechargable
(ni-cad, ni-mh, etc) batteries.
+
—
page 3
page 4
TIPS:
Make sure the SD Card is unlocked
(small switch on the side of the SD Card)
or the camera LCD will read “LOCK”.
IMPORTANT:
Make sure the camera is powered off
before removing or installing an SD card.
If you are using an SD card from other
cameras, please make sure to format the
SD card in your computer prior to use in
your camera. New cards are ok to use
straight from the package.
Installing Batteries
Open the door at the bottom of
the camera by unlatching the
locking tab.
1.
Close battery compartment cover. To
latch the cover simply pull the latch
slightly to the left as you close the
battery compartment cover.
4. Load SD memory card (up to 32GB not
included) into the SD card slot with
the connectors facing up.
5.
With the camera facing up, open
the battery compartment cover
by sliding the latch to the left.
2.
With the bottom of the camera
towards you, load two C-cell batteries
with the positive ends towards you in
the left battery chamber and load two
C-cell batteries with the negative
ends towards you in the right battery
chamber.
3.
NOTE:
Do not mix old and new batteries. Do not mix
alkaline, standard (carbon-zinc) or rechargable
(ni-cad, ni-mh, etc) batteries.
+
—
page 3
page 4
TIPS:
Make sure the SD Card is unlocked
(small switch on the side of the SD Card)
or the camera LCD will read “LOCK”.
IMPORTANT:
Make sure the camera is powered off
before removing or installing an SD card.
If you are using an SD card from other
cameras, please make sure to format the
SD card in your computer prior to use in
your camera. New cards are ok to use
straight from the package.
Ready
Time/Date
Location
Trigger
Flextime
PIR Mode
PIR Active
PIR Sense
Still Res
Pic/Video
Delay
PIR Mode Flextime Both
P1 P2 Interval
Still Video
24Hr Day Night
Hi Med Lo
Hi Med Lo
Regular Wide HD
15s 30s 1m 2m 5m 10m
Ready
Time/Date
Location
Trigger
Flextime
PIR Mode
PIR Active
PIR Sense
Still Res
Pic/Video
Delay
PIR Mode Flextime Both
P1 P2 Interval
Still Video
24Hr Day Night
Hi Med Lo
Hi Med Lo
Regular Wide HD
15s 30s 1m 2m 5m 10m
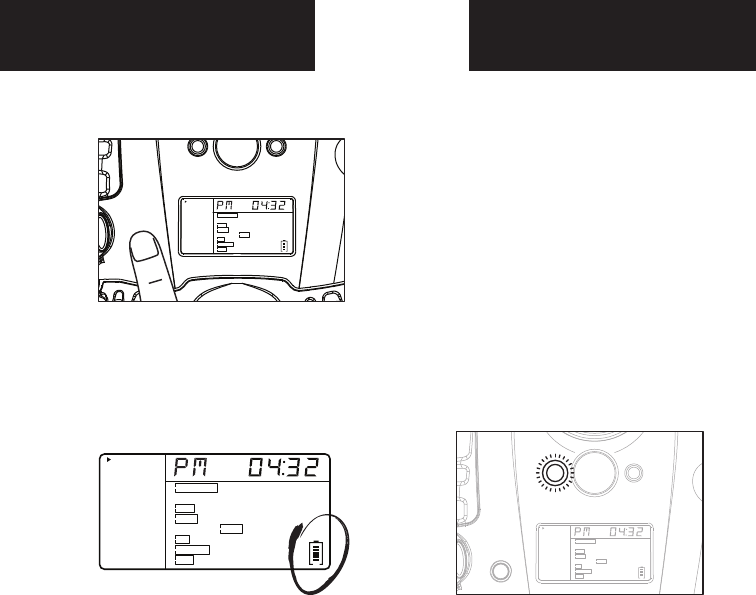
Power On
Test Mode
1.
Check the battery level icon to
ensure the batteries just
installed contain the proper
charge level. If so, you are ok to
proceed with camera use.
2.
To turn the unit ON, press and
release the power button.
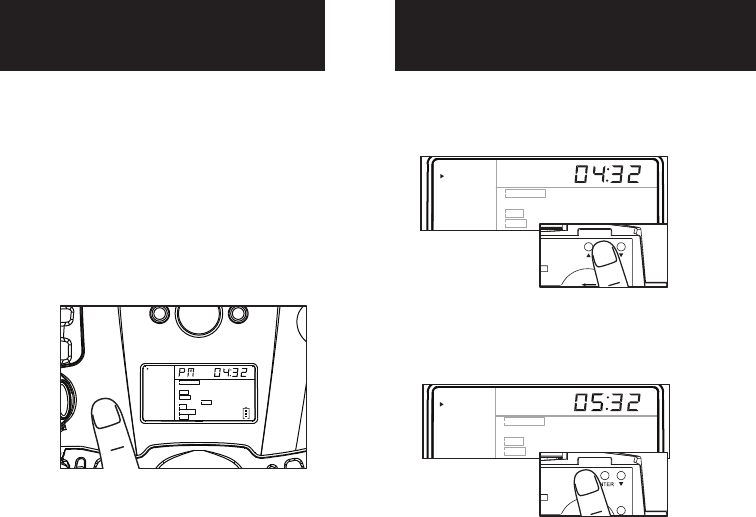
1. To change date and time, start by
pressing and release the center
navigation button to set the hour.
2. Press the left or right navigation
button to go up or down in
sequence.
3. When the hour is set, repeat steps
1 and 2 to set the minutes.
page 5
NOTE: LCD cycle through camera
information. PIR picture number >
Flextime number > Remaining
pictures > Time
After 30 seconds without any
buttons being pushed, the LCD
will turn off and camera enters
into Power Save or Ready Mode.
1.
The LCD screen can be awak-
ened by pressing the Power
button briefly.
Note: The LCD will not “wake up” when
camera is writing to memory.
2.
PIR LED Status Light: During the
first 2 minutes of Ready Mode,
the red light will illuminate when
a PIR event is triggered. The red
light will blink for 2-3 seconds
when photo is taken during this
first 2 minutes. After 2 minutes
all indicator lights will turn off
until a button is pressed.
1. LCD Ready Mode: The camera
will automatically enter Ready
Mode if a button is not pressed
for greater than 30 seconds. The
status lights will illuminate for a
total of 2 minutes.
2.
Ready
Time/Date
Location
Trigger
Flextime
PIR Mode
PIR Active
PIR Sense
Still Res
Pic/Video
Delay
PIR Mode Flextime Both
P1 P2 Interval
Still Video
24Hr Day Night
Hi Med Lo
Hi Med Lo
Regular Wide HD
15s 30s 1m 2m 5m 10m
POWER
POWER
Ready
Time/Date
Location
Trigger
Flextime
PIR Mode
PIR Active
PIR Sense
Still Res
Pic/Video
Delay
PIR Mode Flextime Both
P1 P2 Interval
Still Video
24Hr Day Night
Hi Med Lo
Hi Med Lo
Regular Wide HD
15s 30s 1m 2m 5m 10m
Ready
Time/Date
Location
Trigger
Flextime
PIR Mode
PIR Active
PIR Sense
Still Res
Pic/Video
Delay
PIR Mode Flextime Both
P1 P2 Interval
Still Video
24Hr Day Night
Hi Med Lo
Hi Med Lo
Regular Wide HD
15s 30s 1m 2m 5m 10m
Ready
Time/Date
Location
Trigger
Flextime
PIR Mode
PIR Active
PIR Sense
Still Res
Pic/Video
Delay
PIR Mode Flextime Both
P1 P2 Interval
Still Video
24Hr Day Night
Hi Med Lo
Hi Med Lo
Regular Wide HD
15s 30s 1m 2m 5m 10m
Power Save
Setting Time
Test Mode
1.
Check the battery level icon to
ensure the batteries just
installed contain the proper
charge level. If so, you are ok to
proceed with camera use.
2.
To turn the unit ON, press and
release the power button.
1. To change date and time, start by
pressing and release the center
navigation button to set the hour.
2. Press the left or right navigation
button to go up or down in
sequence.
3. When the hour is set, repeat steps
1 and 2 to set the minutes.
page 6
NOTE: LCD cycle through camera
information. PIR picture number >
Flextime number > Remaining
pictures > Time
After 30 seconds without any
buttons being pushed, the LCD
will turn off and camera enters
into Power Save or Ready Mode.
1.
The LCD screen can be awak-
ened by pressing the Power
button briefly.
Note: The LCD will not “wake up” when
camera is writing to memory.
2.
PIR LED Status Light: During the
first 2 minutes of Ready Mode,
the red light will illuminate when
a PIR event is triggered. The red
light will blink for 2-3 seconds
when photo is taken during this
first 2 minutes. After 2 minutes
all indicator lights will turn off
until a button is pressed.
1. LCD Ready Mode: The camera
will automatically enter Ready
Mode if a button is not pressed
for greater than 30 seconds. The
status lights will illuminate for a
total of 2 minutes.
2.
Ready
Time/Date
Location
Trigger
Flextime
PIR Mode
PIR Active
PIR Sense
Still Res
Pic/Video
Delay
PIR Mode Flextime Both
P1 P2 Interval
Still Video
24Hr Day Night
Hi Med Lo
Hi Med Lo
Regular Wide HD
15s 30s 1m 2m 5m 10m
POWER
POWER
Ready
Time/Date
Location
Trigger
Flextime
PIR Mode
PIR Active
PIR Sense
Still Res
Pic/Video
Delay
PIR Mode Flextime Both
P1 P2 Interval
Still Video
24Hr Day Night
Hi Med Lo
Hi Med Lo
Regular Wide HD
15s 30s 1m 2m 5m 10m
Ready
Time/Date
Location
Trigger
Flextime
PIR Mode
PIR Active
PIR Sense
Still Res
Pic/Video
Delay
PIR Mode Flextime Both
P1 P2 Interval
Still Video
24Hr Day Night
Hi Med Lo
Hi Med Lo
Regular Wide HD
15s 30s 1m 2m 5m 10m
POWER
Ready
Time/Date
Location
Trigger
Flextime
PIR Mode
PIR Active
PIR Sense
Still Res
Pic/Video
Delay
PIR Mode Flextime Both
P1 P2 Interval
Still Video
24Hr Day Night
Hi Med Lo
Hi Med Lo
Regular Wide HD
15s 30s 1m 2m 5m 10m
Ready
Time/Date
Location
Trigger
Flextime
PIR Mode
PIR Active
PIR Sense
Still Res
Pic/Video
Delay
PIR Mode Flextime Both
P1 P2 Interval
Still Video
24Hr Day Night
Hi Med Lo
Hi Med Lo
Regular Wide HD
15s 30s 1m 2m 5m 10m
Ready
Time/Date
Location
Trigger
Flextime
PIR Mode
PIR Active
PIR Sense
Still Res
Pic/Video
Delay
PIR Mode Flextime Both
P1 P2 Interval
Still Video
24Hr Day Night
Hi Med Lo
Hi Med Lo
Regular Wide HD
15s 30s 1m 2m 5m 10m
Trigger
Flextime
PIR Mode
PIR Active
PIR Sense
Still Res
Pic/Video
PIR Mode Flextime Both
P1 P2 Interval
Still Video
24Hr Day Night
Hi Med Lo
Hi Med Lo
Regular Wide HD
Ready
Time/Date
Location
Trigger
Flextime
PIR Mode
PIR Active
PIR Sense
Still Res
Pic/Video
Delay
PIR Mode Flextime Both
P1 P2 Interval
Still Video
24Hr Day Night
Hi Med Lo
Hi Med Lo
Regular Wide HD
15s 30s 1m 2m 5m 10m
Ready
Time/Date
Location
Trigger
Flextime
PIR Mode
PIR Active
PIR Sense
Still Res
Pic/Video
Delay
PIR Mode Flextime Both
P1 P2 Interval
Still Video
24Hr Day Night
Hi Med Lo
Hi Med Lo
Regular Wide HD
15s 30s 1m 2m 5m 10m
Ready
Time/Date
Location
Trigger
Flextime
PIR Mode
PIR Active
PIR Sense
Still Res
Pic/Video
Delay
PIR Mode Flextime Both
P1 P2 Interval
Still Video
24Hr Day Night
Hi Med Lo
Hi Med Lo
Regular Wide HD
15s 30s 1m 2m 5m 10m
Ready
Time/Date
Location
Trigger
Flextime
PIR Mode
PIR Active
PIR Sense
Still Res
Pic/Video
Delay
PIR Mode Flextime Both
P1 P2 Interval
Still Video
24Hr Day Night
Hi Med Lo
Hi Med Lo
Regular Wide HD
15s 30s 1m 2m 5m 10m
Setting Date
Location
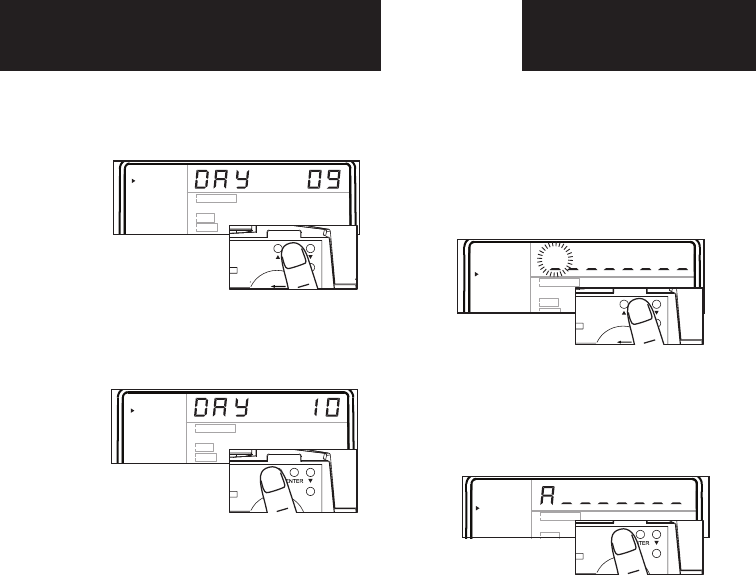
1. Press the center navigation
button after setting the minute to
change the Day.
2. Press the left or right navigation
button to go up or down in
sequence.
3. When the DAY is set, repeat
steps 1 and 2 to set the Month
and Year.
1. Press the center navigation button
while Location is selected. The
first character will be blinking.
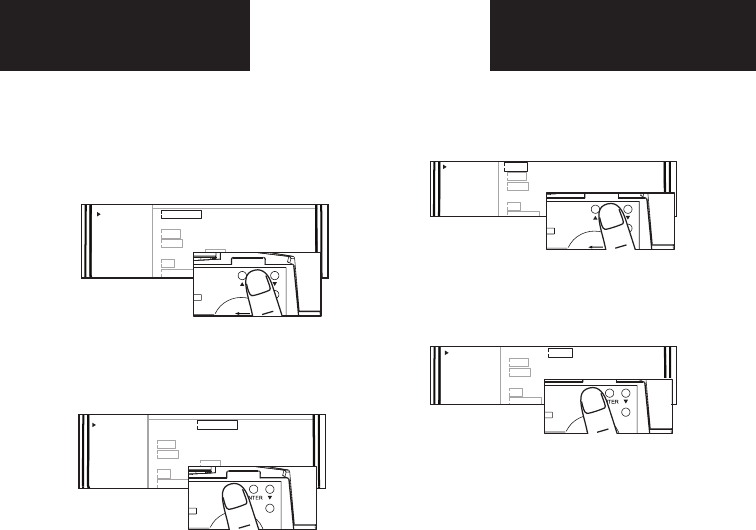
1. Press the center navigation button
while Trigger is selected. The
highlighted option will be blinking.
TRIGGER:
PIR MODE: Takes a photo only when the PIR
sensor is triggered.
FLEXTIME(Time Lapse): Takes time lapse images at
set intervals during the key movement periods
of the day, depending on your Flextime settings.
BOTH: Both PIR and Flextime are active.
The Interval setting is set by the Delay Setting on
the camera with a 1 minute minimum Flextime
delay. See chart on the next page for Flextime
options.
NOTE: Camera needs at least 48 hours in the
field to acclimate to the environment for
Flextime to function properly.
Reminder: Only use “Flextime” and “Both”
modes if you are wanting to use time lapse
technology. These modes can reduce battery life
versus the standard “PIR” mode.
2. Press the left or right navigation
button to move to different
options. Press the center naviga-
tion button to save the setting.
2. Press the left or right navigation
button to go up or down in
sequence. Press the center
navigation button when the
character shown is what you want
and move to the next character.
3. Repeat steps 1 and 2 to set the rest
of the characters. Press the center
navigation button to skip spaces
and save the location name.
1. Press the center navigation button
while Flextime is selected. The
highlighted option will be blinking.
2. Press the left or right navigation
button to move to different options.
Press the center navigation button
to save the setting.
page 7
Trigger
Flextime
PIR Mode
PIR Active
PIR Sense
Still Res
PIR Mode Flextime Both
P1 P2 Interval
Still Video
24Hr Day Night
Hi Med Lo
Hi Med Lo
Regular Wide HD
This setting allows you to choose the mode in
which the camera will be capturing images.
Save the location of the area the camera was
installed. This is for your reference and is
optional. If you do not wish to name your location
skip to the next step.
Ready
Time/Date
Location
Trigger
Flextime
PIR Mode
PIR Active
PIR Sense
Still Res
Pic/Video
Delay
PIR Mode Flextime Both
P1 P2 Interval
Still Video
24Hr Day Night
Hi Med Lo
Hi Med Lo
Regular Wide HD
15s 30s 1m 2m 5m 10m
Ready
Time/Date
Location
Trigger
Flextime
PIR Mode
PIR Active
PIR Sense
Still Res
Pic/Video
Delay
PIR Mode Flextime Both
P1 P2 Interval
Still Video
24Hr Day Night
Hi Med Lo
Hi Med Lo
Regular Wide HD
15s 30s 1m 2m 5m 10m
Trigger
Flextime
PIR Mode
PIR Active
PIR Sense
Still Res
Pic/Video
PIR Mode Flextime Both
P1 P2 Interval
Still Video
24Hr Day Night
Hi Med Lo
Hi Med Lo
Regular Wide HD
Ready
Time/Date
Location
Trigger
Flextime
PIR Mode
PIR Active
PIR Sense
Still Res
Pic/Video
Delay
PIR Mode Flextime Both
P1 P2 Interval
Still Video
24Hr Day Night
Hi Med Lo
Hi Med Lo
Regular Wide HD
15s 30s 1m 2m 5m 10m
Ready
Time/Date
Location
Trigger
Flextime
PIR Mode
PIR Active
PIR Sense
Still Res
Pic/Video
Delay
PIR Mode Flextime Both
P1 P2 Interval
Still Video
24Hr Day Night
Hi Med Lo
Hi Med Lo
Regular Wide HD
15s 30s 1m 2m 5m 10m
Ready
Time/Date
Location
Trigger
Flextime
PIR Mode
PIR Active
PIR Sense
Still Res
Pic/Video
Delay
PIR Mode Flextime Both
P1 P2 Interval
Still Video
24Hr Day Night
Hi Med Lo
Hi Med Lo
Regular Wide HD
15s 30s 1m 2m 5m 10m
Ready
Time/Date
Location
Trigger
Flextime
PIR Mode
PIR Active
PIR Sense
Still Res
Pic/Video
Delay
PIR Mode Flextime Both
P1 P2 Interval
Still Video
24Hr Day Night
Hi Med Lo
Hi Med Lo
Regular Wide HD
15s 30s 1m 2m 5m 10m
Trigger Flextime
Location
1. Press the center navigation
button after setting the minute to
change the Day.
2. Press the left or right navigation
button to go up or down in
sequence.
3. When the DAY is set, repeat
steps 1 and 2 to set the Month
and Year.
1. Press the center navigation button
while Location is selected. The
first character will be blinking.
1. Press the center navigation button
while Trigger is selected. The
highlighted option will be blinking.
TRIGGER:
PIR MODE: Takes a photo only when the PIR
sensor is triggered.
FLEXTIME(Time Lapse): Takes time lapse images at
set intervals during the key movement periods
of the day, depending on your Flextime settings.
BOTH: Both PIR and Flextime are active.
The Interval setting is set by the Delay Setting on
the camera with a 1 minute minimum Flextime
delay. See chart on the next page for Flextime
options.
NOTE: Camera needs at least 48 hours in the
field to acclimate to the environment for
Flextime to function properly.
Reminder: Only use “Flextime” and “Both”
modes if you are wanting to use time lapse
technology. These modes can reduce battery life
versus the standard “PIR” mode.
2. Press the left or right navigation
button to move to different
options. Press the center naviga-
tion button to save the setting.
2. Press the left or right navigation
button to go up or down in
sequence. Press the center
navigation button when the
character shown is what you want
and move to the next character.
3. Repeat steps 1 and 2 to set the rest
of the characters. Press the center
navigation button to skip spaces
and save the location name.
1. Press the center navigation button
while Flextime is selected. The
highlighted option will be blinking.
2. Press the left or right navigation
button to move to different options.
Press the center navigation button
to save the setting.
page 8
Trigger
Flextime
PIR Mode
PIR Active
PIR Sense
Still Res
Pic/Video
PIR Mode Flextime Both
P1 P2 Interval
Still Video
24Hr Day Night
Hi Med Lo
Hi Med Lo
Regular Wide HD
This setting allows you to choose the mode in
which the camera will be capturing images.
Save the location of the area the camera was
installed. This is for your reference and is
optional. If you do not wish to name your location
skip to the next step.
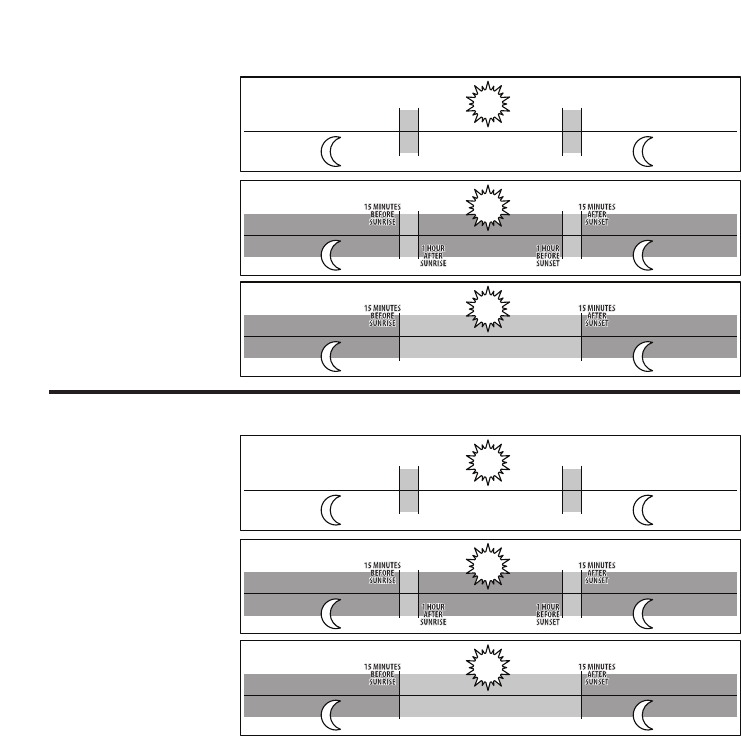
Ready
Time/Date
Location
Trigger
Flextime
PIR Mode
PIR Active
PIR Sense
Still Res
Pic/Video
Delay
P1 P2 Interval
Still Video
24Hr Day Night
Hi Med Lo
Hi Med Lo
Regular Wide HD
15s 30s 1m 2m 5m 10m
Ready
Time/Date
Location
Trigger
Flextime
PIR Mode
PIR Active
PIR Sense
Still Res
Pic/Video
Delay
P1 P2 Interval
Still Video
24Hr Day Night
Hi Med Lo
Hi Med Lo
Regular Wide HD
15s 30s 1m 2m 5m 10m
Ready
Time/Date
Location
Trigger
Flextime
PIR Mode
PIR Active
PIR Sense
Still Res
Pic/Video
Delay
P1 P2 Interval
Still Video
24Hr Day Night
Hi Med Lo
Hi Med Lo
Regular Wide HD
15s 30s 1m 2m 5m 10m
Ready
Time/Date
Location
Trigger
Flextime
PIR Mode
PIR Active
PIR Sense
Still Res
Pic/Video
Delay
P1 P2 Interval
Still Video
24Hr Day Night
Hi Med Lo
Hi Med Lo
Regular Wide HD
15s 30s 1m 2m 5m 10m
PIR Mode
1. Press the center navigation
button while PIR Mode is
selected. The highlighted option
will be blinking.
PIR MODE:
STILL: The camera takes still photographs.
VIDEO: The camera takes 30 second videos.
2. Press the left or right navigation
button to move to different
options. Press the center naviga-
tion button to save the setting.
PIR Active
1. Press the center navigation
button while PIR Active is
selected. The highlighted option
will be blinking.
PIR ACTIVE:
24 HR: The PIR can be active at all times.
DAY: The PIR can be active in daylight hours
only.
NIGHT: The PIR can be active in nighttime
hours only.
2. Press the left or right navigation
button to move to different
options. Press the center naviga-
tion button to save the setting.
page 9
Flextime period:
1. 15 min before Sunrise
to 1 hour after Sunrise.
2. 1 hour before Sunset
to 15 min after Sunset
Flextime period:
1. 15 min before Sunrise
to 1 hour after Sunrise.
2. 1 hour before Sunset
to 15 min after Sunset
Flextime period:
1. 15 min before Sunrise
to 15 min after Sunset
1 HOUR
AFTER
SUNRISE
1 HOUR
BEFORE
SUNSET
15 MINUTES
BEFORE
SUNRISE
15 MINUTES
AFTER
SUNSET
FLEX
TIME FLEX
TIME
FLEX
TIME FLEX
TIME
PIR
INACTIVE
Camera is inactive before and after Flextime periods. Flextime is active twice a day.
Flextime is active twice a day.
Flextime is active during daytime.
Camera is in PIR mode before and after Flextime periods.
Camera is in PIR mode before and after Flextime periods.
INACTIVE
INACTIVE
INACTIVE
INACTIVE
INACTIVE
PIR
PIR
FLEXTIME
PIR PIR
P1
FLEXTIME selected
BOTH selected
P2
INTERVAL
Flextime + PIR period:
1. 15 min before Sunrise
to 1 hour after Sunrise.
2. 1 hour before Sunset
to 15 min after Sunset
Flextime + PIR period:
1. 15 min before Sunrise
to 1 hour after Sunrise.
2. 1 hour before Sunset
to 15 min after Sunset
Flextime + PIR period:
1. 15 min before Sunrise
to 15 min after Sunset
P1
P2
INTERVAL
1 HOUR
AFTER
SUNRISE
1 HOUR
BEFORE
SUNSET
15 MINUTES
BEFORE
SUNRISE
15 MINUTES
AFTER
SUNSET
FLEX
TIME FLEX
TIME
FLEX
TIME FLEX
TIME
PIR
PIR PIR
PIR PIRPIR
PIR
FLEXTIME & PIR
PIR PIR
Camera is inactive before and after Flextime + PIR periods. Flextime + PIR is active twice a day.
Camera is in PIR mode before and after Flextime + PIR periods. Flextime + PIR is active twice a day.
Camera is in PIR mode before and after Flextime + PIR periods. Flextime + PIR is active during daytime.
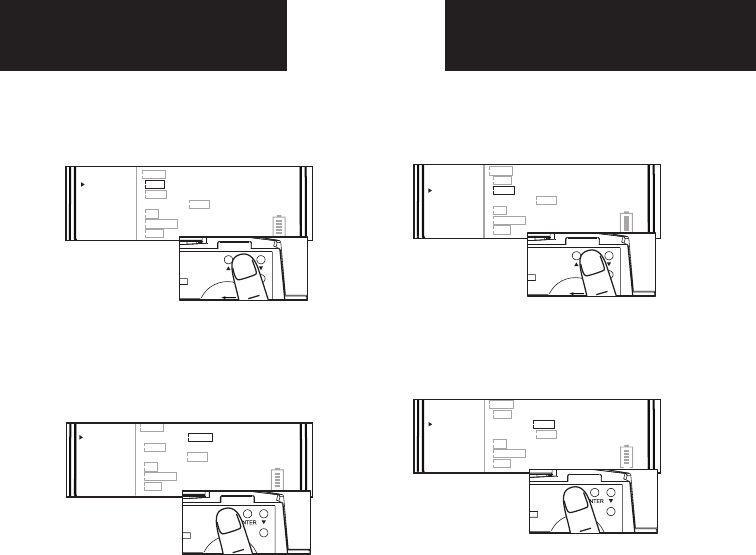
Ready
Time/Date
Location
Trigger
Flextime
PIR Mode
PIR Active
PIR Sense
Still Res
Pic/Video
Delay
P1 P2 Interval
Still Video
24Hr Day Night
Hi Med Lo
Hi Med Lo
Regular Wide HD
15s 30s 1m 2m 5m 10m
Ready
Time/Date
Location
Trigger
Flextime
PIR Mode
PIR Active
PIR Sense
Still Res
Pic/Video
Delay
P1 P2 Interval
Still Video
24Hr Day Night
Hi Med Lo
Hi Med Lo
Regular Wide HD
15s 30s 1m 2m 5m 10m
Ready
Time/Date
Location
Trigger
Flextime
PIR Mode
PIR Active
PIR Sense
Still Res
Pic/Video
Delay
P1 P2 Interval
Still Video
24Hr Day Night
Hi Med Lo
Hi Med Lo
Regular Wide HD
15s 30s 1m 2m 5m 10m
Ready
Time/Date
Location
Trigger
Flextime
PIR Mode
PIR Active
PIR Sense
Still Res
Pic/Video
Delay
P1 P2 Interval
Still Video
24Hr Day Night
Hi Med Lo
Hi Med Lo
Regular Wide HD
15s 30s 1m 2m 5m 10m
PIR Mode
1. Press the center navigation
button while PIR Mode is
selected. The highlighted option
will be blinking.
PIR MODE:
STILL: The camera takes still photographs.
VIDEO: The camera takes 30 second videos.
2. Press the left or right navigation
button to move to different
options. Press the center naviga-
tion button to save the setting.
PIR Active
1. Press the center navigation
button while PIR Active is
selected. The highlighted option
will be blinking.
PIR ACTIVE:
24 HR: The PIR can be active at all times.
DAY: The PIR can be active in daylight hours
only.
NIGHT: The PIR can be active in nighttime
hours only.
2. Press the left or right navigation
button to move to different
options. Press the center naviga-
tion button to save the setting.
page 10
Flextime period:
1. 15 min before Sunrise
to 1 hour after Sunrise.
2. 1 hour before Sunset
to 15 min after Sunset
Flextime period:
1. 15 min before Sunrise
to 1 hour after Sunrise.
2. 1 hour before Sunset
to 15 min after Sunset
Flextime period:
1. 15 min before Sunrise
to 15 min after Sunset
1 HOUR
AFTER
SUNRISE
1 HOUR
BEFORE
SUNSET
15 MINUTES
BEFORE
SUNRISE
15 MINUTES
AFTER
SUNSET
FLEX
TIME FLEX
TIME
FLEX
TIME FLEX
TIME
PIR
INACTIVE
Camera is inactive before and after Flextime periods. Flextime is active twice a day.
Flextime is active twice a day.
Flextime is active during daytime.
Camera is in PIR mode before and after Flextime periods.
Camera is in PIR mode before and after Flextime periods.
INACTIVE
INACTIVE
INACTIVE
INACTIVE
INACTIVE
PIR
PIR
FLEXTIME
PIR PIR
P1
FLEXTIME selected
BOTH selected
P2
INTERVAL
Flextime + PIR period:
1. 15 min before Sunrise
to 1 hour after Sunrise.
2. 1 hour before Sunset
to 15 min after Sunset
Flextime + PIR period:
1. 15 min before Sunrise
to 1 hour after Sunrise.
2. 1 hour before Sunset
to 15 min after Sunset
Flextime + PIR period:
1. 15 min before Sunrise
to 15 min after Sunset
P1
P2
INTERVAL
1 HOUR
AFTER
SUNRISE
1 HOUR
BEFORE
SUNSET
15 MINUTES
BEFORE
SUNRISE
15 MINUTES
AFTER
SUNSET
FLEX
TIME FLEX
TIME
FLEX
TIME FLEX
TIME
PIR
PIR PIR
PIR PIRPIR
PIR
FLEXTIME & PIR
PIR PIR
Camera is inactive before and after Flextime + PIR periods. Flextime + PIR is active twice a day.
Camera is in PIR mode before and after Flextime + PIR periods. Flextime + PIR is active twice a day.
Camera is in PIR mode before and after Flextime + PIR periods. Flextime + PIR is active during daytime.
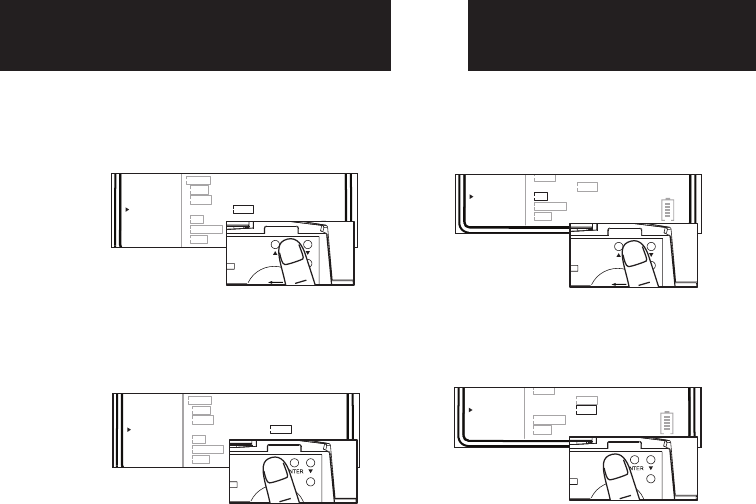
Ready
Time/Date
Location
Trigger
Flextime
PIR Mode
PIR Active
PIR Sense
Still Res
Pic/Video
Delay
PIR Mode Flextime Both
P1 P2 Interval
Still Video
24Hr Day Night
Hi Med Lo
Hi Med Lo
Regular Wide HD
15s 30s 1m 2m 5m 10m
Ready
Time/Date
Location
Trigger
Flextime
PIR Mode
PIR Active
PIR Sense
Still Res
Pic/Video
Delay
PIR Mode Flextime Both
P1 P2 Interval
Still Video
24Hr Day Night
Hi Med Lo
Hi Med Lo
Regular Wide HD
15s 30s 1m 2m 5m 10m
Ready
Time/Date
Location
Trigger
Flextime
PIR Mode
PIR Active
PIR Sense
Still Res
Pic/Video
Delay
PIR Mode Flextime Both
P1 P2 Interval
Still Video
24Hr Day Night
Hi Med Lo
Hi Med Lo
Regular Wide HD
15s 30s 1m 2m 5m 10m
Ready
Time/Date
Location
Trigger
Flextime
PIR Mode
PIR Active
PIR Sense
Still Res
Pic/Video
Delay
PIR Mode Flextime Both
P1 P2 Interval
Still Video
24Hr Day Night
Hi Med Lo
Hi Med Lo
Regular Wide HD
15s 30s 1m 2m 5m 10m
Ready
Time/Date
Location
Trigger
Flextime
PIR Mode
PIR Active
PIR Sense
Still Res
Pic/Video
Delay
PIR Mode Flextime Both
P1 P2 Interval
Still Video
24Hr Day Night
Hi Med Lo
Hi Med Lo
Regular Wide HD
15s 30s 1m 2m 5m 10m
Ready
Time/Date
Location
Trigger
Flextime
PIR Mode
PIR Active
PIR Sense
Still Res
Pic/Video
Delay
PIR Mode Flextime Both
P1 P2 Interval
Still Video
24Hr Day Night
Hi Med Lo
Hi Med Lo
Regular Wide HD
15s 30s 1m 2m 5m 10m
Ready
Time/Date
Location
Trigger
Flextime
PIR Mode
PIR Active
PIR Sense
Still Res
Pic/Video
Delay
P1 P2 Interval
Still Video
24Hr Day Night
Hi Med Lo
Hi Med Lo
Regular Wide HD
15s 30s 1m 2m 5m 10m
Ready
Time/Date
Location
Trigger
Flextime
PIR Mode
PIR Active
PIR Sense
Still Res
Pic/Video
Delay
P1 P2 Interval
Still Video
24Hr Day Night
Hi Med Lo
Hi Med Lo
Regular Wide HD
15s 30s 1m 2m 5m 10m
page 11
page 12
Picture/Video
1. Press the center navigation
button while Picture is selected.
The highlighted option will be
blinking.
PICTURE:
REGULAR: Images taken will be in regular
angle or 4:3 aspect ratio.
WIDE: Images taken will be in wide angle or
16:9 aspect ratio.
2. Press the left or right navigation
button to move to different
options. Press the center naviga-
tion button to save the setting.
Resolution
1. Press the center navigation
button while Resolution is
selected. The highlighted option
will be blinking.
RESOLUTION:
HI: Images will be at the highest resolution
but take up the most space.
MED: Images will be at medium resolution
and take up average space.
LO: Images will be at the lowest resolution
and take up the least space.
2. Press the left or right navigation
button to move to different
options. Press the center naviga-
tion button to save the setting.
Delay
1. Press the center navigation
button while Delay is selected.
The highlighted option will be
blinking.
2. Press the left or right navigation
button to move to different
options. Press the center naviga-
tion button to save the setting.
PIR Sensitivity
1. Press the center navigation
button while PIR Sense is
selected. The highlighted option
will be blinking.
PIR SENSE:
HI: The PIR detects the smallest movement.
MED: (Default) The PIR detects most common
size movements.
LO: The PIR detects only larger movements.
2. Press the left or right navigation
button to move to different
options. Press the center naviga-
tion button to save the setting.
DELAY: The time before the camera is able
to take another picture.
PIR Mode: minimum 15s
FLEXTIME Mode: minimum 1 minute
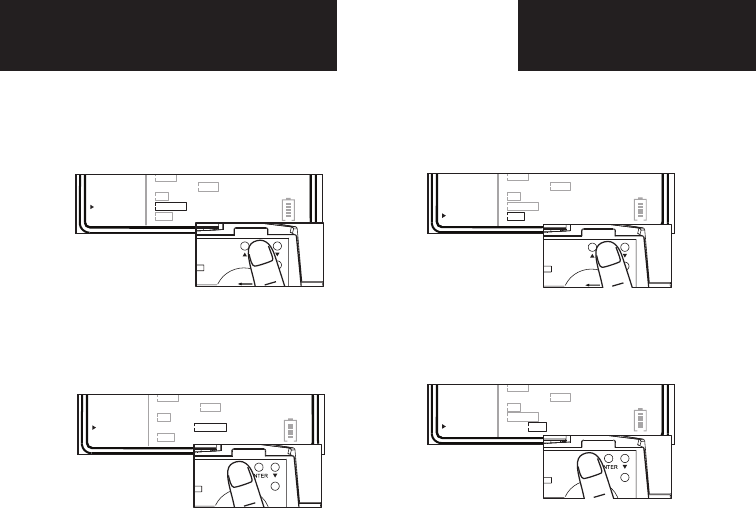
Ready
Time/Date
Location
Trigger
Flextime
PIR Mode
PIR Active
PIR Sense
Still Res
Pic/Video
Delay
PIR Mode Flextime Both
P1 P2 Interval
Still Video
24Hr Day Night
Hi Med Lo
Hi Med Lo
Regular Wide HD
15s 30s 1m 2m 5m 10m
Ready
Time/Date
Location
Trigger
Flextime
PIR Mode
PIR Active
PIR Sense
Still Res
Pic/Video
Delay
PIR Mode Flextime Both
P1 P2 Interval
Still Video
24Hr Day Night
Hi Med Lo
Hi Med Lo
Regular Wide HD
15s 30s 1m 2m 5m 10m
Ready
Time/Date
Location
Trigger
Flextime
PIR Mode
PIR Active
PIR Sense
Still Res
Pic/Video
Delay
PIR Mode Flextime Both
P1 P2 Interval
Still Video
24Hr Day Night
Hi Med Lo
Hi Med Lo
Regular Wide HD
15s 30s 1m 2m 5m 10m
Ready
Time/Date
Location
Trigger
Flextime
PIR Mode
PIR Active
PIR Sense
Still Res
Pic/Video
Delay
PIR Mode Flextime Both
P1 P2 Interval
Still Video
24Hr Day Night
Hi Med Lo
Hi Med Lo
Regular Wide HD
15s 30s 1m 2m 5m 10m
Ready
Time/Date
Location
Trigger
Flextime
PIR Mode
PIR Active
PIR Sense
Still Res
Pic/Video
Delay
PIR Mode Flextime Both
P1 P2 Interval
Still Video
24Hr Day Night
Hi Med Lo
Hi Med Lo
Regular Wide HD
15s 30s 1m 2m 5m 10m
Ready
Time/Date
Location
Trigger
Flextime
PIR Mode
PIR Active
PIR Sense
Still Res
Pic/Video
Delay
PIR Mode Flextime Both
P1 P2 Interval
Still Video
24Hr Day Night
Hi Med Lo
Hi Med Lo
Regular Wide HD
15s 30s 1m 2m 5m 10m
Ready
Time/Date
Location
Trigger
Flextime
PIR Mode
PIR Active
PIR Sense
Still Res
Pic/Video
Delay
P1 P2 Interval
Still Video
24Hr Day Night
Hi Med Lo
Hi Med Lo
Regular Wide HD
15s 30s 1m 2m 5m 10m
Ready
Time/Date
Location
Trigger
Flextime
PIR Mode
PIR Active
PIR Sense
Still Res
Pic/Video
Delay
P1 P2 Interval
Still Video
24Hr Day Night
Hi Med Lo
Hi Med Lo
Regular Wide HD
15s 30s 1m 2m 5m 10m
page 11
page 12
Picture/Video
1. Press the center navigation
button while Picture is selected.
The highlighted option will be
blinking.
PICTURE:
REGULAR: Images taken will be in regular
angle or 4:3 aspect ratio.
WIDE: Images taken will be in wide angle or
16:9 aspect ratio.
2. Press the left or right navigation
button to move to different
options. Press the center naviga-
tion button to save the setting.
Resolution
1. Press the center navigation
button while Resolution is
selected. The highlighted option
will be blinking.
RESOLUTION:
HI: Images will be at the highest resolution
but take up the most space.
MED: Images will be at medium resolution
and take up average space.
LO: Images will be at the lowest resolution
and take up the least space.
2. Press the left or right navigation
button to move to different
options. Press the center naviga-
tion button to save the setting.
Delay
1. Press the center navigation
button while Delay is selected.
The highlighted option will be
blinking.
2. Press the left or right navigation
button to move to different
options. Press the center naviga-
tion button to save the setting.
PIR Sensitivity
1. Press the center navigation
button while PIR Sense is
selected. The highlighted option
will be blinking.
PIR SENSE:
HI: The PIR detects the smallest movement.
MED: (Default) The PIR detects most common
size movements.
LO: The PIR detects only larger movements.
2. Press the left or right navigation
button to move to different
options. Press the center naviga-
tion button to save the setting.
DELAY: The time before the camera is able
to take another picture.
PIR Mode: minimum 15s
FLEXTIME Mode: minimum 1 minute
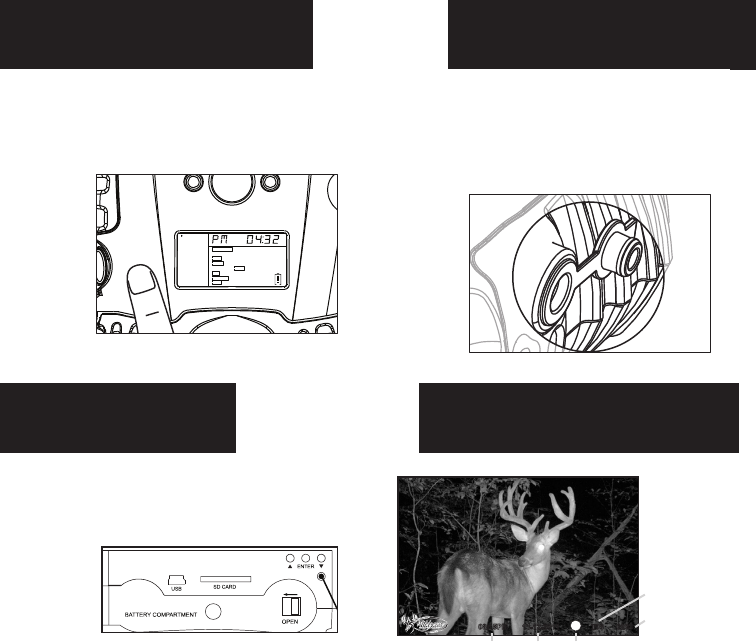
Power Off Power Port
Image Stamp
1. WGI Cameras come standard with
an external power port. You must
open the weather resistant cover
and use a Wildgame Innovations
6 Volt camera battery accessory.
1.
To turn the unit off, first wake up
the LCD screen and then depress
and hold the power button until
the LCD turns off.
page 13
Pictures Display:
08:15PM 11-12-2011 T08 0200
Time Date Moon Phase
Location
Photo
Count
Reset
Reset button located next to the
battery compartment. Push
button to reset settings back to
factory settings.
RESET
Mounting
When mounting to a tree, first latch
the 2 bungee cords through the
mounting holes on the left or right
side of the camera. Then, stretch
the cords around the tree and latch
the other ends of the bungee cords
through the mounting holes on the
opposite side of the camera.
1.
Important
Once you connect the camera to your computer via the
USB cable/ports, the camera will then draw power from
the computer. When completing the viewing, transfer-
ring, copying or deletion of images, please make sure
that you DISCONNECT THE USB CABLE FROM BOTH
THE CAMERA AND THE COMPUTER, as you will not be
able to power the camera OFF until you do so.
The directions as contained herein assume that you are
using a Microsoft operating system and not Linux or a
Mac-based operating system. Even said, there may be
slight variations in your process based on the specific
version of the operation system that you are using as
well as the predefined user preference for each
computer. The below listed steps are to serve as a
guideline and may have to be slightly modified based on
the specific operating system and preference as on your
personal computer.
TIPS:
Recommended distance from target area is 25-30 feet
for optimal imaging quality.
To improve the quality of your images, try not to mount
the unit facing the rising or the setting sun in order to
avoid direct sunlight into the camera lens.
If mounting to a feeder unit or dusty environment, be
sure to clean the camera lens cover, incandescent flash
cover, and the PIR sensor cover on a regular basis.
Periodically check the mounting of the camera to
insure it is not loose.
Make sure that you securely latch the door closed
each and every time you use the unit, as the moisture
seal will not be activated unless closed properly.
Check batteries frequently to insure no corrosive
build-up, as this may cause harm to the camera.
POWER
Ready
Time/Date
Location
Trigger
Flextime
PIR Mode
PIR Active
PIR Sense
Still Res
Pic/Video
Delay
PIR Mode Flextime Both
P1 P2 Interval
Still Video
24Hr Day Night
Hi Med Lo
Hi Med Lo
Regular Wide HD
15s 30s 1m 2m 5m 10m
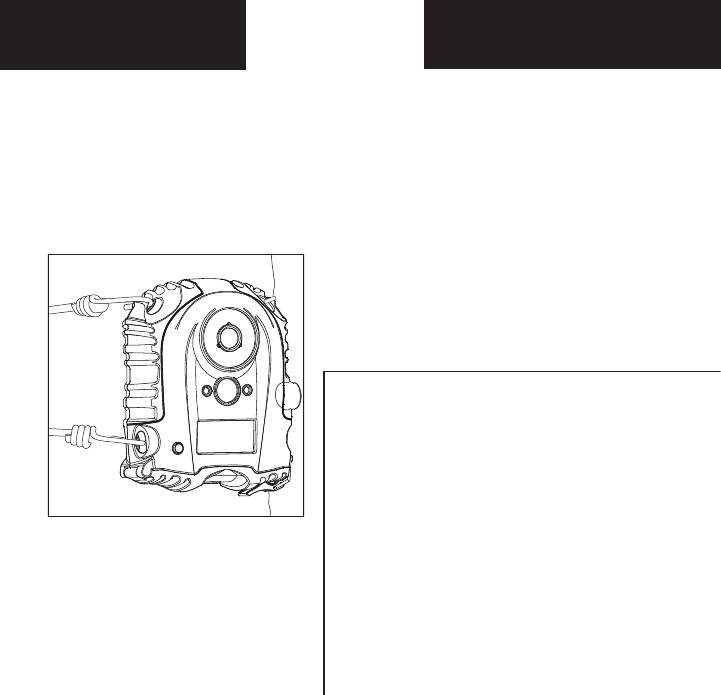
Power Off Power Port
Image Stamp
1. WGI Cameras come standard with
an external power port. You must
open the weather resistant cover
and use a Wildgame Innovations
6 Volt camera battery accessory.
1.
To turn the unit off, first wake up
the LCD screen and then depress
and hold the power button until
the LCD turns off.
page 13
page 14
Pictures Display:
08:15PM 11-12-2011 T08 0200
Time Date Moon Phase
Location
Photo
Count
Reset
Reset button located next to the
battery compartment. Push
button to reset settings back to
factory settings.
RESET
Mounting
When mounting to a tree, first latch
the 2 bungee cords through the
mounting holes on the left or right
side of the camera. Then, stretch
the cords around the tree and latch
the other ends of the bungee cords
through the mounting holes on the
opposite side of the camera.
1.
Important
Once you connect the camera to your computer via the
USB cable/ports, the camera will then draw power from
the computer. When completing the viewing, transfer-
ring, copying or deletion of images, please make sure
that you DISCONNECT THE USB CABLE FROM BOTH
THE CAMERA AND THE COMPUTER, as you will not be
able to power the camera OFF until you do so.
The directions as contained herein assume that you are
using a Microsoft operating system and not Linux or a
Mac-based operating system. Even said, there may be
slight variations in your process based on the specific
version of the operation system that you are using as
well as the predefined user preference for each
computer. The below listed steps are to serve as a
guideline and may have to be slightly modified based on
the specific operating system and preference as on your
personal computer.
TIPS:
Recommended distance from target area is 25-30 feet
for optimal imaging quality.
To improve the quality of your images, try not to mount
the unit facing the rising or the setting sun in order to
avoid direct sunlight into the camera lens.
If mounting to a feeder unit or dusty environment, be
sure to clean the camera lens cover, incandescent flash
cover, and the PIR sensor cover on a regular basis.
Periodically check the mounting of the camera to
insure it is not loose.
Make sure that you securely latch the door closed
each and every time you use the unit, as the moisture
seal will not be activated unless closed properly.
Check batteries frequently to insure no corrosive
build-up, as this may cause harm to the camera.
POWER
Ready
Time/Date
Location
Trigger
Flextime
PIR Mode
PIR Active
PIR Sense
Still Res
Pic/Video
Delay
PIR Mode Flextime Both
P1 P2 Interval
Still Video
24Hr Day Night
Hi Med Lo
Hi Med Lo
Regular Wide HD
15s 30s 1m 2m 5m 10m

Retrieving Images (SD Card in Camera)
Retrieving Images (SD Card reader)
Method 1: Leave SD card in camera
A. First, make sure that the camera is
powered OFF. Next, plug the USB cable into
the camera and then into the USB port on
your computer. Once this is complete (in this
order only), then power the camera ON.
B. Once complete, your computer may
automatically launch “AutoPlay”, a window
recognizing a new Removable disk (the
camera).
C. If so, it should give you three selections:
1. Import pictures
2. View pictures
3. Open folder to view files
D. Select the method from the list provided
that best suits your requirements. Once a
selection is made, you can then view the
images located on the SD Card and manipu-
late them as needed.
E. If your computer does not automatically
launch the AutoPlay window recognizing the
Removable Disk (the camera), then you will
need to go to the “Start Menu” at the bottom
left of your screen and select “Computer”.
The summary view will then be illustrated on
the right hand side of the window where the
“Devices with Removable Storage” will be
listed. The computer will recognize the
camera as Removable Disk.
Method 2: Remove SD card and use card
reader
A. First, remove the SD Card from the camera
unit itself by pressing on it to where it
automatically ejects.
B. Next, insert the SD card into your SD card
reader.
C. Once inserted into your computer it may
automatically launch “AutoPlay”, a window
recognizing a new Secure Digital Storage
Device (the SD Card).
D. If so, it should list several options for the
next steps (not limited to the following):
1. Picture Options
a. Import pictures
b. View pictures
c. Copy Disc
d. Transfer pictures
2. General Options
a. Open folder to view files
E. Select the method from the list provided
that best suits your requirements. If the
selection is made to “View pictures”, you can
then view the images located on the SD Card
and manipulate them as needed.
F. If your computer does not automatically
launch the AutoPlay window recognizing the
Removable Disk (the SD Card), then you will
need to go to the “Start Menu” at the bottom
left of your screen and select “Com-
puter”. The summary view will then be
illustrated on the right hand side of the
window where by the “Devices with
Removable Storage” will be listed. The
computer will recognize the reader as
“Secure Digital Storage Device”. Please
select “Secure Digital Storage Device”
from this menu (or double click on the
graphical icon).
G. This will then direct you into the SD
Card file folder. Images are in the MEDIA
folder while Flextime files are in the
FLEX folder.
H. Once open, you will then see all of the
photo files that are located on the SD
Card. Select each image individually to
view. The default viewing browser for
your computer will then automatically
launch.
I. Repeat for viewing all or other photos.
J. If you determine that you want to
delete the image, select the image by
placing your cursor on it and clicking
your mouse only once. Right click on your
mouse and select delete. This will delete
the image permanently, so be absolutely
sure you want to do this before selecting
delete.
Please select Removable Disk from this
menu (or double click on the graphical
icon).
F. This will then direct you into the SD
Card file folder. Images are in the MEDIA
folder while Flextime files are in the FLEX
folder.
G. Once open, you will then see all of the
photo files that are located on the SD
Card. Select each image individually to
view. The default viewing browser for
your computer will then automatically
launch.
H. Repeat for viewing all or other photos.
I. If you determine that you want to
delete the image, select the image by
placing your cursor on it and clicking your
mouse only once. Right click on your
mouse and select delete. This will delete
the image permanently, so be absolutely
sure you want to do this before selecting
delete.
TIP: The software drivers necessary to
use and view the camera are automati-
cally downloaded to the computer when
you connect your camera to the computer
via the included USB cable.
page 15
page 16

FCC
FCC STATEMENT
Product Name: Game Trail Camera
Trade Name: Wildgame Innovations
Model# I8
This device complies with Part 15 of the FCC Rules. Operation is subject to the following two criteria: (1)
This device may not cause harmful interference, and (2) This device must accept any interference
received, including interference that may cause undesired operation.
Warning: Changes or modications to this unit not expressly approved by the party responsible for
compliance could void the user’s authority to operate the equipment.
NOTE: This equipment has been tested and found to comply with the limits for a Class B digital device,
pursuant to Part 15 of the FCC Rules. These limits are designed to provide reasonable protection against
harmful interference in a residential installation. This equipment generates, uses and can radiate radio
frequency energy and, if not installed and used in accordance with the instructions, may cause harmful
interference to radio communications.
However, there is no guarantee that interference will not occur in a particular installation. If this
equipment does cause harmful interference to radio or television reception, which can be determined
by turning the equipment o and on, the user is encouraged to try to correct the interference by one or
more of the following measures:
-Reorient or relocate the receiving antenna.
-Increase the separation between the equipment and receiver.
-Connect the equipment into an outlet on a circuit dierent from that to which the receiver is
connected.
-Consult the dealer or an experienced radio/TV technician for help.
page 17
Warranty
DISCLAIMERS
WGI Innovations, LTD. is not responsible for damage, expense or injury caused by the unauthorized use of,
alterations to, improper connection of and abuse or neglect of the WGI Innovations™ products.
DISCLAIMER
WGI Innovations, LTD. reserves the right to make changes to product features, functionality and physical design
at its sole discretion. As a result, such changes may not be reected in this version of the manual.
WARRANTY
For the warranty to be in eect, you MUST completely ll out and mail the warranty card along with your proof
of purchase to WGI Innovations within (14) days after the date of purchase. As an alternative to mail, you may also
visit our website and register your product at www.wildgameinnovations.com (you are still required to mail WGI
Innovations your proof of purchase before the warranty is placed in eect.) Follow the onscreen directions to
complete the process.
WGI Innovations, LTD will replace all workmanship defects free of charge for ONE (1) YEAR after the date of
purchase as long as your warranty is in eect.
This warranty DOES NOT COVER damage, expense or injury caused by unauthorized repairs, alterations,
improper connection, shipping, abuse, theft, accident, neglect or collateral loss.
When returning product(s) for service you MUST obtain a Return Merchandise Authorization (RMA) number from
WGI Innovations, LTD. Please include name, UPS address (No P.O. Box), telephone number, RMA number and a
complete description of the problem on all enclosed correspondence. When possible, pack product carefully in
original carton. Customers are responsible for any shipping cost to WGI Innovations. WGI Innovations will pay the
shipping cost of replacement product to the customer. We are not responsible for damage incurred in returning
items for repair.
For product service send to:
WGI Innovations
602 Fountain Parkway
Grand Prairie, TX 75050
(800) 847-8269
Thank you for your purchase!
CUSTOMER SERVICE
WGI Innovations, LTD. stands behind every product we manufacture for a one year product workmanship
warranty and a strong commitment to customer service. If you are in need of customer service for missing parts
or need assistance with the operation or assembly of your product, we encourage you to call one of our
customer service representatives and let us assist you with your WGI Innovations product.

FCC
FCC STATEMENT
Product Name: Game Trail Camera
Trade Name: Wildgame Innovations
Model# I8
This device complies with Part 15 of the FCC Rules. Operation is subject to the following two criteria: (1)
This device may not cause harmful interference, and (2) This device must accept any interference
received, including interference that may cause undesired operation.
Warning: Changes or modications to this unit not expressly approved by the party responsible for
compliance could void the user’s authority to operate the equipment.
NOTE: This equipment has been tested and found to comply with the limits for a Class B digital device,
pursuant to Part 15 of the FCC Rules. These limits are designed to provide reasonable protection against
harmful interference in a residential installation. This equipment generates, uses and can radiate radio
frequency energy and, if not installed and used in accordance with the instructions, may cause harmful
interference to radio communications.
However, there is no guarantee that interference will not occur in a particular installation. If this
equipment does cause harmful interference to radio or television reception, which can be determined
by turning the equipment o and on, the user is encouraged to try to correct the interference by one or
more of the following measures:
-Reorient or relocate the receiving antenna.
-Increase the separation between the equipment and receiver.
-Connect the equipment into an outlet on a circuit dierent from that to which the receiver is
connected.
-Consult the dealer or an experienced radio/TV technician for help.
page 18
Warranty
DISCLAIMERS
WGI Innovations, LTD. is not responsible for damage, expense or injury caused by the unauthorized use of,
alterations to, improper connection of and abuse or neglect of the WGI Innovations™ products.
DISCLAIMER
WGI Innovations, LTD. reserves the right to make changes to product features, functionality and physical design
at its sole discretion. As a result, such changes may not be reected in this version of the manual.
WARRANTY
For the warranty to be in eect, you MUST completely ll out and mail the warranty card along with your proof
of purchase to WGI Innovations within (14) days after the date of purchase. As an alternative to mail, you may also
visit our website and register your product at www.wildgameinnovations.com (you are still required to mail WGI
Innovations your proof of purchase before the warranty is placed in eect.) Follow the onscreen directions to
complete the process.
WGI Innovations, LTD will replace all workmanship defects free of charge for ONE (1) YEAR after the date of
purchase as long as your warranty is in eect.
This warranty DOES NOT COVER damage, expense or injury caused by unauthorized repairs, alterations,
improper connection, shipping, abuse, theft, accident, neglect or collateral loss.
When returning product(s) for service you MUST obtain a Return Merchandise Authorization (RMA) number from
WGI Innovations, LTD. Please include name, UPS address (No P.O. Box), telephone number, RMA number and a
complete description of the problem on all enclosed correspondence. When possible, pack product carefully in
original carton. Customers are responsible for any shipping cost to WGI Innovations. WGI Innovations will pay the
shipping cost of replacement product to the customer. We are not responsible for damage incurred in returning
items for repair.
For product service send to:
WGI Innovations
602 Fountain Parkway
Grand Prairie, TX 75050
(800) 847-8269
Thank you for your purchase!
CUSTOMER SERVICE
WGI Innovations, LTD. stands behind every product we manufacture for a one year product workmanship
warranty and a strong commitment to customer service. If you are in need of customer service for missing parts
or need assistance with the operation or assembly of your product, we encourage you to call one of our
customer service representatives and let us assist you with your WGI Innovations product.

Model # I8
602 Fountain Parkway
Grand Prairie, TX 75050
800.847.8269
“Wildgame Innovations” and the “Button Logo” are TM trademarks of Wildgame Innovations, LLC.
“Sport Responsible” , “Redux” and “Flextime” are TM trademarks of WGI Innovations, LTD. User’s Manual
Infrared Digital Scouting Camera
В этой статье мы ответим на частые вопросы, которые возникают при работе с экшн-камерой. Мы рассмотрим алгоритм по настройке любых экш-камер с разбором конкретных инструкций, способы их подключения к разным устройствам, варианты управления и другие моменты.
Инструкция по настройке экшн-камер с примерами
Экшн-камеры отличаются друг от друга внешним видом, устройством и функциями. Однако принцип работы и настройки у них примерно одинаковые, освоив которые вы сумеете разобраться с любым гаджетом.
Алгоритм подготовки и настройки
1. После распаковки камеры установите в нее идущий в комплекте аккумулятор и карту памяти. Если карты в комплекте нет, вам придется купить ее самостоятельно из списка тех карт, что рекомендует производитель в руководстве пользователя. Некоторые модели могут работать и без карт, но их собственная память обычно маленькая.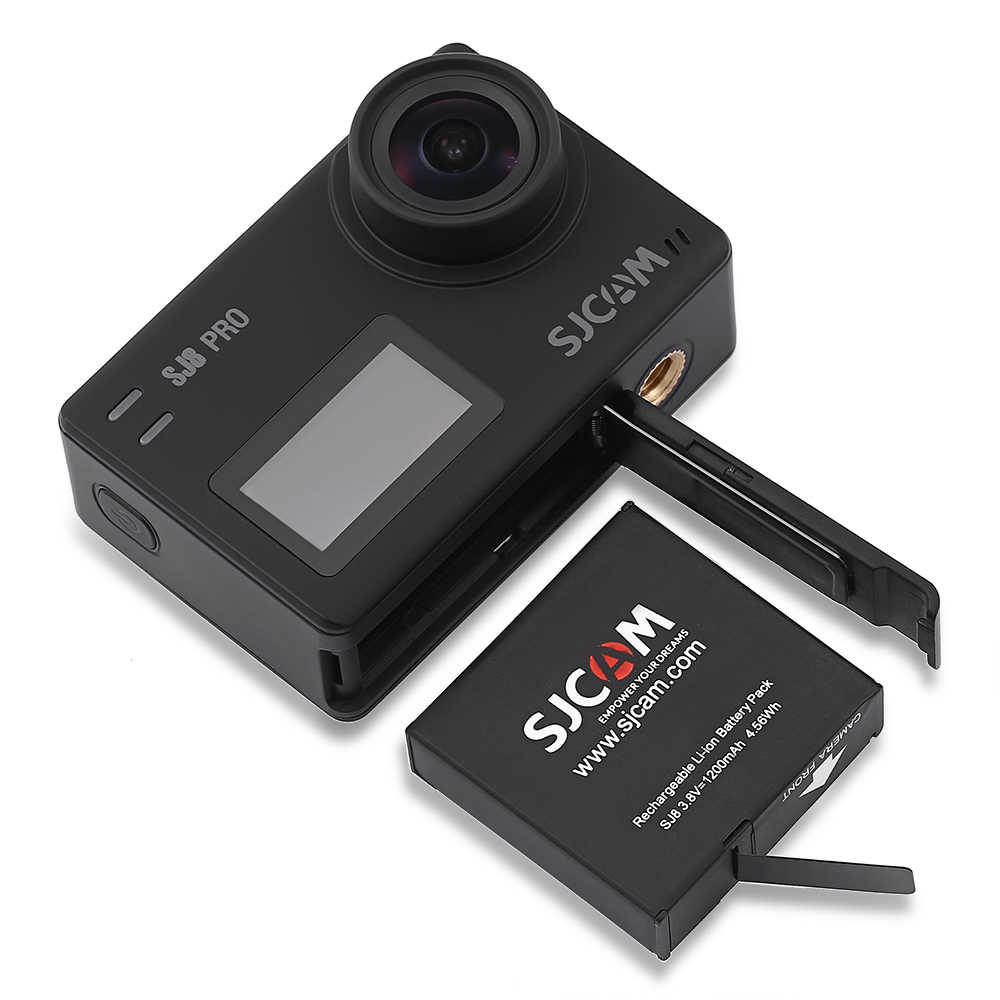
2. Зарядите аккумулятор камеры, подключив ее к источнику питания при помощи идущего в комплекте зарядного устройства. Если с камерой идет только USB-кабель, тогда зарядите батарею через USB-порт компьютера, ноутбука, зарядного устройства смартфона или используйте внешний аккумулятор. Отследить уровень заряда можно на самом дисплее камеры или по индикаторам на ее корпусе. После полной зарядки они меняют цвет, гаснут или меняют мигание на постоянное свечение (в разных моделях по-своему).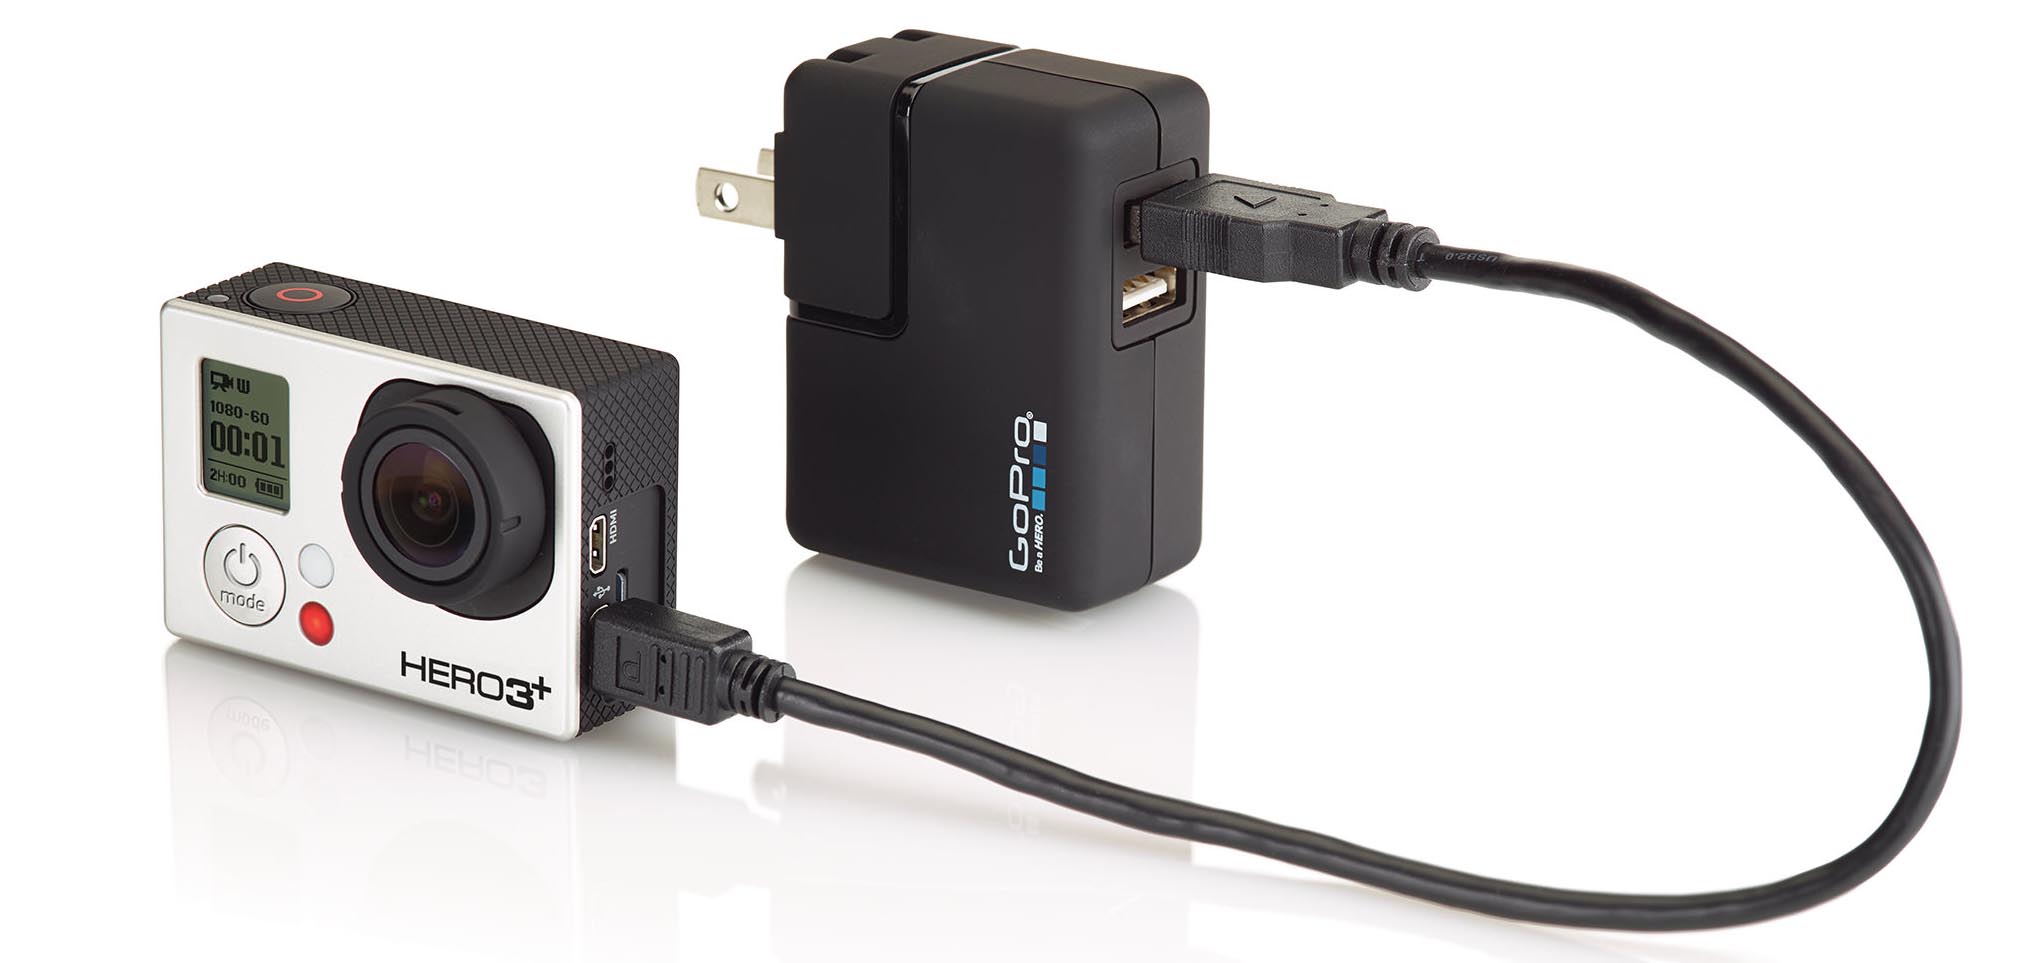
3. Включите камеру. Часто в самом начале пользователю предлагается выбрать язык и посмотреть приветственные материалы. Проделайте предложенные шаги и познакомьтесь с приветственной инструкцией. Если в списке языков нужного вам нет, тогда придется устанавливать русскоязычную прошивку (см. ниже). Некоторые камеры не выдают основное меню до подключения к телефону. Если это ваш случай, тогда вначале проделайте шаги из пункта 5, а затем вернитесь к пункту 4.
4. При помощи сенсорного экрана или управляющих кнопок на корпусе изучите возможности меню. Посмотрите, какие в камере есть режимы съемки фото и видео, как вести запись, просматривать ее и какие есть настройки. Часто настройки скрываются под значком шестеренки и могут быть довольно обширными: настройка беспроводных технологий, автоблокировка дисплея, отключение индикаторов, смена языка, регулировка яркости экрана и другое. Одни настройки интуитивно понятны, а для других вам придется разобраться с терминологией фотографов. Например, выяснить, что такое режим таймлапс, баланс белого и другое. Постарайтесь изучить функции камеры на практике, чтобы в полевых условиях сразу выбирать нужные режимы и настройки.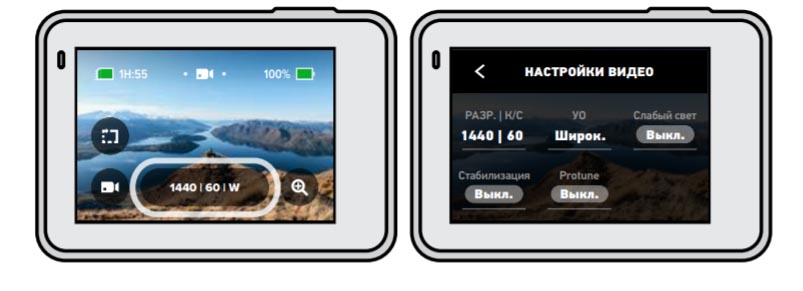
5. Подключите экшн-камеру к телефону или пульту, если такая возможность предусмотрена. Конкретные шаги подключения к телефону и другим устройствам мы рассмотрим ниже.
6. Познакомьтесь с новыми возможностями настройки камеры через мобильное приложение. Большая часть из них обычно дублирует настройки с дисплея, но есть и дополнительные возможности, недоступные с камеры. Это может быть редактирование отснятого видео, размещение материалов в соцсетях, подписи и другое.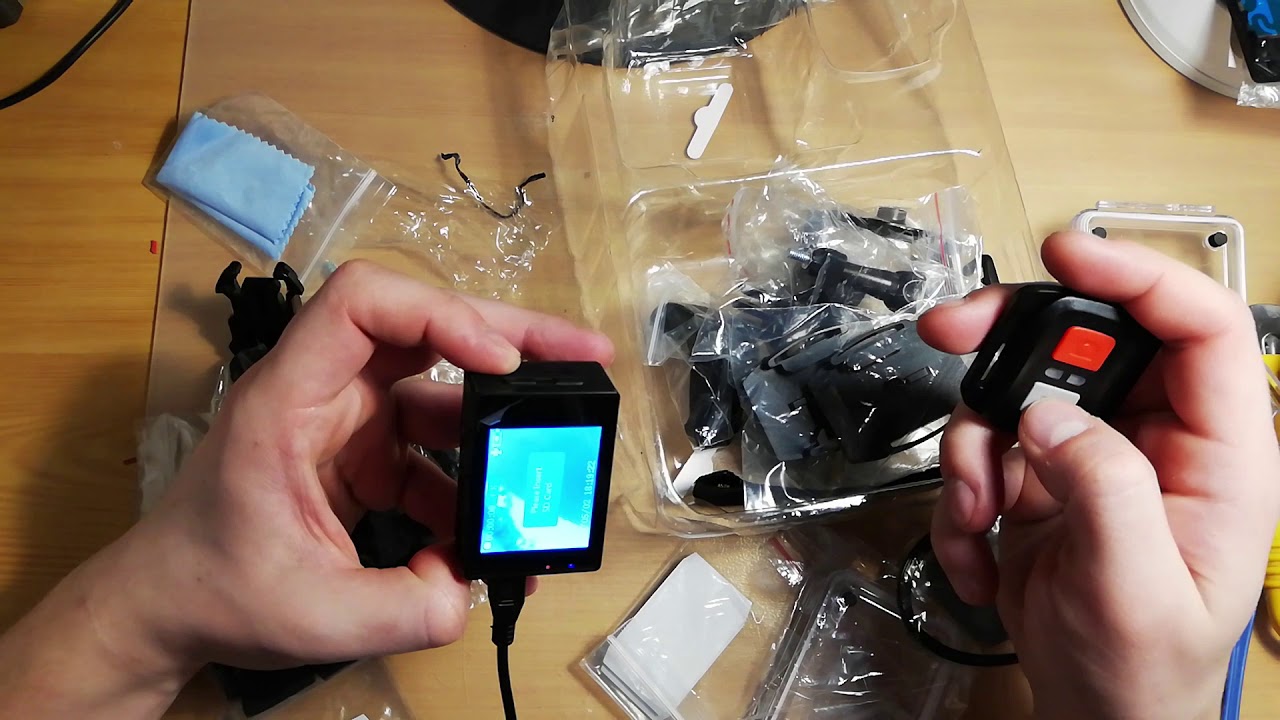
Примеры инструкций к экшн-камерам на русском языке
Инструкция к Xiaomi Yi 4K Plus Action Camera. Настройка, прошивка и подключение экшн-камеры
Как подключить камеру Yi Action Camera к телефону, особенности настройки
Инструкция по эксплуатации экшн-камер GoPro Hero 7 и 8 на русском языке
Инструкция к Sony HDR AS50. Как настроить и подключить экшн-камеру
Инструкция к камерам SJCAM серии SJ4000 на русском языке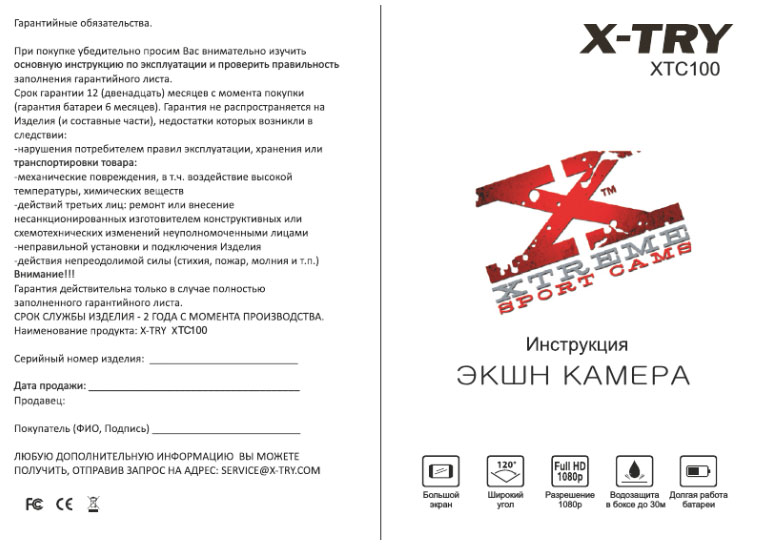
Как подключить экшн-камеру к телефону
Для подключения экшн-камеры к смартфону вам понадобится конкретное мобильное приложение, рекомендуемое производителем. При отсутствии инструкции вы можете узнать его в интернете по названию модели вашей камеры. Скачайте приложение на телефон из App Store или «Play Маркет». Установите его, откройте, при необходимости пройдите регистрацию, примите соглашения и дайте доступы к вашим видео, фото и другой запрашиваемой информации.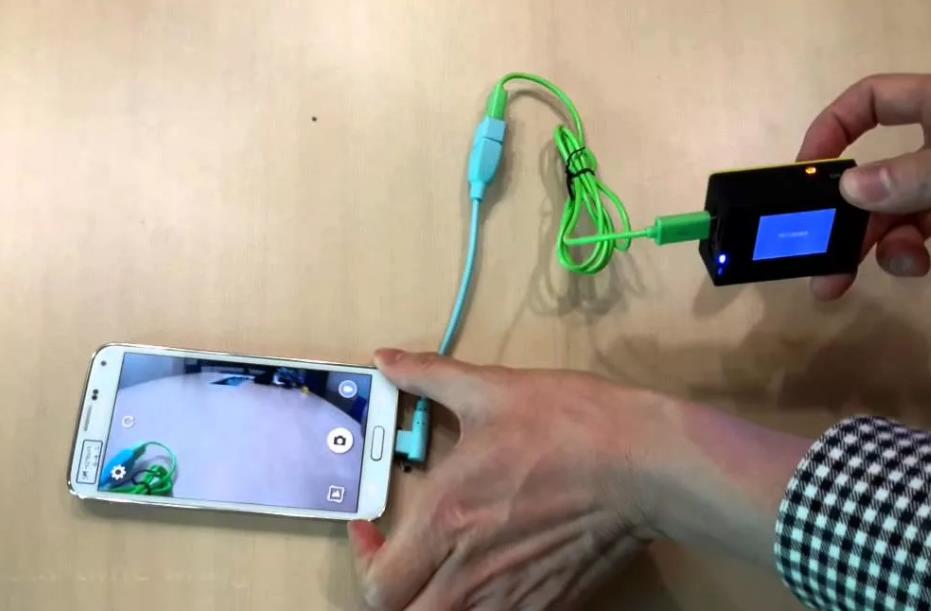
Если камера сама не вывела понятную инструкцию на экран, тогда найдите на главном экране кнопку вроде «Добавить устройство», «Подключить камеру», значок плюса или список доступных камер. Выберите из списка модель вашего устройства, включите саму экшн-камеру и следуйте указаниям приложения. При этом будьте готовы ввести пароль от вашей сети Wi-Fi. В некоторых моделях понадобится ввести в мобильном приложении PIN-код или отсканировать QR-код, который часто располагают на корпусе, в батарейном отсеке камер, на коробке или в настройках камеры. Понять конкретные шаги вам поможет статья по подключению к телефону камеры Yi Action Camera.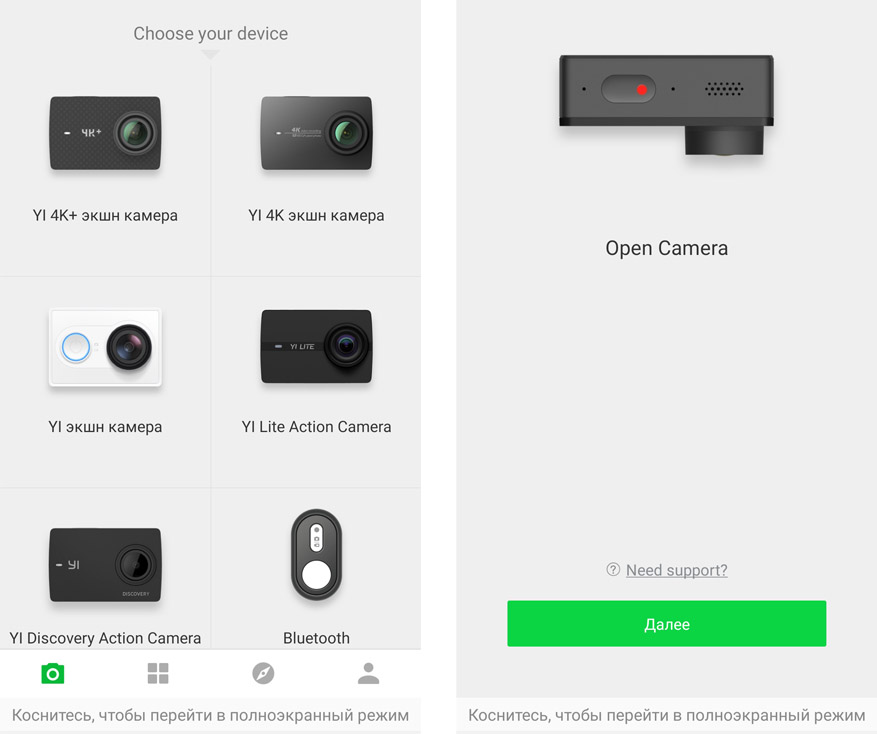
Как подключить экшн-камеру к компьютеру, телевизору и другим устройствам
Для подключения камеры к другому устройству вам понадобится соответствующий кабель. Соединение с компьютером обычно устанавливается по USB-кабелю, а с телевизором по HDMI или другому подходящему кабелю. Дальнейшие действия зависят от модели камеры. Если компьютер автоматически не открыл папку камеры, можно найти ее хранилище в разделе дисков и устройств, просмотреть и при желании скопировать из него содержимое папок. На некоторых экшн-камерах нужно в меню выбрать команду Mass Storage (накопитель) или подобную ей, после чего камера появится в разделе дисков и устройств. При наличии картридера, вы можете вставить SD-карту в него без подключения камеры к компьютеру.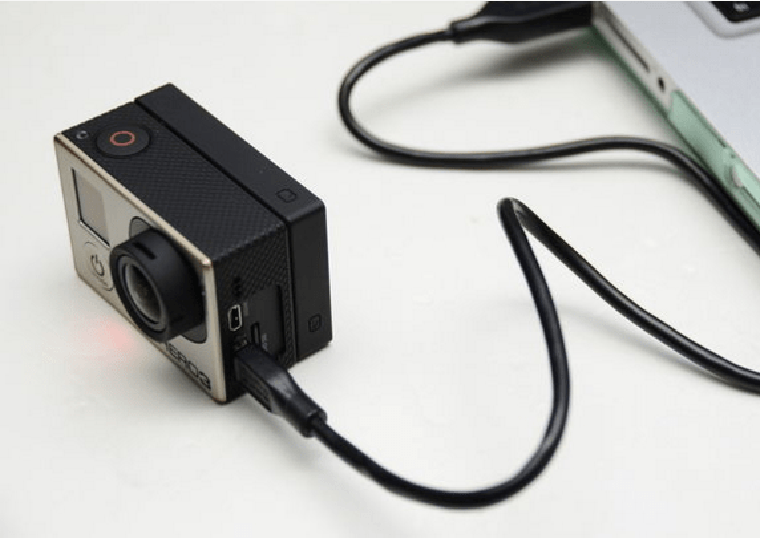
Для подключения гаджета к телевизору воспользуйтесь подходящим кабелем, например HDMI. В меню телевизора выберите источник сигнала (часто для этого используется кнопка SOURCES, INPUT или AV). Подключив экшн-камеру к телевизору, на многих моделях можно вести съемку, сразу просматривая видео на большом экране. Правда, при такой трансляции качество картинки может существенно снизиться, так как основной ресурс идет на съемку.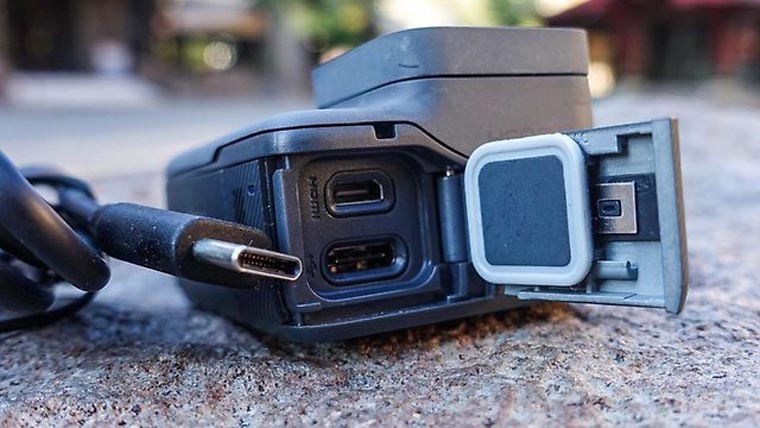
Управление экшн-камерой
Есть несколько вариантов управления камерой, которые зависят от возможностей конкретных моделей. Самый простой и доступный во всех моделях способ — это управление с самой камеры при помощи кнопок или сенсорного дисплея при его наличии. Он позволяет сделать основные настройки, но неудобен или не подходит, если камера размещена на вашем шлеме или находится в водоеме в аквабоксе.
Другой вариант — управление с небольшого пульта или смартфона. С пульта можно быстро начать или остановить запись, переключиться между режимами съемки и другое. На смартфоне функционал часто шире и зависит от возможностей мобильного приложения, через которое происходит управление экшн-камерой. Помимо перечисленных возможностей пульта здесь можно сразу наблюдать снимаемый материал на более крупном экране, просматривать записи или быстро отправлять их друзьям.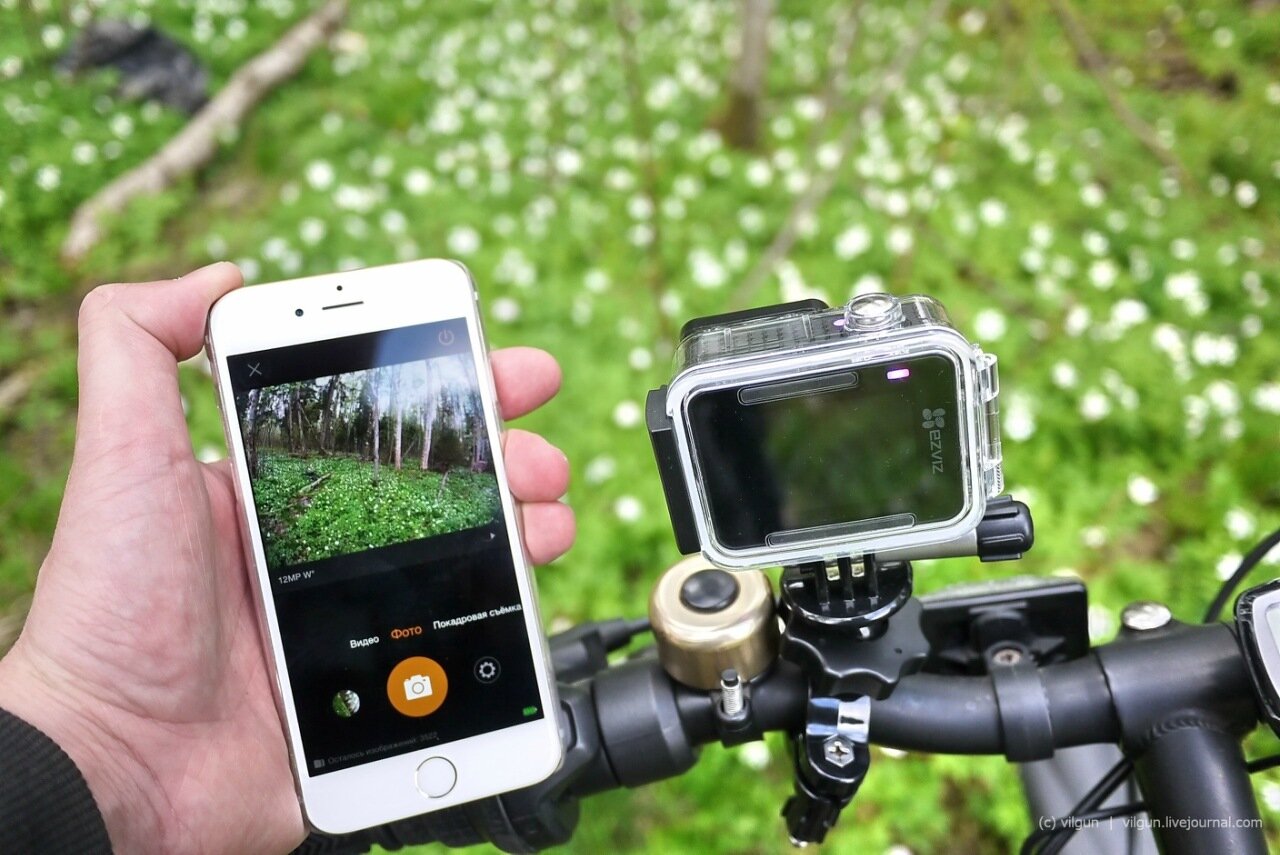
Следующий вариант — голосовое управление. Если в камере есть такая функция, вы можете отдавать команды голосом, что избавляет от необходимости постоянно нажимать на кнопки телефона, пульта или камеры. Во многих моделях экшн-камер команды отдаются только на иностранном языке, так что придется потренироваться и разучить один или несколько десятков иностранных слов. Дополнительно может понадобиться и внешний микрофон, но это зависит от требований самой камеры.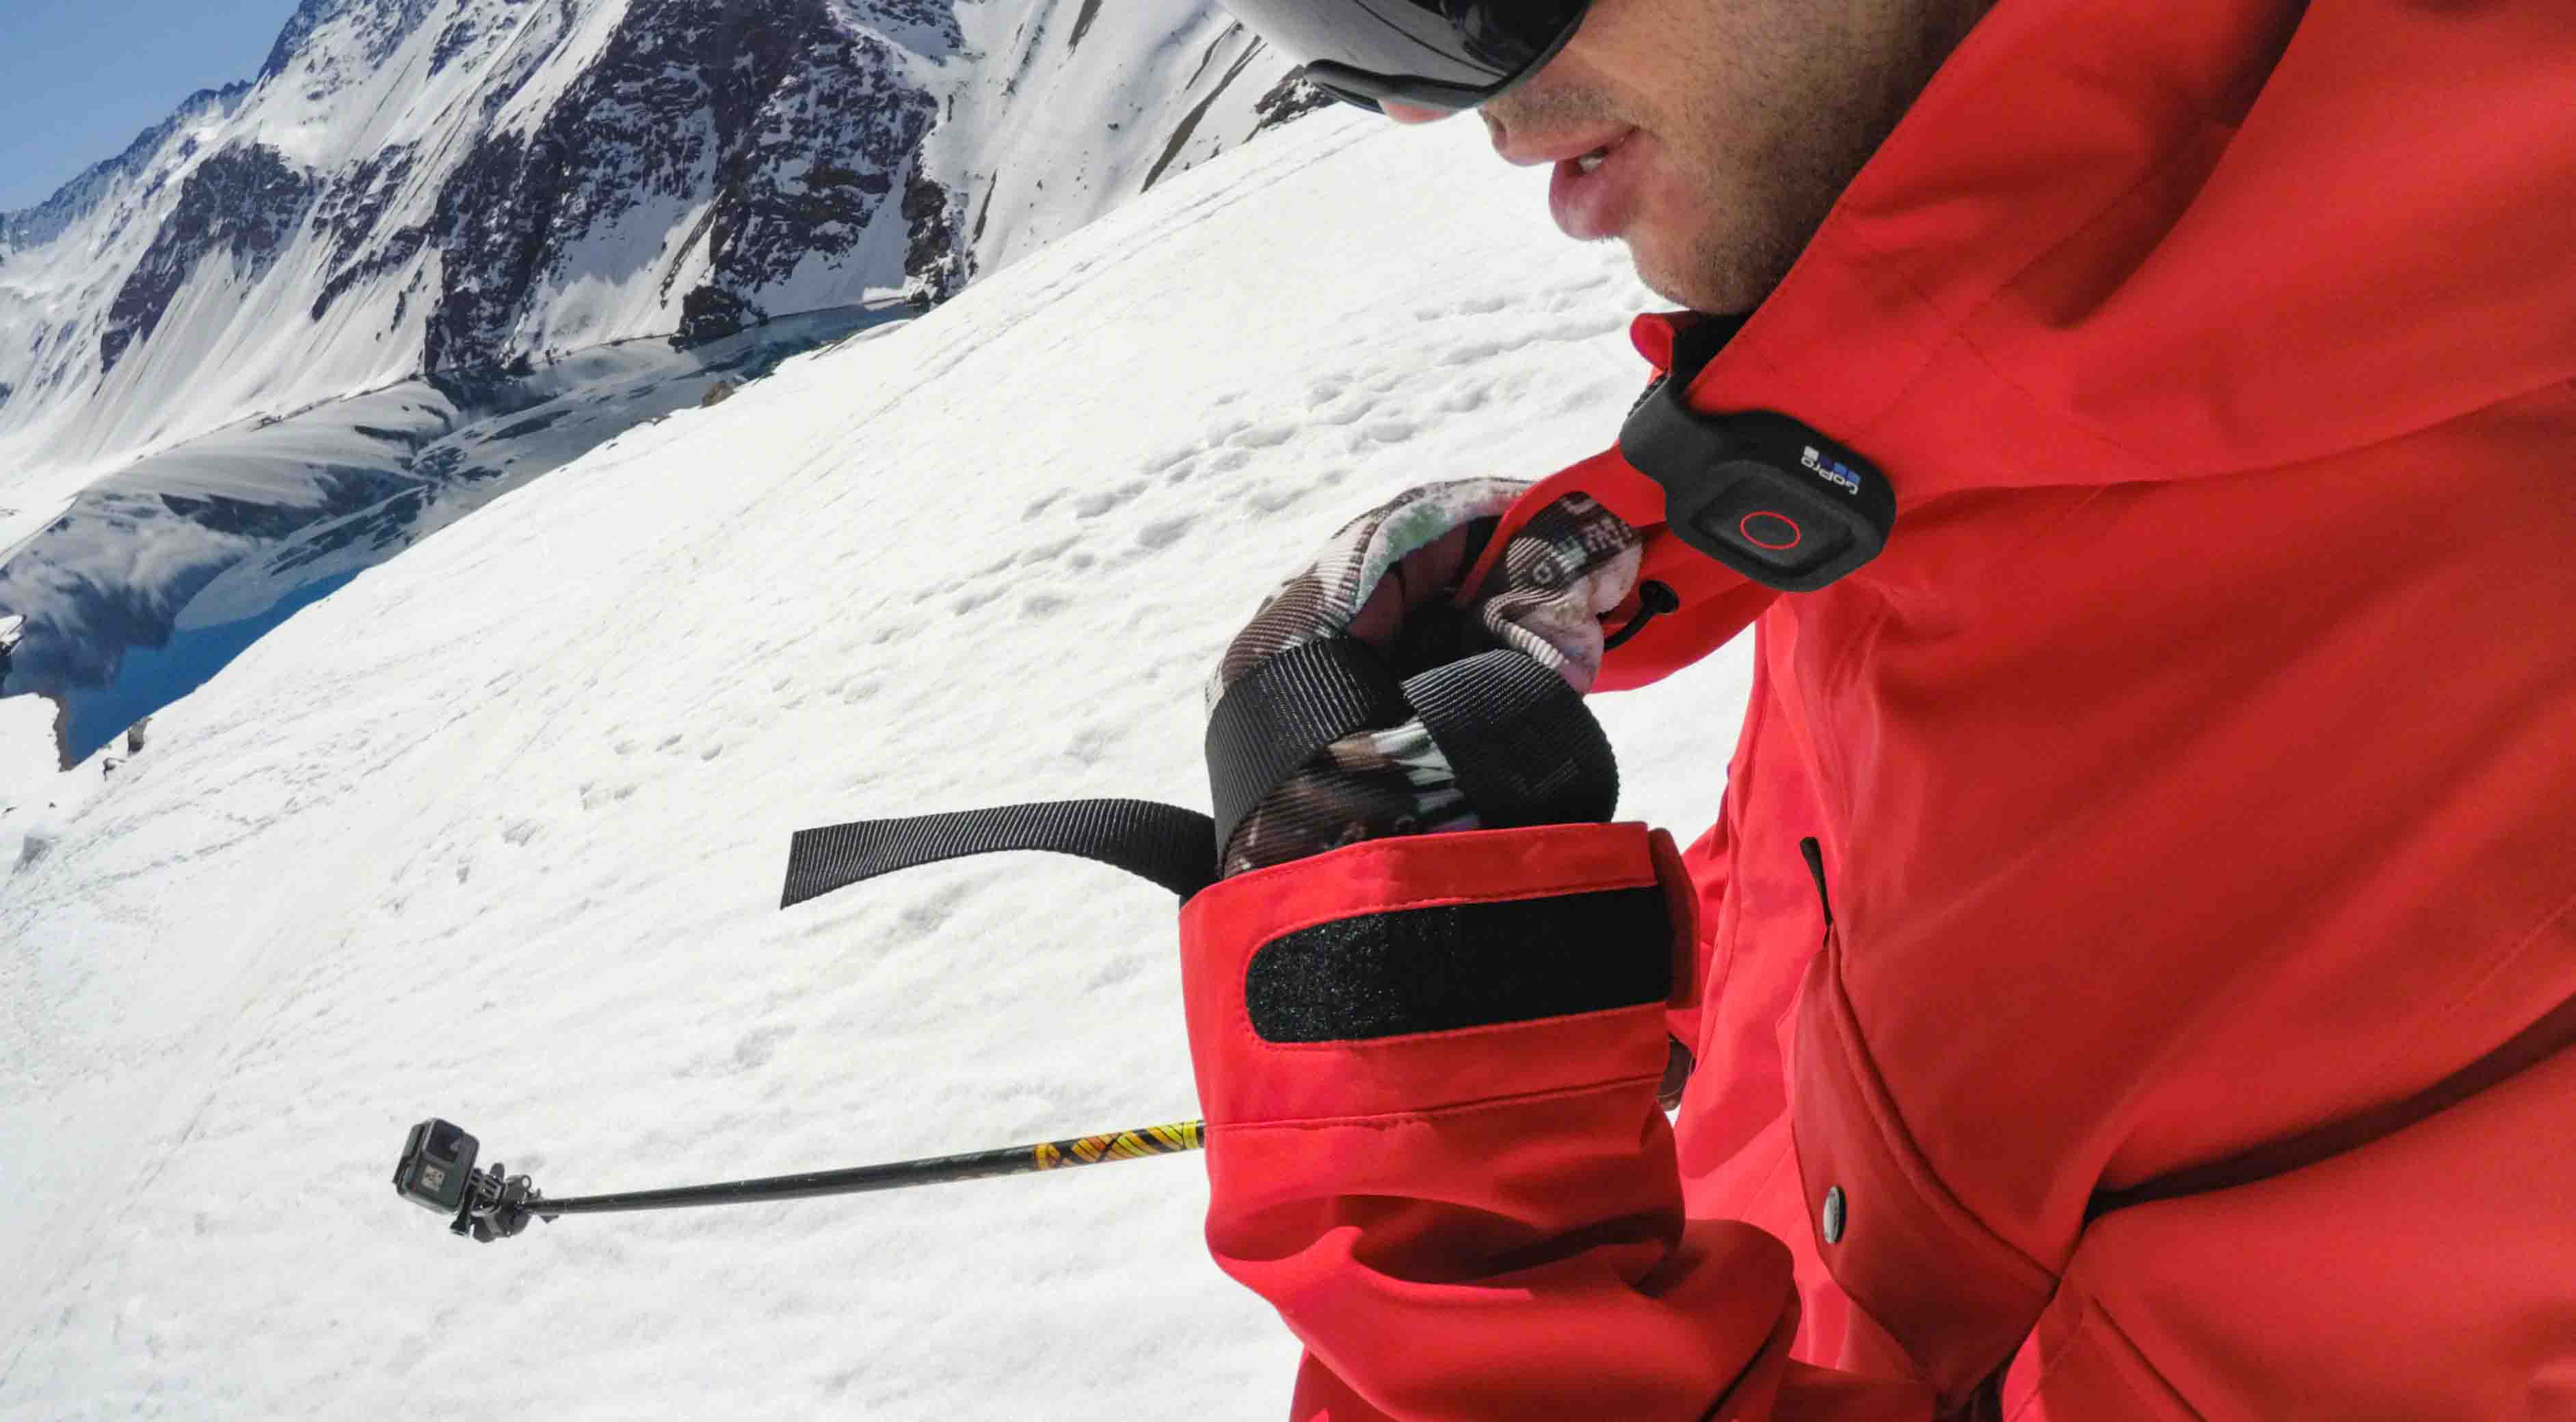
Обновление и смена прошивки экшен-камеры
После выпуска производителем обновленной прошивки многие камеры выводят пользователю сообщение о необходимости обновления при подключении к телефону. Перед обновлением прошивки обязательно убедитесь в достаточном заряде камеры и телефона, так как сбои в этом процессе могут привести к выходу камеры из строя. Если у вас отключено автоматическое обновление, вы можете проверить наличие новых прошивок самостоятельно в соответствующем разделе мобильного приложения (обычно в разделе настроек). Другой вариант — скачать последнее обновление на официальном сайте производителя эшн-камеры, сохранить его на SD-карту, вставить карту в камеру и подключить ее телефону. После этого запустится модуль обновления.
Иногда приходится ставить другую прошивку, если в меню нет подходящего языка или камера стала работать со сбоями. Этот вариант связан с рисками повреждения камеры, поэтому используйте его с осторожностью или доверьте специалисту. Установка производится с SD-карты.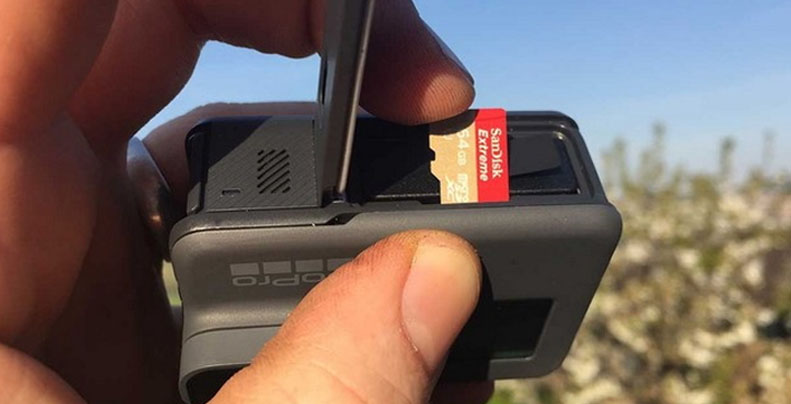
Мобильные приложения для экшн-камер
Программы для экшн-камер делятся на две группы. Первая из них — это базовые мобильные приложения, необходимые для настройки и управления камерой, вторая — любые дополнительные программы для расширения функций экшн-камер и обработки снятых материалов. Базовые приложения можно найти в инструкции к продукту или на сайте производителя. Например, для камер серии GoPro Hero нужно приложение GoPro, для Xiaomi Yi 4K Action подходит программа Yi Action — Yi Action Camera.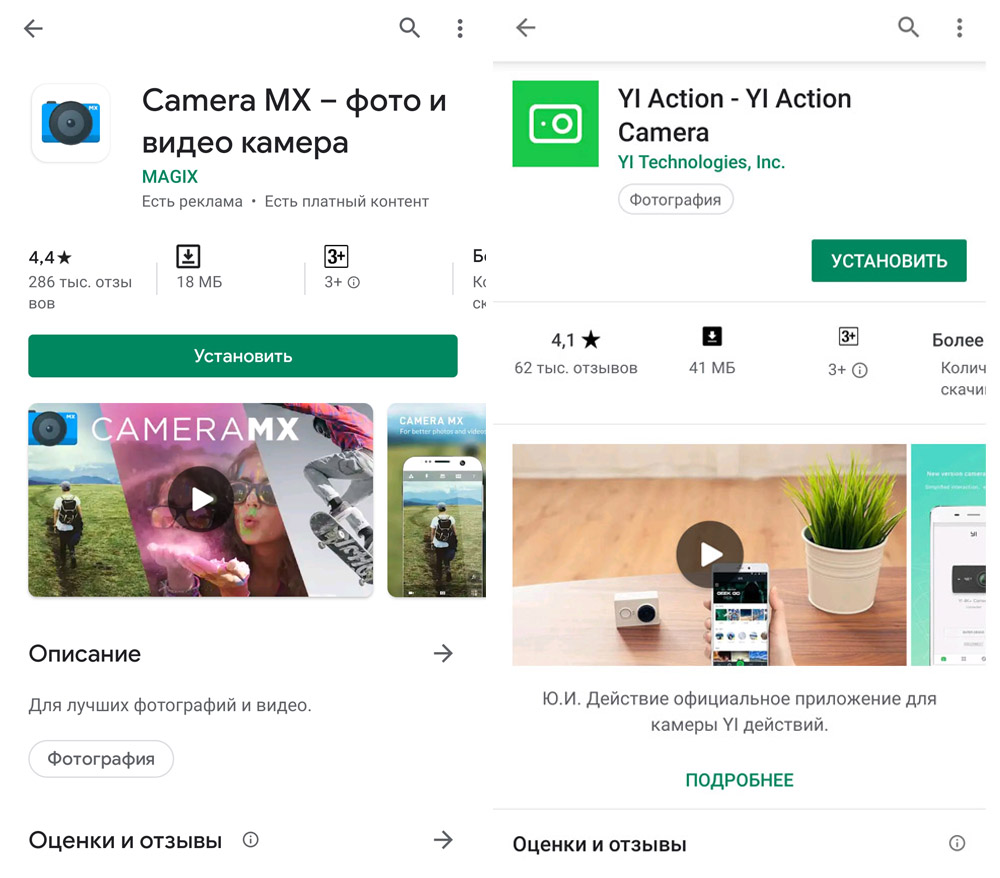
Мобильные приложения из второй группы заточены под расширение функций камеры, под обработку фото и видео или то и другое. Из них назовем A Better Camera, Camera MX, Camera FV-5. Например, в программе A Better Camera можно выбрать разные режимы съемки, настроить экран и другое.
Как использовать экшн-камеру
Особенностью использования экшн-камеры является подготовка дополнительного оборудования, поскольку одна из базовых задач такого девайса заключается в освобождении ваших рук.
Если вы планируете снимать собственные прыжки с тарзанки, турпоход, гонки на мотоциклах или что-то подобное, вам понадобится крепление камеры на тело. Лучший обзор дает крепление на плечо или голову. Так как подобные приспособления редко идут в комплекте, вам придется приобретать его самостоятельно.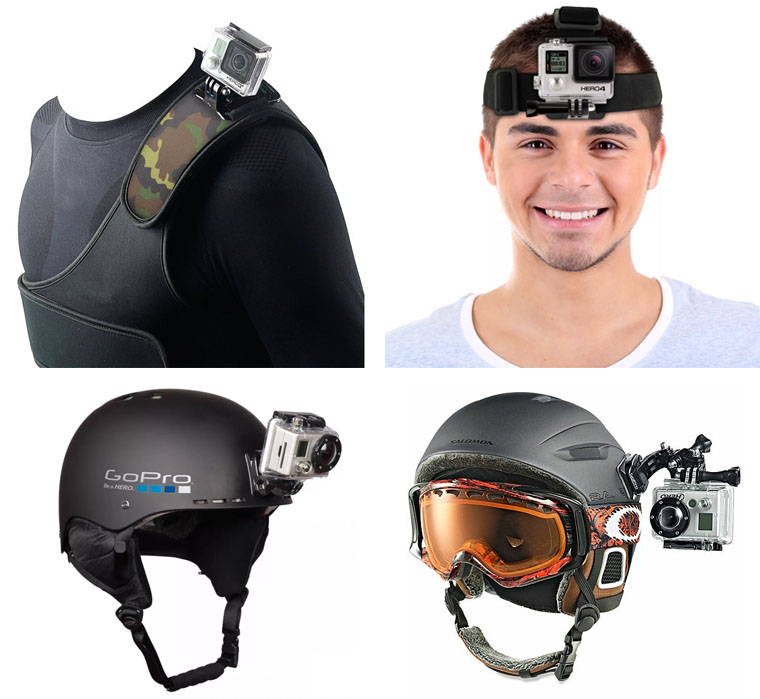
При любой экстремальной деятельности воспользуйтесь аквабоксом (он часто идет в комплекте). Его нужно применять не только при съемке под водой, но и когда речь идет о брызгах или пыли. Например, при катании по лужам, на водном мотоцикле, во время моросящего дождя, при гонках по пескам и так далее. Аквабокс также убережет вашу камеру от повреждений в результате ударов и давления на корпус, поэтому будет полезен в любом приключении. Некоторые экшн-камеры можно погружать под воду и без боксов, но их герметичность нужно тщательно проверять перед каждым погружением, а после работы в морской воде обязательно хорошо промывать. Для подводного плавания вам могут понадобиться и другие принадлежности, например поплавок для камеры и светофильтры (защищают от искажения цветов под водой).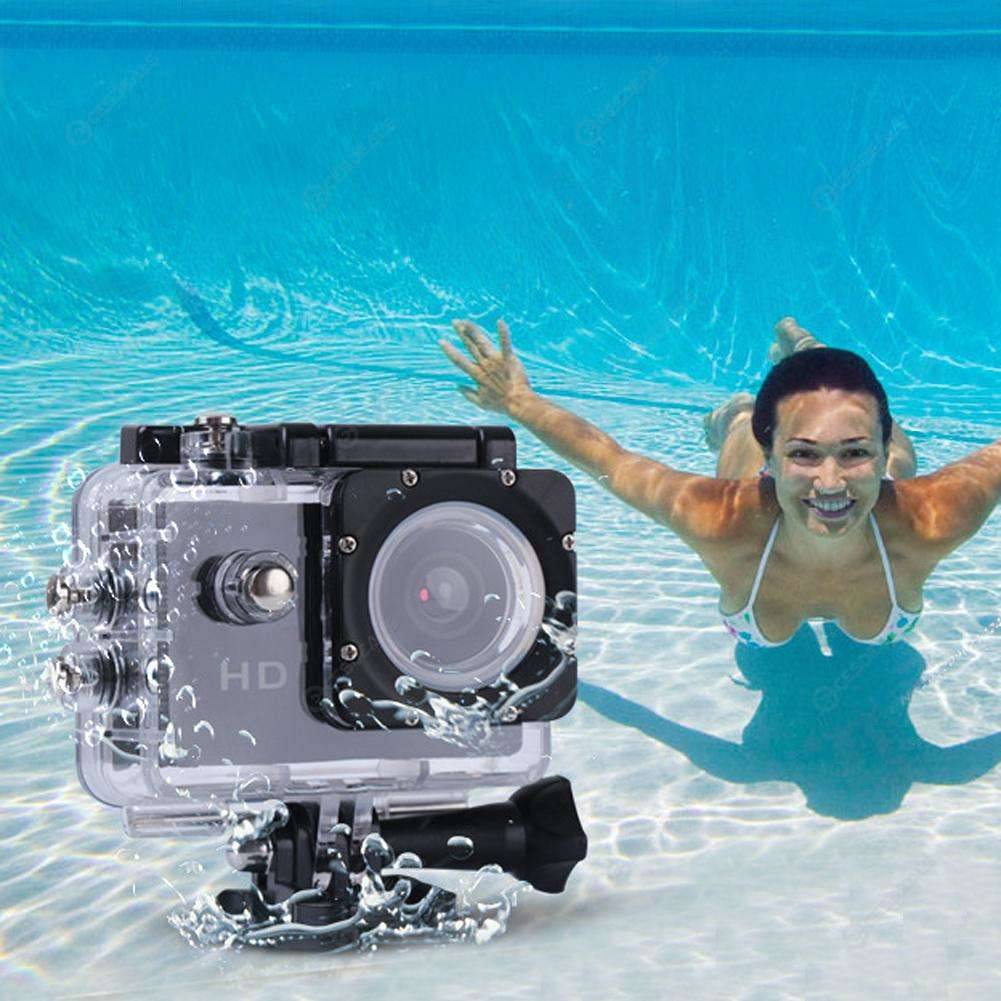
Для съемки спокойных мероприятий вам пригодится штатив и внешний микрофон. В отличие от предыдущих вариантов использования камеры, когда вам некогда нажимать на кнопки, здесь вы можете переключаться на разные режимы съемки, даже если сами находитесь в кадре.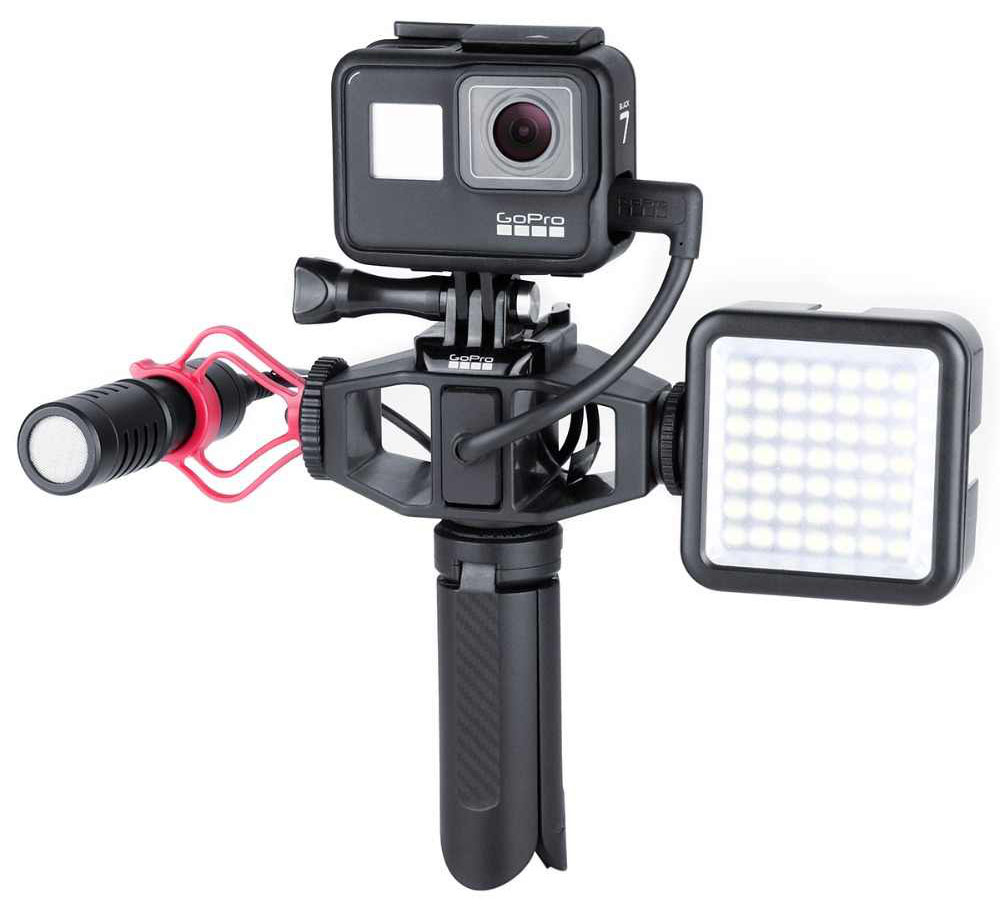
Наличие остального оборудования зависит от того, какую задачу призвана решать экшн-камера. Так, при работе видеорегистратором камера должна подключаться к сети автомобиля и соответствовать определенным условиям. Для изучения труднодоступных мест где-то в горах ее доставляют на место съемки при помощи дрона. Кроме этого экшн-камеру можно использовать для наблюдения за домом, в качестве веб-камеры при работе на компьютере, для панорамной съемки, наблюдением за миром животных и с другими целями.
H70
Trail Camera
Instruction Manual
Contents
1.PACKING LIST ……………………………………………………………………0 1
2.INTRODUCTION ………………………………………………………………0 1
4.PREPARING THE CAMERA
………………………………………………..04
5.USING THE CAMERA AND SETUP MENU ……………………………..06
5.1 Using the camera ……………………………………………………………06
5.2 Setup menu
…………………………………………………………………07
6.ENTERING AUTOMATIC MONITORING
……………………………….1 3
6.1 Adjusting and installing the camera ………………………………………1 3
6.2 Setting up the live mode …………………………………………………….1 5
7.CONNECTION TO COMPUTER
…………………………………………..1 6
8.TECHINCAL SPECIFICATION
…………………………………………….1 7
9.SIMPLE TROUBLE SHOOTING ……………………………………………1
8
9.1Care …………………………………………………………………………..1
9
9.2Storage
…………………………………………………………………………….1
9
V190318
1. PACKING LIST
Please carefully unpack camera and check that below accessories are contained in the box.
EN
1 2 3 4
1.Wildlife Camera x 1
2.USB cable x 1
3.Instruction Manual x 1
4.Mounting Belt x 1
5.Wall Mount x 1
6.Screws x 3
5 6
2. INTRODUCTION
The Wildlife Camera is a wildlife and surveillance camera with an infrared sensor. The sensor can detect sudden changes to the ambient temperature within an evaluation area. The signals of the highly sensitive infrared sensor (PIR, passive infrared sensor) switch on the camera, activating picture of video mode.
1
EN
2.1 Features Of Wildlife Camera
1. CMOS sensor.
2.20 Megapixels photo and 1080P HD video.
3.6.1 cm (2.4’)’ color TFT LCD: 320×240 pixels
4.42 pcs IR LEDs.
5.Full automatic IR filter.
6.Trigger speed: Approx. 0.3 second.
7.Setup Serial No. to record the position.
8.Time, date, temperature, phase and Serial No. will be stamped on the
photo.
9.Password protection.
10.Power indicating.
11.Built-in test function about environmental temperature.
12.Built-in microphone and speaker.
13.Mini USB 2.0 interface.
14.Waterproof standard IP56.
15.Working temperature: -20°C to 60°C.
16.Extremely low power consumption in standby operation providing
extremely long operating time, lasts 6 months with 8 pcs batteries
when taking 50 pcs photos every day.
2.2 Features Of Wildlife Camera
1.Camera trap for hunting
2.Animal or incident observation.
3.Motion triggered security camera for domestic, office or public use.
4.Any internal and external surveillance.
2
3. STRUCTURE
Understanding the camera structure helps to use this product more skillfully.
EN
1
1-Infrared LEDs
2-Lens
3.1-Front motion sensor
3.2-Left motion sensor
3.3-Right motion sensor
4.Display screen
5.Up button
6.Menu button
7.Left button
8.Replay button
9.Shot button
10.Right button
11.OK button
12.Down button
13.TF Slot
9
6
14.AV jack
15.USB jack
16.ON
17.SETUP
18.OFF
19.Battery compartment
20.Seal ring
21.DC connection 6V/1.5A
22.1/4″ Tripod thread
10
11
14
2
3.1
3.2
3.3
4
5
7
12
8
13
15
AV
SHOT
OK
ON-SETUP-OFF
16 17 18
19
21
22
20
3
EN
23
Digital Trail Camera
Model:H70
Power : 8*AA Battery
DC6V Input
RoHS
Made in China
24
23.Locking brackets 24.Slot for mounting belt
▲ 1.The monitor is only switched on in the SETUP mode for changing
menu settings or viewing existing photos and videos.
2.A micro SD memory card must have been inserted into the memory
card slot to save photos and videos.
3.Using the mini USB connection (USB 2.0), the camera can be
connected to a computer to download photos and videos.
4.Using the mode switch, the three operating modes:OFF,SETUP and
ON can be selected.
4. PREPARING THE CAMERA
Note :
1.Micro SD memory cards up to a capacity of 32 GB are supported.
4
2.Instead of type LR6 (AA) batteries with the same specification (with
2000 mAh or higher) may be used. We recommend Alkaline batteries
with low self discharge (not supplied).
3.The camera must be inserted 4 or 8 x 1.5V AA batteries . Do not use
new and old batteries together. DC interface need 6V/1.5A adaptor
with 3.5 mm (outer diameter) s*l .3 mm (inner D) plug head.
4.Insert CLASS6 or higher class micro SD card
(
CLASS10 recommend).
Prior to insert into memory card, ensure that the lateral write protection
on the memory card has not been locked.
5.Switch on the camera. 3 switches: power off (OFF
)
,setup menu
/
SETUP mode (SETUP
) and live mode
(
ON
)
.
6.New memory card is recommended to be formatted when using (as
below described).
7.Please note that the camera will power off when power is very low.
EN
AALR6
AALR6
AALR6
AALR6
AALR6
AALR6
AALR6
AALR6
AV
SHOT
OK
ON-SETUP-OFF
ON SETUP OFF
Settings
Time&date
Photo stamp
Password protection
Beep sound
Format memory card
Serial NO
M
ENU Back OK Select
Settings will be deleted
Beep sound
Format memory card
Serial NO
Yes
No
M
ENU Back OK Select
5
EN
Operation (See Figures Below)
Open the locking brackets and the protective cover of the battery compartment
—
insert batteries -insert memory card—switch to
SETUP — enter system menu by pressing MENU button -choose to format memory card—choose to reset to factory.
(this step can be skipped)—choose to setup system time.
Open the battery cover
►
Insert 8pcs batteries. Battery model:
AALR6 > Ensure that the lateral write protection on the memory card has not been activated > Insert CLASS6 or above Micro SD memory card in the memory card slot before switching on the camera and select SETUP mode to adjust settings
Assembly With Strap
5
. USING THE CAMERA AND SETUP
MENU
5
.
1 Using The Camera
1.Operating Buttons
Functions of operating buttons in recording mode:
Below, the operating buttons are described in the recording mode with non-activated menu.
6
1. UP Key: Page up (Menu mode): Switch to Video recording mode
2. MENU: Open or exit this Setting menu/Stop playing video (Replay Mode)
3. Left Key: Page left
4. Replay Key: Review photos and videos
5. SHOT Key: shot video recording/capturing
6. Right Key: Page right
7. OK: Play/Pause play video files (Replay mode)
8. Down Key: Page down(Menu mode)/Switch to Photo mode.
EN
1
2
3
4
SHOT
OK
5
6
7
8
2.Mode Switch
2.1 Shift the switches to choose work mode:
ON-SETUPOFF ONSETUP -OFF ON SETUP -OFF
Power off (OFF) Setup system (SETUP) Live mode (ON)
2.2 Press Up/Down key to switch modes between Video and Photo mode.
2.3 Press the MENU key to open setting menu.Press OK to confirm the
setting changes.
2.4 Press the MENU key one more time to return to previous menu or exit the settings MENU.
2.5 Switch the mode selector to «OFF» to power off the camera.
7
EN
5.2 Setup Menu
1
.
Mode
Photo, Video, Photo+Video, Select whether photos or videos should be taken when motion is detected. When in the «Photo+Video» mode, the camera first takes a set number of photos prior to recording a video.
2.Photo Resolution
20MP (5200*3900) ; 16MP (4608*3456); 12MP (4000*3000),
8MP (3264×2448), 5MP (2592 x 1944). 3MP (2048×1536).
Select the desired resolution for photos. We recommend the resolution
16M.A higher resolution produces a somewhat better photo quality but results in larger files requiring more space on the memory card .
Taking 16GB memory card for example:
Photo Pixels
20MP
16MP
12MP
8MP
5MP
3MP
Size (MB)
(approximately)
3.5
2.7
2.0
1.4
0.9
0.54
Photo Quantity
(approximately)
4100
5300
7000
10500
16600
26600
3.Photo series : 1 P, 2P. 3P
8
4.Video resolution
[email protected], [email protected], [email protected],
[email protected], [email protected] Select the required video resolution.
Select the number of photos to be taken in succession when the camera is triggered in the Photo mode. Please also observe the parameter interval!
A higher resolution produces higher quality videos but results in larger files requiring more space on the memory card. Videos are recorded in
AVI format which can be played back on most video devices.
Taking 16GB memory card for example:
EN
Video
Resolution
1920×1080
1280×720
720 x480
640×480
320*240
Video Length:10 seconds
Video size
(MB
)
38
22
17
12.8
6.3
Video quantity
380
659
852
1132
2300
Total Recording
Length
(Minutes)
63.5
106
141
189
385
5.Video Length
▲
Default 5 seconds, optional 3s-59s, 1-10Minutes
Specify the duration of a video recording when the camera is trigged automatically. The recording period for videos is not limited in the
SETUP mode.
9
EN
1
.
In the SETUP mode in daytime and at night.
> When recording manually, the camera will stop automatically after 29
minutes’ recording;
> When recording manually, the camera will stop when one video clip
size gets to 4 GB,
> When recording manually, the camera will stop when the memory
card is full or ultra low power.
2
.
In live mode (ON) at night the camera will work automatically as per
the video length setting. For low power, it will stop recording in
advance.
3
.
Please set the shorter video length to guarantee a long-time usage of
batteries.
6.Audio recording
Turn on/off audio recording
7.Shot lag
▲
Defaulted 1 MIN. optional from 5 seconds-60 minutes.
Select the shortest period for the camera to wait before it reacts to the successive triggering of the main sensor after an animal has first been detected. The camera does not record any photos or videos during the selected interval. This prevents the memory card from being filled with unnecessary shots.
1.The shot lag is short, the camera shooting frequency would be high, and there would be high consumption of the power. It would affect the usage days of the batteries.
2.On the opposite, if the shot lag is long, it would be a lower consumption of power to guarantee a long-time usage.
8.Side motion sensors
During the alignment consider whether the use of the side motion sensors may be useful for attaining the desired observation results or not.
10
9.Sensitivity of motion sensors
1. Select «High» For interior areas and environments with little interference
2.Select «Medium» for exterior areas and environment with a normal
amount of interference,
3.select «Low» for an environment with a high level of interference.
10.Target recording time
Press «OK», and then select «ON» to set the starting working and ending working time. After finishing setting, the camera only works during the set time every day. Beyond the period, the camera is in standby.If the start time is, for instance set to 18:35 and the end time to 8:25, the camera will be operational from 6:35 pm of the current day until 8:25 am of the following day. The camera will not be triggered and will not take any photos or videos outside of this period.
EN
11.Time lapse
Press «MENU» to find «Time lapse». Press «OK», then select «ON» to set the time interval, and set the values of Hr, Min and Sec. For example, if the process of flowers blooming has to be recorded, time lapse can be used.
The camera automatically takes pictures in every set time intervals.
12.Language
Select the desired menu language.
The following languages are available: English, German, French, Spanish,
Chinese, etc.
13.Time&date
Find the “Time & Date” in the setup menu, then press OK to enter.
Use the “Time Format” and “Date Format” to configure time and date format.
Choose “Set time & date” to change the camera time. Press Left/Right to choose number and press Up/Down to change value. Press OK to confirm changes.
11
EN
14.Photo stamp
Turn on/off display of watermark on photo
15 .
Password protection
Select «Password protection». Press «OK», and then select «ON» to set the password of the camera. The password is a 4-digit number selected between 0-9.
If the password is lost, press MENU key and REPLAY at the same time, and slide the operating mode selector from OFF to SETUP position. The camera is unlocked.
16.Beep sound
Turn on/off beep sound
17.Format memory card
Select to format memory card on this camera, we suggest format the memory card on computer then format it on this camera again for first use.
18.Serial NO.
Press «OK», and then select «ON» to set the serial number for the camera.
You can use a combination of 4 digits to documents the location on the photos. When using several cameras, this makes it easier to identify the location when viewing photos.
19.Reset settings
Select to reset the camera to the default settings.
Please note to set date and time again.
12
20.Version
Select to check the camera’s current firmware version number.
21.Playback
Slide the operating mode selector switch to «SETUP» position. Press replay key and Up/Down key to review the photos/videos.While reviewing photos, press Up/Down key to page up/down. While reviewing videos, press OK key to start playing, press OK one more time to stop. Press replay key to return to standby.
21.1 Delete selection
You can use this function to delete individual recordings from the memory card. Press MENU key under the mode of playback, move the select bar to “Delete current file” and press OK to delete the selected recording.
21.2 Delete all recordings
You can use this function to delete all recordings from the memory card.
Press MENU key under the mode of playback, move the selection bar to
“Delete all files” and press OK to delete all recordings.
21.3 Activate slide show
This function can be used to play back the photos stored on the memory card automatically. Each photo is shown for about 2 seconds. To stop the slide show and keep the current image permanently on the screen, press the OK button.
EN
13
EN
22.Write protection
>This function can be used to protect individual recordings of all saved
recordings from accidental deletion.
>Select «Write-protect current file» to protect the currently selected
recording from accidental deletion.
>Select «Write-protect all files» to protect all saved recordings from
accidental deletion.
>Select «Unlock current file» to remove the write protection for the
currently selected recording.
>Select «Unlock all files» to remove the write protection for all saved
recordings.
6. ENTERING LIVE MODE
6.1 Adjusting And Installing The Camera
The SETUP mode is advantageous for determining the best possible detection angle and range of the movement sensor. For this purpose, attach the camera at approx. 1 -2m height to a tree and align the camera with a desired direction.
Move slowly from one side of the observed area to the other. Move parallel to the camera. Try out different angles and distances.The green LED flashing indicated that you were detected by side
PIR sensor.And the blue LED flashing indicated that you were detected by main PIR sensor.
NOTE : green LED only lights up when “Side motion sensor” is ON. In this way you can determine the best position for aligning the camera.The blue/green LED only flash in the SETUP mode as soon as the PIR sensor has detected movement.
14
The red LED will flash for 15 times when you just switch to Live mode (ON), and then the camera work automatically and enters the Standby mode.
To prevent incorrect signals and unnecessary photos, we recommend not using the camera at sunny points and check that no branches are in the active area of the sensor.
Also check that the camera is set to the correct height in line with the point to be observed. Where necessary, point the camera down for optimum alignment
EN
For 1 meter height, Place the camera parallel to the ground.
For 2 meters height, Tilt the camera down five degrees to the ground.
10
°
Note
:
Please do the horizontal movement before the PIR. vertical movement could not detect correctly.
Please quicken your steps when you do the test in a long distance before PIR detection area.
The PIR detection distance would be shorter if the environment temperature reaches or above 30 °
The screen would automatically turn off without any operation within
3 minutes in SETUP mode, press any button will make turn it on again.
15
EN
6.2 Setting Up The Live Mode
The standard application of the Wildlife Camera is the Live mode.
In this mode , photos are either triggered by movement sensors or at intervals according to the respective setting.
To set up the Live mode , switch mode switch to ON position. The red
LED will flash for 15 times when you just switch to Live mode (ON), and then the camera work automatically and enters the Standby mode.
As soon as wild animals or other objects directly enter the detection area of the sensor zone, the camera starts to record photos and videos.
Note:
In the daytime. IR LEDs will not light up. The photos and videos are in color.
At night. IR LEDs will give lights, and the photos and videos are in black and white.
The Shot lag is 1 minute defaulted. The optional is 5s-60 min.
Please set up recording mode and related parameters before entering Live mode.
When Flash Light is set to «Auto», the camera will adjust the brightness of IR
LEDs automatically in low power. When shooting at night, the brightness will decrease automatically, and the shooting effect will become a little poor. For ultra low power, shooting will stop at night.
16
7
.
Connection to computer
Please shift Mode to «SETUP», and connect the camera to computer with
USB cable, the camera LCD will show «MSDC prompt .This indicates connecting successfully. And then read or copy the data in SD card to the computer.
1. Connect the camera to your computer using the USB cable.
2.The camera switches on automatically in the USB mode, irrespective of the selection on the mode switch.
3.The camera installs itself on the computer as an additional drive under the name “Removable storage device
«
4.Double click on the device to detect the folder «DCIM*
5.The photos and videos are in the sub folders of the «DCIM» folder.
6.You can copy or move photos and video files on the computer.
Alternatively, you can insert the memory card in a card reader on the computer.
EN
17
EN
8. TECHNICAL SPECIFICATION
Element Macintosh
Image sensor
Photo resolution
Screen
Recording medium
Video resolutions
Lens
The distance of night version
Triggering distance
Triggering time
20 Megapixel CMOS sensor
20MP (5200*3900) ;
16MP (4608*3456);
12MP (4000*3000),
8MP(3264×2448),
5MP(2592 x 1944). 3MP(2048×1536).
6.1cm (2.4”
)
color TFTLCD;
320×240 pixels
Supports Micro SD memory cards up to 32 GB (Not Included)
1920×1080,1280×720,
720 x480,640×480,320×240
F2.5, f=3.6mm,FOV=130°
20m
Up to 20 meters
0.3-0.5 second
Shot lag
IR flash
Detection angle of sensor
Spray water protected
Storage formats
5 seconds to 60 minutes
42 pcs infrared LEDs
130°
Yes (IP56)
Photo:JPEG; Video:AVI. MJPC
Connections
Standby time
Dimensions
Power
Mini USB 2.0
Approx.6 months
(with 8 batteries)
97x140x67mm
8 X LR6 (AA) Alkaline Batteries with low discharge;
External 6V power supply, at least 1.5A (not supplied)
18
9
.
SIMPLE TROUBLESHOOTING
The camera will not turn on
The camera turns off automatically
1.Please check whether the batteries are installed in proper way.
2.Check if the battery capacity is low or exhausted. If so, please replace by new batteries.
1. Please check whether the battery
capacity is low or exhausted. If so,
try to change new batteries for
outdoor using or connect AC
adapter for indoor using.
2. Please check if SD card is full. If so,
transfer images and videos to your
computer or delete some files in the
Replay Mode.
It shows ‘SD card Error»
1. Please ensure that SD card is with
class 10 standard or higher level.
2. Please use the camera to format
SD card at the first time.
Videos are choppy or jumpy when played on a computer
1. Try to use different media players
such as VLC player.
2. Ensure AVI format Video clip can be
played on your computer.
The image is not clear
The camera does not take images or record videos
1 .
Please ensure that you have removed the protective films on IR
LEDs and lens before using.
1 .
Check If the memory of SD card is full, transfer images or videos to your computer or delete some files in the Replay Mode.
EN
19
EN
9.1 Care
Do not use any corrosive cleaners, such as methylated spirits, thinners, etc. to clean the camera housing and supplied accessory. When required, the clean system components with a soft dry cloth.
9.2 Storage
Always remove the battery from the housing if the camera is not being used for some time and store the battery separately. On a day to day basis and over longer periods the batteries can be kept at a dry location out of the reach of children.
IF YOU HAVE ANY QUESTIONS OR PROBLEMS.
Please contact us by
USA&Canada [email protected]
Europe [email protected]
UK [email protected]
We will offer prompt and authoritative reply within 24 hours, and try our best to resolve your problem ASAP. More Safe Guarantee with TOGUARD!
If you are not satisfied with our product. Please tell us about your thought.
That will be much appreciated.
20
21
22
1. VERPACKUNGSLISTE
Bitte packen Sie die Kamera sorgfältig aus und überprüfen Sie, ob das folgende Zubehör in der Verpackung enthalten ist.
DE
1 2 3 4
1. Wildkamera x1
2. USB-Kabel x 1
3.Bedienungsanleitung x 1
4.Montageband x 1
5.Wandhalterung x 1
6.Schrauben x 3
5 6
2. EINFÜHRUNG
Die Wildkamera ist eine Tier- und Überwachungskamera mit Infrarotsensor.
Der Sensor kann plötzliche Änderungen der Umgebungstemperatur innerhalb eines Auswertebereichs erkennen. Die Signale des hochempfindlichen Infrarotsensors (PIR, Passiver Infrarotsensor) schalten die Kamera ein und aktivieren das Bild des Videomodus.
23
DE
2.1 Merkmale der WildKamera
1. CMOS-Sensor
2. 20 Megapixel-Foto und 1080P HD-Video.
3. TFT-LCD mit 6,1 cm (2,4 Zoll): 320 x 240 Pixel
4. 42 Stück IR-LEDs.
5. Vollautomatischer IR-Filter.
6.Triggergeschwindigkeit: Ca. 0,3 Sekunden.
7.Seriennummer einrichten, um die Position aufzuzeichnen.
8.Zeit, Datum, Temperatur, Phase und Seriennummer werden auf das
Foto gestempelt.
9. Passwortschutz.
10.Anzeige der Leistung.
11. Eingebaute Testfunktion über Umgebungstemperatur.
12. Eingebautes Mikrofon und Lautsprecher.
13. Mini USB 2.0-Schnittstelle.
14.Wassersicherer Standard IP56.
15. Arbeitstemperatur: -20 ° C bis 60 ° C.
16. Extrem niedriger Stromverbrauch im Standby-Betrieb mit extrem langer Betriebsdauer. 6 Monate mit 8 PC-Batterien bei täglich 50 Bildern.
2.2 Merkmale der Wildkamera
1. Kamerafalle für die Jagd
2.Tier- oder Vorfallbeobachtung.
3.Motion ausgelöst Kamera für den Hausgebrauch, Büro oder die
Öffentlichkeit.
4. Jede interne und externe Überwachung.
24
3. STRUKTUR
Das Verständnis der Kamerastruktur hilft, dieses Produkt geschickter einzusetzen.
1
1-Infrarot-LEDs
2-Linse
3.1-Frontbewegungssensor
3.2-Linker Bewegungssensor
3.3-Rechtsbewegungssensor
4. Displayanzeige
5. Auf-Taste
6.Menü-Taste
7. Linke Taste
2
3.1
3.2
3.3
8. Wiedergabetaste
9. Shot-Taste
10.Rechts-Taste
11. OK-Taste
12.Down-Taste
13.TF-Steckplatz
14. AV-Buchse
15.USB-Buchse
16.ON
17. SETUP
18.OFF
19. Batteriefach
20. Dichtungsring
21. DC Anschluss 6V / 1.5A
22.1 / 4 «Stativgewinde
9
6
10
11
14
4
5
7
12
8
13
15
AV
SHOT
OK
ON-SETUP-OFF
16 17 18
19
21
22
20
25
DE
DE
23
Digital Trail Camera
Model:H70
Power : 8*AA Battery
DC6V Input
RoHS
Made in China
24
22. 23. Halterungen verriegeln 24. Schlitz für die Montage des Riemens
▲
1.Der Monitor ist nur im SETUP-Modus eingeschaltet, um
Menüeinstellungen zu ändern oder vorhandene Fotos und Videos anzuzeigen.
2. Zum Speichern von Fotos und Videos muss eine microSD-Speicherkarte in den Speicherkartensteckplatz eingesetzt sein.
3.Mit der Mini-USB-Verbindung (USB 2.0) kann die Kamera an einen
Computer angeschlossen werden, um Fotos und Videos herunterzuladen.
4.Mit dem Betriebsartenschalter können die drei Betriebsarten: OFF,
SETUP und ON ausgewählt werden.
4. VORBEREITUNG DER KAMERA
Hinweis :
1.Micro SD-Speicherkarten mit einer Kapazität von bis zu 32 GB werden unterstützt..
26
2. Statt Batterien des Typs LR6 (AA) mit der gleichen Spezifikation (mit
2000 mAh oder höher) verwendet werden. Wir empfehlen Alkalibatterien mit niedriger Selbstentladung (nicht im Lieferumfang enthalten).
3. Die Kamera muss mit 4 oder 8 x 1,5 V AA-Batterien ausgestattet sein.
Verwenden Sie keine neuen und alten Batterien zusammen. Die
DC-Schnittstelle benötigt einen 6V / 1,5A-Adapter mit 3,5 mm
(Außendurchmesser) s * l, 3 mm (innerer D) Steckerkopf.
4. Legen Sie eine Micro-SD-Karte der Klasse CLASS6 oder höher ein
(Empfehlung CLASS10).Stellen Sie vor dem Einsetzen in die Speicherkarte sicher, dass der seitliche Schreibschutz auf der Speicherkarte nicht gesperrt ist.
5.Schalten Sie die Kamera ein. 3 Schalter: Ausschalten (OFF), Setup-Menü
/ SETUP-Modus (SETUP) und Live-Modus (ON).
6. Es wird empfohlen, eine neue Speicherkarte zu formatieren (wie unten beschrieben).
7.Bitte beachten Sie, dass sich die Kamera ausschaltet, wenn der Strom sehr niedrig ist.
DE
AALR6
AALR6
AALR6
AALR6
AALR6
AALR6
AALR6
AALR6
AV
SHOT
OK
ON-SETUP-OFF
ON SETUP OFF
Settings
Time&date
Photo stamp
Password protection
Beep sound
Format memory card
Serial NO
M ENU
Back
OK
Select
27
Settings
Time&date
Photo stamp
Password protection
Beep sound Yes
No
Serial NO
M ENU
Back
OK
Select
DE
Bedienung (siehe Abbildungen unten)
Öffnen Sie die Verriegelungsklammern und die Schutzabdeckung des
Batteriefachs. — Legen Sie die Batterien ein. — Setzen Sie die Speicherkarte ein. — Wechseln Sie zu SETUP. — Rufen Sie das Systemmenü auf, indem Sie die MENU-Taste drücken. — Wählen Sie, um die Speicherkarte zu formatieren.
(Dieser Schritt kann übersprungen werden) — Wählen Sie die Systemzeit.
Batteriefachdeckel öffnen
►
Legen Sie 8-teilige Batterien ein. Batteriemodell:
AALR6> Vergewissern Sie sich, dass der seitliche Schreibschutz auf der
Speicherkarte nicht aktiviert ist.> Setzen Sie die CLASS6 oder die
Micro SD-Speicherkarte in den Speicherkartensteckplatz ein, bevor Sie die Kamera einschalten, und wählen Sie den SETUP-Modus, um die
Einstellungen anzupassen
Montage mit Gurt
5. VERWENDUNG DES KAMERA- UND
SETUP-MENÜS
5. 1 Kamera verwenden
1. Bedientasten
Funktionen der Bedientasten im Aufnahmemodus:
Im Folgenden sind die Bedientasten im Aufnahmemodus mit nicht aktiviertem Menü beschrieben.
28
1.UP-Taste: Bild auf (Menümodus): Wechseln Sie in den
Videoaufnahmemodus.
2.MENU: Einstellungsmenü öffnen oder beenden / Video-Wiedergabe stoppen (Wiedergabemodus).
3. Linke Taste: Seite links.
4. Wiedergabetaste: Fotos und Videos überprüfen.
5. SHOT-Taste: Videoaufnahme / Aufnahme.
6. Rechte Taste: Seite rechts.
7. OK: Wiedergabe / Pause der Wiedergabe von Videodateien
(Wiedergabemodus).
8.Down-Taste: Bild runter (Menümodus) / In den Fotomodus wechseln.
1
2
5
SHOT
3
4
OK
6
7
8
2.Modus wechseln
2.1 Verschieben Sie die Schalter, um den Arbeitsmodus auszuwählen:
ON-SETUPOFF ONSETUP -OFF ON SETUP -OFF
DE
Ausschalten (OFF) Setup-System (SETUP) Live-Modus (ON)
2.2 Drücken Sie die Auf / Ab-Taste, um zwischen den Modi Video und
Foto zu wechseln.
2.3 Drücken Sie die MENU-Taste, um das Einstellungsmenü zu öffnen.
Drücken Sie OK, um die Einstellungen zu bestätigen.
2.4 Drücken Sie die MENU-Taste noch einmal, um zum vorherigen Menü zurückzukehren oder das Einstellungsmenü zu verlassen.
2.5 Stellen Sie den Moduswahlschalter auf «OFF», um die Kamera auszuschalten.
29
DE
5.2 Setup-Menü
1. Modus
Foto, Video, Foto + Video, Wählen Sie aus, ob Fotos oder Videos aufgenommen werden sollen, wenn eine Bewegung erkannt wird.
Im Modus «Foto + Video» nimmt die Kamera vor der Videoaufnahme zuerst eine festgelegte Anzahl von Fotos auf.
2. Fotoauflösung
20MP (5200*3900) ; 16MP (4608*3456); 12MP (4000*3000),
8MP(3264×2448), 5MP (2592 x 1944). 3MP (2048×1536).
Wählen Sie die gewünschte Auflösung für Fotos. Wir empfehlen die
Auflösung 16M. Eine höhere Auflösung führt zu einer etwas besseren
Fotoqualität, führt jedoch dazu, dass größere Dateien mehr Speicherplatz auf der Speicherkarte benötigen.
Nehmen Sie zum Beispiel eine
16-GB-Speicherkarte:
Auflösung
20MP
16MP
12MP
8MP
5MP
3MP
3.Serienaufnahme: 1 P, 2P. 3P
Größe (MB)(etwa)
3.5
2.7
2.0
1.4
0.9
0.54
Foto Menge
( etwa)
4100
5300
7000
10500
16600
26600
30
4.Videoauflösung
1920x1080P bei 25 Bildern pro Sekunde, 1280x720P bei 30 Bildern pro
Sekunde, 720x480P bei 30 Bildern pro Sekunde, 640x480P bei 30 Bildern pro Sekunde, 320x240P bei 30 Bildern pro Sekunde. Wählen Sie die gewünschte Videoauflösung.
Wählen Sie die Anzahl der Fotos aus, die nacheinander aufgenommen werden sollen, wenn die Kamera im Fotomodus ausgelöst wird. Bitte beachten Sie auch das Parameterintervall!
Bei einer höheren Auflösung werden Videos von höherer Qualität erzeugt, jedoch benötigen größere Dateien mehr Speicherplatz auf der
Speicherkarte. Videos werden im AVI-Format aufgenommen, das auf den meisten Videogeräten wiedergegeben werden kann.
DE
Nehmen Sie zum Beispiel eine
16-GB-Speicherkarte:
Video
Auflösung
Videolänge: 10 Sekunden
Video Größe
(MB
)
Video-Menge
Gesamtaufnahmedauer
(Minuten)
1920×1080
1280×720
720 x480
640×480
320*240
38
22
17
12.8
6.3
380
659
852
1132
2300
63.5
106
141
189
385
5.Videolänge
▲
Standardeinstellung 5 Sekunden, optional 3s-59s, 1-10 Minuten
Legen Sie die Dauer einer Videoaufnahme fest, wenn die Kamera automatisch ausgelöst wird. Die Aufnahmedauer für Videos ist im
SETUP-Modus nicht begrenzt.
31
DE
1.Im SETUP-Modus tagsüber und nachts.
> Bei der manuellen Aufnahme stoppt die Kamera nach 29 Minuten automatisch;
> Wenn Sie manuell aufnehmen, stoppt die Kamera, wenn eine
Videoclipgröße 4 GB erreicht.
> Bei der manuellen Aufnahme stoppt die Kamera, wenn die Speicherkarte voll ist oder extrem wenig Strom verbraucht.
2.Im Live-Modus (EIN) arbeitet die Kamera nachts automatisch die Videolängeneinstellung. Bei niedrigem Stromverbrauch wird die
Aufnahme vorzeitig beendet.
3.Bitte stellen Sie die kürzere Videolänge ein, um eine lange Verwendung der Batterien zu gewährleisten.
6.Tonaufnahme
Audioaufnahme ein- / ausschalten
7.Aufnahmeabstand
▲
voreingestellt 1 MIN. optional von 5 Sekunden bis 60 Minuten.
Wählen Sie die kürzeste Zeit, die die Kamera warten soll, bevor sie auf das sukzessive Auslösen des Hauptsensors reagiert, nachdem ein Tier zum ersten Mal erkannt wurde. Die Kamera nimmt während des
Vorgangs keine Fotos oder Videos auf das ausgewählte Intervall. Dadurch wird verhindert, dass die
Speicherkarte mit unnötigen Aufnahmen gefüllt wird.
1. Die Verzögerung der Aufnahme ist kurz, die Aufnahmefrequenz der
Kamera wäre hoch und der Stromverbrauch wäre hoch. Dies würde sich auf die Gebrauchstage der Batterien auswirken.
2. Im Gegenteil, wenn die Verzögerung weit ist, wäre es ein geringerer
Energieverbrauch, um eine lange Nutzung zu gewährleisten.
8.Seitliche Bewegungsmelder
Berücksichtigen Sie während der Ausrichtung, ob die Verwendung der
Seitenbewegungssensoren zum Erreichen der gewünschten
Beobachtungsergebnisse nützlich sein kann oder nicht.
32
9. Empfindlichkeit Bewegungssensoren
1. Wählen Sie «Hoch» für Innenbereiche und Umgebungen mit geringer
Interferenz.
2. Wählen Sie «Mittel» für Außenbereiche und Umgebungen mit
NormalzustandStörungsgrad
3. Wählen Sie «Niedrig» für eine Umgebung mit hoher Interferenz.
10.Ziel-Aufnahmezeit
Drücken Sie «OK» und wählen Sie dann «ON», um die Arbeits- und
Endarbeitszeit einzustellen. Nach Beendigung der Einstellung arbeitet die
Kamera jeden Tag nur während der eingestellten Zeit. Nach dieser Zeit ist die Kamera im Standby-Modus. Wenn die Startzeit beispielsweise auf
18:35 und die Endzeit auf 8:25 eingestellt ist, ist die Kamera von 18:35 Uhr des aktuellen Tages bis 08:25 Uhr betriebsbereit bin von der folgender Tag. Die Kamera wird nicht ausgelöst und nimmt außerhalb dieses Zeitraums keine Fotos oder Videos auf.
11. Zeitraffer-Aufnahme
Drücken Sie «MENU», um nach «Zeitraffer» zu suchen. Drücken Sie «OK» und wählen Sie «EIN», um das Zeitintervall einzustellen, und stellen Sie die
Werte für Hr, Min und Sec ein. Wenn beispielsweise der Prozess des
Blühens von Blumen aufgezeichnet werden muss, kann der Zeitraffer
verwendet werden. Die Kamera nimmt automatisch in allen eingestellten
Zeitintervallen Bilder auf.
12. Sprache
Wählen Sie die gewünschte Menüsprache.
Folgende Sprachen sind verfügbar: Englisch, Deutsch, Französisch,
Spanisch, Chinesisch usw.
DE
33
DE
13.Zeit & Datum
Suchen Sie im Setup-Menü nach „Uhrzeit & Datum“ und drücken Sie zur
Bestätigung OK.
Verwenden Sie das «Zeitformat» und «Datumsformat», um das Zeit- und
Datumsformat zu konfigurieren. Wählen Sie „Uhrzeit & Datum einstellen“, um die Kamerazeit zu ändern. Drücken Sie links / rechts, um die Nummer auszuwählen, und drücken Sie hoch / runter, um den Wert zu ändern.
Drücken Sie OK zu Änderungen bestätigen.
14.Fotostempel
Ein- / Ausschalten der Anzeige des Wasserzeichens auf dem Foto
15. Passwortschutz
Wählen Sie «Passwortschutz». Drücken Sie «OK» und wählen Sie «EIN», um das Passwort der Kamera festzulegen. Das Passwort ist eine 4-stellige
Zahl, die zwischen 0 und 9 ausgewählt wird.
Wenn das Passwort verloren geht, drücken Sie gleichzeitig die MENU-Taste und REPLAY und schieben Sie den
Betriebsartenwähler von OFF in die SETUP-Position.
Die Kamera ist nicht gesperrt.
16. Acoustic signal
Signalton ein- / ausschalten
17.Speicherkarte formatieren
Wählen Sie diese Option zum Formatieren der Speicherkarte in dieser
Kamera aus. Wir empfehlen, die Speicherkarte im Computer zu formatieren und dann für die erste Verwendung erneut auf dieser Kamera zu formatieren.
18. Serie Nr.
Drücken Sie «OK» und wählen Sie «ON», um die Seriennummer der Kamera einzustellen. Sie können eine Kombination aus 4 Ziffern verwenden, um den Ort auf den Fotos zu dokumentieren. Wenn Sie mehrere Kameras verwenden, können Sie den Ort beim Anzeigen von Fotos leichter ermitteln.
34
19. Einstellungen zurücksetzen
Wählen Sie diese Option, um die Kamera auf die Standardeinstellungen zurückzusetzen. Bitte beachten Sie, um Datum und Uhrzeit erneut einzustellen.
20.Version
Wählen Sie diese Option, um die aktuelle Firmware-Versionsnummer der
Kamera zu überprüfen.
21. Wiedergabe
Schieben Sie den Betriebsartenwahlschalter auf die Position «SETUP».
Drücken Sie die Wiedergabetaste und die Aufwärts- / Abwärtstaste, um die Fotos / Videos anzuzeigen. Drücken Sie beim Überprüfen der Fotos die Aufwärts- / Abwärts-Taste, um die Seite nach oben / unten zu blättern.
Drücken Sie während der Videowiedergabe die OK-Taste, um die
Wiedergabe zu starten. Drücken Sie erneut die OK-Taste, um die
Wiedergabe zu beenden. Drücken Sie die Wiedergabetaste, um zum
Standby-Modus zurückzukehren.
21.1 Auswahl löschen
Mit dieser Funktion können Sie einzelne Aufnahmen von der Speicherkarte löschen. Drücken Sie die MENU-Taste unter dem Wiedergabemodus, bewegen Sie den Auswahlbalken auf «Aktuelle Datei löschen» und drücken Sie OK, um die ausgewählte Aufnahme zu löschen.
DE
21.2 Alle Aufnahmen löschen
Mit dieser Funktion können Sie alle Aufnahmen von der Speicherkarte löschen. Drücken Sie die MENU-Taste unter dem Wiedergabemodus, bewegen Sie die Auswahlleiste auf „Alle Dateien löschen“ und drücken
Sie OK, um alle Aufnahmen zu löschen.
21.3 Diashow aktivieren
Mit dieser Funktion können die auf der Speicherkarte gespeicherten Fotos automatisch wiedergegeben werden. Jedes Foto wird etwa 2 Sekunden lang angezeigt. Um die Diaschau anzuhalten und das aktuelle Bild dauerhaft auf dem Bildschirm zu behalten, drücken Sie die OK-Taste.
35
DE
22. Schreibschutz
> Mit dieser Funktion können Sie einzelne Aufnahmen aller gespeicherten
Daten schützen Aufnahmen aus versehentlichem Löschen.
> Wählen Sie «Aktuelle Datei schreiben», um die aktuell ausgewählte
Aufnahme vor versehentlichem Löschen zu schützen.
> Wählen Sie «Alle Dateien schreibgeschützt», um alle gespeicherten
Aufnahmen vor versehentlichem Löschen zu schützen.
> Wählen Sie «Aktuelle Datei entsperren», um den Schreibschutz für die aktuell ausgewählte Aufnahme aufzuheben.
> Wählen Sie «Alle Dateien entsperren», um den Schreibschutz für alle gespeicherten Aufnahmen aufzuheben.
6.ENTER LIVE-MODUS
6.1Kamera einstellen und installieren
Der SETUP-Modus ist vorteilhaft, um den bestmöglichen Erfassungswinkel und -bereich des Bewegungssensors zu bestimmen. Bringen Sie dazu die
Kamera bei ca. 1 -2 m Höhe zu einem Baum und richten Sie die Kamera in die gewünschte Richtung aus.
Bewegen Sie sich langsam von einer Seite des
Beobachtungsbereichs zur anderen. Bewegen
Sie sich parallel zur Kamera. Probieren Sie verschiedene Winkel und Entfernungen aus. Die grüne LED blinkt und zeigt an, dass Sie vom seitlichen PIR-Sensor erkannt wurden. Und die blaue LED zeigt an, dass Sie vom PIR-Hauptsensor erkannt wurden.
HINWEIS: Die grüne LED leuchtet nur, wenn „
Seitenbewegung
Sensor ”ist eingeschaltet. Auf diese Weise können
Sie die beste Position für das Ausrichten der
Kamera bestimmen. Die blau / grüne LED blinkt nur im SETUP-Modus, sobald der PIR-Sensor eine
Bewegung erkannt hat.
36
Die rote LED blinkt 15 Mal, wenn Sie gerade in den Live-Modus (ON) wechseln. Die Kamera arbeitet dann automatisch und wechselt in den
Standby-Modus.
Um falsche Signale und unnötige Fotos zu vermeiden, empfehlen wir, die
Kamera nicht an sonnigen Punkten zu verwenden und zu prüfen, dass sich keine Äste im aktiven Bereich des Sensors befinden.
Vergewissern Sie sich auch, dass die Kamera entsprechend dem zu betrachtenden Punkt auf die richtige Höhe eingestellt ist. Richten Sie die
Kamera bei Bedarf nach unten, um eine optimale Ausrichtung zu erreichen.
Positionieren Sie die Kamera für eine Höhe von 1 Meter parallel zum
Boden.Neigen Sie die Kamera für eine Höhe von 2 Metern um fünf Grad nach unten.
10
°
DE
Hinweis:
Bitte machen Sie die horizontale
Bewegung vor dem PIR. vertikale
Bewegung konnte nicht richtig erkannt werden.
Bitte beschleunigen Sie Ihre
Schritte, wenn Sie den Test in einer großen Entfernung vor dem
PIR-Erkennungsbereich durchführen.Der PIR-Erkennungsabstand wäre kürzer, wenn die Umgebungstemperatur 30 Grad oder mehr übersteigt.
Der Bildschirm schaltet sich innerhalb von 3 Minuten im SETUP-Modus automatisch aus. Durch Drücken einer beliebigen Taste wird er wieder eingeschaltet.
37
DE
6.2 Live-Modus einrichten
Die Standardanwendung der Wildlife Camera ist der Live-Modus.
In diesem Modus werden Fotos entweder durch Bewegungssensoren oder in Intervallen entsprechend der jeweiligen Einstellung ausgelöst.
Um den Live-Modus einzurichten, schalten Sie den Modusschalter in die
Position ON. Die rote LED blinkt 15 Mal, wenn Sie in den Live-Modus (ON) wechseln. Die Kamera arbeitet dann automatisch und wechselt in den
Standby-Modus.
Sobald wilde Tiere oder andere Objekte direkt in den Erfassungsbereich von gelangen Im Sensorbereich beginnt die Kamera mit der Aufnahme von
Fotos und Videos.
Hinweis:
Am Tag. IR-LEDs leuchten nicht auf. Die Fotos und Videos sind in Farbe. In der Nacht. IR-LEDs leuchten und die Fotos und Videos sind in Schwarzweiß.
Die Shot-Verzögerung beträgt standardmäßig 1 Minute. Die Option ist
5s-60 min.
Richten Sie den Aufnahmemodus und die zugehörigen Parameter ein, bevor
Sie den Live-Modus aufrufen.
38
7. Verbindung zum Computer
Bitte schalten Sie den Modus auf «SETUP» und verbinden Sie die Kamera
über ein USB-Kabel mit dem Computer. Auf dem LCD-Display der Kamera wird die Aufforderung «MSDC» angezeigt.
1.Schließen Sie die Kamera über das USB-Kabel an Ihren Computer an.
2. Die Kamera wird im USB-Modus unabhängig von der Auswahl des
Modusschalters automatisch eingeschaltet.
3. Die Kamera installiert sich als zusätzliches Laufwerk unter dem Namen
«Wechselspeichergerät» auf dem Computer.
4. Doppelklicken Sie auf das Gerät, um den Ordner «DCIM » zu ermitteln.
5.Die Fotos und Videos befinden sich in den Unterordnern des Ordners
«DCIM».
6.Sie können Fotos und Videodateien auf dem Computer kopieren oder verschieben.
Alternativ können Sie die Speicherkarte in einen Kartenleser des Computers einlegen.
DE
39
DE
8. TECHNISCHE DATEN
Element Macintosh
Bildsensor
Fotoauflösung
20 Megapixel CMOS sensor
20MP (5200*3900) ;
16MP (4608*3456);
12MP (4000*3000),
8MP(3264×2448),
5MP(2592 x 1944). 3MP(2048×1536).
Bildschirm
Aufzeichnungsmedium
Videoauflösungen
Linse
Die Entfernung der Nachtversion
Auslöseentfernung
6,1 cm (2,4 «) -Farb-TFT-LCD;
320×240 Pixel
Unterstützt Micro SD-Speicherkarten mit bis zu 32 GB (nicht enthalten)
1920×1080,1280×720,
720 x480,640×480,320×240
F2.5, f=3.6mm,FOV=130°
20m
Bis zu 20 Meter
Triggering time
0.3-0.5 Zweitens
Schussverzögerung
5 Sekunden bis 60 Minuten
42 Stück Infrarot-LEDs
IR-Blitz
Erfassungswinkel des Sensor
Spritzwasser geschützt
130°
Ja (IP56)
Speicherformate Foto: JPEG; Video: AVI. MJPC
Verbindungen Mini USB 2.0
Standby-Zeit Ca. 6 Monate (mit 8 Batterien)
Maße
Leistung
97x140x67mm
8 x LR6 (AA) Alkalibatterien mit niedriger Entladung;
Externe 6-V-Stromversorgung, mindestens 1,5 A (nicht mitgeliefert)
40
9
.
EINFACHE FEHLERSUCHE
Die Kamera lässt sich nicht einschalten
Die Kamera schaltet sich automatisch aus
Es zeigt «SD-Kartenfehler»
1. Bitte überprüfen Sie, ob die Batterien richtig eingelegt sind.
Überprüfen Sie, ob die Akkukapazität niedrig oder erschöpft ist. Wenn ja, ersetzen Sie bitte die neuen Batterien.
1.Bitte überprüfen Sie, ob die
Batteriekapazität niedrig oder erschöpft ist. Wenn dies der Fall ist, wechseln Sie die neuen Batterien für den Außengebrauch oder schließen Sie den Netzadapter für den Innengebrauch an.
2. Bitte überprüfen Sie, ob die SD-Karte voll ist. Übertragen Sie in diesem Fall Bilder und Videos auf Ihren Computer oder löschen Sie einige Dateien.
1.Bitte stellen Sie sicher, dass die
SD-Karte dem Standard 10 oder höher entspricht.
2. Bitte formatieren Sie die SD-Karte zum ersten Mal mit der Kamera.
Videos sind abgehackt oder sprunghaft, wenn sie auf einem Computer abgespielt werden
1.Verwenden Sie verschiedene
Mediaplayer wie den VLC-Player.
2. Stellen Sie sicher, dass das
AVI-Format Videoclip auf Ihrem
Computer abgespielt werden kann
DE
Das Bild ist nicht klar
Die Kamera nimmt keine
Bilder oder Videos auf
Stellen Sie sicher, dass Sie die
Schutzfilme von IR-LEDs und Objektiv vor der Verwendung entfernt haben.
Überprüfen Sie Wenn der Speicher der SD-Karte voll ist, übertragen Sie
Bilder oder Videos auf Ihren Computer oder löschen Sie einige Dateien im
Wiedergabemodus.
41
DE
9.1 Pflege
Verwenden Sie zum Reinigen des Kameragehäuses und des mitgelieferten Zubehörs keine ätzenden Reinigungsmittel wie z. Bei
Bedarf reinigen Sie die Systemkomponenten mit einem weichen, trockenen Tuch.
9.2 Lagerung
Nehmen Sie den Akku immer aus dem Gehäuse, wenn Sie die Kamera längere Zeit nicht benutzen, und lagern Sie den Akku separat. Täglich und über längere Zeiträume können die Batterien an einem trockenen
Ort außerhalb der Reichweite von Kindern aufbewahrt werden.
WENN SIE FRAGEN ODER PROBLEME HABEN
:
Bitte kontaktieren Sie uns per
USA und Kanada [email protected]
Europa [email protected]
UK [email protected]
Wir werden innerhalb von 24 Stunden umgehend und verbindlich antworten und versuchen, Ihr Problem so schnell wie möglich zu lösen.
Mehr sichere Garantie mit TOGUARD!
Wenn Sie mit unserem Produkt nicht zufrieden sind. Erzählen Sie uns bitte von Ihrem Gedanken. Vielen Dank.
42
43
44
1. LISTE D’EMBALLAGE
Veuillez déballer soigneusement l’appareil photo et vérifier que les accessoires ci-dessous sont contenus dans la boîte.
FR
1 2 3 4
1. Caméra de chasee x 1
2. Câble USB x 1
3. Manuel d’instruction x 1
4. Ceinture de montage x 1
5. Fixation murale x 1
6. Vis x 3
5 6
2. INTRODUCTION
La Camera de Chasse est une caméra de surveillance de la faune avec un capteur infrarouge. Le capteur peut détecter des changements soudains de la température ambiante dans une zone d’évaluation. Les signaux du capteur infrarouge hautement sensible (PIR, capteur infrarouge passif) allument l’appareil photo, activant l’image du mode vidéo.
45
FR
2.1 Caractéristiques de Camera de Chasse
1. Capteur CMOS.
2. Photo 20 mégapixels et vidéo HD 1080p.
3. LCD TFT couleur 6,1 cm (2,4 ’): 320×240 pixels
4. 42 LEDs IR.
5. Filtre IR entièrement automatique.
6. Vitesse de déclenchement: env. 0,3 seconde.
7. Configurez le n°de série pour enregistrer la position.
8. Le temps, la date, la température, la phase et le numéro de série seront
estampillés sur la photo.
9. Protection par mot de passe.
10. Puissance indiquant.
11. Fonction de test intégré concernant la température ambiante.
12. Microphone et haut-parleur intégrés.
13.Mini interface USB 2.0.
14.Waterproof standard IP56.
15.Température de travail: -20°C à 60°C.
16.Consommation électrique extrêmement basse en mode veille offrant
une durée de fonctionnement extrêmement longue; dure 6 mois avec
8 piles pour 50 photos par jour.
2.2 Caractéristiques de Camera de chasse
1. Piège à caméra pour la chasse
2. Observation d’animal ou d’incident.
3. Caméra de sécurité déclenchée pour une utilisation domestique,
professionnelle ou publique.
4.Toute surveillance interne et externe.
46
3. STRUCTURE
Comprendre la structure de la caméra aide à utiliser ce produit plus habilement.
1
1- LED infrarouges
2- lentille
3.1-Capteur de mouvement avant
3.2-Capteur de mouvement gauche
3.3-Capteur de mouvement droit
4. écran d’affichage
5. Bouton Up
6. Bouton de menu
2
3.1
3.2
3.3
7. bouton gauche
8. Bouton Replay
9. bouton Shot
10. Bouton droit
11. bouton OK
12. Bouton bas
13.Fente Slot
14.AV Jack
15.USB Jack
16.ON
17.SETUP
18.OFF
19. Compartiment à piles
20.Bague d’étanchéité
21.Connexion DC 6V / 1.5A
22. Filetage de trépied 1/4 «
9
6
10
11
14
4
5
7
12
8
13
15
AV
SHOT
OK
ON-SETUP-OFF
16 17 18
19
21
22
20
47
FR
23
Digital Trail Camera
Model:H70
Power : 8*AA Battery
DC6V Input
RoHS
Made in China
24
23.Place de fixation 24.Slot pour ceinture de montage
▲ 1.Le moniteur est allumé uniquement en mode CONFIGURATION pour modifier les paramètres du menu ou visualiser des photos et vidéos existantes.
2.Une carte mémoire micro SD doit avoir été insérée dans son logement pour pouvoir enregistrer des photos et des vidéos.
3.En utilisant la connexion mini USB (USB 2.0), l’appareil photo peut être connecté à un ordinateur pour télécharger des photos et des vidéos.
4.A l’aide du sélecteur de mode, les trois modes de fonctionnement: OFF,
SETUP et ON peuvent être sélectionnés.
4. PREPARATION DE LA CAMERA
Remarque :
Les cartes mémoire Micro SD d’une capacité maximale de 32 Go sont prises en charge.
48
2.Vous pouvez utiliser des piles de type LR6 (AA) répondant aux mêmes spécifications (2000 mAh ou plus). Nous recommandons les piles alcalines à faible autodécharge (non fournies).
3.La caméra doit être insérée avec 4 ou 8 piles AA de 1.5V. N’utilisez pas des piles neuves et usagées ensemble. L’interface CC nécessite un adaptateur 6V / 1,5 A avec une fiche de 3,5 mm (diamètre extérieur) s * l .3 mm (D intérieur).
4.Insérez une carte micro SD de classe CLASS6 ou supérieure (CLASS10 recommandée).Avant de l’insérer dans la carte mémoire, assurez-vous que la protection en écriture latérale de la carte mémoire n’a pas été verrouillée.
5. Allumez l’appareil photo. 3 commutateurs: éteindre (OFF), menu de configuration/ Mode SETUP (SETUP) et mode direct (ON).
6. Il est recommandé de formater la nouvelle carte mémoire lors de son utilisation (comme décrit ci-dessous).
7.Veuillez noter que l’appareil photo s’éteindra lorsque le niveau de puissance est très bas.
FR
AALR6
AALR6
AALR6
AALR6
AALR6
AALR6
AALR6
AALR6
AV
SHOT
OK
ON-SETUP-OFF
ON SETUP OFF
Settings
Time&date
Photo stamp
Password protection
Beep sound
Format memory card
Serial NO
M
ENU Back OK Select
49
Settings will be deleted
Beep sound
Format memory card
Serial NO
Yes
No
M
ENU Back OK Select
FR
Fonctionnement (voir figures ci-dessous)
Ouvrez les supports de verrouillage et le couvercle de protection du compartiment à piles — insérez les piles — insérez la carte mémoire — passez
à SETUP (Configuration) — entrez dans le menu système en appuyant sur la touche MENU — choisissez de formater la carte mémoire — choisissez de rétablir les réglages d’usine.
(cette étape peut être ignorée) — choisissez de configurer l’heure du système. Ouvrez le couvercle du compartiment à piles
►
Insérez 8 piles.
Modèle de batterie:
AALR6> Assurez-vous que la protection contre l’écriture latérale sur la carte mémoire n’a pas été activée> Insérez une carte mémoire Micro SD de classe CLASS6 ou supérieure dans la fente pour carte mémoire avant d’allumer l’appareil photo et sélectionnez le mode SETUP pour ajuster les paramètres
Assemblage avec sangle
5. UTILISATION DU MENU APPAREIL
PHOTO ET CONFIGURATION
5. 1 Utilisation de l’appareil photo
1. Boutons de fonctionnement
Fonctions des boutons de commande en mode d’enregistrement:
Les boutons de commande sont décrits ci-dessous en mode d’enregistrement avec menu non activé.
50
1. Touche UP: Page précédente (mode Menu): passer en mode d’enregistrement vidéo.
2. MENU: Ouvre ou quitte ce menu de configuration / Arrête la lecture de la vidéo (mode de lecture)
3. Touche gauche: page gauche
4. Touche Replay: revoir des photos et des vidéos
5. Touche SHOT: enregistrement / capture vidéo
6. Touche droite: page droite
7. OK: Lecture / Pause lecture de fichiers vidéo (mode Replay)
8. Touche Bas: Page suivante (mode Menu) / Basculer en mode Photo.
1
2
5
SHOT
3
4
OK
6
7
8
2. Commutateur de mode
2.1 Déplacez les commutateurs pour choisir le mode de travail
ON-SETUPOFF
Mise hors tension (OFF)
ONSETUP -OFF
Configuration du système (SETUP)
ON SETUP -OFF
Mode direct (ON)
2.2 Appuyez sur la touche Haut / Bas pour basculer entre les modes
Vidéo et Photo.
2.3 Appuyez sur la touche MENU pour ouvrir le menu de réglage. Appuyez
sur OK pour confirmer les changements de réglage.
2.4 Appuyez une nouvelle fois sur la touche MENU pour revenir au menu
précédent ou quitter les paramètres du MENU.
2.5 Basculez le sélecteur de mode sur «OFF» pour éteindre l’appareil photo.
FR
51
FR
5.2 Menu de configuration
1
.
Mode
Photo, Vidéo, Photo + Vidéo, Indiquez si des photos ou des vidéos doivent
être prises lorsqu’un mouvement est détecté. En mode «Photo + Vidéo», l’appareil prend d’abord un nombre défini de photos avant d’enregistrer une vidéo.
2. Résolution de I’image
20MP (5200*3900) ; 16MP (4608*3456); 12MP (4000*3000),
8MP (3264×2448), 5MP (2592 x 1944). 3MP (2048×1536).
Sélectionnez la résolution souhaitée pour les photos. Nous recommandons la résolution 16M.Une résolution plus élevée produit une qualité photo légèrement meilleure, mais des fichiers plus volumineux nécessitent plus d’espace sur la carte mémoire
Prenant une carte mémoire de 16 Go par exemple:
Pixels photo
20MP
16MP
12MP
8MP
5MP
3MP
Taille (Mo) (environ)
3.5
2.7
2.0
1.4
0.9
0.54
Quantité de photos
(environ)
4100
5300
7000
10500
16600
26600
3.Séries photos: 1 P, 2P. 3P
52
4. Résolution vidéo
[email protected], [email protected], [email protected],
[email protected], [email protected] Sélectionnez la résolution vidéo requise.Sélectionnez le nombre de photos à prendre successivement lorsque l’appareil photo est déclenché en mode Photo. Veuillez également respecter l’intervalle de paramètre! Une résolution plus élevée produit des vidéos de meilleure qualité mais entraîne la création de fichiers plus volumineux nécessitant plus d’espace sur la carte mémoire. Les vidéos sont enregistrées au format AVI et peuvent être lues sur la plupart des appareils vidéo.
Prenant une carte mémoire de 16 Go par exemple:
FR
Durée de la vidéo: 10 secondes
Résolution vidéo
Taille de la vidéo
(Mo)
Quantité de vidéo
Durée totale d’enregistrement
(minutes)
1920×1080
1280×720
720 x480
640×480
320*240
38
22
17
12.8
6.3
380
659
852
1132
2300
63.5
106
141
189
385
5. Longueur de la vidéo
▲
5 secondes par défaut, 3s-59s en option, 1-10 minutes
Spécifiez la durée d’un enregistrement vidéo lorsque la caméra est déclenchée automatiquement. La période d’enregistrement des vidéos n’est pas limitée en mode SETUP.
1.En mode SETUP pendant le jour et la nuit.
> Lors d’un enregistrement manuel, l’appareil photo s’arrête automatiquement après 29 minutes d’enregistrement.
53
FR
> Lorsque vous enregistrez manuellement, la caméra s’arrête dès que la taille d’un clip vidéo atteint 4 Go.
> Lors d’un enregistrement manuel, l’appareil photo s’arrête lorsque la carte mémoire est pleine ou à très basse consommation.
2.En mode direct (ON) la nuit, la caméra fonctionnera automatiquement selon le réglage de la longueur de la vidéo. Pour une puissance faible, l’enregistrement sera arrêté à l’avance.
3.S’il vous plaît définir la longueur vidéo plus courte pour garantir une utilisation à long terme de piles
6. Enregistrement audio
Activer / désactiver l’enregistrement audio
7. Temps entre les prises de vue
▲
Defaulted 1 MIN. optional from 5 seconds-60 minutes.
Défaut 1 MIN. facultatif de 5 secondes à 60 minutes.Sélectionnez la période d’attente la plus courte avant que la caméra ne réagisse au déclenchement successif du capteur principal après la détection initiale d’un animal. La caméra n’enregistre pas de photos ou de vidéos pendant l’intervalle sélectionné. Cela évite que la carte mémoire ne se remplisse de coups inutiles.
1.Le délai de prise de vue est court, la fréquence de prise de vue de l’appareil photo est élevée et la consommation d’énergie élevée. Cela affecterait les jours d’utilisation des batteries.
2. Au contraire, si le décalage est long, ce serait une consommation d’énergie inférieure pour garantir une utilisation de longue durée.
8. Détecteur de mouvement latéral
Pendant l’alignement, déterminez si l’utilisation des capteurs de mouvement latéraux peut être utile pour obtenir les résultats d’observation souhaités ou non.
9.Sensibilité du détecteur de mouvement
1. Sélectionnez «Elevé» pour les zones intérieures et les environnements peu perturbés.
54
2. 2.Sélectionnez «Moyen» pour les zones extérieures et les environnements avec quantité d’interférence.
3.sélectionnez «Faible» pour un environnement avec un niveau élevé d’interférences.
10. Durée d’enregistrement cible
Appuyez sur «OK», puis sélectionnez «ON» pour définir le début et la fin du temps de travail. Une fois les réglages terminés, la caméra ne fonctionne que pendant l’heure définie chaque jour. Au-delà de cette période, la caméra est en veille. Si, par exemple, l’heure de début est réglée sur
18h35 et l’heure de fin à 20h25, la caméra sera opérationnelle de 18h35 du jour à 8h25 suis du le jour suivant. L’appareil photo ne se déclenchera pas et ne prendra aucune photo ni vidéo en dehors de cette période.
11. Photographie d’accéléré
Appuyez sur «MENU» pour trouver «Time lapse». Appuyez sur «OK», puis sélectionnez «ON» pour définir l’intervalle de temps et définissez les valeurs de Hr, Min et Sec. Par exemple, si le processus de floraison des fleurs doit être enregistré, vous pouvez utiliser le temps écoulé. L’appareil photo prend automatiquement des photos à chaque intervalle de temps défini.
12.Langue
Sélectionnez la langue de menu souhaitée.Les langues suivantes sont disponibles: anglais, allemand, français, espagnol, chinois, etc.
FR
13. Date&heure
Recherchez l’heure et la date dans le menu de configuration, puis appuyez sur OK pour entrer.Utilisez le “Format heure” et le “Format date” pour configurer le format heure et date. Choisissez «Régler l’heure et la date» pour changer l’heure de la caméra. Appuyez sur Gauche / Droite pour choisir le numéro et appuyez sur Haut / Bas pour changer la valeur.
Appuyez sur OK pour confirmer les modifications.
55
14.Timbre photo
Activer / désactiver l’affichage du filigrane sur la photo
FR
15.Protection du mot de passe
Sélectionnez «Protection par mot de passe». Appuyez sur «OK», puis sélectionnez «ON» pour définir le mot de passe de la caméra. Le mot de passe est un nombre à 4 chiffres sélectionné entre 0 et 9.
Si le mot de passe est perdu, appuyez simultanément sur les touches MENU et REPLAY, puis faites glisser le sélecteur de mode de fonctionnement de la position OFF
à la position SETUP. La caméra est déverrouillée.
6. Signal acoutstique
Activer / désactiver le bip sonore
17. Formater la carte mémoire
Sélectionnez Formater la carte mémoire sur cet appareil photo. Nous vous suggérons de formater la carte mémoire sur odinateur, puis de le formater à nouveau sur cet appareil photo pour la première utilisation.
18.Numéro de série
Appuyez sur «OK», puis sélectionnez «ON» pour définir le numéro de série de l’appareil photo. Vous pouvez utiliser une combinaison de 4 chiffres pour documenter l’emplacement sur les photos. Lorsque vous utilisez plusieurs appareils photo, cela facilite l’identification du lieu lors de la visualisation de photos.
19. Réinitialiser tous les paramètres
Sélectionnez pour réinitialiser l’appareil photo aux paramètres par défaut.
S’il vous plaît noter pour régler la date et l’heure à nouveau.
20.Version
Sélectionnez pour vérifier le numéro de version actuel du micrologiciel de l’appareil photo.
56
21.Lecture
Faites glisser le sélecteur de mode de fonctionnement sur «SETUP».
Appuyez sur la touche de relecture et sur la touche Haut / Bas pour revoir les photos / vidéos. Pendant la révision de photos, appuyez sur la touche
Haut / Bas pour faire défiler les pages. Lors de la lecture de vidéos, appuyez sur la touche OK pour commencer la lecture, appuyez une nouvelle fois sur OK pour arrêter. Appuyez sur la touche Replay pour revenir en mode veille.
FR
21.1 Supprimer la sélection
Vous pouvez utiliser cette fonction pour supprimer des enregistrements individuels de la carte mémoire. Appuyez sur la touche MENU dans le mode de lecture, déplacez la barre de sélection sur «Supprimer le fichier actuel» et appuyez sur OK pour supprimer l’enregistrement sélectionné.
21.2 Supprimer tous les enregistrements
Vous pouvez utiliser cette fonction pour supprimer tous les enregistrements de la carte mémoire. Appuyez sur la touche MENU dans le mode de lecture, déplacez la barre de sélection sur «Supprimer tous les fichiers» et appuyez sur OK pour supprimer tous les enregistrements.
21.3 Activer le diaporama
Cette fonction peut être utilisée pour lire automatiquement les photos stockées sur la carte mémoire. Chaque photo est affichée pendant environ 2 secondes. Pour arrêter le diaporama et conserver l’image actuelle à l’écran de façon permanente, appuyez sur le bouton OK.
57
FR
22. Protection en écriture
> Cette fonction peut être utilisée pour protéger des enregistrements individuels de tous les enregistrements. enregistrements supprimés accidentellement.
> Sélectionnez «Protéger en écriture le fichier actuel» pour protéger l’enregistrement actuellement sélectionné contre toute suppression accidentelle.
> Sélectionnez «Protéger tous les fichiers en écriture» pour protéger tous les enregistrements sauvegardés d’une suppression accidentelle.
> Sélectionnez «Déverrouiller le fichier actuel» pour supprimer la protection en écriture de l’enregistrement actuellement sélectionné.
> Sélectionnez «Déverrouiller tous les fichiers» pour supprimer la protection en écriture de tous les enregistrements sauvegardés.
6.ENTRER EN MODE LIVE
6.1 Réglage et installation de la caméra
Le mode SETUP est avantageux pour déterminer le meilleur angle de détection et la meilleure portée possibles du capteur de mouvement.
Pour cela, fixez l’appareil photo à env. 1 -2m de hauteur à un arbre et aligner la caméra avec une direction souhaitée.
Déplacez-vous lentement d’un côté à l’autre de la zone observée. Déplacer parallèlement à la caméra. Essayez différents angles et distances.
Le voyant vert clignotant indique que vous avez
été détecté par le capteur PIR latéral. Et le voyant bleu clignotant indique que le capteur PIR principal vous a détecté.
REMARQUE: la LED verte ne s’allume que lorsque capteur ”est allumé. De cette manière, vous pouvez déterminer la meilleure position pour aligner la caméra. Le voyant bleu / vert ne clignote qu’en mode SETUP dès que le capteur
PIR a détecté un mouvement.
58
Le voyant rouge clignote 15 fois lorsque vous passez en mode direct (ON), puis la caméra fonctionne automatiquement et passe en mode veille.
Pour éviter les signaux incorrects et les photos inutiles, nous vous recommandons de ne pas utiliser l’appareil photo par temps ensoleillé et de vérifier qu’aucune branche ne se trouve dans la zone active du capteur.
Vérifiez également que la caméra est réglée à la hauteur correcte en ligne avec le point à observer. Si nécessaire, dirigez la caméra vers le bas pour un alignement optimal
FR
Pour une hauteur de 1 mètre, placez la caméra parallèlement au sol.
Pour une hauteur de 2 mètres, inclinez la caméra de cinq degrés au sol.
10
°
Remarque:
S’il vous plaît faire le mouvement horizontal avant le PIR. le mouvement vertical n’a pas pu détecter correctement.
Veuillez accélérer vos pas lorsque vous effectuez le test sur une longue distance avant la zone de détection PIR.
La distance de détection PIR serait plus courte si la température ambiante atteignait ou dépassait 30 °.
L’écran s’éteindrait automatiquement sans aucune opération dans les
3 minutes en mode SETUP, appuyez sur n’importe quel bouton pour le rallumer.
59
FR
6.2 Configuration du mode direct
L’application standard de la caméra Wildlife est le mode Live.
Dans ce mode, les photos sont déclenchées par des capteurs de mouvement ou à des intervalles différents en fonction du réglage respectif.
Pour configurer le mode direct, réglez le sélecteur de mode sur ON. Le voyant rouge clignote 15 fois lorsque vous passez en mode direct (ON), puis la caméra fonctionne automatiquement et passe en mode veille.
Dès que des animaux sauvages ou d’autres objets pénètrent directement dans la zone de détection dela zone du capteur, la caméra commence à enregistrer des photos et des vidéos.
Remarque:
En journée. Les LED IR ne s’allumeront pas. Les photos et les vidéos sont en couleur. La nuit. Les LED IR vont éclairer, et les photos et vidéos sont en noir et blanc.
Le délai de prise de vue est de 1 minute par défaut. L’option est 5s-60 min.
Veuillez configurer le mode d’enregistrement et les paramètres associés avant d’entrer en mode direct.
60
7.Connexion à l’ordinateur
Veuillez passer le mode sur «SETUP», et connecter l’appareil photo à l’ordinateur avec un câble USB, l’écran LCD de l’appareil photo affichera «
Invite MSDC. Ceci indique que la connexion est établie. Lisez ensuite ou copiez les données de la carte SD sur l’ordinateur.
1.Connectez l’appareil photo à votre ordinateur à l’aide du câble USB.
2.L’appareil photo s’allume automatiquement en mode USB, quelle que soit la sélection sur le commutateur de mode.
3.L’appareil photo s’installe sur l’ordinateur en tant que lecteur supplémentaire sous le nom de «Périphérique de stockage amovible».
4. Double-cliquez sur le périphérique pour détecter le dossier «DCIM *
5.Les photos et vidéos se trouvent dans les sous-dossiers du dossier «DCIM».
6.Vous pouvez copier ou déplacer des photos et des fichiers vidéo sur votre ordinateur.
FR
Vous pouvez également insérer la carte mémoire dans un lecteur de carte sur l’ordinateur.
61
FR
8. SPECIFICATION TECHNIQUE
Élément
Temps d’attente
Macintosh
Capteur d’image Capteur
CMOS de 20 mégapixels
Résolution photo
Écran
Support d’enregistrement
Résolutions vidéo
Objectif
La distance de la version de nuit
Distance de déclenchement
Temps de déclenchement
Décalage
Flash SI
Angle de détection du capteur
Spray protégé contre l’eau
Formats de stockage
20MP (5200*3900) ;
16MP (4608*3456);
12MP (4000*3000),
8MP(3264×2448),
5MP(2592 x 1944). 3MP(2048×1536).
TFTLCD couleur de 6,1 cm (2,4 po)
320×240 pixels
Prend en charge les cartes mémoire
Micro SD jusqu’à 32 Go (non inclus)
1920×1080,1280×720,
720 x480,640×480,320×240
F2.5, f=3.6mm,FOV=130°
20m
Jusqu’à 20 mètres
0.3-0.5 seconde
5 secondes à 60 minutes
42 LEDs infrarouges
130°
Avoir (IP56)
Photo:JPEG; Video:AVI. MJPC
Les liaisons
Mini USB 2.0
Environ 6 mois (avec 8 piles)
Dimensions
Puissance
97x140x67mm
8 piles alcalines LR6 (AA)
à d
é charge faible;Alimentation externe 6V, au moins 1,5 A (non fournie)
62
9. DÉPANNAGE SIMPLE
L’appareil photo ne s’allume pas
1.Vérifiez que les piles sont correctement installées.
2.Vérifiez si la capacité de la batterie est faible ou épuisée. Si c’est le cas, veuillez remplacer les piles par des piles neuves.
L’appareil photo s’éteint automatiquement
Il montre ‘Erreur de la carte SD «
1.Veuillez vérifier si la capacité de la batterie est faible ou épuisée. Si c’est le cas, essayez de remplacer les nouvelles piles pour une utilisation en extérieur ou connectez un adaptateur secteur pour une utilisation en intérieur.
2.Vérifiez si la carte SD est pleine. Si tel est le cas, transférez des images et des vidéos sur votre ordinateur ou supprimez des fichiers en mode Lecture.
1.Veuillez vous assurer que la carte SD est de classe 10 ou supérieure.
2. Veuillez utiliser l’appareil photo pour formater la carte SD la première fois.
Les vidéos sont agitées ou nerveuses lorsqu’elles sont lues sur un ordinateur
1. Essayez d’utiliser différents lecteurs multimédias tels que le lecteur VLC.
2. Assurez-vous que le clip vidéo au format AVI peut être lu sur votre ordinateur.
L’image n’est pas claire
Veuillez vous assurer que vous avez retiré les films de protection des
LED IR et de la lentille avant de
La caméra ne prend pas d’images ni n’enregistre de vidéos
Cochez Si la mémoire de la carte SD est saturée, transférez des images ou des vidéos sur votre ordinateur ou supprimez certains fichiers en mode Lecture.
FR
63
EN
9.1 Soins
N’utilisez pas de produits de nettoyage corrosifs, tels qu’essences de méthyle, diluants, etc. pour nettoyer le boîtier de l’appareil photo et les accessoires fournis. Si nécessaire, nettoyez les composants du système avec un chiffon doux et sec.
9.2 Stockage
Retirez toujours la batterie du boîtier si vous ne l’utilisez pas pendant un certain temps et rangez-la séparément. Au jour le jour et sur de longues périodes, les piles peuvent être conservées dans un endroit sec, hors de portée des enfants.
SI VOUS AVEZ DES QUESTIONS OU DES PROBLÈMES.
S’il vous plaît nous contacter par
États-Unis et Canada [email protected]
Europe [email protected]
UK [email protected]
Nous répondrons rapidement et avec autorité dans les 24 heures et ferons de notre mieux pour résoudre votre problème le plus rapidement possible.
Garantie plus sûre avec TOGUARD!
Si vous n’êtes pas satisfait de notre produit. Parlez-nous de votre pensée, s’il vous plaît. Ce sera très apprécié.
64
65
66
1. LISTA IMBALLAGGIO
Disimballare la fotocamera con attenzione e controllare che gli accessori sottostanti siano nella scatola.
1 2 3 4
5 6
1. Fotocamera Caccia x 1
2. Cavo USB x 1
3. Manuale di istruzioni x 1
4. Cinghia di montaggio x 1
5. Montaggio a parete x 1
6. Viti x 3
2. INTRODUZIONE
The Fotocamera Caccia è una telecamera per animali selvatici e di sorveglianza con un sensore a infrarossi. Il sensore può rilevare cambiamenti improvvisi alla temperatura ambiente all’interno di un’area di valutazione. I segnali del sensore a infrarossi altamente sensibile (PIR, sensore a infrarossi passivi) si accendono sulla fotocamera, attivando l’immagine della modalità video.
67
IT
IT
2.1 Caratteristiche di fotocamera Caccia
1.Sensore 1.CMOS
2.Foto da 2,20 megapixel e video HD 1080p
3.LCD TFT a colori da 3,6,1 cm (2,4 »); 320×240 pixel
4.42 pezzi LED IR.5.Full filtro IR automatico.
6. Velocità di rotazione: ca. 0,3 secondi.
7.Impostare il numero di serie per registrare la posizione.
8.Time, data, la temperatura, fase e numero di serie saranno stampate sulla foto.
9. Protezione password.
10. Indicatore di potenza.
11. Funzione di test integrata sulla temperatura ambientale.
12. Microfono e altoparlante incorporati.
13. Interfaccia USB 2.0 Mini.
14. Standard impermeabile IP56.
15. Temperatura di esercizio: da -20 ° C a 60 ° C.
16.Extremely basso consumo energetico in modalità standby fornitura di tempo di funzionamento estremamente lunga, dura 6 mesi con 8 batterie dei pc 50 quando si scattano foto foto ogni giorno.
2.2 Caratteristiche di fotocamera Caccia
1.Camera trap per la caccia
2. Osservazione animale o incidente.
3.Motion ha attivato la telecamera di sicurezza per uso domestico, d’ufficio o pubblico.
4. Qualsiasi controllo interno ed esterno.
68
3. STRUTTURA
Comprendere la struttura della fotocamera consentono di utilizzare il prodotto più abilmente.
1
1-LED a infrarossi
2-Boton di tiro
3.1-Sensore di movimento anteriore
Sensore di movimento
3.2-Sinistra
3.3-Sensore di movimento destro
4. Display schermo
5. Pulsante UP
2
3.1
3.2
3.3
6. Pulsante Menue
7. Pulsante sinistro
8. Pulsante di riproduzione
9. Pulsante di scatto
10. Pulsante destro
11. Pulsante OK
12. Pulsante di discesa
13. Slot TF
14.Jack AV
9
6
10
11
14
15. Jack USB
16.ON
17.SETUP
18.OFF
19.Scomparto batterie.
20 Anello di sicurezza
21. Connessione DC 6V / 1.5A
22.Filettatura treppiede1 / 4 «
4
5
7
12
8
13
15
AV
SHOT
OK
ON-SETUP-OFF
16 17 18
19
21
22
69
20
IT
24
23
Digital Trail Camera
Model:H70
Power : 8*AA Battery
DC6V Input
RoHS
Made in China
IT
23. Staffe di fissaggio 24. Slot per il montaggio della cinghia
▲ 1.El monitor si accende solo in modalità SETUP per modificare le impostazioni del menu o visualizzare foto e video esistenti.
2. Una scheda di memoria micro SD deve essere inserita nello slot della scheda di memoria per memorizzare foto e video.
3. Con la connessione mini USB (USB 2.0), la fotocamera può essere collegata a un computer per scaricare foto e video.
4.Utilizzando il selettore di modalità, è possibile selezionare le tre modalità operative: OFF, SETUP e ON.
4. PREPARARE LA MACCHINA
FOTOGRAFICA
Nota :
1. Sono supportate schede di memoria Micro SD con capacità fino a 32 GB.
70
2. Invece di batterie tipo LR6 (AA) con le stesse specifiche (con 2000 mAh o più), possono essere utilizzate. Raccomandiamo batterie alcaline.
con bassa autoscarica (non fornita).
3. La fotocamera deve inserire 4 o 8 batterie AA da 1,5 V. Non utilizzare batterie nuove e vecchie insieme. L’interfaccia DC richiede un adattatore da 6 V / 1,5 A con 3,5 mm (diametro esterno) s * l .3 mm (interno D).
4. Inserire la scheda micro SD CLASS6 o superiore (si consiglia CLASS10).
Prima di inserire nella scheda di memoria, assicurarsi che la protezione di scrittura laterale della scheda di memoria non sia bloccata.
5. Accendi la videocamera. 3 interruttori: spento (OFF), menu di configurazione / modalità SETUP (SETUP) e modalità live (ON).
6. Si consiglia di formattare la nuova scheda di memoria quando viene utilizzata (come descritto di seguito).
7. Notare che la fotocamera si spegne quando la potenza è troppo bassa.
IT
AALR6
AALR6
AALR6
AALR6
AALR6
AALR6
AALR6
AALR6
AV
SHOT
OK
ON-SETUP-OFF
ON SETUP OFF
Settings
Time&date
Photo stamp
Password protection
Beep sound
Format memory card
Serial NO
M
ENU Back OK Select
Settings will be deleted
Beep sound
Format memory card
Serial NO
Yes
No
M
ENU Back OK Select
71
IT
Operazione (vedi figure sotto)
Aprire le staffe di bloccaggio e il coperchio protettivo del vano batteria.
Inserire le batterie — inserire la scheda di memoria, passare a
CONFIGURAZIONE, accedere al menu di sistema premendo il pulsante
MENU, scegliere di formattare la scheda di memoria, scegliere Ripristino di fabbrica.
(questo passaggio può essere omesso): scegliere l’orario di configurazione del sistema. Aprire il coperchio della batteria
►
I Inserire le batterie da 8 pezzi. Modello di batteria:
AALR6> Assicurarsi che la protezione da scrittura laterale sulla scheda di memoria non sia stata attivata> Inserire la scheda di memoria
Micro SD CLASS6 o successiva nello slot per schede di memoria prima di accendere la fotocamera e selezionare la modalità SETUP per impostare la configurazione
Montaggio a cinghia
5. UTILIZZO DELLA FOTOCAMERA E
DEL MENU DI IMPOSTAZIONE
5. 1 utilizzando la fotocamera
1. Pulsanti di funzionamento
Funzioni dei pulsanti operativi in modalità di registrazione:
Quindi, i pulsanti operativi sono descritti in modalità di registrazione con menu non attivato.
72
1. Tasto SU: Re P. (Modalità Menu): passa alla modalità di registrazione video
2.MENU: aprire o uscire dal menu di configurazione / interrompere la riproduzione del video (modalità di riproduzione)
3. Chiave sinistra: pagina sinistra
4. Tasto di riproduzione: rivedere foto e video
5. Tasto SHOT: registrazione / acquisizione di video filmati
6. Tasto destro: pagina destra
7.OK: riproduzione / pausa per riprodurre file video (modalità riproduzione)
8. Tasto giù: pagina precedente (modalità menu) / passa alla modalità foto.
IT
1
2
SHOT
3
OK
4
2. Cambia modalità
2.1 Cambia gli switch per scegliere la modalità di lavoro:
5
6
7
8
ON-SETUPOFF
Spegnimento(OFF)
ONSETUP -OFF
Sistema di configurazione (SETUP)
ON SETUP -OFF
Modalità live (ON)
2.2Premere il tasto Su / Giù per cambiare le modalità tra Video e Foto.
2.3Premere il tasto MENU per aprire il menu di configurazione. Premere
OK per confermare le modifiche alla configurazione.
2.4Premere nuovamente il tasto MENU per tornare al menu precedente o uscire dall’impostazione MENU.
2.5 Mettere il selettore di modalità su «OFF» per spegnere la fotocamera.
73
IT
5.2 Menu di configurazione
1. Modalità
Foto, video, foto + video, selezionare se scattare foto o video quando viene rilevato un movimento. Quando si è in modalità «Foto + Video», prima di registrare un video la fotocamera esegue prima un determinato numero di foto.
2. Risoluzione foto
20MP (5200*3900) ; 16MP (4608*3456); 12MP (4000*3000),
8MP (3264×2448), 5MP (2592 x 1944). 3MP (2048×1536).
Seleziona la risoluzione desiderata per le foto. Raccomandiamo la risoluzione 16M. Una risoluzione più elevata produce una qualità fotografica leggermente migliore, ma produce file più grandi che richiedono più spazio sulla scheda di memoria.
Prendendo ad esempio una scheda di memoria da 16 GB:
Pixel nella foto
Dimensioni (MB) (circa)
20MP
16MP
12MP
8MP
5MP
3MP
3.5
2.7
2.0
1.4
0.9
0.54
Numero di foto (circa)
4100
5300
7000
10500
16600
26600
3.Ripresa in serie: 1 P, 2P. 3P
74
4. Risoluzione video
1920x1080P @ 25fps, 1280x720P @ 30 fps, 720x480P @ 30 fps,
640x480P @ 30 fps, 320x240P @ 30 fps. Seleziona la risoluzione video richiesta.
Seleziona il numero di foto che verranno scattate in successione quando la fotocamera Spara in modalità foto. Notare anche la gamma di parametri!
Una risoluzione più elevata produce video di qualità più elevata, ma produce file più grandi che richiedono più spazio sulla scheda di memoria.
I video sono registrati in formato AVI che possono essere riprodotti sulla maggior parte dei dispositivi video.
Prendendo ad esempio una scheda di memoria da 16 GB:
IT
Risoluzione video
Risoluzione video
Durata del video: 10 secondi
Dimensione del video (MB)
Quantità di video
Lunghezza di registrazione totale
(minuti)
1920×1080
1280×720
720 x480
640×480
320*240
38
22
17
12.8
6.3
380
659
852
1132
2300
63.5
106
141
189
385
5. Lunghezza video
▲
Predefinito 5 secondi, opzionale 3s-59s, 1-10Minutes
Specificare la durata di una registrazione video quando la fotocamera viene attivata automaticamente. Il periodo di registrazione dei video non è limitato nella modalità CONFIGURAZIONE.
1. Nella modalità di configurazione di giorno e di notte.
> Quando si registra manualmente, la fotocamera si fermerà automaticamente dopo 29 minuti di registrazione;
75
IT
> Quando si registra manualmente, la fotocamera si fermerà quando le dimensioni di un videoclip raggiungono i 4 GB.
> Quando si registra manualmente, la fotocamera si arresterà quando la scheda di memoria è piena o a bassissima potenza2. In modalità live (ON) di notte, la telecamera funzionerà automaticamente in base a la regolazione della durata del video. Per bassa potenza, smetterà di registrare in anticipo.
3. Si prega di impostare la durata più breve del video per garantire una lunga durata della batteria.
6. Registrazione audio
Attiva / disattiva la registrazione audio
7.Distanza di registrazione
▲
Predeterminado 1 MIN. Opcional de 5 segundos a 60 minutos.
Predefinito 1 MIN. Opzionale da 5 secondi a 60 minuti.
Selezionare il periodo più breve in cui la videocamera deve attendere prima di reagire all’attivazione successiva del sensore principale dopo che un animale è stato rilevato per la prima volta. La fotocamera non registra alcuna foto o video durante l’intervallo selezionato. Ciò impedisce alla scheda di memoria di riempirsi di scatti non necessari.
1. L’intervallo di ripresa è breve, la frequenza di scatto della fotocamera sarebbe elevata e il consumo energetico sarebbe elevato. Avrebbe effetto sui giorni di utilizzo delle batterie.
2. Al contrario, se il ritardo di intervento è lungo, sarebbe un minor consumo di energia per garantire un uso prolungato.
8. Sensori di movimenti laterali
Durante l’allineamento, considerare se l’uso di sensori di movimento laterale può essere utile per ottenere i risultati di osservazione desiderati o meno.
9. Sensibilità sensori di movim.
1. Selezionare «Alto» per aree interne e ambienti con poche interferenze.
76
2. Selezionare «Medio» per le aree esterne e l’ambiente con una normale quantità di interferenze,
3. Seleziona «Basso» per un ambiente con un livello elevato di interferenze.
10. Tempo di registrazione target
Premere «OK», quindi selezionare «ON» per impostare il tempo di lavoro iniziale e finale. Dopo aver terminato la regolazione, la fotocamera funziona solo per il tempo impostato ogni giorno. Oltre il periodo, la fotocamera è in attesa. Se l’ora di inizio è, ad esempio, impostata alle
18:35 e l’ora di fine alle 8:25, la fotocamera sarà operativa dalle 6:35 pm.
Sono il giorno dopo. La fotocamera non si attiverà e non farà foto o video al di fuori di questo periodo.
IT
11. Lasso temporale
Premere «MENU» per trovare «Time Lapse». Premere «OK», quindi selezionare «ON» per impostare l’intervallo di tempo e impostare i valori di Hr, Min e Sec. Ad esempio, se è necessario registrare il processo di fioritura dei fiori, è possibile utilizzare il lasso di tempo . La fotocamera scatta automaticamente le foto ad ogni intervallo di tempo impostato.
12. Lingua
Seleziona la lingua del menu desiderato.
Sono disponibili le seguenti lingue: inglese, tedesco, francese, spagnolo, cinese, ecc.
13. Ora e data
Cerca «Data e ora» nel menu di configurazione, quindi premi OK per accedere.
Usa «Formato ora» e «Formato data» per configurare il formato dell’ora e della data. Scegli «Imposta ora e data» per cambiare l’ora della telecamera.
Premere Sinistra / Destra per selezionare il numero e premere Su / Giù per modificare il valore. Premere OK per confermare le modifiche.
14. Timbro foto
Attiva / disattiva la visualizzazione della filigrana nella foto
77
IT
15. Protetto da password
Seleziona «Protezione password». Premere «OK», quindi selezionare «ON» per impostare la password della telecamera. La password è un numero di 4 cifre selezionato da 0-9.
Se la password viene persa, premere contemporaneamente i tasti MENU e REPLAY e spostare il selettore della modalità di funzionamento dalla posizione OFF a SETUP.
La fotocamera è sbloccata.
16.Señal acústica
Activar / desactivar el pitido
17. Formatta scheda di memoria
Selezionare questa opzione per formattare la scheda di memoria in questa fotocamera, si consiglia di formattare la scheda di memoria nel computer e formattarla nuovamente in questa fotocamera per il primo utilizzo.
18. Numero Serie.
Premere «OK», quindi selezionare «ON» per impostare il numero di serie della telecamera. È possibile utilizzare una combinazione di 4 cifre per documentare la posizione nelle foto. Utilizzando più telecamere, questo rende più facile identificare la posizione durante la visualizzazione delle foto.
19. Reset delle impostazioni
Selezionare per ripristinare la fotocamera alle impostazioni predefinite.
Ricordarsi di impostare nuovamente la data e l’ora.
20.Versione
Selezionare per verificare il numero di versione corrente del firmware della fotocamera.
78
21. Riproduzione
Spostare il selettore dei modi operativi sulla posizione «CONFIGURAZIONE».
Premi il tasto Ripeti e il tasto Su / Giù per rivedere le foto / i video. Durante la revisione delle foto, premere il tasto Su / Giù per spostare le pagine su / giù. Durante la revisione dei video, premere il tasto OK per avviare la riproduzione, premere OK ancora una volta per interrompere. Premere il tasto play per tornare in modalità standby.
IT
21.1 Elimina la selezione
È possibile utilizzare questa funzione per cancellare singole registrazioni dalla scheda di memoria. Premere il tasto MENU sotto la modalità di riproduzione, spostare la barra di selezione su «Elimina file corrente» e premere OK per cancellare la registrazione selezionata.
21.2 Elimina tutte le registrazioni
È possibile usare questa funzione per cancellare tutte le registrazioni sulla scheda di memoria. Premere il tasto MENU in modalità riproduzione, spostare la barra di selezione su «Elimina tutti i file» e premere OK per cancellare tutte le registrazioni.
21.3 Attiva la presentazione
Questa funzione può essere utilizzata per riprodurre automaticamente le foto memorizzate sulla scheda di memoria. Ogni foto viene visualizzata per circa 2 secondi. Per interrompere la presentazione e mantenere l’immagine corrente permanentemente sullo schermo, premere il tasto
OK.
22. protezione da scrittura
> Questa funzione può essere utilizzata per proteggere singole registrazioni di tutti i file salvati Registrazioni di cancellazione accidentale.
> Selezionare «Scrivi protezione per il file corrente» per proteggere la registrazione attualmente selezionata dalla cancellazione accidentale.
> Seleziona «Proteggi tutti i file contro la scrittura» per proteggere tutte le registrazioni salvate dalla cancellazione accidentale.
79
IT
> Selezionare «Sblocca file corrente» per rimuovere la protezione da scrittura per la registrazione attualmente selezionata.
> Selezionare «Sblocca tutti i file» per rimuovere la protezione da scrittura per tutte le registrazioni salvate.
6. INOLTRE LA MODALITÀ IN DIRETTA
6.1 Regolazione e installazione della fotocamera
La modalità CONFIGURAZIONE è vantaggiosa per determinare il miglior angolo di rilevamento possibile e la gamma del sensore di movimento.
Per fare questo, posiziona la fotocamera a ca. 1 -2 m di altezza su un albero e allineare la telecamera con la direzione desiderata.
Spostati lentamente da un lato dell’area osservata all’altra. Sposta parallelamente alla telecamera. Prova diversi angoli e distanze.
Il LED verde lampeggiante indica che è stato rilevato dal sensore PIR laterale. Il LED blu lampeggiante indica che è stato rilevato dal sensore PIR principale.
NOTA: Il LED verde si accende solo quando «Movimento laterale» sensore «è acceso, quindi è possibile determinare la posizione migliore per allineare la fotocamera, Il LED blu / verde lampeggia solo in modalità
CONFIGURAZIONE non appena il sensore PIR rileva il movimento.
80
Il LED rosso lampeggia 15 volte quando si passa semplicemente alla modalità Live (ON), quindi la fotocamera funzionerà automaticamente e passerà alla modalità standby.
Per evitare segnali errati e foto non necessarie, si consiglia di non utilizzare la fotocamera in luoghi soleggiati e di verificare che non vi siano rami nell’area attiva del sensore.
Verificare inoltre che la fotocamera sia impostata all’altezza corretta in linea con il punto da osservare. Se necessario, puntare la fotocamera verso il basso per un allineamento ottimale
IT
Per un’altezza di 1 metro, posizionare la fotocamera parallela al pavimento.
Per un’altezza di 2 metri, inclinare la fotocamera di cinque gradi verso il suolo..
10
°
Nota:
Si prega di fare il movimento orizzontale prima del PIR. Il movimento verticale non
è stato rilevato correttamente.
Accelerare i passaggi quando si esegue il test a lunga distanza prima dell’area di rilevamento PIR.
La distanza di rilevamento PIR sarebbe più breve se la temperatura ambiente raggiunge o supera i 30 °
Lo schermo si spegnerà automaticamente senza alcuna operazione entro
3 minuti nella modalità CONFIGURAZIONE, premere qualsiasi pulsante per riaccenderlo.
81
IT
6.2Configurazione della modalità live
L’applicazione standard della Fotocamera Caccia è la modalità live.
In questa modalità, le foto vengono attivate da sensori di movimento o in intervalli secondo la configurazione corrispondente.
Per impostare la modalità live, spostare il selettore di modalità su ON. Il LED rosso lampeggia 15 volte quando si passa semplicemente alla modalità
Live (ON), quindi la fotocamera funzionerà automaticamente e passerà alla modalità standby.
Non appena animali selvatici o altri oggetti entrano direttamente nell’area di rilevamento dell’area del sensore, la fotocamera inizia a registrare foto e video.
Nota:
Nel giorno I LED IR non si accendono. Le foto e i video sono a colori. Di notte
I LED IR daranno le luci e le foto e i video saranno in bianco e nero.
Il ritardo del trigger è 1 minuto predeterminato. L’opzionale è 5s-60 min.
Impostare la modalità di registrazione e i relativi parametri prima di accedere alla modalità live.
Quando la luce del flash è impostata su «Auto», la fotocamera regola automaticamente la luminosità dei LED IR a bassa potenza. Quando si scatta di notte, la luminosità diminuisce automaticamente e l’effetto di ripresa diventa un po ‘scarso. Per una potenza ultrabassa, i colpi si fermeranno di notte.
82
7. Connessione al computer
Cambiare la Modalità in «CONFIGURAZIONE» e collegare la fotocamera al computer con un cavo USB, lo schermo LCD della fotocamera mostrerà
«prompt MSDC». Questo indica che è stato collegato correttamente, quindi leggere o copiare i dati della scheda SD sul computer.
1. Collega la fotocamera al tuo computer usando il cavo USB.
2. La fotocamera si accende automaticamente in modalità USB, indipendentemente dalla selezione sul selettore di modalità.
3.La telecamera è installata nel computer come un’unità aggiuntiva con il nome «Dispositivo di memorizzazione rimovibile»
4. Fare doppio clic sul dispositivo per rilevare la cartella «DCIM *
5. Le foto e i video si trovano nelle sottocartelle della cartella «DCIM».
6. È possibile copiare o spostare foto e file video sul computer.
IT
In alternativa, è possibile inserire la scheda di memoria in un lettore di schede sul computer.
83
IT
8. SPECIFICHE TECNICHE
Elemento Macintosh
Sensor d’immagine
Tiempo di attesa
Sensore CMOS da 20 Megapixel
Risoluzione delle foto
LCD
Supporto di registrazione
Risoluzioni video
Lente
La distanza della versione notturna.
Distanza di tiro
Tempo di attivazione
Shot lag
IR flash
Angolo di rilevamento del sensore
Protezione contro gli spruzzi d’acqua.
Formati di archiviazione
20MP (5200*3900) ;
16MP (4608*3456);
12MP (4000*3000),
8MP(3264×2448),
5MP(2592 x 1944). 3MP(2048×1536).
6.1cm (2.4”) color TFTLCD;
320×240 pixels
Supporta schede di memoria
Micro SD fino a 32 GB (non incluse)
1920×1080,1280×720,
720 x480,640×480,320×240
F2.5, f=3.6mm,FOV=130°
20m
Fino a 20 metri
0.3-0.5 secondi
5 secondi a 60 minuti
42 LED a infrarossi
130°
Yes (IP56)
Photo:JPEG; Video:AVI. MJPC
Connessioni
Mini USB 2.0
Circa 6 mesi (con 8 batterie)
Dimensioni
Energia
97x140x67mm
8 batterie alcaline LR6 (AA) a scarica bassa;
Alimentatore esterno 6V, almeno
1,5 A (non in dotazione)
84
9. SOLUZIONE DI SEMPLICI PROBLEMI
La fotocamera non si accende.
La fotocamera si spegne automaticamente.
1. Si prega di verificare se le batterie sono installate correttamente.
2.Controllare se la capacità della batteria
è bassa o è esaurita. In tal caso, sostituirli con nuove batterie.
1. Controllare se la capacità della batteria
è bassa o esaurita. In tal caso, provare a sostituire le nuove batterie per uso esterno o collegare l’adattatore CA per uso interno.
2. Si prega di verificare se la scheda SD è piena. In tal caso, trasferire immagini e video sul computer o eliminare alcuni file in modalità di riproduzione.
IT
Mostra ‘Errore scheda SD’
1. Assicurati che la scheda SD sia di classe
10 o superiore.
2. Utilizzare la fotocamera per formattare la scheda SD la prima volta.
I video sono mossi o saltati quando vengono riprodotti su un computer
1. Prova a utilizzare diversi lettori multimediali come il lettore VLC.
2. Assicurati che il video clip in formato AVI possa essere riprodotto sul tuo computer.
L’immagine non è chiara
1. Assicurati di aver rimosso le pellicole protettive dai LED e dalle lenti IR prima di usarle.
La fotocamera non scatta foto o registra video.
1. Controllare se la memoria della scheda
SD è piena, trasferire immagini o video sul computer o eliminare alcuni file nella modalità di riproduzione.
85
IT
9.1Cuidado
Non usare detergenti corrosivi, come alcool denaturato, diluenti, ecc. per pulire l’alloggiamento della fotocamera e l’accessorio in dotazione. Se necessario, pulire i componenti del sistema con un panno morbido e asciutto.
9.2 Archiviazione
Rimuovere sempre la batteria dalla custodia se non si intende utilizzare la fotocamera per un po ‘di tempo e conservarla separatamente. Giorno dopo giorno e per periodi più lunghi, le batterie possono essere conservate in un luogo asciutto, fuori dalla portata dei bambini.
SE AVETE QUALUNQUE DOMANDE O PROBLEMI.
Vi preghiamo di contattarci da
USA e Canada [email protected]
Europa [email protected]
UK [email protected]
Ti offriremo una risposta rapida e autorizzata entro 24 ore e faremo tutto il possibile per risolvere il tuo problema il prima possibile. Più garanzia di sicurezza con Toguard!
Se non sei soddisfatto del nostro prodotto. Per favore, parlaci del tuo pensiero. Questo sarà molto apprezzato
86
87
88
1. LISTA DE EMBALAJE
Desembale la cámara con cuidado y compruebe que los accesorios que se encuentran a continuación se encuentran en la caja.
1 2 3 4
5 6
1.Cámara de vida silvestre x 1
2.USB Cable x 1
3.Manual de instrucciones x 1
4.Correa de montaje x 1
5.Montaje en pared x 1
6.Tornillos x 3
2. INTRODUCCIÓN
Cámara de Caza de vida silvestre es una cámara de vigilancia y vida silvestre con un sensor infrarrojo. El sensor puede detectar cambios repentinos en la temperatura ambiente dentro de un área de evaluación.
Las señales del sensor infrarrojo altamente sensible (PIR, sensor infrarrojo pasivo) se encienden en la cámara, activando la imagen del modo de video.
ES
89
ES
2.1 Características de Cámara de Caza
1.CMOS sensor
2.Foto de 20 megapíxeles y video 1080p HD
3.6.1 cm (2.4’’)color TFT LCD; 320×240 píxeles
4.42 pcs IR LEDs.5. filtro de infrarrojos automático completo.
6. Velocidad de disparo: Aprox. 0.3 segundos
7. Configure el número de serie para registrar la posición.
8. La hora, la fecha, la temperatura, la fase y el número de serie se estamparán en la foto.
9. Protección de contraseñas.
10. Indicación de energía.
11. Función de prueba incorporada sobre la temperatura ambiental.
12.Built-in micrófono y altavoz.
13.Mini interfaz USB 2.0.
14.Sistema IP56 a prueba de agua.
15. Temperatura de trabajo: -20°C to 60°C.
16.El consumo de energía extremadamente bajo en modo de espera proporciona un tiempo de operación extremadamente largo, dura 6 meses con 8 baterías de PC cuando se toman 50 fotos de fotos por día.
2.2 Características de Cámara de Caza
1.Camera trampa para la caza.
2. Observación animal o incidente.
3. Cámara de seguridad activada por movimiento para uso doméstico, de oficina o público.
4. Cualquier vigilancia interna y externa.
90
3. ESTRUCTURA
Comprender la estructura de la cámara ayuda a utilizar este producto con mayor habilidad.
1
1. LEDs infrarrojos
2. 2 lentes
3.1 sensor de movimiento delantero
3.2sensor de movimiento izquierdo
3.3 sensor de movimiento derecho
4.Pantalla de visualización
5.Botón arriba
6.Botón de menú
2
3.1
3.2
3.3
7.Botón de izquierda
8.Botón de reproducción
9.Botón de reproducción
10.Botón de derecha
11.Botón de encendido
9
12.Botón de caída
13.TF Slot
6
14.Conector AV
10
15.Conector usb
11
14
16.ON
17.SETUP
18.OFF
19.Batería
20.Sella anillo
21. DC Conexión6V/1.5A
22.Rosca de trípode de 1/4’’
4
5
7
12
8
13
15
AV
SHOT
OK
ON-SETUP-OFF
16 17 18
ES
19
21
22
20
91
24
23
Digital Trail Camera
Model:H70
Power : 8*AA Battery
DC6V Input
RoHS
Made in China
ES
23.Corchetes de bloqueo 24.Ranura para la correa de montaje
▲ 1.El monitor solo está encendido en el modo CONFIGURACIÓN para cambiar la configuración del menú o ver fotos y videos existentes.
2.Una tarjeta de memoria micro SD debe haberse insertado en la ranura de la tarjeta de memoria para guardar fotos y videos.
3.Con la conexión mini USB (USB 2.0), la cámara se puede conectar a una computadora para descargar fotos y videos.
4.Utilizando el interruptor de modo, se pueden seleccionar los tres modos de funcionamiento: OFF, SETUP y ON.
4. PREPARANDO LA CAMARA
Nota :
1.Se admiten tarjetas de memoria micro SD de hasta 32 GB de capacidad.
92
2.En lugar de las baterías tipo LR6 (AA) con la misma especificación
(con 2000 mAh o más), se pueden usar. Recomendamos pilas alcalinas.
con baja autodescarga (no suministrada).
3.La cámara debe insertar 4 u 8 x 1.5V pilas AA. No use pilas nuevas y viejas juntas. La interfaz de CC necesita un adaptador de 6V / 1.5A con
3.5 mm (diámetro exterior) s * l .3 mm (interior D) cabeza del tapón.
4. Inserte la tarjeta micro SD CLASS6 o de clase superior (se recomienda
CLASS10). Antes de insertar en la tarjeta de memoria, asegúrese de que la protección de escritura lateral de la tarjeta de memoria no esté bloqueada.
5. Encienda la cámara. 3 interruptores: apagado (OFF), menú de configuración / Modo SETUP (SETUP) y modo en vivo (ON).
6. Se recomienda formatear la nueva tarjeta de memoria cuando se usa
(como se describe a continuación).
7. Tenga en cuenta que la cámara se apagará cuando la potencia sea muy baja.
ES
AALR6
AALR6
AALR6
AALR6
AALR6
AALR6
AALR6
AALR6
AV
SHOT
OK
ON-SETUP-OFF
ON SETUP OFF
Settings
Time&date
Photo stamp
Password protection
Beep sound
Format memory card
Serial NO
M
ENU Back OK Select
Settings will be deleted
Beep sound
Format memory card
Serial NO
Yes
No
M
ENU Back OK Select
93
ES
Operación (Ver Figuras Abajo)
Abra los soportes de bloqueo y la tapa protectora del compartimiento de la batería. Inserte las baterías — inserte la tarjeta de memoria, cambie a
CONFIGURACIÓN, ingrese al menú del sistema presionando el botón
MENÚ, elija para formatear la tarjeta de memoria, elija restablecer a la fábrica.
(este paso se puede omitir): elija la hora de configuración del sistema.
Abra la tapa de la batería
►
Inserte las baterías de 8 piezas. Modelo de batería:
AALR6> Asegúrese de que no se haya activado la protección de escritura lateral en la tarjeta de memoria> Inserte la tarjeta de memoria Micro SD
CLASS6 o superior en la ranura de la tarjeta de memoria antes de encender la cámara y seleccione el modo CONFIGURACIÓN para ajustar la configuración
Montaje con correa
5. USANDO LA CÁMARA Y LA
CONFIGURACIÓN MENÚ
5. 1 usando la cámara
1. Botones de funcionamiento
Funciones de los botones de operación en modo de grabación:
A continuación, los botones de operación se describen en el modo de grabación con menú no activado.
94
1. Tecla UP: Re Pág. (Modo de menú): cambia al modo de grabación de video.
2.MENU: abra o salga de este menú de configuración / deje de reproducir el video (modo de reproducción).
3.Left Key: Página izquierda.
4.Replay Key: revisa fotos y videosTecla .
5.SHOT: grabación / captura de video filmado.
6.Clave derecha: página derecha.
7.OK: Reproducir / Pausa reproducir archivos de video (modo de reproducción).
8. Tecla abajo: avanzar página (modo de menú) / cambiar al modo de foto.
ES
1
2
5
SHOT
3
4
OK
6
7
8
2. Cambio de modo
2.1Cambia los interruptores para elegir el modo de trabajo:
ON-SETUPOFF
Apagado(OFF)
ONSETUP -OFF
Sistema de configuración (SETUP)
ON SETUP -OFF
Modo en vivo (ON)
2.2Presione la tecla Arriba / Abajo para cambiar los modos entre Video y
Foto.
2.3Presione la tecla MENÚ para abrir el menú de configuración. Presione
OK para confirmar los cambios de configuración.
2.4Pulse la tecla MENÚ una vez más para volver al menú anterior o salir de la configuración del MENÚ.
2.5Ponga el selector de modo en «OFF» para apagar la cámara.
95
ES
5.2 Menú de configuración
1. Modo
Foto, Video, Foto + Video, seleccione si se deben tomar fotos o videos cuando se detecta movimiento. Cuando está en el modo «Foto + Video», la cámara primero toma un número determinado de fotos antes de grabar un video.
2. Resolución de foto
20MP (5200*3900) ; 16MP (4608*3456); 12MP (4000*3000),
8MP (3264×2448), 5MP (2592 x 1944). 3MP (2048×1536).
Seleccione la resolución deseada para las fotos. Recomendamos la resolución 16M. Una resolución más alta produce una calidad fotográfica algo mejor, pero produce archivos más grandes que requieren más espacio en la tarjeta de memoria.
Tomando tarjeta de memoria de 16GB por ejemplo:
Píxeles de la foto
Tamaño (MB)
(aproximadamente)
20MP
16MP
12MP
8MP
5MP
3MP
3.5
2.7
2.0
1.4
0.9
0.54
Cantidad de fotos
(aproximadamente)
4100
5300
7000
10500
16600
26600
3.Foto serie: 1 P, 2P. 3P
96
ES
4.Resolución de video
[email protected], [email protected], [email protected],
[email protected], [email protected] Seleccione la resolución de video requerida.Seleccione la cantidad de fotos que se tomarán en sucesión cuando la cámara Se dispara en el modo foto. ¡Observe también el intervalo de parámetros!
Una resolución más alta produce videos de mayor calidad pero produce archivos más grandes que requieren más espacio en la tarjeta de memoria. Los videos se graban en formato AVI que se puede reproducir en la mayoría de los dispositivos de video.
Tomando tarjeta de memoria de 16GB por ejemplo:
Duración del video: 10 segundos
Resolución de video
Tamaño del video
(MB)
Cantidad de video
Longitud total de grabación
(minutos)
1920×1080
1280×720
720 x480
640×480
320*240
38
22
17
12.8
6.3
380
659
852
1132
2300
63.5
106
141
189
385
5. Duración de video
▲
Predeterminado 5 segundos, 3s-59s opcionales, 1-10Minutos
Especifique la duración de una grabación de video cuando la cámara se dispara automáticamente. El período de grabación para videos no está limitado en el modo CONFIGURACIÓN.
1.En el modo de configuración en el día y por la noche.
> Al grabar manualmente, la cámara se detendrá automáticamente después de 29 minutos de grabación;
97
> Al grabar manualmente, la cámara se detendrá cuando el tamaño de un videoclip alcance 4 GB,
> Cuando grabe manualmente, la cámara se detendrá cuando la tarjeta de memoria esté llena o sea de potencia ultra baja.
1. En el modo en vivo (ON) por la noche, la cámara funcionará automáticamente según el ajuste de la duración del video. Para baja potencia, dejará de grabar por adelantado.
3.Por favor, establezca la duración más corta del video para garantizar un uso prolongado de baterias
6. Grabacion de audio
Activar / desactivar la grabación de audio
7.Shot lag
▲
Predeterminado 1 MIN. Opcional de 5 segundos a 60 minutos.
Seleccione el período más corto para que la cámara espere antes de que reaccione a la activación sucesiva del sensor principal después de que un animal haya sido detectado por primera vez. La cámara no graba ninguna foto o video durante el intervalo seleccionado. Esto evita que la tarjeta de memoria se llene con tomas innecesarias.
1.El intervalo de disparo es corto, la frecuencia de disparo de la cámara sería alta y el consumo de energía sería alto. Afectaría los días de uso de las baterías.
2. Por el contrario, si el retraso de disparo es largo, sería un menor consumo de energía para garantizar un uso prolongado.
8.Detectores de movimiento laterales
Durante la alineación, considere si el uso de los sensores de movimiento lateral puede ser útil para lograr los resultados de observación deseados o no.
ES
9. Sensibilidad detectores de movimiento.
1. Seleccione «Alto» para áreas interiores y ambientes con poca interferencia
98
2. Seleccione «Medio» para las áreas exteriores y el ambiente con una cantidad normal de interferencia,
3.eleccione «Bajo» para un entorno con un alto nivel de interferencia.
10. Tiempo de grabación objetivo
Presione «OK», y luego seleccione «ENCENDIDO» para configurar el tiempo de trabajo inicial y final. Después de finalizar el ajuste, la cámara solo funciona durante el tiempo establecido todos los días. Más allá del período, l a cámara está en espera. Si la hora de inicio es, por ejemplo, configurada a las 18:35 y la hora de finalización a las 8:25, la cámara estará operativa desde las 6:35 p. Soy del día siguiente. La cámara no se activará y no tomará fotos o videos fuera de este período.
ES
11. Time-lapse
Presione «MENÚ» para encontrar «Lapso de tiempo». Presione «OK», luego seleccione «ON» para configurar el intervalo de tiempo, y establezca los valores de Hr, Min y Sec. Por ejemplo, si se debe registrar el proceso de floración de las flores, se puede usar el lapso de tiempo. La cámara toma fotos automáticamente en cada intervalo de tiempo establecido.
12. Idioma
Seleccione el idioma del menú deseado.Los siguientes idiomas están disponibles: inglés, alemán, francés, español, chino, etc.
13. Hora y fecha
Busque «Fecha y hora» en el menú de configuración, luego presione OK para entrar.
Utilice el «Formato de hora» y el «Formato de fecha» para configurar el formato de hora y fecha. Elija «Establecer hora y fecha» para cambiar la hora de la cámara. Presione Izquierda / Derecha para elegir el número y presione Arriba / Abajo para cambiar el valor. Presione OK para confirmar los cambios.
14. Sello de la foto
Activar / desactivar la visualización de la marca de agua en la foto.
99
15.Protección con contraseña
Seleccione «Protección de contraseña». Presione «OK», y luego seleccione
«ON» para configurar la contraseña de la cámara. La contraseña es un número de 4 dígitos seleccionado entre 0-9.
Si se pierde la contraseña, presione la tecla MENÚ y
REPLAY al mismo tiempo, y deslice el selector de modo de operación desde la posición DESACTIVADA a
CONFIGURACIÓN. La cámara está desbloqueada.
ES
16.Señal acústica
Activar / desactivar el pitido
17.Formatear de memoria
Sélectionnez Formater la carte mémoire sur cet appareil photo. Nous vous suggérons de formater la carte mémoire sur odinateur, puis de le formater à nouveau sur cet appareil photo pour la première utilisation.
18.Numéro de série
Presione «OK», y luego seleccione «ON» para configurar el número de serie de la cámara. Puede utilizar una combinación de 4 dígitos para documentar la ubicación en las fotos. Al usar varias cámaras, esto hace que sea más fácil identificar la ubicación cuando se ven fotos.
19.Restaurar ajustes a los valores originales
Seleccione para restablecer la cámara a la configuración predeterminada.
Tenga en cuenta para establecer la fecha y la hora de nuevo.
20.Versión
Seleccione para verificar el número de versión actual del firmware de la cámara.
100
21. Reproducción
Deslice el interruptor selector de modo de operación a la posición
«CONFIGURACIÓN». Presione la tecla Repetir y la tecla Arriba / Abajo para revisar las fotos / videos. Mientras revisa las fotos, presione la tecla
Arriba / Abajo para subir / bajar páginas. Mientras revisa los videos, presione la tecla OK para comenzar a reproducir, presione OK una vez más para detener. Presione la tecla de reproducción para volver al modo de espera.
21.1Borrar selección
Puede utilizar esta función para eliminar grabaciones individuales de la tarjeta de memoria. Presione la tecla MENÚ bajo el modo de reproducción, mueva la barra de selección a «Eliminar archivo actual» y presione OK para eliminar la grabación seleccionada.
ES
21.2Borrar todas las grabaciones
Puede utilizar esta función para eliminar todas las grabaciones de la tarjeta de memoria. Presione la tecla MENÚ bajo el modo de reproducción, mueva la barra de selección a «Eliminar todos los archivos» y presione OK para eliminar todas las grabaciones.
21.3Activar presentación de diapositivas
Esta función se puede utilizar para reproducir automáticamente las fotos almacenadas en la tarjeta de memoria. Cada foto se muestra durante unos 2 segundos. Para detener la presentación de diapositivas y mantener la imagen actual de forma permanente en la pantalla, presione el botón OK.
22. protección contra escritura
> Esta función se puede utilizar para proteger grabaciones individuales de todos los archivos guardados
Grabaciones de borrado accidental.
> Seleccione «Proteger contra escritura el archivo actual» para proteger la grabación actualmente seleccionada de una eliminación accidental.
101
ES
> Seleccione «Proteger todos los archivos contra escritura» para proteger todas las grabaciones guardadas de una eliminación accidental.
> Seleccione «Desbloquear archivo actual» para eliminar la protección contra escritura para la grabación actualmente seleccionada.
> Seleccione «Desbloquear todos los archivos» para eliminar la protección contra escritura para todas las grabaciones guardadas.
6.ENTERING MODO EN VIVO
6.1Ajuste e instalación de la cámara
El modo CONFIGURACIÓN es ventajoso para determinar el mejor ángulo de detección y rango posibles del sensor de movimiento. Para ello, coloque la cámara a aprox. 1 -2 m de altura a un árbol y alinee la cámara con la dirección deseada.
Muévase lentamente de un lado del área observada al otro. Mover en paralelo a la cámara.
Pruebe diferentes ángulos y distancias.
El parpadeo del LED verde indica que fue detectado por el sensor PIR lateral. Y el parpadeo del LED azul indicó que fue detectado por el sensor PIR principal.
NOTA: el LED verde solo se enciende cuando
“Movimiento lateral” sensor «está encendido. De esta manera, puede determinar la mejor posición para alinear la cámara. El LED azul / verde solo parpadea en el modo CONFIGURACIÓN tan pronto como el sensor PIR detecte movimiento.
102
El LED rojo parpadeará 15 veces cuando simplemente cambie al modo
En vivo (ENCENDIDO), y luego la cámara funcionará automáticamente y entrará en el modo de espera.
Para evitar señales incorrectas y fotos innecesarias, recomendamos no usar la cámara en puntos soleados y verificar que no haya ramas en el
área activa del sensor.
También verifique que la cámara esté ajustada a la altura correcta en línea con el punto a observar. Cuando sea necesario, apunte la cámara hacia abajo para una alineación óptima
Para una altura de 1 metro, coloque la cámara paralela al suelo.
Para una altura de 2 metros, incline la cámara cinco grados hacia el suelo.
ES
10
°
Nota:
Por favor haga el movimiento horizontal antes del PIR. El movimiento vertical no pudo detectar correctamente.
Acelere los pasos cuando realice la prueba a larga distancia antes del área de detección de PIR.
La distancia de detección de PIR sería más corta si la temperatura ambiente alcanza o supera los 30 °
La pantalla se apagaría automáticamente sin ninguna operación dentro d e los 3 minutos en el modo CONFIGURACIÓN, presione cualquier botón para encenderlo nuevamente.
103
ES
6.2Configurando el modo en vivo
La aplicación estándar de la Cámara de Caza es el modo en vivo.
En este modo, las fotos se activan mediante sensores de movimiento o en intervalos según la configuración correspondiente.
Para configurar el modo en vivo, cambie el interruptor de modo a la posición
ON. El LED rojo parpadeará 15 veces cuando simplemente cambie al modo
En vivo (ENCENDIDO), y luego la cámara funcionará automáticamente y entrará en el modo de espera.
Tan pronto como los animales salvajes u otros objetos entren directamente en el área de detección de la zona del sensor, la cámara comienza a grabar fotos y videos.
Nota:
En el dia. Los LEDs IR no se encenderán. Las fotos y videos son en color.
Por la noche. Los LEDs IR darán luces, y las fotos y videos estarán en blanco y negro.
El retraso de disparo es de 1 minuto predeterminado. El opcional es 5s-60 min.
Configure el modo de grabación y los parámetros relacionados antes de ingresar al modo en vivo.
Cuando la luz del flash está configurada en «Auto», la cámara ajustará el brillo de los LED IR automáticamente en baja potencia. Cuando se dispara por la noche, el brillo disminuirá automáticamente y el efecto de disparo se volverá un poco pobre. Para poder ultra bajo, los disparos se detendrán por la noche.
104
7.Conexión a la computadora.
Cambie el Modo a «CONFIGURACIÓN», y conecte la cámara a la computadora con un cable USB, la pantalla LCD de la cámara mostrará
«MSDC prompt. Esto indica que se conectó correctamente. Luego lea o copie los datos de la tarjeta SD a la computadora.
1.Conecte la cámara a su computadora usando el cable USB.
2.La cámara se enciende automáticamente en el modo USB, independientemente de la selección en el interruptor de modo.
3.La cámara se instala en la computadora como una unidad adicional con el nombre «Dispositivo de almacenamiento extraíble»
4.Haga doble clic en el dispositivo para detectar la carpeta «DCIM *
5.Las fotos y los videos están en las subcarpetas de la carpeta «DCIM».
6.Usted puede copiar o mover fotos y archivos de video en la computadora.
ES
Alternativamente, puede insertar la tarjeta de memoria en un lector de tarjetas en la computadora.
105
ES
8. ESPECIFICACIONES TECNICAS
Elemento
Tiempo de espera
Macintosh
Sensor de imagen 20 Megapixel CMOS sensor
Resolución de fotos
Pantalla
Medio de grabación
Resoluciones de video
Lente
La distancia de la versión nocturna.
Distancia de disparo
Triggering time
Disparo de
IR flash
Detection angle of sensor
Agua rociada protegida.
Formatos de almacenamiento
Conexiones
20MP (5200*3900) ;
16MP (4608*3456);
12MP (4000*3000),
8MP(3264×2448),
5MP(2592 x 1944). 3MP(2048×1536).
6.1cm (2.4”) color TFTLCD;
320×240 pixels
Admite tarjetas de memoria Micro SD de hasta 32 GB (no incluidas)
1920×1080,1280×720,
720 x480,640×480,320×240
F2.5, f=3.6mm,FOV=130°
20m
Hasta 20 metros
0.3-0.5 segundo
5 segundos a 60 minutos
42 pcs LEDs infrarrojos
130°
Yes (IP56)
Foto:JPEG; Video:AVI. MJPC
Mini USB 2.0
Aprox.6 meses (con 8 baterías)
Dimensions
Poder
97x140x67mm
8 baterías alcalinas LR6 (AA) con descarga baja;
Fuente de alimentación externa de
6V, al menos 1.5A (no suministrada)
106
9.SOLUCIÓN DE PROBLEMAS SIMPLES
La cámara no se encenderá.
1.Vérifiez que les piles sont correctement installées.
2.Vérifiez si la capacité de la batterie est faible ou épuisée. Si c’est le cas, veuillez remplacer les piles par des piles neuves.
La cámara se apaga automáticamente.
1. Compruebe si la capacidad de la batería es baja o está agotada. Si es así, intente cambiar las baterías nuevas para uso en exteriores o conecte el adaptador de CA para uso en interiores.
2. Por favor, compruebe si la tarjeta SD está llena. Si es así, transfiera imágenes y videos a su computadora o elimine algunos archivos en el modo de reproducción.
Muestra ‘Error de tarjeta SD «
1. Asegúrese de que la tarjeta SD sea de clase 10 o superior.
2.Utilice la cámara para formatear la tarjeta SD a la primera.
Los videos están entrecortados o saltados cuando se reproducen en una computadora
La imagen no es clara
1.Trate de usar diferentes reproductores de medios como el reproductor VLC.
2.Asegúrese de que el video clip en formato AVI se puede reproducir en su computadora.
1. Asegúrese de haber retirado las películas protectoras de los LED y lentes IR antes de usarlos.
La cámara no toma imágenes ni graba videos.
1. Compruebe si la memoria de la tarjeta
SD está llena, transfiera imágenes o videos a su computadora o elimine algunos archivos en el modo de reproducción.
ES
107
ES
9.1Cuidado
No utilice limpiadores corrosivos, como espíritus metilados, diluyentes, etc. para limpiar la carcasa de la cámara y el accesorio suministrado.
Cuando sea necesario, limpie los componentes del sistema con un paño suave y seco.
9.2Almacenamiento
Retire siempre la batería de la carcasa si no va a utilizar la cámara durante un tiempo y guárdela por separado. Día a día y durante períodos más prolongados, las baterías se pueden mantener en un lugar seco, fuera del alcance de los niños.
SI TIENE ALGUNA PREGUNTA O PROBLEMAS
Por favor contáctenos por
USA&Canadá [email protected]
Europe [email protected]
UK [email protected]
Le ofreceremos una respuesta rápida y autorizada dentro de las 24 horas, y haremos todo lo posible para resolver su problema lo antes posible.
¡Más garantía de seguridad con toguard!
Si no está satisfecho con nuestro producto. Por favor, cuéntanos sobre tu pensamiento. Eso será muy apreciado.
108