- Manuals
- Brands
- VeriFone Manuals
- Payment Terminal
- V205c
- Installation manual
-
Contents
-
Table of Contents
-
Troubleshooting
-
Bookmarks
Quick Links
V205c
Installation Guide
Verifone Part Number DOC470-103-EN-A, Revision A
Related Manuals for VeriFone V205c
Summary of Contents for VeriFone V205c
-
Page 1
V205c Installation Guide Verifone Part Number DOC470-103-EN-A, Revision A… -
Page 2
Verifone, Inc. The information contained in this document is subject to change without notice. Although Verifone has attempted to ensure the accuracy of the contents of this document, this document may include errors or omissions. The examples and sample programs are for illustration only and may not be suited for your purpose. -
Page 3: Table Of Contents
Connecting ECRs to the V205c ……..21…
-
Page 4
External Dimensions ……… . . 25 Weight. -
Page 5: Preface
This guide is organized as follows: Chapter 1, Overview. Provides an overview of a V205c device. Chapter 2, Setup. Explains how to set up and install the V205c and establish connections with other devices. Chapter 3, Specifications. Discusses the power requirements and dimensions of V205c.
-
Page 6: Acronym Definitions
REFACE Guide Conventions Table 1 Document Conventions Convention Meaning Example The pencil icon is used to RS-232-type devices do not work NOTE highlight important information. on the communication port. The caution symbol indicates The unit is not waterproof or CAUTION hardware or software failure, or dustproof, and is intended for loss of data.
-
Page 7
REFACE Guide Conventions Table 2 Acronym Definitions (continued) Acronym Definitions Universal Serial Bus Verifone Part Number V205 NSTALLATION UIDE… -
Page 8
REFACE Guide Conventions V205 NSTALLATION UIDE… -
Page 9: Hapter
The V205c offers several communication options, enhanced display, increased processing power and two USB peripheral ports. The V205c terminal uses a robust, sleek, and highly functional design. With modular communication options, enhanced color display, increased processing power, expanded memory, and two USB peripheral ports.
-
Page 10: Rear Compartments
VERVIEW V205c Terminal Rear Compartments After removing the rear covers, the underside of the V205c shows the following: Figure 2 V205c Card Compartment View • Dual MSAM slots • Micro SD Card slot Figure 3 V205c Port Compartment View •…
-
Page 11: Features And Benefits
Meets ISO and ANSI standards for PIN encryption, key management, and MAC. • The VeriShield security architecture meets published specifications for PCI PTS POI and provides sophisticated file authentication to prevent execution of unauthorized software. • Key injection simplified and secured with Verifone’s SecureKit key loading software. V205 NSTALLATION UIDE…
-
Page 12: Countertop Performance In A Hand-Over Design
VERVIEW Features and Benefits Countertop • The 32-bit processing and multi-tasking capabilities ensures fast processing of Performance in a payment, payment-related, and value-added applications. Hand-Over Design • Exceptional display and printer graphics-handling capabilities that quickly render logos, graphical fonts, and character-based languages. V205 NSTALLATION UIDE…
-
Page 13: Setup
• A flat support surface such as a countertop or a table, • Near a power outlet and the terminal or computer that connects to the V205c. WARNING For safety, do not string cables or cords across a walkway. Environmental •…
-
Page 14: Electrical Considerations
PIN Protection Measures • Do not use the V205c outdoors. CAUTION The V205c is not waterproof or dustproof and is intended for indoor use only. Any damage to the unit from exposure to rain or dust can void any warranty. Electrical •…
-
Page 15: Unpacking Shipping Carton
• Offer PIN security literature at the point of sale • Use signage to limit the view of the V205c to just that of the cardholder. Unpacking Carefully inspect the shipping carton and its contents for possible tampering or Shipping Carton damage.
-
Page 16: Installing Or Replacing Msam And Micro Sd Cards
Remove the clear protective film from the display. Replace all the packing materials, close the lid, and save the carton for repacking or moving the V205c unit in the future. Do not use a unit that has been tampered with or otherwise damaged. This unit WARNING comes equipped with tamper-evident label.
-
Page 17: Changing Or Installing Micro Sd Card
ETUP Installing or Replacing MSAM and Micro SD Cards Remove the old card, if any, and insert the MSAM card carefully into the slot (with the gold contacts facing downward) until fully inserted. Figure 6 Inserting MSAM Card NOTE Insert the card with the card’s gold contacts facing away from you, toward the unit. Take note of the notched edge on the MSAM card for quick orientation.
-
Page 18: Establishing Communication
ETUP Establishing Communication If you are finished replacing or inserting cards, put the rear cover back in place. Establishing You can connect the V205c to your network by using the following options: Communication • Connecting by Telephone Line • Connecting by Ethernet Cable.
-
Page 19: Loading Printer Paper
Paper install paper in the printer. The V205c uses a roll of 57 mm wide x 40 mm, single-ply, thermal sensitive paper. A pink out-of-paper indicator line appears on the edge of the paper before the end of the roll. After this line appears, there is enough paper remaining on the roll to conclude at least one more transaction.
-
Page 20: Optional Device Connections
Different terminals support different devices, so for more information about optional devices, please contact your Verifone distributor. Optional Device You can connect several devices to your V205c. You can use the following cables Connections for different types of device connections: •…
-
Page 21: Connecting Ecrs To The V205C
Power Supply Verifone ships the power supply unit with the terminal as required. Contact your Verifone representative If you have changed the context in which the terminal is used or have questions about which power supply should be used. CAUTION Using an incorrectly rated power supply can damage the unit or cause it not to work properly.
-
Page 22: Smart Card Reader
When the terminal has power and an application is loaded, the application starts after the initial Verifone copyright screen and displays a unique copyright screen. If no application is loaded, DOWNLOAD NEEDED appears on the display after the initial Verifone copyright screen.
-
Page 23: Magnetic Stripe Card Reader Use
ETUP Magnetic Stripe Card Reader Use Magnetic Stripe The V205c has a magnetic card reader that uses a triple track stripe reader. This Card Reader Use gives the unit greater reliability over a wide range of swipe speeds and operating environments.
-
Page 24: Periodic Inspection
If any device is found in tamper state, please remove it immediately from service. NOTE Keep it available for potential forensic investigation, and notify your company security officer and your local Verifone representative or service provider. For more information on contacting Verifone, refer to Service and Support.
-
Page 25: Hapter
HAPTER Specifications This chapter discusses power requirements, dimensions, and other specifications of the V205c terminal. V205c Terminal Refer to the following technical information for the V205c terminal: Unit Power • 8 V DC, 2.25 A Operating Power: Requirements Temperature •…
-
Page 26: Connectivity
PECIFICATIONS V205c Terminal Connectivity • Ethernet RJ45 • Speed 10 Base-T /100 Base-TX • Compliant with IEEE802.3 LAN networks. • Dial modem RJ11 • V.92 standard supported, line speeds of up to 56 Kbps • USB type-A receptacle • USB2.0 high speed •…
-
Page 27: Hapter
HAPTER Troubleshooting Guidelines This chapter lists typical malfunctions that may occur while operating a V205c device and the appropriate corrective action. If the problem persists – even after performing the outlined guidelines, or if the problem is not described, contact your local Verifone representative for assistance.
-
Page 28
ROUBLESHOOTING UIDELINES Transactions Fail To Process • If the problem persists, contact your local Verifone representative. Check Smart Card Reader • Perform a test transaction using several different smart cards to ensure the problem is not a defective card. •… -
Page 29: Hapter
Never use thinner, trichloroethylene, or ketone-based solvents – they can deteriorate plastic or rubber parts. Because the V205c can be damaged by liquid, do not spray cleaners or other solutions directly onto the keypad or display. Always apply the cleaner to a cloth before cleaning the device.
-
Page 30
You will be issued MRA number(s) and the fax will be returned to you. NOTE One MRA number must be issued for each V205c unit you return to Verifone, even if you are returning several of the same model. Describe the problem(s). -
Page 31: Accessories And Documentation
Monday — Friday, 7 A.M. — 5 P.M., MST • International – Contact your Verifone representative Cables Contact your local Verifone distributor to determine which cable fits your needs. CBL159-312-01-A LAN cable for Ethernet connections (CAT5, 2.0 m). CBL000-051-02-A RJ9 to DB9 cable, 2.0 m…
-
Page 32
ERVICE AND UPPORT Accessories and Documentation V205 NSTALLATION UIDE… -
Page 33: A P P En Di
être endommagé, en label. If a label or component aviser immédiatement la compagnie maritime appears damaged, immediately et votre représentant Verifone ou prestataire notify the shipping company and de services. your Verifone representative or service provider.
-
Page 34
Electrostatic discharges décharges électrostatiques. Les décharges can damage the equipment. électrostatiques peuvent endommager le Verifone recommends using a matériel. Verifone recommande d’utiliser un grounded anti-static wrist strap. bracelet anti-statique à la terre. Caution Setup page… -
Page 35
Caution and Warning Messages V205 NSTALLATION UIDE… -
Page 36
Verifone, Inc. 1-800-Verifone www.verifone.com V205c Installation Guide Verifone Part Number DOC470-103-EN-A, Revision A…
Verifone, Inc.
1-800-Verifone
V205c CTLS Certifications and Regulations
Verifone Part Number: DOC470-101-EN-A
Revision A
©
2017 Verifone, Inc. All rights reserved.
*DOC470-101-EN-A*
Electrical
Separate Power Sources
Please ensure you review the power output of any device you connect to the V205c CTLS.
NOTE: The reference input power rating for the V205c CTLS is as follows: 8.0 V DC, 2.25 A.
Location – Electrical Considerations
CAUTION:
Due to risk of electrical shock or unit damage, do not use the unit near water, including a bathtub, wash bowl, kitchen sink or laundry
tub, in a wet basement, or near a swimming pool. Also, avoid using this product during electrical storms.
Avoid locations near electrical appliances or other devices that cause excessive voltage fluctuations or emit electrical noise (for
example, air conditioners, neon signs, high-frequency or magnetic security devices, or electric motors).
Du fait d’un risque d’électrocution ou d’une détérioration du terminal, ne pas utiliser cet équipement près d’une source d’eau, par
exemple près d’une baignoire, d’un lavabo, d’un évier de cuisine ou d’un bac de lavage, dans un sous-sol humide ou à proximité d’une
piscine. De même, éviter d’utiliser ce produit lors des orages provoquant des coupures électriques. Éviter de placer le terminal à
proximité d’appareils électriques ou autres unités pouvant entraîner des fluctuations de tension importantes ou des interférences
électriques, tels que les climatiseurs, enseignes au néon, dispositifs de sécurité à haute fréquence ou équipements électriques.
Equipment
Location – Environmental Considerations
This device is for indoor use only. Do not operate the device outdoors; it is not waterproof nor dust proof. Any damage to the unit from
exposure to rain or dust may invalidate the product warranty. Keep the device away from dust, humidity, moisture, caustic chemicals or oils,
direct sunlight, high heat and anywhere that radiates heat such as a stove or a motor.
WARNING!
Your device contains sensitive electronic components that can be permanently damaged if exposed to excessive shock or vibration. To
minimize the risk of damage to your device, avoid dropping your device and operating it in high-shock and high-vibration
environments. Do not store the device where prolonged exposure to extreme temperature can occur, because it can cause permanent
damage. Do not expose the device to water. Contact with water can cause this unit to malfunction.
Votre terminal de point de vente contient des composants électroniques sensibles, susceptibles de subir des dommages définitifs en
cas d’exposition à des chocs ou à des vibrations excessives. Pour minimiser le risque de dommages pour votre terminal, éviter de le
faire tomber ou de l’exposer à des environnements pouvant provoquer des chocs et des vibrations excessives. Ne pas stocker le
terminal dans des lieux susceptibles d’entraîner une exposition prolongée à des températures extrêmes, du fait des dommages
définitifs que cette situation peut provoquer. Ne pas exposer le terminal à l’eau. Un contact avec de l’eau peut provoquer un
dysfonctionnement de l’unité.
Telecom
This product meets the applicable Innovation, Science and Economic Development Canada technical specifications.
The Ringer Equivalence Number (REN) is an indication of the maximum number of devices allowed to be connected to a telephone interface.
The termination of an interface may consist of any combination of devices subject only to the requirement that the sum of the RENs of all the
devices not exceed five.
Le présent matériel est conforme aux specifications techniques applicables d’Innovation, Science and Economic Development Canada.
L’indice d’équivalence de la sonnerie (IES) sert à indiquer le nombre maximal de terminaux qui peuvent être raccordés à une interface
téléphonique. La terminaison d’une interface peut consister en une combinaison quelconque de dispositifs, à la seule condition que la somme
d’indices d’équivalence de la sonnerie de tous les dispositifs n’excède pas cinq.
Repairs
Do not, under any circumstances, attempt any service, adjustments, or repairs on this equipment. Instead, contact your local Verifone
distributor or service provider for assistance. Failure to comply may void the product warranty.
V205c CTLS Certifications and Regulations
FCC Compliance
The following device has been tested and certified as compliant with the regulations and guidelines set forth in Part 15 of FCC Rules:
Manufacturer: Verifone, Inc.
Brand: V205, Model: V205c CTLS
Part 15 of FCC Rules
This device complies with the limits for a Class B digital device as specified in Part 15 of FCC Rules which provide reasonable protection
against harmful interference in a residential installation. Operation is subject to the following two conditions:
(1) This device may not cause harmful interference, and
(2) This device must accept any interference received, including interference that may cause undesired operation.
This equipment generates and uses radio frequency energy, and if not installed and used in accordance with the instructions, may cause
harmful interference to radio communications. However, there is no guarantee that interference will not occur in a particular installation. In the
unlikely even that there is interference to radio or television reception, which can be determined by turning the equipment off and on, the user
is encouraged to try to correct the interference by doing any of the following measures:
•
Reorient or relocate the receiving antenna.
•
Increase the separation between the equipment and receiver.
•
Connect the equipment into an outlet on a circuit different from that to which the receiver is connected.
•
Consult the dealer or an experienced radio/TV technician for help.
Any changes or modifications to this equipment not expressly approved by Verifone could void the user’s authority to operate this equipment.
The antenna(s) used for this transmitter must not be co-located or operating in conjunction with any other antenna or transmitter.
Cet équipement est conforme aux limites d’un dispositif numérique de classe B, comme stipulé dans la partie 15 des règles FCC, qui prévoient
une protection raisonnable contre les interférences nocives dans une zone résidentielle. Le fonctionnement est soumis aux deux conditions
suivantes:
(1) Ce dispositif ne peut pas provoquer d’interférences nocives, et
(2) Ce dispositif doit accepter la réception d’interférences éventuelles, y compris des interférences susceptibles de provoquer un
fonctionnement inattendu.
Cet équipement produit et utilise l’énergie des ondes radio et, s’il n’est pas installé et utilisé conformément aux présentes instructions, peut
provoquer des interférences nuisibles pour les communications radio. Toutefois, aucune garantie n’est donnée que des interférences ne se
produiront pas dans une installation particulière.
Dans l’éventualité improbable d’une interférence avec la réception d’ondes de radio ou de télévision (pouvant être déterminée en éteignant et
en rallumant l’équipement), il est conseillé à l’utilisateur d’essayer de corriger l’interférence en appliquant une ou plusieurs des mesures
suivantes:
•
Réorienter ou déplacer l’antenne de réception.
•
Augmenter la distance entre l’équipement et le récepteur.
•
Connecter l’équipement à une sortie de circuit différente de celle à laquelle est connecté le récepteur.
•
Consulter le fournisseur ou demander l’aide d’un technicien expérimenté dans le domaine de la radio et/ou de la télévision.
Tout changement ou modification apportés à cet équipement, non approuvé de manière expresse par Verifone, est susceptible d’entraîner le
retrait de l’autorisation de l’utilisateur à utiliser cet équipement. L’antenne ou les antennes utilisées pour cet émetteur ne doivent pas être
placées côte à côte ou fonctionner conjointement à une autre antenne ou à un autre émetteur.
Legal Terms and Conditions Regarding PCI SSC Approvals
PCI SSC’s approval only applies to PEDs that are identical to the PED tested by a PCI Security Standards Council recognized laboratory.
If any aspect of the PED is different from that which was tested by the laboratory, even if the PED conforms to the basic product description
contained in the letter, then the PED model should not be considered approved, nor promoted as approved. For example, if a PED contains
firmware, software, or physical construction that has the same name or model number as those tested by the laboratory, but in fact are not
identical to those PED samples tested by the laboratory, then the PED should not be considered or promoted as approved.
No vendor or other third party may refer to a PED as “PCI Approved,” nor otherwise state or imply that PCI SSC has, in whole or part, approved
any aspect of a vendor or its PEDs, except to the extent and subject to the terms and restrictions expressly set forth in a written agreement with
PCI SSC, or in an approval letter. All other references to PCI SSC’s approval are strictly and actively prohibited by PCI SSC.
When granted, an approval is provided by PCI SSC to ensure certain security and operational characteristics important to the achievement of
PCI SSC’s goals, but the approval does not under any circumstances include any endorsement or warranty regarding the functionality, quality,
or performance of any particular product or service. PCI SSC does not warrant any products or services provided by third parties. Approval
does not, under any circumstances, include or imply any product warranties from PCI SSC, including, without limitation, any implied warranties
of merchantability, fitness for purpose or non-infringement, all of which are expressly disclaimed by PCI SSC. All rights and remedies regarding
products and services, which have received an approval, shall be provided by the party providing such products or services, and not by PCI
SSC or the payment brand participants.
This equipment operates on a secondary basis, and must not cause interference to systems operating on a primary basis. As secondary
equipment, it is not protected from harmful interference, even from stations of the same type.
Industry Canada Class B Emission Compliance Statement
This Class B digital apparatus complies with Canadian ICES-003.
This device complies with Industry Canada license-exempt RSS standard(s). Operation is subject to the following two conditions: (1) this
device may not cause interference, and (2) this device must accept any interference, including interference that may cause undesired
operation of the device.
Cet appareil numérique de la classe B est conforme à la norme NMB-003 du Canada.
Le présent appareil est conforme aux CNR d’Industrie Canada applicables aux appareils radio exempts de licence. L’exploitation est autorisée
aux deux conditions suivantes: (1) l’appareil ne doit pas produire de brouillage, et (2) l’utilisateur de l’appareil doit accepter tout brouillage
radioélectrique subi, même si le brouillage est susceptible d’en compromettre le fonctionnement.
RF Exposure
This equipment complies with FCC, Canadian and European limits for RF exposure from hand operated wireless devices.
Cet équipement est conforme aux limites FCC, canadiennes et européennes pour l’exposition aux RF des appareils sans fil à commande
manuelle.
Recycling: DO NOT DISCARD!
UNIT MUST BE RECYCLED OR DISPOSED OF PROPERLY
For proper disposal instructions go to http://recycle.verifone.com/ Please retain this sheet for future reference.
continued on rear cover
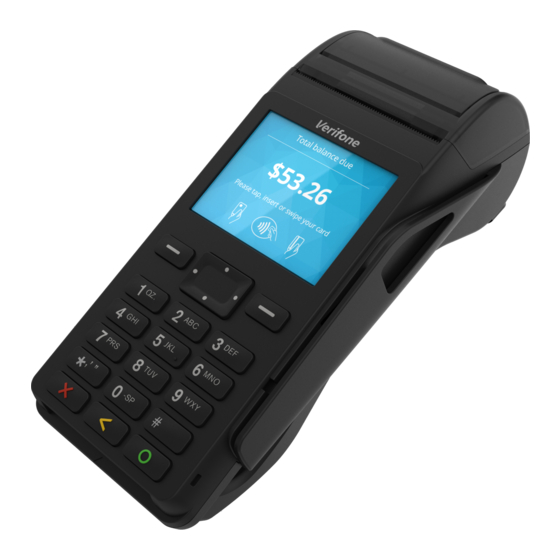
Внешний вид терминала и назначение клавиш


Начало работы
Перед началом работы кассир должен убедиться в том, что терминал подключен к коммуникационной сети и к электросети 220В, проверить наличие бумаги в принтере. После включения терминала происходит его начальная загрузка.
После этого на экране появляется сообщение: ВВЕДИТЕ КАРТУ.
После появления данной надписи устройство готово к работе.
Выполнение финансовых операций:
Оплата товара, Отмена ОПЕРАЦИИ, Возврат,
СВЕРКА ИТОГОВ
1.ОПЛАТА ТОВАРА ПО КАРТЕ С МАГНИТНОЙ ПОЛОСОЙ
1. Проведите карту через считывающее устройство терминала (карта вставляется в прорезь считывающего устройства терминала магнитной полосой к себе и плавным движением проводится через терминал до полного выхода карты из прорези).
После этого на экране терминала появляется список возможных операций, в котором по умолчанию выбрана операция «ОПЛАТА ПОКУПКИ»:
Нажмите клавишу ![]() (если операция по каким-то причинам проводиться не будет, нажмите клавишу Clear
(если операция по каким-то причинам проводиться не будет, нажмите клавишу Clear ![]() для возврата терминала в исходное состояние).
для возврата терминала в исходное состояние).
2. 2. Введите сумму покупки в рублях. Для ввода копеек необходимо нажать клавишу ![]()
Для ввода цифр используйте клавиши терминала 0..9; если при вводе суммы была допущена ошибка, используйте клавишу ![]() для удаления неправильно введенного символа (символов). После правильного ввода суммы нажмите клавишу
для удаления неправильно введенного символа (символов). После правильного ввода суммы нажмите клавишу ![]() .
.
3. Далее может понадобится ввод PIN-кода держателем карты на клавиатуре терминала либо специальном устройстве, подключённом к терминалу (ПИН-пад). После ввода PIN-кода держатель нажимает ![]() для подтверждения.
для подтверждения.
4. После этого терминал проводит операцию и печатает чек (рис 1). При успешном проведении операции терминал предлагает нажать любую клавишу для распечатки второго экземпляра чека, а на экране устройства появляется сообщение о успешном завершении операции «ОДОБРЕНО» или «ЗАВЕРШЕНО УСПЕШНО».
Подпись на чеке обязательна только в случае если держатель карты НЕ вводил ПИН-код!
В случае если операция отклонена на чеке печатается причина отказа.
Предоставлять товары и услуги по отказным чекам запрещено!
Образец чека успешной операции
«ОПЛАТА ПОКУПКИ»
Номер ссылки
Тип операции
Номер чека
Номер терминала (ID)
Сумма оплаты
рис.1
2. ОПЛАТА ТОВАРА ПО СМАРТ-КАРТЕ СНАБЖЕННОЙ ЧИПОМ
1. Вставьте карту в слот для устройства чтения смарт-карт плавным непрерывным движением до упора. Значок над считывателем указывает положение и направление, в котором необходимо вставлять карту.

Если данные со смарт-карты не считываются, то терминал выдает сообщение:
Проверьте чистоту контактов смарт-карты и повторите попытку. Если повторные попытки безуспешны, то, возможно, данные на смарт-карте повреждены и операция невозможна либо возможна с использованием магнитной полосы. Если использование магнитной полосы допустимо (после 3х не успешных попыток использования чипа), то терминал выдаст сообщение:
После этого на экране терминала появляется список возможных операций, в котором по умолчанию выбрана операция «ОПЛАТА ПОКУПКИ»:
Нажмите клавишу ![]() (если операция по каким-то причинам проводиться не будет, нажмите клавишу Clear
(если операция по каким-то причинам проводиться не будет, нажмите клавишу Clear ![]() для возврата терминала в исходное состояние).
для возврата терминала в исходное состояние).
2. Введите сумму покупки в рублях. Для ввода копеек необходимо нажать клавишу ![]()
Для ввода цифр используйте клавиши терминала 0..9; если при вводе суммы была допущена ошибка, используйте клавишу ![]() для удаления неправильно введенного символа (символов). После правильного ввода суммы нажмите клавишу
для удаления неправильно введенного символа (символов). После правильного ввода суммы нажмите клавишу ![]() .
.
Далее может понадобится ввод PIN-кода держателем карты на клавиатуре терминала либо специальном устройстве, подключённом к терминалу (ПИН-пад). После ввода PIN-кода держатель нажимает ![]() для подтверждения.
для подтверждения.
3. После этого терминал проводит операцию и печатает чек (рис 1). При успешном проведении операции терминал предлагает нажать любую клавишу для распечатки второго экземпляра чека, а на экране устройства появляется сообщение о успешном завершении операции «ОДОБРЕНО» или «ЗАВЕРШЕНО УСПЕШНО».
4. Извлеките карту из терминала. Извлечение возможно только после надписи «ОПЕРАЦИЯ ОДОБРЕНА, УДАЛИТЕ КАРТУ» в противном случае транзакция может быть аннулирована!
Подпись на чеке обязательна только в случае если держатель карты НЕ вводил ПИН-код!
В случае если операция отклонена на чеке печатается причина отказа.
Предоставлять товары и услуги по отказным чекам запрещено!
3.ОПЛАТА ТОВАРА ПО КАРТЕ БЕСКОНТАКТНЫМ СПОСОБОМ
1.Нажмите клавишу![]() .
.
В меню выберите пункт ‘’Бесконтактный ввод’’
После появления меню «ОПЛАТА ПОКУПКИ», «ВОЗВРАТ», «ОТМЕНА» выберите пункт «ОПЛАТА ПОКУПКИ», и на жмите клавишу ![]() .
.
Нажмите клавишу ![]() (если операция по каким-то причинам проводиться не будет, нажмите клавишу Clear
(если операция по каким-то причинам проводиться не будет, нажмите клавишу Clear ![]() для возврата терминала в исходное состояние).
для возврата терминала в исходное состояние).
2. Введите сумму покупки в рублях. Для ввода копеек необходимо нажать клавишу ![]()
Для ввода цифр используйте клавиши терминала 0..9; если при вводе суммы была допущена ошибка, используйте клавишу ![]() для удаления неправильно введенного символа (символов). После правильного ввода суммы нажмите клавишу
для удаления неправильно введенного символа (символов). После правильного ввода суммы нажмите клавишу ![]() .
.
3. Поднесите банковскую карту к экрану терминала
При списании суммы покупки до 1000р ввод PIN-кода не потребуется.
При операциях на большую сумму понадобится ввод PIN-кода держателем карты на клавиатуре терминала либо специальном устройстве, подключённом к терминалу (ПИН-пад). После ввода PIN-кода держатель нажимает ![]() для подтверждения.
для подтверждения.
4. После этого терминал проводит операцию и печатает чек . При успешном проведении операции терминал предлагает нажать любую клавишу для распечатки второго экземпляра чека, а на экране устройства появляется сообщение о успешном завершении операции «ОДОБРЕНО» или «ЗАВЕРШЕНО УСПЕШНО».
4.ОПЛАТА ТОВАРА ПО КАРТЕ С ПРЕАВТОРИЗАЦИЕЙ
4.1 Авторизация
1.Проведите карту через считывающее устройство терминала либо вставьте
карту в слот для устройства чтения смарт-карт (или просто поднесите карту к терминалу при бесконтактном способе оплаты)
В списке операций выберите пункт ‘’авторизация’’ для замораживания ден. средств
покупателя на счёте карты.
Нажмите клавишу ![]() (если операция по каким-то причинам проводиться не будет, нажмите клавишу Clear
(если операция по каким-то причинам проводиться не будет, нажмите клавишу Clear ![]() для возврата терминала в исходное состояние).
для возврата терминала в исходное состояние).
2. Введите сумму покупки в рублях. Для ввода копеек необходимо нажать клавишу ![]()
Для ввода цифр используйте клавиши терминала 0..9; если при вводе суммы была допущена ошибка, используйте клавишу ![]() для удаления неправильно
для удаления неправильно
введенного символа (символов). После правильного ввода суммы нажмите клавишу ![]() .
.
3. Далее может понадобится ввод PIN-кода держателем карты на клавиатуре терминала
либо специальном устройстве, подключённом к терминалу (ПИН-пад). После ввода PIN-кода держатель нажимает ![]() для подтверждения.
для подтверждения.
4. После этого терминал проводит операцию и печатает чек (см. Рис 2). При успешном проведении операции терминал предлагает нажать любую клавишу для распечатки второго экземпляра чека, а на экране устройства появляется сообщение об успешном завершении операции «ОДОБРЕНО» или «ЗАВЕРШЕНО УСПЕШНО».
5. Отмену авторизации можно сделать аналогично с операцией ‘’отмена’’
Образец чека успешной операции «АВТОРИЗАЦИЯ» Рис 2.
Номер ссылки RRN
4.2 Завершение расчёта
1.Проведите карту через считывающее устройство терминала либо вставьте
карту в слот для устройства чтения смарт-карт (или просто поднесите карту к
терминалу при бесконтактном способе оплаты)
В списке операций выберите пункт ‘’ завершение расчёта’’ для перевода ден.средств на счёт продавца.
Нажмите клавишу ![]() (если операция по каким-то причинам проводиться не будет, нажмите клавишу Clear
(если операция по каким-то причинам проводиться не будет, нажмите клавишу Clear ![]() для возврата терминала в исходное состояние).
для возврата терминала в исходное состояние).
2. Введите сумму покупки в рублях. Для ввода копеек необходимо нажать клавишу ![]()
Для ввода цифр используйте клавиши терминала 0..9; если при вводе суммы была допущена ошибка, используйте клавишу ![]() для удаления неправильно
для удаления неправильно
введенного символа (символов). После правильного ввода суммы нажмите клавишу ![]() .
.
Сумма не может быть больше суммы, указанной при авторизации
3.Введите 12-ти значный номер ссылки RRN (находится на чеке авторизации)
После правильного ввода номера нажмите клавишу ![]() .
.
4. После этого терминал проводит операцию и печатает чек (см. Рис 3). При успешном проведении операции терминал предлагает нажать любую клавишу для распечатки второго экземпляра чека, а на экране устройства появляется сообщение об успешном завершении операции «ОДОБРЕНО» или «ЗАВЕРШЕНО УСПЕШНО».
Образец чека успешной операции
«ЗАВЕРШЕНИЕ РАСЧЁТА»

Рис 3.
Операция ЗАВЕРШЕНИЕ РАСЧЁТА проводится только при наличии чеков операций АВТОРИЗАЦИЯ и карты по которой была совершена операция.
5. Отмена ОПЕРАЦИИ (для карт любого типа)
Отмена операции возможна в течении рабочего дня до выполнения команды «СВЕРКА ИТОГОВ». После проведения данной команды память терминала очищается и выполнить операцию «ОТМЕНА» нельзя.
1. Проведите карту через магнитный считыватель полосой к себе (карта с магнитной полосой) либо вставьте в слот для устройства чтения смарт-карт плавным непрерывным движением до упора (карты с чипом). Если отмена происходит бесконтактным способом, то необходимо нажать клавишу ![]() и выбрать ‘’БЕСКОНТАКТНАЯ ОПЛАТА’’. Карту потребуется поднести к экрану терминала, когда на нём появится сообщение об этом.
и выбрать ‘’БЕСКОНТАКТНАЯ ОПЛАТА’’. Карту потребуется поднести к экрану терминала, когда на нём появится сообщение об этом.
2. После появления меню «ОПЛАТА ПОКУПКИ», «ВОЗВРАТ», «ОТМЕНА» навигационными клавишами F1,F4 выберите пункт «ОТМЕНА» и нажмите клавишу ![]() .
.
3. Терминал выведет на экран надпись «ВВЕДИТЕ НОМЕР ЧЕКА». После ввода номера чека (рис 1.) нажмите клавишу![]() .
.
4. Терминал на экран выведет сумму отменяемой операции и предложит либо согласиться с дальнейшим проведением операции (клавиша ![]() ), либо остановить ее проведение (клавиша
), либо остановить ее проведение (клавиша ![]() 2 раза).
2 раза).
5. После этого терминал проводит операцию и печатает чек (см. Рис 4). При успешном проведении операции терминал предлагает нажать любую клавишу для распечатки второго экземпляра чека, а на экране устройства появляется сообщение об успешном завершении операции «ОДОБРЕНО» или «ЗАВЕРШЕНО УСПЕШНО».
6. Для карт с чипом. Извлеките карту из терминала. Извлечение возможно только после надписи «ОПЕРАЦИЯ ОДОБРЕНА, УДАЛИТЕ КАРТУ» в противном случае транзакция может быть аннулирована!
Образец чека успешной операции
«ОТМЕНА»

Рис 4.
Операции ОТМЕНА проводятся только при наличии чеков операций ОПЛАТЫ ТОВАРА и карты по которой была совершена операция.
6. выполнение операций возврат (по картам любого типа)
1. Проведите карту через магнитный считыватель полосой к себе (карта с магнитной полосой) либо вставьте в слот для устройства чтения смарт-карт плавным непрерывным движением до упора (карты с чипом). Если возврат происходит бесконтактным способом, то необходимо нажать клавишу ![]() и выбрать ‘’БЕСКОНТАКТНАЯ ОПЛАТА’’. Карту потребуется поднести к экрану терминала, когда на нём появится сообщение об этом.
и выбрать ‘’БЕСКОНТАКТНАЯ ОПЛАТА’’. Карту потребуется поднести к экрану терминала, когда на нём появится сообщение об этом.
2. После появления меню «ОПЛАТА ПОКУПКИ», «ВОЗВРАТ», «ОТМЕНА» навигационными клавишами F1,F4 выберите пункт «ВОЗВРАТ» и на жмите клавишу ![]() .
.
3. Терминал выведет на экран надпись «ВВЕДИТЕ СУММУ». После ввода суммы на которую будет осуществлен возврат (она может быть как полной так и частичной) нажмите клавишу![]() .
.
4. Терминал выведет на экран надпись «ВВЕДИТЕ НОМЕР ССЫЛКИ» (см. Рис 1). После ввода номера ссылки нажмите клавишу![]() .
.
5. После этого терминал проводит операцию и печатает чек. При успешном проведении операции терминал предлагает нажать любую клавишу для распечатки второго экземпляра чека, а на экране устройства появляется сообщение о успешном завершении операции «ОДОБРЕНО» или «ЗАВЕРШЕНО УСПЕШНО».
6. Для карт с чипом. Извлеките карту из терминала. Извлечение возможно только после надписи «ОПЕРАЦИЯ ОДОБРЕНА, УДАЛИТЕ КАРТУ» в противном случае транзакция может быть аннулирована!
Операция ВОЗВРАТ проводятся по операциям ОПЛАТА ТОВАРА только при наличии чеков операций ОПЛАТЫ ТОВАРА. Операции ВОЗВРАТА проводятся в том случае, если после ОПЛАТЫ ТОВАРА (в предыдущую смену) была проведена СВЕРКА ИТОГОВ.
7. ПРОВЕДЕНИЕ ОПЕРАЦИИ СВЕРКА ИТОГОВ
| Перед началом каждой смены кассир должен убедиться в том, что операция «СВЕРКА ИТОГОВ» была проведена !!! |
1. Зайдите в меню административных операций (нажмите клавишу ![]() ), установите с помощью клавиш F1 или F4 курсор на надпись «СЛУЖЕБ.ОПЕРАЦИИ» и нажмите клавишу
), установите с помощью клавиш F1 или F4 курсор на надпись «СЛУЖЕБ.ОПЕРАЦИИ» и нажмите клавишу ![]() .
.
2. После этого с помощью клавиш F1 или F4 выберите пункт «СВЕРКА ИТОГОВ». После этого терминал печатает чек с сообщением «ИТОГИ СОВПАЛИ» (см. Рис 5). Если итоги не совпали, то необходимо позвонить в службу поддержки.
Образец чека успешной операции
«СВЕРКА ИТОГОВ»
Общая сумма проведенных операций за смену
Кол-во операций «отмена» проведенных за смену
Кол-во операций «оплата» проведенных за смену
Рис 5
проведение дополнительных операций на терминале
1. печать копии чека
Печать копии чека возможна в течении рабочего дня до выполнения команды «СВЕРКА ИТОГОВ». После проведения данной команды память терминала очищается и операция «КОПИЯ ЧЕКА» становится не возможна.
1. Зайдите в меню административных операций (нажмите клавишу ![]() ), установите с помощью клавиш F1 или F4 курсор на надпись «КОПИЯ ЧЕКА» и нажмите клавишу
), установите с помощью клавиш F1 или F4 курсор на надпись «КОПИЯ ЧЕКА» и нажмите клавишу ![]() .
.
2. Терминал предложит либо распечатать «ПОСЛЕДНИЙ ЧЕК», либо «ЧЕК ПО НОМЕРУ». С помощью клавиш F1 или F4 выберите нужный пункт и нажмите ![]() . В случае выбора функции «ЧЕК ПО НОМЕРУ» Вы должны знать номер чека (см. Рис 1) печать которого хотите повторить.
. В случае выбора функции «ЧЕК ПО НОМЕРУ» Вы должны знать номер чека (см. Рис 1) печать которого хотите повторить.
2. ОТЧЕТЫ
Печать краткого и полного отчетов возможна в течении рабочего дня, в любое время, до выполнения команды «СВЕРКА ИТОГОВ». После проведения данной команды память терминала очищается и выполнить операцию «ОТЧЕТЫ» нельзя.
1. Зайдите в меню административных операций (нажмите клавишу ![]() ), установите с помощью клавиш F1 или F4 курсор на надпись «ОТЧЕТЫ» и нажмите клавишу
), установите с помощью клавиш F1 или F4 курсор на надпись «ОТЧЕТЫ» и нажмите клавишу ![]() .
.
2. Выберите нужный тип отчета с помощью клавиш F1 или F4, «КРАТКИЙ» либо «ПОЛНЫЙ» и нажмите клавишу ![]() .
.
3. Затем выберите критерий отчета «БЕЗ СОРТИРОВКИ», «ПО ОПЕРАЦИЯМ», «ПО ВАЛЮТАМ», «ПО КАРТАМ» и нажмите клавишу ![]() .
.
3. проверка связи
проверка связи выполняется для определения работоспособности терминала в случае необходимости
1. Зайдите в меню административных операций (нажмите клавишу ![]() ), установите с помощью клавиш F1 или F4 курсор на надпись «СЛУЖЕБ.ОПЕРАЦИИ» и нажмите клавишу
), установите с помощью клавиш F1 или F4 курсор на надпись «СЛУЖЕБ.ОПЕРАЦИИ» и нажмите клавишу ![]() .
.
2. Установите с помощью клавиш F1 или F4 курсор на надпись «ПРОВЕРКА СВЯЗИ» и нажмите клавишу ![]() . Терминал распечатает чек — операция выполнена успешно (терминал можно использовать) либо нет связи с Банком (проведение операций не возможно, обратитесь в службу поддержки).
. Терминал распечатает чек — операция выполнена успешно (терминал можно использовать) либо нет связи с Банком (проведение операций не возможно, обратитесь в службу поддержки).
Контакты:
| Бесплатный номер Банка
(ежедневно, круглосуточно) |
8-800-700-787-7
(цифра 4 – торговый эквайринг) |
По всем вопросам в рамках торгового эквайринга |
| Московский номер Банка
(ежедневно, с 8.00 до 20.00, кроме выходных и праздничных дней) |
(495) 780-07-38
(цифра 2 – торговый эквайринг) |
По всем вопросам в рамках торгового эквайринга |
| Отдел мониторинга | 8-800-700-78-77, (495) 787-78-77 (ежедневно, круглосуточно)
(доб. 18-6747, 11-3065 (c 9.00 до 18.00) |
По вопросам безопасности обслуживания карт |
| Департамента сопровождения терминальной сети (ежедневно, с 9.00 до 21.00) | 8-800-700-787-7 | По техническим вопросам работы оборудования |
| Отдел поддержки бизнеса
(по раб. дням c 9.00 до 18.00) |
8(495) 787-787-7
(11-3331, 11-3878) |
По финансовым вопросам и отчетности |
VeriFone, Inc. Общая деятельность банковско-финансового сектора всегда активна. У нас есть различные способы использования наших финансовых активов через COD, кредитные карты для личного использования, обработку кредитных карт для малого бизнеса или даже обработку кредитных карт продавца. Их официальный webсайт Verifone.com
Каталог руководств пользователя и инструкций для продуктов Verifone можно найти ниже. Продукты Verifone запатентованы и зарегистрированы под торговыми марками VeriFone, Inc.
Контактная информация:
Адрес: 88 West Plumeria Drive Сан-Хосе, Калифорния 95134 США
ПО ТЕЛЕФОНУ 1-408-232-7800
Эл. почта: info@verifone.com
Найти
Это руководство пользователя относится к моделям Verifone M425-1 и M450-1, включая сертификаты и правила электробезопасности. В нем содержатся рекомендации по источникам питания, электрическим аспектам и предотвращению потенциальных опасностей. Важные ключевые слова включают сертификаты и правила B32M4250, Verifone и M425-1.
Узнайте, как работать и обрабатывать платежи с помощью платежного терминала Verifone VX520, из инструкции по эксплуатации XEPT410. Это руководство пользователя содержит подробные инструкции по использованию терминала VX520, включая советы по устранению неполадок. Загрузите PDF-файл сейчас.
Узнайте больше о кассовом терминале Verifone UX7002 из этого руководства пользователя. Узнайте о важных электрических и экологических аспектах, которые необходимо учитывать для достижения оптимальной производительности.
Узнайте, как использовать планшетный ПК IX90-CQA1103, из этого подробного руководства пользователя. Это руководство, содержащее технические характеристики, функции и советы по увеличению срока службы аккумулятора, является обязательным для пользователей планшетного ПК Verifone IX90-CQA1103.
Ознакомьтесь с инструкциями по установке Verifone UX700 Android ECR POS, также известного как UX700. Это руководство пользователя относится к номеру детали Verifone DOC184-003-EN-A, редакция A © 2021 Verifone, Inc. Получите дополнительную информацию по предоставленной ссылке.
В данном Руководстве по установке зарядной базы Verifone T650m с номером детали DOC560-043-EN-A содержатся подробные инструкции по установке и использованию зарядной базы и комплекта для зарядки. Получите дополнительную информацию и загрузите PDF-файл на странице документации по продукту Verifone.
Узнайте о кассовом терминале Verifone E2351 из руководства пользователя. Узнайте о его электрических и экологических характеристиках, чтобы обеспечить оптимальную производительность и избежать повреждений. Узнайте требования к питанию для различных моделей и узнайте, как защитить устройство от воды, тепла и других опасностей.
Узнайте, как использовать кассовый терминал T650P с помощью этого руководства пользователя. Обеспечьте электробезопасность, правильное использование адаптера переменного тока и не допускайте повреждения терминала Verifone B32T650P. Начать сейчас.
Узнайте о кассовом терминале Verifone V240MPLUSU с помощью этого руководства пользователя. Узнайте, как эксплуатировать модель B32V240MPLUSU и обеспечить соответствие требованиям FCC.
Узнайте, как работать с кассовым терминалом Verifone V240M3GBWU, с помощью этих инструкций для пользователя. Это цифровое устройство класса B, соответствующее правилам FCC, содержит полезные советы по минимизации помех и соблюдению безопасных разделительных расстояний.
All rights reserved. No part of the contents of this document may be reproduced or transmitted in any form without the written
permission of Verifone, Inc.
The information contained in this document is subject to change without notice. Although Verifone has attempted to ensure the
accuracy of the contents of this document, this document may include errors or omissions. The examples and sample programs are
for illustration only and may not be suited for your purpose. You should verify the applicability of any example or sample program
before placing the software into productive use. This document, including without limitation the examples and software programs, is
supplied «As-Is.»
Verifone and the Verifone logo, are registered trademarks of Verifone. Other brand names or trademarks associated with Verifone’s
products and services are trademarks of Verifone, Inc.
All other brand names and trademarks appearing in this manual are the property of their respective holders.
Product Warranty
For product warranty information, go to http://www.verifone.com/terms.
Comments? Please e-mail all comments on this document to your local Verifone Support Team.
V205c Installation Guide
© 2017 Verifone, Inc.
Verifone Inc.
1-800-Verifone
www.verifone.com
Verifone Part Number DOC470-103-EN-A, Revision A