
Star 03
Скачать руководство пользователя
Star 03V2 User Manual(Russian)
Jun 23,2020 PM 14:18
XP-PEN New UI Driver Manual V1.2(Russian)
Dec 04,2020 PM 12:19
программное обеспечение и драйверы
XPPenMac_3.4.6_230607
Jun 08,2023 PM 17:39
XPPenMac_3.4.0_230104
Jan 09,2023 PM 18:24
XPPenWin_3.4.7.230608
Jun 16,2023 PM 14:44
XPPenWin_3.4.0.230109
Jan 11,2023 PM 18:38
Star 03V1 for Windows Beta driver
(the last fifth Serial No. is 1 or 2)
May 09,2020 AM 10:58
Ubuntu、Centos、Fedora、Red Hat、Manjaro、Arch、Debian、OpenSUSE、elementary OS、Mint、ezgo Linux、Pop!_OS、Mageia
XPPen-pentablet-3.2.3.230215-1.x86_64.tar.gz
Mar 21,2023 AM 10:22
Ubuntu、Debian、elementary OS、Mint、ezgo Linux、Pop!_OS
XPPen-pentablet-3.2.3.230215-1.x86_64.deb
Mar 21,2023 AM 10:22
Centos、Fedora、Red Hat、OpenSUSE、Mageia
XPPen-pentablet-3.2.3.230215-1.x86_64.rpm
Mar 21,2023 AM 10:22
Если кто-то до сих пор был не в курсе, то подавляющее большинство графических рисунков в сети (Digital Arts) были сделаны именно на таких вот устройствах. Планшеты бывают разного вида, разного функционала, но в общем и целом, красиво рисовать вам будут мешать только ваши недостаточные умения, а за неимением недостаточных умений — ничего мешать и не будет. Сильно разглагольствовать без повода я сейчас не буду, и всем заинтересованным желаю приятного прочтения.
У этого планшета очень большая история получения, что в общем-то не так и важно для обзора, но если кратко, то он стал возмещением в диспуте на другую модель — Deco Pro M, с доставкой которой оказалось немало проблем.
А теперь к самому обзору.
***
Коробка и комплектация XP-pen Star 03 V2.
Графический планшет пришел в обычной упаковке без какой-либо защиты. Но коробка оказалась плотной и не помялась. Учитывая, что месяцем ранее я был участником распаковки модели в два раза дороже, я могу с уверенностью сказать, что качество самой коробки у моделей отличается пропорционально цене. Это и не так и плохо, трудно ожидать чего-то супер качественного за 40 долларов.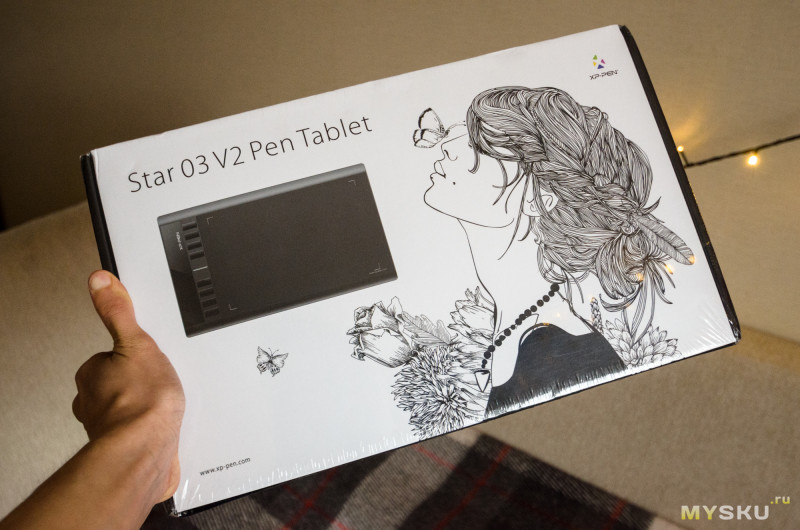
Если на передней части лишь привлекательный арт, то на задней подробности о самом планшете и его характеристики.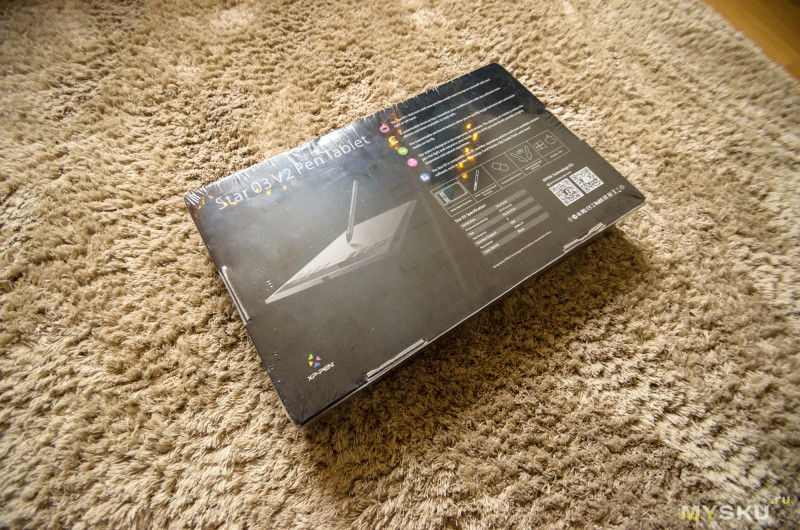
Изначально коробка была в целлофановой пленке. Внутри первым делом, что меня встретило, так это воздушная прослойка для защиты довольно таки плоского, а значит и хрупкого, планшета. Сам планшет находится в мягкой упаковке с наклейкой маскота фирмы — маленькой большеухой лисы фенека.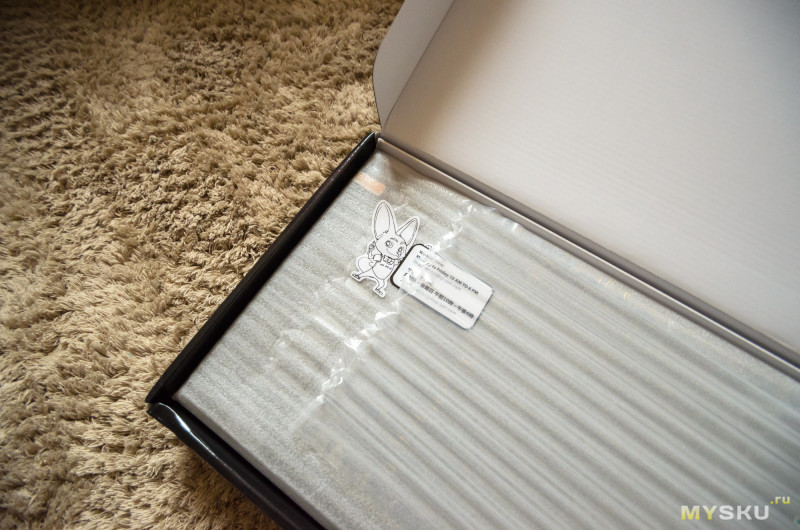
Под планшетом в коробке разместились ванночки:
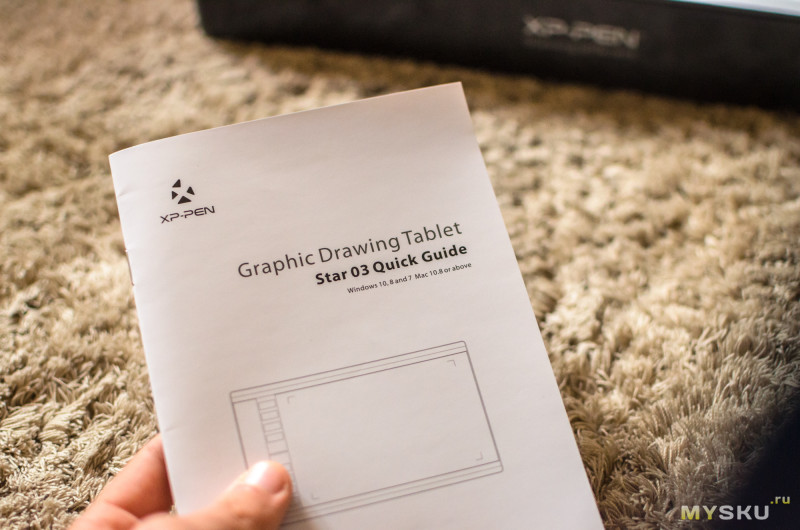
И в этих ванночках, соответственно, была вся комплектация модели. А это: фирменное перо для рисования, разборная подставка для пера вместе с восемью наконечниками, MicroUSB кабель с удлиненным концом, а так же документация.
***
Рассмотрим всё подробнее. Это всё будет интересно непосредственно заинтересованным в графическом планшете, а остальным я бы посоветовал пролистать обзор до конца.
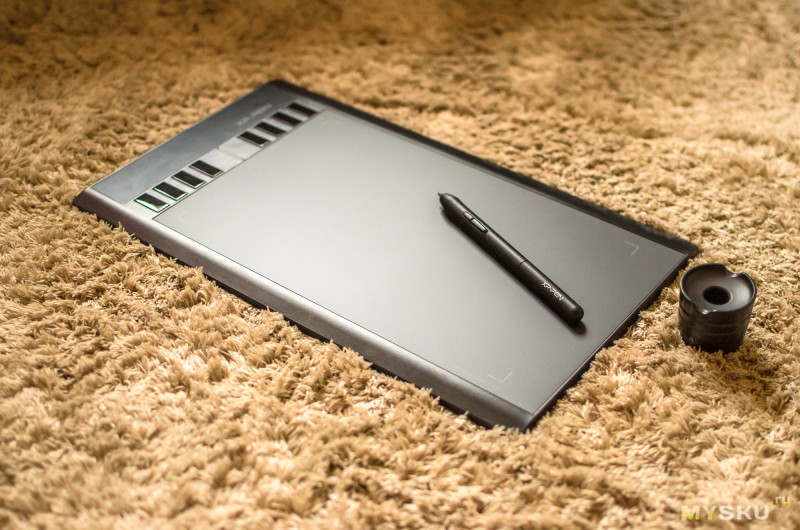
У XP-Pen есть несколько версий пера, и в комплекте этого планшета лежит одна из самых дешевых версий, P01. Это сразу же бросается в глаза — на вид обычный пластиковый маркер или типа того. По ощущениям всё то же самое. Перо легкое, непривычно легкое. 
Легкость отчасти обуславливается тем, что это перо так называемое «пассивное», а другими словами — без батареек. Работает напрямую от планшета и заряжать его отдельно вам не придется. Довольно стандартная характеристика, но как и раньше были перья с батарейками, так и сейчас их можно найти. Данный же тип пера вполне себе удобен и не вызывает лишних вопросов.
На пере находится две кнопки — нижняя и верхняя. Обе можно настроить после установки драйвера и софта. Нажимаются кнопки с щелчком, но я бы сказал что несколько легко — пока не привыкнуть, нажиматься могут сами по себе, даже когда не нужно.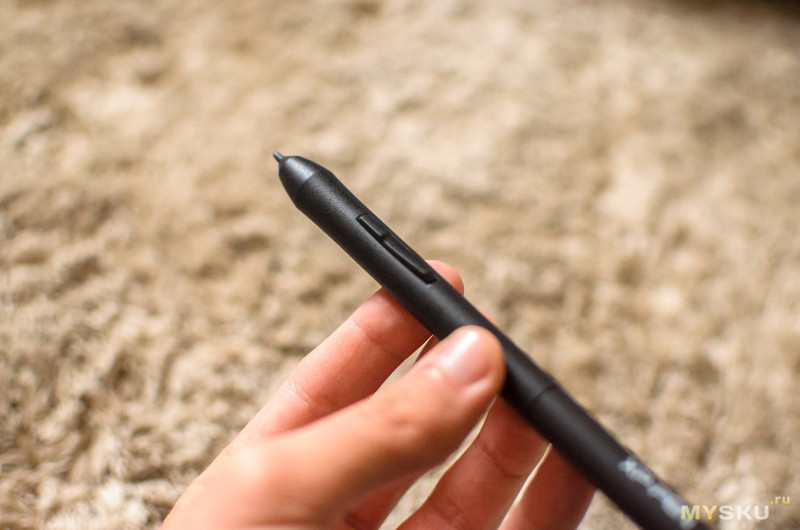
Наконечник: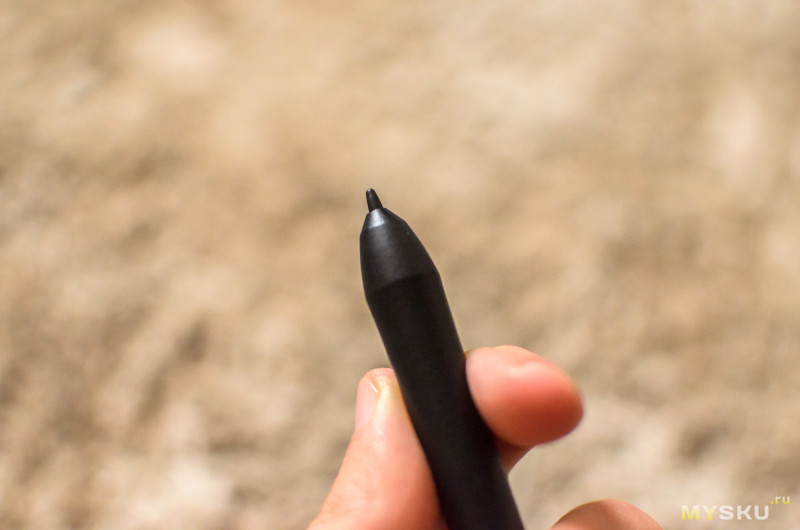
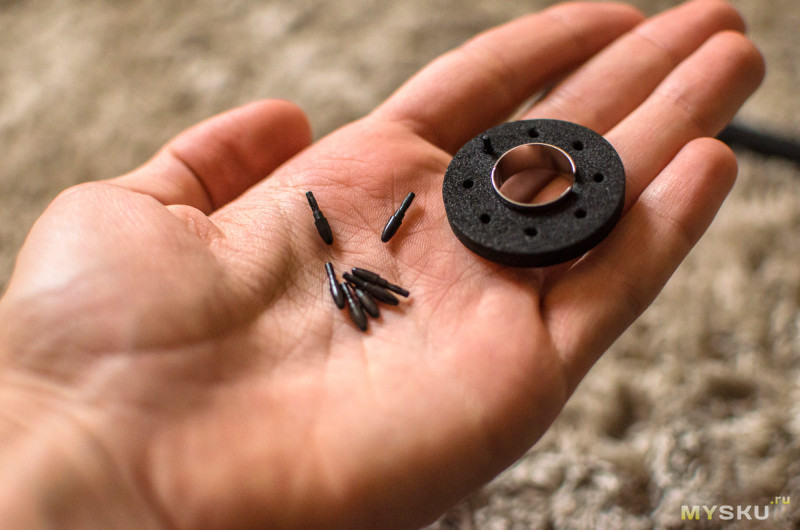
В комплекте идет половинка док-станции для пера, в которой, в поролоновую вставку, встроено еще восемь запасных. По опыту использования Deco Pro M могу сказать, что таких восьми наконечников должно хватить на больше, чем год. Это не так много и вроде как меньше, чем у аналогов. Стоит подумать о покупке запасных. Благо это не та вещь, за которую просят много.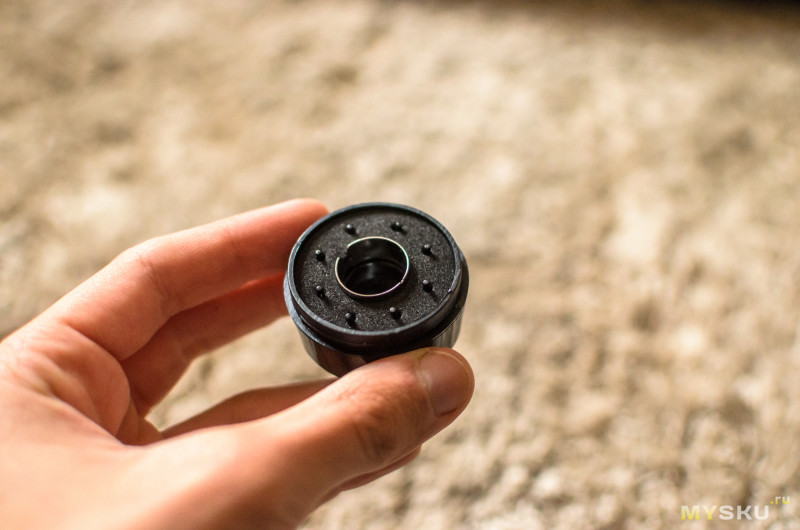
Вторая половинка док-станции является просто крышкой. 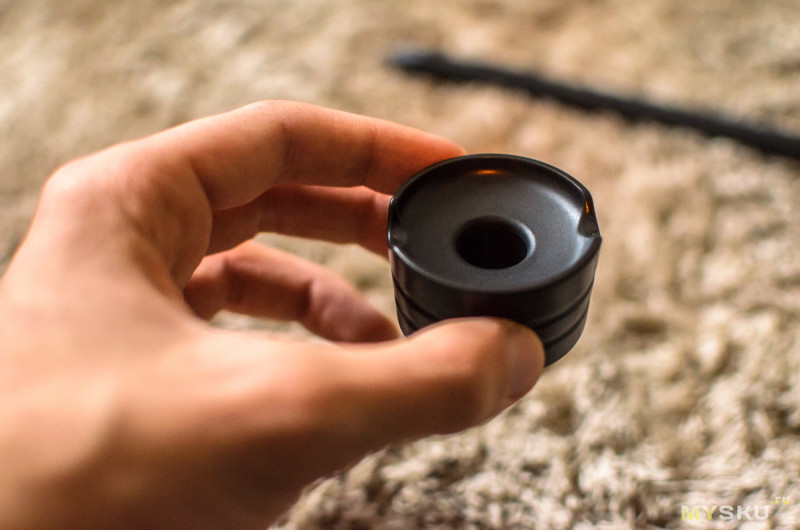
Две половинки закручиваются с помощью резьбы и получается держатель для пера с набором наконечников внутри: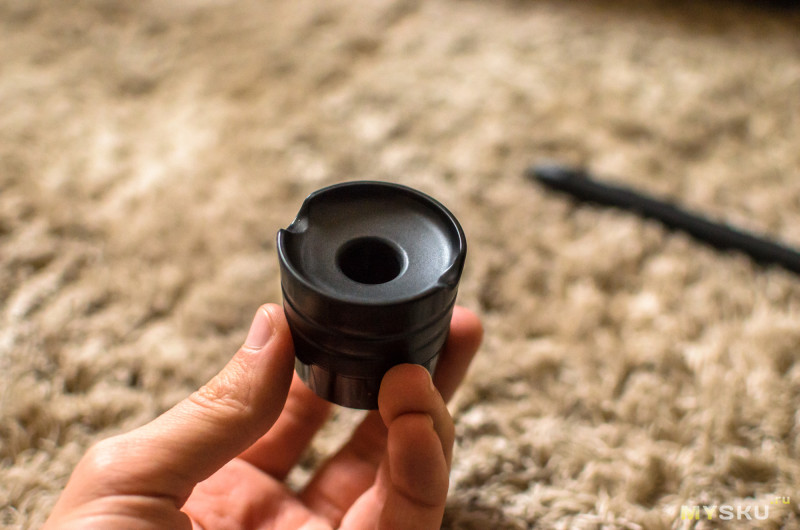
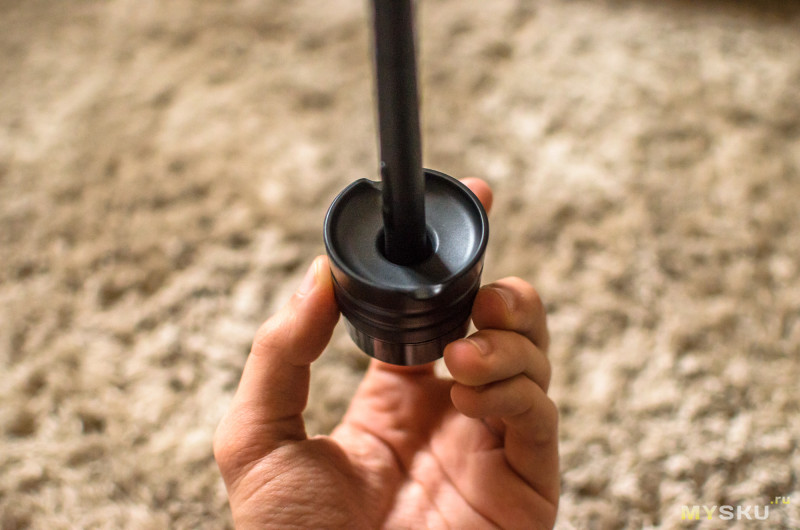
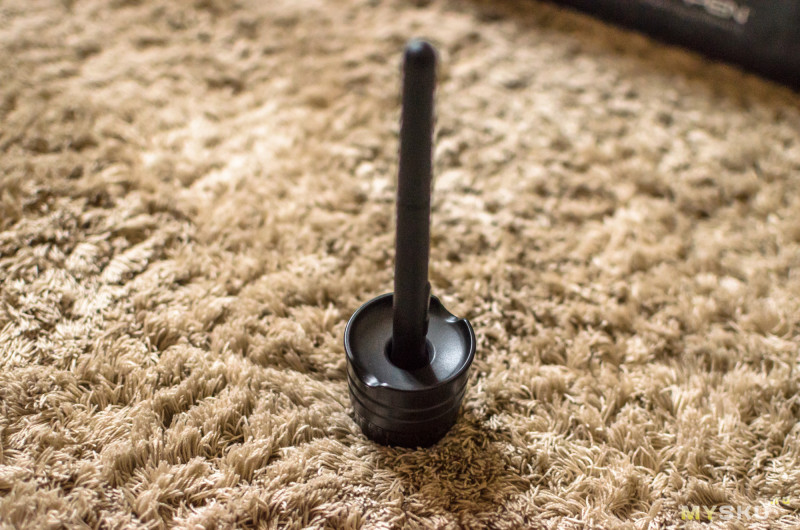
Снизу у подставки резиновое покрытие, благодаря чему подставка не должна будет кататься по столу. По опыту скажу, что подставка с пером скорее будет падать, чем ёрзаться.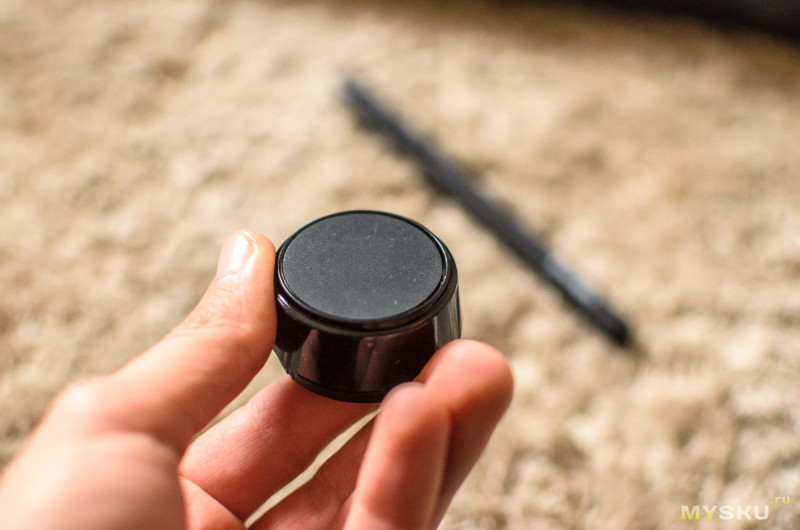
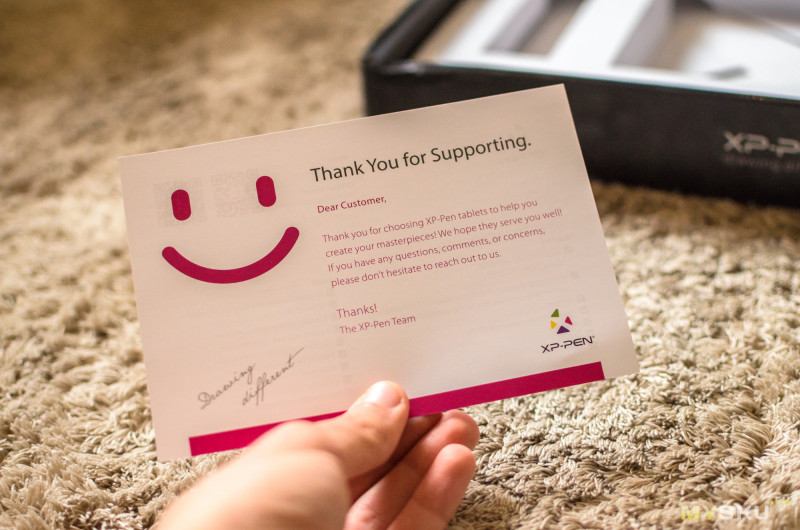
Из остального комплекта осталась макулатура. На вид довольно приятная. При покупке и распаковке такая производит приятное впечатление, потому кто бы что не говорил, но хорошо оформленные бумажки вполне себе часть комплекта.

На этом с комплектом поставки всё.
***
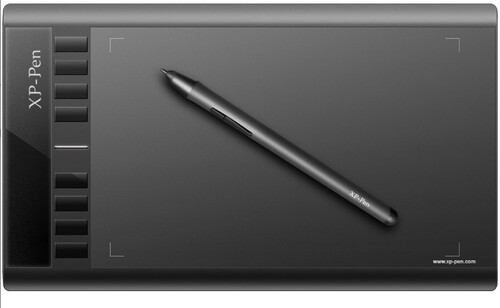
Дизайн и качество сборки XP-Pen Star 03.
Планшет выполнен в привычном для графических планшетов дизайне. Я бы даже сказал, что модель похожа на некоторые вакумы (в частности, на четвертую серию Intuos), особенно из-за скошенных верхних и нижних граней. Тем не менее это точно не копия чего-либо, а вполне самобытное устройство с приятным дизайном. Из коробки на планшете была пленка как на кнопках, так и на экране.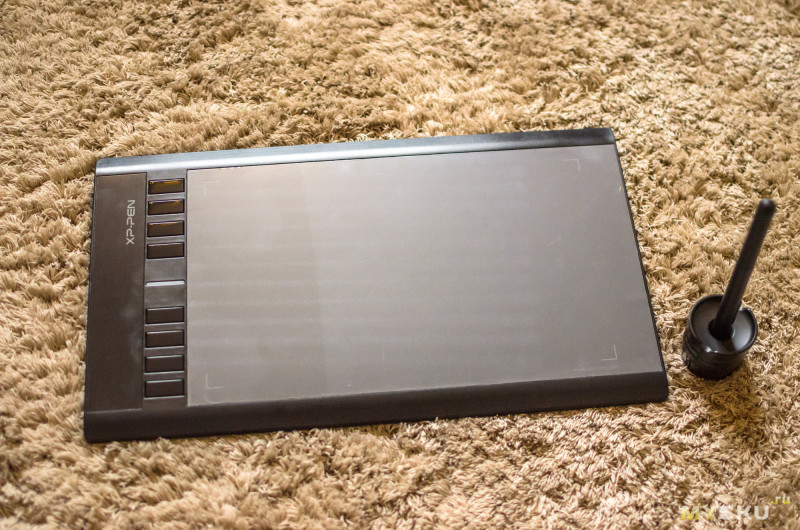
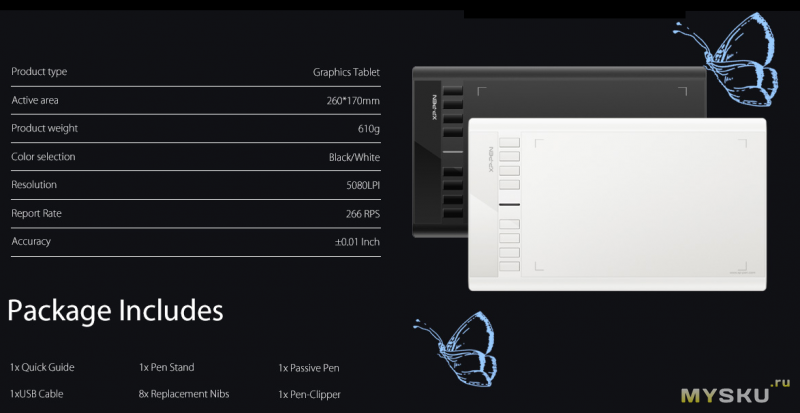
На передней панели расположена рабочая поверхность относительного немаленького размера — на 10х6 дюймов (270х160мм). Она слегка шершавая, немного напоминает бумагу. 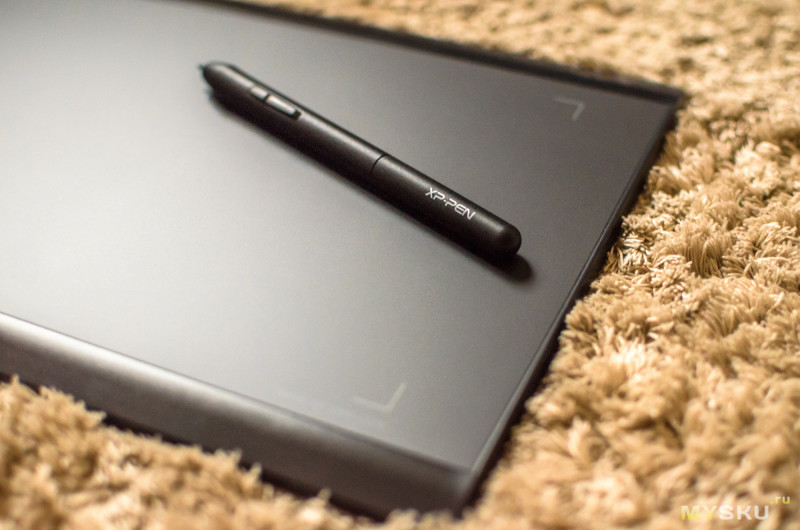
Такой размер рабочей поверхности вполне себе оптимален как для новичков, так и для более профессиональных художников. Хоть и всегда можно сказать, что рисовать можно хоть на 160х80мм (и ведь и правда можно!). Так что это дело каждого, но данный размер рабочий области мало кого расстроит. На планшете область обрамлена маленькими уголками, которые в моделях подороже ко всему прочему светятся.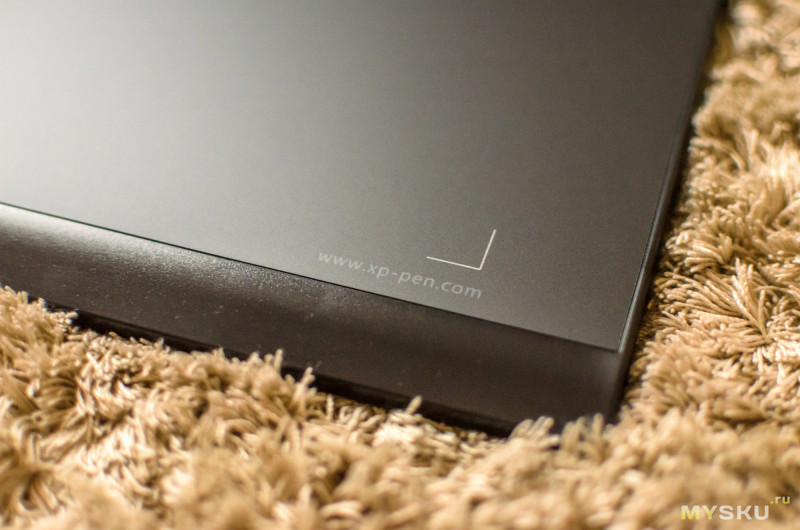
Тут же светится только световой индикатор возле кнопок, который реагирует на касания к рабочей поверхности и нажатие кнопок.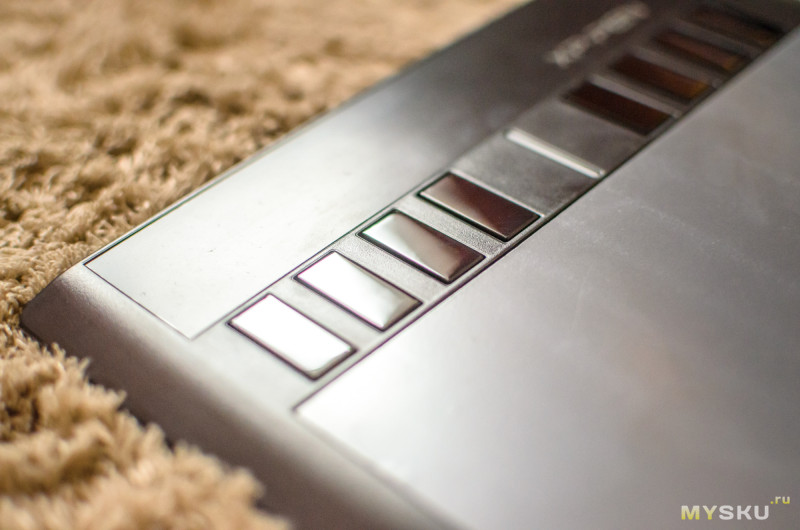
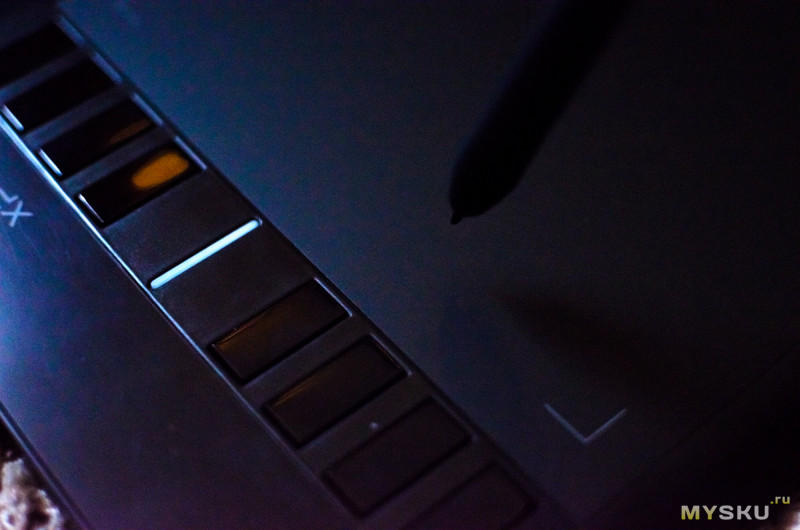
И реагирует исправно:
Всего у планшета 8 элементов управления, то есть 8 кнопок. Каждая по умолчанию отвечает за какую-то функцию, описания которых можно будет найти в настройках драйвера на ПК. К этому мы еще вернемся, а пока о самих кнопках: они большие и занимают левую область корпуса. Расположение привычное, сами кнопки глянцевые, из-за чего конечно же поцарапаются. Зато они большие и нажимаются с отчетливым щелчком — приятно и, главное, сами по себе срабатывать не будут.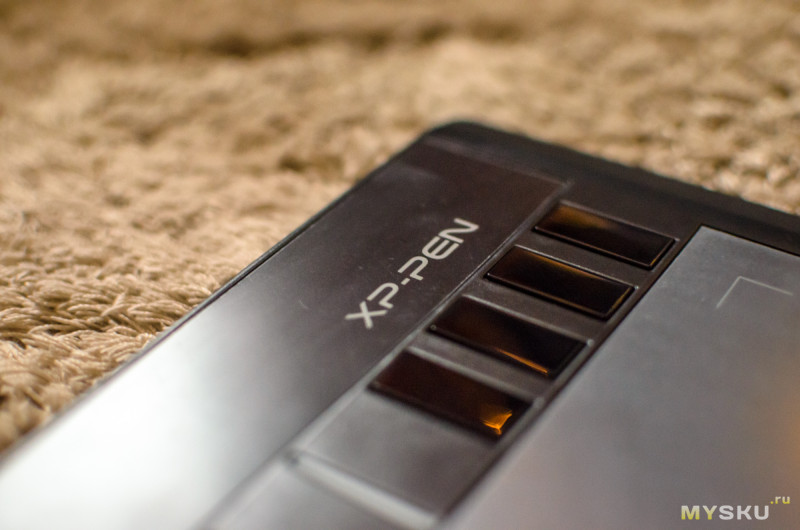
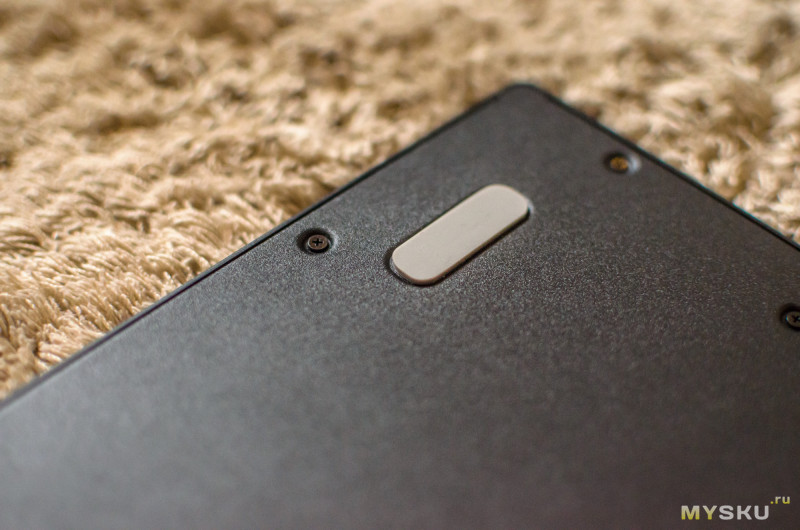
Больше на передней панели планшета ничего интересного нет. Сзади же железное дно с четырьмя большими резиновыми ножками. Они прекрасно справляются со своей задачей.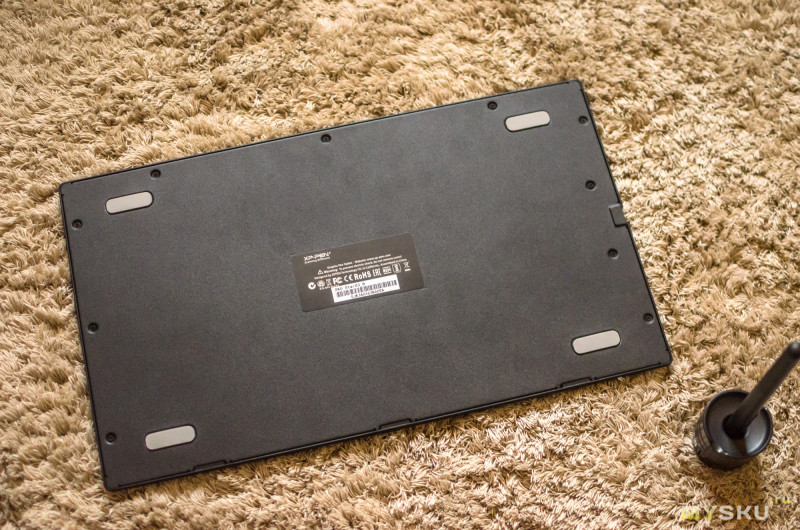
Так же тут можно найти наклейку с информацией о модели: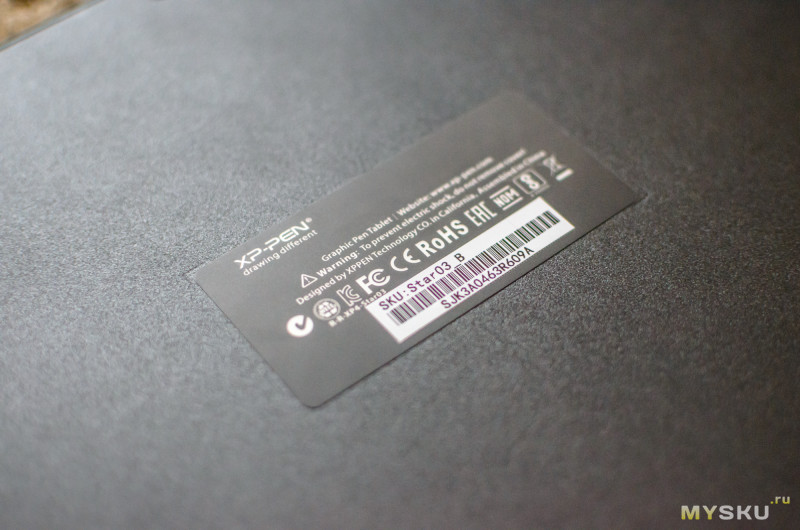
И выступающий MicroUSB разъём. Это служит своего рода дополнительной ножкой/опорой.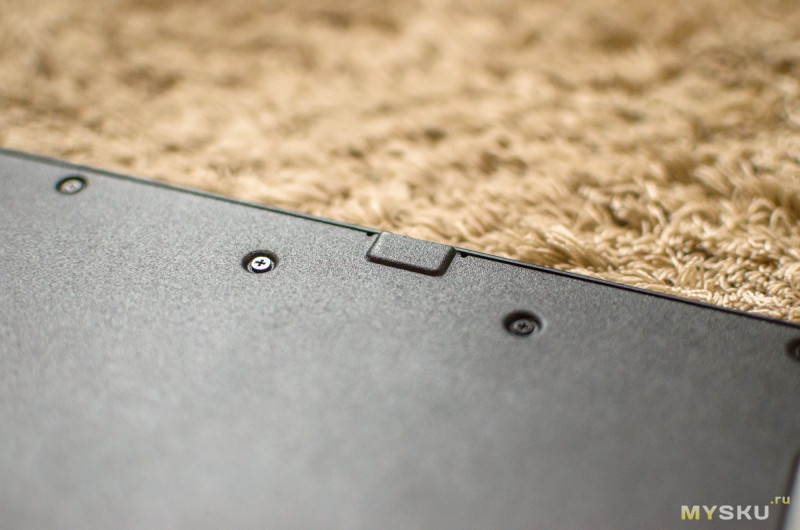
MicroUSB разъём расположен со стороны кнопок и сам по себе ну очень углублен. Поэтому и кабель в комплекте необычайно с длинным входом.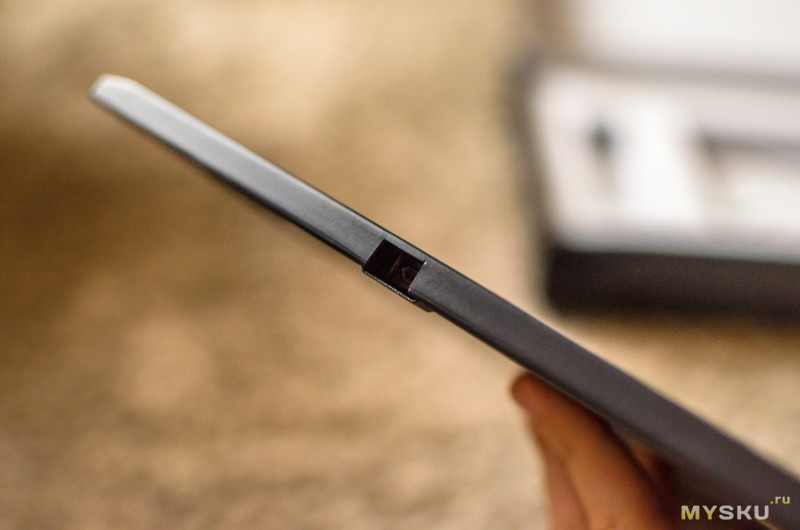
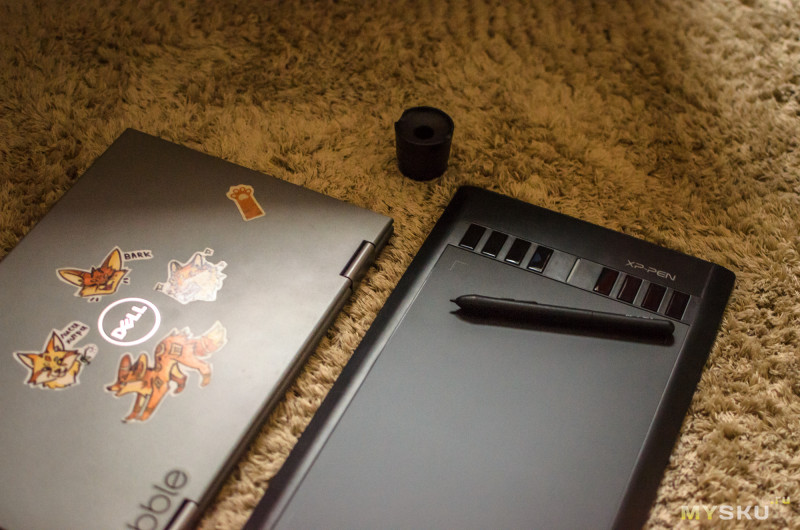
Толщина планшета составляет смешные 8мм, что тоньше некоторых смартфонов, или же на их уровне. А учитывая габариты Star 03 (360×210мм), в руке это чудо ощущается очень забавно. Своего рода Макбук Эйр среди граф. планшетов (хотя громко сказано, сейчас почти все такие тонкие, это раньше их толщина превышала 1см).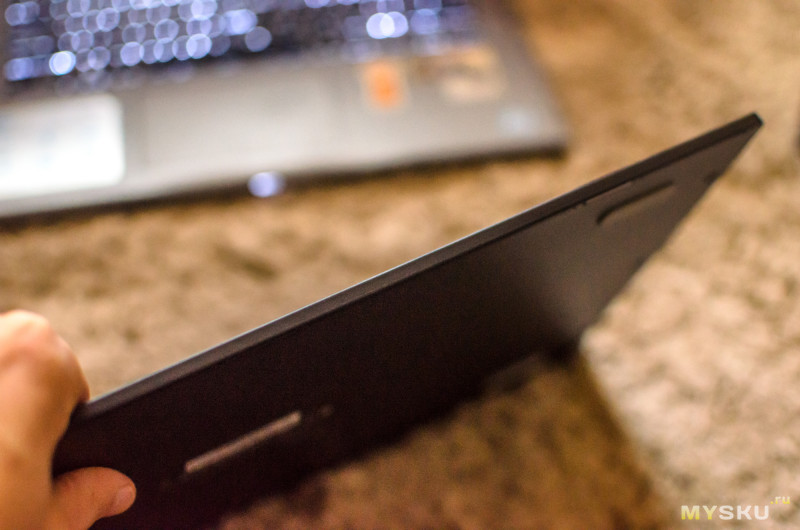
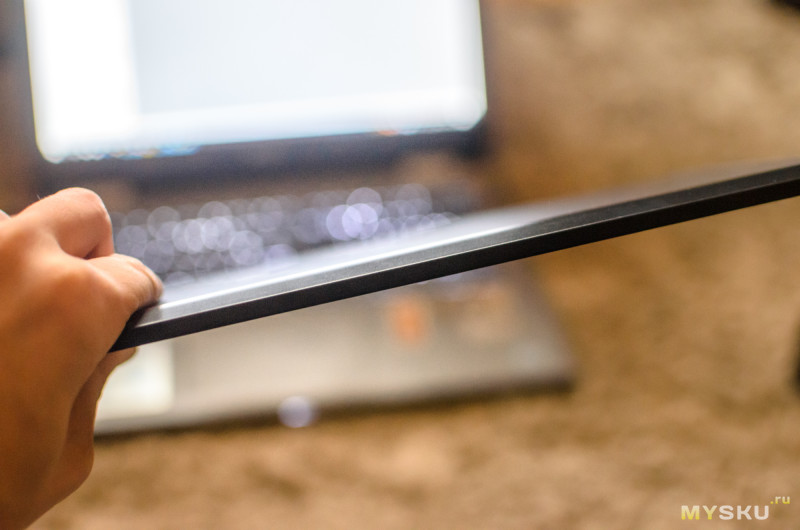
Хотя если бы этот графический планшет положили рядом с Эйром, то это выглядело бы даже странно, в отличие от использования с более традиционными (не такими тонкими, другими словами) ноутбуками: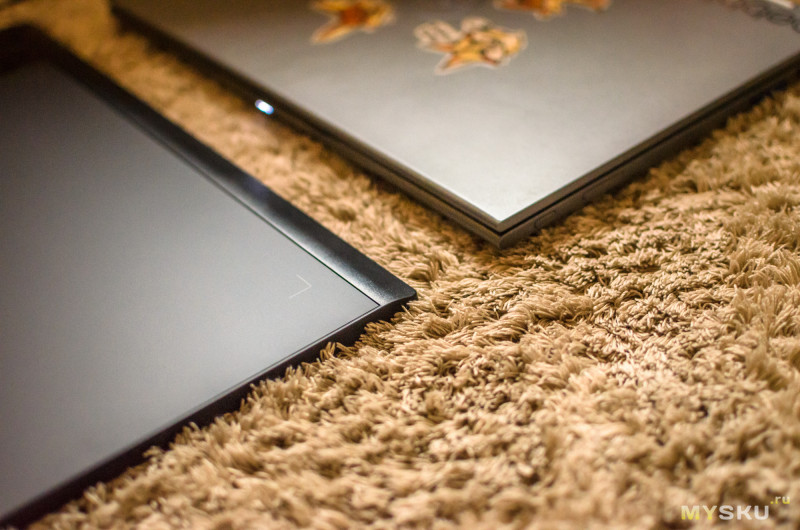
А так как я много раз ссылался на Deco Pro M, то без сравнительного фото не обойдемся.
Размеры (Star 03 — Deco Pro M):
— габариты: 360х210мм — 400х228мм
— рабочая область: 270х160мм — 279×157мм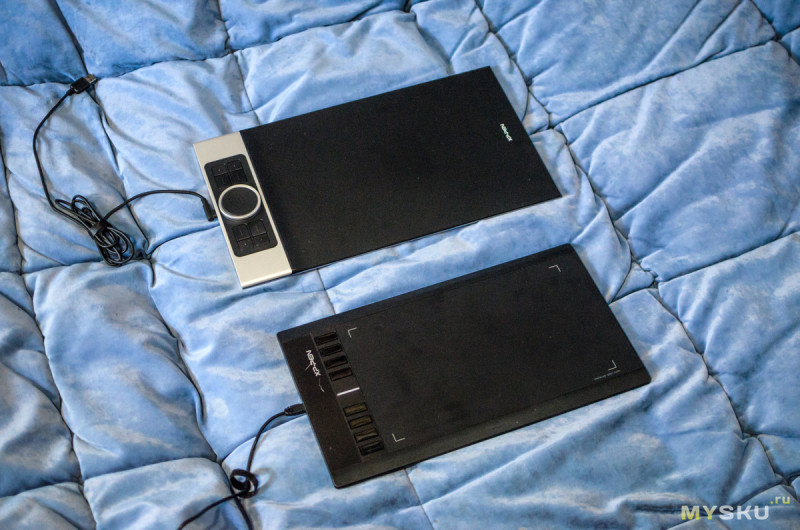
Как видите, они примерно равны, но один в два раза дешевле, а второй с дополнительной областью с механическим колесом.
Качество сборки Star 03 хорошее, хоть в материале и чувствуется общая бюджетность устройства. Планшет относительно легкий, и внутри, по ощущениям, пустой. Хотя и чему там быть? Но в общем и целом, выше стоимости прыгнуть модель не пытается, да и не особо это нужно. Кнопки нажимаются, всё держится крепко и ничего не болтается, не шуршит внутри. Больше ничего и не нужно.
***
Подключение к ПК и установка ПО.
Драйвера для планшета находятся на официальном сайте XP-Pen. Если вам было недостаточно под десяток ссылок на сайт в комплектной макулатуре, то вот вам еще (к тому же кликабельная): xp-pen star 03 drivers. Драйвера доступны для МакОс и Виндовс 7+, а так же бета версия для других систем. Помимо этого на сайте можно скачать руководство пользователя.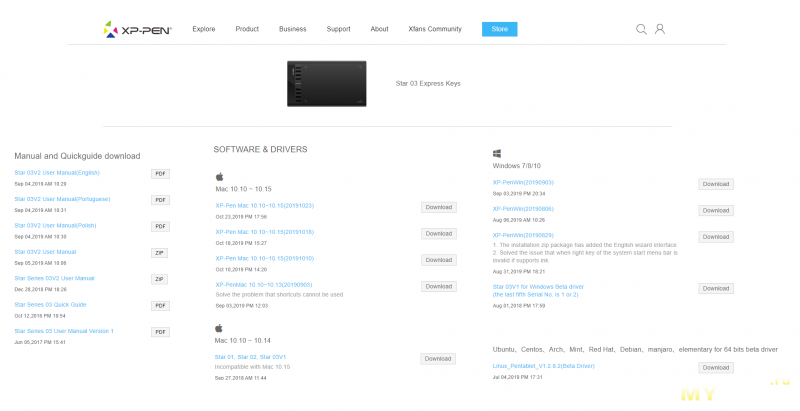
С вашего позволения кидать драйвер еще и в обзор я не стану, так как скачать его не составит труда и с оифиального сайта. Вес драйвера 20мб и ставится он чуть ли не в один клик и в одну минуту.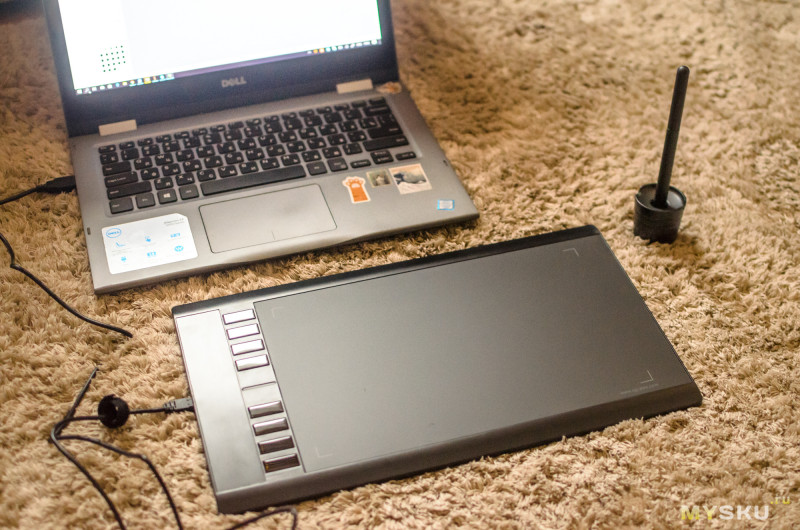
Даже в инструкции всё есть:
Выбираем путь (установки) и ждём проиллюстрированную загрузку:

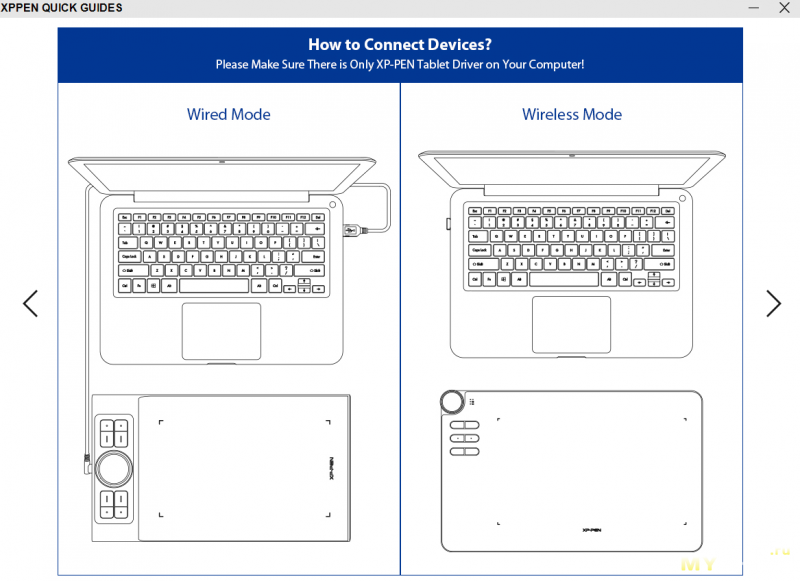
Дальше вам предлагают инструкцию по выбору устройства (а точнее типа устройства) и его подключению:
И всё. Драйвер установлен и отображается в трее иконкой с пером: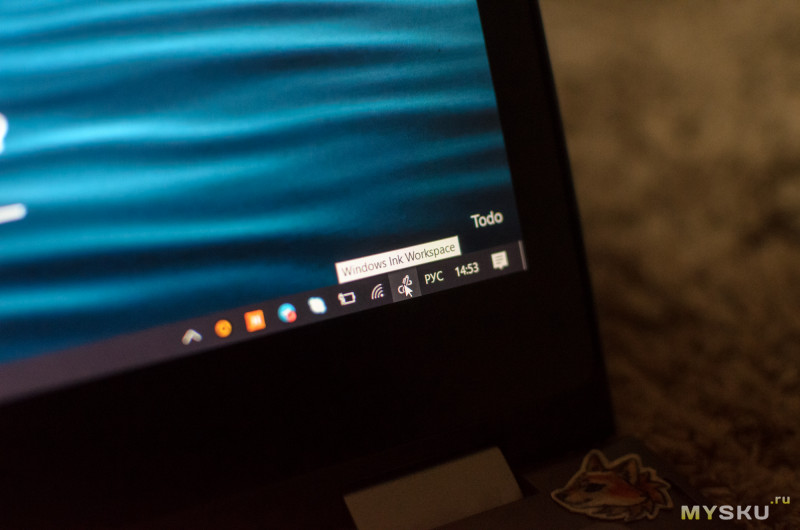
Планшет работает и без драйвера, но на каких-то системах без драйвера могут быть проблемы или просто неработающие программы, до кучи без драйвера вы не настроите кнопки, а это, в общем-то, довольно важный аспект работы с графическим планшетом.
После установки драйвера появится приложение PenTablet, где вам откроются все настройки: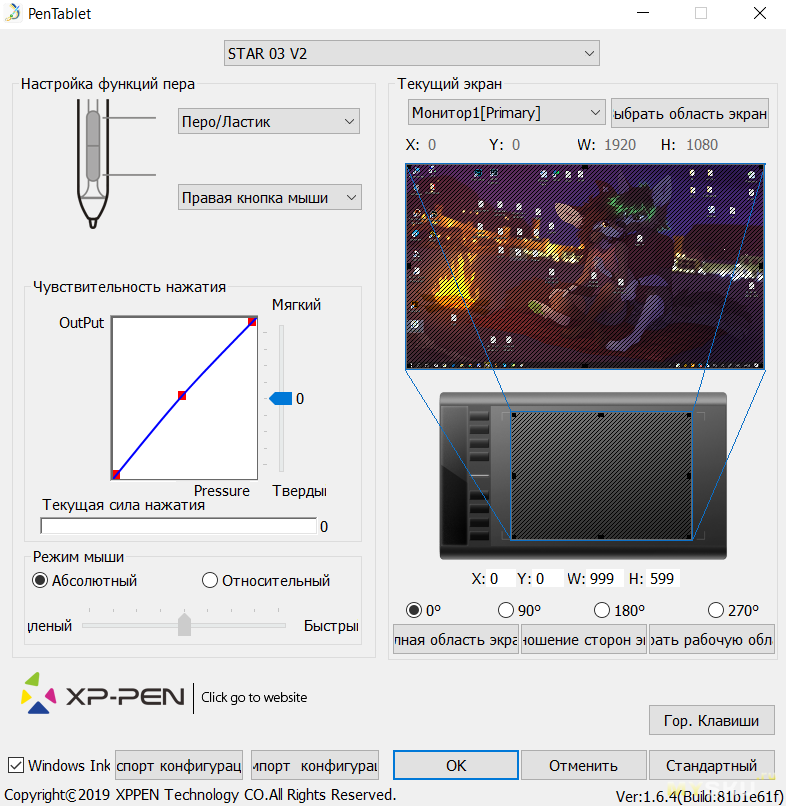
Первое наперво, настройка области отображения — обычно она выставляется автоматически и правильно. Исключением могут быть сборки с несколькими мониторами, но не думаю, что и там будут проблемы с правильным выбором зоны работы. Что еще важно сказать — драйвер позволяет выбрать зону и вручную, благодаря чему рисовать можно и на маленьком квадратике.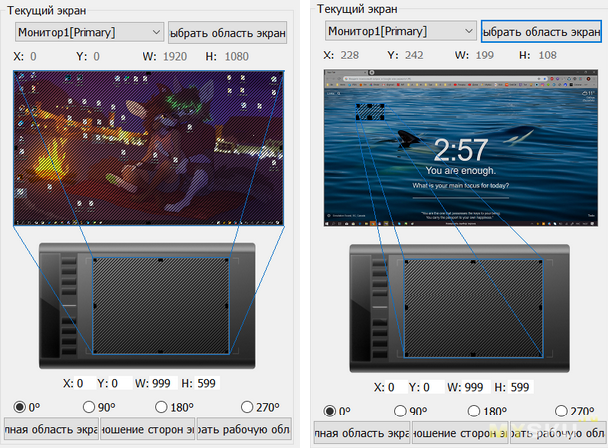
Помимо этого можно настроить чувствительность работы пера, но это уже для тех, кого не устроили изначальные установки и это становится понятно зачастую лишь после какого-то времени использования. Ещё тут можно выбрать назначения двух кнопок, которые расположены сбоку корпуса пера. Правда оптимальными настройками можно назвать то, что установлено по умолчанию: Перо/Ластик и правая кнопка мыши.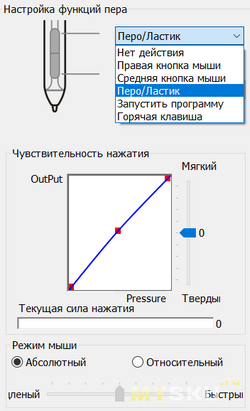
Остальные настройки на этом экране стандартные и вряд ли стоят размусоливания, кроме как настройки дополнительных клавиш. По умолчанию это: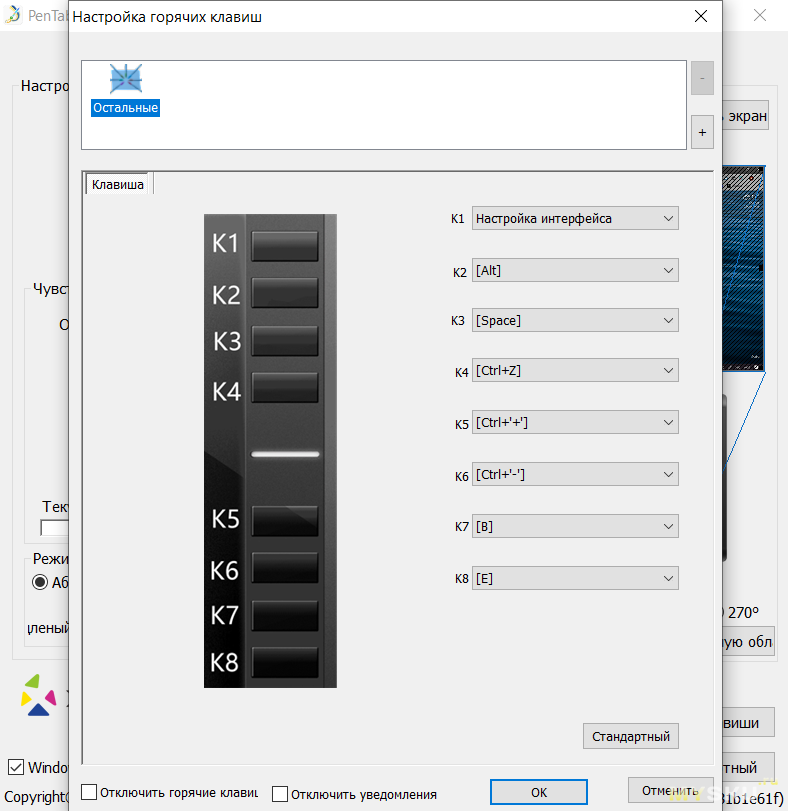
К каждой можно дать какое-то другое значение, выбрав «Горячая клавиша».
Откроется небольшое меню, где можно самому задать комбинацию, которую будет отыгрывать клавиша при нажатии.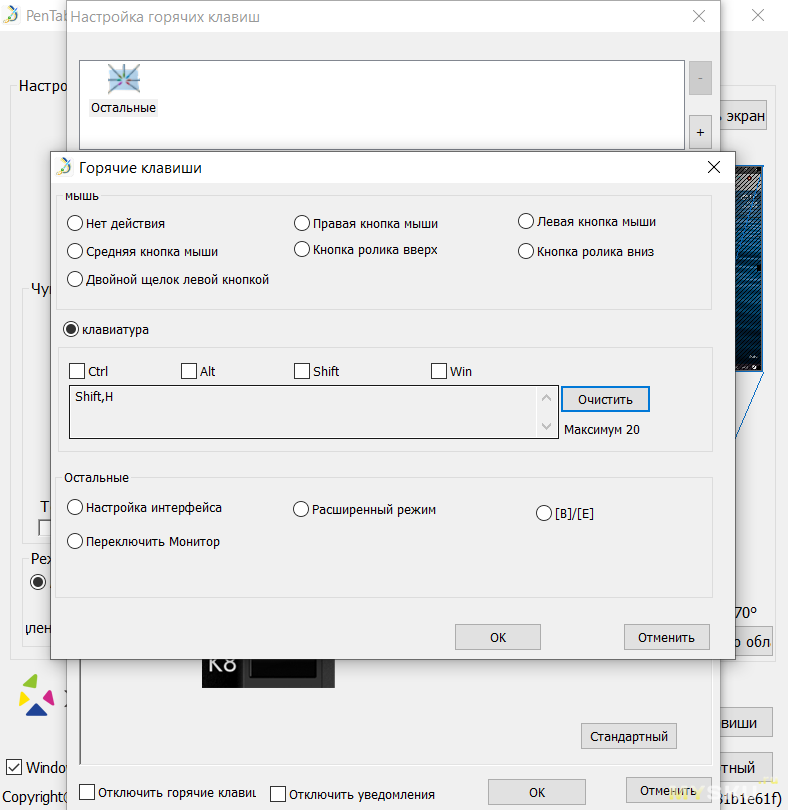
Удобно, очень удобно, особенно если вы пользуетесь шорткатами в программах.
На этом настройка планшета закончена, по факту он и так готов к работе прямо из коробки. Скорее это мы не сразу готовы 
***
Описание принципа работы и примеры рисунков.
Теперь поговорим про сам процесс работы. Во-первых, перо работает на расстоянии до 10мм от поверхности, то есть им можно рисовать в воздухе, хоть и смысла в этом никакого.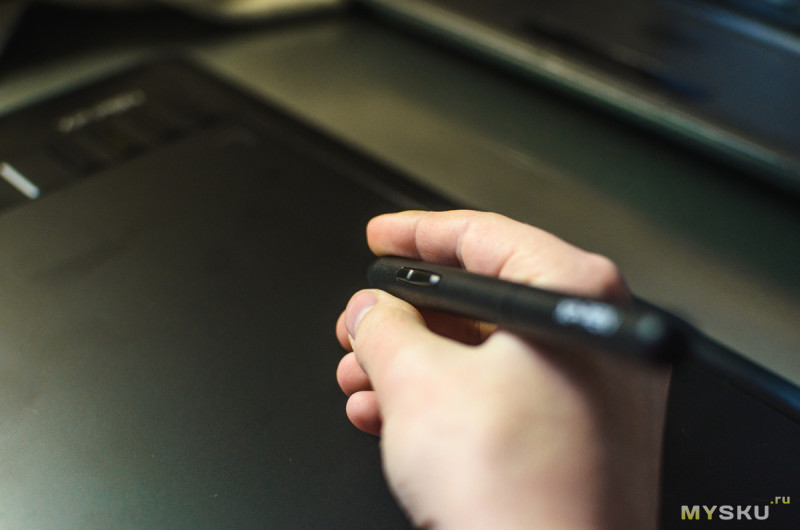
Само перо не такое удобное, как у старшей модели, да и выглядит иначе:
Но наконечники вроде как одни и те же.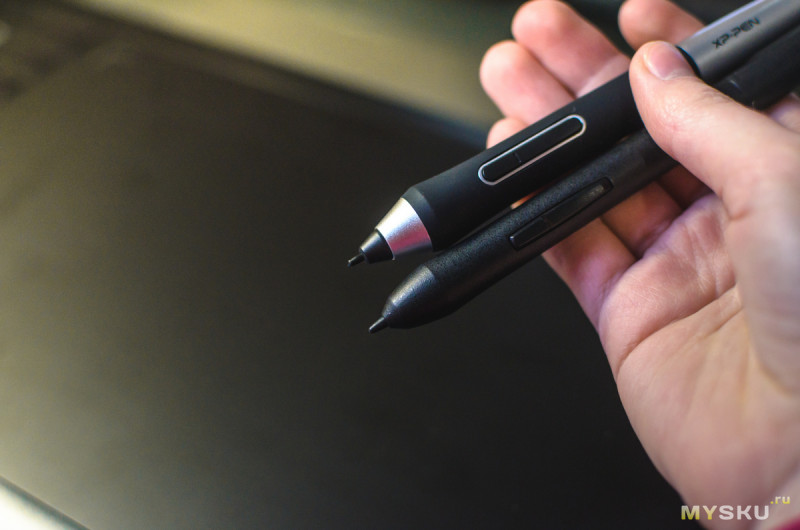
Во время работы довольно трудно не задевать кнопки, которые на нем расположены, потому надо либо привыкать, либо убирать с них действия. Второе — слишком кардинальное решение, потому лучше привыкнуть, т.к. это реально.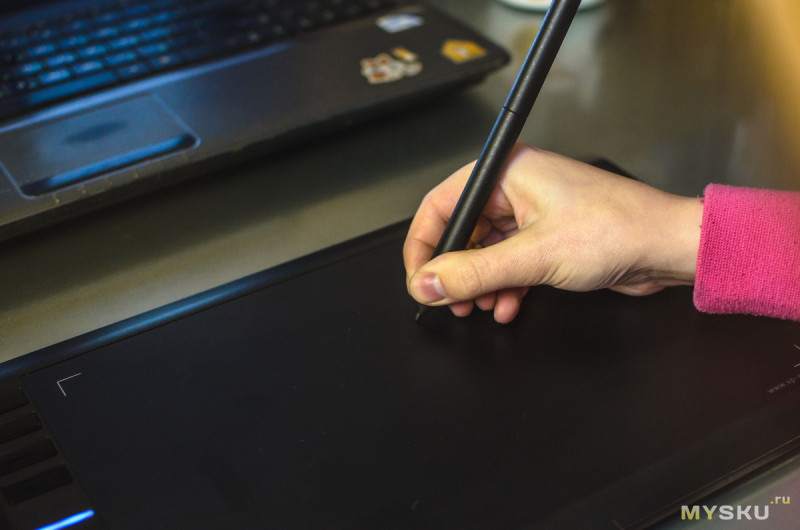
Так как сам я не такой уж и художник, то потому все фотографии в данном пункте сделаны не без помощи (а владельцем упомянутого Deco Pro M).
XP-Pen поддерживает все основные параметры рабочей поверхности: от 8192 уровней нажатия до понимания уровня наклона (до 60 градусов). Кроме кнопок, рисовать вам может мешать только отсутствие опыта, как я и говорил в начале обзора.
У некоторых других моделей, в частности у Huion’ов, можно встречать проблемы с тем, что линия нажима проходит с рывком. Другими словами — если линию вы начали вести мягко и потом увеличиваете силу, то в какой момент линия не плавно поменяет свою толщину, а рывком. Подобного у XP-Pen нет, и это замечательно, потому что такое вот уже могло бы и правда мешать рисовать.
Линия тут ведётся одновременно и мягко, хоть и с ощутимым звуком от рабочей поверхности из-за её фактуры, а с другой стороны усилий для рисования приходится прикладывать больше, чем при рисовании на старшей модели. Разное качество рабочих поверхностей все же имеет место быть.

Но проблем никаких нет. Одиночные касания планшет распознаёт хорошо.
Пора уже просто начать рисовать, а не линиями баловаться.
Процесс образования композиции запечатлен на таймлапс. Уж извините за такой маленький размер (с мобильного устройства с этим не такие проблемы), но ограничение 5мб для медиафайла накладывает свои правила, а кидать короткое видео на youtube, на который некоторым будет лень зайти (сказано не в укор), я посчитал не лучшим решением.
Темой рисунка стали две кошки в зимнем лесу.
XP-Pen Star 03 работает и в Photoshop, и в ряде других программ: SAI, CorelDraw, Medibang, Ibis, ArtRage и другие. Весь список поддерживаемых программ вот: 
Но при создании этих кошек использовался лишь SAI (первой версии, не второй).
Второй и финальный этап рисования картинки:
Вот так это выглядело на экране: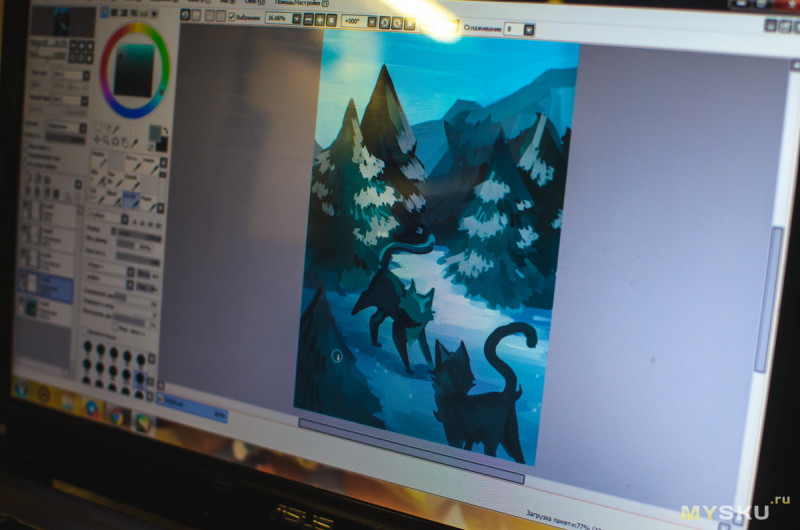
И вот что из этого получилось:
Кроме того, что перо отличалось, и тактильные ощущения от рабочей поверхности разные, никакой ощутимой разницы в том, на чем рисовать — на Deco Pro M или на Star 03 V2 — нет. Разница между двумя устройствами есть, и она ощутимая и сразу бросается в глаза — не только в мелочах. Но рисовать картинки можно на обоих, что доказывает прямое сравнение.
Если вам понравилась картинка, то посмотреть другие работы автора можно по ссылке: FenneFox (DevianArt). На данный момент последние несколько работ сделаны уже на Deco Pro M. Фактически это значит то, что такие же работы можно сделать и на обозреваемой модели.
Выводы.
Плюсы:
— большая рабочая поверхность (~10х6″)
— тонкий корпус и небольшой вес (610гр.)
— 8192 уровня нажатий.
— 8 удобных настраиваемых клавиш.
— удобный и функциональный драйвер (приложение PenTablet).
— поддержка большого количества приложений.
— цена.
Минусы:
— откровенно средненькое перо.
— не самая чувствительная рабочая поверхность.
Как бы странно это ни было, но это и все минусы, о которых могу сказать я. Второй минус это, наверное, единственное отличие рабочей поверхности от более дорогих аналогов (в пределах как минимум XP-Pen и/или китайских производителей), а первое — следствие небольшой цены. В остальном, всё что можно добавить в минусы — это дополнительные функции, которые где-то есть, а где-то нет. Например наличие механического элемента управления, кабель с изгибом, Type-C или поддержка смартфона. Тут ничего этого нет, но ведь не всем оно и нужно.
В остальном XP-Pen Star 03 V2 меня удивил. Я не думал, что устройство за 40 долларов окажется настолько неплохим и я бы даже сказал способным. На нем можно создавать, и вполне себе так сказать «сносно». Думаю, такой планшет окажется действительно прекрасным подарком для кого-то, кто хотел бы попробовать себя в качестве диджитал художника, при этом не особо потратившись.
UPD: уровня наклона в модели нет.
На сим всё, спасибо за чтение и просмотр!
Товар для написания обзора предоставлен магазином. Обзор опубликован в соответствии с п.18 Правил сайта.
Графический планшет XP-PEN Star 03
проводной, ввод — перьевой, 260×170 мм, 5080 lpi, перо — беспроводное, чувствительность — 2048 уровней, USB
подробнее

1
Код товара: 1169426
GRAPHICS
TABLET
XP-Pen STAR03 Manual
www.arpixel.co.uk
1 ARPIXEL XP-PEN STAR03 Manual | www.arpixel.co.uk
Safety Precautions
This manual uses the following symbols to ensure that the ARPIXEL tablet is being used correctly. Be sure to use and observe the Safety Precautions.
[Symbol description]
WARNING
This symbol indicates a potentially hazardous situation which, if not avoided, could result in death or serious injury.
CAUTION
This symbol indicates a potentially hazardous situation which, if not avoided, could result in minor injury or damage to the tablet or property.
[Meanings of Symbols]
Indicates a safety alert
Indicates a safety alert
Indicates a mandatory action
2 ARPIXEL XP-PEN STAR03 Manual | www.arpixel.co.uk
WARNING
Do not use this product in a control system that are sensitivity to signal interference
This product could negatively affect / cause an interference to highly sensitive electronic devices, leading them to malfunction
Turn the power off in areas where use of electronic devices is prohibited
When on board an aircraft or in any other location where use of electronic devices is prohibited, this product, if left on, could negatively affect other electronic devices. Unplug the USB connect from this product and turn the power off.
Choking hazards — Keep away from children
The pen, pen nibs, remover and pen holder are all choking hazards. The pen nib or side switch could be detached and accidentally swallowed.
CAUTION
Do not place this product on an unstable surface
Placing this product on an unstable or tilted surface or in a location exposed to excessive vibrations could cause it to fall off causing damage to the tablet.
Do not place heavy objects on top of this product
Do not step or place heavy objects on this product as this could result in damaging it.
3 ARPIXEL XP-PEN STAR03 Manual | www.arpixel.co.uk
WARNING
Avoid storing in high or low temperature places
Do not store this product in a location where the temperature can drop below
5C or gets above 40C and in places subject to extreme temperature fluctuations; storing in such places may result in damage to the product or its components
Do not disassemble
Do not or attempt to disassemble or modify this product as this could expose you to heat, fire, electric shock and injury. Disassembling this product will also risk damaging the product and waive your rights to any warranty claim.
Do not use alcohol for cleaning
Never use alcohol, thinner, benzene or other mineral solvents as they could discolour or cause deterioration to the product.
Do not expose to water
Do not place glasses or vases filled with water or other liquid near this product.
Exposure to water or liquid could damage the product
4 ARPIXEL XP-PEN STAR03 Manual | www.arpixel.co.uk
CAUTION
Do not place metal objects on this product during its operation
Placing metal objects on this product during its operation could cause it to malfunction or damage it
Do not hit the pen against hard objects
Hitting the pen against hard object could damage it
Do not handle the pen with soiled hands
The pen is a high precision instrument. Handling it with soiled hands or using it in locations exposed to dust or strong orders may cause entry of foreign matter which will cause the pen to malfunction.
Limitation of Liability
•
ARPIXEL shall in no event be liable for damages resulting from fires or earthquakes, those caused by third parties and those arising from user misuse, abuse or neglect.
•
ARPIXEL shall in no event be liable for consequential loss – including but not limited to loss of business income, interruption of business activities, corruption or loss of data – that arise out of the user’s use or failure to use this product.
•
ARPIXEL shall in no event be liable for damages resulting from uses not documented in this manual
•
ARPIXEL shall in no event be liable for damages from malfunction caused by connection to other devices or use of third party software
5 ARPIXEL XP-PEN STAR03 Manual | www.arpixel.co.uk
Contents
I.
II.
III.
IV.
V.
VI.
Full view of the product………………………………………
Installation & accessories…………………………………..
Driver Installation………………………………………………
Setting up on Windows………………………………………
Setting up on Mac………………… ………………………….
FAQ & Support…………………….. …………………………
7
9
13
16
20
39
6 ARPIXEL XP-PEN STAR03 Manual | www.arpixel.co.uk
7 ARPIXEL XP-PEN STAR03 Manual | www.arpixel.co.uk
Full view of the product
The drawing is for illustration purposes and does not accurately reflect the size and features of the product.
Note:
Under normal working condition, when the pen is above (but not in contact with) the work area and is within the detection range, the indicator light will be flickering; when the pen is away from detection range, the indicator light will remain on
8 ARPIXEL XP-PEN STAR03 Manual | www.arpixel.co.uk
9 ARPIXEL XP-PEN STAR03 Manual | www.arpixel.co.uk
1. Pen
Please refer to the illustration below for an overview of the accessories
10 ARPIXEL XP-PEN STAR03 Manual | www.arpixel.co.uk
2. Changing pen nib
11 ARPIXEL XP-PEN STAR03 Manual | www.arpixel.co.uk
3. Waking the pen
If the pen tablet is not used for a while, it will enter into sleep mode to save power.
Please tab the tip of the pen on the tablet work area to wake it from its sleeping mode
4. Double clicking
The tip of the pen functions as the left mouse click, if you tab the tip of the pen twice on the tablet work area, you will carry out a double click command (as if you would with a mouse)
5. Drag and scroll
You can also drag and scroll like a mouse, keep the tip of the pen in contact with the tablet work area as you drag the pen across the tablet to scroll or drag
6. Placing the pen
When you finish using the product, you should always keep the pen in a pen holder to keep it safe and avoid losing it.
You can rest the pen on the pen holder horizontally or vertically.
12 ARPIXEL XP-PEN STAR03 Manual | www.arpixel.co.uk
13 ARPIXEL XP-PEN STAR03 Manual | www.arpixel.co.uk
Installing the driver
Follow &check these steps before installing
Advised – making sure that all hidden files are removed
Windows: Go to Device Manager and click “Show Hidden Devices” and remove other tablets and all non-used/unused devices you have on your computer
Mac: Delete folder(s) associated to the developer of the driver (which you uninstalled) in Application Support and System Library Folder
Remove Wacom hidden files — http://www.Arpixel.co.uk/support/faq#toggle-id-22
(kb.22)
2. Close down any programmes you don’t need running on your computer before starting installation
3. Disable any anti-virus protection program such as Firewall
4. Make sure that you are installing the driver as the Administrator
5. Connect the tablet to your computer before installation.
6. Insert the disk into your CD drive and follow the on screen instructions; or go to www.arpixel.co.uk/03-dm for the latest driver (Installation Readme on website).
Insert the disk into your CD drive and follow the on screen instructions:
Windows: If the disk does not run automatically, please double click the disk on My
Computer and run the “Setup.exe” file
Mac: Open the CD content and run
under Mac Driver contents for installation
Note: If you do not have a CD drive, you can download the driver online: www.arpixel.co.uk/support
14 ARPIXEL XP-PEN STAR03 Manual | www.arpixel.co.uk
After installation, the icon should show on your task bar, it means that the driver is installed successfully and the tablet can be used
Note:
If the sign doesn’t show after you have installed the driver, try unplugging and replugging the USB and if no icon prompts, restart your computer.
If the icon still doesn’t show on your computer, you will need to install the driver again.
Remove any files that were installed during the initial installation.
15 ARPIXEL XP-PEN STAR03 Manual | www.arpixel.co.uk
16 ARPIXEL XP-PEN STAR03 Manual | www.arpixel.co.uk
1. Tablet settings
1. Opening tablet settings
The first step to customize tablet settings and/or diagnose problems is to open up the tablet settings. There are two ways to open it:
(1) Click on the task bar
icon to open up tablet settings, this icon should be located on your
(2) Startup manually
A. If the PC is installed with Windows XP:
Start > Settings > Control Panel > Tablet Setting
B. If the PC installed with Windows Vista/7:
Start > Control Panel > Tablet Setting
C. If the PC is installed with Windows 8:
Fix the cursor in the left corner of the screen, right click > Control panel > Tablet settings
2. Tablet settings, configuration & options
Below is a list of tabs you have on our tablet settings:
A. Info
B. Monitor Settings
C. Buttons
D. Express Keys
E. Scope
F. Pressure Sensitivity
17 ARPIXEL XP-PEN STAR03 Manual | www.arpixel.co.uk
A. Info
1. Control Panel Version
Displays basic information about the tablet and driver version
2. Support tablet PC
Tick ”Support Tablet PC Feature” will enable the tablet to support tablet PC ink function contained in Windows system. (We recommend you keep this unticked)
Note:
1. Tablet PC ink includes Windows Journal, StikyNot, Tab Tip of Tablet PC, Microsoft Office ink and other software supporting Tablet PC ink contained within the system
2. If you don’t want to use Tablet PC ink function, it is recommend that you uncheck the option.
18 ARPIXEL XP-PEN STAR03 Manual | www.arpixel.co.uk
3. Display the icon in taskbar
Tick this and then icon will be displayed on your taskbar/system tray
B. Monitor Setting
Monitor mapping option makes it possible for you to correspond to two screens or a single one.
Exhibit 1 – Single monitor mapping
The above shows mapping option for 1 monitor. When the computer is set up for two screens, the tablet corresponds to two screens; if you move your pen/cursor from left to write, the cursor on the screen should move from 1 monitor to another.
19 ARPIXEL XP-PEN STAR03 Manual | www.arpixel.co.uk
Exhibit 2 – Monitor mapping for 2 screens
Exhibit 2 shows that the working area of the tablet corresponding to screen 1: moving pen on the tablet can only control the cursor to move on screen 1.
20 ARPIXEL XP-PEN STAR03 Manual | www.arpixel.co.uk
Exhibit 3 – Work area of the tablet corresponds to screen 1
Note:
You can customize the location of the screen to determine which area of the tablet is corresponding to which part of the screen
21 ARPIXEL XP-PEN STAR03 Manual | www.arpixel.co.uk
C. Buttons
Exhibit 4 – Setting up pen buttons
1. Button Name
Pick which button you wish to customize
2. Mouse Command
Chose the (mouse) function you want to execute when pressing the button
Note:
1. The default function of the pen tip is the left mouse key.
2. All functions can be customised.
22 ARPIXEL XP-PEN STAR03 Manual | www.arpixel.co.uk
3. Double Click Speed
You can change the speed of the double click by moving the pointer on the bar towards slow or fast to decrease or increase the speed it takes to double click.
Note:
Modifying this will not change only change the double click speed of the pen, it also changes the speed of your mouse
4. Eraser Function
When you have changed a button to “Eraser” key, the key can be used to switch between pen and eraser function. Lift your pen from the tablet (so that the pen tip is not in contact with the work area) and press the button to switch from pen to eraser or vice versa; press the button again to switch back.
When you have switched, a text (“Eraser Mode” or “Pen Mode”) should appear on your screen to indicate what mode you are on.
Notes:
1. Changing eraser mode to pen mode doesn’t mean you are changing the brush
2. The eraser can be used in most software, but not all of them may display a text when switching, please refer to the icon on your screen
23 ARPIXEL XP-PEN STAR03 Manual | www.arpixel.co.uk
D. Express Keys
When you press the shortcut key next to the work area of the tablet, all functions of the shortcut key will be executed. Setting up of hard shortcut key is similar to that of soft shortcut key.
Exhibit 5 – Defining the function of express keys
Setting up express keys
Click the express key button that you want to set up on the screen and you can see the control panel for hard shortcut key configuration.
24 ARPIXEL XP-PEN STAR03 Manual | www.arpixel.co.uk
E. Scope
1. Work Area
Size and position of the working area in the tablet can be customized. B Area Exhibit 6
(below) shows the actual work area. If you want to change the size of the work area, you can drag the squares surrounding the edge of the work area to resize. If you want to reposition, you can click and drag the blue area indicated below.
Exhibit 6 – Adjusting work area
2. Working Scope
When you adjust the working area, dimension of the working area will change accordingly. You can also input the dimensions to setup the size of the working area directly.
3. Deviation of the Working Scope
Deviation of the working scope means the left upper corner of the work area moving to the actual work area. You can also input the dimensions to decide the movement of the working area.
25 ARPIXEL XP-PEN STAR03 Manual | www.arpixel.co.uk
4. Full Area
Click the “Full Area” to set work area to full
5. Screen Ratio
Click “Screen Ratio” button to automatically adjust the work area of the tablet by the size for the computer screen. Setting up this way can avoid distortion.
6. Reserve Edges
Click the “Reserve Edges” button and the working area of the tablet will automatically leave a space around the edges of the work area
7. Location of the Work Area
Choosing “Right” or “Left” will change the physical working direction of the tablet to suit your habit.
26 ARPIXEL XP-PEN STAR03 Manual | www.arpixel.co.uk
F. Pressure Sensitivity
When you press the pen on the tablet work area, the tablet should detect the pressure from the pen and transfer the pressure value to the computer programme
Exhibit 7 – Pressure sensitivity test
1. Pressure Sensitivity Test
Use the pen to draw on within the Pressure Test Area; apply different pressure on the pen onto the tablet, the pressure should be reflected by the line thickness
2. Clear Button
Press the “Clear” button would clear what you drew on the Pressure Test Area
27 ARPIXEL XP-PEN STAR03 Manual | www.arpixel.co.uk
3. Colour Test
You can also pick colour of the lines you draw on the test area
4. Pressure Value
The more pressure you apply, the greater the value
5. Sensitivity
Heavier sensitivity requires the greater amount of pressure to be applied from the pen to the tablet for the pressure to be detected
G. Uninstall Driver
You can uninstall using the following methods
1. Run “Start” > “All Programme” > “ARPIXEL” > “Uninstall” and follow onscreen instructions
2. Run “Control Panel” > “Uninstall a programme” > Find “Pen Tablet” or “ARPIXEL” or
“Driver v5.02” > Choose “Uninstall/Change” and follow onscreen instructions
28 ARPIXEL XP-PEN STAR03 Manual | www.arpixel.co.uk
29 ARPIXEL XP-PEN STAR03 Manual | www.arpixel.co.uk
Open the Control Panel
Open “Finder” > “Applications” > “Pen Tablet Settings” > Open “Pen Tablet Settings” programme
30 ARPIXEL XP-PEN STAR03 Manual | www.arpixel.co.uk
A. Information Page
1. Control Panel Version
Displays basic information about the tablet and driver version
2. Support tablet PC
Tick ”Support Tablet PC Feature” will enable the tablet to support tablet PC ink function contained in Windows system.
31 ARPIXEL XP-PEN STAR03 Manual | www.arpixel.co.uk
B. Button Page
32 ARPIXEL XP-PEN STAR03 Manual | www.arpixel.co.uk
C. Express Keys
When you press the shortcut key next to the work area of the tablet, all functions of the shortcut key will be executed. Setting up of hard shortcut key is similar to that of soft shortcut key.
Setting up express keys
Click the express key button that you want to set up on the screen and you can see the control panel for hard shortcut key configuration.
33 ARPIXEL XP-PEN STAR03 Manual | www.arpixel.co.uk
D. Scope
1. Work Area
Size and position of the working area in the tablet can be customized. B Area Exhibit 6
(below) shows the actual work area. If you want to change the size of the work area, you can drag the squares surrounding the edge of the work area to resize. If you want to reposition, you can click and drag the blue area indicated below.
2. Working Scope
When you adjust the working area, dimension of the working area will change accordingly. You can also input the dimensions to setup the size of the working area directly.
3. Deviation of the Working Scope
Deviation of the working scope means the left upper corner of the work area moving to the actual work area. You can also input the dimensions to decide the movement of the working area.
34 ARPIXEL XP-PEN STAR03 Manual | www.arpixel.co.uk
4. Full Area
Click the “Full Area” to set work area to full
5. Screen Ratio
Click “Screen Ratio” button to automatically adjust the work area of the tablet by the size for the computer screen. Setting up this way can avoid distortion.
6. Reserve Edges
Click the “Reserve Edges” button and the working area of the tablet will automatically leave a space around the edges of the work area
7. Location of the Work Area
Choosing “Right” or “Left” will change the physical working direction of the tablet to suit your habit.
35 ARPIXEL XP-PEN STAR03 Manual | www.arpixel.co.uk
E. Pressure
When you press the pen on the tablet work area, the tablet should detect the pressure from the pen and transfer the pressure value to the computer programme
1. Pressure Sensitivity Test
Use the pen to draw on within the Pressure Test Area; apply different pressure on the pen onto the tablet, the pressure should be reflected by the line thickness
2. Clear Button
Press the “Clear” button would clear what you drew on the Pressure Test Area
3. Colour Test
You can also pick colour of the lines you draw on the test area
4. Pressure Value
The more pressure you apply, the greater the value
5. Sensitivity
Heavier sensitivity requires the greater amount of pressure to be applied from the pen to the tablet for the pressure to be detected
36 ARPIXEL XP-PEN STAR03 Manual | www.arpixel.co.uk
Uninstalling Mac Driver
For Mac OS
Open “Finder” > “Applications” > “Pen Tablet Setting” > Uninstall “PenTablet Driver”
Note:
If you wish to install the driver again after you uninstalled it, you will need to restart your computer first.
37 ARPIXEL XP-PEN STAR03 Manual | www.arpixel.co.uk
Note:
If you are unable to uninstall successfully or completely, please open the “Finder”, find
[application]—[penTablet Setting], then directly delete the file > Restart the computer.
38 ARPIXEL XP-PEN STAR03 Manual | www.arpixel.co.uk
39 ARPIXEL XP-PEN STAR03 Manual | www.arpixel.co.uk
FAQ
IMPORTANT: For a full and updated list of FAQ, please visit: www.arpixel.co.uk/support/faq
1. How do I know if the tablet is working?
If you can use the pen like a mouse (the cursor is tracking your pen movement on the tablet), then it is working; if its not working, check your pen’s battery
2. Pressure sensitivity is not working
You will need to:
•
Go to your tablet settings/options
•
Click on the “Pressure Sensitivity” tab
•
Check if pressure sensitivity can be detected on there
If pressure sensitivity is working on tablet setting/option, that means the tablet is not faulty, you will need to contact the support team of the software you are using. You can also pop us an email alerting us of any potential compatibility issue (Also please go to
FAQ 3.)
If the pressure sensitivity is not working on tablet setting/option, you will need to reinstall your driver
3. Pressure sensitivity not working for specific software:
•
•
Run the tablet software as Administrator
•
Update your drawing software to the latest version if possible
•
Run your drawing software as Administrator
•
Close down any programmes you don’t need running on your computer
•
It is optimal to have only 1 drawing software running at a time
•
Unplug your mouse
Check that other graphics tablet driver is removed completely (How?
Click Here )
40 ARPIXEL XP-PEN STAR03 Manual | www.arpixel.co.uk
SUPPORT
Website: www.arpixel.co.uk
Email: [email protected]
Contact: www.arpixel.co.uk/contact
41 ARPIXEL XP-PEN STAR03 Manual | www.arpixel.co.uk
130x107x2 мм
178,2x125x8 мм
190x162x8 мм
210,5×159,8×12,9 мм
260,2х162,2х9,3 мм
315x187x8,8 мм
315×222,9×12,5 мм
319,5×209,5×10 мм
320x210x10 мм
350,8х199,5х16,5 мм (высота рабочей поверхности 7 мм)
351х217х8 мм
354х218,8х8 мм
354х229х9,9 мм
362х210х8 мм
399,7х227х16,5 мм
(высота рабочей поверхности 7 мм)
400х227х16,5 (высота рабочей поверхности 7 мм)