-
Contents
-
Table of Contents
-
Bookmarks
Quick Links
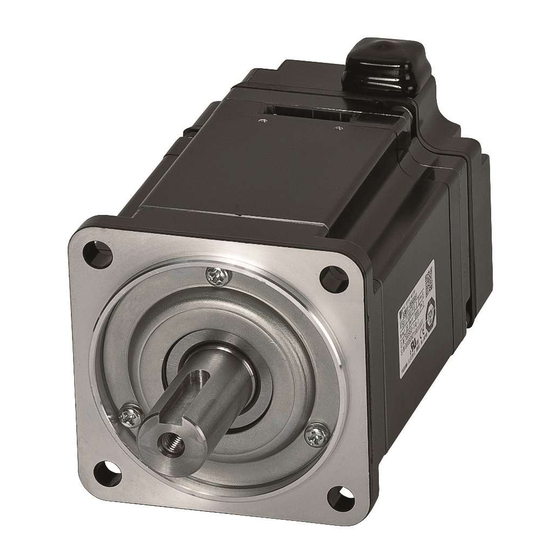
AC Servo Drives
V
—
Series
USER’S MANUAL
Setup
Rotational Motor
SGDV SERVOPACK
SGMJV/SGMAV/SGMPS/SGMGV/SGMSV/SGMCS Servomotors
MANUAL NO. SIEP S800000 43G
Overview of Setup
Installation
Wiring and Connection
Safety Function
Trial Operation
(Checking Servomotor Operation)
1
2
3
4
5
Related Manuals for YASKAWA SGDV
Summary of Contents for YASKAWA SGDV
-
Page 1
AC Servo Drives Series USER’S MANUAL Setup Rotational Motor SGDV SERVOPACK SGMJV/SGMAV/SGMPS/SGMGV/SGMSV/SGMCS Servomotors Overview of Setup Installation Wiring and Connection Safety Function Trial Operation (Checking Servomotor Operation) MANUAL NO. SIEP S800000 43G… -
Page 2
All rights reserved. No part of this publication may be reproduced, stored in a retrieval system, or transmitted, in any form, or by any means, mechanical, electronic, photo- copying, recording, or otherwise, without the prior written permission of Yaskawa. No patent liability is assumed with respect to the use of the information contained herein. -
Page 3: About This Manual
Term Meaning Σ-V Series SGMJV, SGMAV, SGMPS, SGMGV, SGMSV, or Servomotor SGMCS (Direct Drive) servomotor Σ-V Series SGDV SERVOPACK SERVOPACK A set including a servomotor and SERVOPACK (i.e., a servo Servo Drive amplifier) A servo control system that includes the combination of a servo…
-
Page 4
Manuals Related to the Σ-V Series Refer to the following manuals as required. Selecting Trial Ratings Models Panels Operation Maintenance System Trial Name Specifi- Design Operation Peripheral Wiring Servo Inspection cations Devices Adjustment Σ-V Series Product Catalog (KAEP S800000 42) Σ-V Series User’s Manual Design and… -
Page 5
User’s Manual EtherCAT (CoE) Network Module (SIEP C720829 04) AC SERVOMOTOR Safety Precautions (TOBP C230200 00) Σ-V Series AC SERVOPACK SGDV Safety Precautions (TOBP C710800 10) Σ-V Series Option Module Safety Precautions (TOBP C720829 00) Σ-V Series Command Option Module… -
Page 6
(cont’d) Selecting Trial Ratings Models Panels Operation Maintenance System Trial Name Specifi- Design Operation Peripheral Wiring Servo Inspection cations Devices Adjustment Σ-V Series Indexer Module Installation Guide (TOBP C720829 02) Σ-V Series Feedback Option Module Installation Guide (TOBP C720829 03) Σ… -
Page 7
Safety Information The following conventions are used to indicate precautions in this manual. Failure to heed precautions provided in this manual can result in serious or possibly even fatal injury or damage to the products or to related equipment and systems. Indicates precautions that, if not heeded, could WARNING possibly result in loss of life or serious injury. -
Page 8: Safety Precautions
Safety Precautions These safety precautions are very important. Read them before performing any pro- cedures such as checking products on delivery, storage and transportation, installa- tion, wiring, operation and inspection, or disposal. Be sure to always observe these precautions thoroughly. WARNING •…
-
Page 9
WARNING • Provide an appropriate braking device on the machine side to ensure safety. The holding brake on a servomotor with a brake is not a braking device for ensuring safety. Failure to observe this warning may result in injury. •… -
Page 10
Storage and Transportation (cont’d) CAUTION • If disinfectants or insecticides must be used to treat packing materials such as wooden frames, pallets, or plywood, the packing materials must be treated before the product is packaged, and methods other than fumigation must be used. -
Page 11
Wiring CAUTION • Be sure to wire correctly and securely. Failure to observe this caution may result in motor overrun, injury, or malfunction. • Do not connect a commercial power supply to the U, V, or W terminals for the servomotor connection. Failure to observe this caution may result in injury or fire. -
Page 12
Wiring (cont’d) CAUTION • Do not reverse the polarity of the battery when connecting it. Failure to observe this caution may result in damage to the battery, the SERVO- PACK, or cause an explosion. • Wiring or inspection must be performed by a technical expert. •… -
Page 13
Operation (cont’d) CAUTION • When using JOG operations (Fn002) origin search operations (Fn003), or EasyFFT operations (Fn206), the dynamic brake function does not work for reverse overtravel or forward overtravel. Take necessary precautions. Failure to observe this caution may result in damage to the product. •… -
Page 14
• The drawings presented in this manual are typical examples and may not match the product you received. • If the manual must be ordered due to loss or damage, inform your nearest Yaskawa representative or one of the offices listed on the back of this manual. -
Page 15: Warranty
Limitations of Liability 1. Yaskawa shall in no event be responsible for any damage or loss of opportunity to the customer that arises due to failure of the delivered product. 2. Yaskawa shall not be responsible for any programs (including parameter settings) or the results of program execution of the programs provided by the user or by a third party for use with programmable Yaskawa products.
-
Page 16
Yaskawa product is used in combination with any other products. 2. The customer must confirm that the Yaskawa product is suitable for the systems, machines, and equipment used by the customer. 3. Consult with Yaskawa to determine whether use in the following applications is acceptable. -
Page 17: Applicable Standards
∗ Underwriters Laboratories Inc. European Standards EMC Directive Low Voltage Safety Model Directive Standards EN55011 EN954-1 EN50178 EN61800-3 SERVOPACK • SGDV group 1 class A, IEC61508- EN61800-5-1 EN61000-6-2 EN61800-3 1 to 4 • SGMJV IEC60034-1 • SGMAV EN55011 IEC60034-5 EN61800-3 Servomotor •…
-
Page 18: Table Of Contents
3.2 System Configuration Diagram ……… . 3-3 3.2.1 Connecting to SGDV- SERVOPACK (Analog Pulse Model) .
-
Page 19
4 Safety Function ……… . 4-1 4.1 Outline . -
Page 20: Overview Of Setup
Overview of Setup This chapter describes how to set up the Σ-V series of servo drives.
-
Page 21
1 Overview of Setup This chapter describes the flow of the setup procedure from installation until a JOG operation. A panel operator, a digital operator, and SigmaWin+, (which is an engi- neering tool that can be used with a PC) are available to set up a servo drive. The panel operator is included with the SERVOPACK of analog pulse models, and the digital operator and SigmaWin+ are sold separately. -
Page 22: Installation
2.4 EMC Installation Conditions ……2-13 2.4.1 SGDV- (Analog Pulse Model) ….2-13 2.4.2 SGDV-…
-
Page 23: Installation Environment And Applicable Standards
2 Installation 2.1.1 Servomotor Installation Environment Installation Environment and Applicable Standards The installation environment and the applicable standards for servomotors and SERVOPACKs are described in this section. 2.1.1 Servomotor Installation Environment Ambient temperature: 0 to 40°C Ambient humidity: 80% RH or less (with no condensation) Altitude: 1, 000 m or less Vibration resistance The servomotor will withstand the following…
-
Page 24: Servopack Installation Environment
2.1 Installation Environment and Applicable Standards 2.1.2 SERVOPACK Installation Environment Surrounding air temperature: 0 to 55°C Ambient humidity: 90% RH or less (with no condensation) Altitude: 1,000 m or less Vibration resistance: 4.9 m/s Shock resistance: 19.6 m/s Installation Precautions •…
-
Page 25: Installation Conditions For Applicable Standards
Conditions Protection class: IP10 UL Standard and Low Voltage Directive: Σ Satisfy the conditions outlined in -V Series AC SERVOPACK SGDV Safety Installation Precautions (TOBP C710800 10) Conditions EMC Directive: Certification is required after installation in the user’s machine under the…
-
Page 26: Servomotor Installation
2.2 Servomotor Installation Servomotor Installation 2.2.1 Orientation Servomotors can be installed either horizontally or vertically. Servomotors with gears can be installed only horizontally, depending on gear lubrica- Σ tion conditions. Refer to -V Series Product Catalog (KAEP S800000 42) for details. 2.2.2 Installation Standards The motor rated specifications (rated output, rated torque, and rated speed) are the…
-
Page 27: Connecting Servomotor To Machine
2 Installation 2.2.3 Connecting Servomotor to Machine 2.2.3 Connecting Servomotor to Machine The end of the motor shaft is coated with anticorrosive paint. Thoroughly remove the paint prior to installation. Align the shaft of the servomotor with the shaft of the machine, and then couple the shafts.
-
Page 28: Protective Structure
2.2 Servomotor Installation 2.2.4 Protective Structure The servomotor protective structure is described below. Model Without Gears With Gears SGMJV, SGMAV IP65 IP55 IP55 SGMPS IP55 IP67 (Optional) − SGMGV IP67 IP67 − SGMSV (SGMSV-70 servomotor only: IP22) IP42 − SGMCS-02 to -35 (expect for gaps on the rotating section of the shaft) −…
-
Page 29: Other Precautions
2 Installation 2.2.5 Other Precautions 2.2.5 Other Precautions Handling Oil and Water If the servomotor is used in a location that is subject to water or oil mist, use a servo- motor with an oil seal to seal the through shaft section. Precautions on using a servo- motor with an oil seal are described below.
-
Page 30: Servopack Installation
2.3 SERVOPACK Installation SERVOPACK Installation 2.3.1 Orientation The SERVOPACK is available in models that are base-mounted, models that are rack-mounted, and models that are duct-ventilated. In any case, mount the SERVO- PACK with a vertical orientation. Firmly secure the SERVOPACK to the mounting surface, using either two or four mounting holes depending on the SERVOPACK capacity.
-
Page 31
2 Installation 2.3.1 Orientation • Duct-ventilated Duct Air Flow 2-10… -
Page 32: Installation Standards
Leave sufficient space on each side and at the top and the bottom of each SERVO- PACK. The width on each side varies in accordance with the models of the SERVO- PACKS used. Side SERVOPACK Model Top and bottom SGDV- Left Right R70F, R90F, 2R1F, 1 mm or more R70A, R90A, 1R6A, 2R8A…
-
Page 33
The conditions inside the control panel should be the same as the environmental con- ditions of the SERVOPACK. Refer to 2.1.2 SERVOPACK Installation Environment. The SGDV- B SERVOPACKs have an Installation Environment monitor (Un022). With this monitor, operation conditions in the installation environment can be observed and measured. -
Page 34: Emc Installation Conditions
SERVOPACK models such as the rack-mounted types as well. This section describes the EMC installation conditions satisfied in test conditions prepared by Yaskawa. The actual EMC level may differ depending on the actual sys- tem’s configuration, wiring, and other conditions. However, because this product is built-in, check that the following conditions are still met after being installed in the user’s product.
-
Page 35
2 Installation 2.4.1 SGDV- (Analog Pulse Model) Three-phase 200 V • SGDV- A01B ( = R70, R90, 1R6, 2R8) Shield box Brake Power Supply SERVOPACK Brake U, V, W Power supply: Noise L1, L2, L3 Three-phase filter 200 VAC Servomotor… -
Page 36
2.4 EMC Installation Conditions Three-phase 200 V • SGDV- A01A ( = R70, R90, 1R6, 2R8, 3R8, 5R5, 7R6) Shield box Brake Power Supply SERVOPACK Brake U, V, W Power supply: Noise L1, L2, L3 Three-phase filter 200 VAC Servomotor… -
Page 37
2 Installation 2.4.1 SGDV- (Analog Pulse Model) Three-phase 200 V • SGDV- A01A ( = 120) Shield box Brake Power Supply SERVOPACK Brake U, V, W Power supply: Noise L1, L2, L3 Three-phase filter 200 VAC Servomotor One turn L1C, L2C… -
Page 38
2.4 EMC Installation Conditions Three-phase 200 V • SGDV- A01A ( = 180, 200, 330) Shield box Brake Power Supply SERVOPACK Brake U, V, W Power supply: Noise L1, L2, L3 Three-phase filter 200 VAC Servomotor One turn L1C, L2C… -
Page 39
2 Installation 2.4.1 SGDV- (Analog Pulse Model) Three-phase 200 V • SGDV- A01A ( = 470, 550, 590, 780) Shield box Cooling fan Brake Power Supply SERVOPACK Brake U, V, W Power supply: Noise L1, L2, L3 Three-phase filter 200 VAC… -
Page 40
2.4 EMC Installation Conditions Three-phase 400 V • SGDV- D01A ( = 1R9, 3R5, 5R4, 8R4, 120, 170) Shield box Power supply: Noise Brake Power Single-phase Supply filter* 200 VAC Surge SERVOPACK absorber Control Brake power U, V, W 24 V, 0 V… -
Page 41
2 Installation 2.4.1 SGDV- (Analog Pulse Model) Three-phase 400 V • SGDV- D01A ( = 210, 260, 280, 370) Shield box Power supply: Noise Brake Power Single-phase Supply filter* 200 VAC Surge SERVOPACK Control absorber Brake power U, V, W… -
Page 42: Sgdv- (M-Ii Model)
2.4 EMC Installation Conditions 2.4.2 SGDV- (M-II Model) Single-phase 100 V • SGDV- F11A ( = R70, R90, 2R1, 2R8) Shield box Brake Power Supply One turn SERVOPACK Brake U, V, W Power supply: Noise L1, L2 Single-phase filter 100 VAC…
-
Page 43
2 Installation 2.4.2 SGDV- (M-II Model) Three-phase 200 V • SGDV- A11B ( = R70, R90, 1R6, 2R8) Shield box Brake Power Supply SERVOPACK Brake U, V, W Power supply: Noise L1, L2, L3 Three-phase filter 200 VAC Servomotor Surge… -
Page 44
2.4 EMC Installation Conditions Three-phase 200 V • SGDV- A11A ( = R70, R90, 1R6, 2R8, 3R8, 5R5, 7R6) Shield box Brake Power Supply SERVOPACK Brake U, V, W Power supply: Noise L1, L2, L3 Three-phase filter 200 VAC Servomotor… -
Page 45
2 Installation 2.4.2 SGDV- (M-II Model) Three-phase 200 V • SGDV- A11A ( = 120) Shield box Brake Power Supply SERVOPACK Brake U, V, W Power supply: Noise L1, L2, L3 Three-phase filter 200 VAC Servomotor One turn Surge L1C, L2C… -
Page 46
2.4 EMC Installation Conditions Three-phase 200 V • SGDV- A11A ( = 180, 200, 330) Shield box Brake Power Supply SERVOPACK Brake U, V, W Power supply: Noise L1, L2, L3 Three-phase filter 200 VAC Servomotor One turn Surge L1C, L2C… -
Page 47
2 Installation 2.4.2 SGDV- (M-II Model) Three-phase 200 V • SGDV- A11A ( = 470, 550, 590, 780) Shield box Cooling fan Brake Power Supply SERVOPACK Brake U, V, W Power supply: Noise L1, L2, L3 Three-phase filter 200 VAC… -
Page 48
2.4 EMC Installation Conditions Three-phase 400 V • SGDV- D11A ( = 1R9, 3R5, 5R4, 8R4, 120, 170) Shield box Power supply: Brake Power Noise Single-phase Supply filter* 200 VAC Surge SERVOPACK absorber Control Brake power U, V, W 24 V, 0 V… -
Page 49
2 Installation 2.4.2 SGDV- (M-II Model) Three-phase 400 V • SGDV- D11A ( = 210, 260, 280, 370) Shield box Power supply: Brake Power Noise Single-phase Supply filter* 200 VAC Surge SERVOPACK absorber Control Brake power U, V, W 24 V, 0 V… -
Page 50: Sgdv- (M-Iii Model)
2.4 EMC Installation Conditions 2.4.3 SGDV- (M-III Model) Single-phase 100 V • SGDV- F21A ( = R70, R90, 2R1, 2R8) Shield box Brake Power Supply One turn SERVOPACK Brake U, V, W Noise Power supply: L1, L2 filter Single-phase 100 VAC…
-
Page 51
2 Installation 2.4.3 SGDV- (M-III Model) Three-phase 200 V • SGDV- A21B ( = R70, R90, 1R6, 2R8) Shield box Brake Power Supply SERVOPACK Brake U, V, W Power supply: Noise L1, L2, L3 Three-phase filter 200 VAC Servomotor Surge… -
Page 52
2.4 EMC Installation Conditions Three-phase 200 V • SGDV- A21A ( =R70, R90, 1R6, 2R8, 3R8, 5R5, 7R6) Shield box Brake Power Supply SERVOPACK Brake U, V, W Noise Power supply: L1, L2, L3 filter Three-phase 200 VAC 5 Servomotor… -
Page 53
2 Installation 2.4.3 SGDV- (M-III Model) Three-phase 200 V • SGDV- A21A ( = 120) Shield box Brake Power Supply SERVOPACK Brake U, V, W Noise Power supply: L1, L2, L3 filter Three-phase 200 VAC Servomotor One turn L1C, L2C… -
Page 54
2.4 EMC Installation Conditions Three-phase 200 V • SGDV- A21A ( = 180, 200, 330) Shield box Brake Power Supply SERVOPACK Brake U, V, W Noise Power supply: L1, L2, L3 filter Three-phase 200 VAC Servomotor One turn L1C, L2C… -
Page 55
2 Installation 2.4.3 SGDV- (M-III Model) Three-phase 200 V • SGDV- A21A ( = 470, 550, 590, 780) Shield box Brake Power Cooling fan Supply SERVOPACK Brake U, V, W Noise Power supply: L1, L2, L3 filter Three-phase 200 VAC 5… -
Page 56
2.4 EMC Installation Conditions Three-phase 400 V • SGDV- D21A ( = 1R9, 3R5, 5R4, 8R4, 120, 170) Shield box Power supply: Brake Power Single-phase Supply 200 VAC SERVOPACK Control Brake Noise 24 V, Surge power U, V, W absorber… -
Page 57
2 Installation 2.4.3 SGDV- (M-III Model) Three-phase 400 V • SGDV- D21A ( = 210, 260, 280, 370) Shield box Power supply: Brake Power Single-phase Supply 200 VAC SERVOPACK Control Brake Surge Noise power 24 V, U, V, W absorber… -
Page 58: Sgdv- E1A (Command Option Attachable Type)
2.4 EMC Installation Conditions 2.4.4 SGDV- E1A (Command Option Attachable Type) For SERVOPACKs of command option attachable type, EMC installation conditions may differ depending on the attached option module. For details, refer to the user’s manual for each option module.
-
Page 59: Wiring And Connection
3.1 Precautions for Wiring ……. . 3-2 3.2 System Configuration Diagram ……3-3 3.2.1 Connecting to SGDV- SERVOPACK (Analog Pulse Model) .
-
Page 60: Precautions For Wiring
3 Wiring and Connection Precautions for Wiring CAUTION • Be sure to wire correctly and securely. Failure to observe this caution may result in motor overrun, injury, or malfunction. • Do not bundle or run the main circuit cables together with the I/O signal cables or the encoder cables in the same duct.
-
Page 61: System Configuration Diagram
3.2 System Configuration Diagram System Configuration Diagram 3.2.1 Connecting to SGDV- SERVOPACK (Analog Pulse Model) SGDV- F01A Power supply Single-phase 100 VAC Molded-case circuit breaker (MCCB) Protects the power supply line by shutting the circuit OFF when overcurrent is detected.
-
Page 62: Connecting To Sgdv
3 Wiring and Connection 3.2.1 Connecting to SGDV- SERVOPACK (Analog Pulse Model) SGDV- • Using a Three-phase, 200-V Power Supply Power supply Three-phase 200 VAC R S T Molded-case circuit breaker (MCCB) Protects the power supply line by shutting the…
-
Page 63
Single-phase 200 VAC Molded-case circuit breaker (MCCB) Protects the power supply line by shutting the circuit OFF when overcurrent is detected. Digital SGDV- operator SERVOPACK Noise filter Used to eliminate external noise from Magnetic the power line. contactor Turns the servo Personal ON and OFF. -
Page 64
3 Wiring and Connection 3.2.1 Connecting to SGDV- SERVOPACK (Analog Pulse Model) SGDV- D01A Power supply Three-phase 400 VAC R S T Molded-case circuit breaker (MCCB) Protects the power supply line by shutting the circuit OFF when overcurrent is detected. -
Page 65: Servopack (M-Ii Model)
3.2 System Configuration Diagram 3.2.2 Connecting to SGDV- SERVOPACK (M-II Model) SGDV- F11A Power supply Single-phase 100 VAC Molded-case circuit breaker (MCCB) Protects the power supply line by shutting the circuit OFF when overcurrent is detected. Noise filter Used to eliminate external noise from the power line.
-
Page 66
3 Wiring and Connection 3.2.2 Connecting to SGDV- SERVOPACK (M-II Model) SGDV- • Using a Three-phase, 200-V Power Supply Power supply Three-phase 200 VAC R S T Molded-case circuit breaker (MCCB) Protects the power supply line by shutting the circuit OFF when overcurrent is detected. -
Page 67
Single-phase 200 VAC Molded-case circuit breaker (MCCB) Protects the power supply line by shutting the circuit OFF when overcurrent is detected. Connect to the SGDV- MECHATROLINK-II SERVOPACK Digital Noise filter operator Used to eliminate external noise from Magnetic the power line. -
Page 68
3 Wiring and Connection 3.2.2 Connecting to SGDV- SERVOPACK (M-II Model) SGDV- D11A Power supply Three-phase 400 VAC R S T Molded-case circuit breaker (MCCB) Protects the power supply line by shutting the circuit OFF when overcurrent is detected. Noise filter… -
Page 69
3.2 System Configuration Diagram 3.2.3 Connecting to SGDV- SERVOPACK (M-III Model) SGDV- F21A Power supply Single-phase 100 VAC Molded-case circuit breaker (MCCB) Protects the power supply line by shutting the circuit OFF when overcurrent is detected. Noise filter SGDV- F21A… -
Page 70: Servopack (M-Iii Model)
3 Wiring and Connection 3.2.3 Connecting to SGDV- SERVOPACK (M-III Model) SGDV- • Using a Three-phase, 200-V Power Supply Power supply Three-phase 200 VAC R S T Molded-case circuit breaker (MCCB) Protcts the power supply line by shutting the circuit OFF when overcurrent is detected.
-
Page 71
Power supply Single-phase 200 VAC Molded-case circuit breaker (MCCB) Protcts the power supply line by shutting the circuit OFF when overcurrent is detected. SGDV- SERVOPACK Noise filter Digital operator Used to eliminate Connect to the external noise from MECHATROLINK-III. the power line. -
Page 72
3 Wiring and Connection 3.2.3 Connecting to SGDV- SERVOPACK (M-III Model) SGDV- D21A Power supply Three-phase 400 VAC R S T Molded-case circuit breaker MCCB) Protects the power supply line by shutting the circuit OFF when overcurrent is detected. Noise filter… -
Page 73
3.2 System Configuration Diagram 3.2.4 Connecting to SGDV- E1A SERVOPACK (Command Option Attachable Type) SGDV- FE1A Power supply Single-phase 100 VAC Molded-case circuit breaker (MCCB) Protects the power supply line by shutting the circuit OFF when overcurrent is detected. Noise filter… -
Page 74: Connecting To Sgdv- E1A Servopack
3 Wiring and Connection 3.2.4 Connecting to SGDV- E1A SERVOPACK (Command Option Attachable Type) SGDV- AE1A • Using a Three-phase, 200-V Power Supply Power supply Three-phase 200 VAC R S T Molded-case circuit breaker (MCCB) Protects the power supply line by shutting the…
-
Page 75
(MCCB) Protects the power supply line by shutting the circuit OFF when overcurrent is detected. Digital operator Noise filter SGDV- AE1A Used to eliminate SERVOPACK external noise from the power line. Option module Personal Connection cable computer for digital operator… -
Page 76
3 Wiring and Connection 3.2.4 Connecting to SGDV- E1A SERVOPACK (Command Option Attachable Type) SGDV- DE1A Power supply Three-phase 400 VAC R S T Molded-case circuit breaker (MCCB) Protects the power supply line by shutting the circuit OFF when overcurrent is detected. -
Page 77: Main Circuit Wiring
Names and Functions of Main Circuit Terminals SGDV-1R6AE1A Command Option Analog Pulse Models M-II Models M-III Models Attachable Types Terminal Name Model SGDV- Description Symbols Single-phase 100 to 115 V, L1, L2 +10% to -15% (50/60 Hz) Main circuit input Three-phase 200 to 230 V, terminals…
-
Page 78: Servopack Main Circuit Wire Size
3 Wiring and Connection 3.3.2 SERVOPACK Main Circuit Wire Size (cont’d) Terminal Name Model SGDV- Description Symbols If the regenerative capacity is insuf- R70F, R90F, 2R1F, 2R8F, ficient, connect an external regener- R70A, R90A, 1R6A, ative resistor (option) between B1/ 2R8A and B2.
-
Page 79
3.3 Main Circuit Wiring Wire Types Use the following type of wire for main circuit. Cable Type Allowable Conductor Temperature °C Symbol Name 600 V polyvinyl chloride insulated wire 600 V grade heat-resistant polyvinyl chloride insulated wire The following table shows the wire sizes and allowable currents for three wires. Use wires with specifications equal to or less than those shown in the table. -
Page 80
3 Wiring and Connection 3.3.2 SERVOPACK Main Circuit Wire Size Single-phase, 100 V SERVOPACK Model SGDV- Terminal External Terminal Name Symbols Main circuit power input L1, L2 HIV1.25 HIV2.0 terminals Control power input terminals L1C, L2C HIV1.25 Servomotor connection U, V, W HIV1.25… -
Page 81
3.3 Main Circuit Wiring Three-phase, 400 V SERVOPACK Model SGDV- External Terminal Terminal Name Symbols 1R9 3R5 5R4 8R4 120 170 210 260 280 370 Main circuit power input L1, L2, L3 HIV1.25 HIV2.0 HIV3.5 14.0 terminals Control power 24V, 0V HIV1.25… -
Page 82: Typical Main Circuit Wiring Examples
ON and OFF. • After the actual operation starts, the allowable interval for turn- ing power ON and OFF is one hour or longer. The following wiring examples show the Σ-V Series SGDV SERVOPACK (Analog pulse model). Single-phase 100 V, SGDV-…
-
Page 83
1KM: Magnetic contactor (for control power supply) 2KM: Magnetic contactor (for main power supply) 3SA: Surge absorber 1D: Flywheel diode 1Ry: Relay ∗ For SGDV-R70A, -R90A, -1R6A, -2R8A, terminals B2 and B3 are not short-circuited. • SGDV-470A, 550A, 590A, 780A R S T SERVOPACK SGDV-… -
Page 84
3 Wiring and Connection 3.3.3 Typical Main Circuit Wiring Examples Three-phase 400 V, SGDV- • SGDV-1R9D, 3R5D, 5R4D, 8R4D, 120D, 170D R S T SERVOPACK SGDV- 1FIL DC power 24 V supply − 24 V (For servo +24 V alarm display) -
Page 85
3.3 Main Circuit Wiring Precautions When Using More Than One SERVOPACK This section shows an example of the wiring when more than one SERVOPACK is used and the precautions. • Wiring Example (Analog pulse model) Connect the alarm output (ALM) terminals for the three SERVOPACKs in series to enable alarm detection relay 1RY to operate. -
Page 86: Wiring The Main Circuit Terminal Connector (Spring Type)
Two types of main circuit terminals are available: a connector type and a terminal screw type. • SERVOPACKs with terminal screws: SGDV-180A, 200A, 330A, 470A, 550A, 590A, 780A, 8R4D, 120D, 170D, 210D, 260D, 280D, 370D • SERVOPACKs with connectors: SGDV-R70F, R90F, 2R1F, 2R8F, R70A, R90A, 1R6A, 2R8A, 3R8A, 5R5A, 7R6A, 120A, 1R9D, 3R5D, 5R4D A spring connector is used for SERVOPACKs with connectors.
-
Page 87
3.3 Main Circuit Wiring Wiring Procedure Remove the main circuit terminal connector from the SERVOPACK. Enlarged View 1 Press the lock. 2. Remove the main circuit terminal connector while pressing the lock. Main circuit Lock terminal connector Strip the end of the wires. Applicable wire sizes: Refer to 3.3.2 SERVOPACK Main Circuit Wire Size. -
Page 88
3 Wiring and Connection 3.3.4 Wiring the Main Circuit Terminal Connector (Spring Type) Using a screwdriver Use a commercially available flat-blade screwdriver with a blade width of 3.0 to 3.5 mm. Insert the screwdriver into the slot and press down firmly to open the wire termi- nal. -
Page 89: Connecting Regenerative Resistors
• Be sure to connect the regenerative resistor correctly. Failure to observe this warning may result in fire or damage to the product. 3.4.1 Connecting Regenerative Resistor SERVOPACKs: Model SGDV-R70F, R90F, 2R1F, 2R8F, R70A, R90A, 1R6A, 2R8A Connect an external regenerative resistor between B1/ and B2 terminals. After connecting a resistor, select the capacity.
-
Page 90
3 Wiring and Connection 3.4.1 Connecting Regenerative Resistor SERVOPACKs: Model SGDV-3R8A, 5R5A, 7R6A, 120A, 180A, 200A, 330A, 1R9D, 3R5D, 5R4D, 8R4D, 120D, 170D Disconnect the wiring between the SERVOPACK’s B2 and B3 terminals and connect an external regenerative resistor between the B1/ and B2 terminals or between the B1 and B2 terminals. -
Page 91
3.4 Connecting Regenerative Resistors SERVOPACKs: Model SGDV-470A, 550A, 590A, 780A, 210D, 260D, 280D, 370D No built-in regenerative resistor is provided, so the external regenerative resistor is required. The regenerative resistor units are as follow: Main Applicable Applicable Circuit Resistance SERVOPACK… -
Page 92: Safety Function
Safety Function This chapter describes the safety functions. 4.1 Outline ……….4-2 4.2 Hard Wire Base Block (HWBB) Function .
-
Page 93: Outline
4 Safety Function Outline The safety function is incorporated in the SERVOPACK to reduce the risk associated with the machine by protecting workers from injury and by securing safe machine operation. Especially when working in hazardous areas inside the safeguard, as for machine maintenance, it can be used to avoid adverse machine movement.
-
Page 94: Hard Wire Base Block (Hwbb) Function
4.2 Hard Wire Base Block (HWBB) Function Hard Wire Base Block (HWBB) Function The Hard Wire Base Block function (hereinafter referred to as HWBB function) is a safety function designed to baseblock the motor (shut off the motor current) by using the hardwired circuits: Each circuit for two channel input signals blocks the run sig- nal to turn off the power module, and the motor current is shut off.
-
Page 95: Safety Function Signal (Cn8) Names And Functions
4 Safety Function Safety Function Signal (CN8) Names and Functions The following table shows the terminal layout of safety function signals (CN8). Signal Pin No. Function Name − − − − − − /HWBB1- Hard wire baseblock input 1 Hard wire baseblock input /HWBB1+ Baseblock (motor current off) /HWBB2-…
-
Page 96: Connecting A Safety Function Device
Remove the servomotor connection terminal connector while pressing the lock. Applicable SERVOPACKs: SGDV-R70F, -R90F, -2R1F, -R70A, -R90A, -1R6A, -2R8A, -1R9D, -3R5D, — 5R4D For SERVOPACK models not listed above, it is not necessary to remove the servomotor connection terminal connector. Go to step 2.
-
Page 97
4 Safety Function <Using previous model> Slide the lock injector of the safety function’s jumper connector to the SERVOPACK side to unlock and remove the safety function’s jumper connector. Enlarged View 1. Slide the lock injector to the SERVOPACK side. Remove the safety function’s jumper connector while the lock injector is slid Safety function’s… -
Page 98: Trial Operation (Checking Servomotor Operation)
Trial Operation (Checking Servomotor Operation) This chapter describes how to perform trial operation. 5.1 Outline ……….5-2 5.2 Inspection and Checking before Trial Operation .
-
Page 99: Outline
5 Trial Operation (Checking Servomotor Operation) Outline The trial operation described here is a JOG operation for servomotors not connected to machinery (without a load). The purpose of this trial operation is to check whether the SERVOPACK and servomotor are properly connected and whether the servomo- tor is operating normally.
-
Page 100
5.2 Inspection and Checking before Trial Operation An example of the circuit wiring Servomotor SERVOPACK with brake Power supply 24 VDC power supply Brake power supply 24 VDC or 90 VDC A 24 VDC power supply is not included. Brake power supply Input voltage of 200 V: LPSE-2H01-E Input voltage of 100 V: LPDE-1H01-E Configure the relay circuit to apply the holding brake by the emer- gency stop. -
Page 101
5 Trial Operation (Checking Servomotor Operation) Installing the Servomotor and SERVOPACK Install the servomotor and SERVOPACK according to the installation conditions. Secure the mounting plate of the servomotor to the equipment. Do not connect any load to the shaft. <Note> •… -
Page 102: Jog Operation Using A Panel Operator
5.3 JOG Operation Using a Panel Operator JOG Operation Using a Panel Operator This section describes the procedure for executing a JOG operation using a panel operator. The panel operator is located under the front cover of the SERVOPACK (analog pulse models only).
-
Page 103
5 Trial Operation (Checking Servomotor Operation) (cont’d) Step Display after operation Keys Operation Press the Up Cursor Key to rotate the ser- vomotor in the forward direction and press the Down Cursor Key to rotate it in reverse. The servomotor will operate while the key is being pressed. -
Page 104: Jog Operation Using A Digital Operator
Connect the digital operator to the SERVOPACK CN3 connector. Σ-V series Σ-III series JUSP-OP05A-1-E JUSP-OP05A Digital Operator Digital Operator SGDV SERVOPACK Digital operator conversion conneotor Model: JZSP-CVS05-A3-E Insert securely into SERVOPACK CN3 connector. The digital operator can be connected or removed while the SERVOPACK power is…
-
Page 105
5 Trial Operation (Checking Servomotor Operation) (cont’d) Step Display after operation Keys Operation − J O G − P n 3 0 4 = 0 0 5 0 0 Press the Key. U n 0 0 0 = 0 0 0 0 0 The display changes to the execution display of Fn002. -
Page 106
5.4 JOG Operation Using a Digital Operator (cont’d) Step Display after operation Keys Operation Press the Key twice to return to the initial display (step 1). Alarm Display An alarm is automatically displayed if a problem occurs for some reason. Check the alarm using the user’s manual for the corresponding SERVOPACK or command Σ… -
Page 107: Jog Operation Using Sigmawin
5 Trial Operation (Checking Servomotor Operation) JOG Operation Using SigmaWin+ This section describes the procedure for executing a JOG operation using Sig- maWin+. In the following example, test-run procedures are explained using the JOG operation window of Test Run on the main menu of SigmaWin+. Step Operation Display…
-
Page 108
5.5 JOG Operation Using SigmaWin+ (cont’d) Step Operation Display (5) Once SigmaWin+ is started, the connec- tion window is displayed. Note: is used for operation with no SERVOPACK connected. Click to search for the con- nected SERVOPACK. Connection Window (6) Search Condition Setting window is open. Select only Σ-V Select Σ-V( ), and click… -
Page 109
5 Trial Operation (Checking Servomotor Operation) (cont’d) Step Operation Display • Run test operation. Test Run (R) → Jog (J) (1) Select Test Run first, and then select Jog (J) from the menu on the main window. Main Window (2) Warnings for the JOG operation window will be displayed. -
Page 110
5.5 JOG Operation Using SigmaWin+ (cont’d) Step Operation Display • Set the JOG speed The motor speed is set to 500 [min ]. Click if you need to change it. • Servo ON Click . The display changes from Servo OFF to Servo ON and is lit in green. 5-13… -
Page 111
5 Trial Operation (Checking Servomotor Operation) (cont’d) Step Operation Display • Start JOG operation. When you click the servomotor will rotate in the forward direction. When you click it will rotate in reverse. Confirm that the servomotor operation is cor- rect. -
Page 112: Revision History
June 2011 <5> Preface Deletion: Description of “(will be available soon.)” Revision: Illustration of CD March 2011 <4> 2.3.2, 2.4.1, Addition: Description of SGDV-B SERVOPACKs 2.4.2, 3.2.1, 3.2.2 February 2011 <3> Front cover Revision: Format Back cover Revision: Address and format June 2009 <2>…
-
Page 113
Phone 81-4-2962-5151 Fax 81-4-2962-6138 http://www.yaskawa.co.jp YASKAWA AMERICA, INC. 2121, Norman Drive South, Waukegan, IL 60085, U.S.A. Phone 1-800-YASKAWA (927-5292) or 1-847-887-7000 Fax 1-847-887-7310 http://www.yaskawa.com YASKAWA ELÉTRICO DO BRASIL LTDA. 777, Avenida Piraporinha, Diadema, São Paulo, 09950-000, Brasil Phone 55-11-3585-1100 Fax 55-11-3585-1187 http://www.yaskawa.com.br…
• The EDM1 signal is not a safety output. Use it only for monitoring a failure.
(1) Connection Example and Specifications of EDM1 Output Signal
Connection example and specifications of EDM1 output signal are explained below.
For safety function signal connections, the input signal is the 0 V common and the output
signal is the source output. This is opposite to other signals described in this manual. To
avoid confusion, the ON and OFF status of signals for safety functions are defined as fol-
lows:
ON: The state in which the relay contacts are closed or the transistor is ON and current
OFF: The state in which the relay contacts are open or the transistor is OFF and no cur-
Connection Example
EDM1 output signal is used for source circuit.
Specifications
Signal
Type
Name
Output
EDM1
Electrical characteristics of EDM1 signal are as follows.
Items
Maximum Allowable Voltage
Maximum Current
Maximum Voltage Drop at ON
Maximum Delay Time
www.dadehpardazan.ir 88594014-15
WARNING
flows into the signal line.
rent flows into the signal line.
SERVOPACK
CN8
EDM1+
8
EDM1-
7
Connector
Setting
Pin Number
ON (closed)
CN8-8
CN8-7
OFF (open)
Characteristics
30 VDC
50 mADC
1.0 V
20 ms
Host controller
24-V power supply
0 V
Meaning
Both the /HWBB1 and the /HWBB2 signals are working
normally.
The /HWBB1 signal, the /HWBB2 signal or both are not
working normally.
Remarks
Voltage between EDM1+ and EDM1- when current is 50
mA
Time from the change in /HWBB1 or /HWBB2 until the
change in EDM1
5.11 Safety Function
5
5-83
|
|
Ремонт сервопривода Yaskawa
 Сервисный центр «Кернел» предлагает выполнить качественный ремонт сервопривода Yaskawa в на компонентном уровне в максимально сжатые сроки. Сервопривод относятся к сложной промышленной электронике именно поэтому ремонтом сервоприводов Yaskawa, впрочем, как и других производителей должны заниматься специалисты, имеющие не только высшее техническое образование, но и солидный опыт в ремонте подобной промышленной электроники.
Также для восстановления подобного промышленного оборудования понадобится хорошая материально-техническая база. При выполнении всех выше перечисленных условий, шансы на успешный ремонт сервопривода Yaskawa возрастают в геометрической прогрессии.
Именно поэтому за ремонтом сервоприводов, независимо от производителя лучше всего обращаться в специализированный сервисный центр, который отвечает всем техническим требованиям, такой как Кернел. Наш цент имеет отличную материально-техническую базу, а за время существования с 2002 года специалисты компании накопили бесценный опыт в том числе опыт в ремонте сервоприводов Yaskawa.
Особенности ремонта сервопривода Yaskawa
 Ремонт сервоприводов имеет ряд индивидуальных особенностей, это связано с конструктивными особенностями данного промышленного оборудования. По аналогии с частотными преобразователями они состоят из двух взаимосвязанных частей, это:
- Аппаратная часть;
- Программная часть.
В первую очередь ремонтируется аппаратная часть промышленного сервопривода. После глубокой диагностики неисправного блока выявляются все неисправные компоненты, которые в последствии заменяются на оригинальные запасные части (по возможности), в случае если сервопривод уже давно снят с производства и найти оригинальные запчасти просто невозможно они заменяются на аналоги.
Данный вид ремонта называется компонентным. От других видов его отличает две немаловажные детали.
- Значительное удешевление ремонта;
- Существенное сокращение времени ремонта.
По завершении ремонта аппаратной части сервопривода наступает очередь программной. В зависимости от серии выбирается программный продукт и зашивается в блок.
Заключительный этап ремонта сервопривода Yaskawa это проверка на специализированном стенде. Все блоки проверяются без нагрузки и с нагрузкой не менее двух часов.
Коды предупреждений и ошибок сервопривода Yaskawa
Ошибки, связанные с идентификацией модуля обратной связи
|
Номер аварийного сигнала: Имя аварийного сигнала (Описание аварийного сигнала) |
Причина |
Расследование причин |
Устранение причины |
|
A.044: Ошибка задания параме- тра полузамкнутого/пол- ностью замкнутого цикла управления |
Подключенный дополнительный модуль и значение настройки параме- тра Pn00B.3 и/или Pn002.3 не совпа- дают. |
Проверьте настройки PN00B.3 и/или Pn002.3 |
Настройка дополнитель- ного модуля должна совпа- дать с настройками Pn00B.3 и/или Pn002.3. |
|
A.051: Предупреждение о непод- держиваемом устройстве |
1) Неподдерживаемое устройство не было подключено. 2)Неподдерживаемая комбинация: а) СЕРВОУЗЕЛ (вращательный двигатель) с модулем обратной связи для линейного двигателя б) СЕРВОУЗЕЛ (линейный двигатель) с модулем обратной связи для вращательного двигателя 3) Поддержка полностью замкнутого цикла не включена. Пожалуйста, настройте параметр Pn002.3. |
Проверьте xарактеристики продукта |
Настройте Pn00B.3. Выберите правильную ком- бинацию устройств |
|
A.E72: Ошибка обнаружения модуля обратной связи |
Неверное соединение между СЕРВОУЗЛОМ и модулем обратной связи. |
Проверьте соединение между СЕРВОУЗЛОМ и модулем обратной связи. |
Правильно подключите модуль обратной связи. |
|
Модуль обратной связи был отключен. |
— |
Выполните функцию Fn014 (сброс ошибки конфигурации в модуле опций) при использовании цифрового оператора или SigmaWin+, а затем выключите и снова включите питание. |
|
|
Произошла ошибка модуля обратной связи. |
— |
Замените модуль обратной связи. |
|
|
Произошла ошибка СЕРВОУЗЛА. |
— |
Замените СЕРВОУЗЕЛ. |
|
|
A.E75: Неподдерживаемый модуль обратной связи |
Был подключен неподдерживаемый модуль обратной связи. |
См. каталог подключенного модуля обратной связи или руководство СЕРВОУЗЛА |
Подключите совместимый модуль обратной связи. |
|
Была использована неподходящая версия прошивки Sigma-5. |
— |
Замените СЕРВОУЗЕЛ. |
Ошибки в полностью замкнутом цикле управления
|
Номер аварийного сигнала: Имя аварийного сигнала (Описание аварийного сигнала) |
Причина |
Расследование причин |
Устранение причины |
|
A.041: Ошибка настройки импульсов на выходе дат- чика положения |
Импульс на выходе датчика положения (Pn212) выходит за пределы допусти- мого диапазона и не отвечает условиям настройки. |
Проверьте параметр Pn212. |
Установите верное значе- ние для параметра Pn212. |
|
A.042: Ошибка комбинации параметра |
Скорость программирования работы JOG (Fn004) ниже, чем диапазон уста- вок после изменения скорости движе- ния при программировании работы JOG (Pn533). |
Убедитесь, что условия обнаружения соблюдаются. |
Увеличьте значение скоро- сти движения при програм- мировании работы JOG (Pn533). |
|
A.511: Превышение скорости импульсов на выходе дат- чика положения |
Превышен верхний предел скорости вывода импульсов, заданный в импульсе на выходе датчика положения (Pn212). |
Проверьте настройку вывода импульсов на выходе датчика положения |
Уменьшите значение импульса на выходе дат- чика положения (Pn212). |
|
A.8A0: Ошибка внешнего дат- чика положения |
Произошла ошибка внешнего датчика положения. |
— |
Замените внешний датчик положения. |
|
A.8A1: Ошибка в модуле внеш- него датчика положения |
Произошел сбой при использовании серийного конвертера. |
— |
Замените серийный конвер- тер. |
|
A.8A2 Ошибка в сенсоре внеш- него датчика положения |
Произошла ошибка внешнего датчика положения. |
— |
Замените внешний датчик положения. |
|
A.8A3 Ошибка в позиции внеш- него датчика положения |
Произошла ошибка абсолютного внеш- него датчика положения |
— |
Есть вероятность неисправ- ности во внешнем абсолют- ном датчике положения. Подробную информацию об исправлении неисправ- ностей см. в руководстве по эксплуатации датчика положения от производи- теля. |
|
A.8A5 Разгон внешнего датчика положения |
Произошло превышение скорости на внешнем датчике положения. |
— |
Замените внешний датчик положения. |
|
A.8A6 Перегрев внешнего дат- чика положения |
Произошел перегрев внешнего датчика положения. |
— |
Замените внешний датчик положения. |
|
A.CF1: Ошибка в системе связи внешнего датчика поло- жения |
Неправильное подключение кабеля между серийным конвертером и СЕР- ВОУЗЛОМ, либо неисправный контакт. |
Проверьте проводку внеш- него датчика положения. |
Исправьте проводку кабеля. |
|
Указанный кабель не используется, либо слишком длинный. |
Подтвердите характери- стики проводки внешнего датчика положения. |
Используйте указанный кабель макс. длиной 20 м. |
|
|
A.CF2: Ошибка таймера в системе связи внешнего датчика положения |
Шумовые помехи в кабеле между серийным конвертером и СЕРВОУЗ- ЛОМ. |
— |
Исправьте проводку вокруг серийного конвертера, например, отделив линию сигнала ввода/вывода от кабеля главной цепи или заземляющего провода. |
|
A.D10: Ошибка переполнения при позиционировании нагрузки электродвига- теля |
Направление вращения двигателя и направление установки внешнего дат- чика положения противоположны. |
Проверьте направление вращения серводвигателя и направление установки внешнего датчика положе- ния. |
Установите внешний дат- чик положения в противо- положном направлении или измените настройки метода использования внешнего датчика положения (Pn002.3) на обратное направление. |
|
Неверно выполнен монтаж нагрузки и соединений внешнего датчика положе- ния. |
Проверьте механические соединения внешнего дат- чика положения |
Проверьте механические соединения. |
Смотреть все коды ошибок сервопривода Yaskawa Sigma-5
Схемы подключения сервоприводов Yaskawa
В некоторых случает может понадобится схема подключения сервоприводов, ниже мы показаны схемы сервопривода Yaskawa.
|
Схема конфигурации системы Yaskawa |
Схема подключения сервопривода Yaskawa |
|
|

|

Преимущество ремонта сервоприводов Yaskawa в нашем сервисном центре
Во время эксплуатации электроприводов Yaskawa может возникнуть проблема, далеко не всегда возникшую проблему можно исправить на месте своими силами, наш сервисный центр готов вам в этом помочь, выполнив качественный ремонт сервоприводов Yaskawa в сжатые сроки с полугодовой гарантией.
Мы не только восстановим неисправный блок, но и подскажем как действовать в той или иной ситуации для максимально долгой и безаварийной работы сервопривода.
Работы, проводимые при ремонте сервопривода Yaskawa:
![]()
- Предварительный осмотр на возможность восстановления бесплатный;
- Мы производим ремонт сервопривода Yaskawa на компонентном уровне (экономия бюджета и времени)
- При ремонте сервоприводов ни каких конструктивных изменений не вносим;
- Ремонт блоков с применением оригинальных запасных частей (по возможности).
- Вы платите исключительно за результат — работающий сервопривод;
- Гарантия на ремонт сервоприводов Yaskawa и на запасные части замененные в процессе ремонта 6 месяцев;
- Сроки ремонта варьируются от 5 до 15 рабочих дней;
За два десятилетия существования сервисного центра нашими специалистами были успешно проведены тысячи подобных ремонтов с каждым разом поднимая квалификацию наших инженеров. Ниже представлен далеко не полный список сервоприводов Yaskawa серии Sigma-5 ремонтируемые в нашем сервисном центре.
|
Буквенно-цифровое обозначение |
Сервопривода Yaskawa Sigma-5 |
|
SGDV-1R9D01A |
Ремонт сервопривода Yaskawa Sigma-5 0.45 кВт, питающая сеть только 3 фазы 400 В. |
|
SGDV-3R5D01A |
Ремонт сервопривода Yaskawa Sigma-5 1.0 кВт, питающая сеть только 3 фазы 400 В. |
|
SGDV-5R4D01A |
Ремонт сервопривода Yaskawa Sigma-5 1.50 кВт, питающая сеть только 3 фазы 400 В. |
|
SGDV-8R4D01A |
Ремонт сервопривода Yaskawa Sigma-5 2.00 кВт, питающая сеть только 3 фазы 400 В. |
|
SGDV-120D01A |
Ремонт сервопривода Yaskawa Sigma-5 3.00 кВт, питающая сеть только 3 фазы 400 В. |
|
SGDV-170D01A |
Ремонт сервопривода Yaskawa Sigma-5 4.40 кВт, питающая сеть только 3 фазы 400 В. |
|
SGDV-210D01A |
Ремонт сервопривода Yaskawa Sigma-5 5.50 кВт, питающая сеть только 3 фазы 400 В. |
|
SGDV-260D01A |
Ремонт сервопривода Yaskawa Sigma-5 7.50 кВт, питающая сеть только 3 фазы 400 В. |
|
SGDV-280D01A |
Ремонт сервопривода Yaskawa Sigma-5 11.00 кВт, питающая сеть только 3 фазы 400 В. |
|
SGDV-370D01A |
Ремонт сервопривода Yaskawa Sigma-5 15.00 кВт, питающая сеть только 3 фазы 400 В. |
|
SGDV-1R9D05A |
Ремонт сервопривода Yaskawa Sigma-5 0.45 кВт, питающая сеть только 3 фазы 400 В. |
|
SGDV-3R5D05A |
Ремонт сервопривода Yaskawa Sigma-5 1.0 кВт, питающая сеть только 3 фазы 400 В. |
|
SGDV-5R4D05A |
Ремонт сервопривода Yaskawa Sigma-5 1.50 кВт, питающая сеть только 3 фазы 400 В. |
|
SGDV-8R4D05A |
Ремонт сервопривода Yaskawa Sigma-5 2.00 кВт, питающая сеть только 3 фазы 400 В. |
|
SGDV-120D05A |
Ремонт сервопривода Yaskawa Sigma-5 3.00 кВт, питающая сеть только 3 фазы 400 В. |
|
SGDV-170D05A |
Ремонт сервопривода Yaskawa Sigma-5 4.40 кВт, питающая сеть только 3 фазы 400 В. |
|
SGDV-210D05A |
Ремонт сервопривода Yaskawa Sigma-5 5.50 кВт, питающая сеть только 3 фазы 400 В. |
|
SGDV-260D05A |
Ремонт сервопривода Yaskawa Sigma-5 7.50 кВт, питающая сеть только 3 фазы 400 В. |
|
SGDV-280D05A |
Ремонт сервопривода Yaskawa Sigma-5 11.00 кВт, питающая сеть только 3 фазы 400 В. |
|
SGDV-370D05A |
Ремонт сервопривода Yaskawa Sigma-5 15.00 кВт, питающая сеть только 3 фазы 400 В. |
|
SGDV-R70A01A |
Ремонт сервопривода Yaskawa Sigma-5 0.05 кВт, питающая сеть 1/3 фазы 230 В. |
|
SGDV-R90A01A |
Ремонт сервопривода Yaskawa Sigma-5 0.10 кВт, питающая сеть 1/3 фазы 230 В. |
|
SGDV-1R6A01A |
Ремонт сервопривода Yaskawa Sigma-5 0.20 кВт, питающая сеть 1/3 фазы 230 В. |
|
SGDV-2R8A01A |
Ремонт сервопривода Yaskawa Sigma-5 0.40 кВт, питающая сеть 1/3 фазы 230 В. |
|
SGDV-5R5A01A |
Ремонт сервопривода Yaskawa Sigma-5 0.75 кВт, питающая сеть 1/3 фазы 230 В. |
|
SGDV-120A01A008000 |
Ремонт сервопривода Yaskawa Sigma-5 1.50 кВт, питающая сеть 1 фаза 230 В. |
|
SGDV-120A01A |
Ремонт сервопривода Yaskawa Sigma-5 1.50 кВт, питающая сеть только 3 фазы 230 В. |
|
SGDV-180A01A |
Ремонт сервопривода Yaskawa Sigma-5 2.00 кВт, питающая сеть только 3 фазы 230 В. |
|
SGDV-200A01A |
Ремонт сервопривода Yaskawa Sigma-5 3.00 кВт, питающая сеть только 3 фазы 230 В. |
|
SGDV-R90A05A |
Ремонт сервопривода Yaskawa Sigma-5 0.10 кВт, питающая сеть 1/3 фазы 230 В. |
|
SGDV-1R6A05A |
Ремонт сервопривода Yaskawa Sigma-5 0.20 кВт, питающая сеть 1/3 фазы 230 В. |
|
SGDV-2R8A05A |
Ремонт сервопривода Yaskawa Sigma-5 0.40 кВт, питающая сеть 1/3 фазы 230 В. |
|
SGDV-5R5A05A |
Ремонт сервопривода Yaskawa Sigma-5 0.75 кВт, питающая сеть 1/3 фазы 230 В. |
|
SGDV-120A05A008000 |
Ремонт сервопривода Yaskawa Sigma-5 1.50 кВт, питающая сеть 1 фаза 230 В. |
|
SGDV-120A05A |
Ремонт сервопривода Yaskawa Sigma-5 1.50 кВт, питающая сеть только 3 фазы 230 В. |
|
SGDV-180A05A |
Ремонт сервопривода Yaskawa Sigma-5 2.00 кВт, питающая сеть только 3 фазы 230 В. |
|
SGDV-200A05A |
Ремонт сервопривода Yaskawa Sigma-5 3.00 кВт, питающая сеть только 3 фазы 230 В. |
В таблице представлены исключительно сервопривода Yaskawa Sigma-5 ремонт которых мы вам предлагаем, также специалисты нашей компании ремонтируют сервопривода не зависимо от того под каким брендом они были выпущены.
Оставить заявку на ремонт сервопривода Yaskawa
У вас остались вопросы, связанные с ремонтом или сбросом ошибок, а также программированием и настройкой сервоприводов Yaskawa? Оставьте заявку на ремонт сервопривода Yaskawa в нашим менеджерам. Связаться с ними можно несколькими способами:

- Заказав обратный звонок (кнопка в правом нижнем углу сайта)
- Посредством чата (кнопка расположена с левой стороны сайта)
- Позвонив по номеру телефона:
- +7(8482) 79-78-54;
- +7(8482) 55-96-39;
- +7(917) 121-53-01
- Написав на электронную почту: 89171215301@mail.ru
За время существования сервисного центра нашими специалистами были отремонтированы тысячи единиц промышленной электроники. Вот далеко не полный список производителей промышленной электроники и оборудования, ремонтируемой в нашей компании.
Про кабели
С кабелями всегда проблема — их нет. А если есть в продаже, то либо очень дорогие, либо просто дорогие, но китайская подделка. Поэтому тут только два варианта: 1 — отдавать предпочтение покупке моторов вместе с камелями (а так бывает где-то в половине случаев), 2 — изготавливать их самостоятельно (что не всегда тривиально).
Sigma-II
С мощными моторами Sigma-II все довольно просто. На стороне мотора — огромные «военные» разъемы, которые можно распаять, имея просто мощный паяльник. «Военные», потому, что их иногда называют military grade, но на самом деле, они давно уже не милитари (тоесть ногами в сапогах наступать на них не стоит, точно сломаются).

Чтобы найти, какой конкретно нужен разъем, заглядывавем в мануал в раздел 5.2 Servomotor Main Circuit Wire Size and Connectors. Например, для питания моего мотора SGMSH мощностью 1.5 либо 2.0 кВт, согласно таблице в мануале, подходит разъем MS3106B18-10S — если я хочу прямой корпус, либо MS3108B18-10S — если хочу L-образный. Выбирать нужно из соображений габаритных размеров оборудования на станке, куда будет устанавливаться мотор, и направления, куда пойдут провода. Разъемы огромные, а силовой кабель будет не так просто развернуть, даже на 90 градусов.
В названиях раъемов два ключевых индикатора:
3108/3106 — это тип раъема, по нему надо искать их на Али, так как остальные буквы и цифры могут не совсем совпадать
18-10 — кодирует количество контактов и их расположение. Кто хочет, может нагуглить каталоги разъемов Amphenol и ознакомиться со всем нелогичным многообразием кодировок.
Разъемы энткодеров одинаковые для довольно большого типа двигателей, и кодируется как MS3106B20-29S либо MS3108B20-29S
Здесь тот же самый тип разъема, но другое количество контактов, определяемое сочетанием 20-29.
Берем всю эту информацию, и идем на Али. Я предупреждал, что они огромные? Повторю еще раз, они очень огромные, но сделаны из какого-то крашеного в цвет «хаки» силумина.
Теперь разберемся с проводами. Провод питания, ясное дело, довольно мощный. Мануал предписывает нам выбирать сечение где-то 12 AWG, то есть 2.5 mm². Провод должен быть 4-жильный с экранированием. Подойдет и МКЭШ 3х2,5, но он 3х-жильный, хотя можно и так. Я взял моток б/у-шного кабеля Helukabel Topflex EMV 2YSLCY-J 4×2,5mm² — подходит идеально для обоих двигателей, и красивый.
Кабель паяем в соответсвии с распиновкой из мануала.
Для кабеля энкодера отлично подходят бытовые кабели 1394. Они хоть и называются бытовыми, но всегда выпускались хорошего качества, так как предназначались для высокоскоростной передачи данных, например, цифрового изображения. По маслостойкости, они, конечно, вряд ли превосходят специальные Lappkabel или Helukabel, но их дешевизна перекрывает все недостатки. Кроме того, легко найти такой кабель длинною даже 10 метров. Вот такой я купил буквально за цену доставки.
Там же на Али покупаем разъем энкодерного кабеля, который подключается со стороны сервопака. Вплоть до 7-й сигмы, они одни и теже. Ищутся тоже по названию 1394 или по следящий шифовальных соединений servo encoder connector.
Распиновка разъема (провода для питания батарейки нужны только для абсолютных энкодеров)
Припаеваем разъем мотора в соответствии с распиновкой и удивляемся, зачем заложили разъем с таким избыточным количеством пинов.
А вот чего абсолютно не стоит брать у китайцев, так это готовые, якобы оригинальные, кабели. При цене, как у настоящего, могут подсунуть (и скорее всего так и будет) свинченный на коленках, без соблюдения каких-либо принципов и традиций, экземпляр с фирменным названием. Я такие получал — и всегда возвращал за них уплоченные кровные.
Обратите внимание на отсутствие экранировки. То есть, кабель работать будет, но замучаетесь потом искать источник случайных неточностей по осям. Особенно доставляет заботливо подложенная свернутая бумажка под зажим кабеля.
Если есть желание купить сразу готовый нормальный кабель, то готовьтесь раскошелиться на сумму от ста баксов и выше за один кабель. Это очень странно, так как они раза в два дороже готовых кабелей от современных сервомоторов. Искать надо по названию для энкодерного кабеля: JZSP-CMP11-03 (прямой разъем двигателя), JZSP-CMP12-03 (L-образный разъем двигателя), последние две цифры — длина кабеля; для кабеля питания BAE-03A (03 означает длину).
Sigma-III, Sigma-V, Sigma-7
Эти серии объединяет то, что кабели у них одинаковые, как энкодерные, так и кабели питания. Единственно, чем отличаются, это разъемы питания сервопака — в каждой серии одни разные, но обычно они идут с сервопаком.
Энкодерный кабель
Готовый кабель можно найти по кодировке JZSP-CSP01-03-E (где 03 — это длина в метрах, которая может быть и 05, 10, 15 и 20), либо JZSP-CSP21-03-E (отличается гибкостью кабеля). У кабелей с дополнительными проводами для питания абсолютного энкодера кодировка будет JZSP-CSP05/ JZSP-CSP25.
Так как готовый кабель слишком дорогой, а китайцам мы не доверяем, то его можно собрать из компонентов. Энкодерный разъем — такой же, как и у Sigma-II, а разъем энкодера мотора — довольно необычный. Ищется по названию Molex 54346-0670.
Но распаивать такие разъемы — то еще удовольствие. Тем более, не имея соответствующих приспособ, правильно упаковать кабель в разъем не получится. Поэтому я предпочитаю брать моторы, у которых есть, пусть и с обрезанным кабелем, но распаянные разъемы. Потом их можно удлинить, в том числе восстановив оплетку кабеля.
С самим проводом кабеля энкодера тоже не так все просто. Можно, конечно, приспособить обычный бытовой USB кабель, но только как временное решение. Производитель специфицирует два типа кабелей для энкодера (внутри две витые пары с защитной экранирующей оплеткой):
— Samwon ACT UL2464
— Taiyo EXT-XL UL2464
Если вы купили готовый кабель и увидели, что там провод одного их этих типов, то можете быть уверены — кабель оригинальный, сделанный самой Yaskawa или партнером (например Samwon). Если какой-то другой, то тоже может быть неплохого качества, но от китайцев этого точно ожидать не стоит.
Вот небольшой пример различных кабелей энкодера. Загадка: найдите среди них китайский:
Если мотор с абсолютным энкодером, то его можно использовать как инкрементальный, так и как абсолютный. В последнем случае ему понадобится кабель с питанием. В последних моделях энкодер питают от батарейки, встроенной в разрез кабеля.
Оригинальные провода из спецификации найти отдельно не представляется возможным. Поэтому я делаю так: у меня были куплены двигатели, в которых комплектом шли очень длинные кабели, 10-15 метров. Мне такая длина не нужна, поэтому я режу их на 3-4 кабеля, в зависимости от надобности. Либо просто покупаем готовый, но дорогой и длинный кабель, и режем его на куски.
Кабель питания сервомотора
Готовый кабели имеют различные разъемы мотора, в зависимоти от его мощности. Готовые кабели можно найти по кодировке (без тормоза — с тормозом):
50-150W JZSP-CSM01-03/JZSP-CSM21-03 — JZSP-CSM11-03/JZSP-CSM31-03
200-550W JZSP-CSM02-03/JZSP-CSM22-03 — JZSP-CSM12-03/JZSP-CSM32-03
750-1000W JZSP-CSM03-03/JZSP-CSM23-03 — JZSP-CSM33-03/JZSP-CSM33-03
Отдельно разъемы мотора, компании JST:
50-150W J17-06FMH-7KL-1-CF
200-550W J27-06FMH-7KL-1-CF
750-1000W J37-06FMH-8KL-1-CF
Спецификация кабеля такая же как и у экнкодерного, плюс есть дополнительная Taiyo EXT-FE UL2517 ETFE
Обратите внимание, что у обычного кабеля три проводника и один земляной PE, а у кабеля для моторов с тормозом — три на питание, два на тормоз, и один земляной PE.
Заправлять разъем мотора тоже непросто, поэтому лучше также найти распаянные кабели и их удлинять. Благо, на стороне сервопака — обычные контакты (которые прищемляются к контактам разъема на сервопаке).
Необходимо напомнить, что в сервопаках разных поколений разъемы двинаиеля разные, и если покупать сервопак без них, можно купить отдельно под нужную серию.
Кабель данных
Кабель данных нам нужен для того, что бы подключиться к разъему CN1 и управлять сервопаком (например, подавать сигналы SERVO-ON, STEP, DIR). Ищется по названию MDR SCSI 50.
В CN1 целых 50 контактов, но все они нам не нужны, обычно хватает не более 16-ти. Поэтому лучше спаять кабель самому, тем более, что раъем сервопака можно купить за копейки на Али или ebay (искать по тому же названию MDR 50-pin).
Кстати, обратите внимание на название на корпусе разъема — SAN. Это китайские аналоги разъемов Molex. Не могу устверждать, что плохие.
Если нам надо поиграться с подключением сервопака, тo в процессе разработки электрической схемы управления, гораздо удобнее использовать вот такую отладочную плату. Она соединяется MDR SCSI разъемом с сервопаком, а дальше цепляем те сигналы, которые нам необходитмы. Я купил одну такую на Али.
Кабель настройки параметров
Для настройки сервопака с помощью SigmaWin+ используется кабель передачи данных, подключаемый к PC. В случае Sigma-V и Sigma-7 это обычный USB-кабель, где со стороны сервопака подключение в CN7 должно быть разъемом USB-mini.
В случае Sigma-III, вместо USB используется последовательный порт. К нему подключиться чуть сложнее (особенно, если у нас нет PC с посделовательным COM-портом), но тоже возможно.
Я сделал следующим образом. Купил китайский дата-каблель для Sigma-III (стоило 15 баксов). Название JZSP-CMS02. Это просто кабель RS-232 c разъемами DB-9 и MDR-14.
А так как COM-портов на моих ноутбуках нет, то подключил к USB через адаптер RS232-USB (тоже ищется в китайских магазинах и стоят недорого). Я предпочитаю те, где стоит миркосхема адаптера Prolific — с ними обычно нет никаких проблем в плане драйверов для Windows.
Кабель последовательного канала управления
Тем, кто здесь читает мои описания, канал последовательного управления сервопаком не нужен (а те, кому нужен, читают прямо в мануалах). Но для таких упертых как я, могу сказать, что это самый сложный кабель из всех — найти его за вменяемые деньги вообще нереально, так как он предназначен для подключения к CN3 устройству ручного управления сервопаком — Digital Operator. Видимо, он используется только для сервисного обслуживания сервопаков, которые установлены в оборудование, и нужен только специальным людям. Я же хотел попробовать поуправлять сервопаком по последовательному каналу, но столкнулся с тем, что найти разъем для CN3 невозможно.
Название разъема HDR-E14-MAG1, и я один раз видел его аналог на Али. Может как-нибудь и куплю, но пока жалко денег за него.
В заключение про кабели скажу, что информация, изложенная выше для свежих Sigma-V/7, относится только с моторам до 1000W. Все что мощнее, имеет совершенно другие разъемы и кабели, и должны рассматриваться отдельно. Но пока эти моторы стоят от 1000 баксов и выше даже у китайцев, я заниматься ими не буду (пока ограничусь старыми Sigma-II).
Изменено 26.02.2020 13:52 пользователем Katolix
Сервоусилитель серии Sigma 5
Сервоусилитель Sigma 5, 3ф 200В, 3 кВт, аналоговое/импульсное задание, для поворотных серводвигателей
по запросу
по запросу
X5059
встроен
Серводвигатели совместимые с сервоусилителем
SGDV-200A01A
|
Серия серводвигателя |
Мощность |
Номинальная скорость |
Максимальная скорость |
Номинальный момент, Нм |
Максимальный момент, Нм |
|---|---|---|---|---|---|
|
SGMSV (Low Inertia, Medium Capacity) |
2500 |
3000 |
5000 |
7.96 |
23.9 |
|
SGMSV (Low Inertia, Medium Capacity) |
3000 |
3000 |
5000 |
9.8 |
29.4 |
|
SGMGV (Medium Inertia, Medium Capacity) |
2400 |
1500 |
3000 |
15.1 |
45.1 |
|
Модель серводвигателя |
Тип энкодера |
Наличие тормоза |
Разрешение энкодера |
|---|